
A microwave oven is a staple in most modern kitchens, offering unparalleled convenience for quickly reheating leftovers, cooking meals, and defrosting food. However, with frequent use comes the inevitable accumulation of food splatters, grease, and stubborn stains that can turn your once pristine appliance into an unsightly and unhygienic mess. These lingering food particles don’t just look bad; they can harbor bacteria, generate unpleasant odors, and even affect your food’s taste and safety. Maintaining a clean microwave is not just about aesthetics; it’s crucial for food hygiene, appliance longevity, and overall kitchen cleanliness.
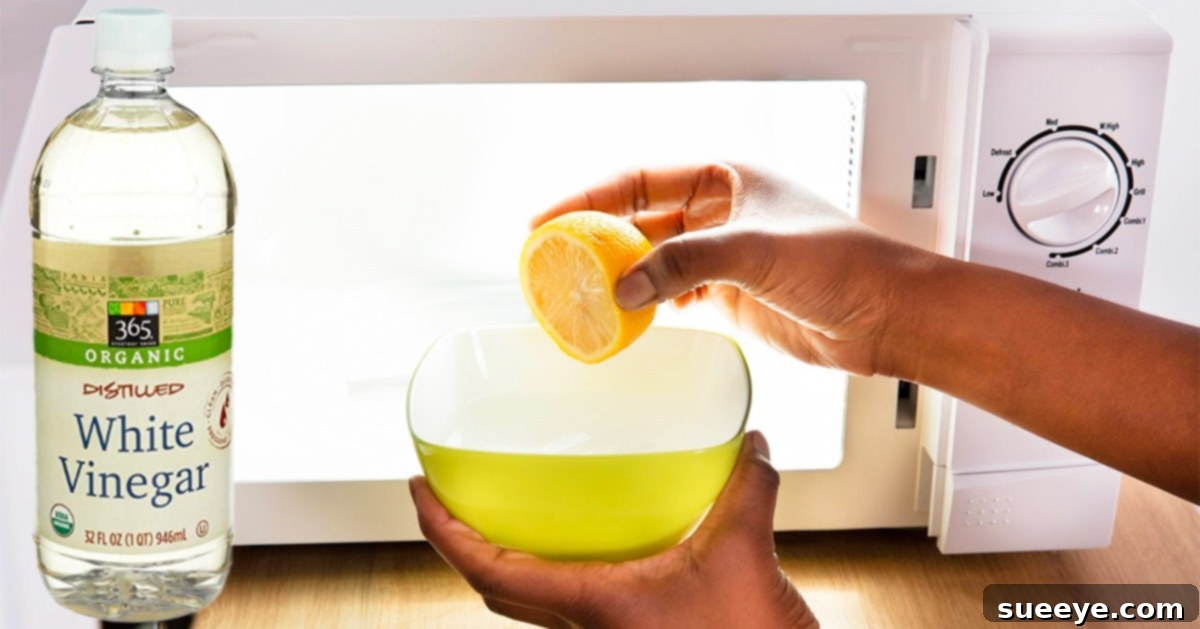
While many commercial microwave cleaners promise sparkling results, they often contain harsh chemicals that can be irritating or leave behind residues. The good news is that you don’t need potent chemicals to achieve a spotless microwave. Nature provides powerful and eco-friendly solutions right in your pantry! This comprehensive guide will walk you through an incredibly simple yet highly effective method to deep clean and deodorize your microwave using two household heroes: white vinegar and lemon. Get ready to transform your microwave with minimal effort and maximum impact.
Why a Clean Microwave Matters More Than You Think
The microwave, despite its frequent use, often gets overlooked in the regular cleaning routine. This oversight can lead to several problems that go beyond just a visually unappealing appliance:
- Health and Hygiene Risks: Every time food splatters inside the microwave, it leaves behind a residue that can become a breeding ground for bacteria like E. coli and Salmonella. These microorganisms can contaminate new food placed inside, posing a serious health risk. Old food particles can also attract pests, further compromising your kitchen’s hygiene.
- Unpleasant Odors: Lingering food odors, especially from strong-smelling dishes like fish or garlic, can permeate your microwave’s interior. These smells can then transfer to other foods you heat, making them unappetizing. A dirty microwave is often a source of stale or acrid smells that can affect the overall freshness of your kitchen.
- Reduced Efficiency and Appliance Lifespan: Caked-on food and grease can absorb microwave energy, leading to uneven heating and potentially longer cooking times. Over time, persistent grime can also cause wear and tear on the interior surfaces, affecting the appliance’s performance and potentially shortening its lifespan.
- Aesthetics and Social Comfort: Let’s be honest, a dirty microwave is an eyesore. If you have guests over or share your kitchen with family members or roommates, a grimy microwave can be an embarrassing sight and reflect poorly on your household’s cleanliness standards. A sparkling clean microwave contributes to a more inviting and pleasant kitchen environment.
Understanding these points highlights the importance of regular microwave cleaning, making it a non-negotiable task for every home cook.
The Power of Natural Cleaners: Lemon and Vinegar
Before diving into the steps, let’s appreciate why white vinegar and lemon are such formidable natural cleaning agents:
- White Vinegar: Your All-Purpose Degreaser and Disinfectant
White vinegar is a miracle worker in the world of natural cleaning. Its primary active component, acetic acid, is a mild acid that effectively breaks down grease, food residue, and mineral deposits. This acidic nature also makes it a powerful disinfectant, capable of killing many types of bacteria and mold without the harshness of chemical cleaners. When heated and turned into steam, vinegar’s cleaning power is amplified, helping to loosen even the most stubborn, dried-on grime, making it incredibly easy to wipe away. It also acts as a natural deodorizer, neutralizing unpleasant smells rather than just masking them. - Lemon: The Natural Deodorizer and Grease Cutter
Lemons aren’t just for refreshing drinks; they’re fantastic for cleaning! The citric acid in lemons acts as a natural bleach, a mild abrasive, and a powerful degreaser, similar to vinegar. Beyond its cleaning properties, lemon is particularly celebrated for its exceptional deodorizing capabilities. Its fresh, citrusy scent can effectively neutralize and eliminate even the most persistent food odors, leaving your microwave smelling clean and inviting. When microwaved, the lemon’s natural oils and acids are released into the steam, working wonders on both grime and smells.
Together, this dynamic duo creates a powerful, non-toxic cleaning solution that tackles tough stains, cuts through grease, disinfects surfaces, and leaves your microwave smelling wonderfully fresh. It’s an eco-friendly approach that’s safe for your family and your appliance.
Supplies You’ll Need
Gathering your materials beforehand ensures a smooth and efficient cleaning process. You’ll likely have most of these items readily available in your kitchen:
- 1-2 tablespoons white vinegar: The star degreaser and disinfectant.
- 1 whole lemon (or 2 tablespoons lemon juice): For added cleaning power and an unbeatable fresh scent.
- Small microwavable glass bowl: Crucial for safely heating the cleaning solution. Choose one that can hold about 1-2 cups of liquid.
- Clean cloth or paper towels: For wiping down the loosened grime. Microfiber cloths are excellent for streak-free cleaning.
- Dish soap: For washing the removable parts.
- Sponge: For scrubbing the turntable and its support in the sink.
- Optional: An old toothbrush or small brush for reaching crevices.
Directions: Your Step-by-Step Guide to a Sparkling Microwave
Follow these simple instructions to effortlessly clean and deodorize your microwave, ensuring every corner is spotless and fresh.
Step 1: Prepare the Steaming Solution
Begin by taking your small microwavable glass bowl. Fill it with approximately one cup of water. To this water, add one to two tablespoons of white vinegar. If you’re using a whole lemon, slice it into halves or quarters and add the pieces directly to the water and vinegar mixture. If you’re using lemon juice, add about two tablespoons to the solution. The lemon adds an extra layer of degreasing power and provides a pleasant, fresh scent to counteract any lingering vinegar smell.
Step 2: Generate Powerful Cleaning Steam
Carefully place the glass bowl with your water, vinegar, and lemon mixture into the center of your microwave. Close the microwave door and set it to run on high power for about 5 to 8 minutes. The goal is to bring the solution to a vigorous boil, allowing the water and acid to create a potent steam. This steam will fill the microwave cavity, softening dried-on food splatters and loosening stubborn grease from the interior walls, ceiling, and door.

Step 3: Let the Steam Work Its Magic
Once the microwave cycle finishes, do NOT immediately open the door. This is a crucial step! Allow the bowl to remain inside the microwave with the door closed for an additional 5 to 10 minutes. This resting period allows the trapped steam to continue working its magic, further penetrating and loosening the baked-on food particles and grease. The longer you let it sit, the easier the subsequent wiping process will be. The interior will become incredibly humid, a perfect environment for dissolving tough grime.
Step 4: Wipe Away the Grime
After the resting period, carefully open the microwave door. Be cautious as the bowl and its contents will still be very hot. Remove the bowl and place it aside to cool. Now, take a clean cloth or a stack of paper towels. You’ll notice that the steam has dramatically softened all the dirt, making it effortless to wipe away. Start by wiping the interior walls, the ceiling, the floor, and the inside of the door. For any particularly stubborn spots, you can dip your cloth into the cooling vinegar-lemon solution from the bowl for an extra boost of cleaning power. You might be amazed at how easily years of grime simply wipe away.
Step 5: Clean the Removable Parts
Don’t forget the removable parts! Carefully take out the glass turntable and its roller support ring. It’s important to wait until these components are cool to the touch before washing them to prevent thermal shock, which could cause the glass turntable to crack. Once cooled, take them to the sink. Wash them thoroughly with warm water, dish soap, and a sponge. Scrub away any food particles, grease, or stains. Rinse them well and allow them to air dry completely or dry them with a clean towel before placing them back into the microwave. This ensures every part of your microwave is hygienically clean.
Tackling Stubborn Odors with Lemon: A Fresh Approach
Even after a thorough cleaning, sometimes persistent odors from strong foods like fish, popcorn, or burnt spills can linger. This is where the power of lemon shines even brighter. The previous steps using lemon already help, but for really tough smells, you can perform an extra odor-busting cycle.
Enhanced Lemon Odor Removal:
- Preparation: Take a fresh lemon, slice it into several wedges or halves, and place them in a microwavable glass bowl filled with about one cup of water. You can also squeeze the juice into the water and add the rinds.
- Microwave: Place the bowl in the microwave and heat on high for 3-5 minutes, allowing the lemon-infused steam to fill the cavity.
- Sit and Absorb: Let the bowl sit in the closed microwave for another 5-10 minutes. This allows the acidic steam to neutralize odor molecules effectively.
- Wipe and Refresh: Remove the bowl (carefully, it will be hot) and use a clean cloth to wipe down the interior once more. You’ll be left with a fresh, citrusy scent and a clean appliance.
This method doesn’t just mask odors; the citric acid in the lemon chemically neutralizes the odor-causing compounds, leaving a truly fresh smell that makes your kitchen feel cleaner and more inviting.
Don’t Forget the Exterior: Cleaning and Maintenance Tips
A sparkling interior deserves an equally clean exterior. The outside of your microwave can accumulate dust, fingerprints, grease splatters from cooking on the stovetop, and general kitchen grime.
Cleaning the Exterior:
- Materials: A soft, damp cloth (preferably microfiber), a few drops of mild dish soap, and a dry cloth for polishing.
- Method:
- Unplug your microwave for safety if you are going to clean around the electrical components, though for a quick wipe down it’s often not necessary.
- Dampen your cloth with warm water and add a tiny amount of dish soap. Wring it out well so it’s not dripping wet.
- Wipe down all exterior surfaces: the top, sides, door handle, and especially the control panel. Pay attention to any sticky spots or smudges.
- For stainless steel finishes, wipe in the direction of the grain to avoid streaks.
- Rinse your cloth and wipe down the surfaces again to remove any soap residue.
- Immediately dry and buff the exterior with a clean, dry cloth to prevent water spots and leave a streak-free shine.
- Caution: Avoid using abrasive cleaners, harsh chemicals, or rough sponges on the exterior, as these can scratch the finish, damage the control panel, or remove labels.
Microwave Maintenance for Long-Lasting Cleanliness:
Prevention is key to keeping your microwave clean for longer. Incorporate these habits into your daily routine:
- Cover Your Food: This is the golden rule! Always use a microwave-safe cover, plastic wrap, or a paper towel over your food to prevent splatters. This simple act drastically reduces the amount of cleaning required.
- Wipe Up Spills Immediately: Fresh spills are much easier to clean than dried-on ones. Keep a damp cloth handy and quickly wipe up any mess as soon as it happens.
- Regular Quick Wipes: Even without major spills, a quick wipe-down of the interior with a damp cloth after each use can prevent grime from building up.
- Schedule Deep Cleans: Depending on how frequently you use your microwave, aim for a deep clean using the lemon and vinegar method at least once a month, or more often if you use it heavily.
Safety First: Important Considerations
While cleaning with natural ingredients like vinegar and lemon is generally safe, always keep these points in mind:
- Hot Steam: Be extremely careful when opening the microwave door and removing the bowl after the steaming cycle. The steam will be very hot and can cause burns. Use oven mitts if necessary.
- Hot Water: The water in the bowl will be boiling hot. Handle the bowl with care.
- No Abrasives: Avoid using steel wool, harsh abrasive scrubbers, or chemical oven cleaners inside your microwave. These can scratch the interior coating, potentially damaging the appliance and making it prone to rust or further grime buildup. Stick to soft cloths or sponges.
- Unplugging: For thorough cleaning, especially when dealing with the exterior or if you feel more comfortable, consider unplugging the microwave from the power outlet.
Conclusion: A Clean Microwave, a Happier Kitchen
A clean microwave is not just a nicety; it’s a necessity for a hygienic, functional, and pleasant kitchen environment. With the simple, natural power of white vinegar and lemon, you can effortlessly banish stubborn food splatters, persistent grease, and unwelcome odors without resorting to harsh chemicals. This eco-friendly method is not only effective but also safe for your family and kind to your appliance.
By incorporating these easy steps into your cleaning routine and adopting preventative measures like covering food, you can ensure your microwave remains a sparkling clean, fresh-smelling, and reliable workhorse for years to come. Say goodbye to embarrassment and hello to a microwave that’s a joy to use. Your kitchen, your food, and your health will thank you!