
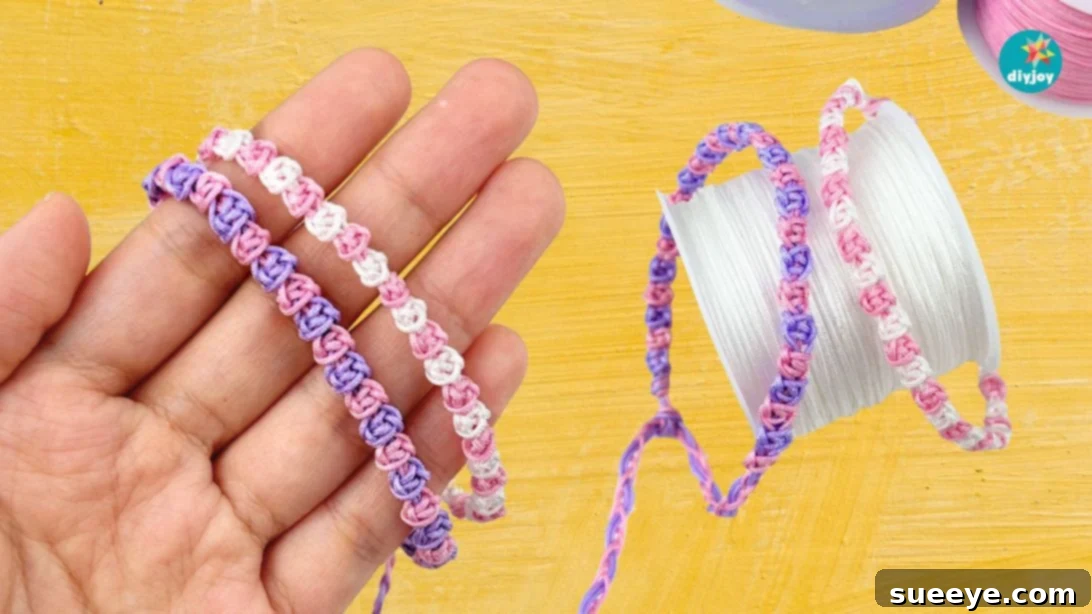
The art of macramé has experienced a stunning resurgence, captivating crafters and fashion enthusiasts alike. Everywhere you look, from social media feeds to boutique storefronts, beautifully knotted creations are making a statement. Among these, the humble yet elegant macramé bracelet stands out as a true favorite. If you’ve been admiring these intricate designs and wondering if you could ever create one yourself, you’re in for a treat! This comprehensive guide will show you just how easy and incredibly fun it is to make your very own macramé bracelet. It’s a completely beginner-friendly project, requiring no prior skills—just a willingness to learn and a little bit of patience. Consider this your perfect introduction to the wonderful world of macramé, paving the way for more intricate projects in the future.
I distinctly remember my childhood days, watching my older siblings meticulously craft vibrant friendship bracelets in a myriad of colors and patterns. They’d spend hours knotting, only to proudly display their handmade treasures on their wrists and ankles. I was always fascinated by their creations and longed for one of my own. Now, years later, I’m reliving that childhood dream, discovering the immense joy of crafting these beautiful accessories. It’s truly a nostalgic and fulfilling experience that I’m thrilled to share with you.
Far from fading into obscurity, macramé is experiencing a powerful renaissance. Its earthy textures and intricate patterns perfectly complement the ever-popular boho-chic aesthetic. From elaborate macramé home decor like plant hangers and wall tapestries to stylish accessories, people are embracing the craft with enthusiasm. If you’re envisioning yourself tackling larger macramé projects down the line, this handmade bracelet serves as an excellent starting point. It allows you to master fundamental knots and techniques in a manageable, rewarding project before moving on to bigger challenges.
What is Macramé? Unraveling the Art of Knotting
For those new to the craft, macramé is a distinctive form of textile art that utilizes various knotting techniques to create decorative and functional pieces. Unlike knitting or crocheting, which rely on needles or hooks, macramé primarily employs just your hands to tie cords into intricate patterns. It’s an ancient art form with roots stretching back to Babylonian and Assyrian carvings, and it truly flourished in 13th-century Arabic weaving before gaining widespread popularity in Europe during the 17th and 18th centuries. Today, it’s celebrated for its versatility and the unique texture it brings to both fashion and home decor.
While macramé doesn’t require complex machinery, a few simple tools can greatly enhance your crafting experience. Essential items include a good pair of sharp scissors for clean cuts, and a measuring tape or ruler to ensure your cords are the correct length and your knots are evenly spaced. Some crafters also find a knotting board or a clipboard incredibly helpful for securing their work, ensuring consistent tension throughout the project.
The beauty of macramé lies in its endless creative possibilities. Beyond bracelets, there’s a whole universe of accessories and decor items you can explore once you’ve mastered the basic knots. If you’re looking for more macramé accessory ideas to personalize your style or give as thoughtful gifts, consider trying your hand at:
- Stylish handbags or chic tote bags
- Boho-inspired earrings that make a statement
- Unique belts to cinch your favorite outfits
- Elegant hair accessories like headbands or decorative barrettes
- Customized sandals for a touch of handmade flair
But the world of macramé extends far beyond wearable art. With just a few basic knots, you can transform simple cords into stunning pieces for your home and beyond. Here are just a few of the many easy macramé projects you can explore:
- Personalized macramé keychains
- Trendy macramé coasters to protect your surfaces
- Beautiful plant hangers that elevate your greenery
- Delicate bookmark tassels for your favorite reads
- Eye-catching wall hanging decor to add texture to any room
- Hand-knotted macramé curtains for a soft, filtered light
- Relaxing hammock swings for your garden oasis
- Charming Christmas ornaments for a handmade holiday touch
Craft Your Own Macramé Bracelet: A Step-by-Step Tutorial for Beginners
Ready to create a beautiful, durable, and truly personalized accessory? This tutorial will guide you through the process of making a classic macramé bracelet, featuring the fundamental square knot. This design is not only elegant but also incredibly versatile, making it perfect for friendship bracelets or a stylish addition to your own jewelry collection. The square knot is a cornerstone of macramé, and once you master it, you’ll be well on your way to tackling more complex designs. Let’s gather your materials and get started on this rewarding DIY journey!
-
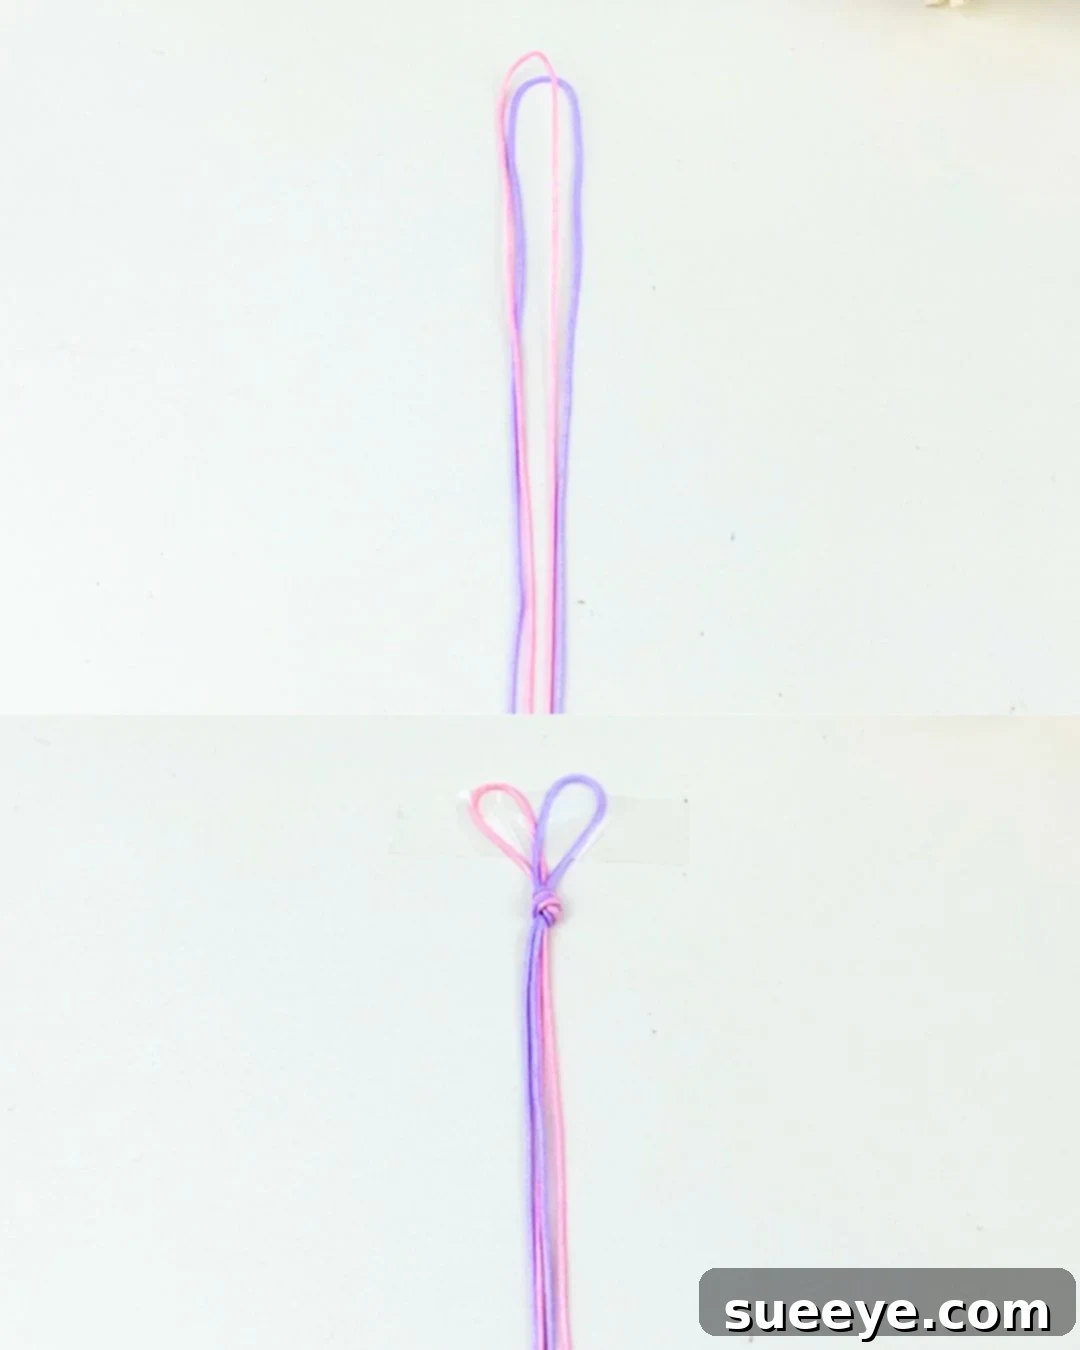
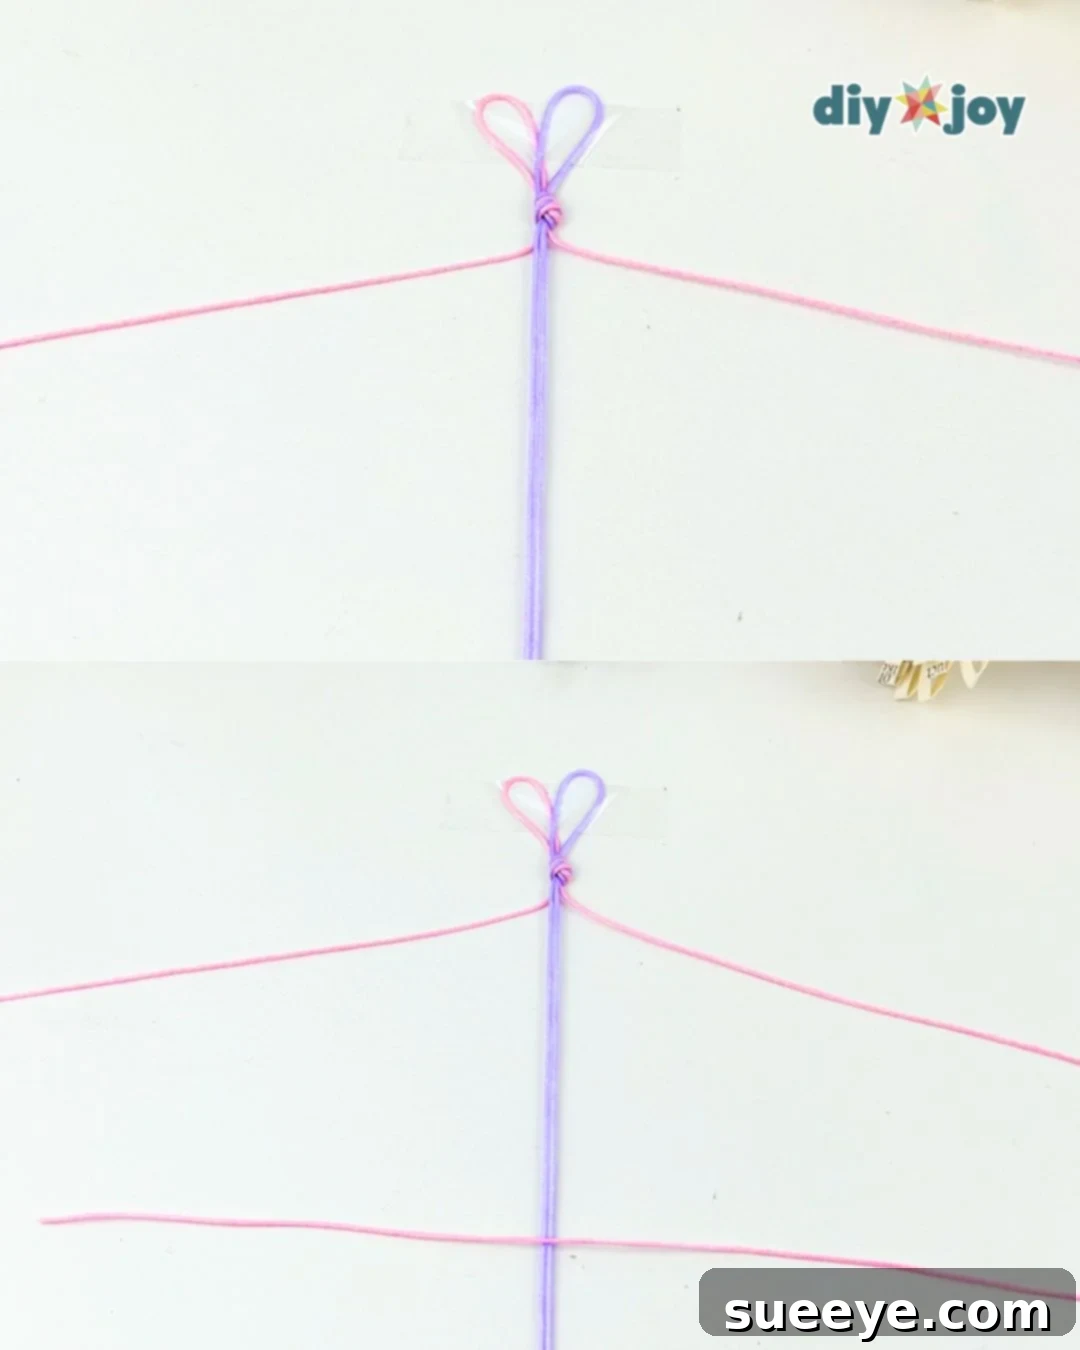
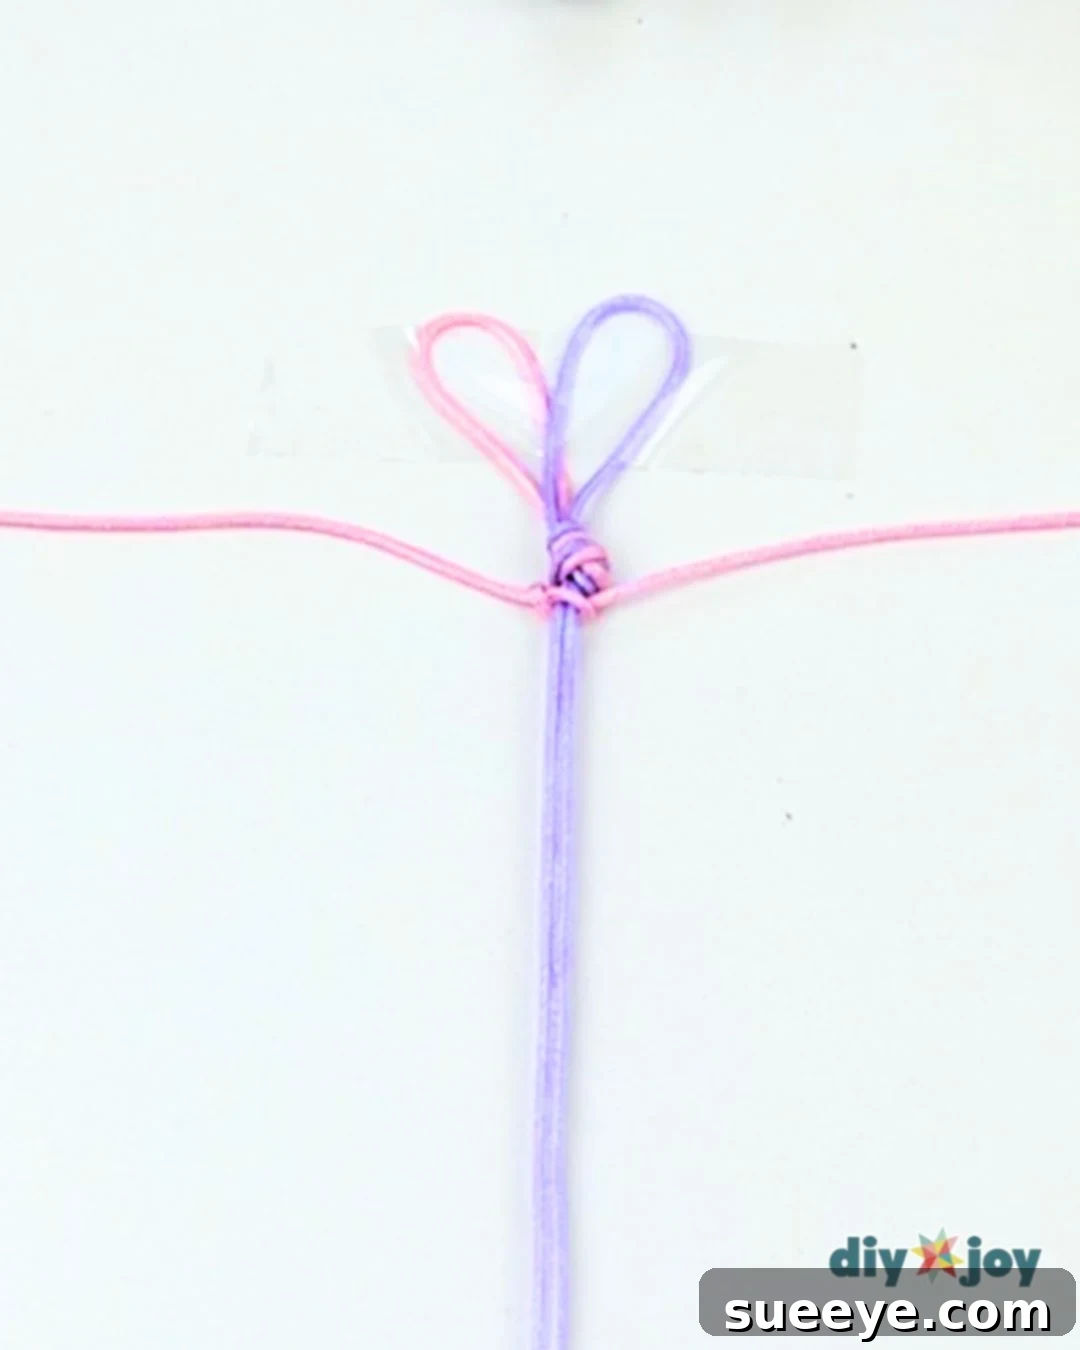
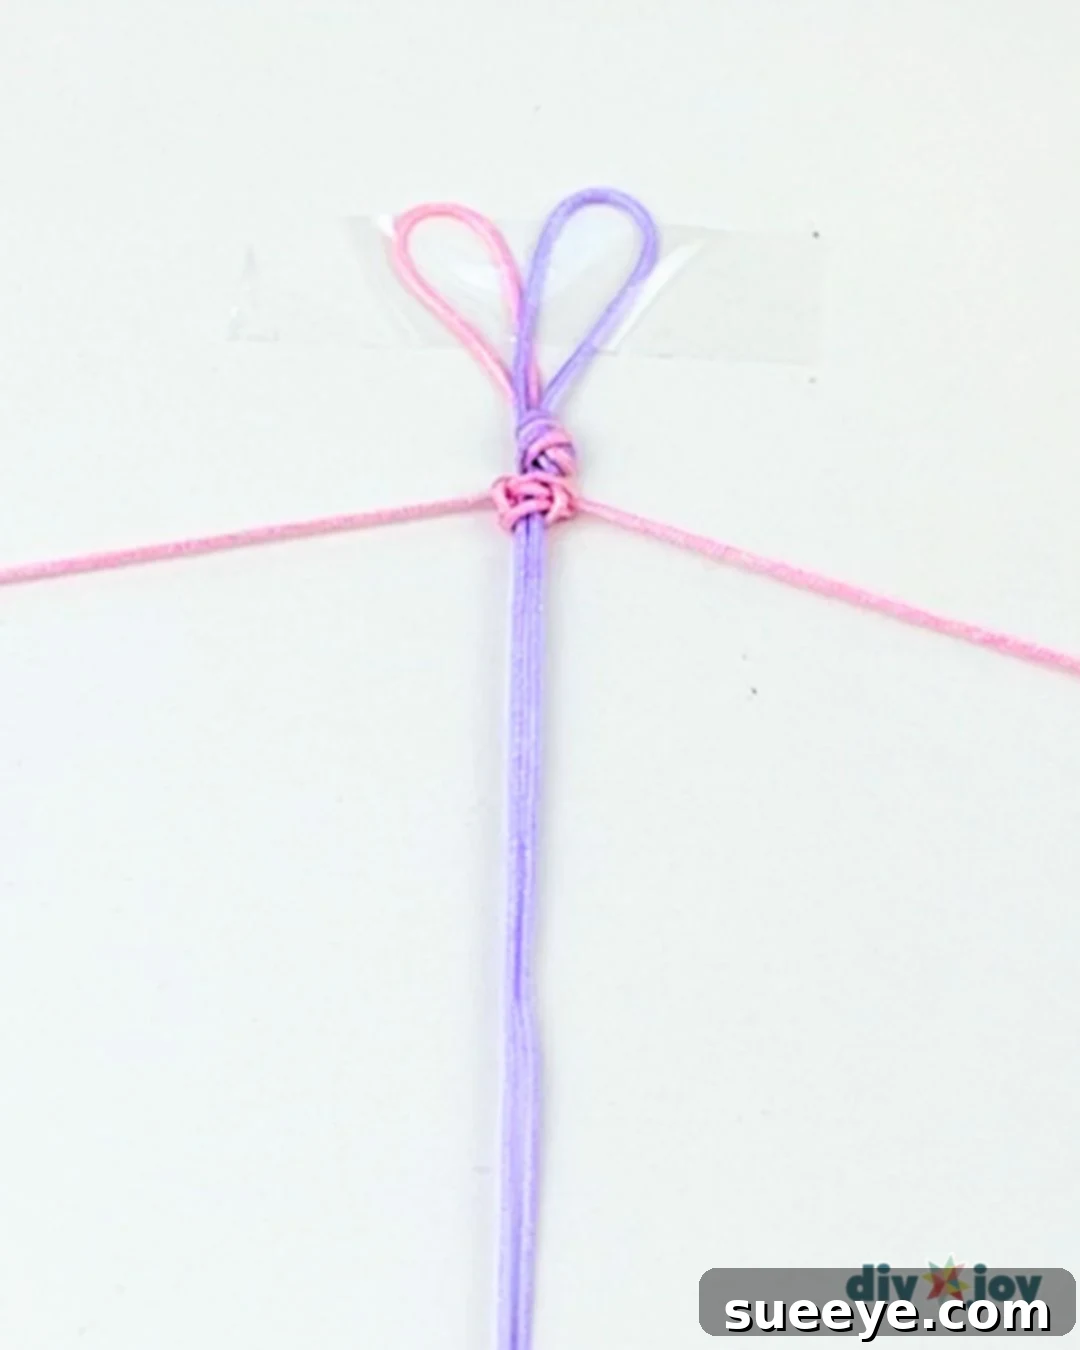
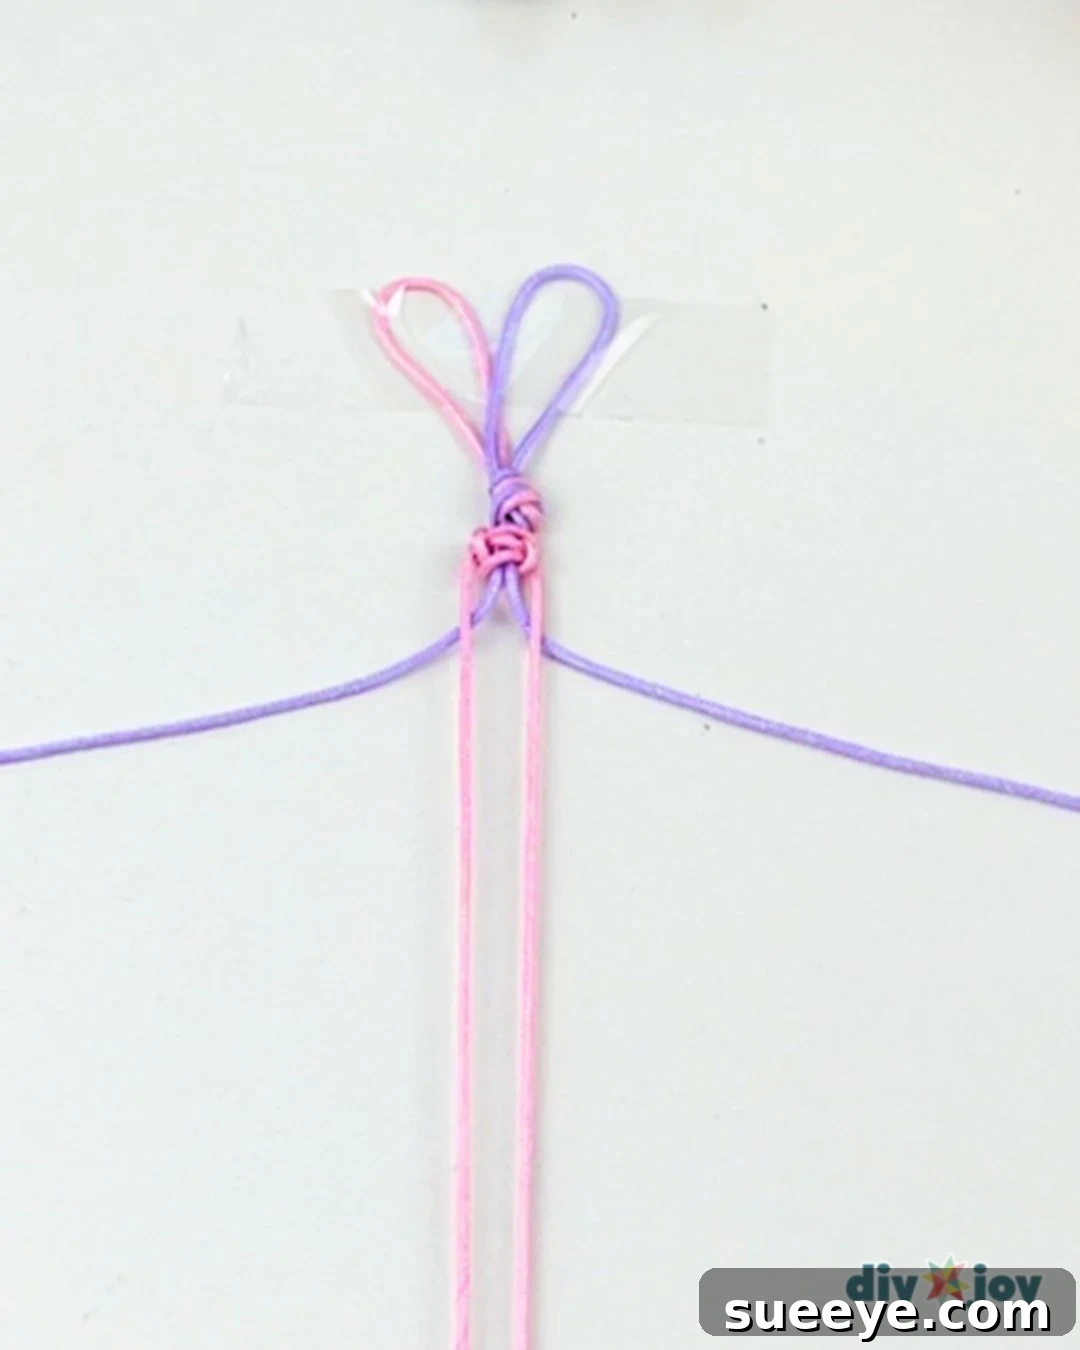
Prepare Your Cords: Begin by cutting two lengths of your chosen macramé cord, each measuring approximately 4.9 feet (about 150 cm). This length ensures you have enough cord to work with without running out prematurely, allowing for a comfortable bracelet length and an adjustable closure. Fold both cords in half precisely. Take the folded end (the loop) of one cord and tie it securely to the center of the other folded cord using an overhand knot. This forms your central “core” cords (which won’t be knotted themselves, but rather serve as the base) and your “working” cords (which you will use for knotting). Once tied, securely tape the looped end to a clean, flat surface like your table or desk. Ensure your core cords are stretched taut, allowing the working cords to hang freely on either side. This stable setup is crucial for consistent knotting.

-
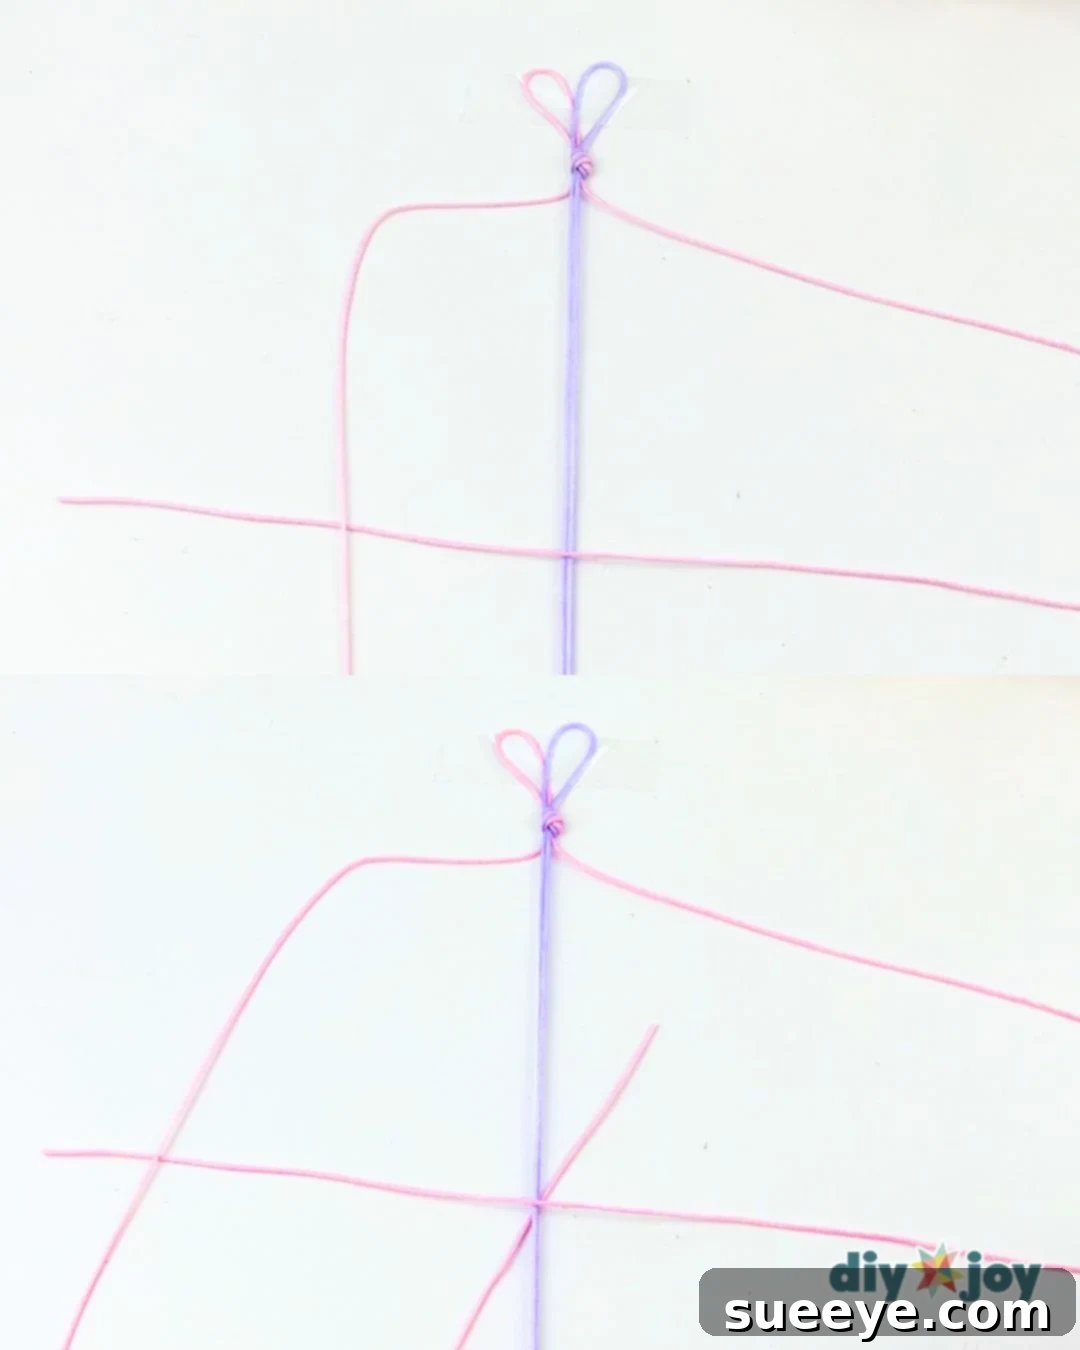
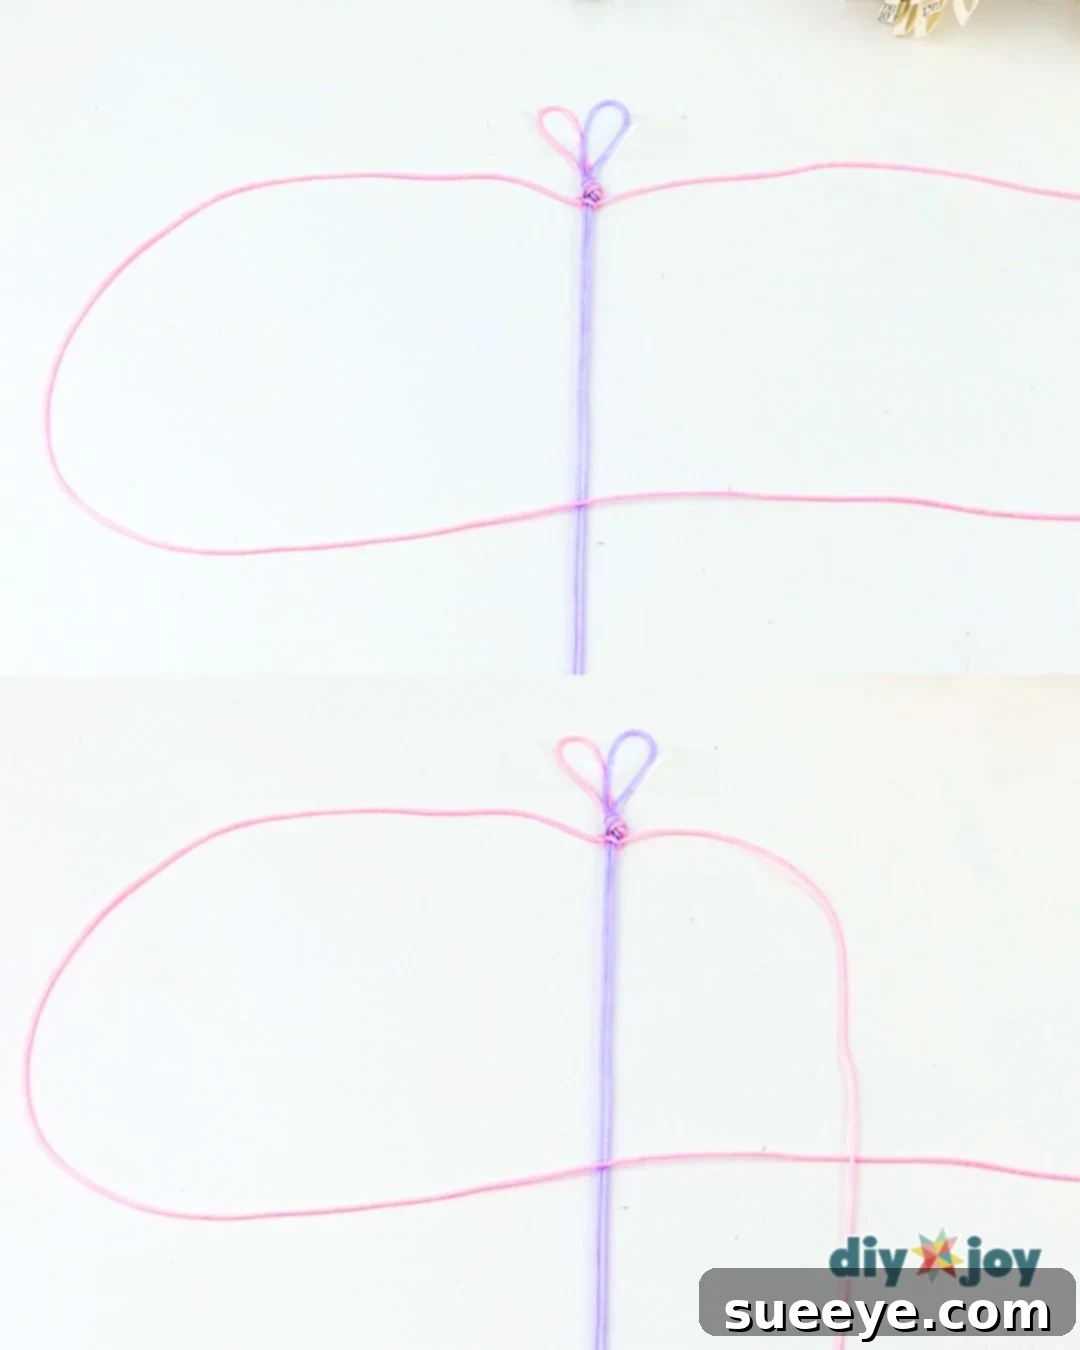
Start the Square Knot – Step 1 (Left Side): Take the working cord from the left side and bring it over the two central core cords. Form a shape resembling a “P” or a “4”. Make sure this left working cord goes underneath the right working cord at this stage. This initial move sets the foundation for the first half of your square knot. Maintain gentle, consistent tension on your working cords throughout the process.
-
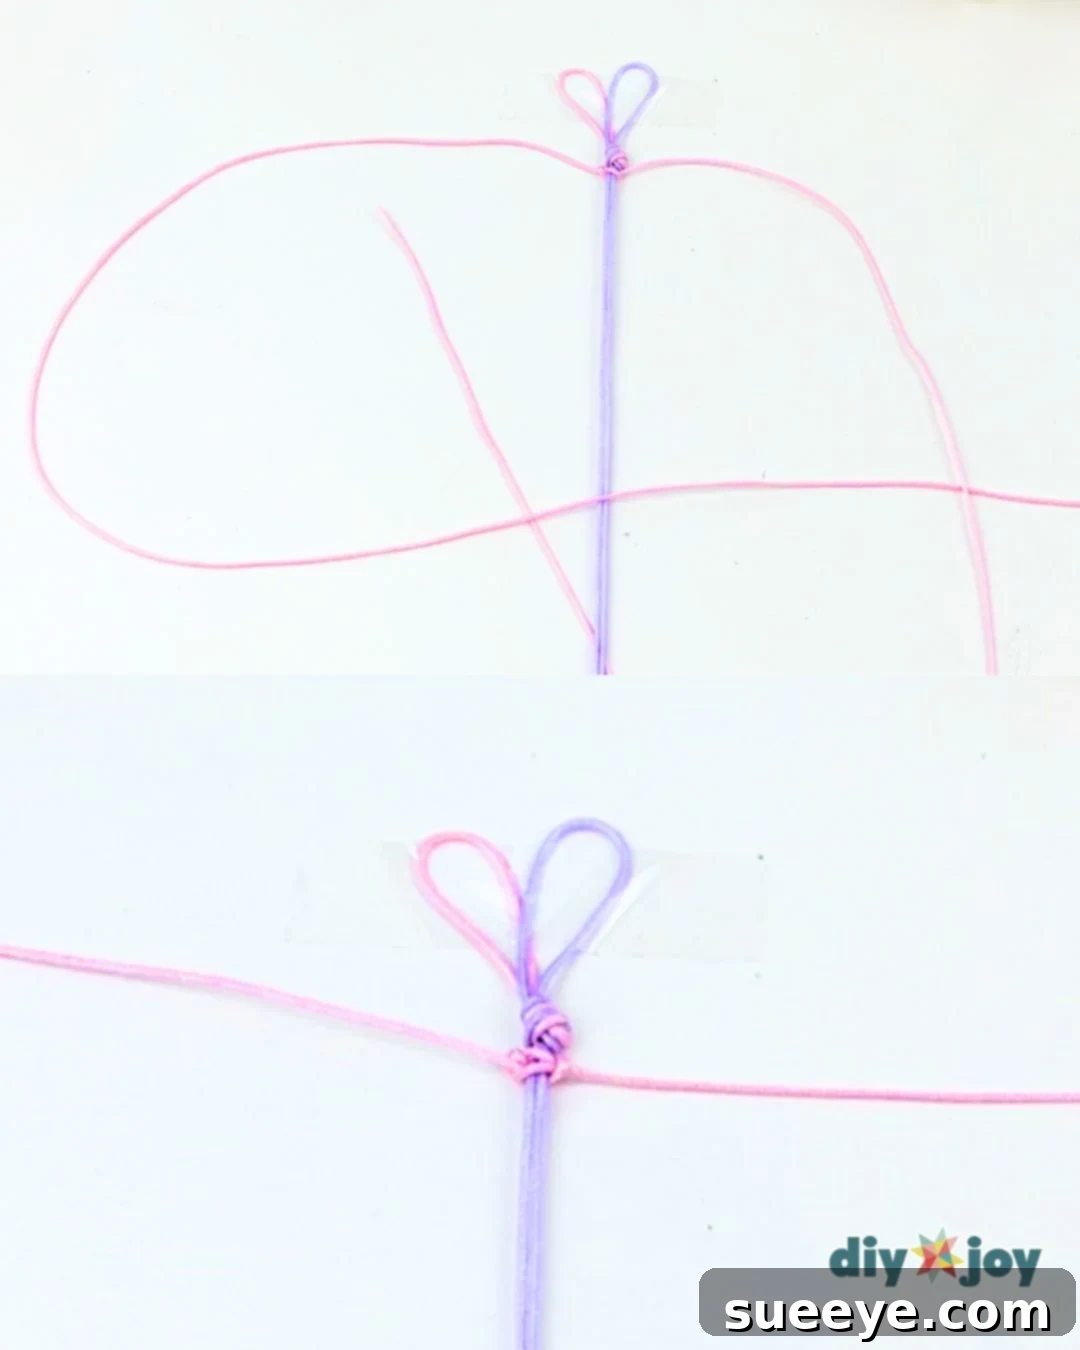
Start the Square Knot – Step 2 (Right Side): Now, take the working cord from the right side. Pass this cord *under* the two central core cords, and then bring it up through the loop you created with the left working cord (the “P” shape). Carefully pull both working cords simultaneously to tighten this first half of the knot. You should see a half-knot forming securely around your core cords. Adjust the tension so the knot is firm but not overly tight, allowing the core cords to remain straight.
-
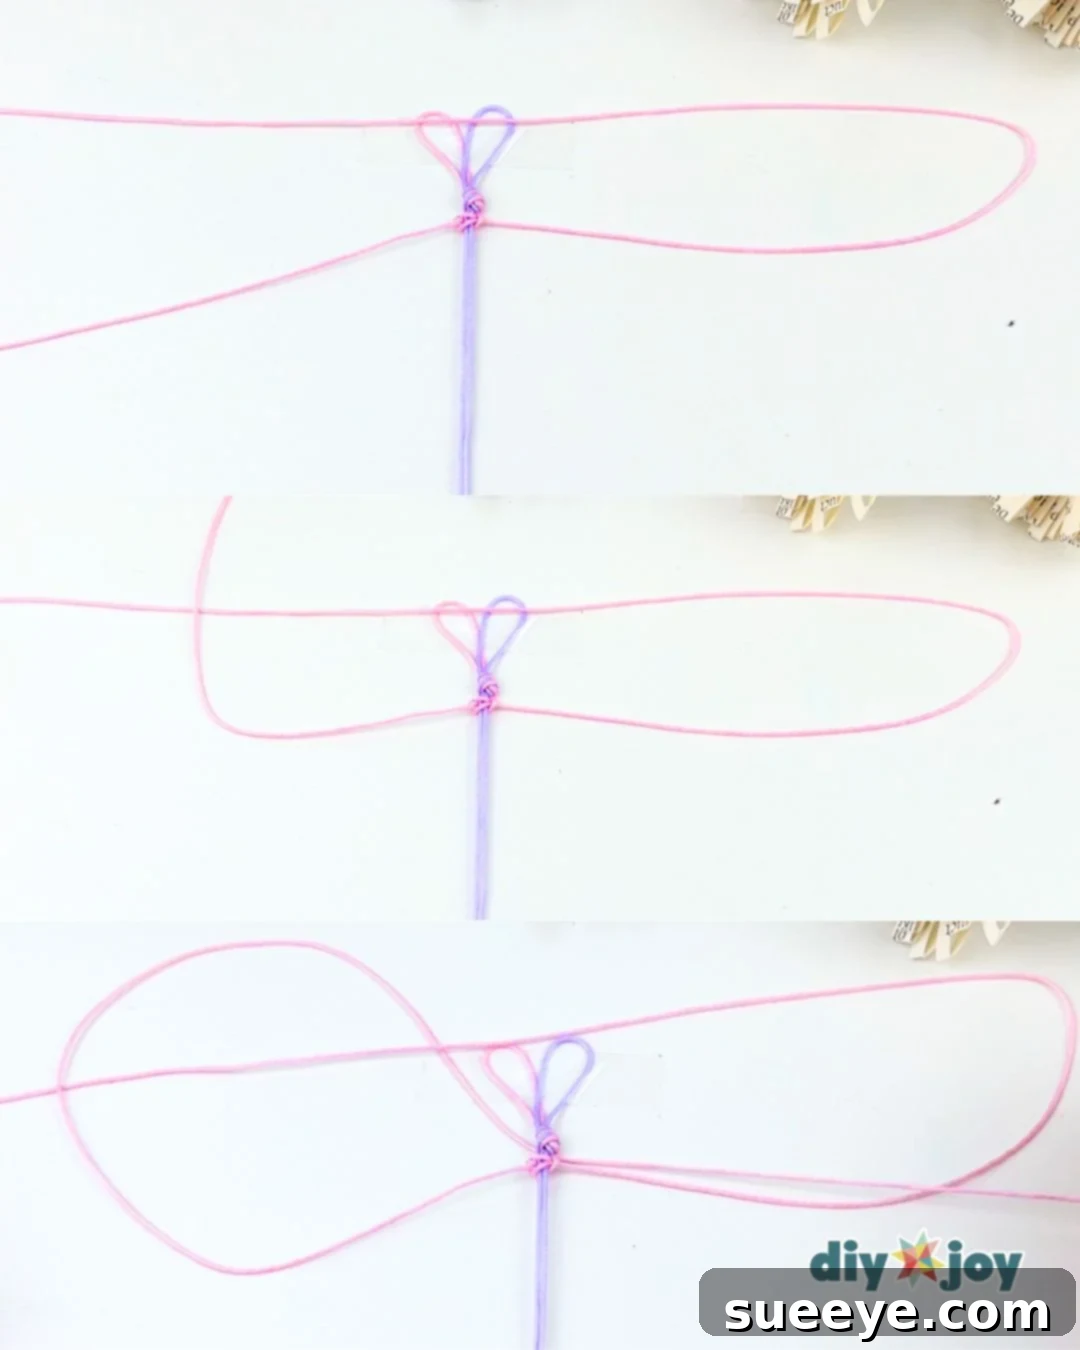
Complete the Square Knot – Step 3 (Right Side): To complete the full square knot, you need to mirror the previous steps. This time, start with the working cord that is now on the right side. Bring this cord *over* the two central core cords, forming a reverse “P” or a “4” shape. Ensure it crosses underneath the left working cord. This alternating start is what gives the square knot its flat, balanced appearance and prevents it from spiraling.
-
Complete the Square Knot – Step 4 (Left Side): Take the left working cord, pass it *under* the two central core cords, and then bring it up through the loop formed by the right working cord. Pull both working cords firmly and evenly to complete the square knot. You’ll notice a distinct, flat square knot has now formed around your core cords. This entire sequence (steps 2-5) constitutes one complete square knot. The key is to always alternate which side you start the “over” step on to maintain the flat knot structure.
-
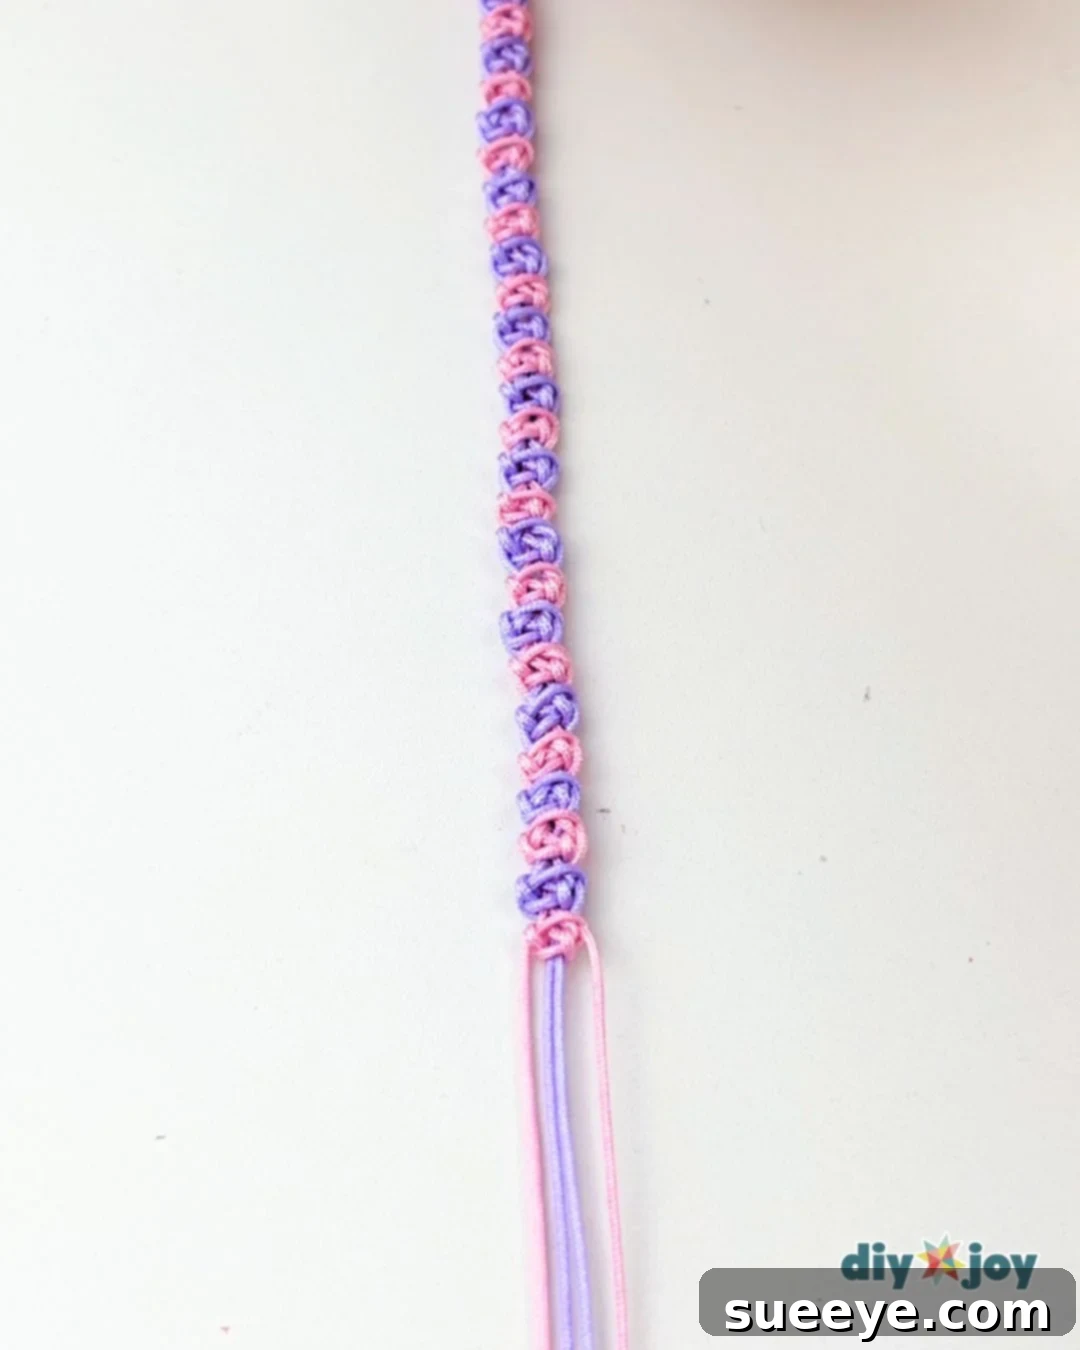
Repeat the Process: Continue tying square knots. Remember the alternating pattern: if you started your last knot by bringing the left cord over, start the next one by bringing the right cord over. This rhythmic repetition is the core of macramé. With each knot, gently slide it up to meet the previous one, ensuring they are snug and evenly spaced. This creates a uniform, beautiful braided effect.
-
Maintaining Consistency: As you knot, periodically check your tension. Uneven tension can lead to a distorted or inconsistent bracelet. Try to keep your knots uniform in size and tightness. This ensures your final product looks polished and professional.
-
Progress and Length Check: Keep repeating the square knot sequence. Your bracelet will gradually lengthen, forming a dense, textured braid. As you progress, regularly hold the knotted section against your wrist to gauge the desired length. Remember to account for a little extra length needed for the final closure. For an average adult wrist, this usually means knotting about 5-7 inches (13-18 cm), but adjust according to personal preference and wrist size.
-
Switching Colors (Optional): While this tutorial focuses on a single color, if you introduced a second color as a working thread (e.g., pink and violet as suggested in the original prompt for demonstrating), the principle remains the same. You would continue knotting with the currently active working thread (e.g., pink), and when you wanted to switch colors, you’d effectively “park” the pink working thread by laying it flat with the core threads, and pick up the violet thread to continue the square knots. This allows for creative color changes within your design. For this simple tutorial, just ensure you’re continuing the square knot correctly, alternating sides for a flat braid.
-
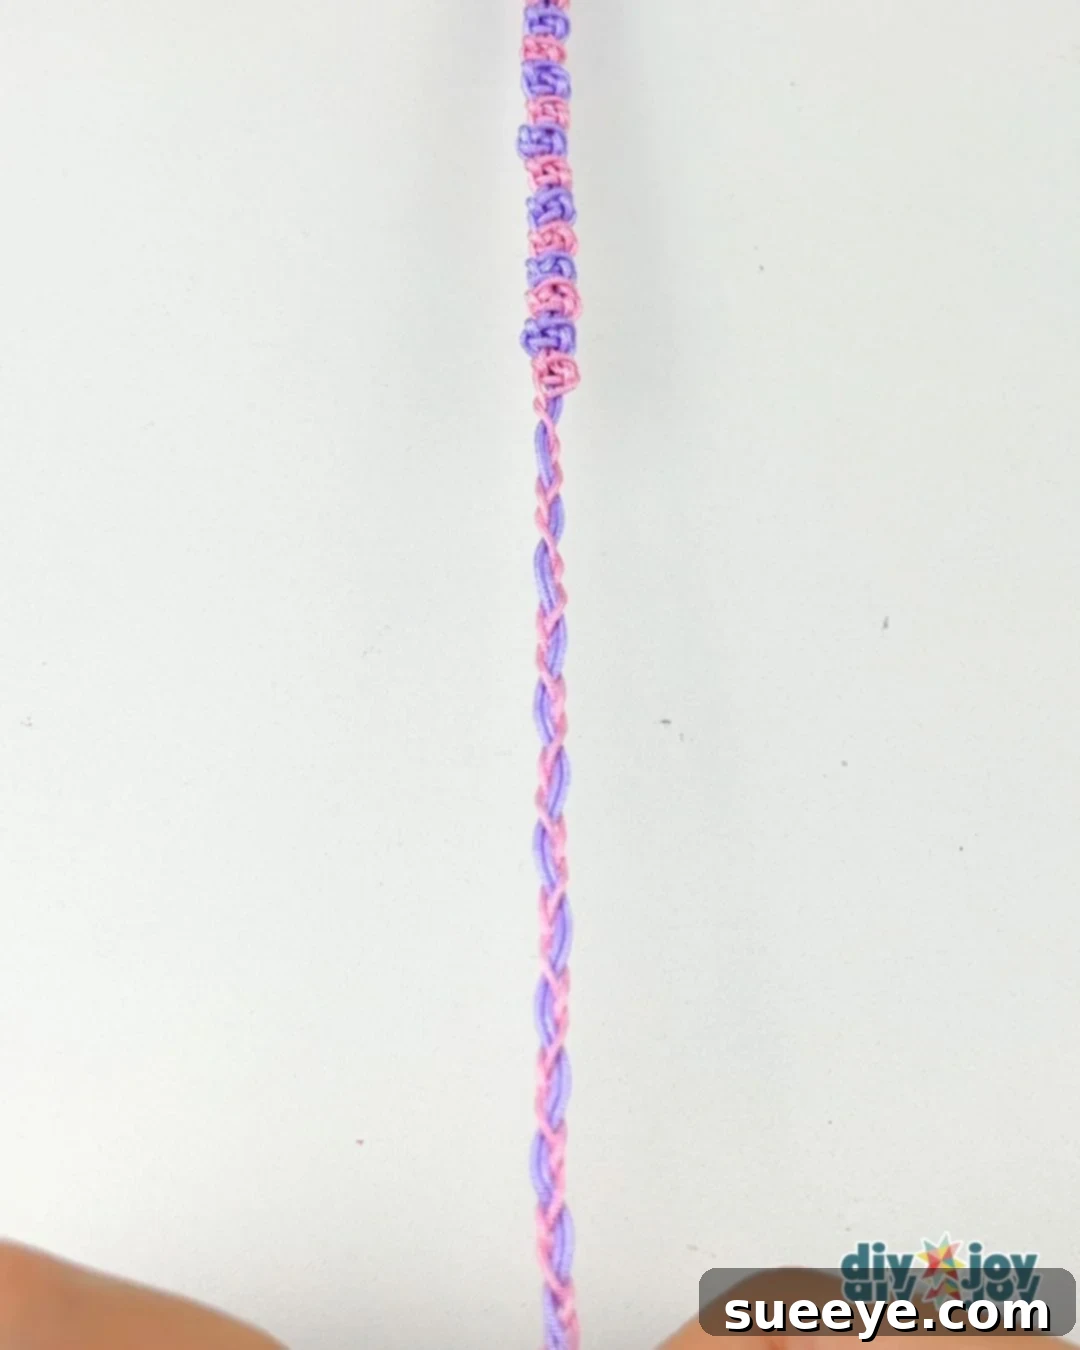
Continue Until Desired Length: Keep repeating the same process of tying square knots until the main body of your bracelet is long enough to comfortably wrap around your wrist, leaving approximately 2-3 inches (5-7 cm) of unknotted core cords and working cords on each end. This extra length is essential for creating a secure and adjustable closure.
-
Finishing the Bracelet: Once your knotted section is complete, you will have four cord ends remaining (two core ends and two working ends). Gather all four of these remaining cord ends on one side. Braid these four cords together for about 1.5 to 2 inches (4-5 cm). This braiding creates a sturdy and aesthetically pleasing end to your bracelet. After braiding, tie all the braided cords into a single, secure overhand knot at the very end. Pull it tight to prevent unraveling. Repeat this braiding and knotting process for the cords on the other side of your bracelet. Finally, trim any excess cord close to the knots, leaving a small tail if desired for aesthetic purposes. Your beautiful, handmade macramé bracelet is now complete and ready to wear or gift!
Tools You’ll Need
- Sharp scissors for clean cuts
- Ruler or measuring tape for accurate cord lengths
- A clipboard, knotting board, or even just strong tape to secure your project while knotting
Materials for Your Macramé Bracelet
- Macramé Cord: Approximately 0.8 mm thickness is ideal for delicate bracelets. Options include nylon cord, waxed cotton cord, or polycherry thread. Choose a durable, non-stretching cord that holds knots well. The color choice is entirely up to you – go for vibrant hues, classic neutrals, or a mix of complementary shades!

Essential Crafting Tip for Macramé Success
For optimal knotting and to make your macramé journey smoother, always secure your cords! Instead of relying solely on tape, consider using a specialized macramé knotting board, a sturdy clipboard, or even a simple piece of cardboard with safety pins. This will firmly hold your core cords in place, preventing them from shifting or tangling. A stable base is key to achieving consistent tension, ensuring your knots are uniform, and ultimately creating a more polished and professional-looking bracelet. It saves you from constant readjustments and allows you to focus purely on the joy of knotting.
Discover More Easy & Inspiring Craft Ideas
Crafts
Easy Crochet Yarn Bow Tutorial
Yarn Crafts
How to Make a Yarn Dog
Yarn Crafts
How to Make Pom Pom Hearts