Accessories
DIY Beaded Wind Chime Tutorial
Lately, I’ve been obsessed with crafts that use beads and charms. One of my favorite past projects was a DIY…

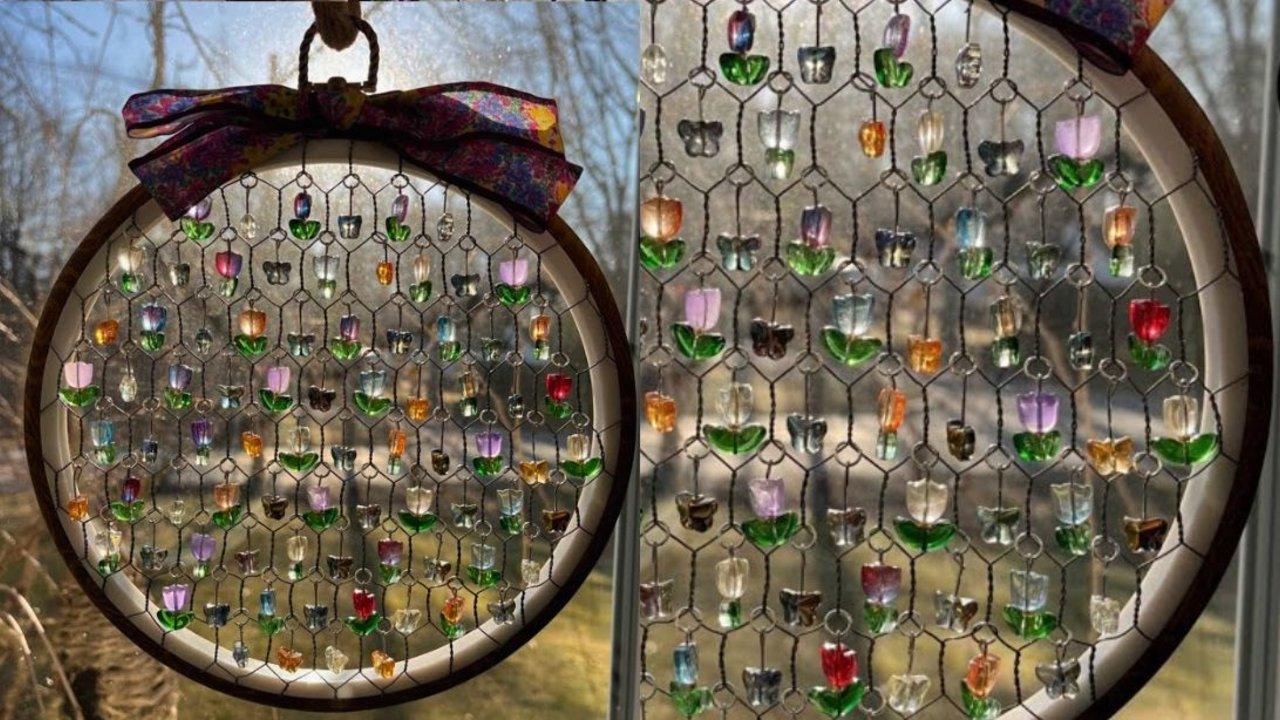
Lately, I’ve been obsessed with crafts that use beads and charms. One of my favorite past projects was a DIY picture frame suncatcher made with colorful beads, and I loved experimenting with different shapes, textures, and colors. That piece turned out beautifully—but my most recent creation, a DIY beaded wind chime, might just rival it. With its mix of shimmering beads and delicate charms, this handmade wind chime is not only fun to make but also a stunning piece of decor that moves and sings in the breeze.

Stringing the beads together for this DIY beaded wind chime was such a fun and rewarding project, though I’ll admit, there were a few frustrating moments. Whenever the string slipped out of my hands and the beads scattered across the floor, I had to start all over again. But in the end, it was worth it. Adding tiny bells was a genius touch—the soft, tinkling sound they make when they sway in the breeze is so calming. It’s one of those things you truly have to experience yourself to believe.
A beaded wind chime is more than just pretty garden decor—it’s a way to bring movement, sound, and personality into your space. Whether you hang it on the porch, in the garden, or by a sunny window, it adds sparkle, soothing sound, and a handmade touch. No two chimes are ever the same, which makes each one completely unique.

The best part? You can make a colorful wind chime using materials you already have. It’s a relaxing, beginner‑friendly project that rewards patience and creativity. And when it’s done, your wind chime won’t just look beautiful—it will sing in the breeze, a daily reminder that you created something from scratch that’s both functional and artful.
@diyjoycraftsYou REALLY won’t believe how easy it is to make this gorgeous DIY with just a stick, some twine, and colorful glass beads ✨🌈 This sparkly DIY wind chime is perfect for garden decor, backyard patios, or even your balcony — the way it sparkles in the sun 🌞 and dances in the breeze is magical! Cottagecore and fairycore vibes for sure. 🧚🪄You could even add little bells to it if you want more peaceful sounds when the wind blows. I’d even be happy hanging it in my kitchen window for a creative decor idea 💕 Save this simple rustic craft idea and try it with friends on craft night, make some for DIY Christmas gifts (I promise they don’t have one of these yet! ) I gave one to my Mom for Mother’s Day and she absolutely loves her beaded wind chime. It even makes a fun kids craft idea and classroom project idea. Just grab a box of colorful beads and start creating! Its pretty much a failproof craft that turns out cute no matter what – definitely a beginner friendly DIY! Did I mention that its a spectacular way to use random, leftover beads? #windchimes #crafts #easycraft #BeadCraft #gardendiy #diywindchime #SummerDIy #BackyardDecor #beadtok #CraftTok #DIY #fypシ Let me know if you have questions about making this cool DIY. Be sure to follow me for more easy crafts and handmade gifts. 🇪🇸 ¡Tan fácil y tan bonito! ✨ 🇺🇸 Easy, sparkly, and so fun to make! 🌈 🇩🇪 So einfach – und sieht wunderschön aus! 💖
♬ original sound – Sueeye – Sueeye
How to Make a Beaded Wind Chime
Step 1: Tying the Bell
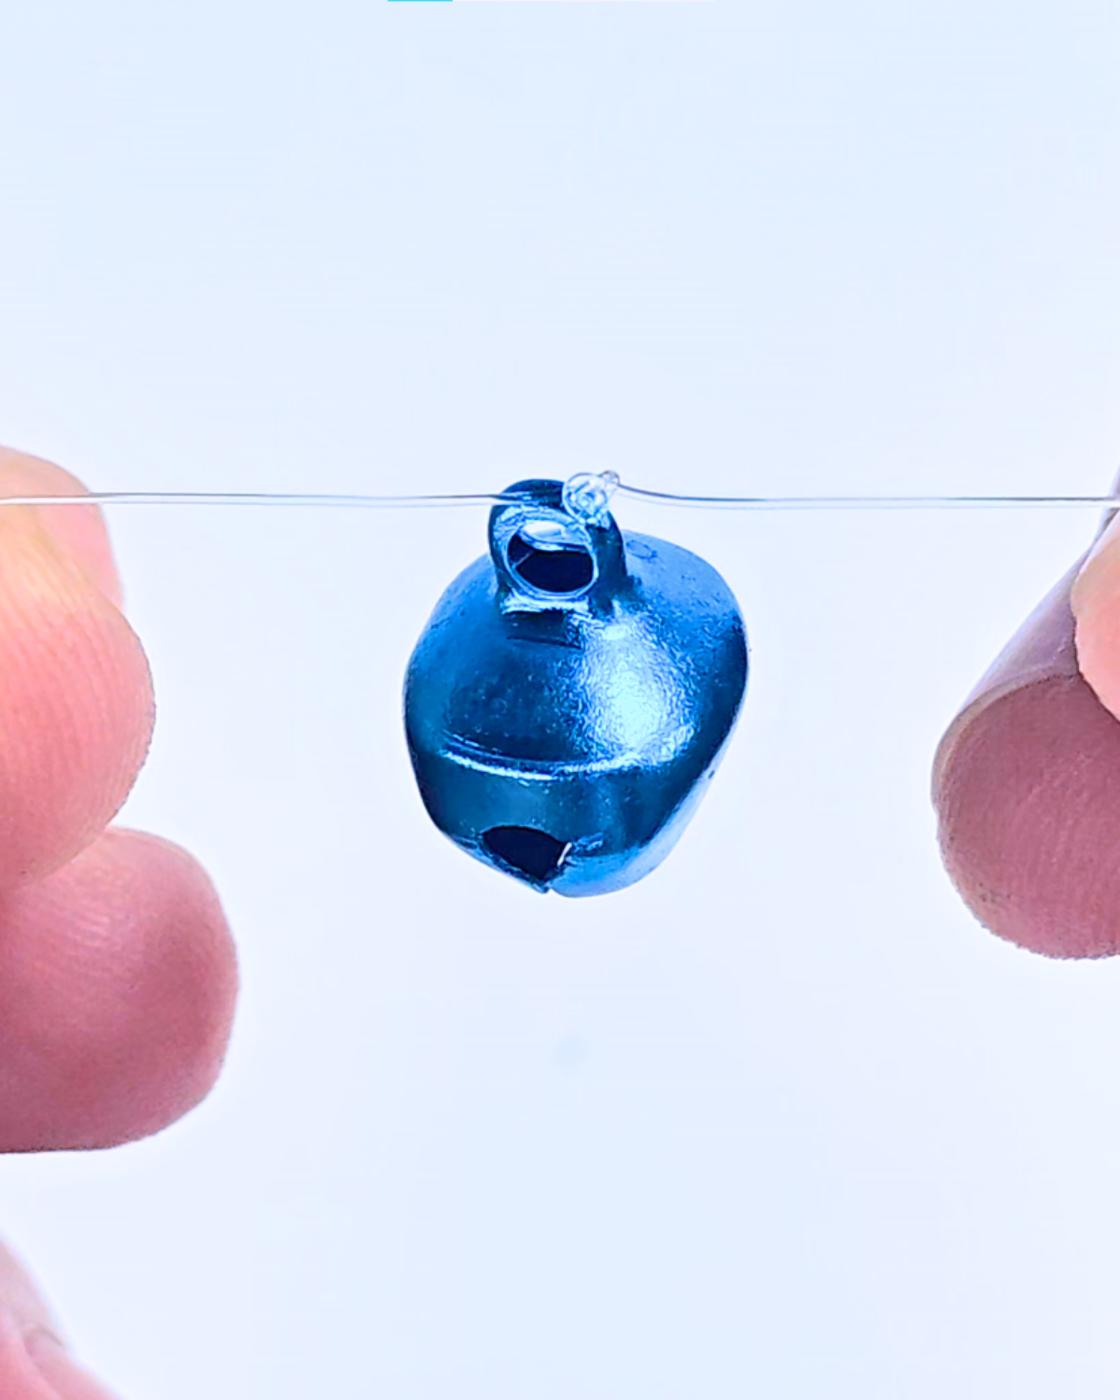
Cut a long piece of fishing line and securely tie a bell to one end, ensuring it’s tight so it won’t slip off.Step 2: Inserting the Beads

Slide on your first bead, followed by a few smaller ones to add height. Thread on a charm you love, then continue layering small beads and charms in any sequence you like. Once your strand reaches the desired length, set it aside for final assembly.Step 3: Making Another Color Set of the Beads
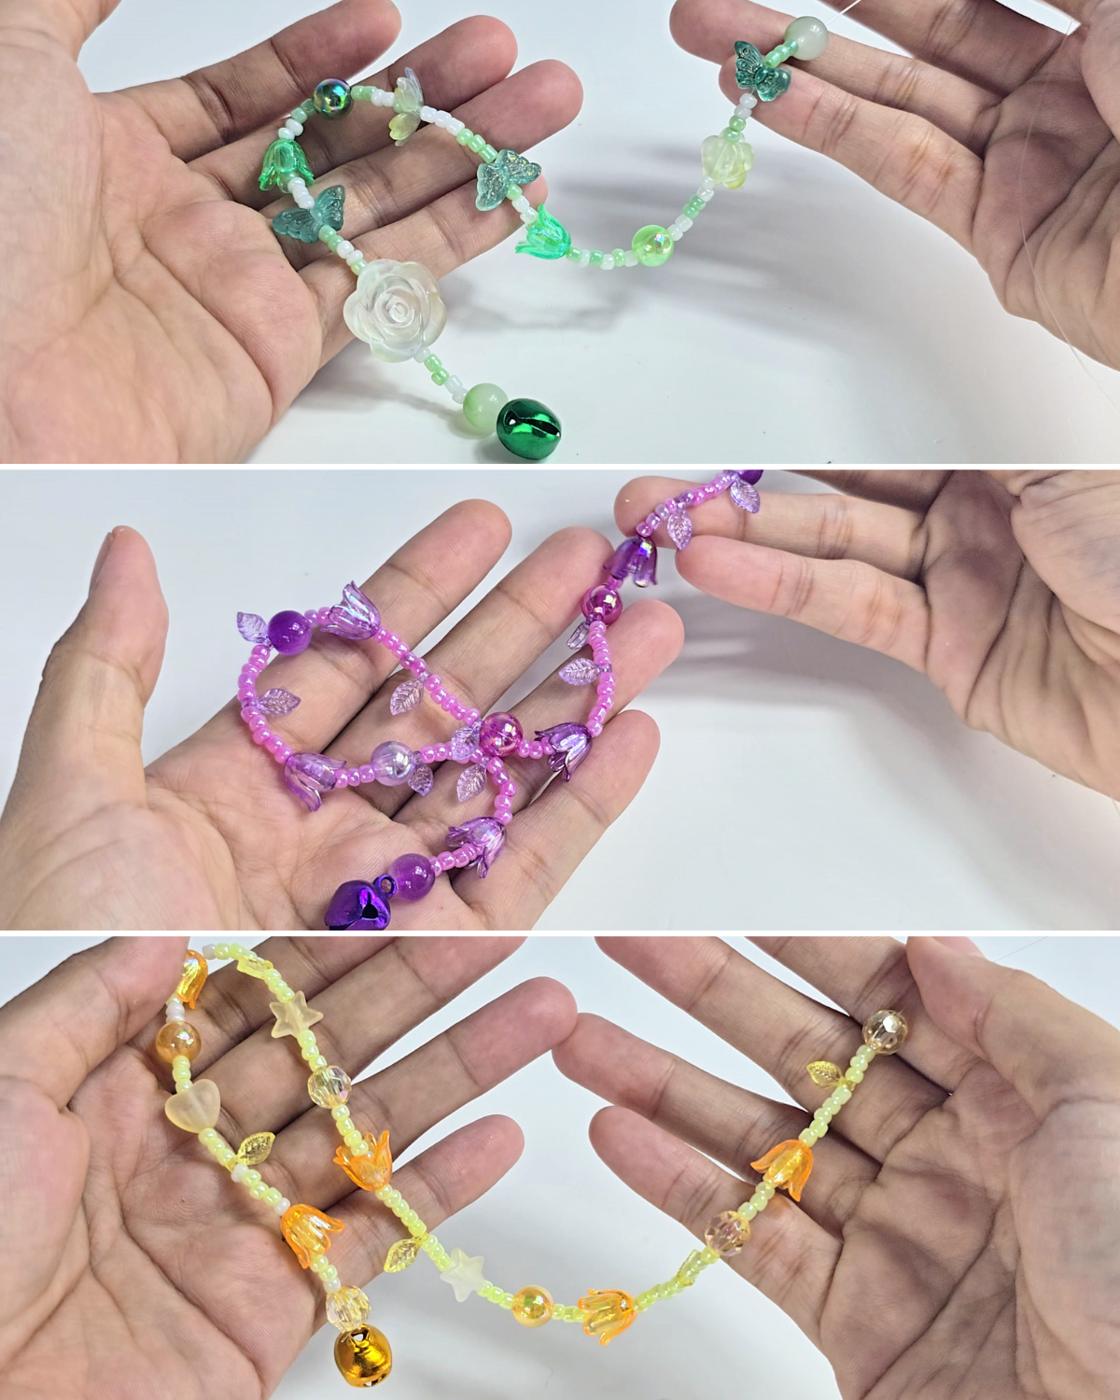
Create more strands of beads and charms, changing their colors to give each strand a unique look.Step 4: Tying it Around the Tree Branch
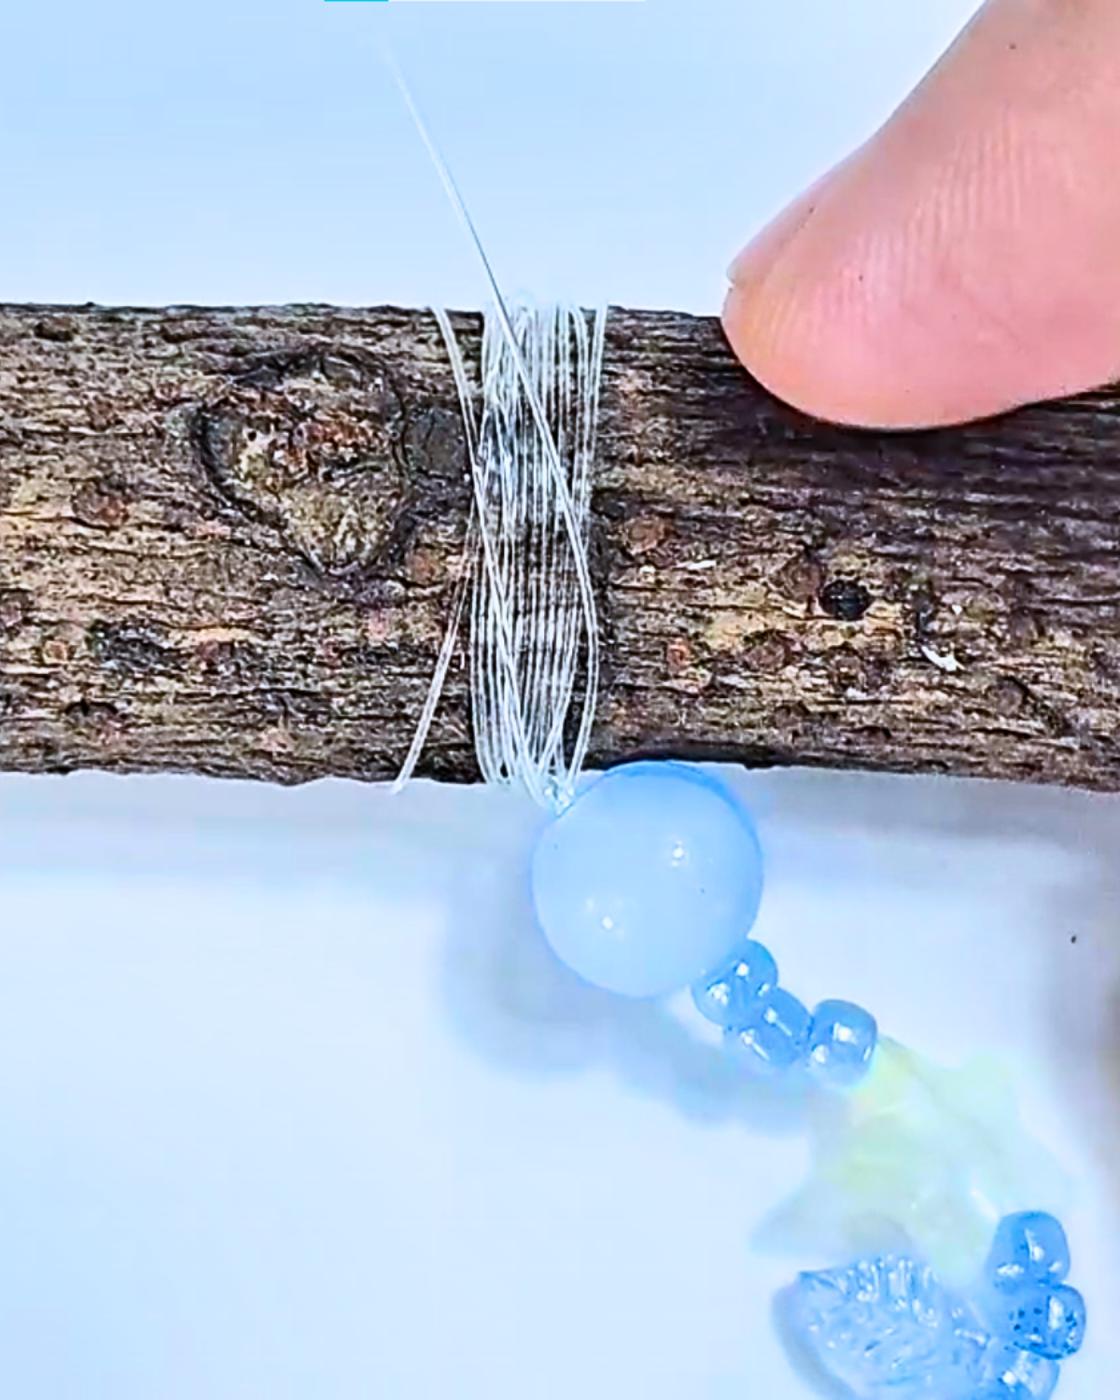
Once you’ve made six strands, begin tying each one around a twig or tree branch, spacing them out evenly to keep the design balanced.Step 5: Attaching the Jute Rope
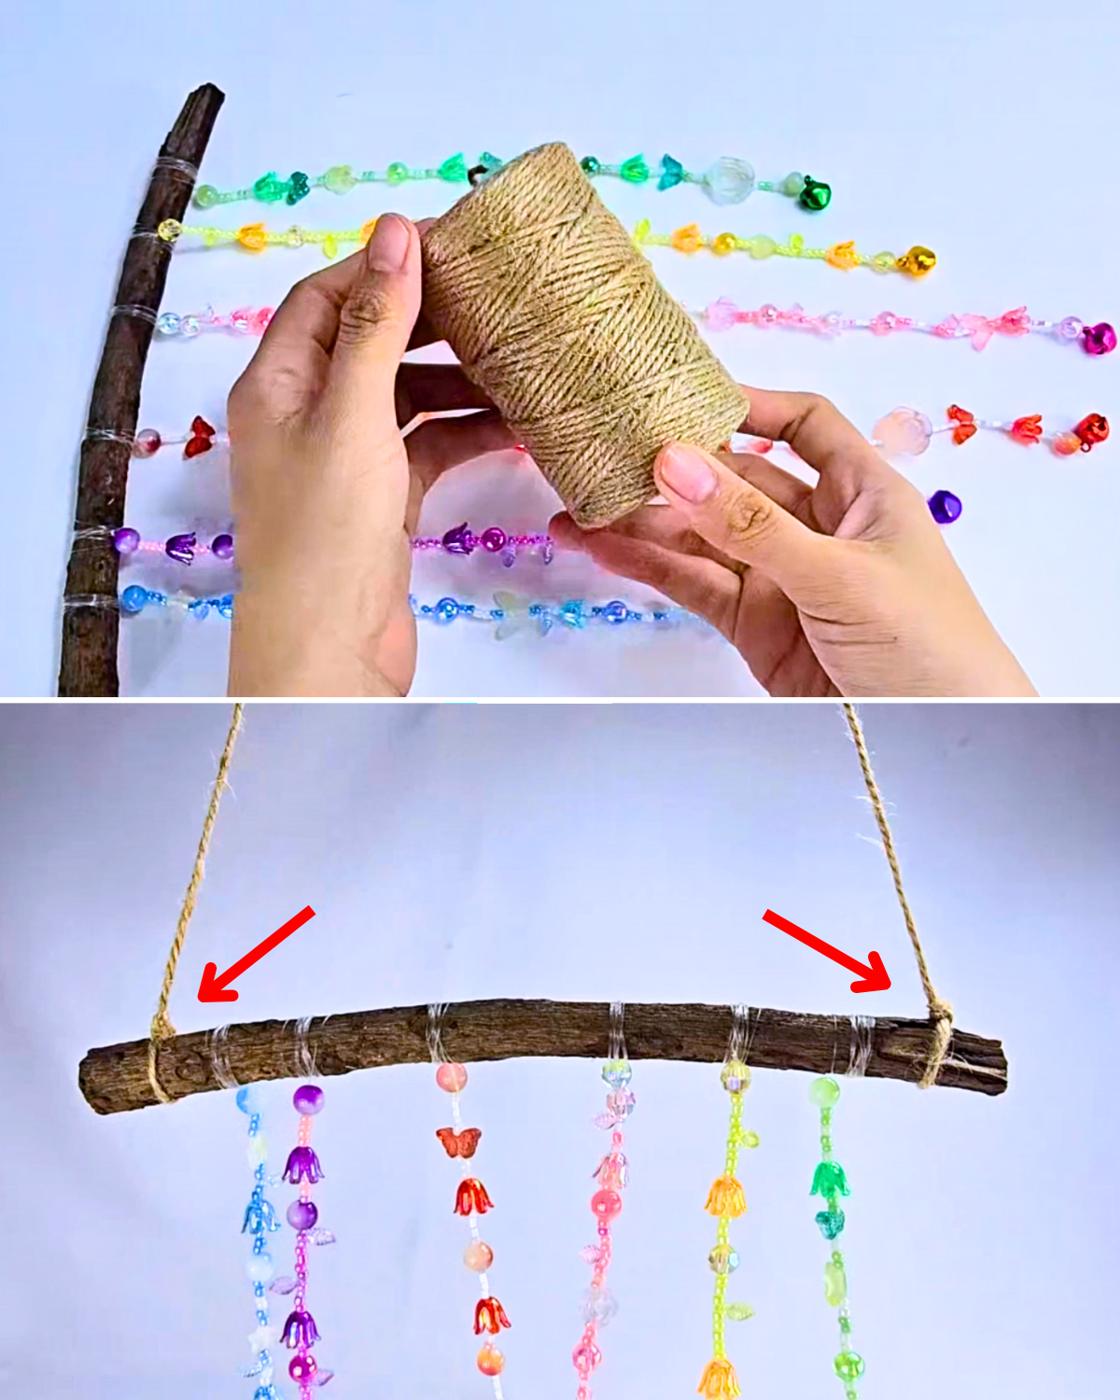
Cut a piece of jute rope and tie each end securely to both sides of the twig or branch. Your beaded wind chime is now ready to hang!
Materials
- Beads and Charms
- Twig and Tree Branch
- Fishing Line
- Scissors
- Jute Rope
- Bells


Pro Tips
- Use fishing line or strong jewelry wire to keep strands secure and long‑lasting.
- Mix glass, wood, and metal beads for texture and visual interest.
- Add chimes for a soft, soothing sound in the breeze.
- Lay out your bead sequence before stringing to ensure balanced colors.
Easy & Quick Craft Ideas

Crafts
Fall Crafts – Yarn Pumpkins Made From Toilet Paper Rolls

Paper Flowers
DIY Marigold Paper Flower Garland
Crafts
Beaded Indian Corn | Thanksgiving Craft Idea
Seasonal
DIY Fall Garland
*If you love this craft, then visit our official website, follow our Facebook page, and subscribe to our YouTube channel for more!