
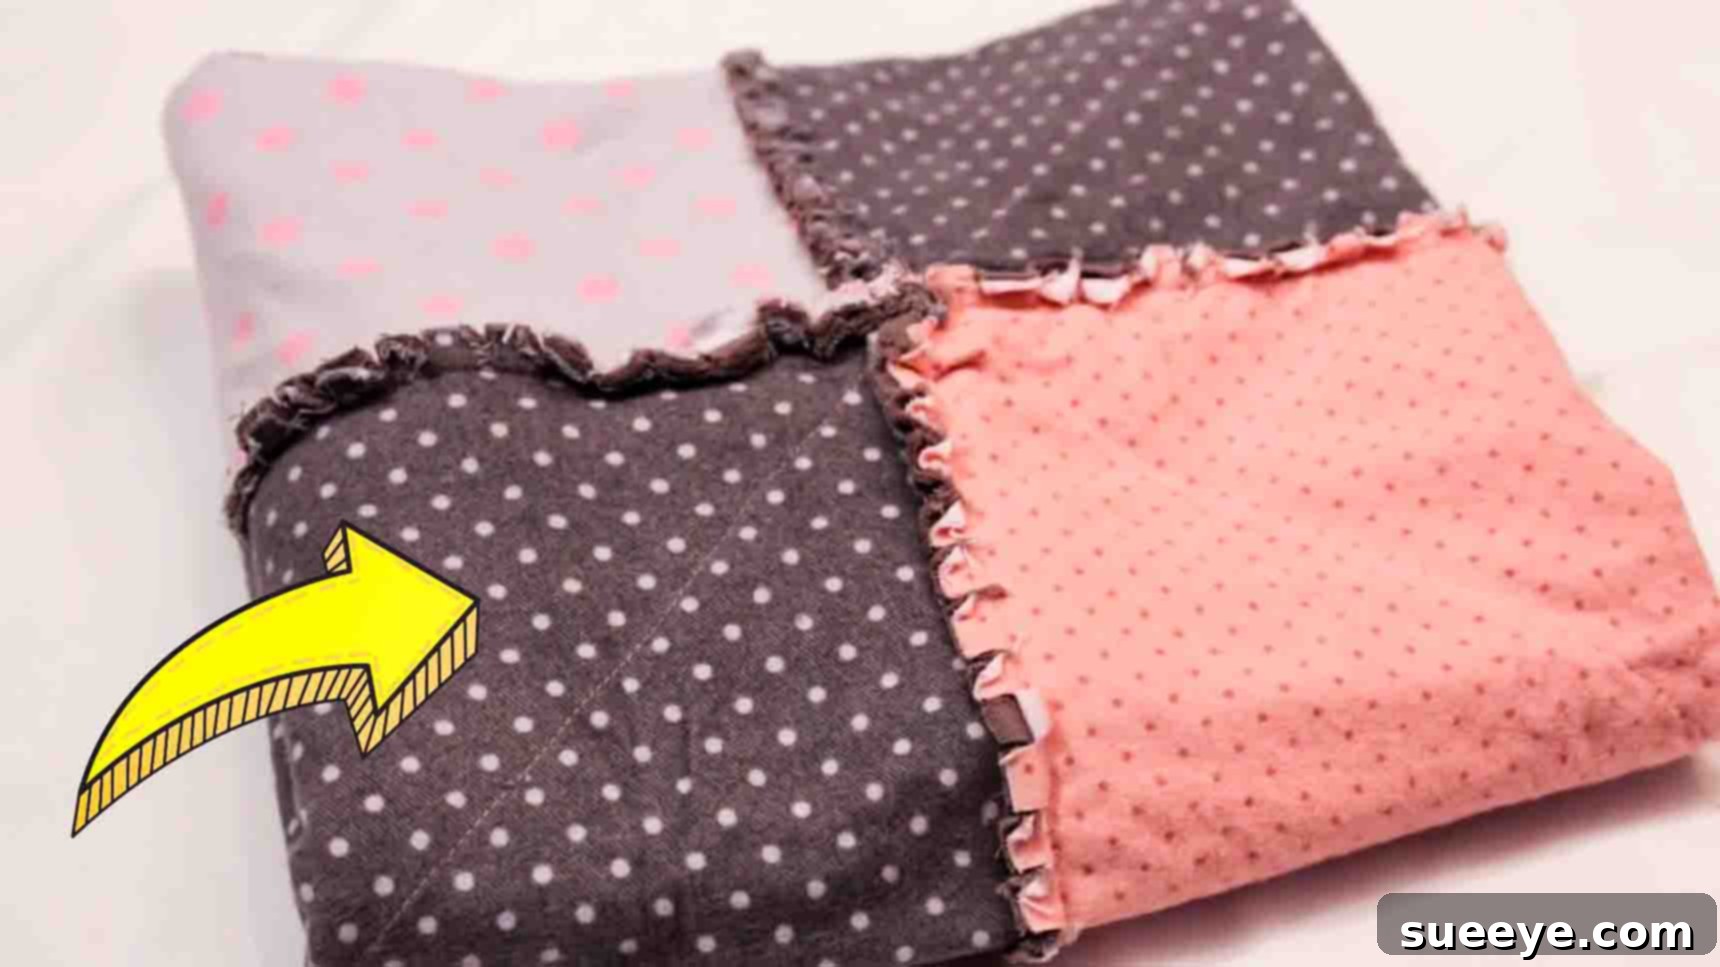
Handmade Rag-Style Baby Quilt: The Ultimate DIY Flannel Blanket Tutorial
Are you searching for a truly special and heartfelt gift for an upcoming baby shower? Or perhaps you simply want to create a cozy, unique blanket for a little one in your life? Look no further! This step-by-step guide will show you how to craft a beautiful rag-style baby quilt using readily available materials, including cherished old flannels. Renowned for their incredible softness and distinctive texture, rag quilts are a fantastic project for sewers of all skill levels, especially beginners. They offer a charming, lived-in aesthetic and provide unparalleled warmth and comfort, making them the perfect addition to any nursery.
This comprehensive tutorial, inspired by the excellent work of Whitney Sews on YouTube, simplifies the process of creating a durable and delightfully cuddly flannel baby blanket. You’ll be amazed at how easily you can transform simple fabric squares into a treasured keepsake. Not only is this a rewarding creative endeavor, but it’s also an eco-friendly way to repurpose old flannels, giving them a new life as a cherished item. Get ready to gather your materials and embark on a fun and fulfilling sewing journey that results in the softest, most charming baby quilt imaginable.
Essential Materials for Your Rag-Style Baby Quilt
Crafting a rag-style baby quilt is a wonderfully forgiving project that doesn’t require an extensive array of specialized tools. With just a few basic items, many of which you likely already own, you’ll be well on your way to creating a beautiful and functional piece. Here’s what you’ll need to get started:
- Old Flannels: This is the star of your project! Scour your linen closet for old flannel shirts, sheets, or even baby blankets that are no longer in use but still in good condition. The beauty of a rag quilt is that it embraces varied patterns and colors, allowing you to create a truly unique and patchwork design. Aim for a selection that complements each other, or go wild with a vibrant, eclectic mix. Ensure they are clean and pre-washed to prevent shrinkage after the quilt is finished.
- Backing Fabric: While flannel is often used for both the front and back layers of a rag quilt, you can introduce another layer of texture or color with a different fabric for the backing. Soft cotton, minky, or even another coordinating flannel works wonderfully. This fabric will form the base of each quilt block, providing stability and an additional layer of warmth.
- Ruler: A clear, sturdy ruler is indispensable for accurate cutting. A quilter’s ruler (typically clear acrylic) with clear measurement markings will make the cutting process much easier and more precise.
- Marking Tool: Whether it’s a fabric chalk, a washable fabric marker, or even a regular pencil (on the wrong side of the fabric), you’ll need a tool to mark your cutting and stitching lines clearly.
- Pins: Quilting pins are essential for holding fabric layers securely in place during cutting and sewing. Choose sharp, fine pins that won’t snag your fabric.
- Fabric Scissors: A good pair of sharp fabric scissors is crucial for clean, straight cuts. Dedicate these scissors solely to fabric to keep them sharp. Alternatively, a rotary cutter and self-healing mat can significantly speed up the cutting process, especially for multiple squares.
- Sewing Machine: A basic sewing machine capable of a straight stitch is all you need. Ensure it’s in good working order and you have a supply of all-purpose thread that matches or complements your flannel fabrics.
Step-by-Step Guide to Crafting Your Rag-Style Baby Quilt
Now that you have all your materials ready, let’s dive into the creative process. Remember, precision in cutting and consistent seam allowances are key to a beautifully finished rag quilt, but don’t be afraid to embrace the handmade charm!
Step 1: Preparing and Layering Your Quilt Blocks
The foundation of your rag quilt lies in carefully prepared squares. This initial stage sets the stage for the distinctive ragged edges that make this type of quilt so beloved.
- Cut Your Squares: Begin by cutting three squares, each measuring 12.5 x 12.5 inches, from each of your chosen flannel prints. This measurement includes your seam allowance. The number of flannels you use will determine the variety in your quilt. Next, cut nine squares of the same dimension (12.5 x 12.5 inches) from your chosen backing fabric. Accuracy here is vital for your blocks to align properly later, so take your time and use your ruler and marking tool carefully.
- Layering the Blocks: Take one of your backing fabric squares and place it right side down on your work surface. This will be the bottom layer. On top of this, center one of your printed flannel squares, placing it right side up. You should now have two layers of fabric with the wrong sides of both fabrics facing each other, and the right sides facing outwards.
- Marking for Stability: To ensure your layers stay together and to create a textured effect, you’ll be sewing an ‘X’ across each block. Using a long ruler and your marking tool, draw a line from one corner to the opposite corner, then repeat from the other two corners. This will form a clear ‘X’ shape across your layered square.
- Secure and Stitch: Carefully secure the two fabric layers together with pins, placing them just outside the marked lines to avoid stitching over them. Now, using your sewing machine, sew precisely along the ‘X’ lines you just drew. This diagonal stitching helps to keep the two fabric layers from shifting, adds stability to each block, and contributes to the overall texture of the finished quilt.
- Repeat for All Blocks: Continue this process of layering, marking, and stitching until you have completed all nine sets of blocks. Each finished block should have an ‘X’ sewn across it, joining the flannel print to the backing fabric.
- Arrange Your Quilt Layout: Once all nine blocks are prepared, lay them out on a large flat surface (like a floor or a large table) to determine the pattern you desire. Play around with the arrangement of colors and prints until you achieve a visually pleasing design. This is your chance to be creative! Once you are happy with your layout, it’s crucial to keep them in order. Place a pin in the first block of each row to help you remember the sequence as you move them to the sewing machine. This simple trick prevents accidental reordering and keeps your design intact.
Step 2: Assembling and Finishing Your Rag Quilt
With your individual blocks prepared and arranged, it’s time to bring your rag quilt to life by joining the blocks into rows and then the rows into a complete blanket. The distinctive ragged edges are created in this stage, so pay close attention to the seam allowance.
- Sewing Blocks into Rows: Working one row at a time to maintain your chosen pattern, take the first two blocks of a row. Place them wrong sides together, carefully aligning all edges. It’s important to sew these with the wrong sides together because, unlike traditional quilting, the seam allowances will be exposed on the right side of the quilt to create the ragging effect. Sew down one side to attach the two blocks together, using a consistent half-inch seam allowance. Open them up. Now, take the third block for that row, place it wrong sides together with the second block, and sew to attach with the same half-inch seam allowance. Repeat this process until all three blocks in the row are joined.
- Repeat for All Rows: Complete steps for all three rows. Once each row is assembled, lay them back out in their original order to ensure everything is still aligned with your chosen design.
- Joining the Rows: Now it’s time to connect your rows to form the full quilt top. Take the first two completed rows. Again, place them wrong sides together, aligning the seam lines and the outer edges. Pin them securely in place. Sew along the entire length where the two rows meet, maintaining that crucial half-inch seam allowance. Open them up and then attach the third row in the same manner. By placing wrong sides together, you are creating the exposed seams that will later become the soft, frayed “rags.”
- Finishing the Outer Edge: Once all the rows are securely sewn together, you will have the full body of your baby quilt. To finish the outer perimeter and prepare for the ragging, sew a continuous seam around the entire outer edge of the quilt, again using a half-inch seam allowance. This final seam encloses all raw edges and provides a consistent border for the next step.
- Snip the Seam Allowances for Ragging: This is the most satisfying part, where your rag quilt truly begins to take its form! Carefully snip all of the exposed seam allowances – both the internal seams that join your blocks and rows, and the outer border you just sewed. Make small, even snips every half-inch or so, cutting through all layers of the seam allowance but being extremely careful not to cut into your main stitch line. These snips allow the fabric to fray beautifully. The more consistent your snips, the more uniform and fluffy your “rags” will be. Take your time with this step, as it’s key to achieving the signature rag quilt look.
- Wash and Dry to Reveal the Rags: Your quilt is almost done! The final magical step involves washing and drying. Place your newly snipped quilt into a washing machine. Use a gentle cycle with warm water. The agitation of the washing machine, combined with the snips you made, will encourage the exposed fabric edges to fray and bloom into the soft, fluffy “rags” that give the quilt its distinctive texture. You might need to run it through a second wash and dry cycle, or use a stiff brush, to achieve maximum fluffiness. Be prepared for a significant amount of lint in your dryer filter – this is a good sign that your ragging is working! Once dry, give it a good shake, and admire your beautifully handmade, incredibly soft, and cuddly rag-style baby quilt.
Why Choose a Rag-Style Baby Quilt?
Rag quilts are more than just a cozy blanket; they offer a unique combination of aesthetic appeal, tactile comfort, and practicality that makes them ideal for babies. The frayed edges create a wonderful sensory experience for little fingers, encouraging exploration and engagement. Unlike traditional quilts with neatly bound edges, the intentionally frayed seams of a rag quilt add a playful, rustic charm that softens with every wash. They are incredibly durable, able to withstand countless washes, which is a major plus for any baby item. Furthermore, the use of flannel makes them exceptionally warm yet breathable, perfect for snuggles during naptime or keeping warm in a stroller.
Tips for Fabric Selection and Design
The beauty of a rag quilt lies in its versatility. When selecting your flannels, don’t be afraid to mix and match patterns and colors. Consider a central theme, like animals or stars, or opt for a cohesive color palette. Pre-washing all your fabrics before cutting is highly recommended to prevent any uneven shrinkage after the quilt is completed. For an extra touch of sensory delight, consider incorporating a small square of minky or an even softer fabric into a few of your blocks. This adds another layer of texture for the baby to explore.
Personalizing Your Rag Quilt
Making a handmade gift is inherently personal, but you can elevate your rag quilt even further! Consider embroidering the baby’s name or birth date onto one of the flannel squares before assembling the quilt. You could also sew on a small fabric label with a sweet message or your signature as the maker. These small details transform a beautiful blanket into an irreplaceable heirloom, cherished for years to come.
Caring for Your Handmade Rag Quilt
One of the best features of a rag quilt is how easy it is to care for. In fact, washing and drying are essential steps in creating its signature look. After the initial fraying wash, subsequent washes will only make the flannel softer and the rags fluffier. Always wash your rag quilt on a gentle cycle with cool or warm water. Tumble dry on low heat. Be mindful of lint in your dryer trap, especially during the first few washes. With proper care, your handmade rag-style baby quilt will remain a soft, durable, and beloved item for many years.
The Joy of Gifting Handmade
In a world of mass-produced items, a handmade gift stands out. A rag-style baby quilt crafted with your own hands carries a warmth and thoughtfulness that cannot be replicated. It’s a tangible expression of love, time, and care. As you watch a new parent wrap their little one in your cozy creation, you’ll feel a sense of pride and accomplishment knowing you’ve given a gift that is truly from the heart, destined to become a cherished part of their family’s story. So gather your flannels, fire up your sewing machine, and create something truly magical!