
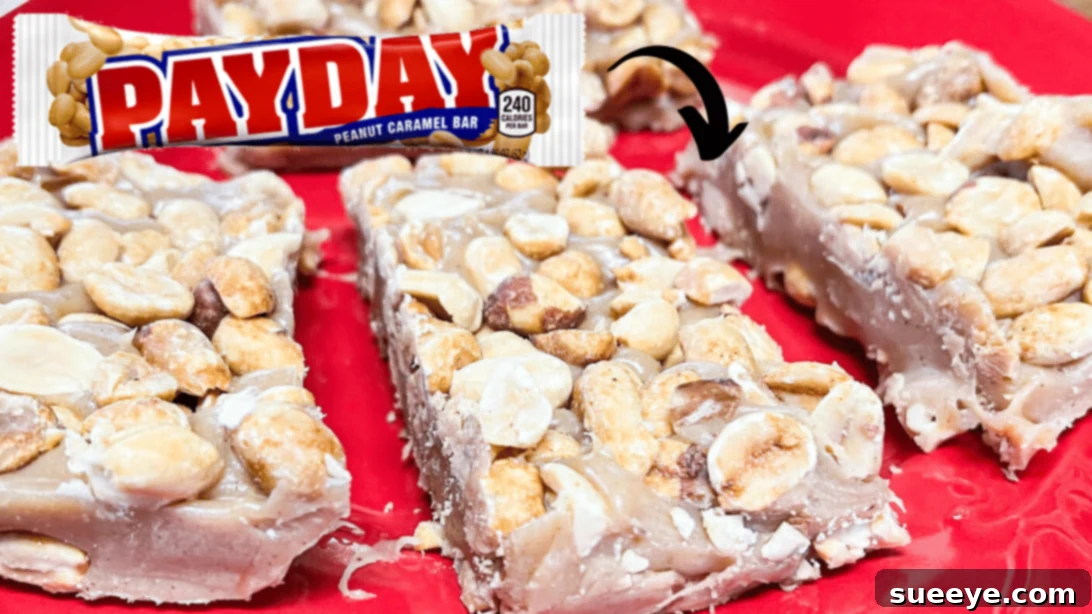
Homemade No-Bake PayDay Candy Bars: Your Ultimate 6-Ingredient Copycat Recipe!
There’s something truly special about a homemade sweet treat, isn’t there? Whether you’re planning a lively picnic, a cozy family gathering, or just looking for that perfect indulgence to brighten your day, a delicious dessert is always a must-have. And when it comes to timeless classics, the humble yet incredibly satisfying PayDay candy bar holds a cherished spot in many hearts. That irresistible combination of crunchy, salty peanuts and a rich, chewy caramel-like center is simply unparalleled.
What if we told you that you could recreate this iconic candy bar right in your own kitchen with minimal effort and absolutely no baking required? Get ready to delight your taste buds and impress your loved ones with our sensational copycat PayDay candy bars! This recipe isn’t just easy; it’s a game-changer. You’ll be amazed at how simple it is to whip up a batch of these glorious treats, and frankly, you’ll be lucky if any leftovers manage to survive the initial onslaught of happy eaters. They are truly that good!
Our goal is to make gourmet-quality treats accessible to everyone, and this no-bake homemade PayDay candy bar recipe perfectly embodies that spirit. Crafted from just six simple, readily available ingredients, this recipe transforms basic pantry staples into a confectionary masterpiece. The process is straightforward, fun, and yields results that are remarkably close to the original — perhaps even better, because they’re made with love right in your home!
Ready to embark on this sweet adventure? We were inspired by the brilliant insights from Catherine’s Plates on YouTube, whose clear instructions make this recipe incredibly approachable. Dive into our detailed guide below and prepare to be utterly charmed by how effortlessly you can bring the magic of homemade PayDay candy bars to life.
Why Choose Homemade No-Bake PayDay Candy Bars?
In a world full of complex baking projects, the allure of a simple, no-bake recipe is undeniable. But beyond the sheer convenience, making your own PayDay candy bars offers a plethora of advantages:
- Effortless Preparation: No need to preheat an oven or worry about precise baking times. This recipe is designed for ease, making it perfect for beginners and seasoned dessert makers alike.
- Cost-Effective Indulgence: Store-bought candy bars can add up, especially when you’re buying for a crowd. Crafting your own at home is often significantly more economical, allowing you to enjoy more for less.
- Control Over Ingredients: You know exactly what goes into your treats. While this recipe is for a classic candy bar, the control means you can choose high-quality ingredients and even make minor adjustments to suit dietary preferences (e.g., using specific brands of peanuts).
- Freshness You Can Taste: There’s nothing quite like a freshly made treat. The flavors of the peanuts, peanut butter, and sweet caramel-like mixture truly shine when prepared and enjoyed fresh.
- Perfect for Any Occasion: These candy bars are incredibly versatile. They’re ideal for holiday gatherings, birthday parties, potlucks, lunchbox treats, or simply as a well-deserved snack during your downtime. Their robust nature also makes them great for gifting!
- A Fun Family Activity: Involving kids (or even just friends!) in the no-bake process can be a delightful way to spend time together, fostering creativity and leading to delicious rewards.
RELATED: If you’re a fan of nostalgic treats, you might also enjoy our recipe for Easy Little Debbie Cosmic Brownies Copycat Recipe!
The Simple Stars: Ingredients for Your PayDay Candy Bars
One of the true beauties of this recipe lies in its simplicity. You won’t need a pantry full of exotic items; just a handful of everyday ingredients come together to create something truly magical. Each component plays a crucial role in replicating that distinctive PayDay flavor and texture.
- 2-3 cups of Salted Roasted Peanuts: The undisputed star of the show! Using salted, roasted peanuts is key for that iconic sweet and salty contrast. Roasting enhances their nutty flavor and provides a satisfying crunch. Feel free to adjust the quantity slightly based on how peanut-packed you like your bars.
- 1 cup of Peanut Butter Chips: These little gems melt down to form the creamy, peanut-flavored base of our “caramel” layer. They contribute richness and intensify the peanut essence that defines a PayDay bar.
- 1 cup of Mini Marshmallows: Essential for achieving the chewy, gooey texture of the candy bar’s interior. As they melt and combine with the other ingredients, they create a wonderfully soft and pliable consistency that holds everything together.
- 7 oz of Sweetened Condensed Milk: This is the backbone of our no-bake caramel. It provides both the sweetness and the necessary thick, sticky consistency that binds the peanuts and other ingredients into a cohesive bar. Do not confuse this with evaporated milk; they are very different!
- 1½ tbsp of Butter: A touch of butter adds richness and helps create a smooth, pliable mixture. It also assists in preventing the mixture from sticking too much to your pan, making for easier removal.
- ¼ tsp of Vanilla Extract: A small but mighty addition! Vanilla extract enhances all the other flavors, adding a subtle warmth and depth that rounds out the sweetness beautifully.
Essential Tools for Your No-Bake Creation
Before you begin, gather these basic kitchen essentials to ensure a smooth and enjoyable candy-making process:
- 8×8-inch Baking Dish: The ideal size for creating perfectly proportioned candy bars. A square dish works best for easy cutting.
- Medium Saucepan: For melting and combining your filling ingredients over the stove.
- Rubber Spatula or Wooden Spoon: Crucial for stirring your mixture constantly and scraping down the sides of the pan.
- Measuring Cups and Spoons: For accurate measurement of all your ingredients.
- Parchment Paper (Optional but Recommended): Lining your baking dish with parchment paper (leaving an overhang on the sides) makes lifting the chilled candy out incredibly easy and ensures clean cuts.
- Sharp Knife: For neatly slicing your chilled candy bars into individual portions.
Step-by-Step Guide: Crafting Your PayDay Masterpiece
This recipe is broken down into simple, manageable steps, ensuring a stress-free and delicious outcome. Follow these instructions carefully, and you’ll be enjoying your homemade PayDay candy bars in no time!
Step 1: Prepare Your Pan and Peanut Base
Begin by thoroughly greasing an 8×8-inch baking dish. Use a small amount of butter to coat the bottom and all sides of the dish. This crucial step prevents the sticky candy mixture from adhering to the pan, making removal and cutting much easier later on. Once greased, evenly pour about half of your salted roasted peanuts into the bottom of the prepared dish, spreading them out to form a uniform layer. These peanuts will create the delightful crunchy base of your candy bars.
Next, place a medium-sized saucepan on your stove over medium heat. Add the butter to the saucepan and allow it to fully melt. Once the butter has liquefied, introduce the peanut butter chips. Keep the heat at medium and stir continuously to ensure the chips melt smoothly without scorching. The goal here is a creamy, lump-free peanut butter mixture.
Step 2: Create the Dreamy Peanut Butter Caramel Filling
Once the peanut butter chips have completely melted and are well combined with the butter, it’s time to transform this base into our signature “caramel” filling. Add the sweetened condensed milk, vanilla extract, and mini marshmallows to the saucepan. Continue to stir the mixture constantly over medium heat. As the marshmallows melt, the mixture will become increasingly thick, glossy, and wonderfully sticky. Keep stirring until all the marshmallows are fully dissolved and the mixture is smooth and cohesive. This process typically takes a few minutes, so be patient and keep an eye on the consistency.
Immediately after the filling reaches the desired smooth and thick consistency, carefully pour it over the layer of peanuts in your prepared baking dish. Use your rubber spatula to spread the mixture evenly across the pan, ensuring it reaches all corners and creates a uniform layer over the peanuts. Work relatively quickly, as the mixture will begin to set as it cools.
Step 3: The Final Peanut Layer and Chilling
Now for the grand finale of peanuts! Generously sprinkle the remaining half of your salted roasted peanuts over the top of the warm peanut butter caramel mixture. Once the peanuts are distributed, take your spatula or the back of a spoon and gently but firmly press them down into the mixture. This ensures the peanuts adhere well to the caramel layer and become integrated into the bar, preventing them from falling off when cut. Pressing them firmly also helps compact the candy, giving it that classic dense PayDay texture.
Once pressed, place the entire baking dish into the refrigerator. Allow it to chill for at least 1 hour, or until the candy is firm to the touch. Chilling is a critical step as it allows the mixture to set completely, making it easy to cut into clean, defined bars.
Step 4: Cut and Serve Your Homemade Delights
After the candy has sufficiently chilled and firmed up (you can test by gently pressing the center), remove the baking dish from the refrigerator. If you lined your pan with parchment paper, simply lift the entire slab of candy out onto a cutting board. If not, carefully loosen the edges with a knife.
Using a sharp knife, cut the large slab into individual candy bars. You can choose to cut them into traditional rectangular shapes, or smaller squares for bite-sized treats. For the cleanest cuts, you can briefly warm your knife under hot water and wipe it dry between cuts. Once cut, your homemade no-bake PayDay candy bars are ready to be served and enjoyed! Prepare for compliments!
Tips for PayDay Perfection: Maximize Your Candy-Making Success
While this recipe is incredibly forgiving, a few expert tips can elevate your homemade PayDay candy bars from great to absolutely extraordinary:
- Don’t Skimp on the Grease: A well-greased pan (or parchment paper lining) is your best friend. This ensures your beautiful candy bars lift out effortlessly without crumbling or sticking.
- Stir, Stir, Stir: When melting the peanut butter chips and later adding the other ingredients, continuous stirring is vital to prevent scorching and ensure a perfectly smooth, uniform mixture.
- Quality Peanuts Matter: Use good quality, fresh salted roasted peanuts. Their flavor is prominent, so choose a brand you love. If using unsalted, consider adding a tiny pinch of salt to the caramel mixture.
- Chill Thoroughly: Patience is a virtue here. Resist the urge to cut the bars before they are completely firm. A fully chilled candy bar will cut cleanly and hold its shape beautifully.
- Storage Secrets: Store your homemade PayDay candy bars in an airtight container at room temperature for up to a week, or in the refrigerator for longer freshness. They can also be frozen for up to a month – just thaw slightly before enjoying.
- Get Creative with Variations: Feel free to experiment! Drizzle a layer of melted chocolate over the top before chilling for a chocolate-peanut twist. You could also sprinkle a pinch of flaky sea salt on top for an extra burst of salty goodness.
- Perfect for Gifting: Wrap individual bars in cellophane or small treat bags for thoughtful homemade gifts that are sure to impress.
Frequently Asked Questions (FAQ) About Homemade PayDay Bars
Q: Can I use different types of nuts?
A: While the classic PayDay uses peanuts, you could certainly experiment with other nuts like cashews or almonds for a different flavor profile. However, to stay true to the copycat nature, salted roasted peanuts are highly recommended.
Q: How long do these candy bars last?
A: When stored in an airtight container, these homemade PayDay candy bars can last for about 5-7 days at room temperature or up to 2 weeks in the refrigerator. For longer storage, they can be frozen for up to a month.
Q: Can I double the recipe?
A: Absolutely! This recipe scales up beautifully. If you’re making a larger batch, you might want to use a 9×13-inch baking dish and ensure you have a larger saucepan to accommodate the increased volume of ingredients.
Q: My mixture seems too sticky to spread. What should I do?
A: The mixture is naturally quite sticky! Working quickly after removing it from the heat will help. You can also lightly grease your spatula or the back of a spoon with a little butter or non-stick spray to make spreading easier.
Q: Do I really need to use sweetened condensed milk, or can I substitute it?
A: Sweetened condensed milk is a critical ingredient for both the sweetness and the unique chewy, caramel-like texture of this no-bake recipe. It’s difficult to substitute effectively without significantly changing the outcome. Please ensure you use sweetened condensed milk, not evaporated milk.
*All image credit for this article belongs to Catherine’s Plates via YouTube. Follow and subscribe to her channel for more incredible recipes and culinary inspiration!
Conclusion: Indulge in Your Homemade PayDay Treat!
There you have it – a foolproof, 6-ingredient, no-bake recipe for homemade PayDay candy bars that will satisfy your deepest sweet and salty cravings. This copycat recipe is not just about making candy; it’s about creating memories, sharing joy, and indulging in the simple pleasures of a perfectly crafted treat. The ease of preparation, combined with the incredibly satisfying results, makes this recipe an absolute winner for any occasion.
So, gather your ingredients, set aside an hour, and prepare to be amazed. Whether you’re making them for a party, a gift, or just for yourself, these homemade PayDay candy bars are guaranteed to disappear quickly. Get ready to experience the delightful crunch of peanuts and the chewy, sweet “caramel” that makes this classic candy so beloved. Happy candy making!
6-Ingredient PayDay Candy Bars Copycat Recipe Summary
Recreate the iconic PayDay candy bar at home with this incredibly simple and delicious 6-ingredient, no-bake recipe. Combining salted roasted peanuts with a creamy, sweet peanut butter caramel-like filling, these homemade treats are perfect for satisfying your sweet tooth, sharing with loved ones, or making ahead for any gathering. Easy to follow steps ensure a perfect batch every time!