
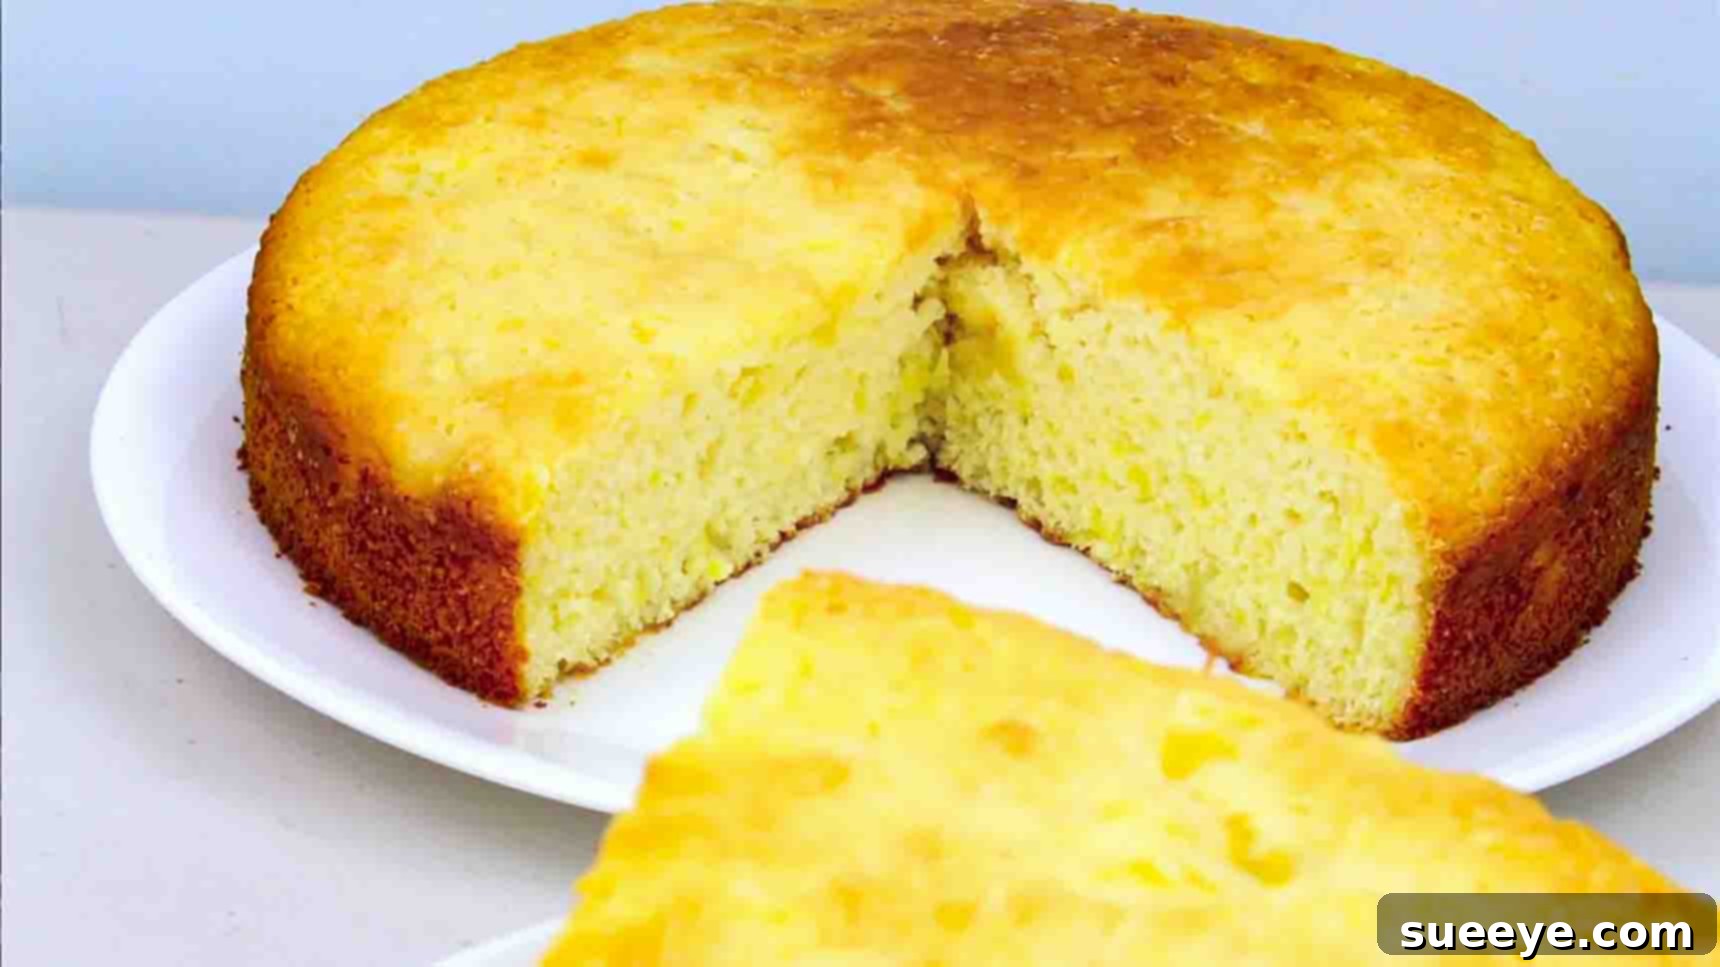
Are you searching for an incredibly easy, yet utterly delicious dessert that requires minimal effort and ingredients? Look no further! This delightful 3-ingredient pineapple cake recipe is a true game-changer for home bakers, busy parents, and anyone craving a sweet treat without the fuss. Inspired by the brilliant simplicity showcased on Todd’s Kitchen on YouTube, this recipe transforms basic pantry staples into a moist, flavorful, and incredibly satisfying cake. Forget complicated steps and lengthy ingredient lists; with just self-raising flour, sugar, and a can of crushed pineapple, you’re mere minutes away from a warm, golden, and aromatic pineapple cake that’s sure to impress. It’s the perfect dessert for a weeknight, a last-minute gathering, or simply to satisfy your sweet tooth. Prepare to be amazed by how such few ingredients can yield such remarkable flavor and texture!
The Magic of Minimal Ingredients
The allure of a 3-ingredient recipe lies in its sheer accessibility and simplicity. In a world where baking often seems intimidating with long lists of specialized items and precise techniques, this pineapple cake stands out as a beacon of ease. It proves that you don’t need a gourmet pantry or advanced culinary skills to create something truly special. This recipe is a testament to the fact that sometimes, less is indeed more. Each ingredient plays a crucial role, contributing to the cake’s unique texture and vibrant flavor without any unnecessary frills. It’s an ideal starting point for beginner bakers and a beloved go-to for experienced cooks seeking a reliable, quick, and delicious option. This minimalist approach not only saves time but also reduces the chance of errors, ensuring a consistently delightful outcome every time you bake.
Essential Ingredients for Your Pineapple Cake
Gathering your ingredients for this incredibly simple pineapple cake is quick and straightforward. You’ll only need three items, making this recipe perfect for those moments when you’re short on time or don’t want to make an extra trip to the grocery store. Quality ingredients, even in a small number, make a big difference in the final taste.
- 2 cups of Self-Raising Flour: This is the backbone of our cake, providing structure and the necessary leavening agents (baking powder and salt) all in one go. Using self-raising flour eliminates the need for separate baking powder and salt, simplifying the recipe even further and ensuring a perfectly risen, airy texture. If you don’t have self-raising flour, you can easily make your own by whisking 1.5 teaspoons of baking powder and a pinch of salt into every cup of all-purpose flour.
- 1 cup Granulated Sugar: Sugar sweetens the cake beautifully and also contributes to its moisture and tender crumb. The fine crystals of granulated sugar dissolve readily, creating a smooth batter. While 1 cup provides a balanced sweetness, you can experiment with slightly less if you prefer a less sweet cake, especially since the pineapple adds natural sweetness. For a richer, deeper flavor, you could even consider substituting a quarter of the granulated sugar with brown sugar.
- 1 can (450g) Crushed Pineapple, undrained: This is where the magic truly happens! The crushed pineapple not only provides its signature tangy-sweet flavor but also supplies all the necessary moisture for the cake. Using it undrained is crucial, as the juice is what activates the self-raising flour and creates the perfect batter consistency without needing eggs, oil, or milk. The natural acidity of the pineapple juice also reacts with the leavening agents, contributing to the cake’s light and fluffy texture.
Step-by-Step Directions for a Perfect Pineapple Cake
Follow these easy steps to bring your delightful 3-ingredient pineapple cake to life. Each stage is designed for maximum simplicity and foolproof results, ensuring even novice bakers achieve a stunning outcome.
Step 1: Prepare the Batter
Begin by selecting a spacious mixing bowl. Into this bowl, add the 2 cups of self-raising flour, followed by the 1 cup of granulated sugar. Finally, add the entire can (450g) of crushed pineapples, ensuring you include all the juice from the can. It is absolutely essential not to drain the pineapple, as its liquid is the sole source of moisture for this cake and is vital for activating the leavening agents within the self-raising flour. Using a sturdy spoon or a rubber spatula, mix all these ingredients thoroughly. Stir until all the flour is incorporated and you achieve a consistent, smooth batter. While mixing, ensure there are no dry pockets of flour remaining. The batter will be relatively thick but should still be pourable. Remember, light mixing is key – avoid overmixing, as this can overdevelop the gluten in the flour, potentially leading to a tougher, less tender cake. Mix just until combined and uniform.
Step 2: Prepare the Baking Pan
With your batter perfectly mixed, it’s time to prepare your baking vessel. A springform pan, typically 8 or 9 inches in diameter, is highly recommended for this recipe as its removable sides make for effortless cake removal and presentation. However, a standard round cake pan of a similar size will also work perfectly; just ensure it’s at least 2 inches deep. First, generously grease the inside of the pan with butter, margarine, or a non-stick cooking spray. This creates a crucial non-stick barrier. Next, line the bottom of the pan with parchment paper. A simple trick for this is to trace the bottom of your pan onto a sheet of parchment paper, cut out the circle, and then press it firmly into the base of the greased pan. This extra step is essential for preventing the cake from sticking to the bottom and ensures a clean, easy release, allowing you to transfer your beautifully baked cake to a serving plate without any hassle. Once prepared, carefully pour the thoroughly mixed batter evenly into the pan, gently spreading it with your spatula to create an even layer for consistent baking.
Step 3: Bake to Golden Perfection
Before you even begin mixing your ingredients, preheat your oven to a precise 350 degrees F (175 degrees C). A properly preheated oven is fundamental for even baking, proper cake rise, and achieving that desirable golden crust. Carefully place the prepared pan with your pineapple cake batter into the center rack of the preheated oven. Bake for approximately forty minutes. Baking times can vary slightly depending on the calibration of your specific oven, so it’s always wise to keep a close eye on your cake as it bakes. To test for doneness, gently insert a clean wooden toothpick or a thin skewer into the very center of the cake. If it comes out clean, with no wet batter clinging to it, your cake is perfectly ready. If you notice any wet batter, continue baking for an additional 5-10 minutes and then retest. The top of the cake should be a beautiful golden brown and should spring back lightly when gently touched. Avoid opening the oven door too frequently, especially during the initial baking phase, as this can cause the cake to sink.
Step 4: Cool and Enjoy
Once your pineapple cake is baked to perfection, carefully remove it from the oven. The aroma filling your kitchen will be incredible, but resist the urge to slice into it immediately! Allowing the cake to cool properly is a critical step for its structural integrity, optimal texture, and full flavor development. Let the cake cool in its pan on a wire rack for about half an hour. This initial cooling period allows the cake to set, firm up, and become much easier to handle without crumbling. After this crucial cooling time in the pan, you can gently release it from the springform pan (or carefully invert it onto a wire rack if using a regular pan) to finish cooling completely. While it can certainly be enjoyed warm, many find that the flavors fully develop and deepen once the cake has completely cooled to room temperature. This also makes for cleaner slices and a more enjoyable eating experience.
Tips for a Flawless 3-Ingredient Pineapple Cake
Achieving a perfect pineapple cake with just three ingredients is remarkably simple, but these expert tips will ensure your success every time:
- Don’t Drain the Pineapple: This cannot be stressed enough – it is arguably the most crucial tip! The juice from the canned crushed pineapple is the only liquid in this recipe, acting as both moisture for the cake and the activator for the self-raising flour’s leavening agents. Draining it will result in a dense, dry, and crumbly cake.
- Avoid Overmixing: Mix the batter just until the ingredients are combined and no dry pockets of flour remain. Overmixing can lead to a tough cake by developing too much gluten, which can detract from the cake’s tender texture.
- Know Your Oven: Ovens can vary significantly in temperature, even if set to the same degree. If your cake seems to be browning too quickly on the outside or not baking through in the center, consider investing in an inexpensive oven thermometer to ensure your oven is truly heating accurately.
- Parchment Paper is Your Friend: Especially if you’re not using a springform pan, lining the bottom of your cake pan with parchment paper ensures easy removal and prevents any sticking, making for a beautifully presented cake.
- Cool Completely for Best Slicing: While it’s incredibly tempting to dig into a warm cake, allowing it to cool completely before slicing will result in cleaner, more defined slices and a more settled, enjoyable texture.
- Check Flour Freshness: Ensure your self-raising flour isn’t expired. Leavening agents lose their potency over time, which can result in a flat cake.
Serving Suggestions and Creative Variations
This 3-ingredient pineapple cake is incredibly versatile and delicious on its own, offering a taste of pure tropical delight. However, a few simple additions or creative twists can elevate it further, transforming it for different occasions or personal preferences.
Simple Serving Ideas:
- Classic Plain: Enjoy a slice just as it is, appreciating its natural sweetness, moist texture, and vibrant pineapple flavor. It’s a humble yet satisfying treat.
- A Dollop of Cream: Serve with a generous dollop of freshly whipped cream, a scoop of premium vanilla ice cream, or even a spoonful of plain Greek yogurt for a lighter touch. The cool, creamy texture perfectly complements the warm, fruity cake.
- Dusting of Powdered Sugar: A light dusting of confectioners’ sugar (powdered sugar) adds a touch of simple elegance and an extra hint of sweetness.
- Toasted Coconut: Sprinkle some toasted coconut flakes over the top before serving for added texture, nutty flavor, and an even more pronounced tropical theme.
Creative Variations to Experiment With:
- Spiced Pineapple Cake: For a warmer, more aromatic profile, add 1/2 teaspoon of ground cinnamon, a pinch of nutmeg, or even a small amount of ginger powder to the dry flour mixture before combining with the pineapple.
- Nutty Twist: Fold in 1/2 cup of finely chopped pecans or walnuts into the batter for a delightful crunch and a complementary nutty flavor that pairs wonderfully with pineapple.
- Coconut Pineapple Delight: Enhance the tropical feel by mixing in 1/2 cup of shredded coconut (sweetened or unsweetened) directly into the batter for an even richer taste and texture.
- Simple Glaze: For a touch of extra indulgence and a glossy finish, whisk together 1 cup of powdered sugar with 2-3 tablespoons of milk or pineapple juice (from a separate can) until smooth. Drizzle this glaze over the cooled cake.
- Cream Cheese Frosting: For a truly decadent treat, spread a luscious layer of homemade or good quality store-bought cream cheese frosting over the completely cooled cake. The tanginess of the cream cheese is a fantastic counterpoint to the sweet pineapple.
- Upside-Down Style: For a visual treat, arrange pineapple rings at the bottom of your greased, parchment-lined pan, sprinkle with brown sugar, and then pour the batter over. This creates a beautiful caramelised topping.
Storage and Make-Ahead Tips
This pineapple cake is best enjoyed fresh, ideally on the day it’s baked, but it also stores remarkably well, making it a great option for meal prep, entertaining, or simply enjoying over a few days. Proper storage ensures its moisture and delicious flavor are preserved.
- Room Temperature Storage: Store any leftover cake in an airtight container at room temperature for up to 2-3 days. Ensure the cake is completely cooled before placing it in the container to prevent any condensation from forming, which can make the cake soggy.
- Refrigeration for Extended Freshness: For longer preservation, especially if you’ve added toppings like whipped cream or cream cheese frosting, refrigerate the cake in an airtight container for up to 5 days. For the best flavor and texture, allow the cake to come back to room temperature for about 30 minutes before serving.
- Freezing for Long-Term Enjoyment: This cake freezes beautifully, making it perfect for preparing ahead or saving for a future craving. To freeze, ensure the cake (without any frosting or cream toppings) is completely cooled. Wrap individual slices or the whole cake tightly in plastic wrap, then wrap again in aluminum foil to prevent freezer burn. Freeze for up to 2-3 months. To thaw, simply transfer the wrapped cake to the refrigerator overnight or allow it to thaw at room temperature for a few hours.
Frequently Asked Questions (FAQs)
Here are answers to some common questions you might have about making this incredibly simple pineapple cake:
- Can I use fresh pineapple instead of canned?
- While canned crushed pineapple is specifically called for due to its consistent moisture content, fine texture, and readily available juice, you could try fresh. However, you would need to finely mince it and ensure you have enough juice to match the liquid content of the canned version. The enzymes in fresh pineapple can also sometimes affect the cake’s texture, potentially making it softer or preventing it from setting properly. For best results and utmost simplicity, sticking with canned crushed pineapple, undrained, is highly recommended.
- What if I don’t have self-raising flour?
- No problem at all! You can easily make your own self-raising flour from all-purpose flour. For every cup of all-purpose flour, whisk in 1.5 teaspoons of baking powder and 1/4 teaspoon of salt. So, for this recipe, you would use 2 cups of all-purpose flour, 3 teaspoons of baking powder, and 1/2 teaspoon of salt. Sift these dry ingredients together to ensure they are well combined before adding to the pineapple.
- Can I use a different size pan?
- Yes, but you may need to adjust the baking time. A larger pan (e.g., 9×13 inch rectangular pan) will result in a thinner cake that bakes faster (possibly 25-35 minutes), while a smaller pan will yield a thicker cake requiring more baking time. Always use the toothpick test to confirm doneness, as timing will vary.
- Is this cake vegan or gluten-free?
- As written, this recipe is not vegan (due to potential animal-derived sugar processing, though many granulated sugars are now vegan-friendly, it’s best to check) and not gluten-free (as it uses wheat-based self-raising flour). For a gluten-free version, you would need to experiment with a self-raising gluten-free flour blend, which might alter the texture and require adjustments. For a vegan version, the core ingredients are plant-based, but you would need to confirm your sugar is vegan-friendly and ensure any added toppings (like whipped cream) are vegan substitutes.
- Why is my cake dry or dense?
- The most common reasons for a dry or dense cake in this recipe are either draining the crushed pineapple (which removes the essential liquid) or overbaking. Ensure you use the pineapple and its juice entirely, and always check for doneness with a toothpick to avoid baking longer than necessary. Overmixing the batter can also lead to a dense, tough texture.
Your New Go-To: 3-Ingredient Pineapple Cake Recipe
Embrace the joy of effortless baking with this fantastic 3-ingredient pineapple cake. It’s a testament to the fact that simplicity doesn’t compromise on flavor or satisfaction. This recipe proves that you don’t need a lengthy ingredient list or complex techniques to create something truly delicious and memorable. Whether you’re a seasoned baker looking for a quick fix or just starting your culinary journey, this recipe promises a delightful experience and a truly delicious result that will impress everyone. So, go ahead, grab your three ingredients, and get ready to enjoy a warm, moist, and utterly irresistible pineapple cake that will quickly become a cherished favorite in your recipe collection. Happy baking, and enjoy the sweet, tropical taste of success!