
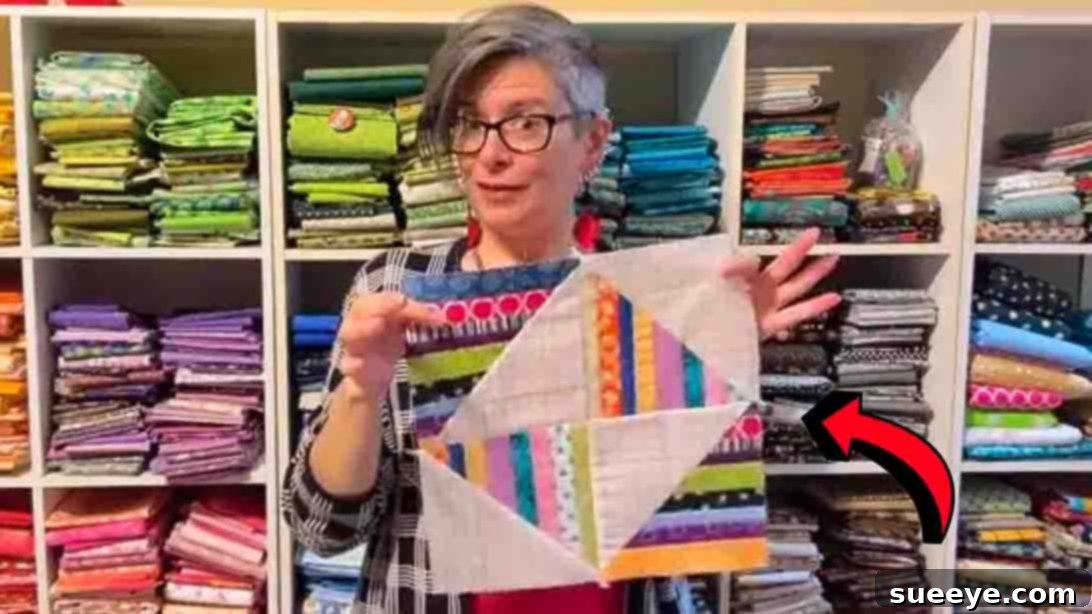
Master the Scrappy Split Stripe Quilt Block: An Ultimate Guide to Repurposing Fabric Scraps
Are you a passionate quilter whose creative journey often leaves you with a growing mountain of fabric scraps? Do these beautiful remnants, too precious to discard, accumulate in bins, waiting for their next purpose? If so, you’re not alone! Every quilter knows the bittersweet challenge of managing a burgeoning scrap stash. Instead of letting these valuable textile treasures go to waste, why not transform them into something truly spectacular and meaningful?
We’re thrilled to introduce you to the Scrappy Split Stripe Quilt Block tutorial from Tulip Square. This ingenious and incredibly rewarding project offers a fantastic way to breathe new life into your leftover fabrics, turning what might otherwise be discarded into gorgeous, unique quilt blocks. It’s a fun, accessible, and eco-conscious method to repurpose your cherished fabric bits, giving them a second chance to shine in a brand-new masterpiece. Say goodbye to the guilt of throwing away scraps and hello to endless creative possibilities!
The true beauty of the Scrappy Split Stripe Quilt Block lies in its incredible versatility. This design truly celebrates the “scrappy” aesthetic, encouraging you to combine an eclectic mix of patterns, colors, and textures. You can blend solid scraps with vibrant prints, experiment with differing strip widths, and even incorporate those tiny, beloved bits of fabric that hold special memories. Each block becomes a unique tapestry of your quilting journey, a visual story woven from fabric remnants. Whether you’re a seasoned quilter looking for a fresh challenge or a beginner eager to dive into the world of quilting, this tutorial offers clear, step-by-step instructions to guide you. Follow along with the video tutorial below to master this delightful and infinitely customizable quilt block.
Why Embrace Scrappy Quilting? The Joy of Repurposing
Scrappy quilting isn’t just a technique; it’s a philosophy that resonates deeply with many crafters. There are numerous compelling reasons why diving into projects like the Scrappy Split Stripe Quilt Block can be incredibly fulfilling:
- Sustainability and Eco-Friendliness: In an age where environmental consciousness is paramount, repurposing fabric scraps is a powerful way to reduce waste. Instead of contributing to landfills, you’re giving materials a new purpose, minimizing your environmental footprint, and promoting a more sustainable crafting practice.
- Cost-Effectiveness: Fabric can be an expensive investment. By utilizing every last scrap, you maximize the value of your purchases. Scrappy quilting allows you to create stunning projects without continually buying new yardage, making it a budget-friendly way to expand your quilting repertoire.
- Unleashing Unique Creativity: Unlike projects that call for specific fabric lines, scrappy quilting encourages improvisation and spontaneity. Each block becomes a delightful puzzle of color and pattern, resulting in a quilt that is truly one-of-a-kind. No two scrappy quilts are ever identical, making your finished piece a unique work of art.
- Skill Development: Working with various fabric types and sizes in a scrappy project hones your cutting, piecing, and pressing skills. It teaches you to adapt and problem-solve, improving your overall quilting proficiency. It’s also an excellent way to practice precision without the pressure of perfect matching across large, continuous pieces.
- A Sense of Accomplishment: There’s immense satisfaction in looking at a finished quilt and knowing that you transformed seemingly random bits of fabric into a cohesive, beautiful design. It’s a testament to your creativity and dedication, turning small pieces into a grand statement.
- Memory Keeping: Scraps often come from previous projects, gifted fabrics, or even old clothes. A scrappy quilt can become a cherished memory quilt, with each piece telling a story or evoking a special moment from your past quilting adventures.
Understanding the Scrappy Split Stripe Quilt Block
Before we dive into the creation process, let’s explore what makes this particular block so appealing. The “scrappy” element refers to the use of a variety of fabric strips, often with different patterns, colors, and even textures (though it’s best to stick with similar fabric weights like quilting cotton for consistency). This diverse collection forms the “stripes” of the block.
The “split stripe” aspect comes from a clever technique where these pieced stripes are cut and then rejoined with a solid or contrasting background fabric, creating a striking diagonal division across the block. This diagonal element adds dynamic movement and visual interest, elevating a simple striped design into something more complex and engaging. The resulting block offers a modern, graphic appeal that can be used in countless ways, either on its own or as part of a larger quilt design.
Materials You’ll Need: Gathering Your Tools for Success
Preparation is key to any successful quilting project. For this Scrappy Split Stripe Quilt Block, you’ll need a combination of basic quilting supplies and, of course, your beloved fabric scraps. Here’s a detailed list to get you started:
Essential Fabrics:
- Background Fabric: You will need two (2) 7-inch squares of a background fabric. This fabric plays a crucial role in creating the “split” effect and helps to unify the diverse scrappy strips. Choose a solid, a tone-on-tone, or a subtle blender fabric that contrasts well with your scraps. A light neutral (white, cream, light grey) often works beautifully to make the colorful scraps pop, but a darker solid can also create a dramatic effect. Consistency in fabric type (e.g., quilting cotton) is recommended for best results.
- Assorted Fabric Scraps: This is where the fun truly begins! Gather a collection of your favorite fabric scraps. Each strip should be cut at least 7 1/2 inches long. The width of these strips can vary significantly, from 1 inch to 2.5 inches or even wider. The more variety you have in widths, the more interesting your finished striped fabric will look. Ensure your scraps are clean, pressed, and made from a similar fiber content to ensure they behave consistently during sewing and washing.
General Quilting Tools:
- Sewing Machine: A reliable machine with a fresh needle (universal or sharp, size 80/12 or 90/14) and good quality all-purpose thread (e.g., 50wt cotton in a neutral color like grey or cream, which blends well with most fabrics).
- Rotary Cutter: A sharp blade is essential for precise, clean cuts.
- Self-Healing Cutting Mat: To protect your work surface and provide a stable base for cutting.
- Quilting Rulers: At least one long ruler (e.g., 6″ x 24″) for cutting strips and a square ruler (e.g., 8.5″ x 8.5″ or larger) for squaring up blocks.
- Iron and Ironing Board: Crucial for pressing seams neatly and accurately.
- Fabric Marking Tool: A fabric pencil, chalk, or erasable marker for drawing diagonal lines.
- Pins or Fabric Clips: To hold fabric pieces together securely before sewing.
- Seam Ripper: Every quilter’s best friend – just in case!
Step-by-Step Directions: Crafting Your Scrappy Split Stripe Quilt Block
Follow these detailed instructions to construct your beautiful Scrappy Split Stripe Quilt Blocks. Precision at each stage will contribute to a more professional-looking final product.
Step 1: Preparing and Piecing Your Scrappy Strips
Begin by diving into your scrap bin! Select a vibrant assortment of fabric scraps. For this project, each individual scrap strip needs to be at least 7 1/2 inches long. The beauty of this block allows for varying widths – feel free to cut strips anywhere from 1 inch to 2.5 inches wide, or even wider if you prefer. The variation in widths adds to the unique, scrappy charm. Make sure you cut them a bit longer than the final desired length (7 inches) to allow for squaring up and trimming, ensuring you have enough fabric to work with. Once your scraps are cut, arrange them into two distinct sets or bundles. This allows for creating two separate striped panels that will later be combined. Start sewing these strips together along their long edges, using a consistent 1/4-inch seam allowance. As you sew, feed the strips through your machine one after another in a technique known as “chain piecing” to save time and thread. Once both sets of strips are sewn, carefully press the seams. You can press the seams open for a flatter finish, or press them to one side (usually towards the darker fabric) to reduce bulk. Choose whichever method you find easiest and most effective for your fabric combination. The goal is to create two cohesive panels of vertically (or horizontally, depending on how you view them) striped fabric.
Step 2: Squaring Up and Preparing for the “Split”
After your striped panels are beautifully pieced and pressed, it’s time to square them up. Using your rotary cutter and square ruler, carefully trim each striped panel down to a precise 7-inch square. This step is crucial for ensuring your finished blocks will fit together accurately in a larger quilt. Next, take one of your 7-inch background fabric squares and one of your newly squared-up 7-inch scrappy striped panels. Align them perfectly, one on top of the other, ensuring all edges match. Using your fabric marking tool and a ruler, draw a diagonal line from one corner to the opposite corner across the background fabric square. This line will serve as your guide. Now, using a 1/4-inch seam allowance, sew a stitch line on either side of the drawn diagonal line. Do not sew directly on the line itself, but precisely 1/4 inch away from it on both sides. Repeat this entire process with your second 7-inch background square and the second 7-inch scrappy striped panel. This method will create two sets of fabric sandwiches, each with two diagonal stitch lines.
Step 3: Creating the “Split” and Final Assembly
Once you have sewn the diagonal lines on both fabric sandwiches, carefully cut each sandwich in half directly along the drawn diagonal line. You will now have four half-square triangle (HST)-like units from each original sandwich, totaling four units in all. Gently press these newly formed units open. Press the seams towards the darker fabric or open, whichever method you’ve chosen for consistency, ensuring your seams lie flat. Now, comes the magic of creating the “split stripe” effect. Lay out these four units to visualize your block. Take two of the units, one from each original fabric sandwich, and place them on opposite sides, for example, top-left and bottom-right. Then, place the remaining two units on the other opposite sides (top-right and bottom-left), rotating them until the diagonal “split” lines align to form a continuous diagonal across the entire block and the scrappy stripes are oriented correctly to create the desired split effect. Refer to the image below for the exact placement and rotation. This step is where the unique aesthetic of the block truly emerges. Once you are satisfied with the arrangement, carefully sew these four pieces together into a 2×2 grid, first sewing the top two units together and the bottom two units together, then joining these two rows. Pin meticulously at the seam intersections to ensure perfect alignment. Press your final seams, and your stunning Scrappy Split Stripe Quilt Block is complete!
Tips for Success and Achieving Precision
To ensure your Scrappy Split Stripe Quilt Blocks turn out beautifully and are a joy to create, consider these helpful tips:
- Accuracy is Paramount: In quilting, a quarter-inch seam allowance is king. Use a dedicated 1/4-inch foot on your sewing machine if you have one, or precisely mark your sewing line. Consistent seam allowances are critical for blocks to fit together perfectly.
- Pressing Matters: Don’t underestimate the power of a good press. Pressing seams after each step, rather than waiting until the end, helps to square up your pieces, flatten bulky areas, and achieve crisp, accurate blocks. Use steam if appropriate for your fabric type.
- Pre-Wash Your Fabrics: Especially when combining fabrics from different sources or with varying dye contents, pre-washing can prevent future issues like shrinkage or color bleeding. While not always necessary for scraps if they’ve already been through a wash cycle in their previous life, it’s good practice for new yardage.
- Audition Your Scraps: Before sewing your strips together, lay them out and experiment with different arrangements. This allows you to visualize the color flow and ensure a pleasing balance of light and dark, warm and cool tones, and busy versus subtle patterns.
- Stay Organized: With many small pieces, it’s easy to get confused. Keep your cut pieces organized, especially when arranging the four units for final assembly. Take a photo with your phone if it helps you remember the layout.
- Sharp Tools: A sharp rotary blade and sewing machine needle make a significant difference in the quality of your cuts and stitches. Change them regularly.
- Don’t Fear Imperfection: While precision is encouraged, remember that quilting is also an art. A handmade item carries character, and minor imperfections are part of its charm. Enjoy the process!
Creative Ways to Use Your Scrappy Split Stripe Blocks
Once you’ve mastered creating these charming blocks, the possibilities for incorporating them into larger projects are virtually endless. Here are just a few ideas to spark your imagination:
- Full Quilt: Create a stunning sampler quilt by repeating this block across an entire bedspread. Experiment with rotating blocks for different effects, or intersperse them with solid blocks or other simple designs.
- Pillows: A single Scrappy Split Stripe block makes a fabulous decorative pillow cover, adding a handmade touch to any sofa or bed.
- Table Runner or Placemats: Sew a few blocks together in a row for a vibrant table runner, or use individual blocks as unique placemats.
- Tote Bags or Pouches: Integrate these blocks into the front panel of a tote bag, purse, or zippered pouch for a personalized accessory.
- Wall Hanging: A small collection of these blocks can be assembled into a beautiful wall hanging, perfect for adding color and texture to any room.
- Combining with Other Blocks: These blocks pair wonderfully with simpler designs like solid squares, half-square triangles, or four-patch blocks to create more complex and visually interesting quilt tops.
Conclusion: Embrace Your Scraps, Unleash Your Creativity
The Scrappy Split Stripe Quilt Block is more than just a sewing project; it’s an invitation to unleash your creativity, practice sustainability, and transform overlooked fabric scraps into something truly beautiful. By following this comprehensive tutorial, you’ll not only learn a versatile new block pattern but also gain confidence in your quilting skills.
Every quilter accumulates a unique collection of scraps, and this project provides the perfect canvas to celebrate that individuality. Imagine the stories your finished quilt will tell, woven from memories and remnants of past creations. So, gather your scissors, fire up your sewing machine, and embark on this delightful journey of scrappy quilting. We encourage you to try this project and experience the joy of making something wonderful from what you already have. Don’t forget to watch the full video tutorial from Tulip Square for visual guidance and additional tips. Happy quilting!