
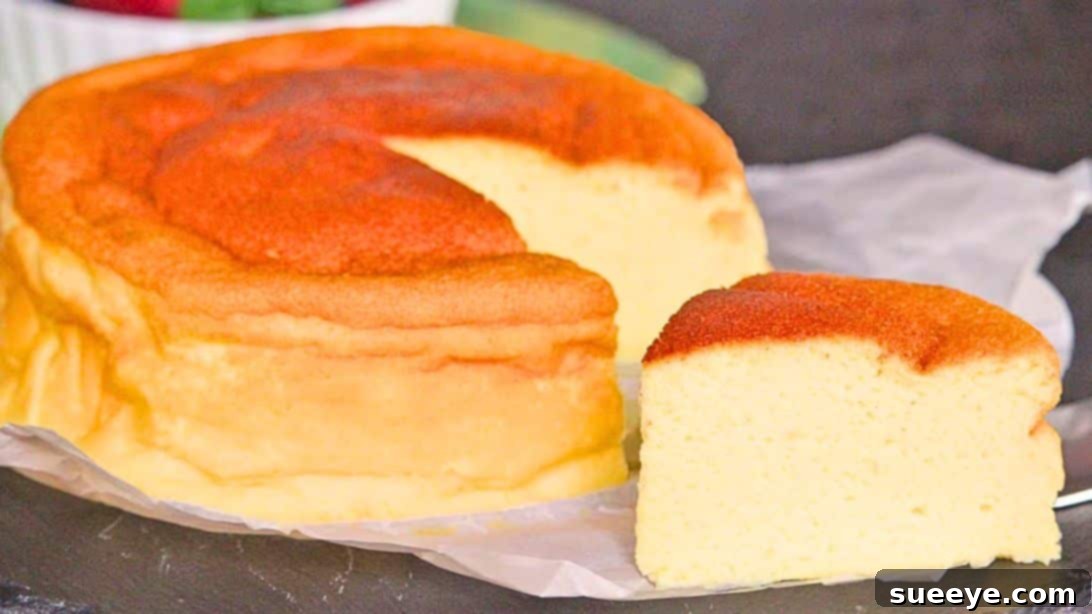
Melt-in-Your-Mouth Fluffy Yogurt Cake: Your New Favorite Dessert
Prepare to fall in love with this incredibly light, moist, and delightfully fluffy yogurt cake! Crafted to perfection by the culinary experts at How Tasty on YouTube, this cake doesn’t just look amazing – it tastes utterly divine. Its tender crumb and delicate flavor make it an absolute joy to bake and an even greater pleasure to eat. Whether you’re seeking a simple yet elegant dessert for a casual snack time or a show-stopping centerpiece for a special celebration, this fluffy yogurt cake is a guaranteed crowd-pleaser. With its straightforward preparation and minimal fuss, you’ll be whipping up this delightful treat in no time. Get ready to impress your taste buds and guests alike!
Why This Fluffy Yogurt Cake Will Become Your Go-To Recipe
In the world of home baking, finding a cake that balances simplicity with sensational results can be a challenge. This fluffy yogurt cake effortlessly achieves that equilibrium, making it a standout recipe for both novice and experienced bakers. Its signature “melt-in-your-mouth” texture is a direct result of the ingenious use of Greek yogurt, which not only imparts incredible moisture but also a subtle tang that beautifully complements the sweetness.
Unlike heavier, denser cakes, this yogurt cake boasts an airy, cloud-like consistency that feels incredibly light on the palate. It’s the perfect antidote to rich desserts, offering a refreshing and satisfying sweetness without being overly indulgent. The straightforward ingredient list features pantry staples, meaning you won’t need to hunt for exotic components. Plus, the step-by-step instructions are designed to guide you seamlessly through the baking process, ensuring success even if you’re new to baking.
Beyond its fantastic taste and texture, this cake is remarkably versatile. It serves beautifully as a humble afternoon snack alongside your favorite hot beverage, transforms into a sophisticated dessert with a dusting of powdered sugar and fresh berries, or can be adorned with glazes and fruits for a truly festive presentation. Its subtle flavor profile also makes it an excellent canvas for various customizations, allowing you to adapt it to any preference or occasion. Prepare to add this exquisite recipe to your permanent collection!
Essential Ingredients for Your Fluffy Yogurt Cake
Crafting this delightful yogurt cake begins with selecting the right ingredients. Each component plays a vital role in achieving its signature light and moist texture. Ensure all your cold ingredients, especially the eggs, are at room temperature before you begin; this allows them to emulsify better and create a more uniform batter, contributing significantly to the cake’s volume and fluffiness.
- 4 medium-large eggs: At room temperature, crucial for achieving maximum volume when whipped.
- ½ cup of caster sugar: Its fine granules dissolve easily, contributing to a smooth batter and tender crumb.
- 1 tsp of vanilla paste or vanilla extract: A classic flavor enhancer that adds warmth and depth to the cake. Vanilla paste offers a more intense flavor and visual specks.
- The zest of ½ a lemon or an extra 1 tsp of vanilla extract: Lemon zest brightens the flavor profile, adding a subtle citrusy note that complements the yogurt beautifully. If you prefer a pure vanilla flavor, an additional teaspoon of vanilla extract works perfectly.
- 1¼ cup of Greek yogurt: The star ingredient! Greek yogurt provides incredible moisture, a delicate tang, and helps create the cake’s tender, fluffy texture. Opt for plain, full-fat Greek yogurt for the best results.
- ½ cup + 1 tbsp of cornstarch: This secret ingredient is key to the cake’s melt-in-your-mouth lightness, making it incredibly delicate and soft.
- ¼ tsp of baking powder: A small but mighty leavening agent that works with the whipped egg whites to give the cake its significant rise and airy structure.
Gathering these simple ingredients is the first step towards baking a cake that will truly impress with its exquisite texture and taste.
Step-by-Step Guide to Baking Perfection
Follow these detailed instructions carefully to ensure your fluffy yogurt cake turns out perfectly moist, light, and utterly delicious. Precision and gentle handling are key to achieving that desirable “melt-in-your-mouth” texture.
Step 1: Preparing Your Egg Bases
Begin by carefully separating the egg whites and yolks into two separate, large, and impeccably clean bowls. Ensure there is absolutely no trace of yolk in the egg whites, as this can prevent them from whipping properly. Using a stand mixer or a hand mixer, whip the egg whites until they form stiff, glossy peaks. This means when you lift the beaters, the peaks stand upright without collapsing. Set these whipped egg whites aside. In the bowl with the egg yolks, add the caster sugar, vanilla paste (or extract), and lemon zest (if using). Beat this mixture vigorously until it becomes thick, pale yellow, and noticeably increased in volume. This aeration is crucial for the cake’s light texture. Next, gently fold in the Greek yogurt, beating on low speed for just a few seconds until it is just combined. Be careful not to overmix at this stage.
Step 2: Combining Dry and Wet Ingredients
Over the egg yolk and yogurt mixture, sift the cornstarch and baking powder directly into the bowl. Sifting prevents lumps and ensures even distribution. Beat these dry ingredients into the wet mixture on low speed, just until they are fully incorporated. It is extremely important not to overmix here; overmixing can develop the gluten in the cornstarch and make the cake tough, sacrificing its desired lightness. Now, it’s time to introduce the whipped egg whites. Gently fold in the whipped egg whites into the yolk mixture in about three additions. Use a spatula to delicately cut through the center of the batter and then fold it back over, carefully rotating the bowl. The goal is to incorporate the egg whites without deflating them, preserving all the air you’ve whipped into them. Continue folding just until no streaks of egg white remain and the batter is homogeneous. Undermixing is better than overmixing at this stage, as deflated egg whites will result in a denser cake.
Step 3: Preparing for Baking (Water Bath Method)
Preheat your oven to 160°C (320°F). Prepare a springform pan by greasing it thoroughly and then lining the bottom and sides with parchment paper. Ensure the parchment paper extends above the rim of the pan, as the cake will rise significantly during baking. Carefully pour the delicate batter into the prepared springform pan. Gently tap the pan a few times on your counter to release any large air bubbles. This cake benefits immensely from a water bath, which ensures even baking and a super moist, creamy texture by preventing the cake from drying out and cracking. Place the springform pan into a larger baking pan, and then place this larger pan onto an even larger baking sheet. Carefully pour hot boiling water into the outermost baking sheet, ensuring it reaches about halfway up the sides of the springform pan. Be very cautious not to get any water into the cake batter itself.
Step 4: Baking, Cooling, and Serving
Carefully transfer the entire setup (springform pan in the water bath) into your preheated oven. Bake for approximately 60 minutes. The cake is done when a wooden skewer inserted into the center comes out clean or with moist crumbs attached. The top should be golden brown and spring back when lightly touched. Once baked, carefully remove the baking sheet with the water bath from the oven. Remove the springform pan from the water bath and place it on a wire rack to cool. Allow the cake to cool in the pan for at least 30 to 40 minutes. This slow cooling prevents the cake from shrinking too much and helps it set properly. After cooling, carefully unmold the cake by releasing the springform clasp and gently peeling off the parchment paper from the sides and bottom. For a simple yet elegant finish, dust the cooled cake generously with powdered sugar. Optionally, top with fresh fruits such as berries, sliced peaches, or kiwi for an extra touch of color and freshness. Slice, serve, and savor every fluffy, melt-in-your-mouth bite!
Tips for Achieving the Perfect Fluffy Yogurt Cake
While this recipe is straightforward, a few expert tips can elevate your fluffy yogurt cake from good to absolutely perfect:
- Room Temperature Ingredients: This cannot be stressed enough, especially for eggs and yogurt. Room temperature ingredients emulsify better, creating a smoother, more voluminous batter and a finer crumb in the finished cake.
- Clean Bowls for Egg Whites: Ensure your bowl and whisk attachments are spotlessly clean and free of any grease or egg yolk, as even a tiny amount can prevent egg whites from reaching stiff peaks.
- Don’t Overmix: Once the dry ingredients are added, mix only until just combined. Overmixing develops gluten, which can make the cake tough and dense instead of light and fluffy.
- Gentle Folding: When incorporating the whipped egg whites, use a light hand and a folding motion. The goal is to retain as much air as possible. Imagine gently scooping the bottom batter over the whites, turning the bowl as you go.
- The Water Bath is Crucial: The water bath creates a steamy environment in the oven, preventing the cake from drying out, cracking, and ensuring a slow, even bake that results in its signature moist and creamy texture.
- Oven Temperature Accuracy: Ovens can vary. Using an oven thermometer can ensure your oven is truly at the desired temperature of 160°C (320°F).
- Cooling Patience: Resist the urge to unmold the cake immediately. Allowing it to cool in the pan for the recommended time helps it set and prevents it from collapsing or tearing.
Creative Variations and Serving Suggestions
This fluffy yogurt cake is a fantastic base for experimentation and can be adapted to suit various tastes and occasions:
Flavor Enhancements:
- Citrus Boost: Instead of or in addition to lemon zest, try orange or lime zest for a different citrus aroma.
- Almond Delight: Add ½ teaspoon of almond extract along with the vanilla for a subtle nutty flavor.
- Spiced Elegance: A pinch of cardamom or a dash of cinnamon can add warmth and complexity, especially during colder months.
Toppings and Garnishes:
- Fresh Fruit Medley: The classic choice! Berries (strawberries, raspberries, blueberries), sliced kiwi, or mango add vibrant color and a burst of freshness.
- Simple Glaze: A quick glaze made from powdered sugar and lemon juice can add an extra layer of sweetness and tang.
- Whipped Cream: A dollop of lightly sweetened whipped cream or crème fraîche makes for a decadent pairing.
- Chocolate Shavings: For chocolate lovers, a sprinkle of dark chocolate shavings can be a delightful addition.
Serving Ideas:
- Afternoon Treat: Enjoy a slice with your favorite coffee or tea for a perfect pick-me-up.
- Light Dessert: Serve as a refreshing end to a meal, perhaps with a fruit compote or a scoop of sorbet.
- Brunch Star: Its light nature makes it an excellent choice for a brunch spread, alongside eggs and savory items.
Storage Instructions
To keep your fluffy yogurt cake fresh and delicious, proper storage is key:
- Room Temperature: Store the cake in an airtight container at room temperature for up to 2-3 days. If your kitchen is very warm, consider refrigeration.
- Refrigeration: For longer storage, or if topped with fresh fruit or cream, refrigerate the cake in an airtight container for up to 5 days. Allow it to come to room temperature for about 30 minutes before serving for the best texture and flavor.
- Freezing: The cake can also be frozen for up to 1 month. Wrap individual slices or the whole cake tightly in plastic wrap, then aluminum foil. Thaw in the refrigerator overnight before serving.
Bake This Irresistible Fluffy Yogurt Cake Today!
You now have all the tools and knowledge to bake this truly exceptional fluffy yogurt cake. Its ethereal lightness, incredible moisture, and delicate flavor profile make it a standout dessert that’s surprisingly easy to achieve. Whether you’re baking for a special occasion or simply craving a delightful treat to brighten your day, this recipe from How Tasty is guaranteed to deliver. Don’t hesitate to give it a try – you’ll be amazed at the results and might just find your new favorite cake recipe. Happy baking!
All images and the original recipe concept are credited to How Tasty via YouTube. We highly recommend visiting their channel and subscribing for more fantastic culinary inspiration!