
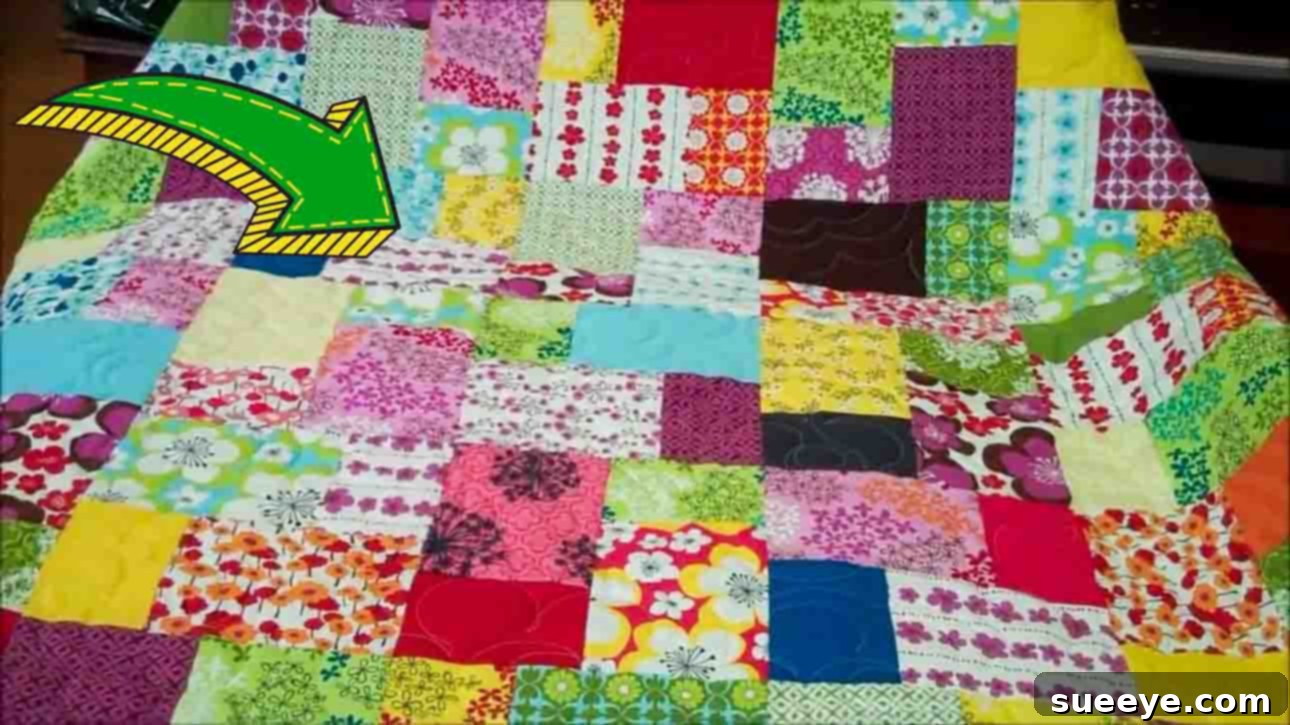
Master the Double Slice Quilt: An Easy & Beautiful Project for All Skill Levels
Embark on a delightful quilting journey with the incredibly fast and easy Double Slice Quilt! This popular technique, famously shared by the Missouri Star Quilt Company on YouTube, leverages the convenience and charm of pre-cut layer cakes, making it an ideal project for both seasoned quilters and those just beginning their fabric adventures. If you love the idea of creating stunning quilts without complex patterns or endless fabric cutting, the Double Slice Quilt is your perfect match. Its simple yet striking design ensures a beautiful finish every time, transforming a stack of coordinated fabrics into a dynamic and visually appealing masterpiece. Dive into this guide to learn the technique and discover how quickly you can create your next cherished quilt.
Why Choose the Double Slice Quilt Technique?
The Double Slice Quilt stands out in the world of quilting for several compelling reasons. Primarily, its simplicity makes it incredibly accessible. Unlike intricate patterns that might intimidate newcomers, this technique relies on straightforward cuts and repetitive sewing, building confidence with every stitch. Utilizing layer cakes—convenient bundles of pre-cut 10-inch fabric squares—eliminates the most time-consuming part of quilting: precise fabric preparation. This means less measuring, less cutting, and more time for the enjoyable process of piecing and sewing. The resulting design is modern and versatile, allowing for endless color combinations and fabric choices to suit any aesthetic. Whether you’re making a cozy throw, a baby quilt, or a larger bedspread, the Double Slice Quilt offers a fast track to a professional-looking finish with minimal fuss.
Understanding Layer Cakes: Your Go-To Pre-Cut for Effortless Quilting
For those new to the quilting vernacular, a “layer cake” is a specific type of pre-cut fabric bundle. It consists of 42 squares of fabric, each measuring 10 inches by 10 inches. These squares are typically from a single fabric collection, ensuring a cohesive and harmonious color palette throughout your project. This pre-cut format is a game-changer for quilters because it significantly reduces the amount of time spent on cutting and coordinating fabrics. Instead of purchasing yardage and meticulously cutting each piece, you can open a layer cake and jump straight into sewing. The beauty of layer cakes lies in their curated nature; designers select fabrics that complement each other perfectly, taking the guesswork out of color theory and pattern matching. This makes them an invaluable asset for projects like the Double Slice Quilt, where speed and visual appeal are paramount.
Essential Materials for Your Double Slice Quilt
Gathering the right tools is the first step toward a successful quilting project. For the Double Slice Quilt, you’ll need a few fundamental items that are staples in any quilter’s toolkit:
- Layer Cake (of your choice): Select a layer cake that speaks to your personal style. Consider the overall theme, color scheme, and patterns. One layer cake is usually sufficient for a lap-sized quilt, but you may need more for larger projects.
- Quilting Ruler: A high-quality acrylic quilting ruler (at least 6″ x 24″ is versatile) is crucial for accurate cuts. Its clear design and measurement markings will help you achieve precise fabric dimensions, which is key to a well-aligned quilt.
- Rotary Cutter: Paired with your ruler, a rotary cutter makes quick and clean cuts through multiple layers of fabric. Choose a comfortable size (45mm is standard) and ensure you have a sharp blade for efficiency and safety. Always use it on a self-healing cutting mat.
- Self-Healing Cutting Mat: Protect your work surface and your rotary cutter blade with a durable self-healing mat. These mats come in various sizes; a large one provides ample space for cutting layer cake squares.
- Sewing Machine: Any standard sewing machine capable of a straight stitch will work. Ensure it’s in good working order and threaded correctly with a high-quality cotton thread that complements your fabric.
- Iron and Ironing Board: Essential for pressing seams flat and open. Proper pressing is as important as accurate sewing for a professional finish, ensuring your blocks lie flat and square.
- Basic Sewing Supplies: Don’t forget sharp fabric scissors, quilting pins or wonder clips to hold fabric pieces together, and a seam ripper (just in case!).
Step-by-Step Guide to Crafting Your Double Slice Quilt
This guide will walk you through each phase of creating your beautiful Double Slice Quilt. Precision in cutting and sewing is important, but remember that quilting is also an art, and every stitch tells a story.
Step 1: Preparing Your Fabric & Initial Seams
Begin by taking your chosen layer cake squares. Each 10-inch square will be cut into two distinct pieces. Using your quilting ruler and rotary cutter, precisely cut each layer cake square into one 3½-inch piece and one 6½-inch piece. The sum of these two measurements (3½” + 6½”) equals the original 10-inch width of your layer cake square, ensuring no waste and perfect alignment later on. Continue this process for all your layer cake squares, maintaining consistency in your cuts. Once all squares are cut, create two separate stacks: one for all the 3½-inch pieces and another for all the 6½-inch pieces.
Now, prepare your smaller 3½-inch pieces for sewing. Take the stack of 3½-inch pieces and flip them over so they are right side down. This will make it easier to pair them correctly. Next, select one 3½-inch piece and one 6½-inch piece. Place the 3½-inch piece on top of the 6½-inch piece, ensuring their right sides are facing each other. Align the raw edges carefully along one side. Using your sewing machine, sew these two pieces together with a precise ¼-inch seam allowance. The ¼-inch seam is a standard quilting seam allowance, crucial for accurate block construction.
Continue this process, chain-piecing your units. This means, after sewing the first pair, instead of cutting your thread, grab the next 3½-inch and 6½-inch pair, align them, and sew them immediately after the first pair, creating a long chain of connected units. This technique saves time and thread. After you have sewn three to five pairs in a chain, take them to your ironing board. Carefully snip the threads connecting them, then press the seams open. Pressing seams open helps to reduce bulk and creates a flatter, more precise block. Ensure your iron is at the appropriate temperature for your fabric type.
Step 2: Transforming Your Units into Double Slices & Final Assembly
With your freshly pressed units, lay them flat on your cutting mat. Each unit now consists of one 3½-inch strip sewn to one 6½-inch strip. Take your quilting ruler and carefully cut each unit in half across its width. This precise cut creates two “double slice” blocks from each original unit. For example, if your sewn unit measures 9½ inches across (6½-inch strip + 3½-inch strip minus ¼-inch seam on both sides), you would cut it roughly in half, resulting in two units. Ensure all units are sewn and pressed before proceeding with this cutting step to maintain consistency across your quilt.
After cutting all your units in half, you will have twice the number of blocks you started with. Stack these newly created blocks into two distinct groups. Now, for the magic that creates the double slice effect: take one of these groups and rotate it 180 degrees. This rotation is crucial as it positions the fabric strips differently, creating the contrasting “slice” when sewn together. Take one block from the rotated group and one block from the non-rotated group. Place them right sides together, aligning the raw edges and ensuring the seam lines meet perfectly. Pin them if necessary to prevent shifting.
Sew these pairs together with a consistent ¼-inch seam allowance, just as before. Once all pairs are sewn, press these new seams open. You will now have individual quilt blocks, each showcasing the unique “double slice” design. The final step involves laying out all your completed blocks to form the desired quilt top design. Experiment with different arrangements until you find a layout that pleases your eye. Once satisfied, begin sewing the blocks together into rows, and then sew the rows together to form the complete quilt top. Always strive for accurate ¼-inch seams and press your seams after each step to ensure a flat, beautiful finish.
Tips for Quilting Success
Achieving a beautiful and professional-looking quilt involves more than just following steps. Here are some essential tips to enhance your quilting experience and results:
- Accuracy is Key: While the Double Slice Quilt is forgiving, precision in cutting and sewing makes a significant difference. Use a fresh rotary blade and a non-slip ruler. Take your time to align fabric edges perfectly before cutting and sewing.
- Master the ¼-inch Seam: A consistent ¼-inch seam allowance is fundamental in quilting. Practice on scraps to ensure your machine stitches a true ¼-inch seam. Many machines have a special foot or markings for this.
- Pressing Matters: Always press your seams after sewing. Pressing sets the stitches and flattens the fabric, leading to more accurate piecing. For this pattern, pressing seams open often helps reduce bulk and creates a smoother surface.
- Chain Piecing: As mentioned, chain piecing (sewing multiple units without breaking the thread between them) is a fantastic time-saver. It also creates a rhythm that can help maintain seam allowance consistency.
- Color and Contrast: When selecting your layer cake, think about how the colors and patterns will interact. Good contrast between light and dark or bold and subtle fabrics will make your “double slices” pop and enhance the visual appeal of your quilt.
- Stay Organized: Keep your cut pieces and sewn units neatly stacked and organized. This prevents confusion and ensures you pick up the correct pieces for each step.
- Take Breaks: Quilting should be enjoyable! If you feel frustrated or tired, step away for a bit. A fresh perspective can often resolve tricky situations.
Bringing Your Double Slice Quilt to Life: Finishing Touches
Once your quilt top is meticulously pieced together, the journey isn’t quite over. The next exciting phase involves transforming your quilt top into a finished, cozy textile. This typically involves layering your quilt top with batting (the soft inner layer) and a backing fabric. These three layers are then secured together, often by basting, before the actual quilting process begins. Quilting involves stitching through all three layers, adding texture, durability, and defining the overall look of your quilt. You can choose to machine quilt with simple straight lines, free-motion designs, or send it to a professional long-arm quilter. Finally, the edges of your quilt are finished with binding, a strip of fabric sewn around the perimeter to create a neat and durable border. These finishing steps complete your Double Slice Quilt, turning it into a cherished item ready to be loved and admired.
Double Slice Quilt Using Layer Cakes Tutorial Video
For a visual demonstration of each step, including expert tips and tricks, we highly recommend watching the original tutorial from Missouri Star Quilt Company. Their clear instructions and practical advice will guide you seamlessly through the creation of your Double Slice Quilt. Click the link below to access the full video and bring this beautiful project to life:
Watch the Double Slice Quilt Tutorial on YouTube