
Transform Your Space: The Ultimate Dollar Tree DIY Wall Organizer for Clutter-Free Living
Are you tired of cluttered countertops and overflowing drawers? Do you dream of an organized, serene space where everything has its place? The solution might be simpler and more budget-friendly than you think! Wall-mounted organizers are a game-changer for maximizing vertical space and keeping your essentials neatly arranged, far from the chaos of horizontal surfaces. Instead of wrestling with limited counter real estate where items invariably get tossed and accumulate, imagine a system that elegantly stores your belongings while freeing up precious space.
While searching for innovative and inexpensive DIY solutions to tackle my own counter clutter, I stumbled upon a truly brilliant idea: the Dollar Tree DIY Wood Jewelry Organizer by Life At 50 And Beyond DIY on YouTube. This project immediately caught my eye as the perfect answer to my organizational dilemmas. It’s not just for jewelry; its versatile design makes it ideal for craft supplies, office essentials, kitchen spices, or even small bathroom toiletries. What makes this DIY project truly stand out is its incredible simplicity, relying on just a few incredibly affordable items readily available at any Dollar Tree store, combined with the effortless assembly power of zip ties.
This DIY wall organizer is the epitome of smart crafting: it’s exceptionally cheap to create, requires minimal crafting experience, and delivers a stunning, highly functional result that looks far more expensive than its actual cost. Prepare to transform your living spaces, one organized wall at a time, with this ingenious and budget-conscious Dollar Tree hack.
Why Choose a Wall-Mounted Organizer? Unlock the Power of Vertical Space
In homes of all sizes, especially those with limited square footage, vertical space often remains an untapped resource. Wall-mounted organizers offer a myriad of benefits that traditional storage solutions simply cannot match:
- Declutter Your Surfaces: The most immediate and satisfying benefit is clearing off countertops, desks, and shelves. By moving items upwards, you instantly create a cleaner, more spacious environment.
- Maximize Small Spaces: A wall organizer is perfect for apartments, small kitchens, bathrooms, or craft rooms where every inch counts. It turns unused wall areas into prime storage zones.
- Easy Accessibility: When items are stored on a wall, they are often at eye level and within easy reach, making it simpler to find what you need without rummaging through drawers or bins.
- Enhance Home Aesthetics: Beyond functionality, a well-designed wall organizer can add a decorative element to your room. When neatly arranged, your belongings can become part of your decor.
- Psychological Benefits: An organized space contributes to a calmer, more focused mindset. Reducing visual clutter can alleviate stress and promote a sense of well-being.
- Customization Potential: Unlike off-the-shelf units, a DIY organizer allows you to tailor its size, configuration, and aesthetic to perfectly match your needs and home decor.
This Dollar Tree DIY project embodies all these advantages, offering a practical, elegant, and affordable solution to common organizational challenges.
Essential Materials for Your Dollar Tree DIY Wall Organizer
One of the most appealing aspects of this project is the minimal investment required. Everything you need can be found at your local Dollar Tree, making it incredibly accessible for anyone on a budget. Here’s a detailed list of the simple materials:
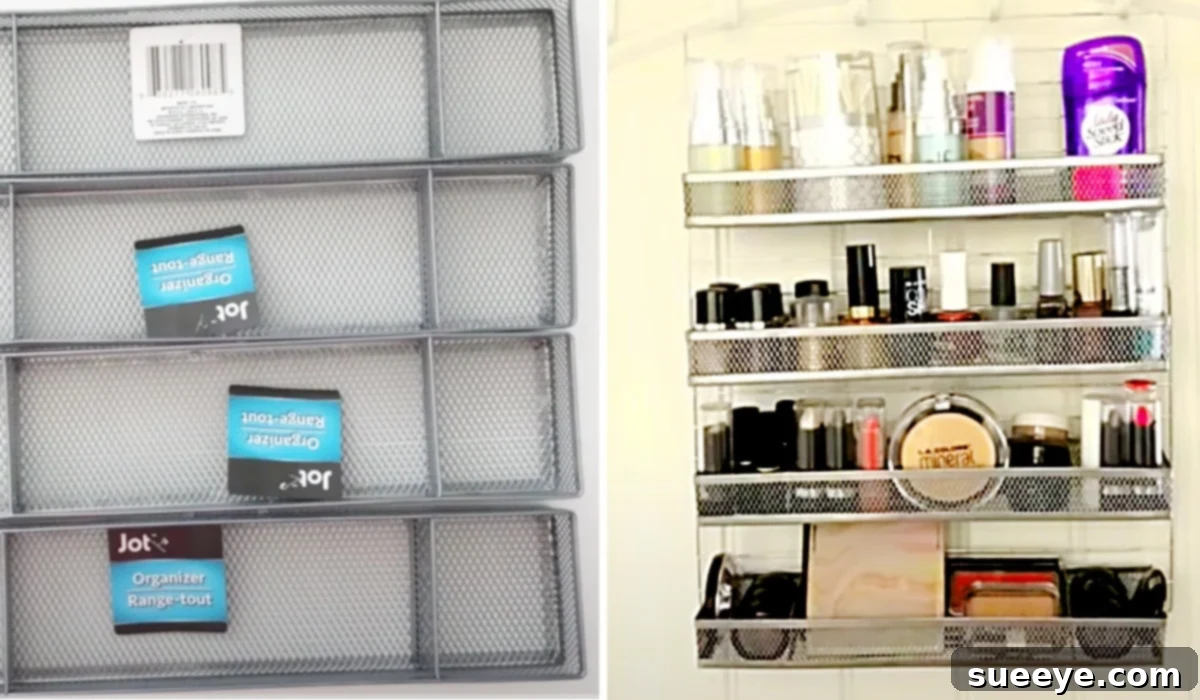
- 2 Dollar Tree Cooling Wire Racks: These form the sturdy base and back panel of your organizer. Their grid pattern is perfect for attaching other components and offers a clean, industrial look that can be easily customized.
- 4 Dollar Tree Wire Organizer Trays: These trays will serve as your shelves or compartments. Their open design ensures visibility and easy access to your stored items. You can adjust the quantity based on how many compartments you desire.
- Zip Ties: The unsung heroes of this project! Zip ties provide an incredibly strong, flexible, and easy-to-use fastening method, making assembly a breeze without the need for complex tools. Opt for a package with plenty of ties, as you’ll use several.
- A Hot Glue Gun: While zip ties handle the primary assembly, a hot glue gun provides extra reinforcement and stability, ensuring your organizer can withstand daily use.
- Glue Sticks: Don’t forget an ample supply of glue sticks for your hot glue gun.
- Scissors (or Wire Cutters): Essential for trimming the excess ends of your zip ties for a neat and professional finish. Wire cutters might be easier for thicker ties or if you plan to do many projects.
Gathering these items is the first exciting step towards transforming your cluttered spaces into beautifully organized areas. The total cost for these materials is surprisingly low, proving that effective organization doesn’t have to break the bank.
Step-by-Step Directions: Crafting Your Stylish Dollar Tree Organizer
Creating this fabulous wall organizer is incredibly straightforward, even for novice DIYers. Follow these easy steps, inspired by the innovative design from Life At 50 And Beyond DIY on YouTube, to bring your vision to life.
Step 1: Assembling the Main Frame of Your Organizer
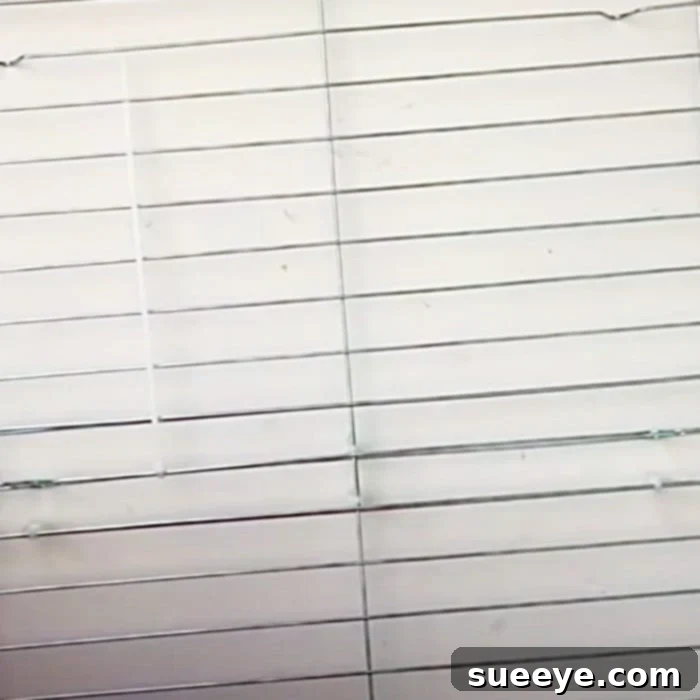
The foundation of your wall organizer begins with the two Dollar Tree cooling wire racks. These will form the main back panel that attaches to your wall. Position the two racks side-by-side, or one above the other, depending on the desired height and width for your finished organizer. For most applications, joining them side-by-side to create a wider surface is ideal.
Once you have decided on your configuration, carefully align the edges of the two racks. Use your zip ties to securely fasten them together. Thread a zip tie through corresponding grid openings on both racks, pull it tight, and then trim the excess tail with scissors or wire cutters. Repeat this process along all connecting edges – top, bottom, and middle – ensuring the racks are firmly joined and stable. Aim for several connection points to prevent any wobbling. This creates a robust and unified base for your organizer.
Step 2: Attaching the Wire Organizer Trays
With your main frame assembled, it’s time to add the functionality: the wire organizer trays. These will become your shelves or bins for various items. Decide on the optimal placement for each of your four trays. Consider what you plan to store and how much space you’ll need between shelves. You can arrange them evenly, stagger them for visual interest, or place them closer together in some areas and further apart in others to accommodate different-sized items.
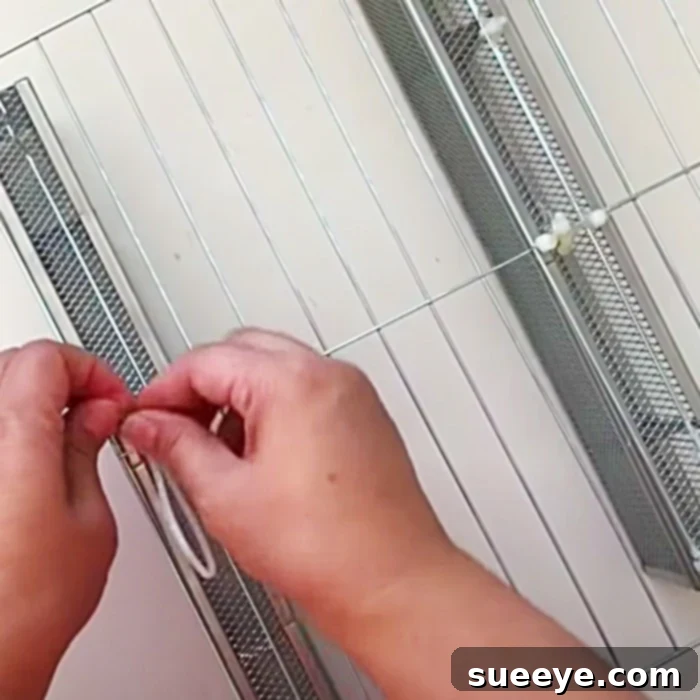
Once you’ve decided on the position for a tray, hold it against the main wire rack frame. Use more zip ties to attach each tray securely. For each tray, thread zip ties through the back of the tray and around the wire frame, pulling them tight. You’ll want at least two connection points on the back of each tray, and potentially one or two underneath for added support, depending on the tray’s design and anticipated weight. Trim all excess zip tie tails for a clean look. Repeat this process for all four trays until they are all firmly attached and level.
Step 3: Reinforcement and Customization (Optional, but Recommended)
For added durability and to prevent any slight movement of the trays over time, a hot glue gun can be your best friend. After securing everything with zip ties, go back and apply a small bead of hot glue at each zip tie connection point, especially where the trays meet the main frame. This creates an extra strong bond. Allow the glue to dry completely.
This is also the perfect stage for customization! While the raw wire look is chic and industrial, you might want to personalize your organizer. You could spray paint the entire unit a color that matches your decor – black for a sleek look, white for a minimalist feel, or a vibrant color for a pop. Ensure you use a paint suitable for metal and apply several thin coats for the best finish. You can also add small S-hooks or magnetic hooks to the wire grid for hanging necklaces, keys, or lightweight tools.
Step 4: Mounting Your New Wall Organizer
Once your organizer is complete and dry, it’s time to mount it. The method you choose will depend on your wall type and the expected weight of the items you’ll store. For lightweight items and temporary solutions, adhesive command hooks are a great option. For more permanent or heavier loads, small nails or screws drilled into wall studs or using appropriate wall anchors are recommended. Always check your wall type and choose suitable hardware to ensure your organizer is secure and safe.
Tips for Success and Creative Uses for Your DIY Organizer
To get the most out of your Dollar Tree DIY wall organizer, consider these helpful tips:
- Plan Your Layout: Before attaching trays, lay them out on the floor or hold them against the main frame to visualize your preferred arrangement.
- Secure Zip Ties Tightly: The tighter the zip ties, the sturdier your organizer will be. Don’t be afraid to use a good number of them for each connection.
- Consider Your Items: Think about what you plan to store. If it’s heavy, reinforce connections with extra zip ties and hot glue. If it’s delicate, line the trays with felt or fabric.
- Labeling: For ultimate organization, add small labels to the front of each tray, especially if you’re storing craft supplies or small office items.
- Beyond Jewelry:
- Craft Supplies: Store beads, threads, small tools, paint tubes.
- Office Desk Organizer: Keep pens, paper clips, sticky notes, small notebooks.
- Kitchen Helper: Hold spice jars, small cooking utensils, tea bags, condiment packets.
- Bathroom Essentials: Organize makeup, hair accessories, small lotions, cotton balls.
- Entryway Catch-All: Use it to hold keys, mail, sunglasses, and small wallets.
- Decorate with Purpose: Add a small faux plant, a mini frame, or string some fairy lights around your organizer to blend it seamlessly with your existing decor.
The Benefits of Embracing This Dollar Tree DIY Project
Embarking on this Dollar Tree DIY wall organizer project offers a multitude of rewards:
- Unbeatable Affordability: You’ll be hard-pressed to find a more cost-effective storage solution. Every item is just a dollar, making this a true budget hack.
- Remarkable Ease of Construction: No specialized tools or advanced crafting skills are needed. If you can use zip ties and a hot glue gun, you can make this organizer.
- High Versatility: Adaptable to virtually any room and for organizing a vast array of items, it’s limited only by your imagination.
- Instant Gratification: The project is quick to complete, offering immediate satisfaction as you see your space transform.
- Sustainable Living: By repurposing inexpensive items, you’re embracing a more sustainable approach to home organization and decor.
- Personalized Touch: The ability to customize its look and function means you get an organizer that perfectly fits your style and needs, unlike generic store-bought options.
Conclusion: Embrace a Clutter-Free, Organized Life Today!
I cannot overstate how brilliant this Dollar Tree DIY wall organizer idea is! It truly embodies the spirit of smart, affordable, and effective home organization. My excitement to head to Dollar Tree and gather the materials for this fantastic project is palpable, and I’m confident you’ll feel the same once you start. Imagine the relief of seeing your formerly cluttered spaces transformed into tidy, functional, and aesthetically pleasing areas.
Whether you’re looking to neatly display your jewelry, streamline your craft corner, or simply bring order to a chaotic counter, this project offers a simple, stunning, and incredibly cheap solution. So, gather your supplies, follow these easy steps, and prepare to enjoy the immense satisfaction of a well-organized home. Happy crafting!