
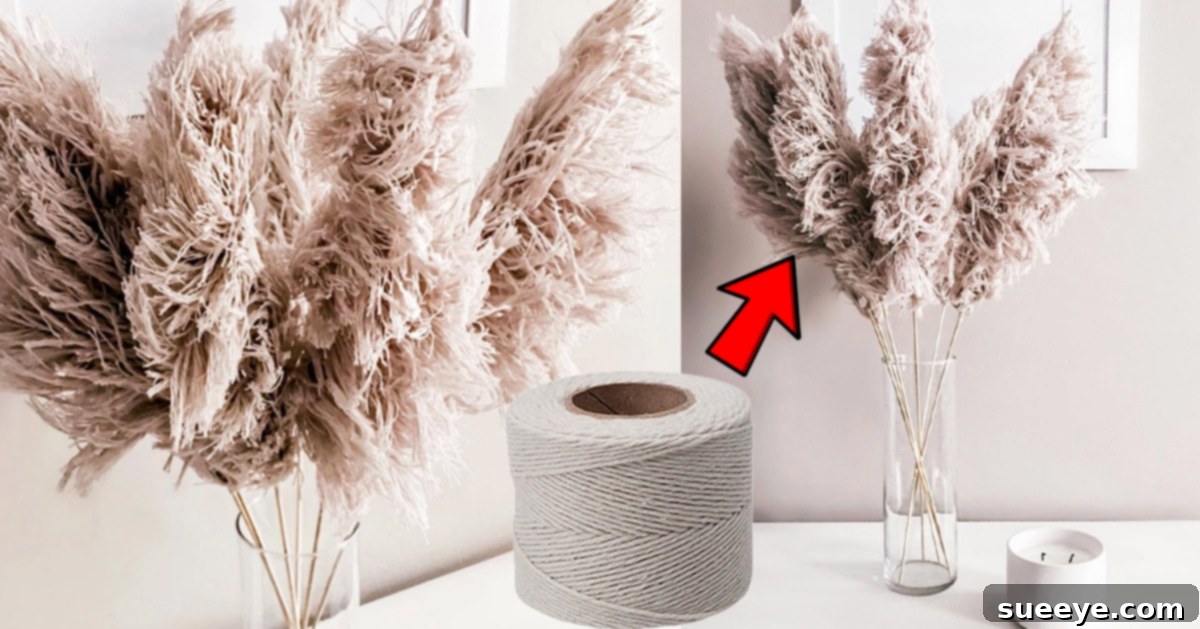
DIY Faux Pampas Grass: Craft Your Own Boho Chic Decor on a Budget
Pampas grass has undeniably captured the hearts of interior design enthusiasts, emerging as a quintessential element of the popular boho aesthetic. Its feathery plumes and natural texture bring an immediate sense of warmth, softness, and organic elegance to any living space. Whether adorning a minimalist Scandinavian setting or complementing a vibrant bohemian abode, the subtle beauty of pampas grass effortlessly elevates the ambiance, making it a highly sought-after decorative accent. The serene, understated charm it offers aligns perfectly with a desire for simple, natural beauty in our homes, creating inviting and stylish environments.
I’ve always been drawn to this earthy, understated look. The idea of having a few delicate plumes gracefully arranged in a sleek, clear glass vase has long been a vision for my own room. However, while browsing popular home decor stores like Target and Urban Outfitters, I often found myself hesitating at the price point for what seemed like a relatively simple decorative item. It felt a tad expensive for something so natural, leading me to believe there had to be a more budget-friendly approach to achieving this coveted style. This sentiment was echoed by my best friend, who also admired pampas grass but never quite committed to purchasing it, partly due to cost and partly due to a shared love for creative DIY solutions.
Embrace the DIY Spirit: Why Make Your Own Faux Pampas Grass?
The allure of a DIY project, especially one that promises significant savings, is always strong for those who appreciate handmade charm. When I stumbled upon Justin Wray’s brilliant tutorial on YouTube, it felt like the perfect solution to our pampas grass dilemma. The prospect of crafting something so stylish and impactful for a fraction of the retail cost was incredibly appealing. Beyond the financial benefits, there’s an immense satisfaction that comes from creating something beautiful with your own hands, infusing your home with a unique, personalized touch that store-bought items simply can’t replicate.
Moreover, opting for faux pampas grass offers several distinct advantages over its natural counterpart. While real pampas grass boasts undeniable beauty, it’s known for shedding, which can be messy and trigger allergies for some. It also requires careful handling and isn’t a permanent fixture, eventually degrading over time. DIY faux pampas grass, on the other hand, is a durable, low-maintenance, and hypoallergenic alternative that will maintain its aesthetic appeal indefinitely. This innovative project promises to deliver the same coveted boho vibe without any of the drawbacks, making it a truly smart and sustainable decor choice.
Essential Materials for Your Pampas Grass Project
One of the most appealing aspects of this DIY venture is the simplicity and accessibility of the materials required. You’ll likely find most of these items around your house or at your local craft store, often for just a few dollars. Gather these components before you begin:
- Cotton Twine or Yarn: This is the star of your pampas grass. Opt for a natural, soft cotton twine or yarn in an off-white, cream, beige, or light brown hue to mimic the authentic look of pampas grass. The thicker the yarn, the fuller and more luxurious your “plumes” will appear. Consider experimenting with different textures for varied effects.
- Dowel Rods or Bamboo Skewers: These will form the sturdy stems of your pampas grass. Dowel rods offer a more robust and refined look, available in various diameters and lengths. Bamboo skewers are a more budget-friendly and readily available option, perfect for smaller, more delicate arrangements. Choose a length appropriate for your desired vase and arrangement height.
- Hot Glue Gun: An indispensable tool for securing the twine to your chosen stem. Ensure it’s in good working condition.
- Hot Glue Sticks: Stock up on these! You’ll need a steady supply to ensure all your tassels are firmly attached and the stem is fully covered.
- A Piece of Cardboard: This will serve as your tassel-making jig. A sturdy piece from a shipping box or an old notebook cover will work perfectly. Its size will determine the length of your pampas grass “feathers.”
- Scissors: Sharp scissors are crucial for cleanly cutting the twine and shaping your tassels, ensuring a crisp and professional finish.
Step-by-Step Guide: Crafting Your Own Faux Pampas Grass
Don’t be fooled by the sophisticated end result; creating this faux pampas grass is surprisingly straightforward and incredibly rewarding. Follow these detailed steps to bring your boho decor dreams to life:
Step 1: Preparing Your Cardboard Tassel Jig
Your cardboard piece will be instrumental in creating uniform and fluffy tassels. Begin by selecting a sturdy piece of cardboard that is approximately 6-8 inches wide. The width of this cardboard will directly correspond to the length of the feathery “plumes” of your pampas grass. To ensure durability and prevent the cardboard from wearing out as you wrap the twine repeatedly, it’s highly recommended to tape over the edges and faces of the cardboard with clear packing tape. This creates a smooth, hardened surface that will allow the twine to slide off easily once wrapped, making the tassel-making process much smoother and more efficient.
Step 2: Crafting the Fluffy Twine Tassels
This is where the magic happens! To create your tassels, begin by wrapping your chosen cotton twine or yarn around the prepared cardboard jig. The number of times you wrap will determine the fullness and density of your pampas grass plume. For a truly luxurious and fluffy effect, aim for anywhere between 150 to 250 wraps, depending on the thickness of your yarn. The more wraps, the more voluminous your pampas grass will appear. Once you’ve achieved the desired fullness, carefully slide the wrapped twine off the cardboard. Lay it flat and use an additional short piece of twine to tie a very tight knot around the middle of the wrapped twine bundle. This will secure the two sides together. Then, take your scissors and cut through all the loops on both ends of the bundle. You’ll now have a central tied section with numerous loose strands cascading from it, resembling a very full tassel.
Step 3: Attaching Tassels to Your Dowel Rod Stem
Once you’ve created a sufficient number of tassels (you’ll typically need 5-8 tassels per pampas grass stem, depending on how full you want it), it’s time to attach them to your dowel rod or bamboo skewer. Begin by applying a small dab of hot glue near the top of your rod. Press the tied center of your first tassel firmly onto the glue, ensuring it adheres securely. Work your way down the rod, attaching subsequent tassels in a slightly overlapping fashion to create a continuous, feathery plume. Apply hot glue sparingly but effectively, ensuring each tassel is well-secured. It’s helpful to rotate the rod as you go, ensuring even coverage and a natural, three-dimensional effect. Once all tassels are attached, you might notice some gaps or the rod still showing. To completely obscure the rod and give your pampas grass a cohesive look, you can wrap a thin layer of cotton twine around the exposed rod sections, securing it with hot glue. This ensures a seamless transition from the “feathers” to the stem, enhancing the natural appearance.
Step 4: Fluffing and Shaping for Natural Appeal
The final and most satisfying step is to fluff and shape your newly created pampas grass. Gently separate the individual strands of twine within each tassel, using your fingers to fan them out and create that characteristic airy, feathery texture. You can also lightly trim any uneven ends with your scissors to achieve a cleaner, more refined silhouette. Don’t be afraid to get a little hands-on; the more you fluff and arrange, the more realistic and voluminous your faux pampas grass will become. Experiment with different levels of fluffiness to match your desired aesthetic – whether you prefer a tighter, more compact look or a wilder, more expansive plume.
Styling Your DIY Pampas Grass: Boho Chic for Every Space
Now that you’ve successfully crafted your beautiful faux pampas grass, it’s time to unleash its full decorative potential! The versatility of this DIY accent means it can enhance virtually any room in your home, adding a touch of sophisticated bohemian charm. Here are some inspiring ideas for styling your creations:
- Vase Arrangements: The classic choice! Place several stems of varying heights in a tall, slender vase for a dramatic statement in your living room or entryway. For a more subtle touch, arrange a few shorter stems in a smaller ceramic or glass vase on a bookshelf, coffee table, or bedside table. The simplicity of the pampas grass allows the vase itself to be a design element.
- Wall Decor: Get creative by incorporating pampas grass into wall hangings. You can tie smaller plumes to a macrame piece, weave them into a dried floral wreath, or even create minimalist wall art by attaching a few stems to a simple wooden dowel.
- Table Centerpieces: For special occasions or everyday elegance, use your faux pampas grass as a stunning centerpiece. Combine it with other dried florals, candles, or natural elements like wood slices for an organic and inviting tablescape.
- Bedroom Serenity: Bring tranquility to your bedroom by placing a single, fluffy pampas grass stem in a small vase on your nightstand, or a larger arrangement on a dresser. Its soft texture promotes a sense of calm and relaxation.
- Bathroom Oasis: Even bathrooms can benefit from this touch of nature. A small arrangement can add a spa-like, serene feel to a vanity or shelf.
- Seasonal Decor: While inherently versatile, pampas grass can be adapted for seasonal displays. Pair it with autumn leaves and mini pumpkins for fall, or with pinecones and fairy lights for a winter wonderland aesthetic.
The Enduring Appeal of DIY Faux Pampas Grass
Reflecting on Justin Wray’s excellent tutorial, I am truly amazed at how simple and inexpensive it is to create such a stylish and impactful decor piece. The idea that he managed to craft six beautiful pampas grass stems for a mere $3 is incredibly inspiring and underscores the value of DIY. This project is a testament to the power of creativity and resourcefulness in achieving high-end aesthetics without the hefty price tag.
My journey into making faux pampas grass has transformed my perception of home decor. It’s not just about saving money; it’s about the joy of crafting, the pride in a handmade item, and the ability to customize every detail to perfectly match your vision. There’s a distinct satisfaction in knowing that the beautiful, airy plumes now gracing my living space were made with my own hands. I can’t wait to share this simple yet incredibly effective technique with my friend, and together, we can finally infuse our homes with the enchanting, natural elegance of pampas grass. It’s time to embrace this innovative and creative project and start making these stunning decorative accents to add a touch of effortless boho chic to every room!