
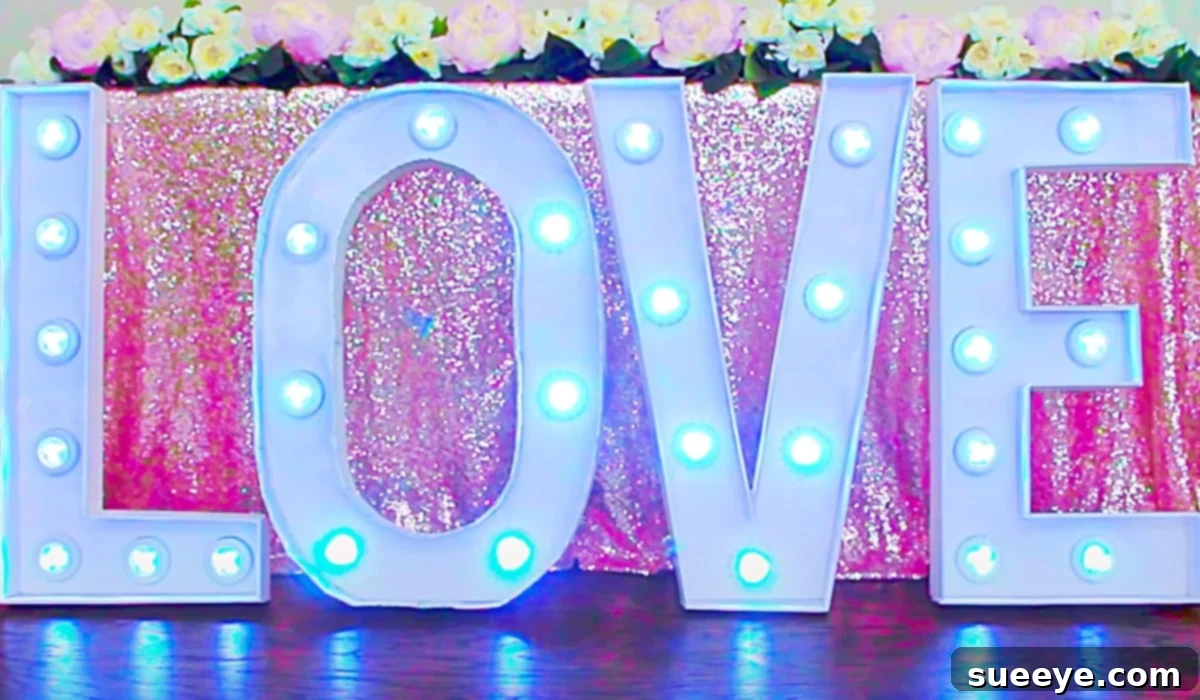
DIY Dollar Tree Marquee Letters: Personalized Decor Made Easy & Affordable
There’s something uniquely charming about personalized decor. Whether it’s a cozy blanket with your initials or a framed photo collage celebrating loved ones, adding a custom touch to your living space truly makes it feel like home. For years, I’ve adored incorporating my initials into everything from fashion accessories to everyday items, but I never considered them a potential centerpiece for room decor until a delightful discovery. I stumbled upon an incredible video tutorial by The Tayra Perez Project on YouTube, showcasing how to craft magnificent marquee letters. The idea was instantly captivating! Imagine vibrant, lighted letters spelling out your initial, a meaningful word, or even a special date, all crafted with readily available and incredibly affordable materials.
My excitement was palpable, and I knew I had to try this project immediately. The allure of creating a stylish, custom piece without a hefty price tag was too strong to resist. I quickly gathered the necessary supplies, starting with the versatile foam board, which I easily found at my local Michael’s Craft Store. The real game-changer, however, came from the Dollar Tree: their battery-operated push lights. These little gems were not only super easy to locate but also astonishingly cheap, proving that stunning home decor doesn’t have to come with a premium price tag. This project truly embodies the spirit of creative crafting on a budget, transforming simple items into eye-catching statement pieces.
If you’re looking to infuse your home with personality, add a warm glow to any room, or create a memorable gift, these DIY marquee letters are an absolute must-try. They’re surprisingly simple to make, even for crafting novices, and the end result is a polished, professional-looking decoration that will surely impress. Let’s dive into the details and discover how you can illuminate your space with these fabulous, personalized marquee letters.
Essential Materials for Your Dollar Tree Marquee Letters:
Crafting these dazzling marquee letters requires only a handful of inexpensive materials, most of which you can find at Dollar Tree or a craft store. Here’s a comprehensive list of what you’ll need:
- Foam Board: This will serve as the sturdy base for your letters. It’s lightweight, easy to cut, and provides a clean surface for painting or decorating. You can often find large sheets at craft stores like Michael’s or Hobby Lobby.
- A Ruler: Essential for precise measurements and creating straight lines, ensuring your letters have crisp edges and uniform sides.
- A Pencil: For drawing your letter outlines and marking cutting lines on the foam board.
- An Exacto Knife (or Utility Knife): A sharp cutting tool is crucial for cleanly cutting through the foam board. Always exercise caution when using an Exacto knife.
- A Hot Glue Gun: Your primary tool for assembling the letter components. A hot glue gun provides a quick and strong bond.
- Glue Sticks: Stock up on these! You’ll need a good supply to secure all the pieces together.
- White Cardboard (or Poster Board): This will form the three-dimensional sides of your marquee letters, giving them depth. Cereal boxes or other thin cardboard can also work in a pinch.
- Dollar Tree Push Lights: These battery-operated LED push lights are the star of the show, providing the signature glowing effect. You’ll need several, depending on the size and number of letters you’re making.
- Cutting Mat (Optional but Recommended): Protects your work surface when using an Exacto knife.
- Painter’s Tape (Optional): Can help hold pieces in place while glue dries.
Step-by-Step Guide to Crafting Your DIY Marquee Letters:
The beauty of this project lies in its simplicity. With a clear vision and a steady hand, you can transform ordinary materials into extraordinary decor. Following the brilliant guidance provided by The Tayra Perez Project on YouTube, you’ll master these techniques in no time. Let’s break down the process into easy-to-follow steps:
Step 1: Design and Outline Your Letters
Begin by deciding on the letters you want to create. This could be your initial, a full name, a meaningful word, or even a special symbol like a heart or an ampersand. Consider the font style and size carefully. A bold, block-style font usually works best for marquee letters, as it provides enough surface area for the lights. You can print out large templates from your computer, freehand draw them, or use stencils. Once you have your design, carefully transfer it onto your foam board using a pencil. Ensure your lines are clear and precise, as these will guide your cuts.
Step 2: Precisely Cut Out Your Letter Bases
With your letters clearly outlined on the foam board, it’s time to cut them out. Using your Exacto knife, carefully follow your pencil lines. Take your time with this step, making slow, deliberate cuts. For intricate curves or sharp corners, it’s often better to make several shallow passes rather than trying to cut through the entire foam board in one go. A cutting mat underneath will protect your table. Accuracy here will result in a cleaner, more professional-looking finished product. Once cut, you’ll have the flat base of each of your marquee letters.
Step 3: Create the Dimensional Sides (Borders)
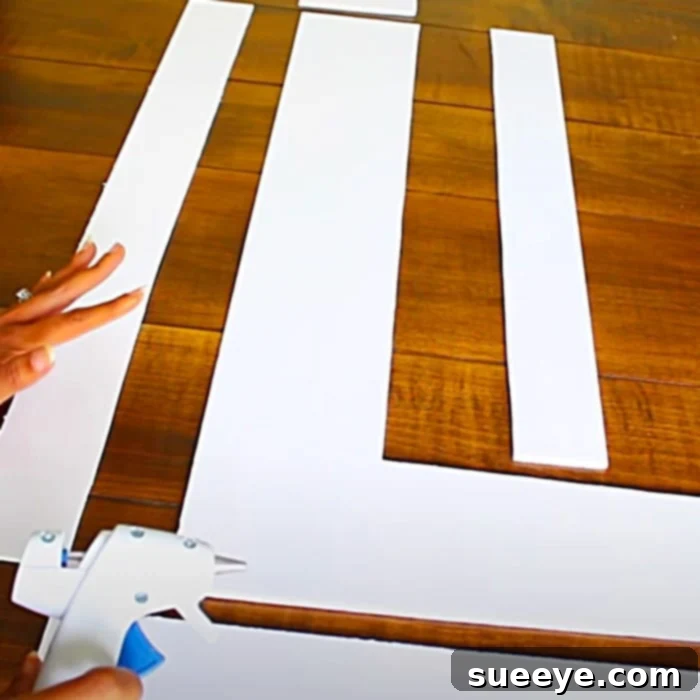
Now, you’ll give your letters their three-dimensional depth. Take your white cardboard (or poster board) and cut it into long strips. The width of these strips will determine the depth of your marquee letters – typically 1.5 to 2 inches works well, but you can adjust this to your preference. For each letter, you’ll need enough strips to go around its entire perimeter. For curves, you might need to gently score the cardboard on one side to help it bend smoothly. For sharp corners, you can cut and glue individual segments. These strips will form the “walls” of your letters.
Step 4: Attach the Borders to Your Letter Bases
Using your hot glue gun, carefully attach the cardboard strips to the edges of your foam board letters. Start at an inconspicuous spot (like the bottom edge of a letter) and work your way around. Apply a thin but consistent bead of hot glue along the edge of the foam board, then press the cardboard strip firmly into place. Hold it for a few seconds until the glue sets. Repeat this process until all the borders are securely attached to each letter. Ensure the cardboard stands upright and forms a clean, enclosed box-like structure for each letter. This step truly brings your letters to life, giving them their characteristic depth.
Step 5: Incorporate Your Dollar Tree Push Lights
This is where your letters truly become “marquee”! Take your Dollar Tree push lights. You have a couple of options here:
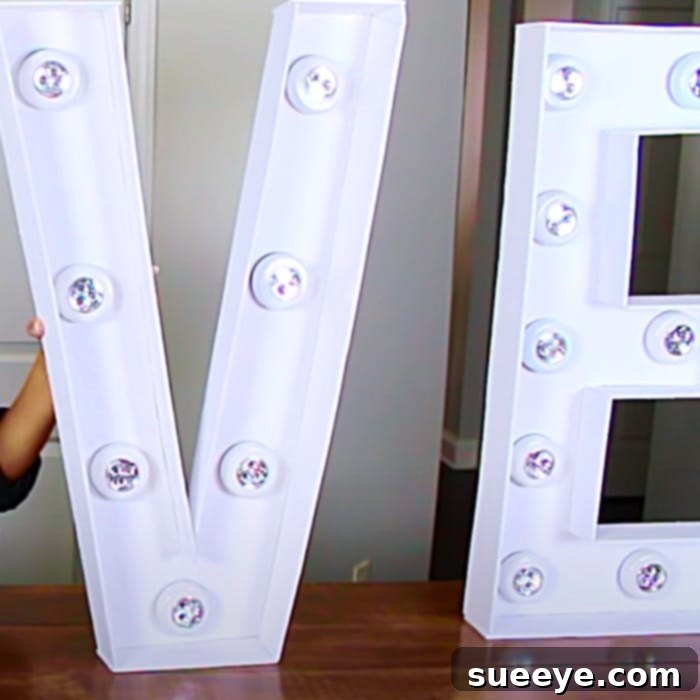
- Surface Mounting: If your push lights are relatively flat, you can simply hot glue them directly onto the face of your foam board letter, spacing them evenly. This is the simplest method.
- Recessed Mounting (for a more flush look): If you want the lights to sit more flush, you can gently mark the positions for each light on the letter’s face. Then, using your Exacto knife, carefully cut out circular holes (slightly smaller than the light’s diameter) for each light. Push the lights through from the back of the letter so the illuminated surface is visible from the front. Secure them from the back with a little hot glue if needed.
The key is to distribute the lights evenly to create a balanced and appealing glow. Consider the letter’s shape and how many lights will fit without looking overcrowded or sparse. Once all lights are in place, test them to ensure they all work.
Personalize and Decorate Your Marquee Letters
While the basic construction is complete, this is where you can truly unleash your creativity! The beauty of DIY marquee letters is their endless customization potential.
- Paint: Once assembled, you can paint your letters any color to match your room’s aesthetic. Acrylic paints work wonderfully on foam board and cardboard. Consider metallic gold or silver for a classic Hollywood glam look, or vibrant pastels for a playful nursery.
- Glitter: For extra sparkle, apply a layer of craft glue and sprinkle glitter generously over the letters. This is perfect for party decor or a touch of whimsy.
- Decorative Paper: Decoupage patterned paper, fabric, or even photos onto your letters for a unique texture and design.
- Embellishments: Add rhinestones, beads, small faux flowers, or other trinkets to create a truly bespoke piece.
Let your imagination guide you! The possibilities are truly limitless when it comes to personalizing these charming light-up letters.
Why Choose DIY Marquee Letters? The Benefits!
Opting to create your own lighted marquee letters offers a multitude of advantages over buying store-bought versions:
- Unbeatable Affordability: This is arguably the biggest draw. By utilizing inexpensive items from Dollar Tree and craft stores, you can create high-end looking decor for a fraction of the cost. Commercial marquee letters can be quite expensive, especially for custom designs.
- Complete Customization: You have full control over the font, size, color, finish, and the specific letters or words you want to display. This ensures your decor perfectly matches your style and space.
- Personal Touch: There’s a special satisfaction that comes from creating something with your own hands. These letters aren’t just decor; they’re a reflection of your effort and creativity, making them more meaningful.
- Versatility in Decor: Marquee letters aren’t just for bedrooms! They can add a festive touch to parties, serve as unique wedding or baby shower decorations, illuminate a home office, or simply add a warm ambient glow to a living room.
- Fun and Engaging Project: This DIY project is enjoyable for individuals, families, or groups of friends. It’s a fantastic way to spend a creative afternoon.
- Thoughtful Gift Idea: A personalized, handmade marquee letter makes a truly special and memorable gift for birthdays, housewarmings, or holidays.
Tips for Success and Durability:
- Safety First: Always use caution when working with an Exacto knife and a hot glue gun. Supervise children closely if they are involved in the project.
- Clean Cuts: A sharp Exacto knife makes all the difference. Change blades frequently for cleaner, safer cuts.
- Patience with Glue: Allow hot glue to cool and set completely before handling heavily. For a stronger bond, apply glue in sections.
- Battery Life: The Dollar Tree push lights are battery-operated. Keep spare batteries on hand for continuous illumination, especially if using them frequently.
- Sturdy Hanging: If you plan to hang your letters, consider adding a small wire loop or command strips to the back for secure mounting. For standing letters, ensure the base is wide enough to prevent tipping.
- Sealing (Optional): For added durability and to prevent paint chipping, you can apply a clear sealant or craft varnish over your finished and decorated letters.
Inspired by The Tayra Perez Project
A huge shout-out and thank you to The Tayra Perez Project on YouTube for sharing such an inspiring and clear tutorial. Visual guides are incredibly helpful when tackling DIY projects, and her video provides an excellent walkthrough that makes this project accessible to everyone. Her creativity in transforming simple materials into such a fantastic decor piece is truly commendable and serves as a wonderful springboard for your own crafting adventures.
This project is more than just making a decorative item; it’s about embracing your creativity, adding a personal touch to your surroundings, and proving that incredible decor doesn’t have to be expensive. The moment those Dollar Tree push lights illuminate your handcrafted letters, you’ll feel an immense sense of accomplishment and joy. It’s truly a cute project, and I absolutely adore the way these personalized marquee letters can brighten up any space and make it uniquely yours. So, gather your materials, get ready to craft, and prepare to be amazed by what you can create!