
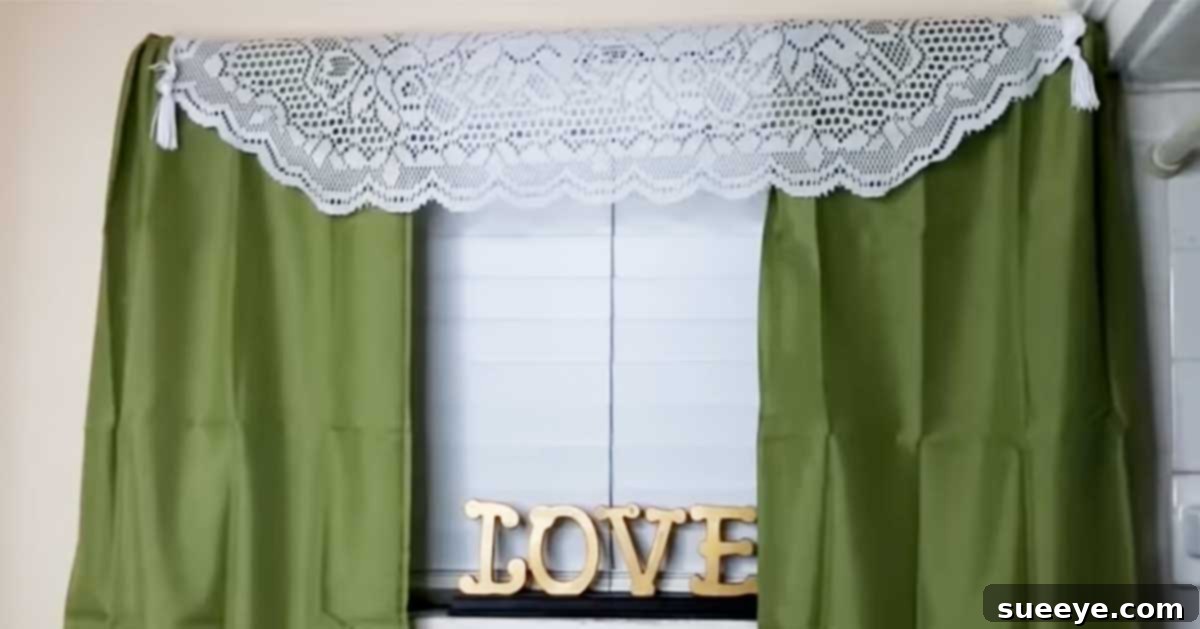
Transform Your Space: The Ultimate Guide to DIY Pillowcase Curtains on a Budget
Are you constantly searching for creative yet budget-friendly ways to refresh your home decor? High-quality curtains often come with a hefty price tag, making them one of the most unnecessarily expensive home items. But what if we told you there’s an ingenious, super-affordable solution that looks fantastic and is incredibly easy to make? Enter the world of DIY pillowcase curtains! This brilliant hack, championed by creators like DaBoss Ella, is a true game-changer for anyone looking to adorn their windows without breaking the bank.
These DIY pillowcase curtains are not only unbelievably inexpensive, but they also offer a fresh, clean aesthetic that complements a variety of interior styles. The beauty lies in their simplicity and the vast array of colors and patterns available in pillowcases. You can effortlessly find a set that perfectly matches your existing decor or use them as an opportunity to introduce a pop of new color. Imagine transforming your windows for as little as $2 to $4! By sourcing your materials from dollar stores, you can keep your costs incredibly low. Plus, if you’re like many of us, you likely have unused pillowcases tucked away in a linen closet, bringing your total cost down even further. These charming and practical curtains are especially ideal for smaller windows, making them perfect additions to bathrooms, kitchens, nurseries, or dorm rooms where traditional custom curtains might be overkill or too costly.
Beyond their affordability, DIY pillowcase curtains offer a unique blend of customizability and convenience. They are a fantastic option for renters who want to personalize their space without making permanent changes, or for students needing quick and chic dorm room solutions. They are also incredibly easy to clean – simply slide them off the rod and toss them in the wash with your regular laundry. Say goodbye to the endless hunt for costly window treatments and embrace this creative, cost-effective, and stylish alternative.
Essential Materials for Your DIY Pillowcase Curtains:
Gathering your supplies is the first step towards creating your stunning new window treatments. The beauty of this project lies in its minimal material requirements, most of which can be found at a dollar store or might already be in your home.
- Pillowcases: The star of our show! Standard or queen-sized pillowcases work best for most small windows. Consider the color, pattern, and fabric (cotton, linen blends are popular) to match your room’s aesthetic. You’ll typically need one to two pillowcases per window, depending on its width and how gathered you want the curtains to appear.
- Curtain Rod and Hanging Kit: Choose a simple, lightweight curtain rod. Dollar stores often carry basic rods and their corresponding mounting hardware. Ensure the rod is slightly wider than your window frame for proper coverage. If you prefer a no-drill option, a tension rod can also work wonders, especially for renters!
- Sharp Scissors: A good pair of sharp scissors will make cutting the fabric much easier and result in cleaner slits.
- Screwdriver: If you’re using a traditional curtain rod with a mounting kit, a screwdriver (Phillips or flathead, depending on your screws) will be essential for secure installation. You can often find a basic screwdriver set at a dollar store for a minimal cost.
- Optional but Recommended:
- Measuring Tape and Pencil: For precise measurements of your window and marking where to cut slits on your pillowcases.
- Iron and Ironing Board: To press the pillowcases for a crisp, finished look before cutting and hanging.
- Fabric Glue or Iron-On Hem Tape: If you want to prevent fraying or create a more polished edge around your slits, these can be very helpful.
- Level: To ensure your curtain rod is perfectly straight.
Step-by-Step Guide: Crafting Your Pillowcase Curtains
Follow these simple instructions to create beautiful, custom-look curtains for a fraction of the cost of store-bought alternatives. This project is beginner-friendly and requires no sewing skills!
Step One: Preparing Your Window and Installing the Curtain Rod
Before you even touch your pillowcases, it’s crucial to prepare your window space. First, measure the width of your window frame. Your curtain rod should extend approximately 3-6 inches beyond each side of the window frame to allow the curtains to stack neatly when open and provide better coverage when closed. Determine the desired height for your rod; typically, it’s installed a few inches above the window frame, but you can go higher to create the illusion of taller windows. If you’re using a traditional curtain rod with brackets, use your screwdriver to securely attach the curtain rod brackets to the wall. Ensure they are level before drilling for a professional finish. You can often find basic curtain rod kits at a dollar store for an incredibly low price, usually around $1. If opting for a tension rod, simply measure the inside width of your window frame and adjust the rod to fit snugly within the frame.
Step Two: Preparing Your Pillowcases for Hanging
This is where your pillowcases transform into curtain panels! To create neat, clean slits for your curtain rod, first turn your pillowcase inside out. This allows for a cleaner cut that won’t show the raw edge as prominently from the front. Identify the bottom seam of the pillowcase – this is the closed end, not the open end where you insert a pillow. You will want to cut several small, horizontal slits directly below this seam. These slits will serve as the channels for your curtain rod. For a standard curtain rod, aim for slits about 1-1.5 inches long and spaced approximately 1.5-2 inches apart. Ensure the number of slits is even, so your curtain hangs balanced. For a clean finish, you can fold and iron the fabric where you plan to cut, or even apply a thin line of fabric glue just before cutting to minimize fraying. Precision here will lead to a more polished final look.
Image by DaBoss Ella via YouTube video.
Step Three: Threading the Pillowcases onto the Curtain Rod
Now it’s time to assemble your curtains! Take your curtain rod (removed from its brackets if using a traditional rod) and begin threading it through the slits you meticulously cut in your pillowcase. Start from one end of the pillowcase and weave the rod through each slit, going over and under the fabric. Continue until the entire pillowcase is threaded onto the rod. If you’re using multiple pillowcases for wider windows, thread each one onto the rod, ensuring they are evenly spaced or gathered to your preference. Once all pillowcases are on the rod, you can adjust the gathering of the fabric to achieve your desired fullness and coverage. A more gathered look provides more privacy and a softer aesthetic.
Step Four: Mounting Your New Curtains
With your pillowcases neatly threaded onto the curtain rod, it’s time for the final step! Carefully lift the curtain rod with the attached pillowcases and mount it back onto the window clips or brackets you installed in Step One. Ensure the rod is securely seated in its holders. Take a moment to adjust the pillowcases, smoothing out any wrinkles and arranging the gathers evenly across the rod. Step back and admire your handiwork! You’ve successfully created stylish, custom-look curtains using simple, affordable pillowcases. If you used a tension rod, simply insert it back into the window frame, ensuring the pillowcases are evenly distributed.
Why DIY Pillowcase Curtains are a Smart Choice for Every Home
Beyond the simple steps, there are numerous compelling reasons why this DIY project has gained so much popularity, especially among budget-conscious decorators and creative individuals.
- Unbeatable Affordability: This is arguably the biggest draw. When traditional custom curtains can cost hundreds, if not thousands, of dollars, creating a set of pillowcase curtains for $2-$10 is revolutionary. This allows you to update your window treatments frequently without financial strain, keeping your home decor fresh and current.
- Limitless Customization: Pillowcases come in an incredible array of colors, patterns, and even textures. Whether you’re looking for vibrant hues, subtle pastels, bold geometrics, or delicate florals, you’re bound to find pillowcases that match your style. This versatility far surpasses the limited options often found in budget curtain sections of stores. You can even mix and match different pillowcases for a unique, eclectic look.
- Effortless to Create: No sewing machine? No problem! This project requires basic cutting and mounting skills, making it accessible to even the most novice DIYer. It’s a quick project that can be completed in under an hour, providing instant gratification.
- Perfect for Small & Unique Spaces: Small windows in bathrooms, kitchens, laundry rooms, or even boat cabins often pose a challenge for standard curtain sizes. Pillowcase curtains are perfectly proportioned for these areas, providing privacy and style without overwhelming the space. They are also ideal for dorm rooms or rental properties where drilling might be restricted, especially when paired with tension rods.
- Easy Maintenance: Unlike many delicate or dry-clean-only curtains, pillowcase curtains are typically made from washable fabrics like cotton. When they get dusty or need a refresh, simply slide them off the rod, wash them according to the pillowcase’s care instructions, and rehang. It’s that simple!
- Sustainable & Repurposed Decor: This project offers a wonderful way to repurpose old pillowcases that might otherwise be discarded. It aligns with a more sustainable approach to home decorating, giving new life to forgotten items and reducing waste.
- Quick Seasonal Updates: Want to change your decor for the holidays or a new season? It’s incredibly easy and inexpensive to swap out your pillowcase curtains for a fresh look. Think light linens for summer, flannel for winter, or festive patterns for holidays.
Tips for Personalizing and Enhancing Your Pillowcase Curtains
While the basic pillowcase curtain is charming on its own, there are many ways to add your personal touch and elevate their style.
- Add Embellishments: Sew or glue on lace trim, pom-poms, tassels, or decorative ribbon along the bottom edge or sides of your pillowcases for a unique flair. Fabric paint or stencils can also be used to add custom designs.
- Create Tie-Backs: Use matching or contrasting ribbons, fabric scraps, or even thin rope to create stylish tie-backs. This allows you to pull the curtains back during the day, letting in more light and adding an elegant touch.
- Layering for Effect: For larger windows or a more layered look, consider using sheer pillowcases behind your main solid-colored ones. This adds depth and provides a subtle filter for light.
- Experiment with Fabric: While cotton is common, don’t shy away from other pillowcase materials. Satin pillowcases can add a touch of luxury, while flannel ones offer warmth and coziness, perfect for a bedroom or during colder months.
- For Longer Windows: If you need more length, you can easily sew or use fabric glue to attach two pillowcases together vertically. Choose complementary patterns or colors for an interesting design.
- Add a Liner: For increased privacy or light-blocking, you can easily add a simple fabric liner. Purchase inexpensive lining fabric and either sew it to the back of your pillowcases or use fabric glue for a no-sew solution.
Care and Maintenance for Your DIY Pillowcase Curtains
One of the many advantages of these curtains is their easy care. To keep them looking fresh and vibrant, follow these simple maintenance tips:
- Regular Washing: Most pillowcases are machine washable. When your curtains need a refresh, simply slide them off the rod and toss them into the washing machine with similar colors. Use a gentle cycle and appropriate detergent.
- Drying: Tumble dry on a low setting or air dry to prevent shrinking and prolong the life of the fabric. Iron them if desired for a crisp, wrinkle-free appearance before re-hanging.
- Spot Cleaning: For small spills or marks, spot clean with a mild detergent and a damp cloth.
- Check for Wear: Periodically check the slits you cut for any signs of fraying, especially if you didn’t reinforce them. If fraying occurs, you can trim loose threads or apply a small amount of fabric glue to the edges.
In conclusion, DIY pillowcase curtains are a testament to how creativity and resourcefulness can lead to stunning and functional home decor solutions. They offer an unparalleled blend of affordability, ease, and style, making them a fantastic choice for any home. Whether you’re decorating a new space, looking for a temporary fix, or simply want to add a personalized touch without breaking the bank, these ingenious window treatments are your answer. So, gather your materials, follow these simple steps, and prepare to transform your windows with charm and character. Happy crafting!