DIY Decor
21 DIY Window Ideas to Dress Up Boring Windows
DIY window ideas beyond curtains: a Greek key box valance, stenciled drapes, a mini blind Roman shade, bamboo and burlap shades, each with a tutorial.
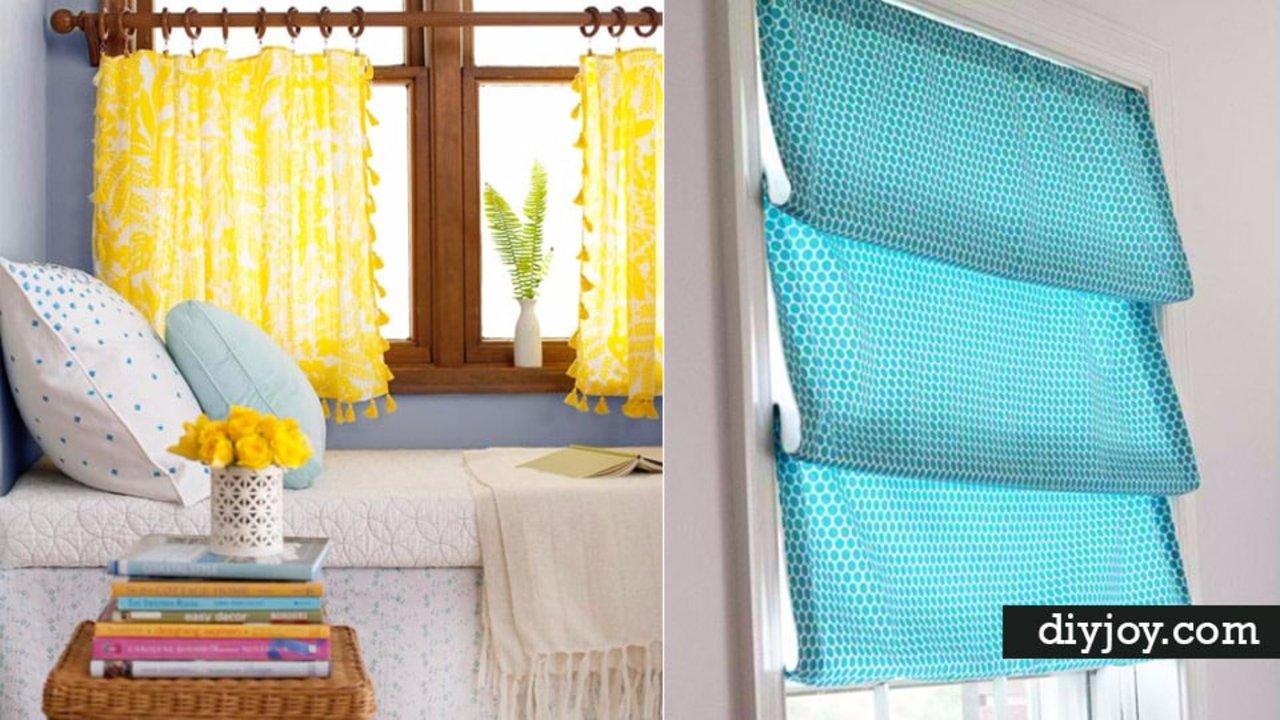
A bare window is the fastest thing in a room to fix and the one most people leave alone the longest, usually because custom treatments cost a fortune and sewing a lined panel sounds like a weekend nobody has. Almost nothing on this list needs either. A Roman shade here is built on a twelve dollar mini blind and held together with fabric glue. A box valance is four straight seams and a rod pocket. Burlap shades for a whole bathroom came in under twenty dollars a panel and took five hours for three of them. There are stenciled drop cloths, grommet topped blackout linen, bamboo shades hung deliberately high and wide to fake a bigger window, and trim added to store bought panels for about five dollars. Every idea below links back to the person who made it.
1. Pottery Barn Inspired Ribbon Drapes
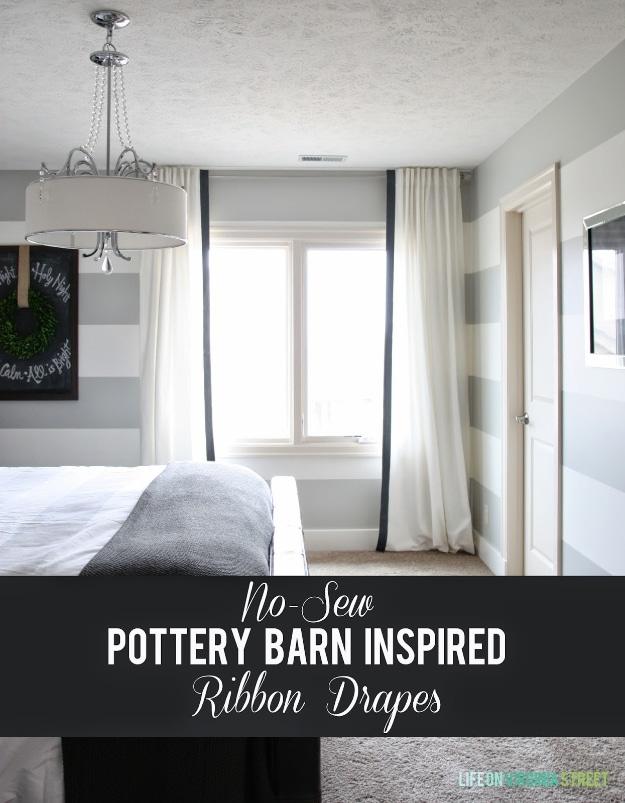
Long cream panels with a single dark gray grosgrain stripe running down the leading edge, hung high in a striped gray and white bedroom. Life on Virginia Street priced the original at $129 per panel and got the same look from cheap ready made IKEA panels and a roll of ribbon. No sewing at all: Stitch Witchery fusible tape bonds the ribbon on with an iron. Pin the ribbon in place first and live with it for a day, because one stripe at the very edge and one inset a few inches read completely differently in a room. The edge won here.
Get the full tutorial at Life on Virginia Street.
2. Box Valance With Greek Key Design
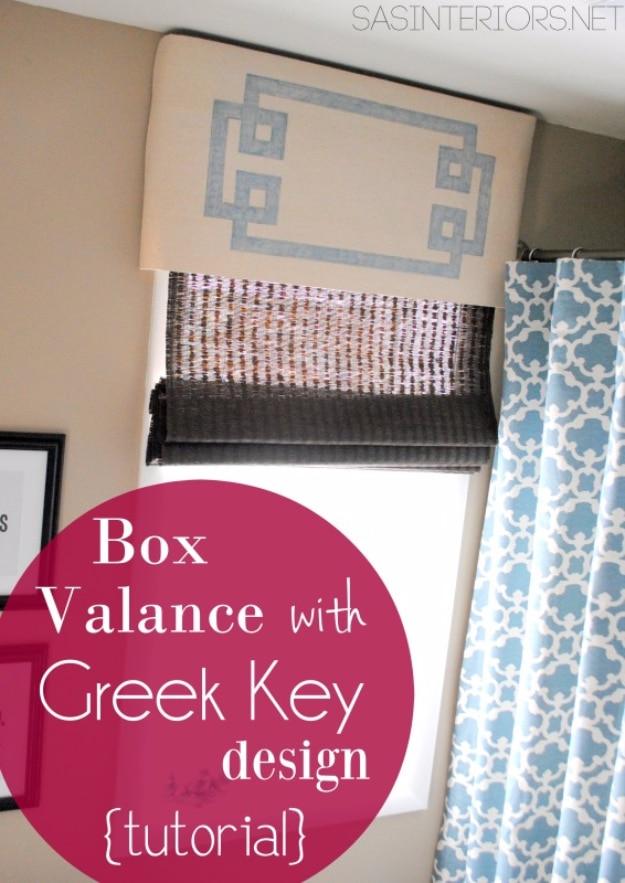
A drop cloth box valance mounted tight to the ceiling with a gray Greek key border painted around it, over a woven shade and blue patterned curtains. Jenna Burger’s construction is four measurements and two seams. Mount the rod first and measure its full width, cut fabric to that width plus one inch and to the drop you want plus four inches, sew the two short sides with a half inch seam, then fold the remaining long edge over four inches and stitch at three and a half to make a generous rod pocket. The Greek key is laid out in painter’s tape, outlined in pencil and filled in.
Get the full tutorial at Jenna Burger.
3. Stenciled Curtains
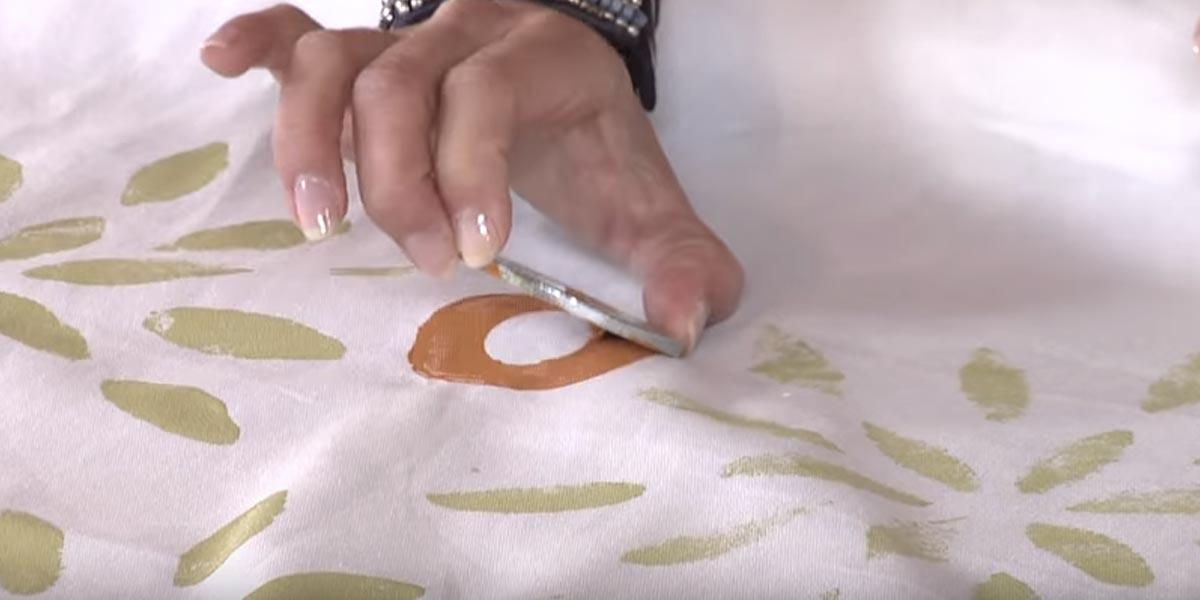
A drop cloth panel stenciled all over in a gold leaf motif, done with an oversized wall stencil rather than a small craft one so the repeat reads at room scale. The whole build is on Sueeye: a six by nine foot drop cloth, the top edge folded back and stitched into a loop for a wooden rod, then the stencil laid down and its edge marked in chalk so the next placement lines up exactly. Weight the stencil edges so it cannot shift, and dab the brush straight up and down rather than brushing sideways, which is what stops paint creeping underneath.
Get the full tutorial at Sueeye.
4. DIY Grommet Topped Blackout Drapes
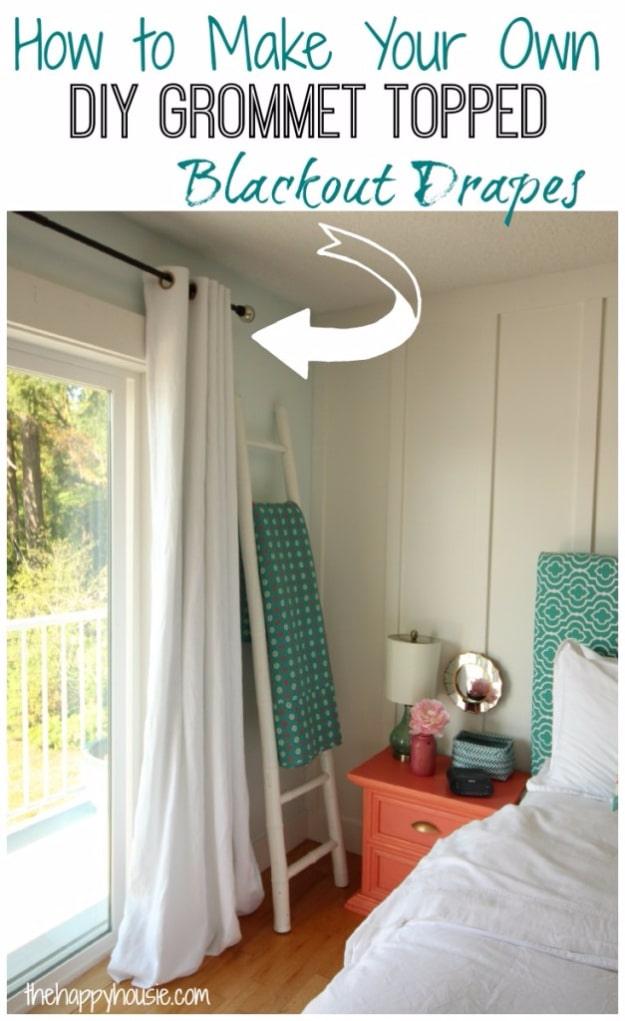
Full length white linen panels with matte gold grommets along the top, hanging to the floor beside a bedroom door. White blackout drapes sound like a contradiction and are the point of the project: blackout liner behind a white Irish linen face gives you real darkness without the room going heavy. The construction is a giant pillowcase, face fabric and liner sewn good sides together then turned out, with grommet tape stitched to the lining first so it ends up sandwiched inside the panel and never shows. The holes are cut slightly smaller than the metal rings so the grommets grip.
Get the full tutorial at The Happy Housie.
5. Add A Decorative Trim To Curtains
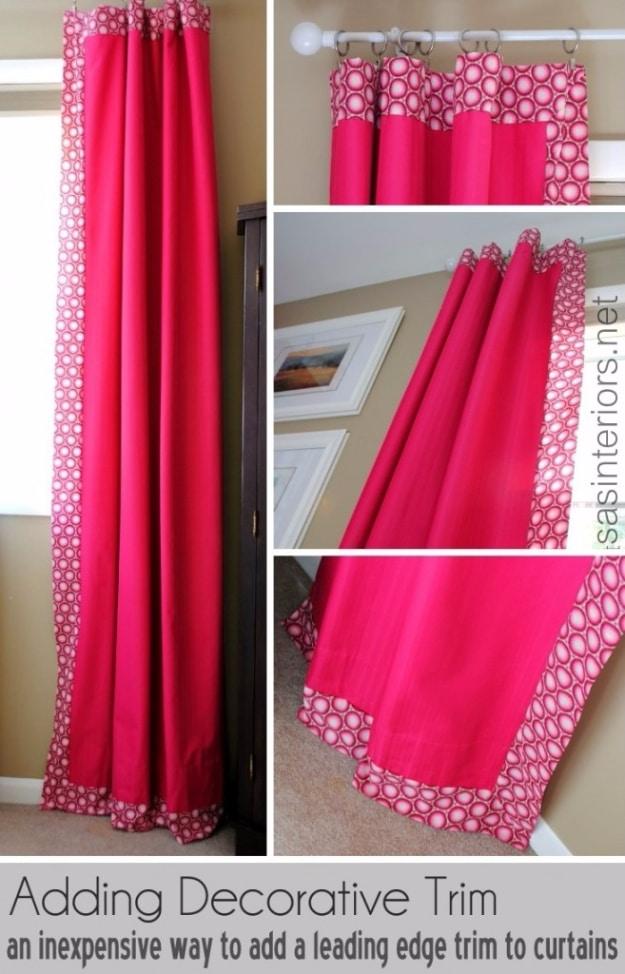
Long fuchsia panels bordered on three sides with a white and pink patterned band, which turns plain shop bought curtains into something that looks made to order. Jenna Burger did it for about five dollars using one yard of $3.97 fabric. For a three inch finished band, cut six and a half inch strips, join the ends into one long strip, fold in half wrong sides together and iron, then align the raw edge with the panel edge and sew at half an inch. Where the corners meet, leave extra and roll one side under the other to form the right angle before stitching.
Get the full tutorial at Jenna Burger.
6. Add A Leading Edge To Store Bought Curtains
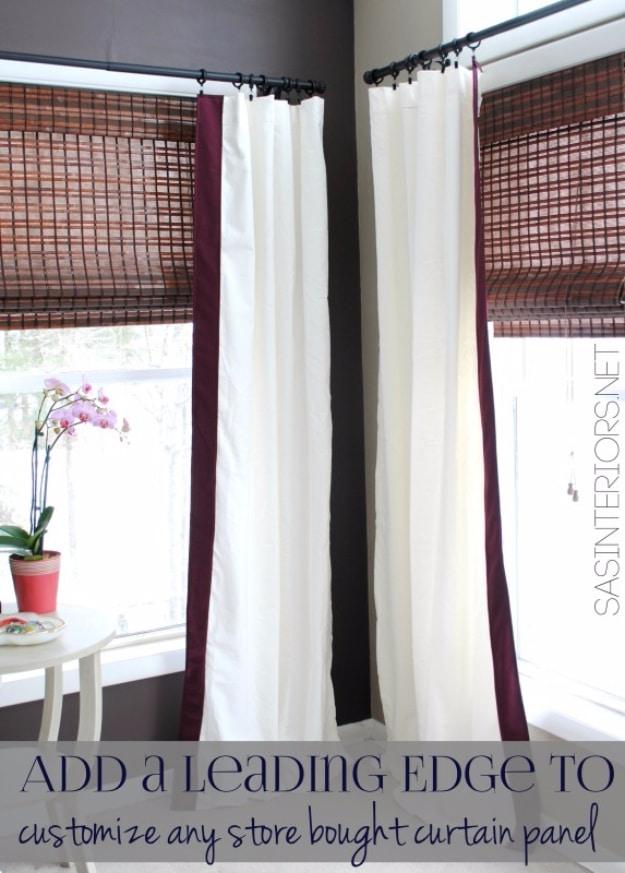
Cream velvet rod pocket panels from a home store with a deep plum band down the leading edge, hung either side of a dark focal wall over woven shades. Jenna Burger’s arithmetic is worth copying exactly: for a three inch finished edge, cut strips four and a half inches wide, being three inches finished plus a half inch seam on one side and a one inch seam on the other. One yard covered three panels. Two strips joined end to end make a length longer than any panel. Iron both seam allowances in before attaching anything, and keep checking the three inches with a tape as you go.
Get the full tutorial at Jenna Burger.
7. Double Ruffle Drop Cloth Panels
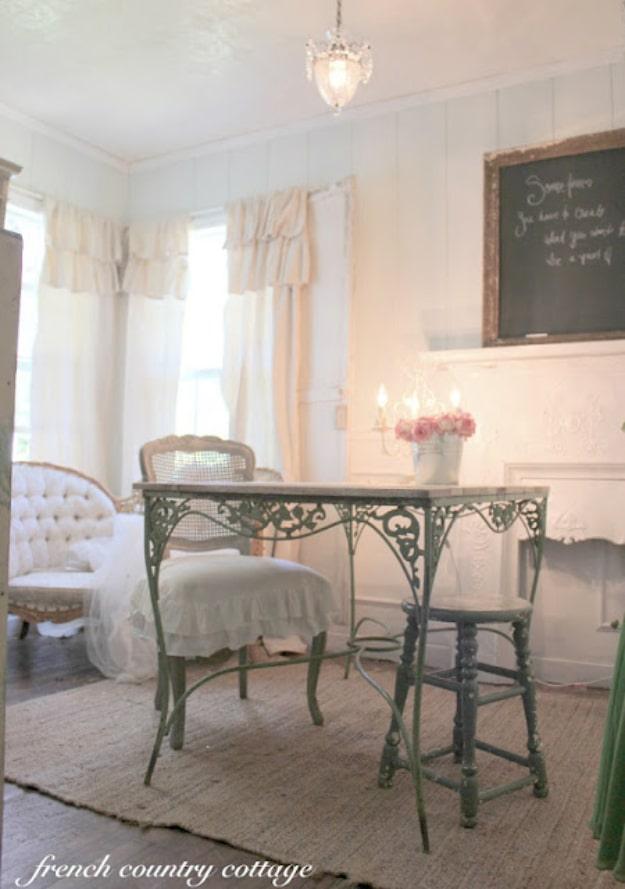
Soft cream drop cloth panels with two deep gathered ruffles across the top, hanging at the corner windows of a white paneled room. French Country Cottage cut the drop cloth to length, hemmed the bottom and made a rod pocket at the top, then cut two ten inch sections at double the panel width for the ruffles. The first is pinned, tucked and sewn straight onto the top of the panel, the second sits immediately below where the first one finishes. There is no ruffling foot involved here; the gathers are made by hand as the seam goes on, which is why they look slightly irregular.
Get the full tutorial at French Country Cottage.
8. Easiest Curtains Ever Made
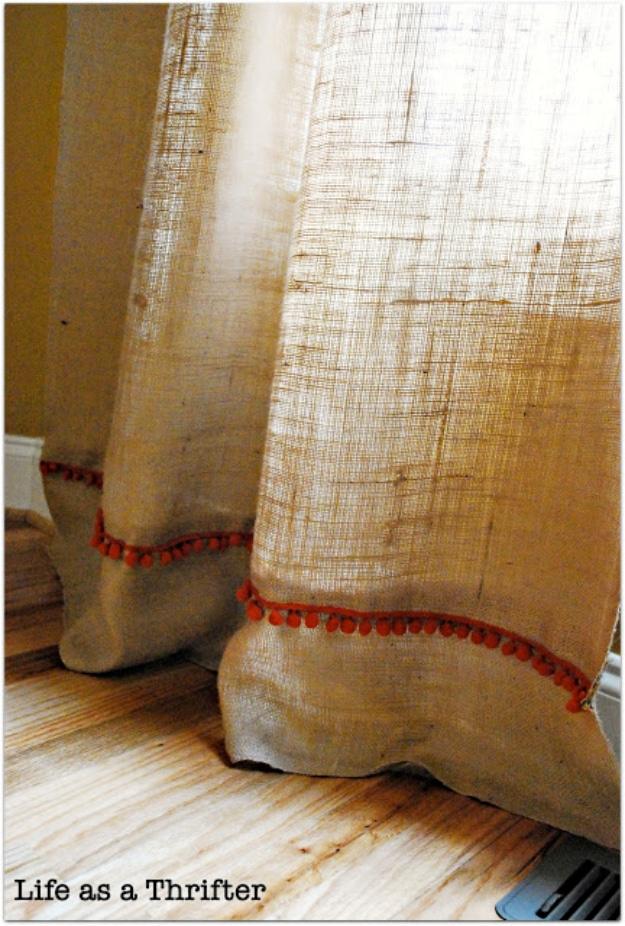
Natural burlap panels puddling on a wood floor, finished with a line of orange pom pom trim along the bottom hem. Life as a Thrifter’s method is about as short as a tutorial gets. Mount the rod as high on the wall as it will go, measure from rod to floor and add about two inches for finishing, and double that figure because you need two panels. Then fold the top and bottom under about an inch, press, and run a single straight stitch. Burlap’s selvedges are already finished so the sides need nothing at all. The trim goes on last.
Get the full tutorial at Life as a Thrifter.
9. Chinoiserie DIY
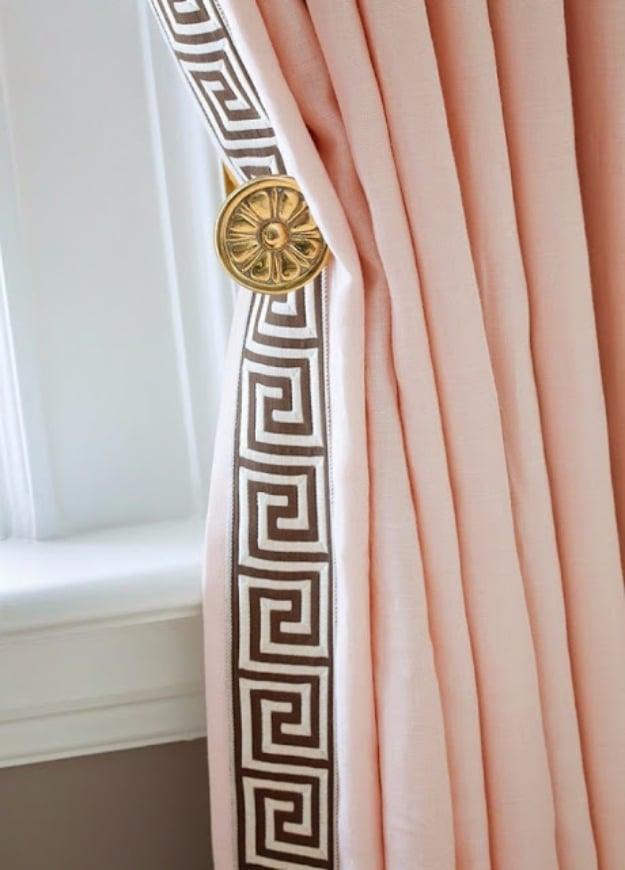
A blush pink linen panel with a wide brown and cream Greek key trim down the leading edge, caught back by a gold rosette holdback. Chinoiserie Chic is straightforward about the whole trick: buy ready made panels and add designer grade Greek key trim, which at under ten dollars a yard is the cheapest upgrade in the room. The panels shown pair a pink linen with pewter and taupe trim. Sewing it on is fine if you own a machine, and gluing it is fine if you do not. Readers on the page report iron on fusible tape still holding a year later.
Get the full tutorial at Chinoiserie Chic.
10. Make Your Own Macrame Curtains
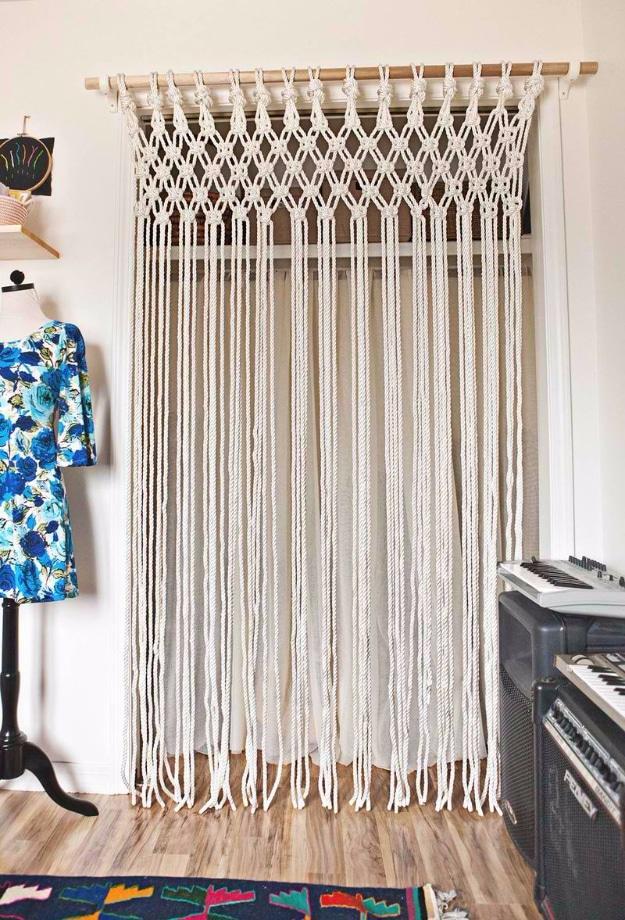
A full width macrame curtain in natural cotton cord hung from a wooden dowel, knotted into a lattice at the top that opens into long loose fringe below. A Beautiful Mess hung it over a closet whose sliding door had been damaged and never replaced, which is the best use for it, because it hides the contents without shutting out any light. The whole panel is one square knot repeated: four strands, outer right across the middle two, outer left under and back over, pull tight, reverse. Fourteen groups of four strands, each one a hundred inches long, made the finished curtain.
Get the full tutorial at A Beautiful Mess.
11. DIY Shabby Chic Curtains
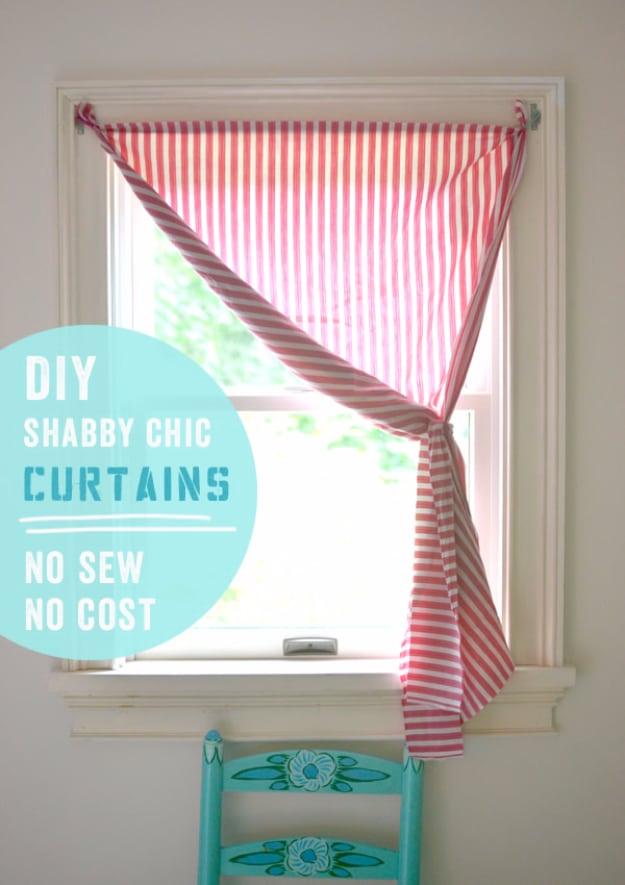
A red and white striped panel pulled diagonally across a window and caught at one corner, with no rod, no sewing and no hem anywhere. Art Bar made these on the last day of summer with a fabric remnant, good scissors and two small hair elastics. Hold the fabric up against the window and snip where you want the cuts, then cut. Twist a hair tie around each of the top two corners and hook them over existing nails or hooks. It took under twenty minutes, it leaves nothing behind in a rented wall, and four months later they were still up.
Get the full tutorial at Art Bar.
12. Classy Yet Affordable White Curtains
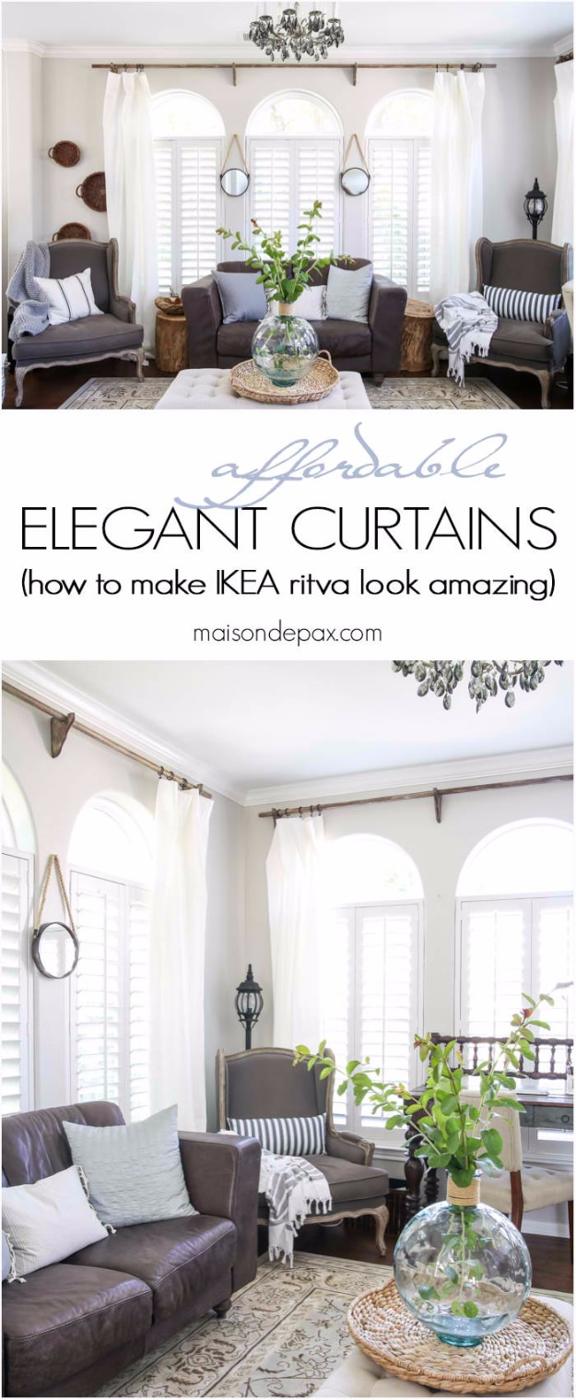
Long white panels hung on dark wooden rods in a living room of arched windows, pooling deliberately on the floor. Maison de Pax uses IKEA Ritva panels in white, in the 57 by 118 inch size for a room with 108 inch ceilings, hung with curtain clips rather than threading the rod through the back loops, because clips fall into better folds and are far easier to adjust. Worth knowing before you buy: these are not a bright white and not quite an off white either, which actually helps them sit alongside several different whites in one room.
Get the full tutorial at Maison de Pax.
13. DIY Window Wear
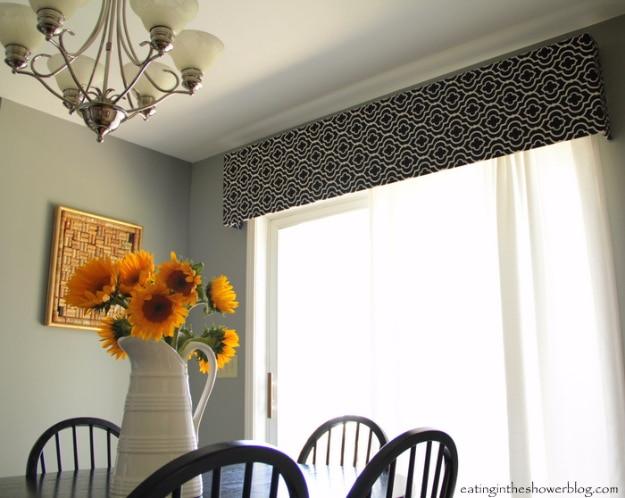
A black and white geometric pelmet box mounted above a sliding door in a dining room, with plain white panels hanging below it. Eating in the Shower built theirs from an eight foot 1×4 for the frame and a sheet of eighth inch MDF for the face, joined with construction adhesive or a brad nailer. Batting over the whole frame is what rounds the hard edges and hides the material underneath, then fabric is pulled tight over that and stapled to the back, corners wrapped like a parcel. Two eyelets on the frame ends carry it. Nearly five yards covered two windows.
Get the full tutorial at Eating in the Shower.
14. Kitchen Window Treatment
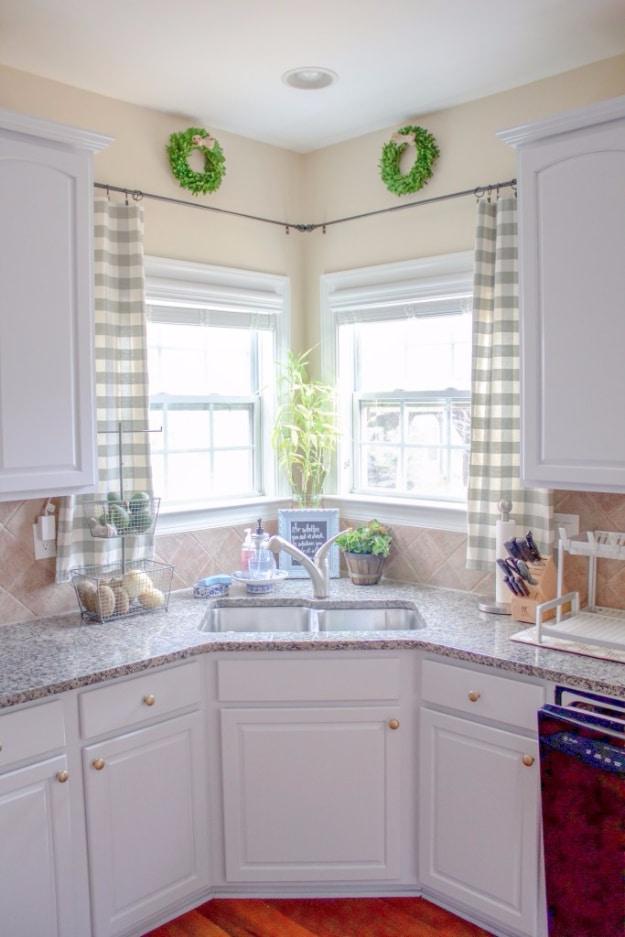
Buffalo check cafe panels on black rods at two corner windows above a kitchen sink, with small wreaths hung on the cabinets beside them. Love Your Abode found the designer fabric at a moving sale for five dollars a bolt, which is the sort of luck worth being ready for. The genuinely reusable part is the hanging advice: mount the rods as high as possible, ideally well above the window trim rather than tight to it, and run them wider than the windows themselves. Both tricks make a window read as longer and broader than it actually is, which matters most on small kitchen windows.
Get the full tutorial at Love Your Abode.
15. Ruffled Drop Cloth Curtains
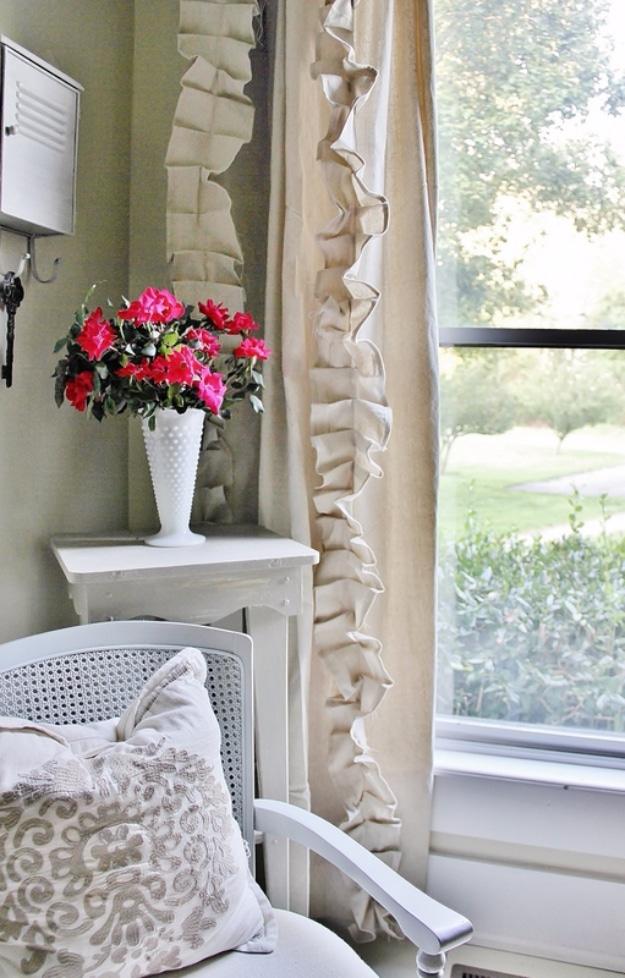
A cream drop cloth panel with a deep column of ruffles running down it, at a window beside a white side table and a cane chair. Thistlewood Farms saw the ruffled panels on the Anthropologie site at $208 each, decided that was out of reach, and reached for drop cloth instead. Six by nine foot cloths at $10.96 apiece from Lowe’s, one ruffle sewn down each, and onto the rods they went. That is genuinely the whole build. The maker’s own verdict swings between loving them and thinking they look like a ruffle stuck onto a drop cloth, which is an unusually honest thing to publish.
Get the full tutorial at Thistlewood Farms.
16. DIY No Sew Pom Pom Curtains
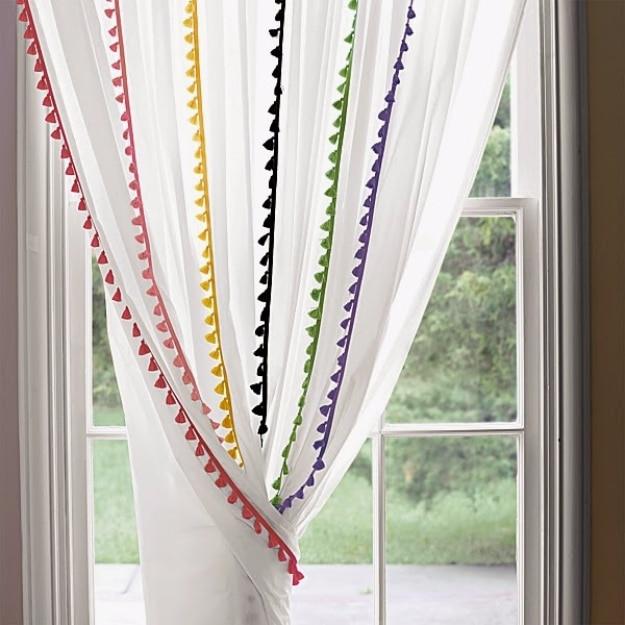
White sheer panels edged with tassel fringe in red, gold, black, green and purple, all five hung together at one window so the colors layer against the light. Hem and Her copied a boutique pair and priced the whole thing out honestly: twenty eight dollars for two IKEA panels, forty for the pom pom trim, twelve for glue and eight for hemming tape, eighty eight dollars in total. Nothing is sewn. Hem the panels with iron on tape first, then run a line of fabric glue along the existing side seam as your guide and press the trim down. Seal the cut ends with glue so they cannot fray.
Get the full tutorial at Hem and Her.
17. DIY Window Curtains
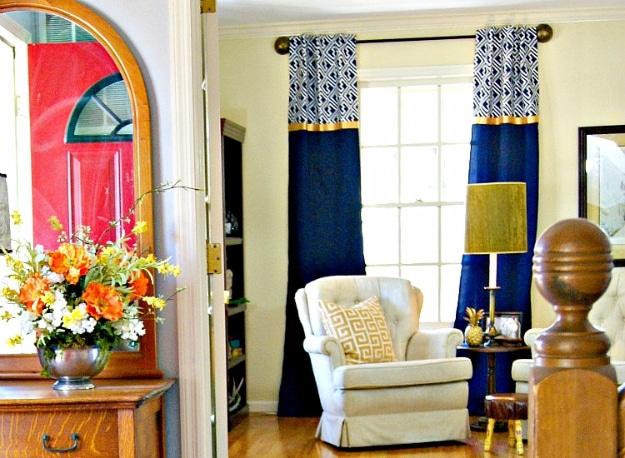
Navy panels with a wide patterned band across the top, hung high in an entryway beside a red front door. Kaleidoscope Living built these without sewing a stitch, and the money saving idea is not using accent fabric for the whole panel, only for one wide strip, so a single yard does an entire pair. Cut the strip two inches deeper than you want it finished, fold an inch over top and bottom and press, then fuse hem tape under each fold. Do the short edges the same way, and the corners come out square. Then fuse the finished strip onto a ready made panel.
Get the full tutorial at Kaleidoscope Living.
18. Bamboo Shades To Make The Room Larger
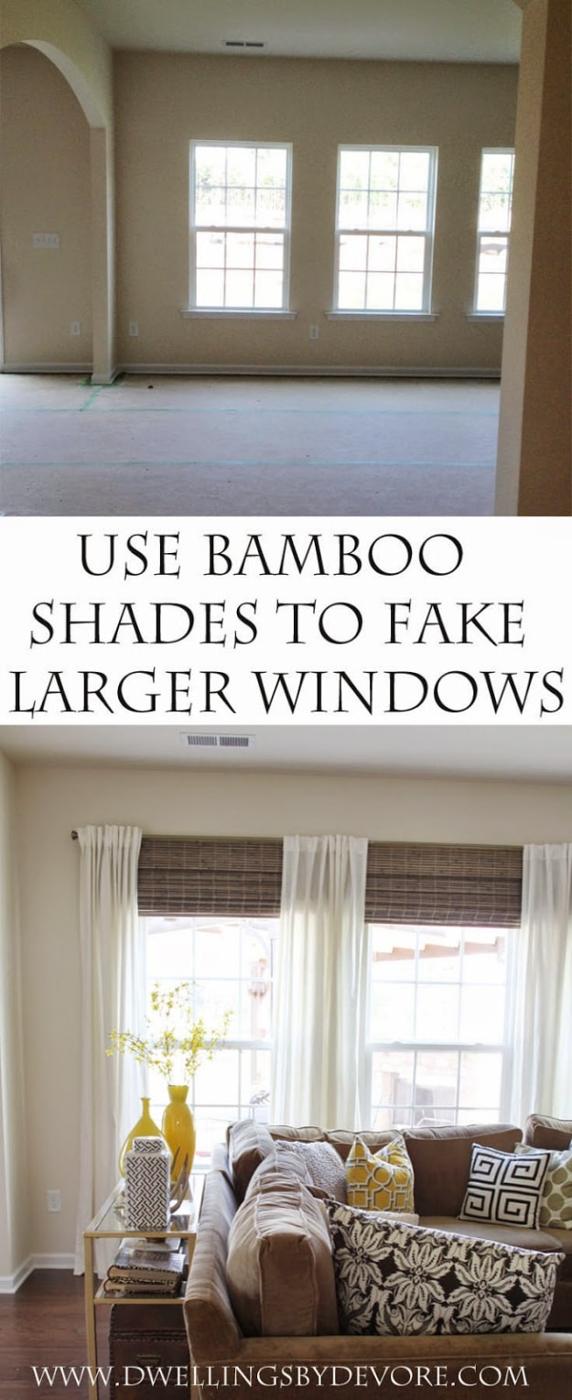
Driftwood colored bamboo roman shades over a bank of family room windows, with white panels either side. Dwellings by DeVore bought the shades rather than making them, at roughly 48 by 72 inches from Home Depot, so this is a hanging trick rather than a build. The trick is a good one: the shades are wider than the windows and were hung about a foot above them, which reads as a much taller, larger opening than the average sized windows actually are. One honest caveat from the author, they are slightly see through, and a blackout lining may be wanted in a bedroom.
Get the full tutorial at Dwellings by DeVore.
19. $12 DIY Roman Shade Made From A Mini Blind
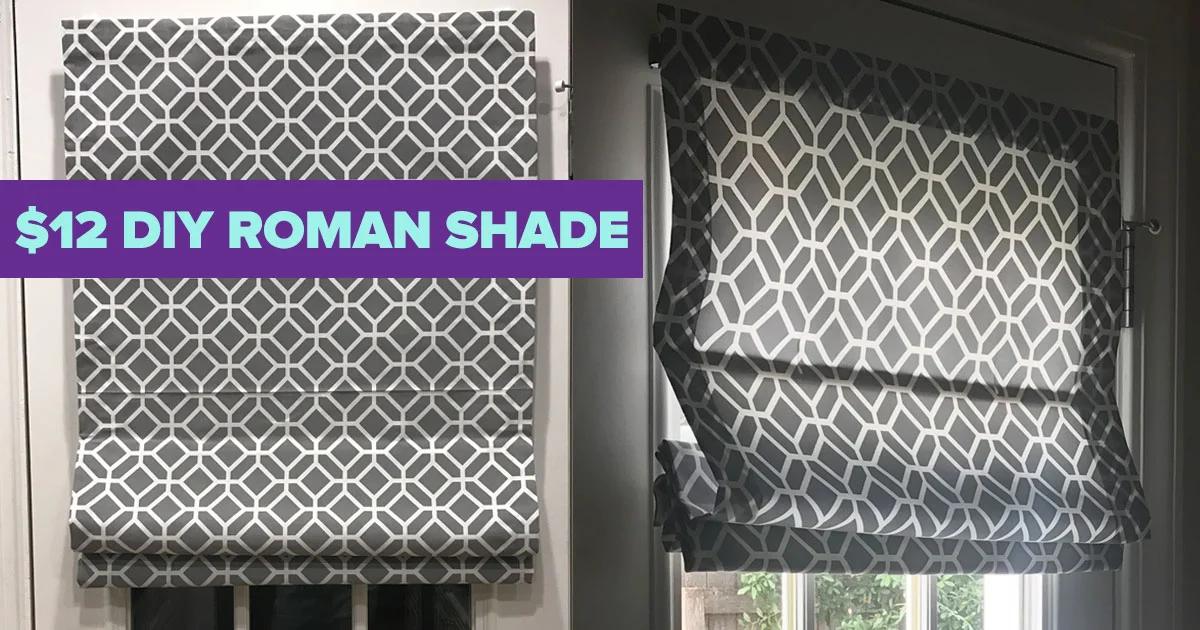
A gray and white quatrefoil Roman shade folded into soft horizontal pleats, built over a cheap mini blind for about twelve dollars. This one is Sueeye’s own, with a full video, and it needs no sewing skill at all: fabric glue and careful measuring do the whole job. Buy a cordless mini blind cut to your window, lay the extended blind over the fabric and mark a three inch allowance all round, cut, then fold a one and a half inch margin on each side and iron a crease the whole way around. Fabric glue goes inside every crease.
Get the full tutorial at Sueeye.
20. No Sew Fabric Covered Roller Shade
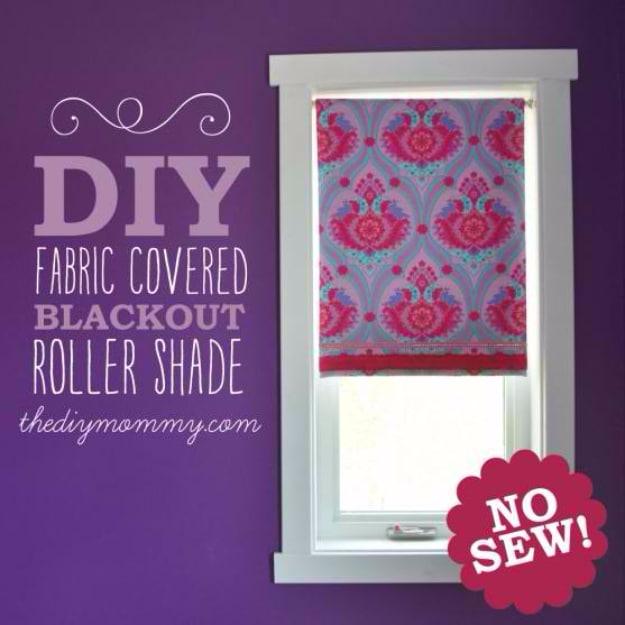
A cheap white vinyl roller blind covered in a pink and purple folk floral, fitted inside the casing of a child’s bedroom window. The starting point is the cheapest vinyl roller shade you can find, and the whole project is attaching fabric to it without any needle holes, which would show as pinpricks of daylight once the sun came through. Spray adhesive does it, and the shade still rolls properly afterward. One decision to make first: an inside mount looks neater against nice window trim, an outside mount that meets the wall gives genuine blackout.
Get the full tutorial at Cozy DIY Home.
21. Easy Burlap Shades
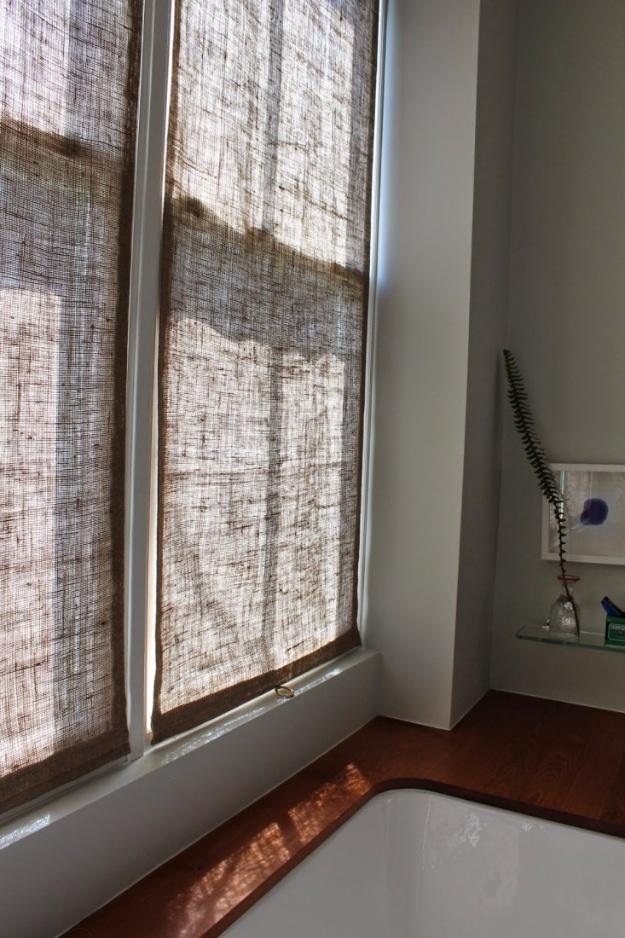
Three natural burlap panels covering a bathroom window, backlit so the weave glows, above a wooden ledge and a white tub. Remodelista’s numbers make the case: five hours for all three panels and under twenty dollars each, against the price of anything comparable. Upholstery grade all cotton burlap is the fabric, about one yard per window from a forty inch bolt, and the maker’s own verdict is that burlap is surprisingly easy to sew and takes a seam very easily. Spring loaded tension rods hold them in the reveal with no hardware at all. Expect to be covered in lint by the end.
Get the full tutorial at Remodelista.