Organizing Ideas
24 Impressive DIY Trash Cans and Recycle Bins
DIY trash cans to make: fabric bins, rope and yarn wrapped cans, a pallet recycle bin, a pull out cabinet bin and painted makeovers, each with a tutorial.
Nobody shops for a trash can. You buy the cheapest plastic one at the store, shove it under the sink and then spend the next six years looking at it every single day. That is the whole argument for a DIY trash can, and it is a better argument than it sounds. Most of these are an afternoon and under twenty dollars, because you are decorating a bin you already own rather than building one from scratch. There is a fabric one held open with an embroidery hoop, a bucket wrapped in fifty feet of rope, a pallet recycle bin with a hinged lid, and a kitchen can on casters sized to whatever gap you actually have. Every idea below links back to the person who worked it out.
1. Make A Fabric Trash Can
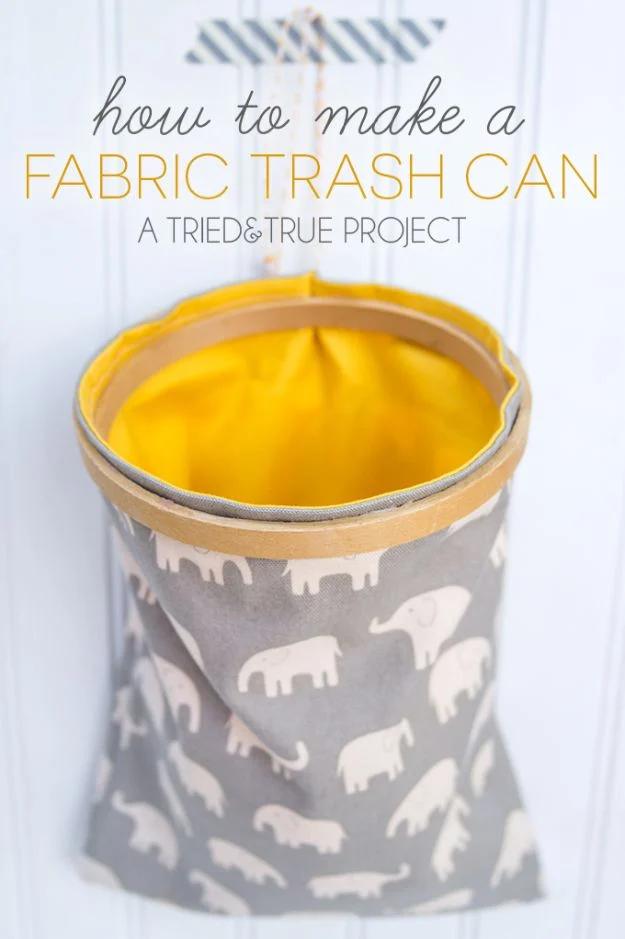
Gray elephant print on the outside, sunshine yellow lining inside, and a wooden embroidery hoop holding the mouth wide open. Tried and True cuts two pieces of fabric 8.5 by 11 inches on the fold and uses a plain sheet of printer paper as the template, which is the kind of shortcut that makes a project feel possible on a weeknight. The whole thing is four straight seams. The lining gets turned right side out through a small hole opened with a seam ripper, then stitched shut, and a 5.25 inch hoop drops in at the top to keep the shape. Add a loop of string and it hangs beside a sewing table.
Get the full tutorial at Tried and True Creative.
2. DIY Rope Trash Can
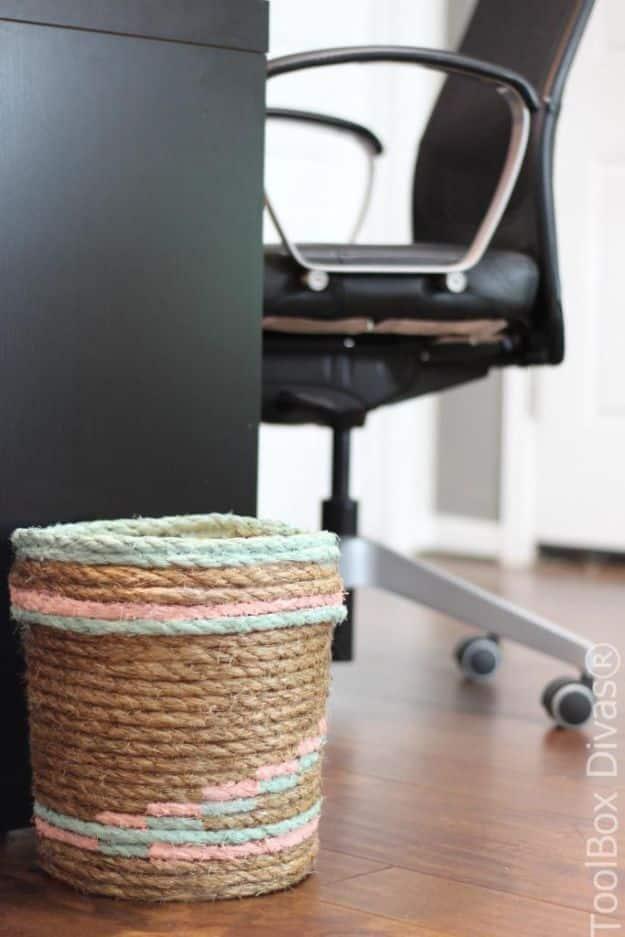
A plain bucket wrapped from the base up in sisal rope, then banded with pink and mint paint so it reads as decor instead of a bucket. Toolbox Divas cuts the handle off with utility scissors first, then hot glues roughly fifty feet of rope around the outside, working from the bottom upward. The tip worth stealing is the cleanup. Lay a thin cloth over the finished rope and press a hot iron over it, and the glue webs melt away instead of sitting there catching the light. Be careful, because that glue runs seriously hot.
Get the full tutorial at ToolBox Divas.
3. DIY Glitter Trashcan
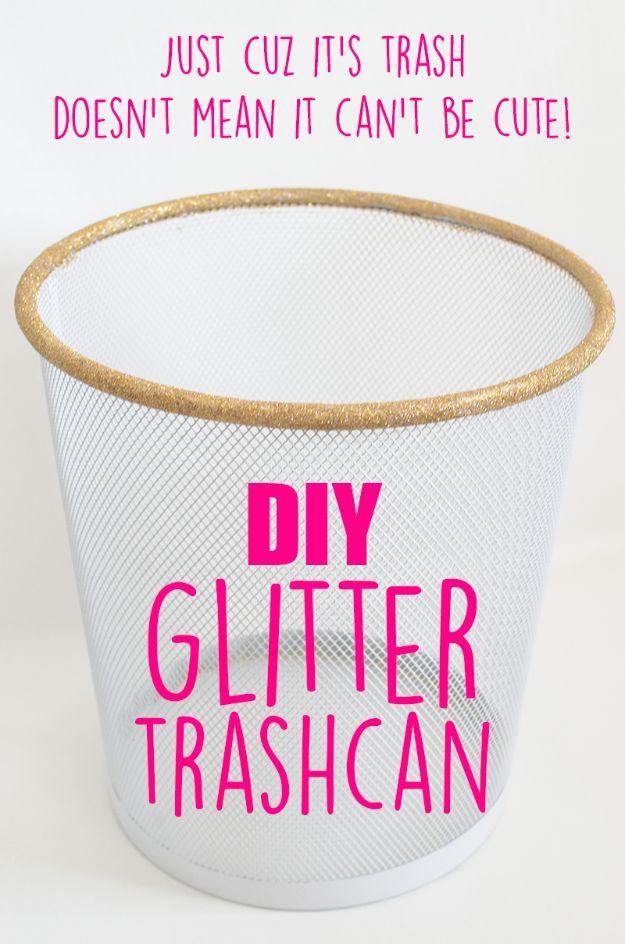
A white mesh office can with a gold glitter rim, which is about as much glitter as a grown adult can defend. The Bold Abode sprays a liberal coat or two of white over the original silver, then builds the rim in layers: DecoArt Decoupage, glitter into the wet medium, dry, another coat of decoupage, more glitter, and finally two sealing coats on top. That last pair is the whole point, because without them the glitter migrates onto everything you own. Expect overspray on whatever is nearby, so paint outside or on newspaper.
Get the full tutorial at The Bold Abode.
4. 15 Minute DIY Spotted Trash Can
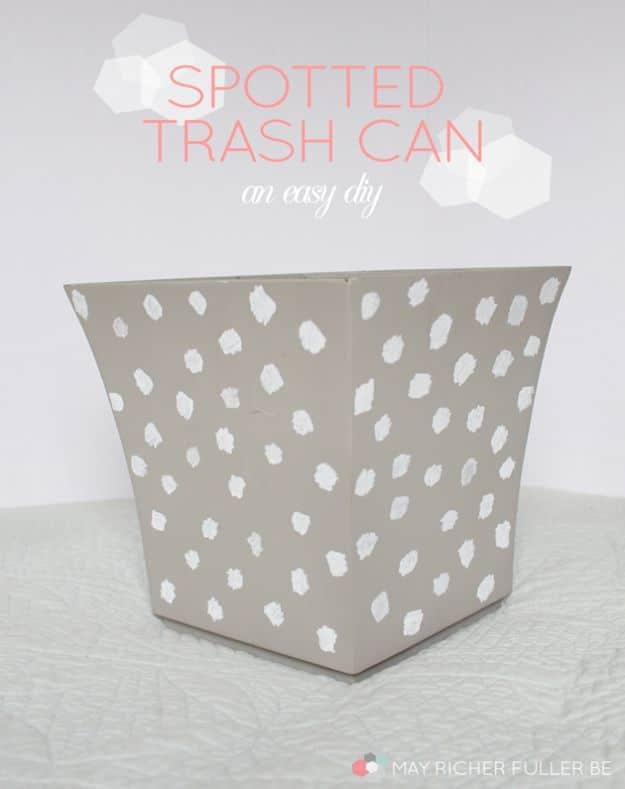
Irregular white spots scattered over a gray tapered can, somewhere between leopard and polka dot and deliberately not even. May Richer Fuller Be did the whole thing with a white paint pen in about fifteen minutes, freehand, no stencil and no measuring. The can underneath was copper originally and had already been painted gray with Annie Sloan chalk paint a couple of years earlier, which is worth knowing if yours is shiny metal: the chalk paint is what gives the pen something to grip. Fifteen minutes is not an exaggeration here.
Get the full tutorial at May Richer Fuller Be.
5. DIY Ice Cream Cone Trash Can
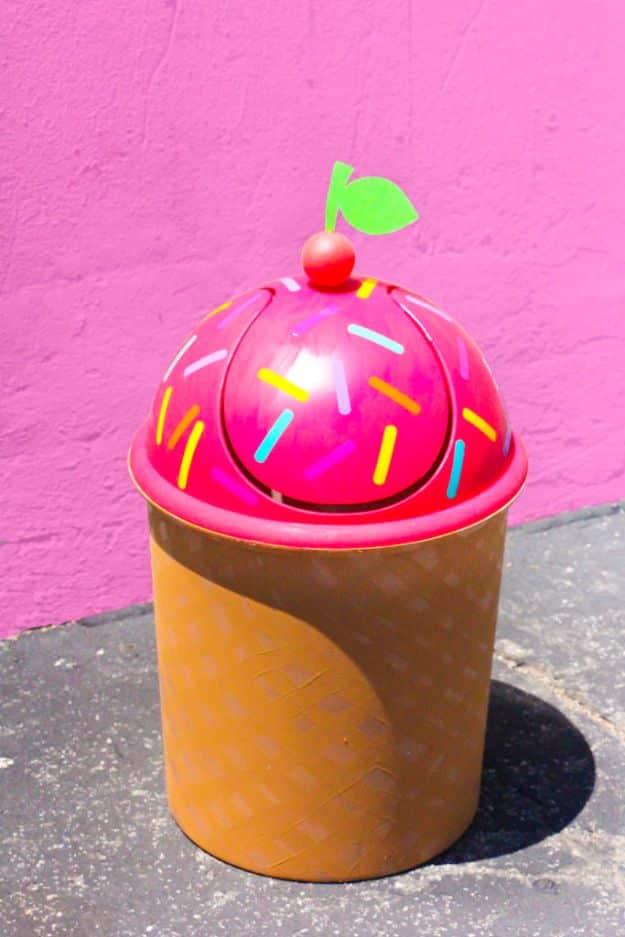
A hot pink domed lid dotted with painted sprinkles and a cherry on top, over a tan waffle cone base, photographed against a pink wall. Brite and Bubbly sprays the lid pieces hot pink and the base light brown, then leaves both overnight before touching them again. The cherry is a red ping pong ball hot glued to the center of the swing panel, with a green cardstock stem cut alongside it. The sprinkles are shapes cut from colored sticker vinyl, and a coat of Mod Podge seals them down. The cone texture is a basket weave brushed on freehand in brown acrylic.
Get the full tutorial at Brite and Bubbly.
6. Easy DIY Pantone Trash Can
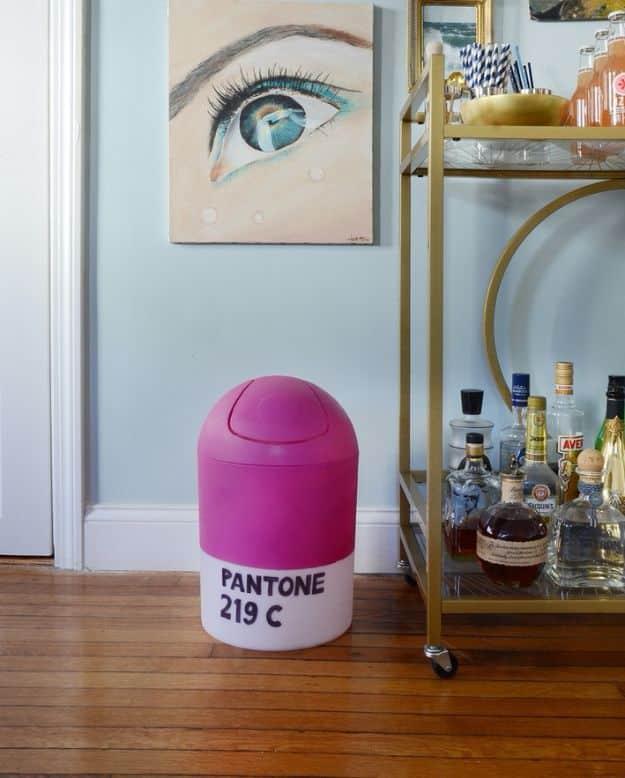
A magenta and white swing lid can hand lettered PANTONE 219 C, parked next to a gold bar cart like it belongs there. Curbly uses Montana Gold acrylic spray paint for the color range, and two of the prep steps are the ones people skip. Tape the lid shut from the inside so it does not flap mid spray, and seal any gaps so paint cannot creep inside. A tape line about two thirds down with a plastic bag hung below it masks the base. Then hand write PANTONE and the closest matching number in black permanent marker.
Get the full tutorial at Curbly.
7. Yarn Wrapped Trash Can DIY
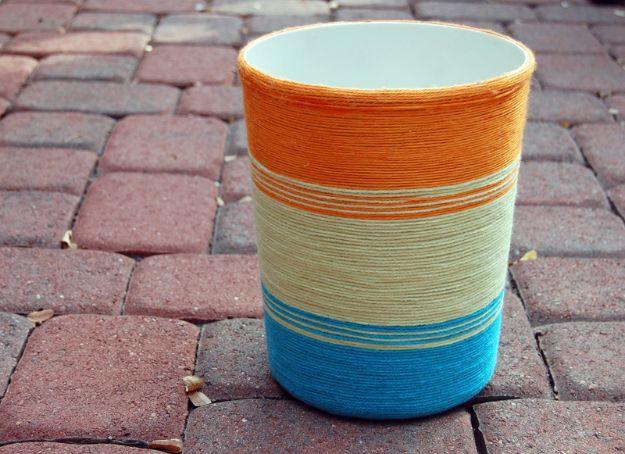
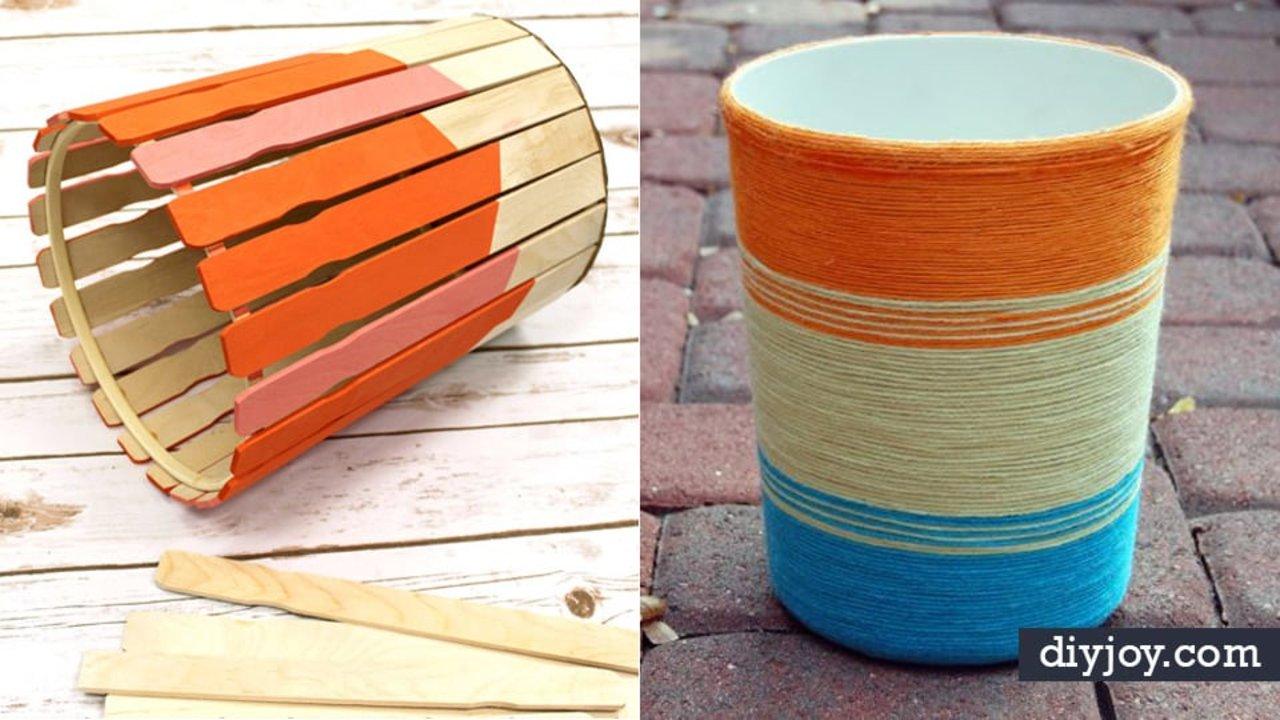
Bands of orange, cream and turquoise yarn wrapped tight around a fabric sided can, sitting out on brick pavers. Jocelyn Naquin uses Aleene’s Original Tacky Glue spread with a foam brush in one to two inch sections, starting at a seam at the top so the join hides itself. Halfway down, flip the whole can upside down. It sounds fussy and it genuinely makes the wrapping faster and neater. Do not pull the yarn tight around curves or it will slide, and hide every color change at the back. Start to finish it ran half an hour to an hour.
Get the full tutorial at Jocelyn Naquin.
8. Disk Trash Can
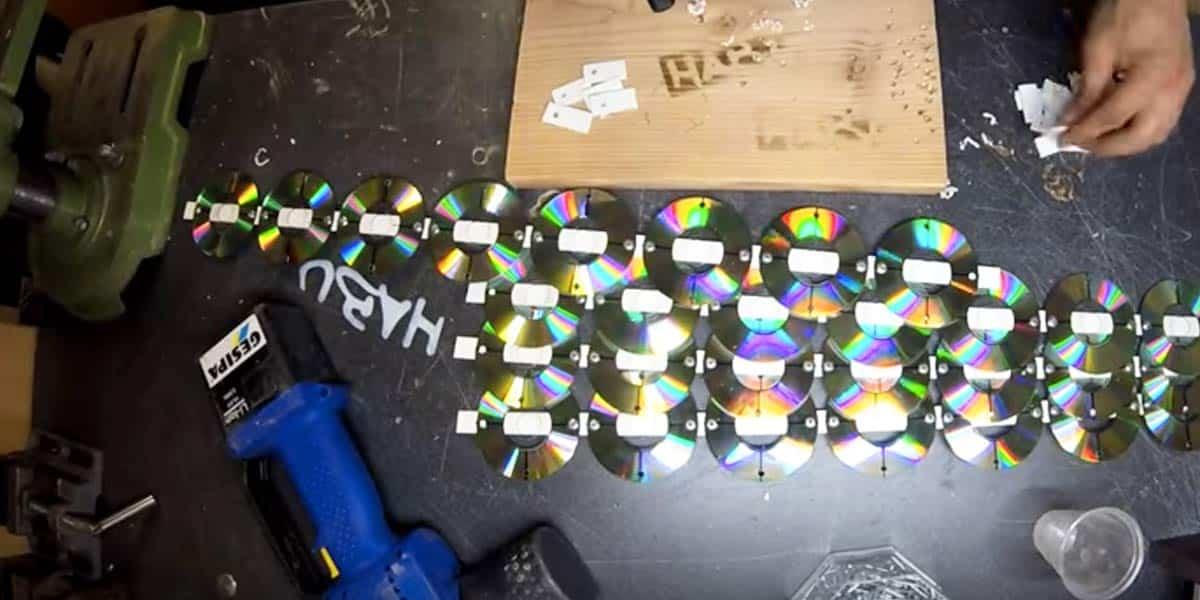
Rows of old CDs clamped flat on a workbench, glue gun at the ready, on the way to becoming a bin that throws rainbows across a wall whenever the light hits it. The discs get laid edge to edge into panels and the finished can is spray painted silver, though any color works if silver is too spaceship for the room. It is a genuinely good use for the stack of burned CDs nobody has been able to throw away since about 2006. Clamp each row flat while the glue sets, because a panel that bows will not meet its neighbour cleanly.
Get the full tutorial at Sueeye.
9. DIY Popcorn Tin Trash Can
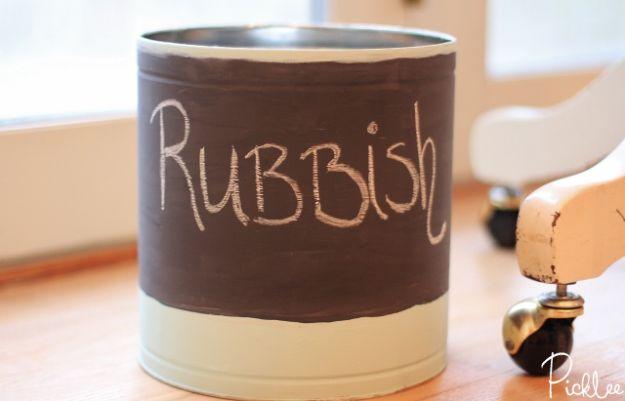
A holiday popcorn tin painted dark brown over cream with the word Rubbish written across it in chalk. Picklee uses two DecoArt Chalky Finish colors, Relic on top and Refreshing on the base, taped along the natural line already pressed into the tin so you do not have to measure a thing. Paint the upper section first and let it dry fully before taping and doing the bottom, which gives a far cleaner edge. An hour of drying, then a light coat of Ultra Matte Varnish. Chalky paint means the label rewrites whenever you like.
Get the full tutorial at Picklee.
10. DIY Book Page Waste Can
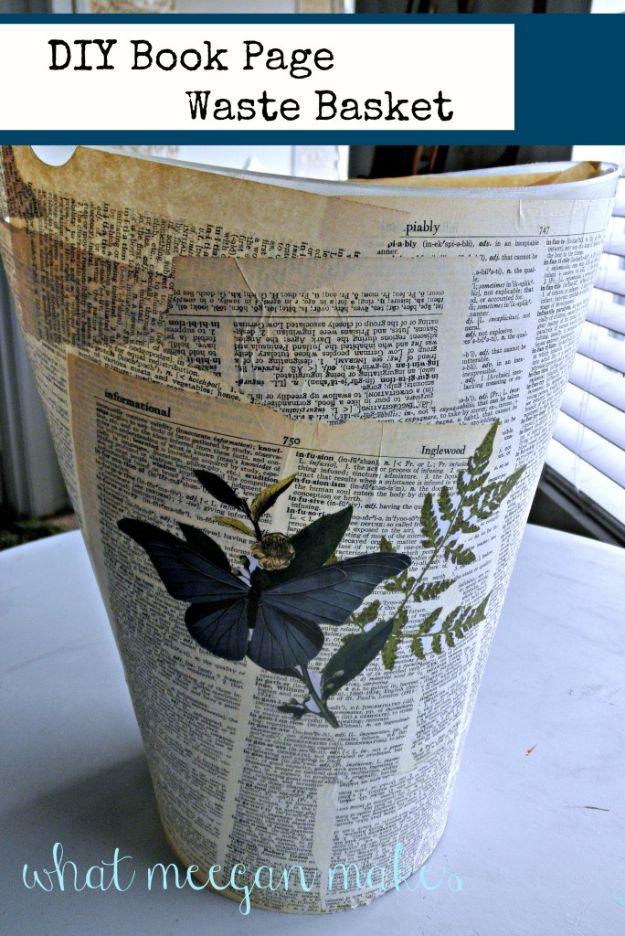
A plain plastic wastebasket covered in vintage dictionary pages with a pressed black butterfly and a fern laid over the front. Meegan Makes brushes washable Mod Podge onto the plastic, lays the pages down and then brushes more over the top, which is the moment wet paper tears if you rush it. Torn smaller pieces fill in around the top and bottom rims where a full page will not sit flat. Thick smooth coats of Mod Podge go over the whole thing before the botanical cut outs go on. Wrapping paper or scrapbook paper works just as well.
Get the full tutorial at What Meegan Makes.
11. Paint Stir Stick Trash Can DIY
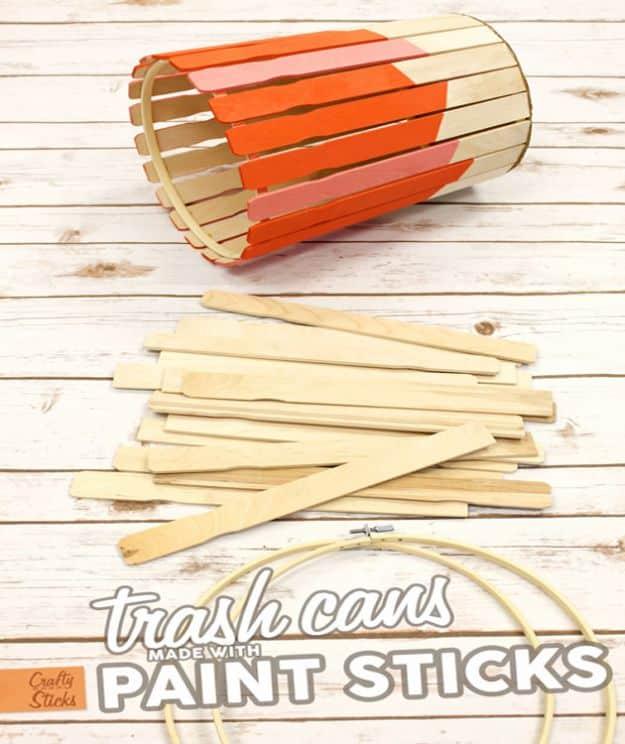
Free paint stir sticks, dipped orange at one end, standing shoulder to shoulder in a ring to make an open slatted bin. Crafty Sticks is blunt about the order of operations: paint the sticks first, because painting them once they are glued in place is miserable. Two embroidery hoops do the structural work, a 9 inch set being the size used, and the metal hardware has to come off the hoop before the top one goes in. A cardboard circle traced off the base and glued underneath closes the bottom. A commenter counted roughly twenty sticks.
Get the full tutorial at Crafty Sticks.
12. Chevron Trash Can
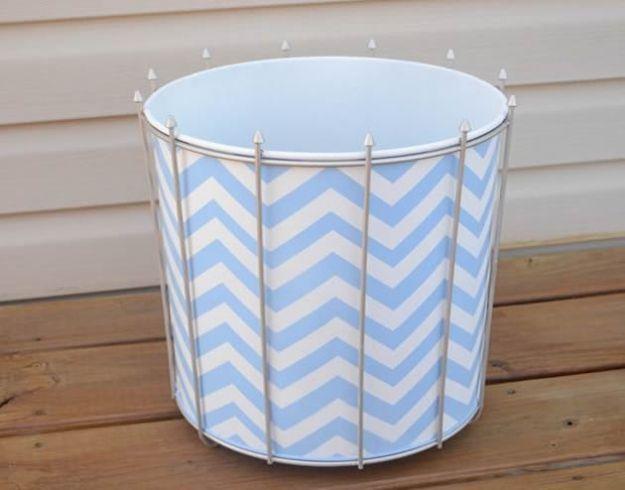
A blue and white chevron panel wrapped inside a white wire frame can, photographed out on a deck. The wire cage is doing something clever here, because the zigzag sheet does not need glueing to anything. It sits between the frame and the liner, held in place by the spokes, which means it can be swapped for a different pattern whenever the room changes. Wire frame cans like this one turn up cheap at every big box store. No adhesive, paper stock or measurement is claimed here, because the source page could not be read to confirm any of it.
Get the full tutorial at Infarrantly Creative.
13. DIY Newspaper Trash Can
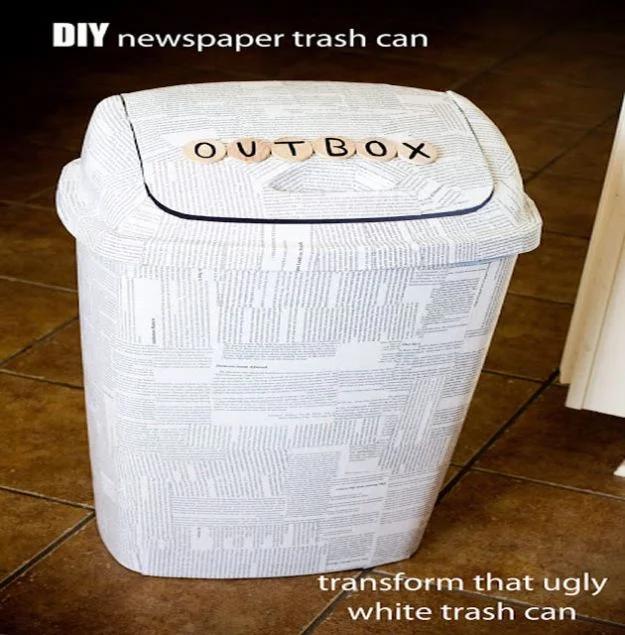
An ordinary white kitchen can covered in torn book print with wooden letter tiles spelling OUTBOX across the lid. The Kubler Homestead tears pages from an old book, trims the margins off and cuts them into strips of deliberately different widths, then Mod Podges them on. Varying the widths is what stops it looking like wallpaper. The whole job ran about an hour and a half and cost $2.99, and the $2.99 was the wooden letters from the craft store, since everything else was already in the cupboard. That is a very good return on three dollars.
Get the full tutorial at The Kubler Homestead.
14. Turn A Stool Into A DIY Trash Can
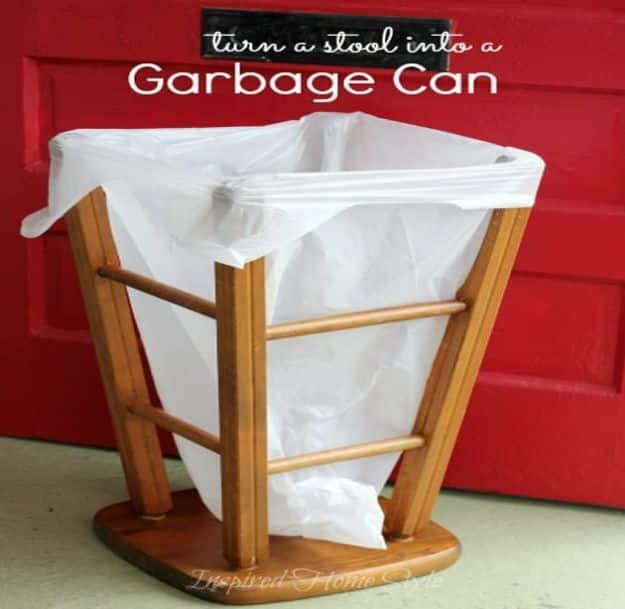
A wooden bar stool flipped upside down with a white bag stretched over the four legs, standing against a red garage door. That is the entire project. No tools, no paint, no shopping trip. It will not replace the bin under the sink, but it solves the specific problem of a barbecue or a birthday party where the kitchen can filled up an hour ago and people started stacking plates on the counter instead. Inspired Home Style used one at an occasional shop. Turn the stool over, stretch the bag across the legs, done.
Get the full tutorial at Inspired Home Style.
15. Recycling Pallets Into A Rustic Recycle Bin
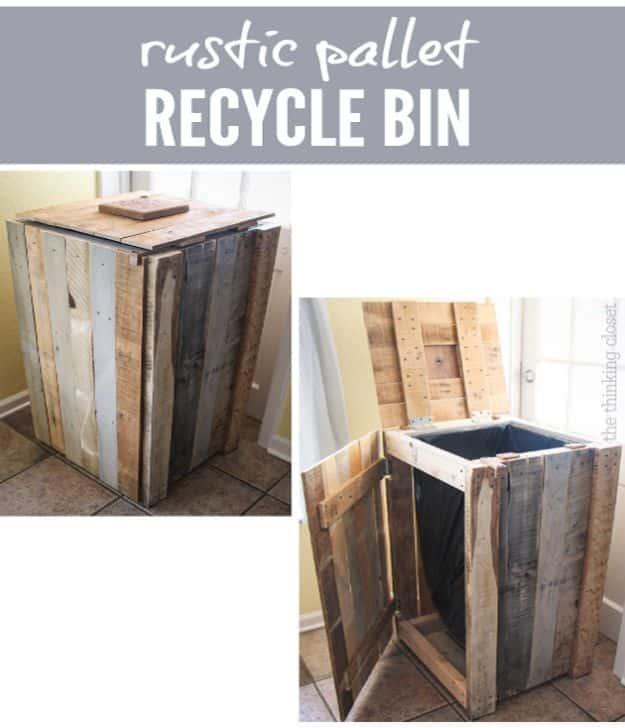
A tall pallet wood box with a hinged lid and a hinged side door, so the bag comes out without a wrestling match. The Thinking Closet builds two 19 inch square frames joined by four 40 inch legs, with a smaller inner frame just under 16 inches square whose only job is gripping the bag rim so it stops sliding down inside. Pallet boards are cut to 39 inches to leave the bottom clear of the ground. Roughly two pallets’ worth of wood plus two 2x4x8 pine studs, four hinges and anti skid pads underneath.
Get the full tutorial at the thinking closet.
16. Laundry Lint Bin
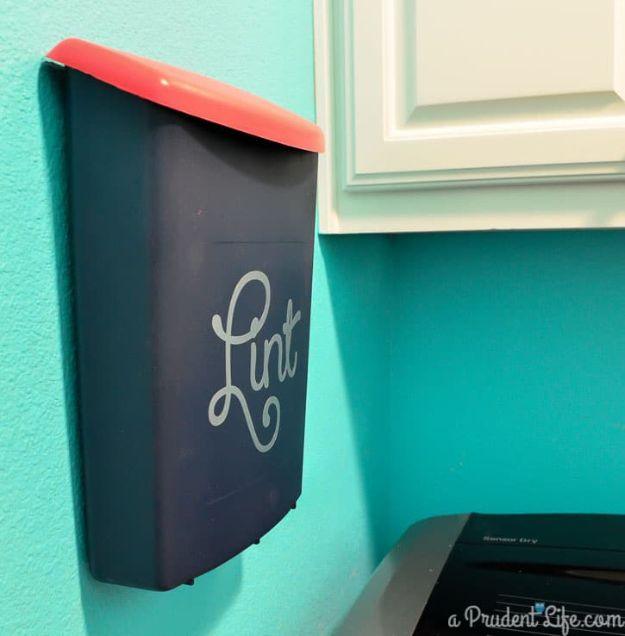
A navy wall mounted bin with a coral lid and Lint lettered across it in silver, hung on a teal laundry room wall above the dryer. Polished Habitat started with one of those brochure boxes estate agents stake by the curb, which is a genuinely inspired thrift. It gets plastic primer first, then navy spray paint, then craft paint on the lid, and a silver vinyl label cut on a Cricut. The box already has hangers moulded into the back, so it goes up on two screws and lifts straight off to empty. Shallow enough that it reads as decor.
Get the full tutorial at Polished Habitat.
17. Convert A Cabinet Into A Pull Out Trash Bin
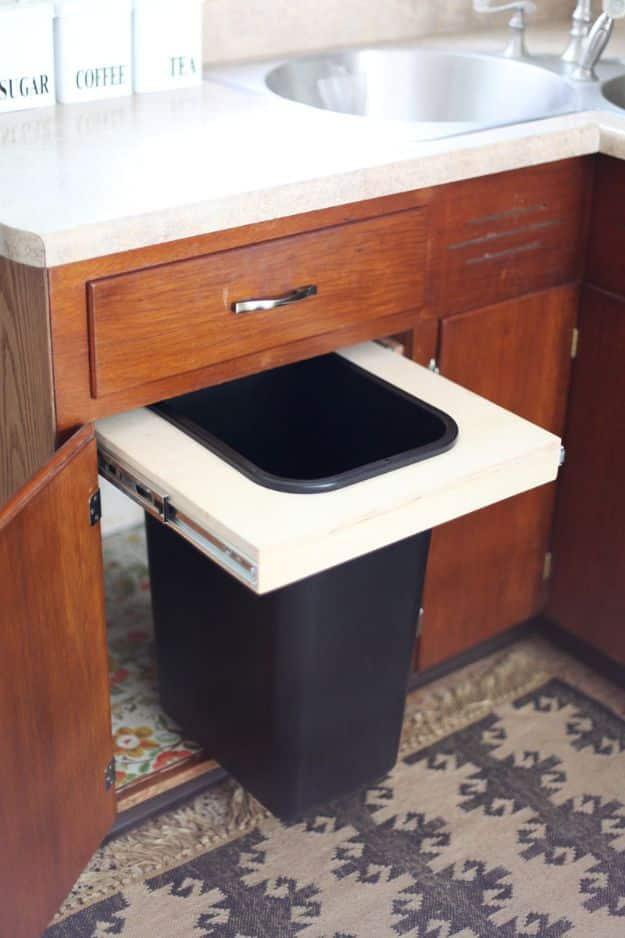
An oak base cabinet with its door open and a tall black bin riding out on a plywood shelf. A Beautiful Mess screws two lengths of one by three to the cabinet walls at the height of the can plus an inch, mounts full extension drawer slides on those, and builds a plywood platform with a three sided apron glued on for stiffness. The can does not sit on top of it. Its outline is traced onto the platform, a second line is drawn a quarter inch inside with two pencils taped together, and that smaller shape is jigsawed out so the rim catches and the body hangs below.
Get the full tutorial at A Beautiful Mess.
18. DIY Car Trash Can
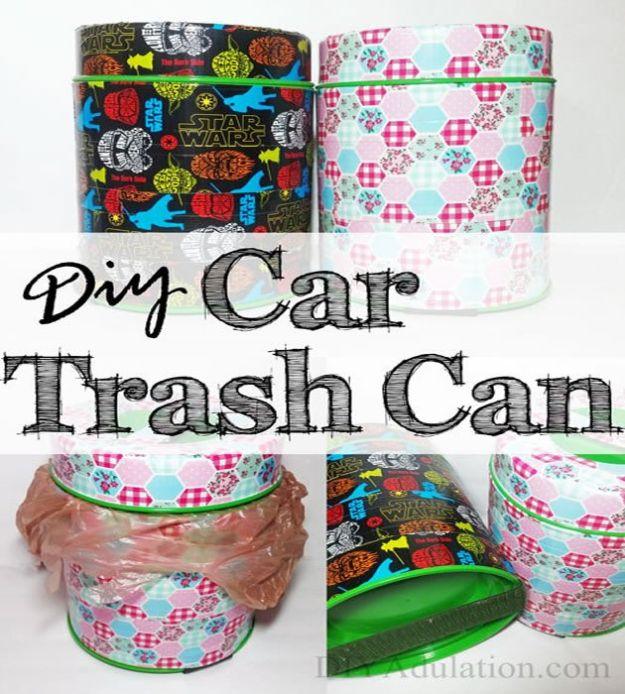
Two lidded plastic tubs covered in duct tape, one in a Star Wars print and one in pink florals, lined with a grocery bag. DIY Adulation uses 2 inch wide velcro on the base, and only the stiff hooked half of it, because the carpet in the footwell acts as the soft side all by itself. That is the tip that makes this work, since a loose bin in a car ends up under the brake pedal. Duct tape goes on in overlapping rows, the lid is covered separately with the edges folded round the handle, and spare bags live in the bottom.
Get the full tutorial at DIY Adulation.
19. Embellished Trash Can
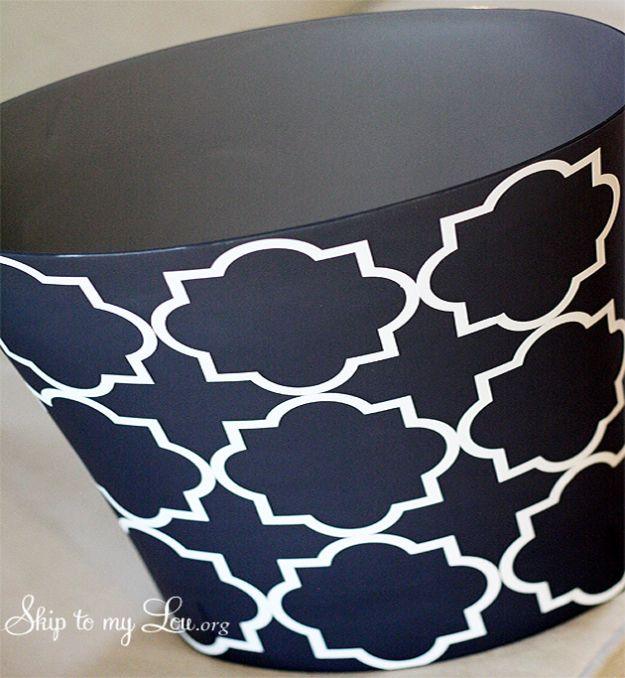
A navy oval bin patterned with white quatrefoil outlines, the kind of thing that costs sixty dollars at a home store. Skip To My Lou downloads a quatrefoil shape from the Silhouette site, sizes it to the can and cuts as many as will fit from vinyl, then lifts each one with transfer paper and burnishes it down with a scraper. The advice that saves an afternoon is about shape: a straight sided can works far better than a slanted one, because angled walls make every individual shape sit slightly wrong.
Get the full tutorial at Skip To My Lou.
20. Patio Recycling Bin
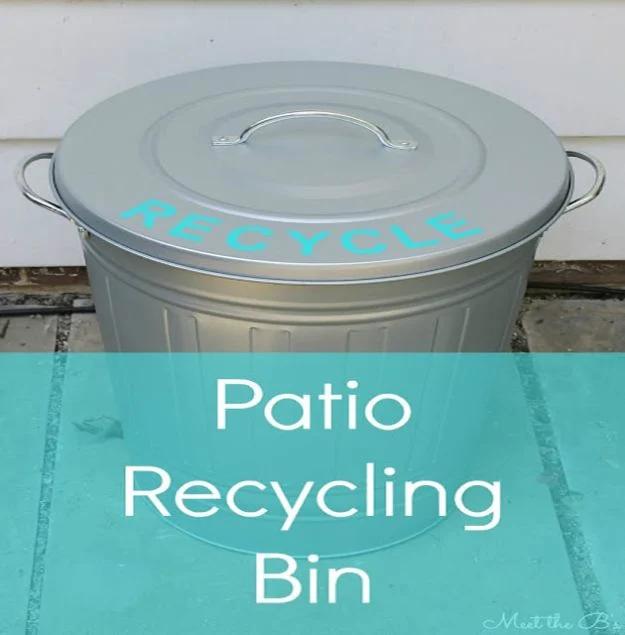
A galvanized lidded can with RECYCLE spelled out in teal vinyl curving across the lid, for the bottles and cans that pile up on a patio table every summer evening. The Inspired Hive starts with a metal trash can from IKEA and cuts a simple font on a Silhouette. The method is what makes the curve work: each letter is transferred individually on its own piece of contact paper rather than the whole word at once, so you can walk the letters around the dome of the lid and keep them level. Contact paper stands in for transfer paper cheaply.
Get the full tutorial at The Inspired Hive.
21. Make A Kitchen Trash Can That Fits Any Space
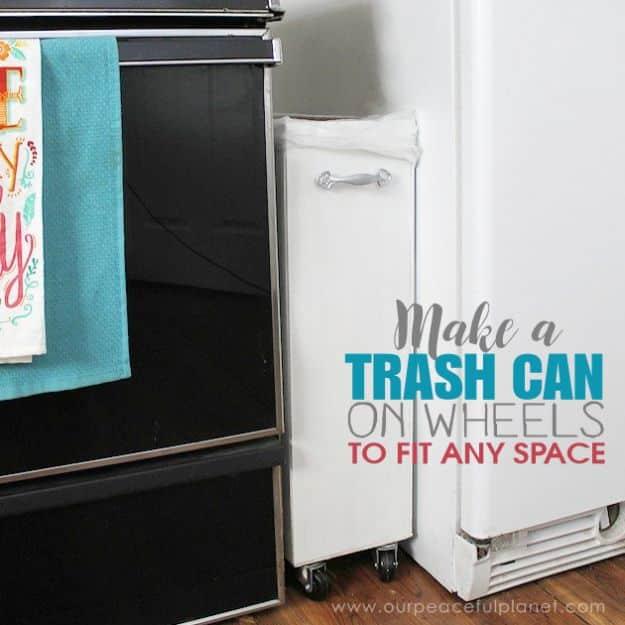
A slim white bin on casters, built to wedge into the gap between an oven and a fridge where no shop bought can would ever fit. Craft Your Happiness measures the space first and cuts everything to suit, which is the entire point of building rather than buying. Quarter inch luan plywood forms the box over 1×2 bracing ripped in half, assembled with wood glue and a brad stapler, then painted. Two inch swivel casters go into the bottom corners so it rolls out for cleaning, a handle goes on the front and clear 33 gallon bags line it.
Get the full tutorial at Craft Your Happiness.
22. DIY Trash Bin With Butcher Block
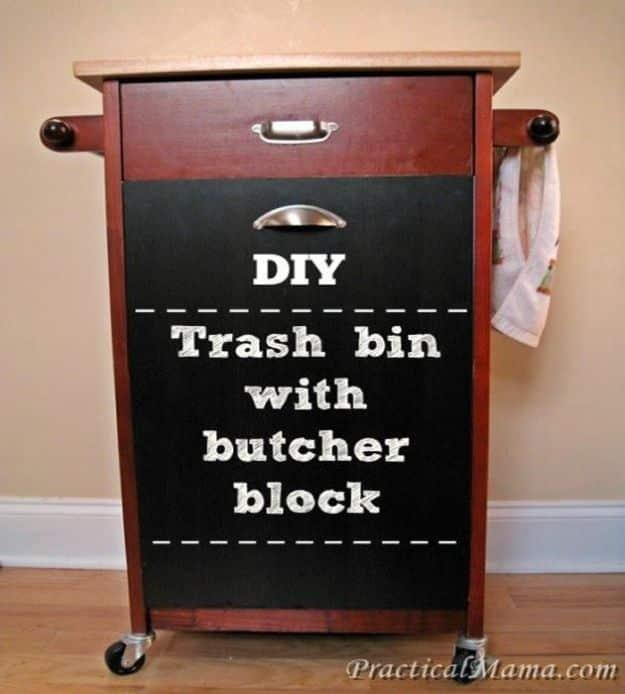
A cherry finished rolling kitchen cart with a butcher block top and a hinged door hiding a 13 gallon bin inside. Practical Mama assembles a Lowe’s kitchen cart but leaves the wire baskets out entirely, then hangs a wood door panel found in the IKEA As Is section for fifty five cents. The bin hangs off the back of the door with wood padding spacing it, so it swings out with the door. Screw hooks and a short length of chain stop the door falling all the way open. On casters it rolls to the counter while you prep.
Get the full tutorial at Practical Mama.
23. T-shirt Trash Can Twist
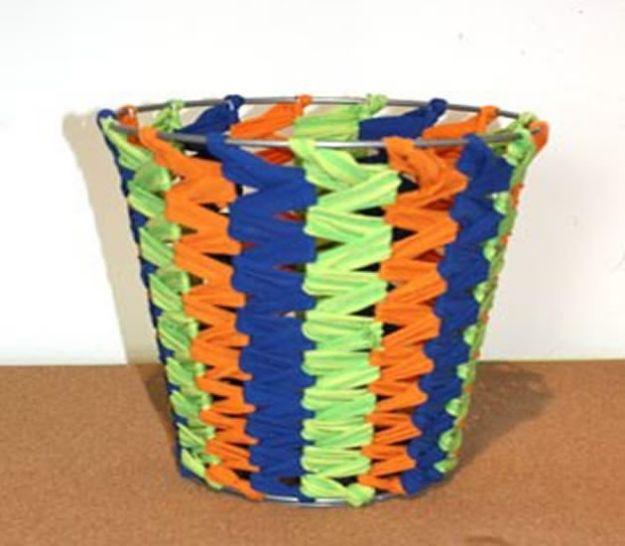
Navy, orange and lime jersey strips woven over and under the spokes of a wire frame can, which turns an ugly frame into something that looks like a basket. Replayground cuts three old t-shirts into seventeen strips measuring 40 inches long by 2 inches wide. Each strip gets tied to a spoke near the bottom, then wrapped over the next spoke to the right, up between the two, back around the first and up again, all the way to the rim. Knot it at the top and tuck the tail back down into the weave. About an hour.
Get the full tutorial at RePlayGround.
24. Recycled Waste Into Trashcan
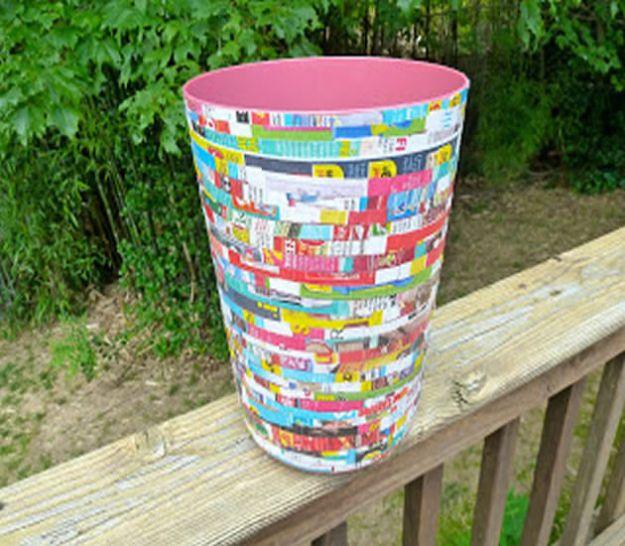
A white can covered in hundreds of narrow paper strips in every color, balanced on a deck rail with green woods behind it. Make It Easy Crafts cuts junk mail, flyers and advertising into strips, varying the thickness but starting around a quarter inch, and a paper shredder does the cutting in seconds if you have one. Tacky glue goes round the rim, strips overlap and connect downward, smaller pieces fill the gaps, and gloss Mod Podge seals the lot. Wrinkles are wanted here, not a flaw. The finished thing looks uncannily like a quilt.
Get the full tutorial at Make It Easy Crafts.