Clothes Sewing Projects
18 DIY Zipper Crafts to Make With Leftover Zippers
DIY zipper crafts and projects: a self zipping coin purse, a rainbow zipper pencil case, zipper rosettes, apple containers and a free camper pouch pattern.
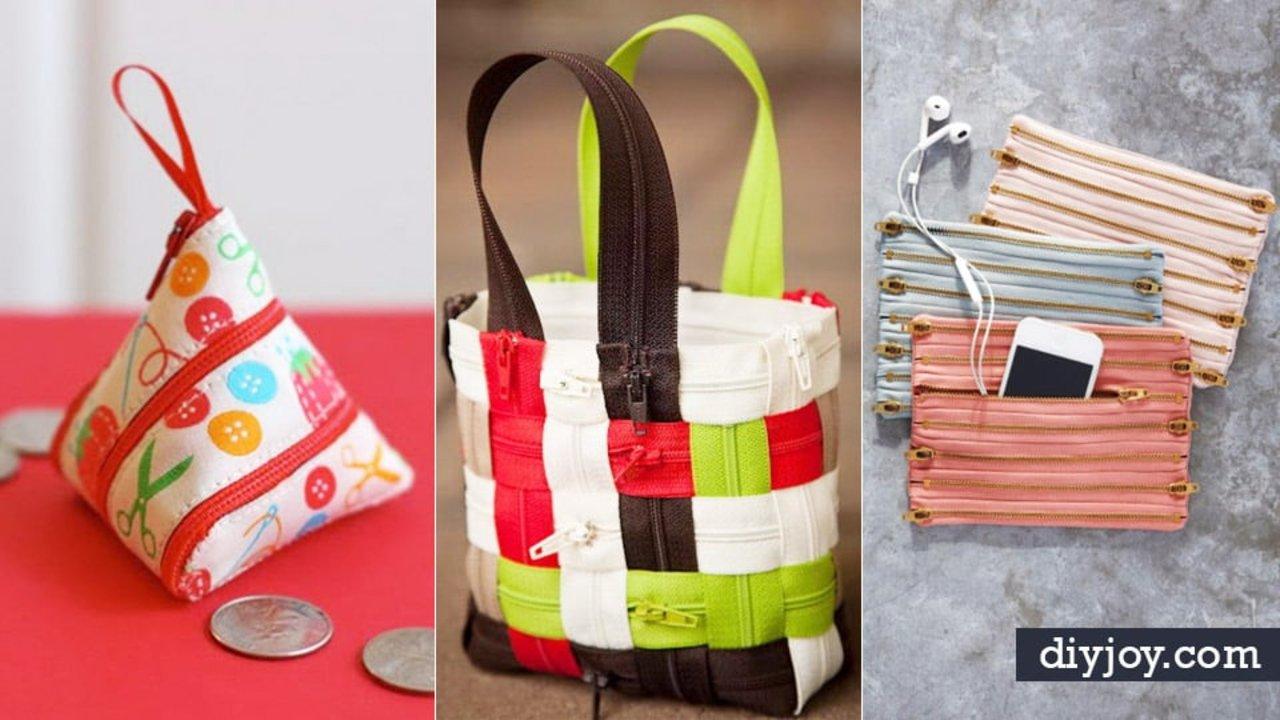
There is a drawer in every sewing room with nine zippers in it and no plan for any of them. This is the plan. DIY zipper crafts turn that pile into things you will actually carry, wear and hand over as gifts, and the range is wider than anyone expects from a notion that costs two dollars. Wound flat, a zipper becomes a rosette that dresses up a pair of plain shoes. Sewn side by side, it becomes a rainbow pencil case. Folded and pinched along the tape, it becomes a flower. Hot glued around a cut soda bottle, it becomes a lidded apple. The sewing projects start with a basic lined pouch and work up to a crossbody bag with pockets front and back, and the no sew ones need nothing but scissors, a lighter and glue. Every outside project links back to the maker who worked it out.
1. Self-Zipping Coin Purse
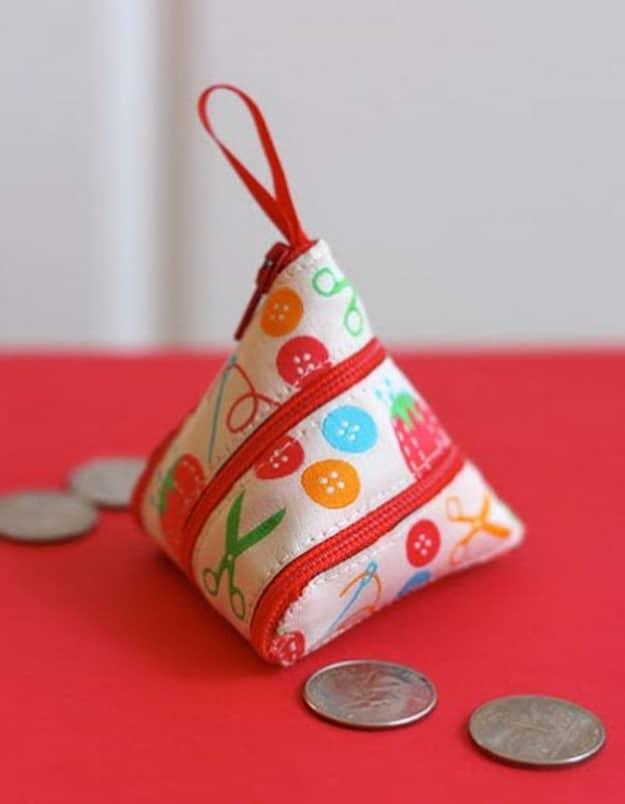
A pyramid coin purse that builds itself: you start zipping and the zipper spirals around, pulling the tape into a three sided pouch as it closes. It is genuinely a magic trick the first time, and it takes one zipper, a strip of fabric and some seven eighths inch ribbon for the pull tab. Lining is optional, but the lined version is the one to copy, because it adds stability and a more finished look. Machine sew what you can and slip stitch the lining by hand, roughly an hour per purse.
Get the full tutorial at How About Orange.
2. Zipper Pencil Case
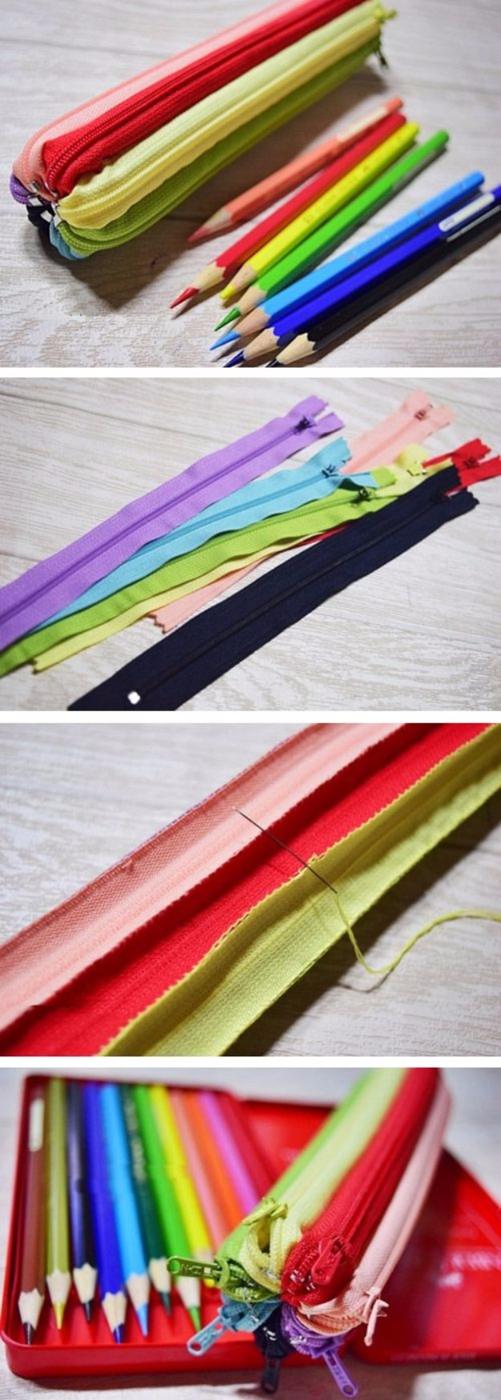
Six or seven nylon zippers in rainbow order, sewn edge to edge until the whole panel is nothing but zipper, then folded and closed with one of them. Only the top zipper actually opens; the rest are structure and stripes. Butt two tapes together without overlapping and join them with a narrow zigzag so the case stays flexible, and press as you go, because a stack of nylon tape wants to curl. Pick one contrasting color for the working zipper so a child can find the right pull without thinking.
Get the full tutorial at Handmadiya.
3. Zippered Crossbody Bag
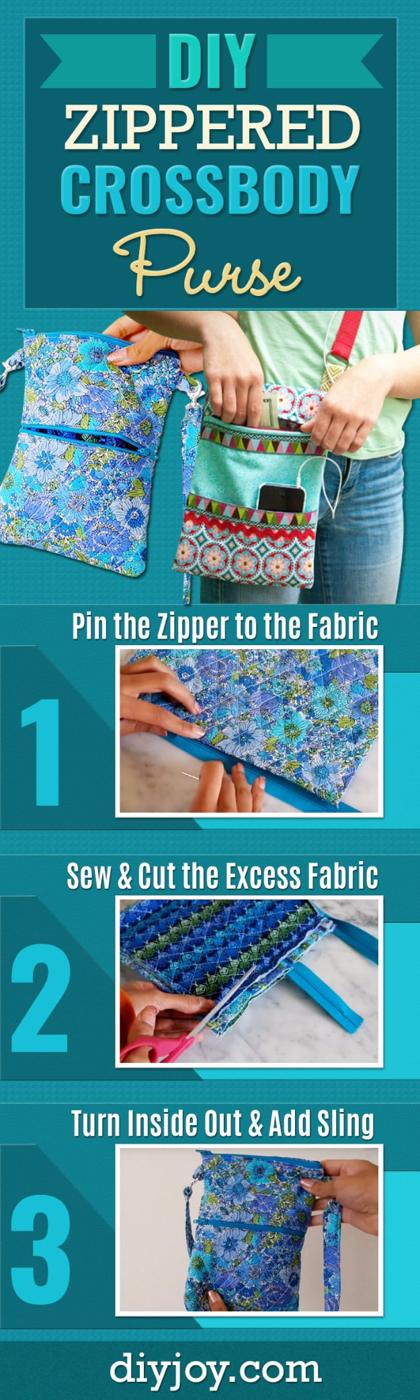
A flat crossbody with open pockets and zipper pockets front and back, inside and out, which is the difference between a bag you like and a bag you use every day. It is roomy enough for a tablet and still reads as a purse rather than a satchel. A fat quarter bundle is the shortcut worth taking, because four coordinating prints in small cuts is exactly what this pattern eats, and rick rack along a seam costs pennies. Add the adjustable strap hardware and it will fit over a coat in winter.
Get the full tutorial at Sueeye.
4. Easy DIY Zippered Wristlet
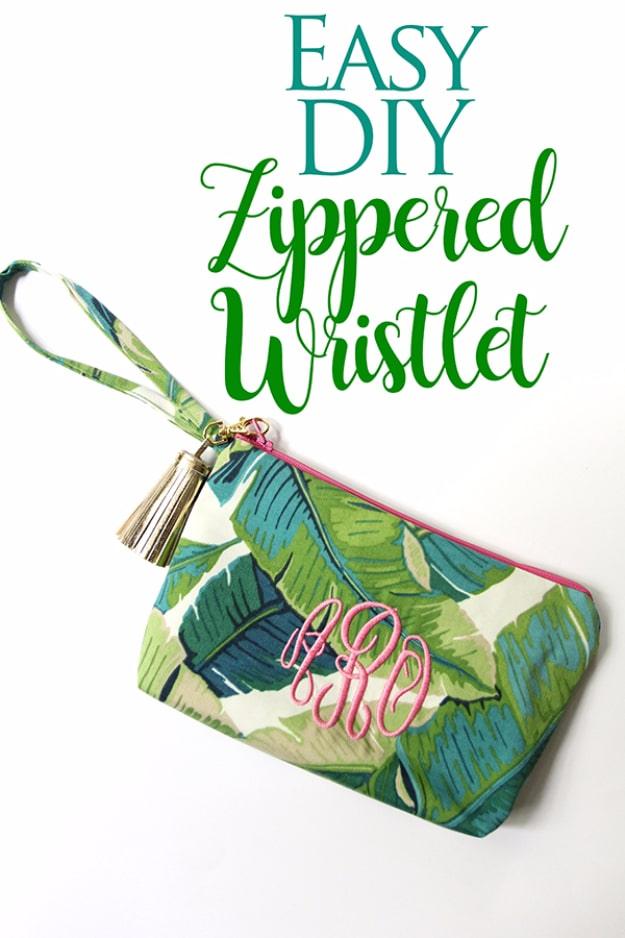
A flat lined wristlet in a banana leaf print with a nine inch zipper, a monogram and a leather tassel, and the cut list is short enough to memorize: main fabric ten and a half by fourteen and a half inches, strap sixteen by two, interfacing the same size as the main piece. Iron the interfacing on first, sew each zipper side face down to a top edge, then stitch up the sides with the strap pinned inside. Box the corners by measuring an inch and a half down from each tip if you want it to stand up. Under an hour.
Get the full tutorial at Less Than Perfect Life of Bliss.
5. Zippered Plastic Bottle Apple Containers
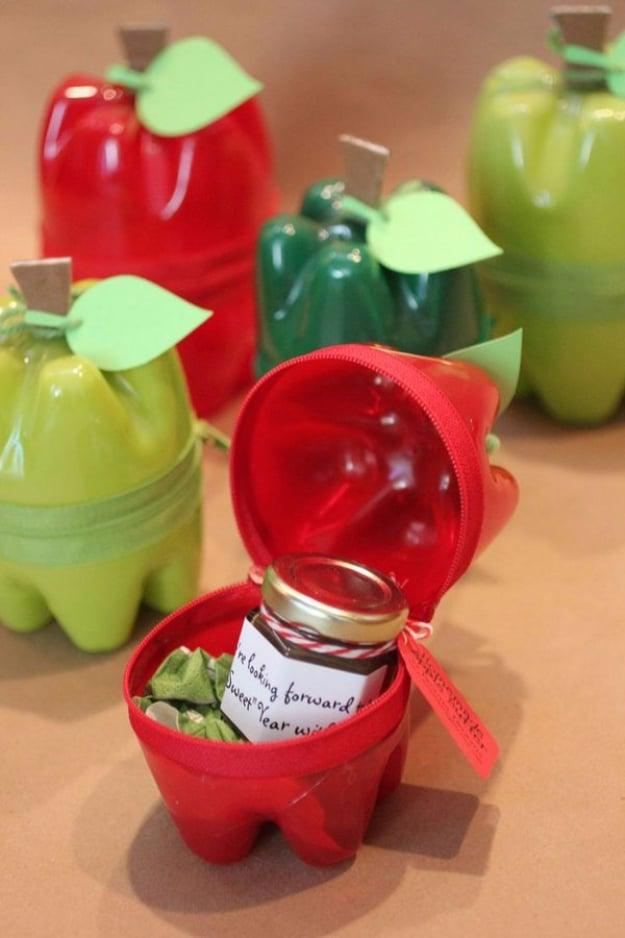
Two soda bottle bottoms, spray painted apple red or green on the inside, hot glued to a zipper so the whole thing opens on a hinge like a little case. One litre and one and a half litre bottles are the right size, and the painting is where people go wrong: tape the outside, spray the inside in several light coats and wait only a couple of minutes between them. Buy the eighteen or twenty two inch zippers, not the seven inch. A cardboard stem and a cardstock leaf finish it, and the leaf is the gift tag.
Get the full tutorial at Repeat Crafter Me.
6. Basic Zipper Pouch
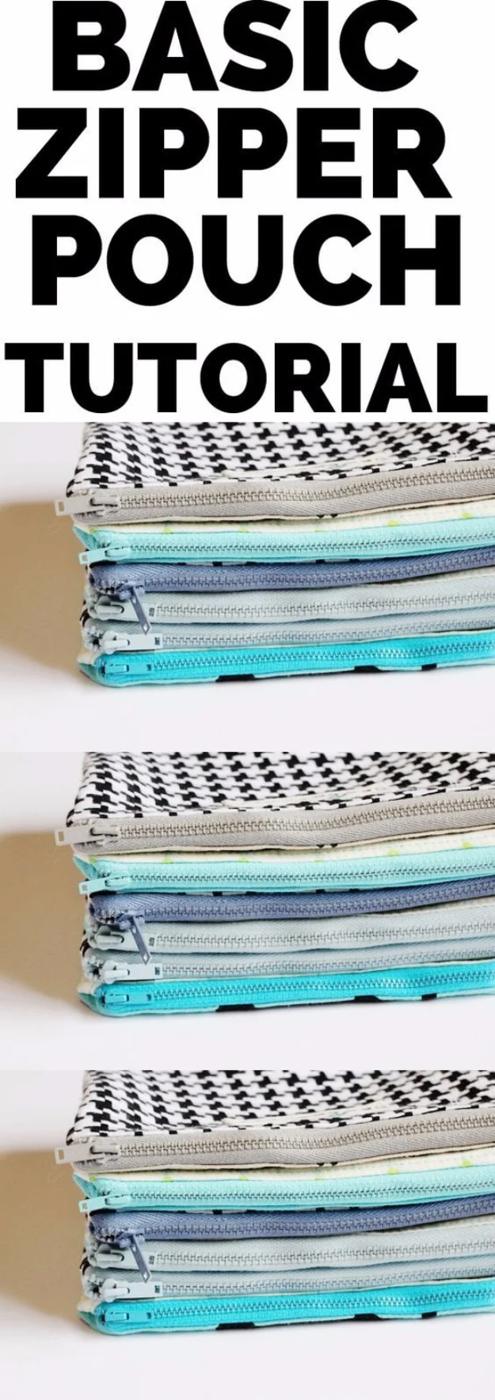
The lined zipper pouch everyone should make once, cut from four rectangles six and a half inches tall by eight wide: a front, a back and two linings. The method is the zipper sandwich, where the outer and the lining meet with the zipper between them, stitched at a quarter inch and then topstitched close to the edge so the fabric never catches in the teeth. Unzip before you sew the sides, or you will box yourself in with no way to turn it. Leave a few inches open in the lining bottom and slip stitch it shut.
Get the full tutorial at See Kate Sew.
7. Zipper Rosette
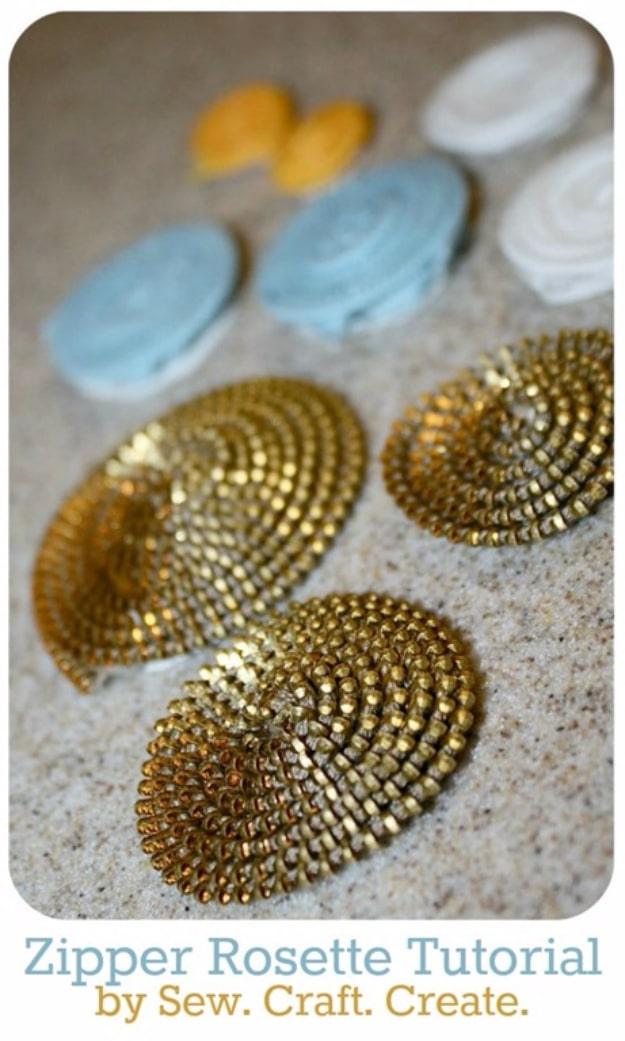
A flat spiral rosette wound from a single zipper, the teeth facing out so each ring catches the light like a row of beads. Cut the full length of the zipper down, leaving just over a quarter inch of tape on either side of the teeth, then separate the halves and work with one. The part that matters is stitching every eighth of an inch as you wrap, because a rosette held by glue alone will spring open. Three rows is the sweet spot. For shoes or frames, back it with heavyweight interfacing before gluing.
Get the full tutorial at U Create.
8. Zipper Ruffle Headband
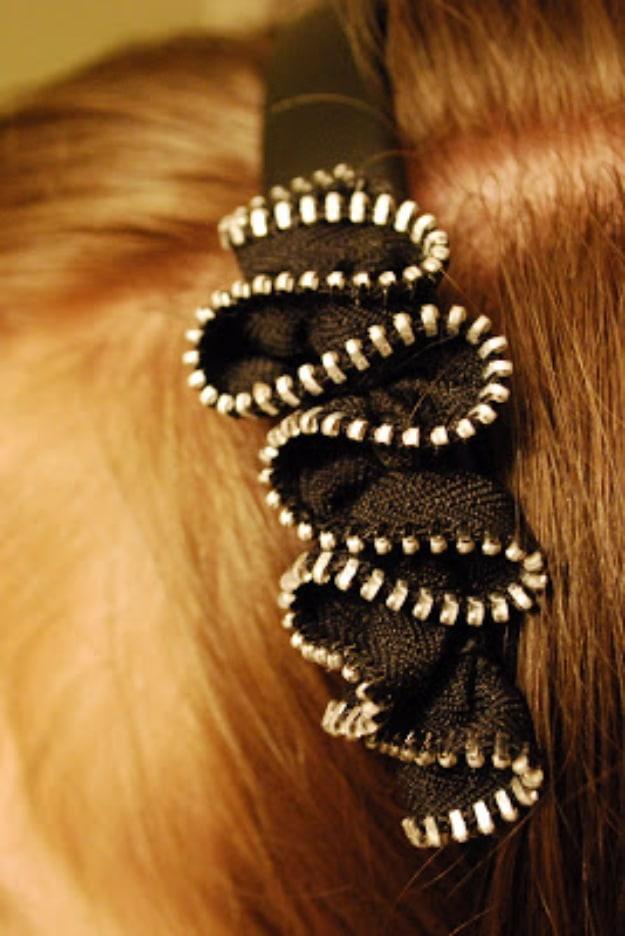
A black zipper gathered into a tight ruffle and mounted along the top of a plain headband, which is about the fastest way to make a shop bought band look designed. Gathering is the whole technique: run a long basting stitch down the tape close to the edge, pull one thread and let the zipper bunch up until it reads as a frill rather than a wave. Metal teeth on a dark tape give the best contrast. Glue or stitch the finished ruffle down in short sections so it curves with the band.
Get the full tutorial at Craftaholics Anonymous.
9. DIY Zipper Book Clutch
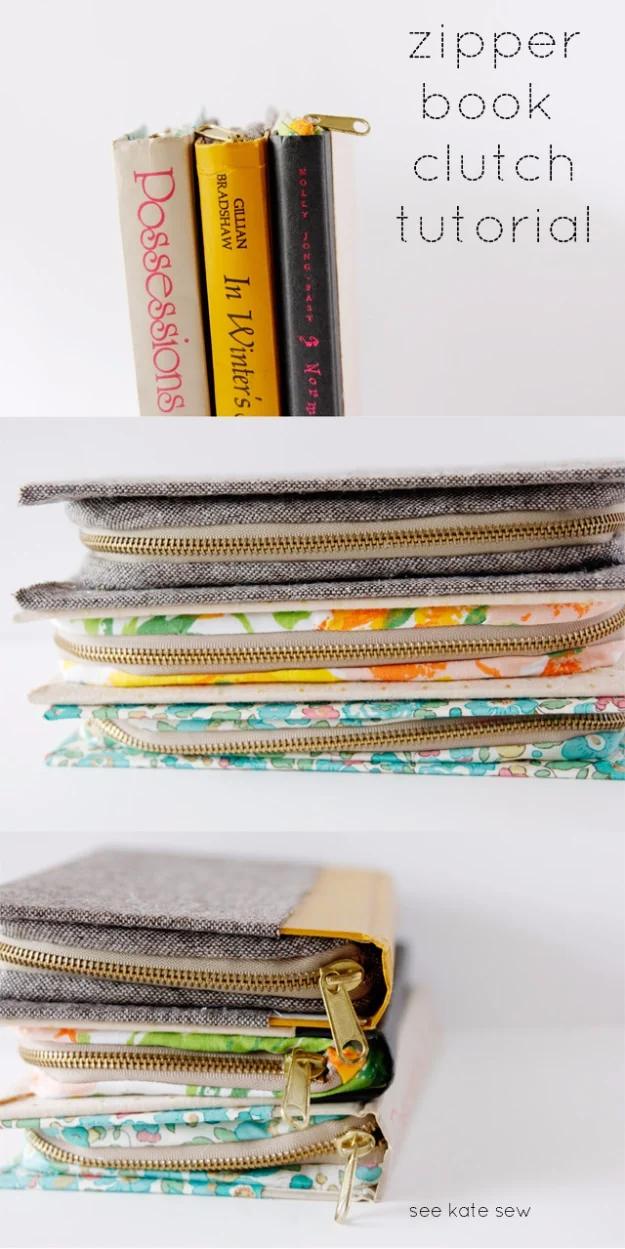
A hardback book gutted and rebuilt as a clutch, with a zipper set into the top and fabric lining the inside of the covers. The gutting is easier than it sounds: slice down the inside cover where it meets the pages and lift the whole page block out with a craft knife in one piece. Heat and bond fuses the lining to board without wrinkling, and archival glue holds the zipper ends where hot glue would go brittle. Sixteen steps, no sewing machine required, and charity shops sell the raw material for a dollar.
Get the full tutorial at See Kate Sew.
10. Zippered Pillow Cover
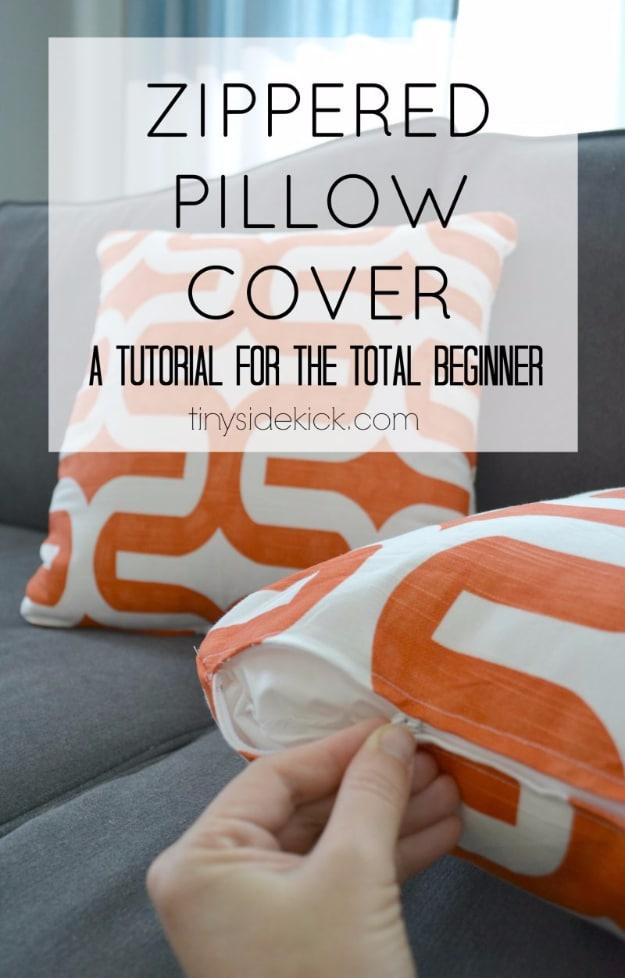
A zipper closure for a cushion, done properly, which means the zipper hides in the bottom seam instead of gaping across the back. Cut two pieces to match the insert exactly and work at a half inch seam so the finished cover sits tight rather than baggy. The zipper wants to be three or four inches shorter than the bottom edge. Baste that seam closed with a wide stitch first, sew the zipper behind it, then unpick the basting so the teeth appear. Unzip halfway before sewing the other three sides.
Get the full tutorial at Hey There Home.
11. Easy Zipper Flowers

A rolled zipper flower with layered petals, worked from a metal toothed zipper so the finished bloom is edged in silver or brass all the way round. Nylon will not hold a petal fold the way metal does, which is the single decision that makes or breaks this one. Cut the zipper free of its stops, separate the halves, then fold and pinch petals along the tape and stitch through the base with strong thread every few folds. The finished flower glues onto a clip, a brooch pin, a shoe toe or the front of a plain bag.
Get the full tutorial at iCreativeIdeas.
12. Zipper Bow
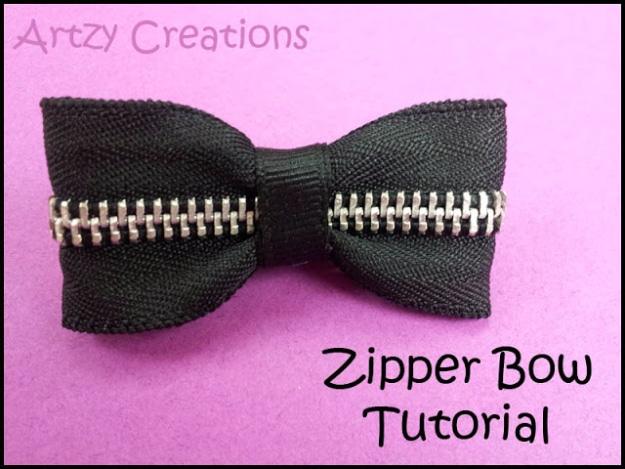
A crisp little bow folded from a black zipper and mounted on a metal hair clip, and the maths is friendly: one twenty four inch zipper yields at least three bows at about six and a quarter inches each. Wrap the clip in three eighths inch grosgrain first, inside and out, so the metal never shows. Then loop the zipper back on itself, glue both ends underneath, pinch the middle and wrap that same ribbon around the waist. Use a little hot glue rather than a lot, unless you enjoy burns.
Get the full tutorial at Artzy Creations.
13. Zipper Mouth Monster

A soft monster cut from a felted wool sweater, with mismatched button eyes and a working zipper for a mouth, and the clever part is that the zipper was already there. The sweater was a thrift find under a dollar with holes in the elbows, chosen because it had a zip neck and a zip chest pocket. Felt it first, hot wash and hot dryer, then cut so the chest pocket becomes the mouth and opens into the stuffing cavity. Fiberfill, a few seams, and the damage in the elbows never shows.
Get the full tutorial at Wood Pond Designs.
14. Zipper Earrings
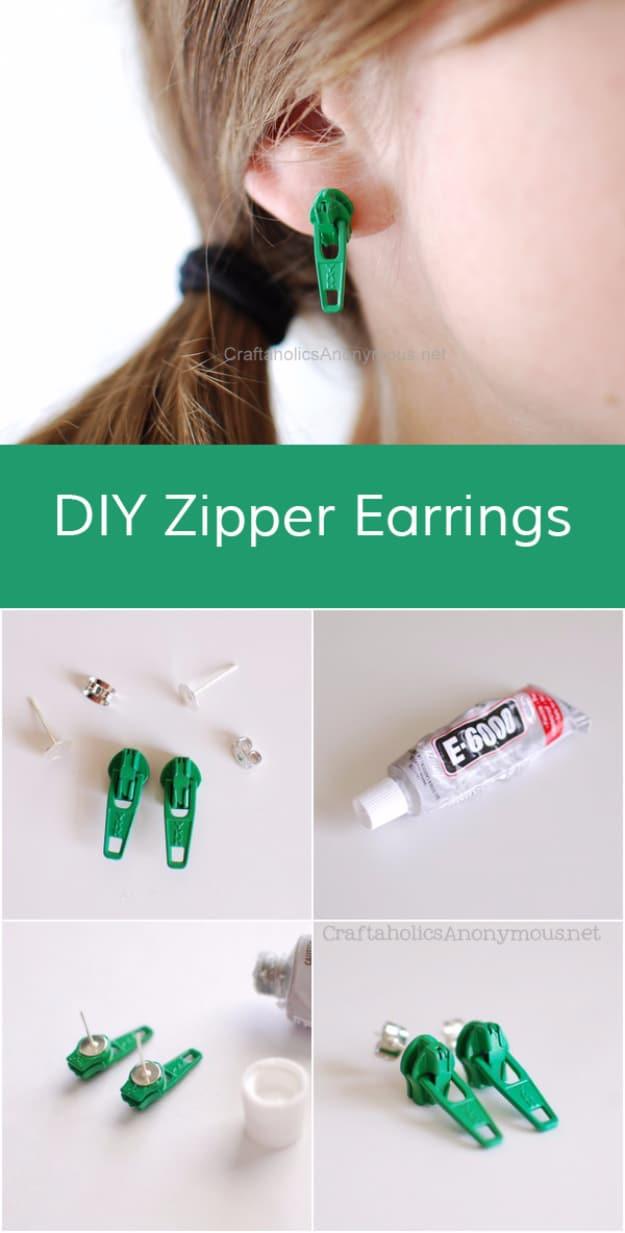
Two zipper pulls glued to earring posts, which is a five minute project with a surprisingly good result because a pull is already a finished, polished little object. E6000 is the adhesive; the maker notes it behaves like a very strong super glue and that no roughing up of the surface is needed first. Wipe the pull clean, put one small dot on the post, press them together and leave them lying flat until fully dry. Brightly coloured plastic pulls read best, and mismatched pairs look intentional.
Get the full tutorial at Craftaholics Anonymous.
15. Easy DIY Zipper Bracelets
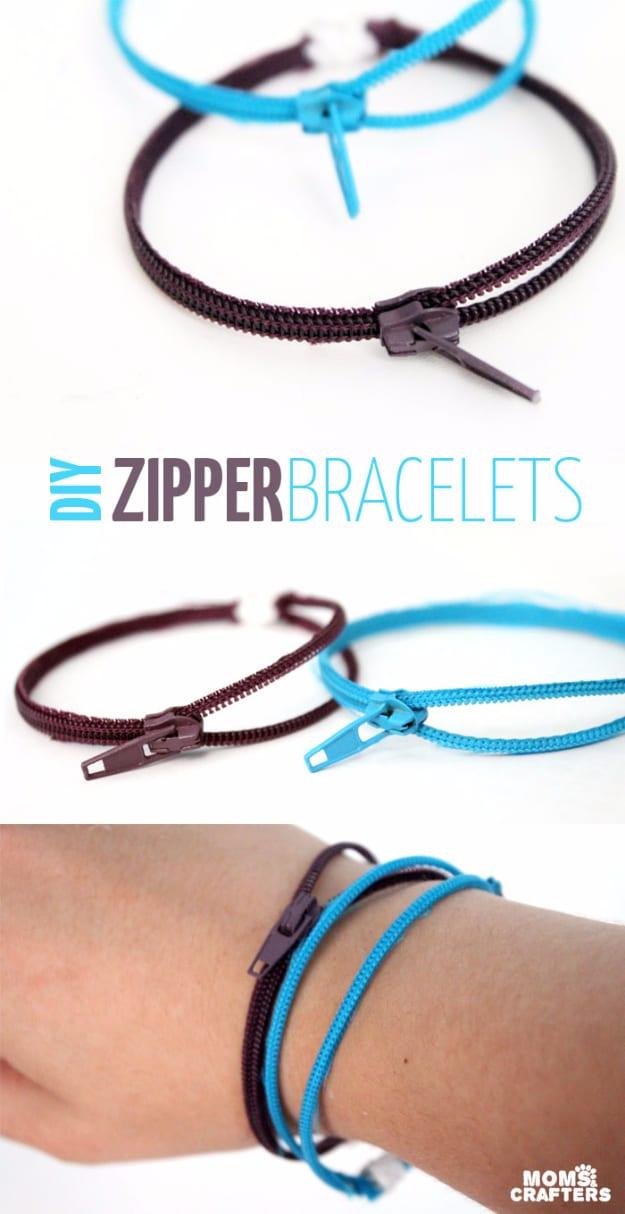
A zipper trimmed down to its teeth and joined into a bangle with a wrap of embroidery floss, and it takes minutes rather than an evening. Nine inch zippers are the right length for most wrists. Cut the cloth away as close to the teeth as you can, then paint the trimmed edge with clear nail polish so it never frays, which is the step that decides whether this lasts a week or a year. Check the circle slips over your hand before you stitch, and leave the zipper partly open so the slider shows.
Get the full tutorial at Moms and Crafters.
16. Zipper Tee
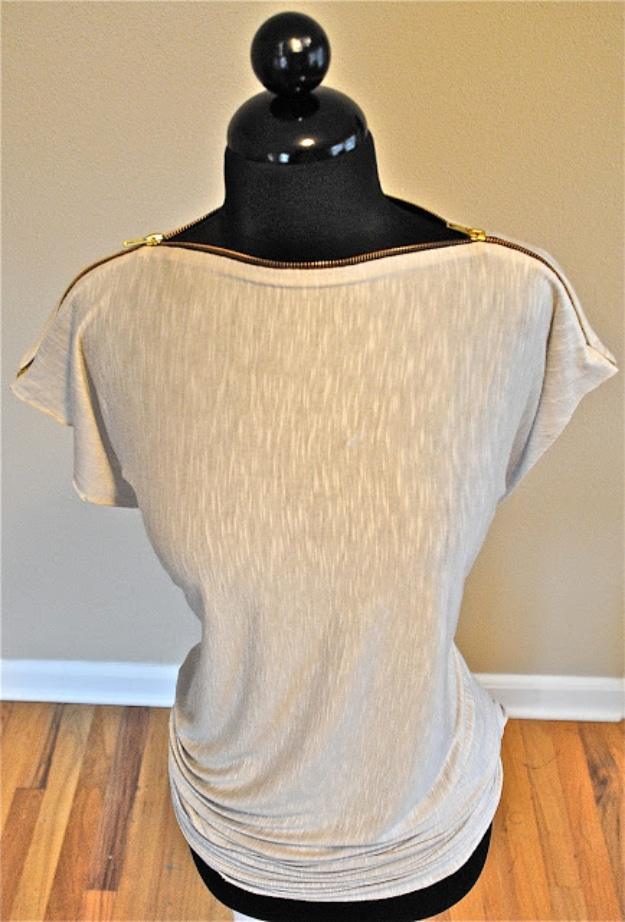
A plain tee reworked with a long zipper running across both shoulders, so the neckline opens flat from arm to arm. It needs a twenty two inch zipper and either an old shirt or about a yard of light jersey with a good drape. Cut the neck ribbing and the shoulder and sleeve seams away first, because the zipper replaces them. To get a slider on each end, prise the stops off one end and feed a second pull on facing the other way, which turns an ordinary zipper into a double ended one.
Get the full tutorial at Trash to Couture.
17. Zipper Ruffle Ballet Flats
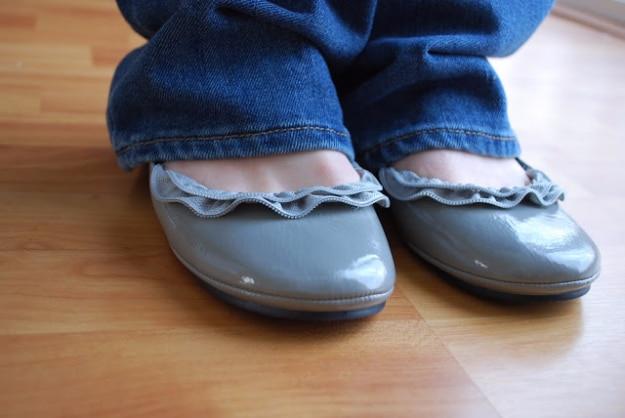
Plain flats given a double ruffle of gathered zipper around the opening, which turns a nine dollar pair into something that looks bought somewhere expensive. Use a twelve to fourteen inch zipper split into its two halves, run a basting stitch as close to the tape edge as you dare and gather it. Glue the first layer starting inside the shoe, working around the front, then add a second layer over it for depth. Singe the cut end with a lighter so it cannot fray, and keep glue out of the teeth.
Get the full tutorial at Craftaholics Anonymous.
18. Free Camper Zipper Pouch Pattern
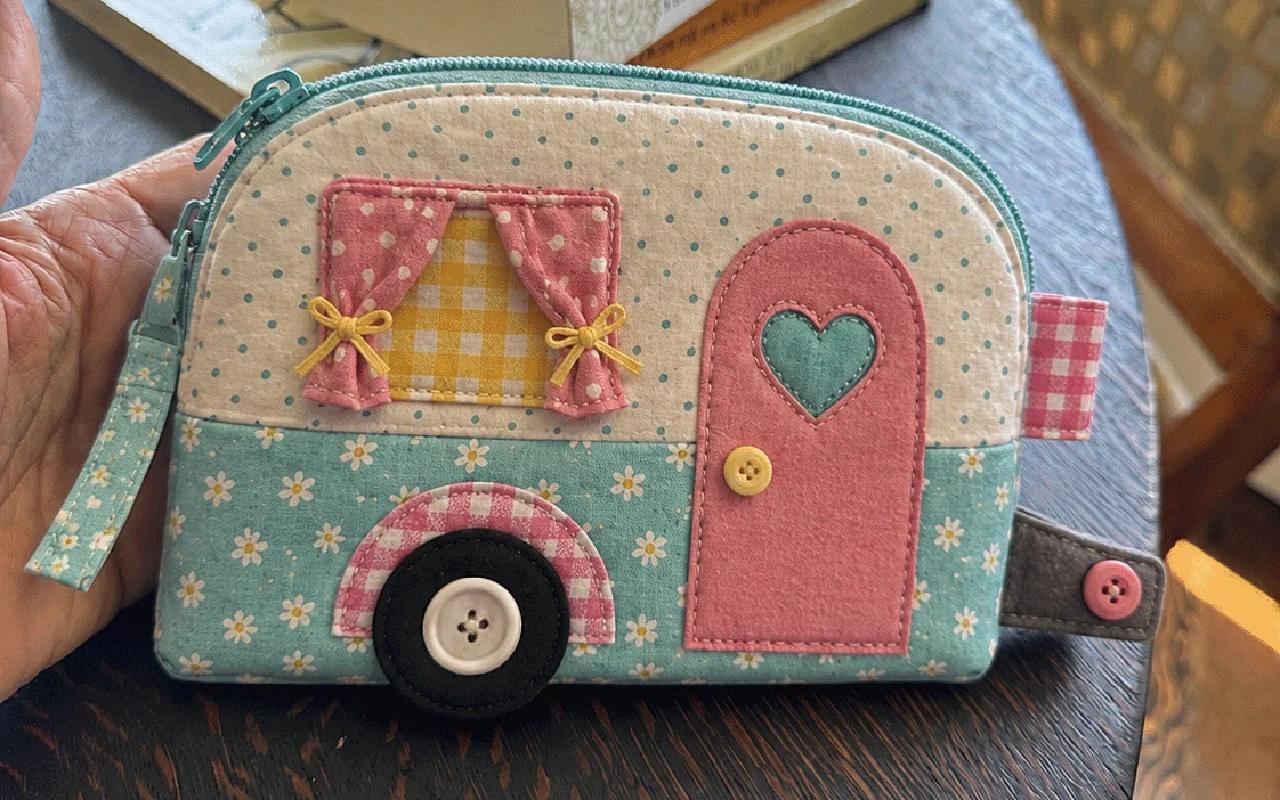
A boxed zipper pouch shaped like a retro caravan, about seven and a quarter inches wide by six tall with a three and a quarter inch boxed base, so it is a makeup bag you will genuinely use rather than a novelty. The camper details are all fusible applique: an arched pink door with a heart window and a button handle, a gingham window framed by curtains tied back with ribbon bows, a felt wheel with a button hub and a stitched hitch tucked into the side seam. A fat quarter each of main, accent and lining, a ten inch zipper, and the printable pattern is free.
Get the full tutorial at Sueeye.