DIY Decor
23 DIY Plastic Bottle Crafts and Recycled Projects
Plastic bottle crafts and recycled projects, 23 of them: planters, bird feeders, bracelets, ornaments and organizers, with free step by step tutorials.
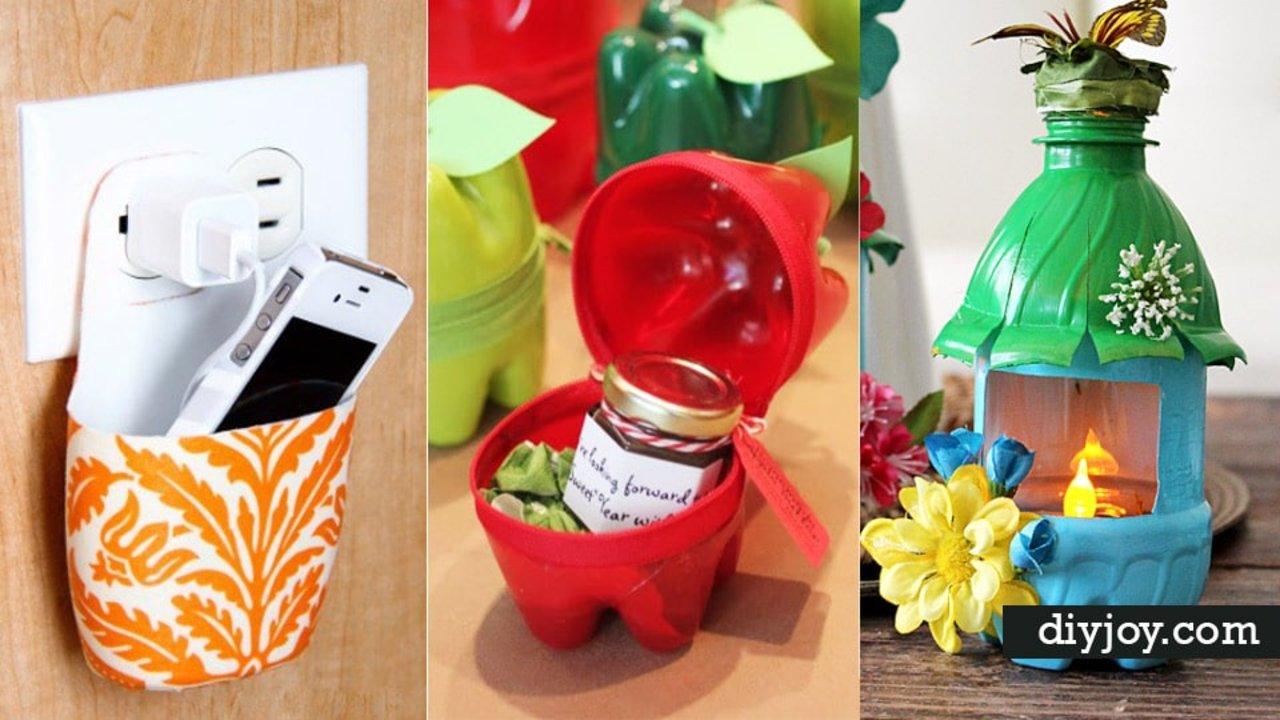
The empty bottle in your recycling bin is a free, waterproof, perfectly shaped craft material and almost nobody treats it like one. These 23 DIY plastic bottle crafts are what happens when you do. A two liter bottom becomes an apple shaped gift box with a zipper round the middle. A milk jug lid, pierced with a hot needle, turns the jug into a watering can that never dribbles. Bottle plastic held over a candle shrinks and curls into earrings, icicles and flower petals, which is the trick that surprises everybody the first time. Some of these are twenty minute projects for a rainy afternoon with kids. Others need a craft knife, a drill and a little patience. All of them start with something you were about to throw away.
DIY Projects Made With Plastic Bottles
1. Upcycled Soda Bottle Pencil Case
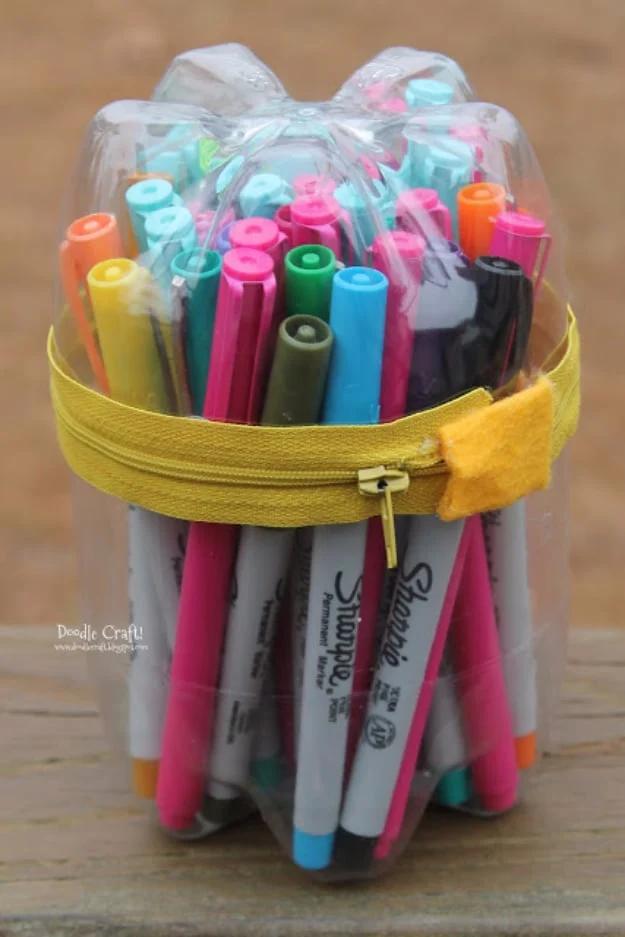
Two bottle bottoms and one zipper, and the result is a clear case that holds a startling number of markers. Cut both bottles cleanly and evenly, because the zipper has to meet a level rim all the way round or it will not close. Hot glue the zipper tape to the outside of each cut edge, working a couple of inches at a time so nothing shifts while it sets. The bottom half stands up on its own, which is the real advantage over a flat pencil case; open the zip and it becomes a pot on the desk rather than a bag you have to hold.
Get the full tutorial at Doodlecraft.
2. Plastic Bottle Apple Containers
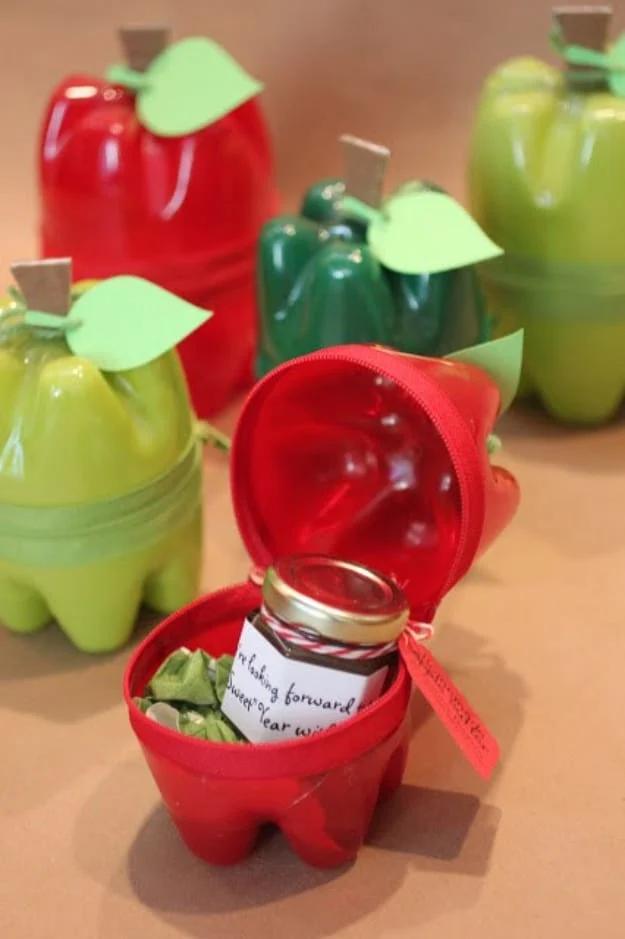
One liter and one and a half liter bottles cut off at the bottom and joined with a zipper, spray painted from the inside so the color reads as glossy apple rather than painted plastic. That inside painting is the trick worth stealing. Tape the outside with painters tape first so no overspray lands on the visible surface, then build the color in several light coats rather than one heavy one, waiting a couple of minutes between. Heavy coats pool and drip. A stem, a paper leaf and a small jar of apple butter inside make it a teacher gift, and a two liter bottle gives you a giant one.
Get the full tutorial at Repeat Crafter Me.
3. Plastic Bottle Jewelry Stand
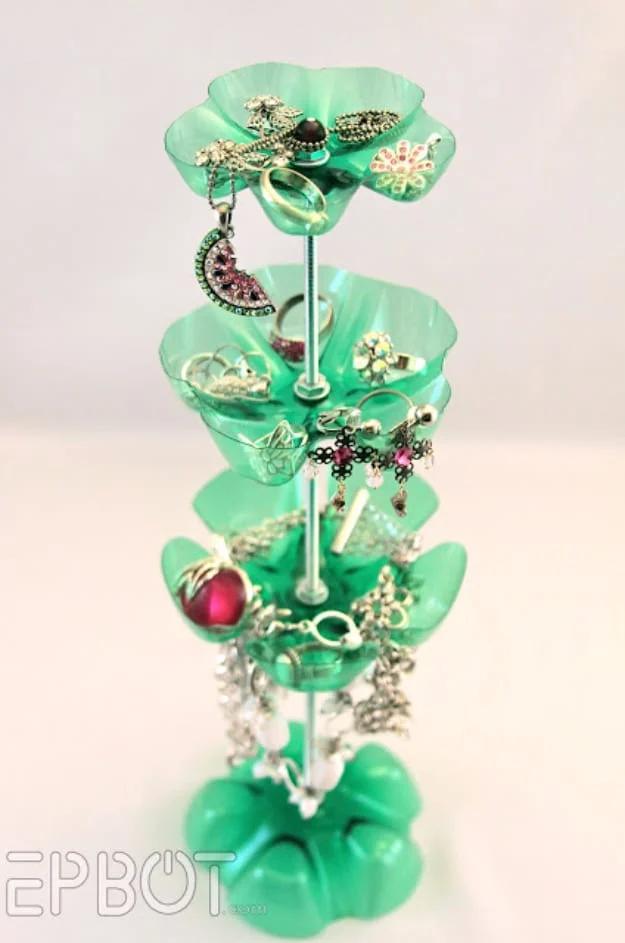
Four bottles, two of them two liter, threaded onto a twelve inch length of threaded rod with nuts and washers setting the height of each tier. Total cost came to three dollars and seventy two cents. Cut the bottoms off, drill a centered hole in each to match the rod diameter, then cut the petal shapes out of the lowest tray with scissors and clean the edges with a Dremel. A metal file takes off the plastic fuzz and cuticle trimmers get the stubborn bits. Wear safety glasses at the Dremel, because bottle plastic throws chips. An inverted two liter makes the base.
Get the full tutorial at EPBOT.
4. Bracelets From Empty Plastic Bottles
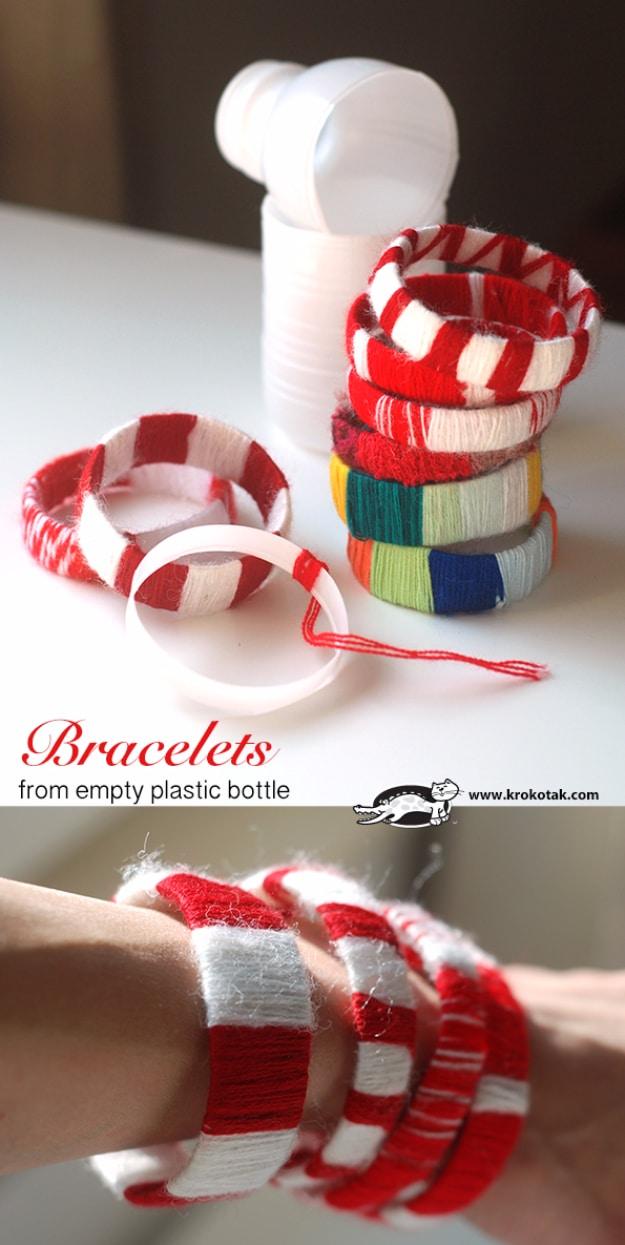
A ring cut from the straight section of a white bottle becomes the bangle, and yarn wrapped round and round it becomes everything you actually see. The red and white pairing in the photograph is a Baba Marta martenitsa, the Bulgarian spring bracelet, but the technique takes any color combination you like. Cut the ring wide enough to be comfortable, roughly three quarters of an inch, and check the edges are smooth before wrapping. Block the colors in solid sections rather than alternating every turn, because tight bands of color read far better at this scale than stripes do.
Get the full tutorial at Krokotak.
5. DIY Kitty Planters From Plastic Bottles
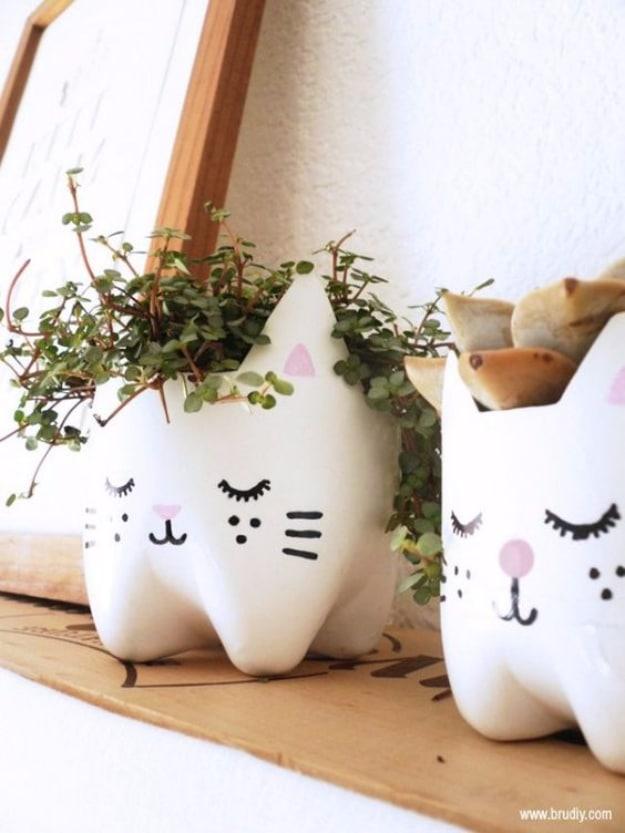
A two liter bottle cut so that two of the base’s lobes become ears, then painted white and given a face in fine black marker. The cut line is everything: follow a template rather than freehanding it, because a cat face only works if the ears are symmetrical. Paint the outside white in a few thin coats, let it cure properly before drawing, and keep the face minimal, since closed eyes and three whiskers a side read far better than a detailed drawing. Punch drainage holes near the base, fill with soil and something trailing, and they sit happily on a shelf.
Get the full tutorial at Recyclart.
6. Plastic Bottle Fairy House
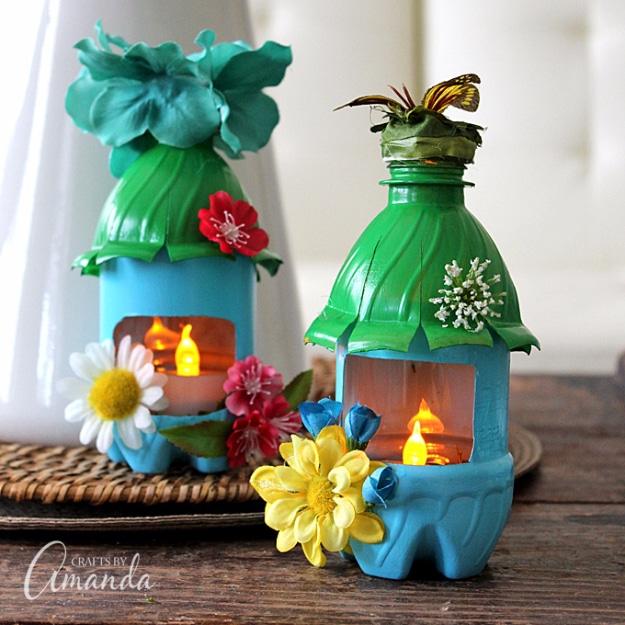
A water bottle cut in two, painted, and reassembled with the top half inverted as a roof. Cut slits about an inch apart halfway up the top section and bend the ends outward, which turns a smooth cone into something that reads as shingles. A window cut in the bottom half lets an LED tea light glow out. Multi surface craft paint, two coats with half an hour between, then silk flowers, moss glued into the base and leaves over the lid. One rule with no flexibility: LED tea lights only, because a real flame will melt the house around it.
Get the full tutorial at Crafts by Amanda.
7. Plastic Bottle Crafts | DIY Pig Planter
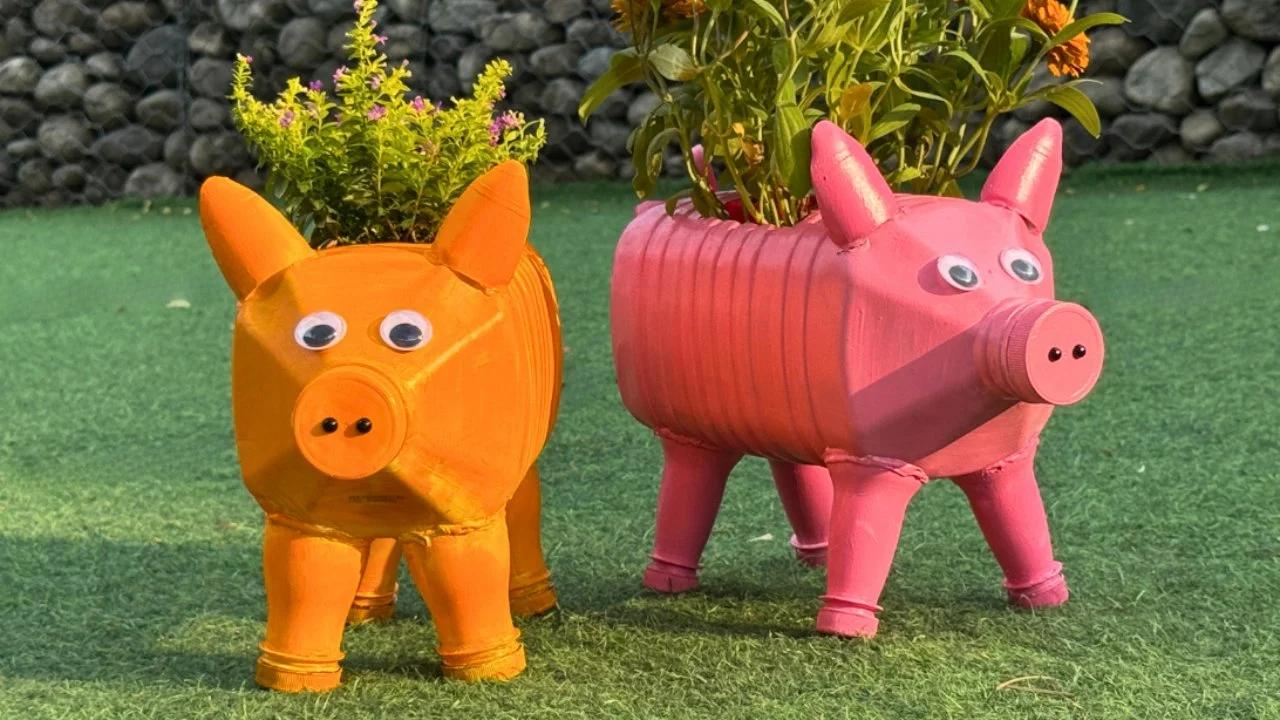
A plastic gallon jug laid on its side turns into a pig with almost no cutting at all: the cap end becomes the snout, four legs get added underneath, and a rectangle cut from the top face becomes the planting bed. Paint the whole thing pink, add ears and a curly tail, and it holds real soil and a real plant rather than being decorative. Plastic is the right material for a garden ornament for the obvious reason that rain does nothing to it. It costs nothing, it takes an afternoon, and it keeps another gallon jug out of the waste stream.
Get the full tutorial at Sueeye.
8. Plastic Bottle Into Earrings
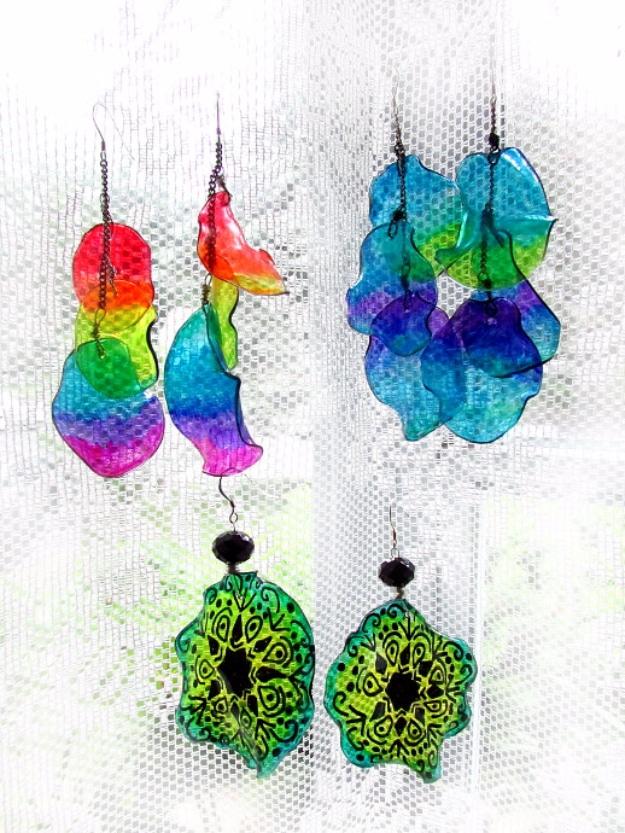
Ovals roughly two inches across cut from sturdy bottle plastic, held over a candle flame with pliers until they shrink and warp into curled petal shapes. That warping is the entire craft and it is unpredictable in the best way, so cut more than you need. Wash the soot off afterward, color them with Sharpie paint markers, then hammer a thin nail through the top to make the hanging hole. Wire, a few beads and a French hook finish each pair. One honest note from the maker about the fumes: work somewhere ventilated and do not let the plastic actually burn.
Get the full tutorial at Happy Family Art.
9. DIY Recycled Bottle Organizer
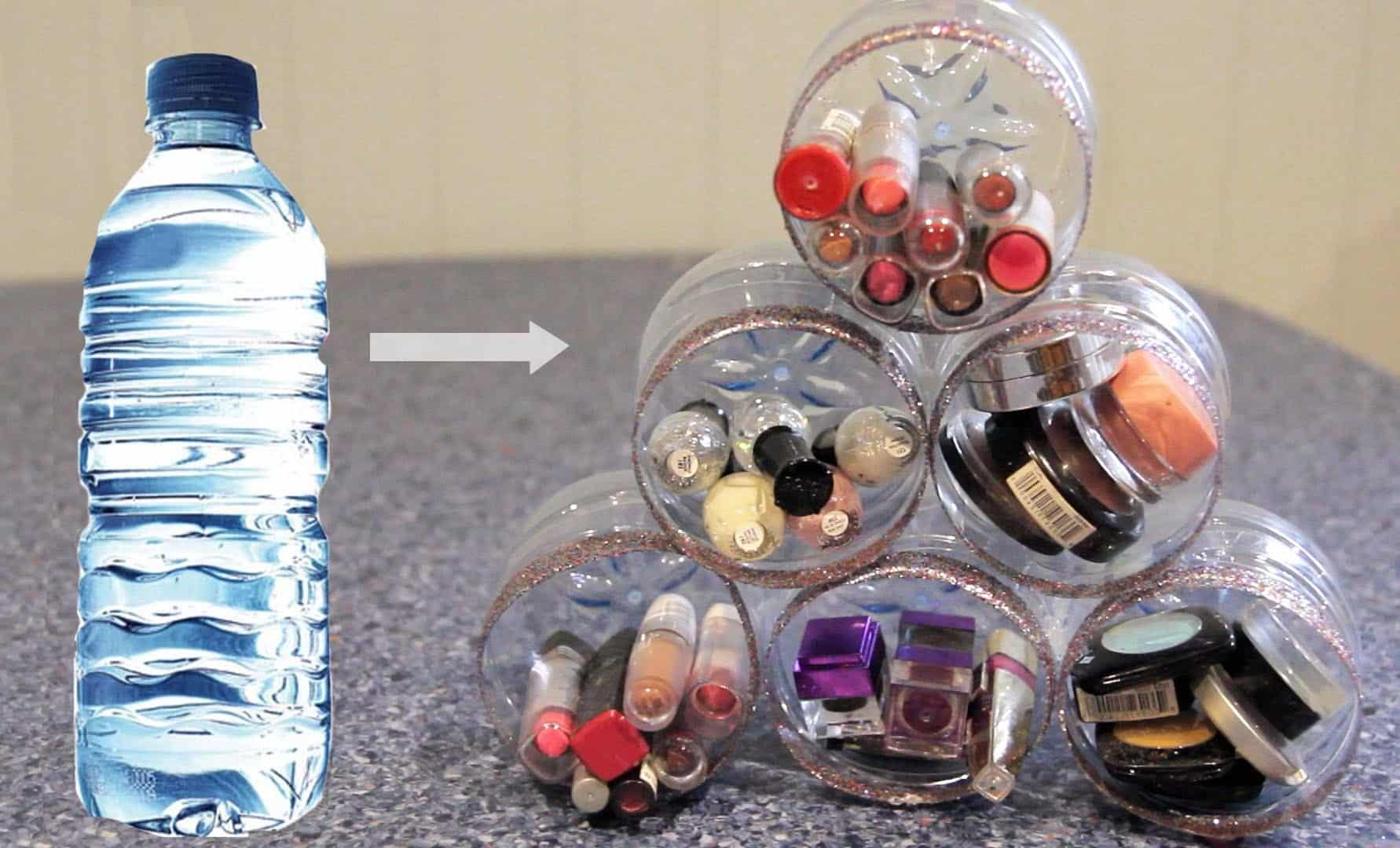
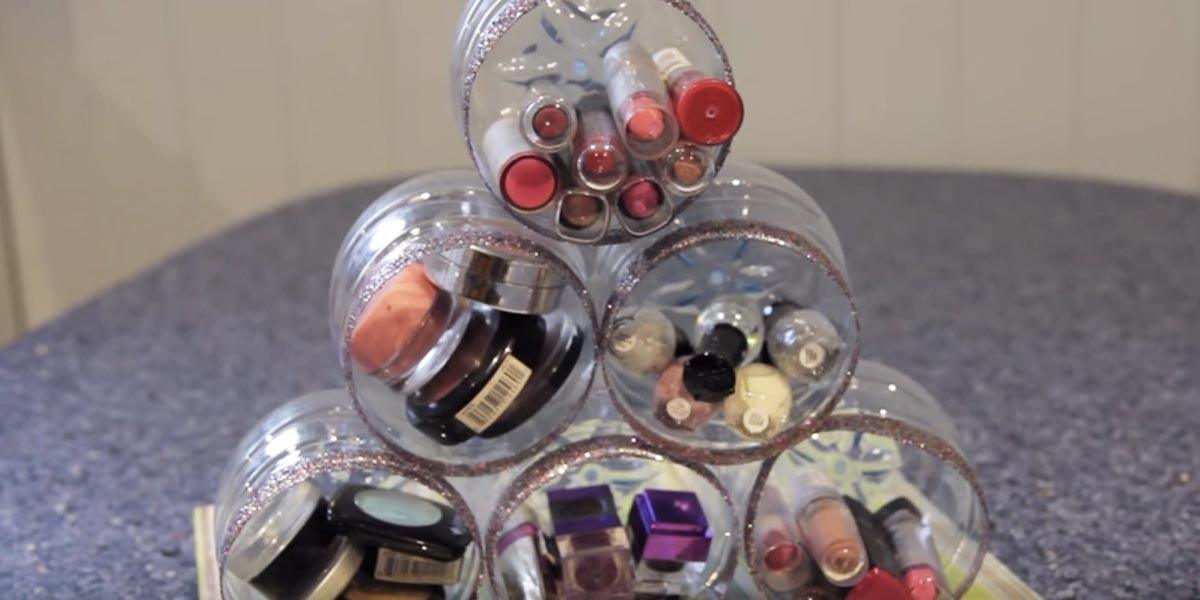
Water bottle bottoms cut into shallow cups, glitter glued round each rim, and the whole lot stacked into a pyramid that holds lipsticks, polishes, compacts and brushes in separate compartments. The rim treatment is what stops it looking like a row of cut bottles, so do not skip it. Cut all the cups to the same height or the pyramid will not stack level. Glue the rows together at the points where the curves touch, and build from the bottom up so each layer has something to sit on. It is free, it is transparent, and you can see what is in every cup.
Get the full tutorial at Sueeye.
10. DIY Plastic Bottle Bird Feeder
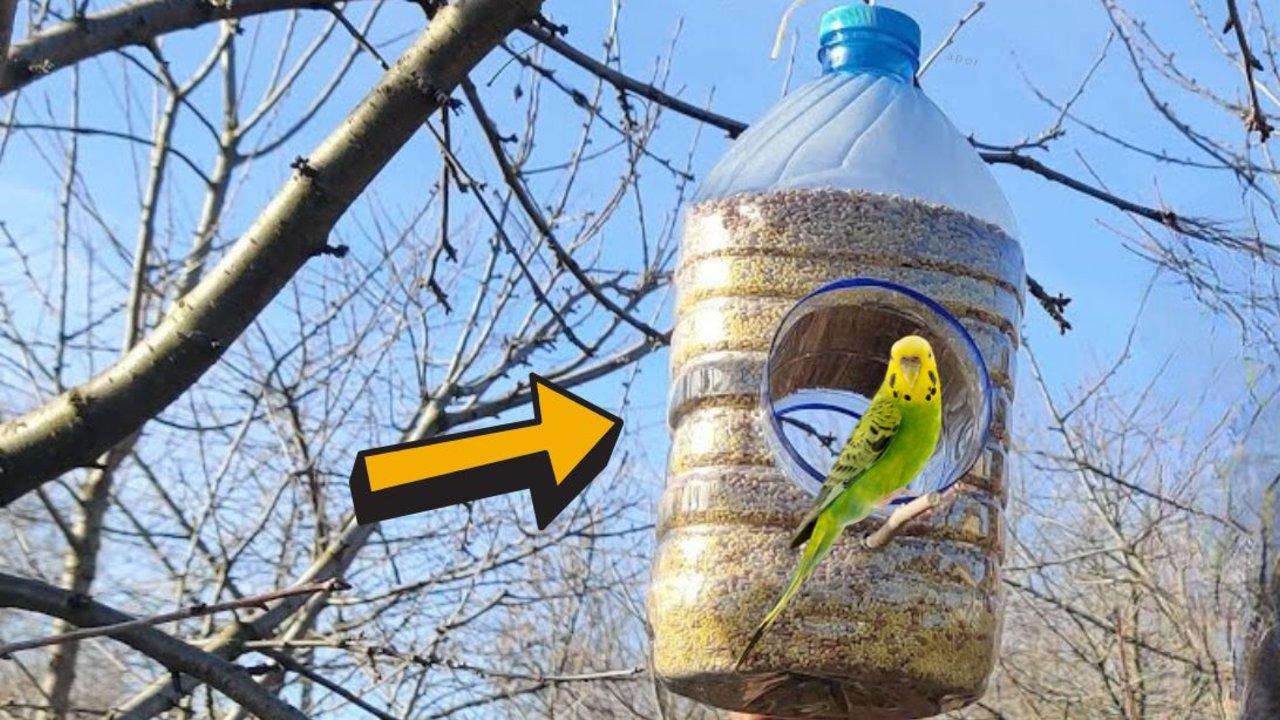
Two plastic bottles become one bird feeder with no special tools at all. One bottle holds the seed, the second is cut down to make the tray the birds actually land on, and twine through the neck hangs the whole thing from a branch. It matters most in the cold months, when insects and berries run out and a garden feeder is genuinely the difference for the birds that stay through winter. It also means you get to watch them from a window. Keep the tray shallow so seed does not sit and go damp, and refill little and often.
Get the full tutorial at Sueeye.
11. DIY Plastic Bottle Bracelet
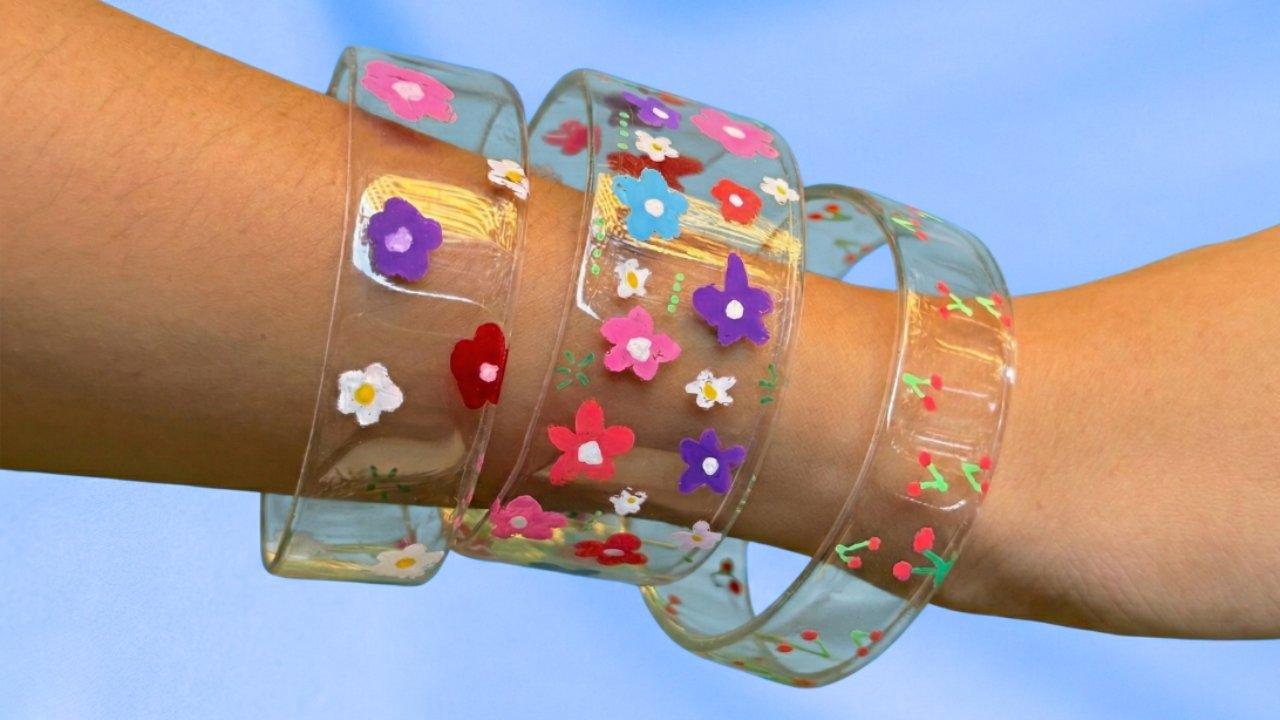
A bottle cut into rings, and then the step that makes the difference: the cut edges are softened and curved by running them against the base of a warm iron, which rounds the sharp plastic and gives the bangle a comfortable rolled edge. Once they are smooth, POSCA paint pens take doodles, patterns, stripes or names, and they hold on plastic where an ordinary marker would rub off in a day. The bracelets weigh almost nothing, cost nothing and are a good project to hand to a child once the cutting and heating part is already done by somebody older.
Get the full tutorial at Sueeye.
12. DIY Flower Key Chains From Plastic Bottle
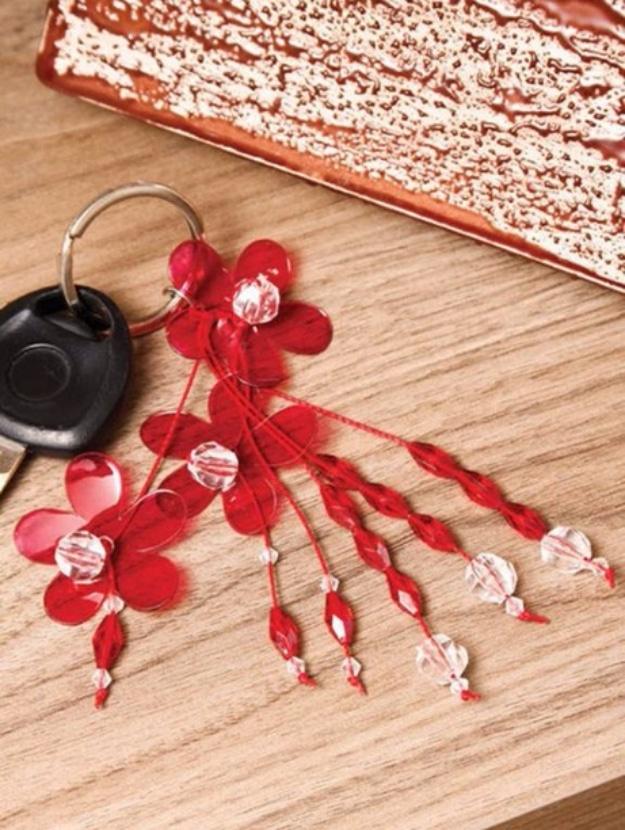
Petal shapes cut from a bottle, briefly heated over a candle so the edges curl and soften, then painted and threaded onto beaded strands with a key ring at the top. Red translucent plastic and clear faceted beads in the photograph give it a look closer to cut glass than to recycling. Cut more petals than you need, because heating is unpredictable and about a third of them will curl in a way you did not want. Keep the flame well away from the plastic itself; you want it warm enough to move, never hot enough to scorch or smoke.
Get the full tutorial at iCreativeIdeas.
13. Icicle Ornaments From Plastic Bottles
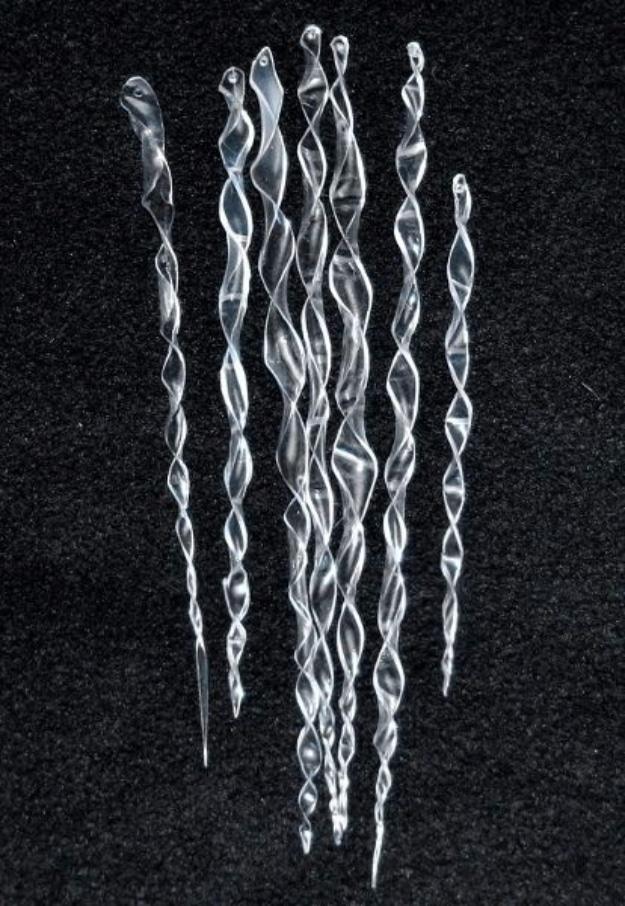
Tapered strips one to one and a half centimetres wide, cut from a PET bottle with the top and bottom removed, then heated over a candle while being twisted and pulled so they spiral without warping out of shape. Two bottles made thirty six icicles. The narrow end becomes the point, and the wider end can be trimmed or rounded off. A needle heated in the flame pierces the hanging hole cleanly, which a cold needle will not do. Thread wire or invisible thread through and hang. Under an hour, free, and the first few will be your practice run.
Get the full tutorial at Cut Out + Keep.
14. Apple Decor From Plastic Bottle
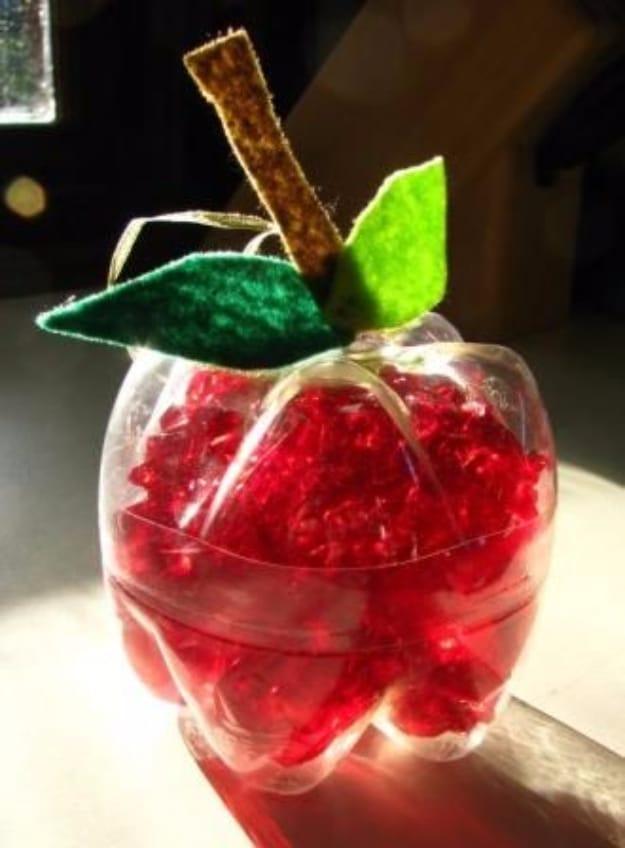
Two ends of a 1.25 litre bottle, ideally ones with a five petal base, slotted together so they hold without glue. A small hole in the center takes a ribbon, anchored with a button on the inside, and felt leaves and a stem stitch onto that ribbon above the apple. Scrunched red cellophane inside gives the whole thing its color and catches light like a real apple skin. Green cellophane makes a green one. The reason this works better than it should is that the bottle base already has the right fluted shape, so you are barely making anything, just recognising it.
Get the full tutorial at Joyful Jewish.
15. DIY Water Wall
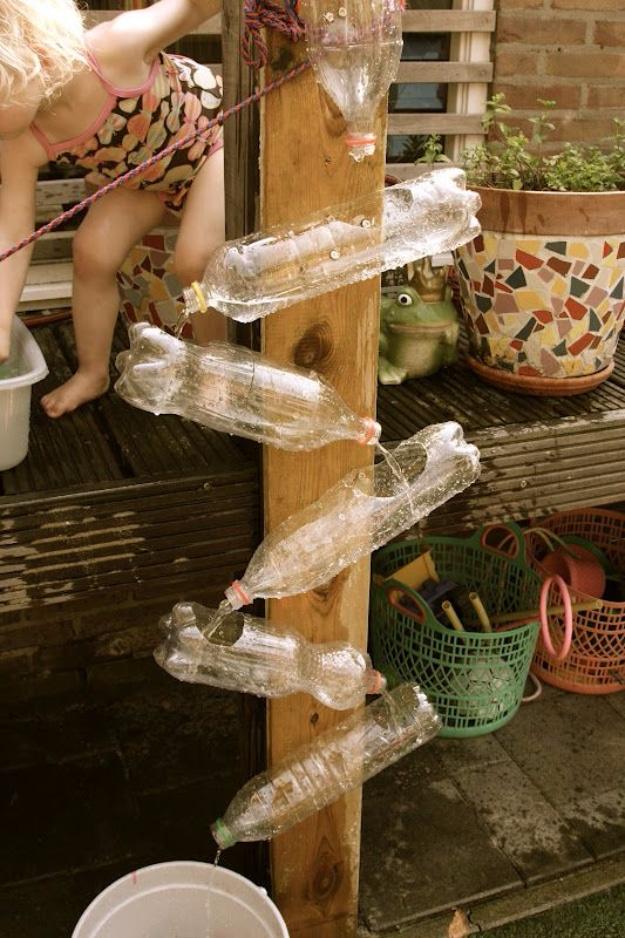
Bottles screwed to a fence or a post at slight downward angles so water poured in at the top cascades from one to the next and lands in a bucket at the bottom. Cut a hand sized hole in the upper side of each bottle with a craft knife, score an X on the back, push two screws through from the inside and drive them into the timber. Tilt each one a little further down than the last. Test with a jug and adjust the holes before you call it finished. A bucket, a few cups and a jug make it an afternoon’s entertainment.
Get the full tutorial at TinkerLab.
16. Fast Easy Cupcake Case
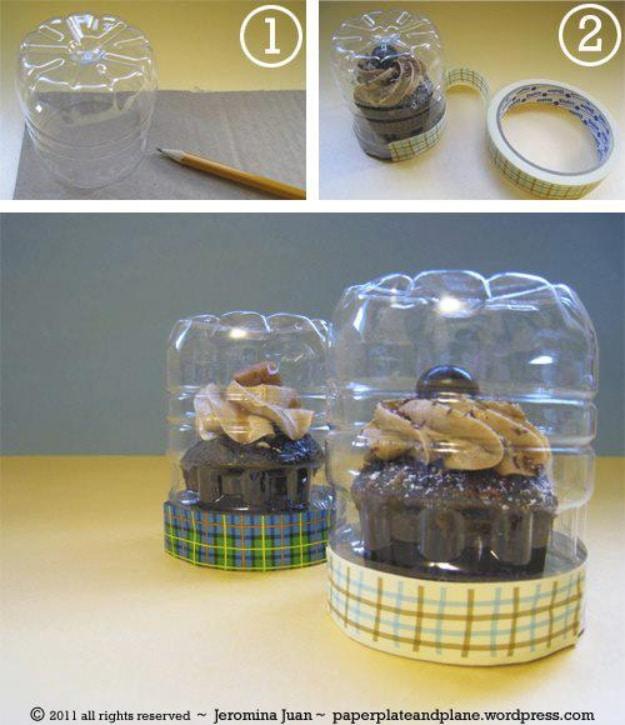
A bottle bottom cut to the height of a cupcake becomes a clear dome, and a cardboard circle traced round that same bottle becomes the base the cupcake sits on. Washi tape round the join holds the two together and does all the decorating at once. That is the whole method. It is the answer to the problem of transporting one cupcake, or of handing out cupcakes at a party without a box, and the dome keeps the frosting off everything it would otherwise meet. Cut a taller dome for a piped swirl and a shorter one for a flat iced top.
Get the full tutorial at Paper Plate and Plane.
17. DIY Grocery Bag Holder
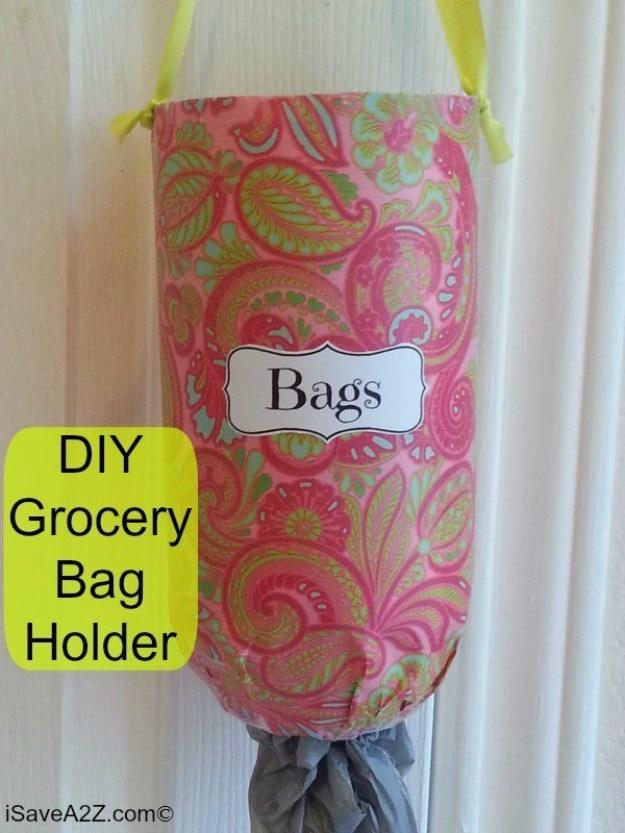
A two or three litre bottle with both ends cut off becomes a tube, wrapped in decorative paper with the edges folded inside and taped, and hung by a ribbon threaded through two punched holes. Bags go in at the top and come out at the bottom, and it holds about seven of them. If they stick on the way out, cut four short vertical slits around the bottom opening to widen it slightly, which is the fix the original offers and it works. Fifteen to twenty minutes, free, and it ends the drawer stuffed with a hundred crumpled bags.
Get the full tutorial at I Save A2Z.
18. Milk Jug Flower Lights
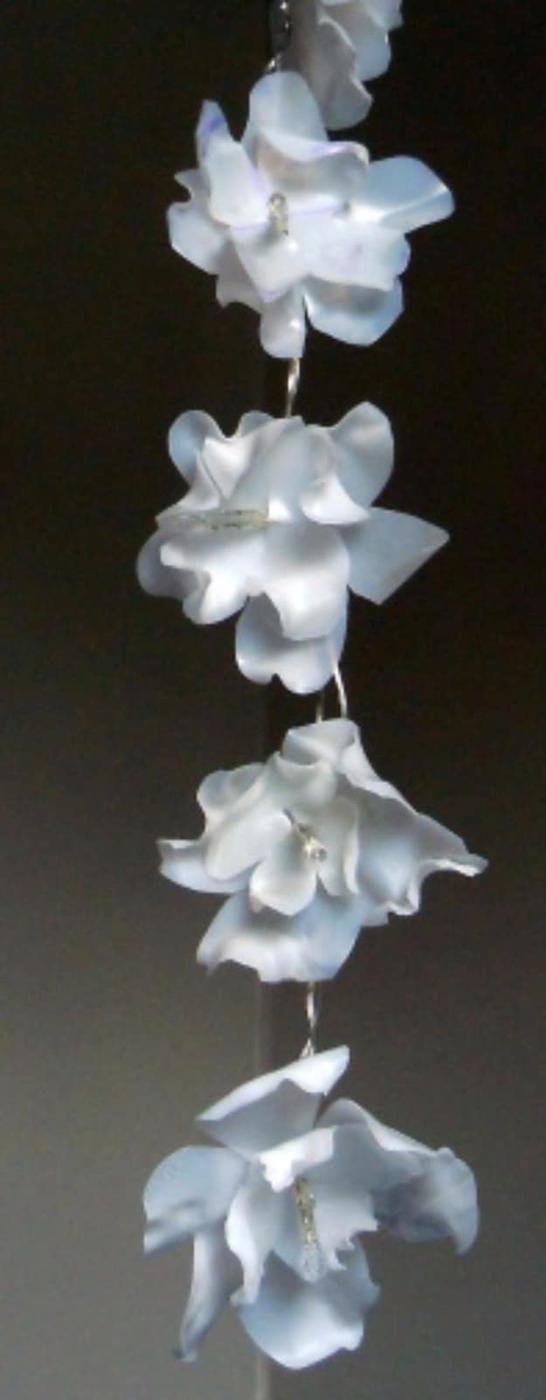
Flower shapes cut from a milk jug, heated petal by petal with a heat gun until the plastic goes translucent, then shaped against a cutting mat as it cools. An X slit in the center of each flower slips over an LED bulb on a string of fairy lights. Two things make this work: hold the flower with pliers rather than fingers while heating, and use LEDs only, since they run cool enough not to soften the plastic back out of shape. Mistakes are recoverable, because a petal that went wrong can simply be reheated. Glue layers together with a button in the middle for brooches.
Get the full tutorial at Recreations Project.
19. Plastic Bottle Watering Can
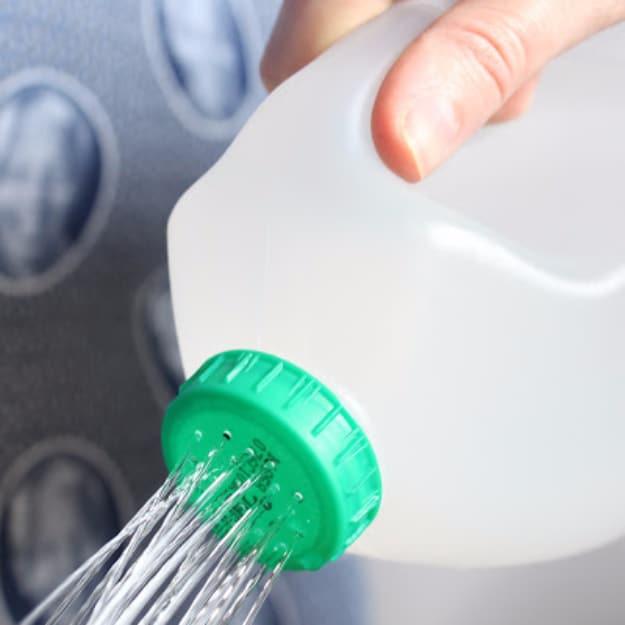
A milk jug lid pierced with a hot needle, and that is genuinely the entire project. Heat the needle tip with a lighter for a few seconds, push it through the lid, reheat between holes. The needle gauge sets the flow: a fine needle gives a gentle spray for seedlings, a thicker one pours faster. Heating matters for a reason beyond ease, which is that a melted hole has a smooth rounded edge, so water leaves cleanly instead of clinging and dribbling down the outside the way a real watering can always does. Move the lid to a new jug when the old one gives out.
Get the full tutorial at A Journey to a Dream.
20. Milk Jug Fairy Tale
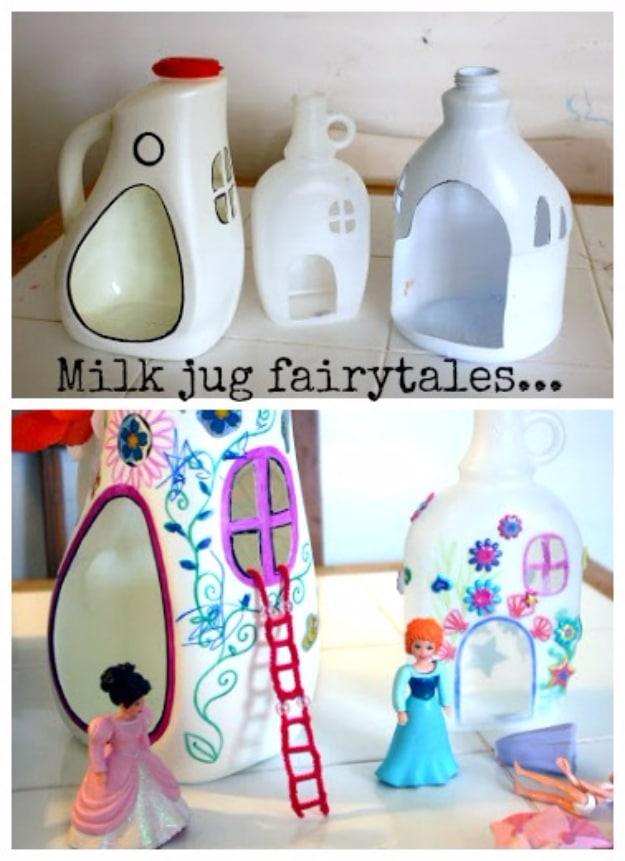
Milk and juice jugs drawn on with marker, with a doorway and windows cut out and the moulded handle left on as an architectural feature. Once there are three of them side by side it stops being a craft and becomes a street. The photographs show the sequence plainly: outline everything in black first, cut the door and the windows, then color the flowers, ladders and window frames afterward so the marker lines stay crisp. The credited page is a short signpost rather than a tutorial, so follow its own link through for the full how to.
Get the full tutorial at ReFab Diaries.
21. DIY Book Organizer From Plastic Bottles
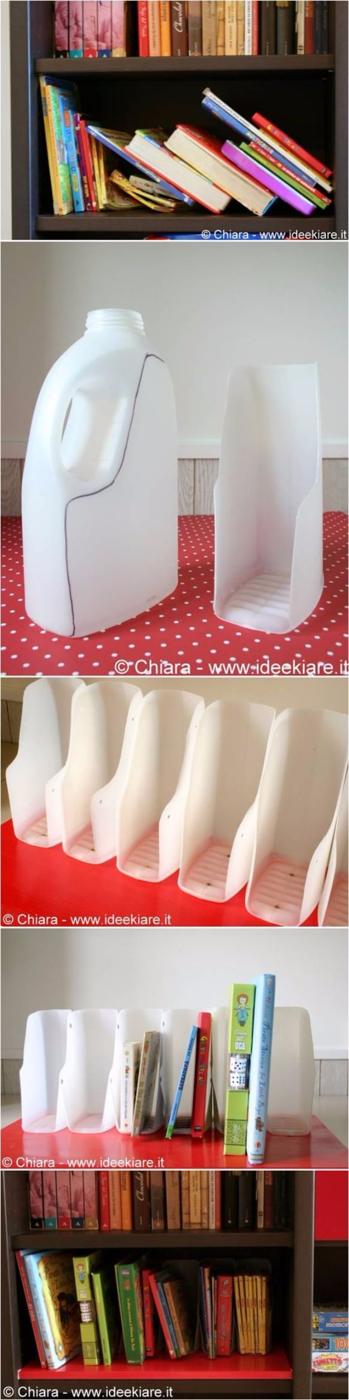
Large detergent or milk jugs cut into magazine file shapes, with the handle side removed and the back left tall, then screwed down to a wooden base so they cannot tip. Line five or six of them along a shelf and picture books stand upright instead of collapsing into the slumped pile every child’s bookshelf turns into. Cut with a marker line drawn first, because a freehand curve through thick jug plastic will wander. White jugs look deliberate; branded ones need the label off and a coat of paint. Cardboard from cereal boxes works if you have no jugs.
Get the full tutorial at iCreativeIdeas.
22. DIY Plastic Bottle Sprinkler
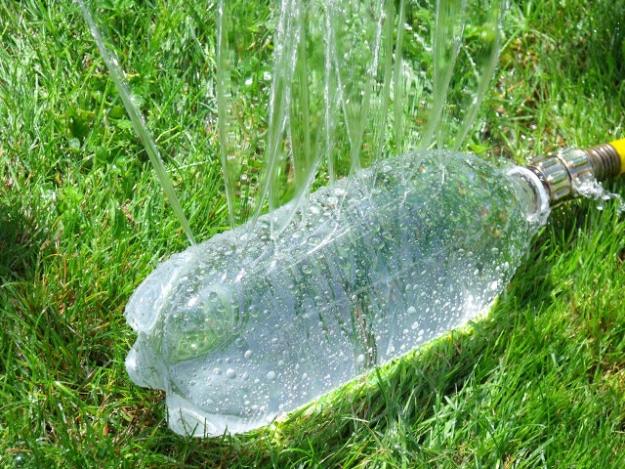
A three quarter inch female to female swivel hose adapter is the part that makes this work, and it costs a couple of dollars in the plumbing aisle. Screw it onto a rinsed two liter bottle with a washer inside the bottle side, and add a second washer if it weeps. Then put eight holes along one side of the bottle with a push pin and widen each one with a bamboo skewer. Push pin holes on their own give a fine mist, which is lovely over a seed bed; the widened holes give jets. Start the tap low and build the pressure up.
Get the full tutorial at Clever Crafty Cookin Mama.
23. Upcycled Soda Bottle Snowflakes
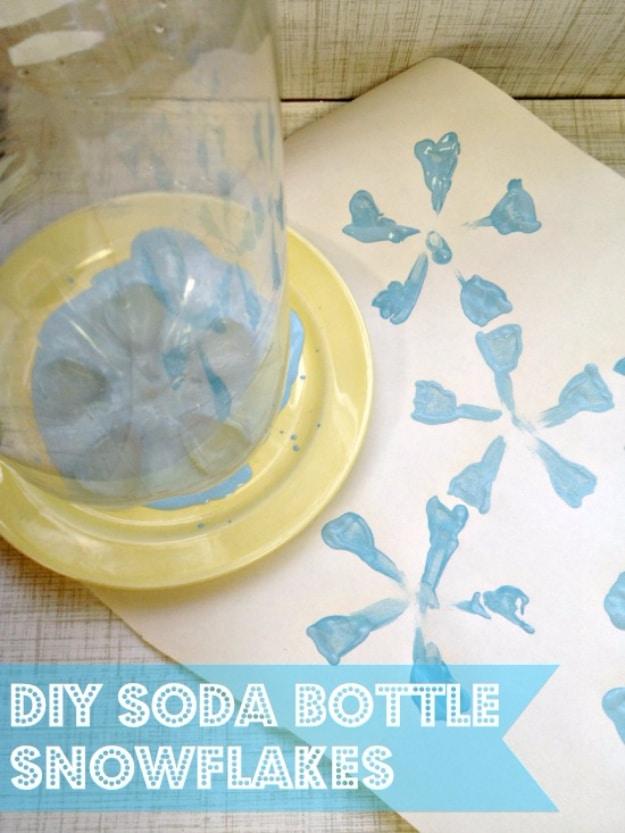
The bottom of a two litre bottle, pressed into a plate of paint and stamped onto paper, prints a five or six pointed snowflake in one move. Press firmly enough to coat the whole fluted base, then press just as firmly on the paper, because a light touch gives you three points and a smudge. Light blue on white is the obvious pairing. Once the print is down a fingertip can connect the dots into a joined up snowflake, which is the step that makes it look finished rather than like a set of blobs. One bottle per child and the whole table can work at once.
Get the full tutorial at Surviving a Teacher's Salary.