Outdoor & Garden
21 DIY Fence Post Projects and Fence Ideas to Build
DIY fence post projects and fence ideas: a welcome sign, a garden bench, a loft bed, a fold down table and a dozen fences you can build yourself.
html PUBLIC "-//W3C//DTD HTML 4.0 Transitional//EN" ""
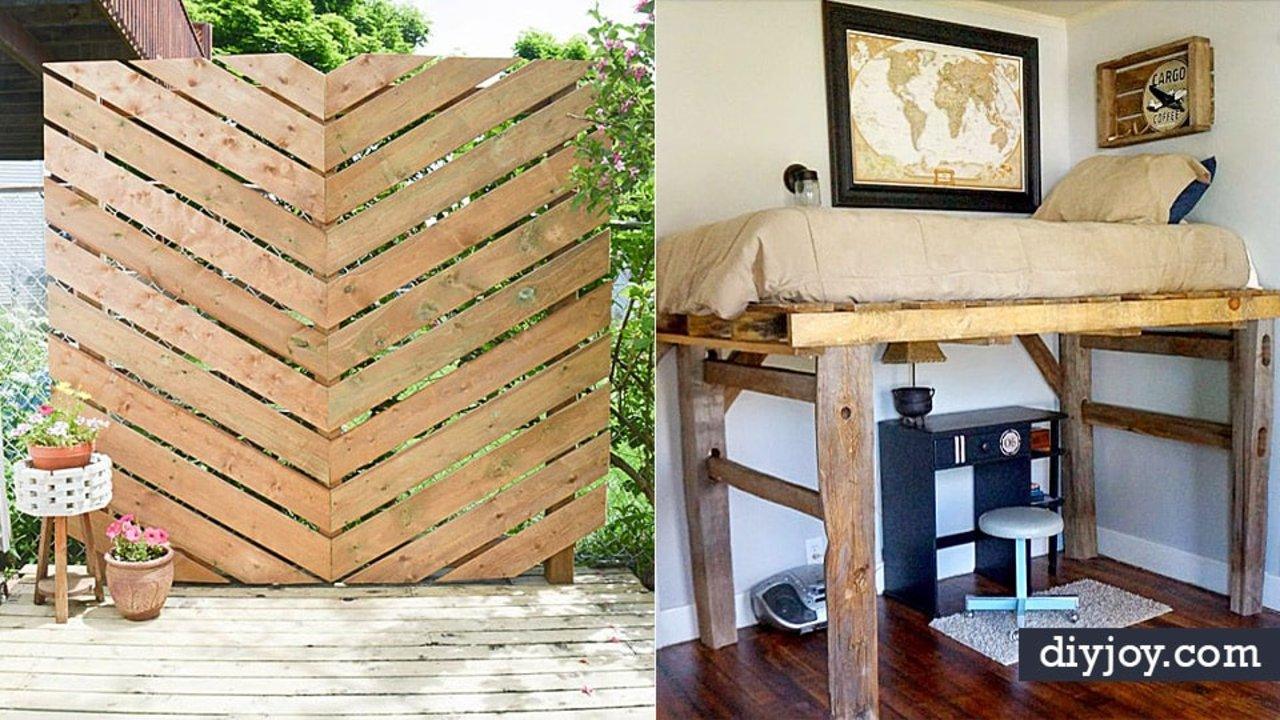
A four foot length of cedar fence post costs about a dollar at the hardware store, and that is the whole reason this list exists. Stand one on a block of pine and you have a porch welcome sign. Line four of them up and you have a garden bench or a loft bed. The other half of these 21 projects is the fence itself, built out of pallets, corrugated tin, split rails, woven branches and in one case a handful of glass marbles tapped into drilled holes so the sun comes through. Budgets run from free to a couple hundred dollars, skills run from a hammer to a post hole digger, and every tutorial links back to the person who worked it out.
1. Fence Post Welcome Sign
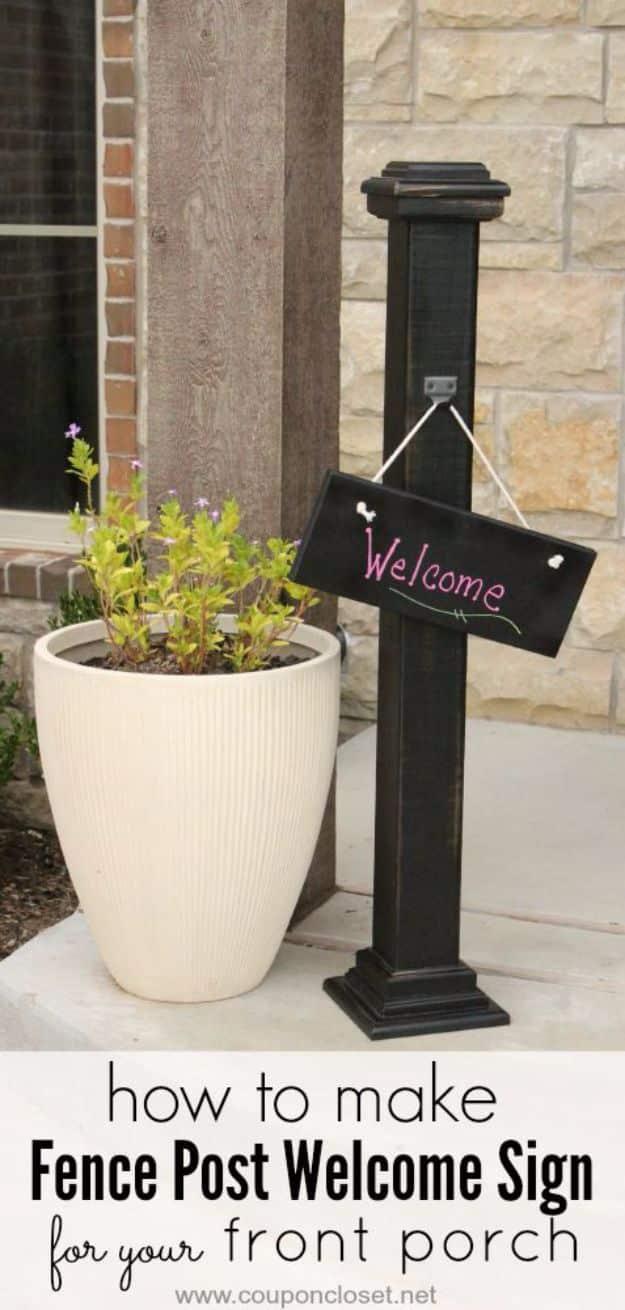
A chunky black porch post with a little chalkboard sign swinging off a hook, and the whole thing is one treated 4×4 fence post cut to 36 inches plus four scraps of pine. A 6×6 square glues and nails to the bottom, an 8×8 square goes under that to widen the base, and a 4×4 square caps the top with glue only so no nail heads show. Titebond and four 1-1/2 inch galvanized nails do all the holding. Paint it, screw a hook in about six inches down from the top, and hang a 6 by 12 chalkboard panel on twine. Rewrite the greeting whenever the season turns.
Get the full tutorial at One Crazy Mom.
2. Fence Post And Pallet Loft Bed
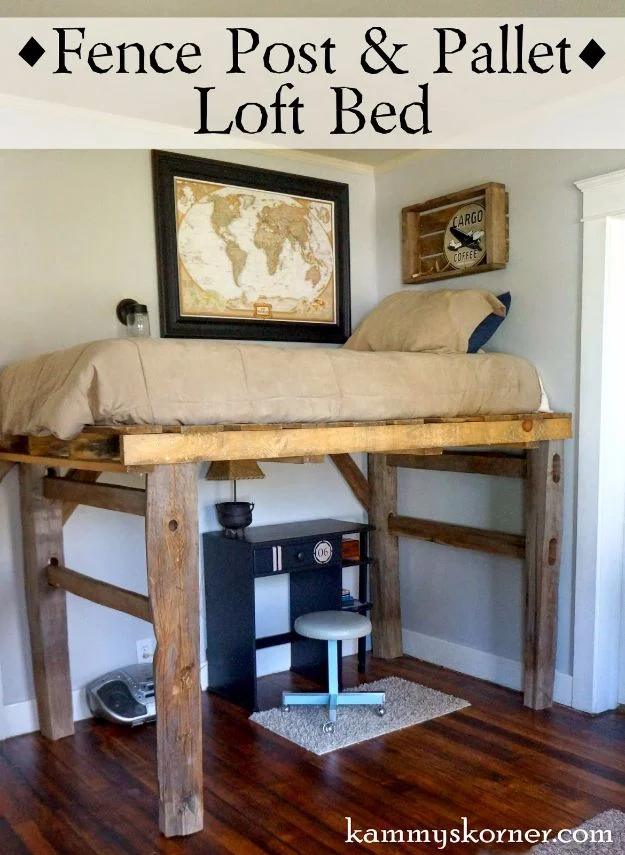
A loft bed framed from four old fence posts with one oversized pallet laid across them as the platform, which is about as cheap as a raised bed gets. The pallet came with a delivery of metal roofing and the posts were already sitting in a shed, so the real cost was the hardware. Under it there is room for a desk and a chair, and a $3.97 Home Depot sconce on the wall handles the reading light. Scrub the posts before they come indoors, because whatever has been living on them for a decade does not belong in a bedroom.
Get the full tutorial at Kammy's Korner.
3. Fence Post Garden Bench
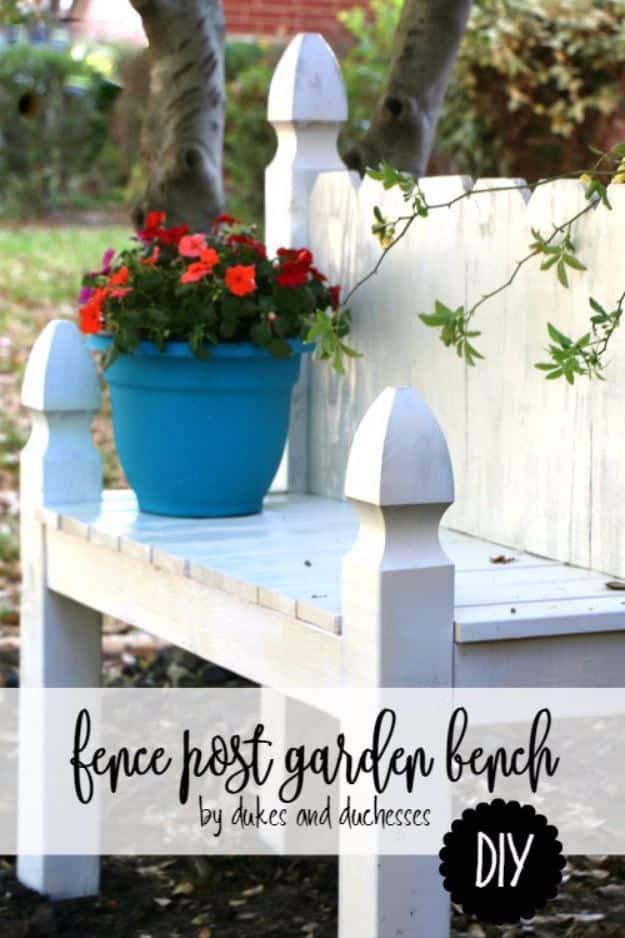
Four garden posts and six fence pickets become a bench with a high picket back, and the measurements are the part worth reading twice. A 4 inch post is really 3.5 inches square and a 6 inch picket is really 5.5 inches wide, so cut from the real numbers, not the label. The back posts stay tall, the front posts come down about six inches, and an 18 inch scrap clamped on as a height guide keeps the frame level while you work alone. Pocket holes in three 33 inch and two 10 inch 2x4s make the seat frame. Heirloom white paint, a coat of sealer, done.
Get the full tutorial at Dukes and Duchesses.
4. Backyard Fence Made With Repurposed Pallets
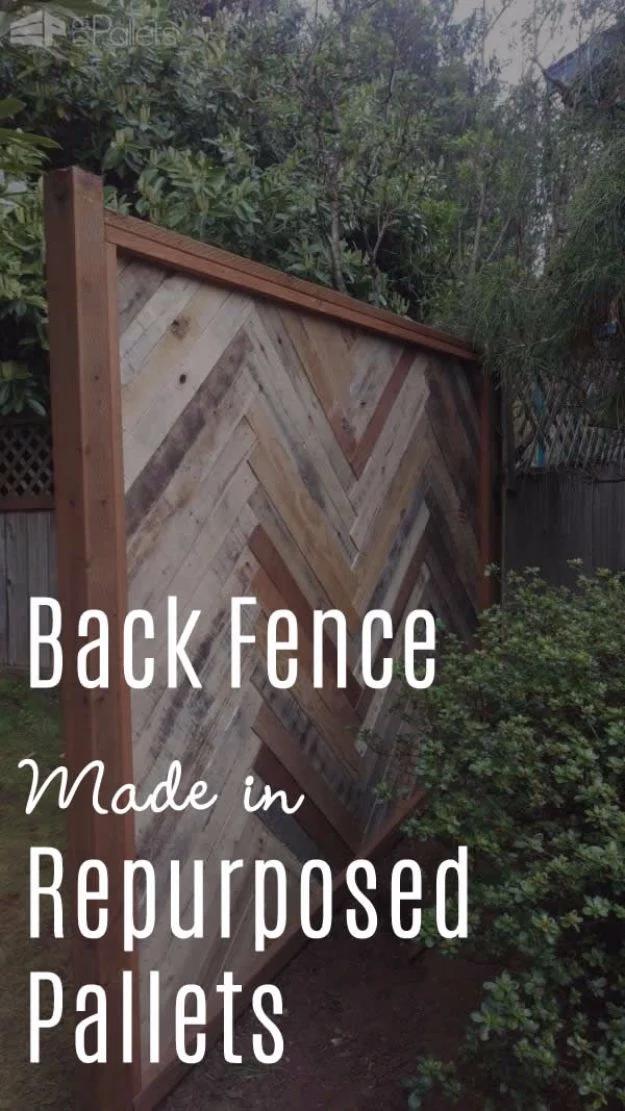
A framed panel filled with pallet boards set at 45 degrees into a herringbone, and it looks like a designer screen rather than a salvage project. Eight pallets supply the slats, a 10 foot treated 4×4 carries the weight, two 8 foot treated 2x4s and about 50 feet of 1×1 make the frame, and a box of #8 by 1-1/4 inch screws holds it all. Drill pilot holes, always, because old pallet boards split the second a screw goes in dry. Budget honestly: this one took over 16 hours, and most of that was ripping warped boards straight and fighting rocky ground for the post holes.
Get the full tutorial at 1001 Pallets.
5. Chicken Fence
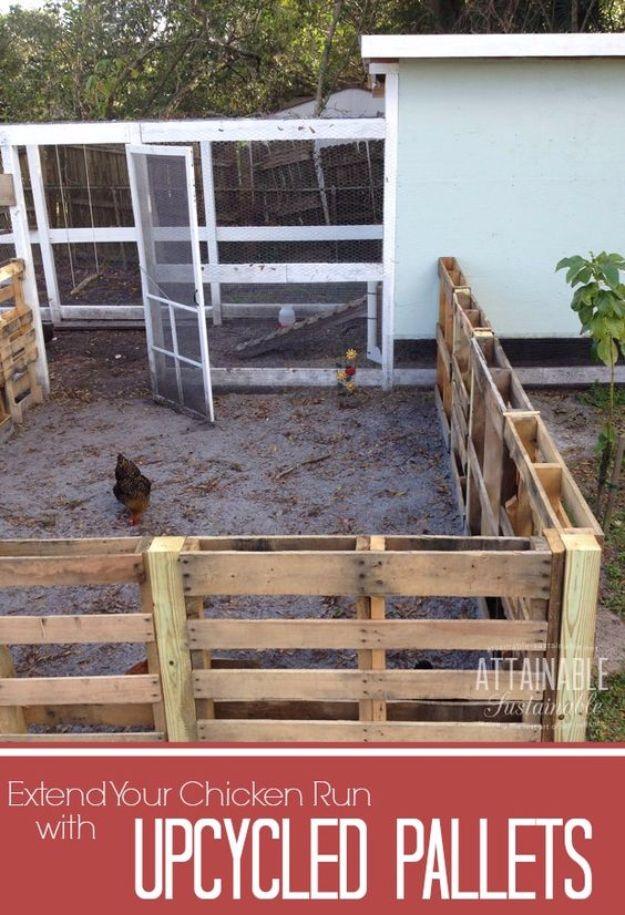
A chicken run extended with upcycled pallets, and the practical detail is that a standard pallet is 40 by 48 inches, so you lay the run out in pallet widths rather than measuring a line and cutting to fit. Dig 12 inch holes for the 4×4 corner posts and pack the soil down hard with the end of a shovel. Screw neighboring pallets to each other at top, middle and bottom. Never run more than two pallets without a 4×4 set in the ground between them. Leave a 32 inch gate opening so a wheelbarrow fits, close the bottom gaps with extra planks, and net the top against hawks.
Get the full tutorial at Attainable Sustainable.
6. Corrugated Metal Fence
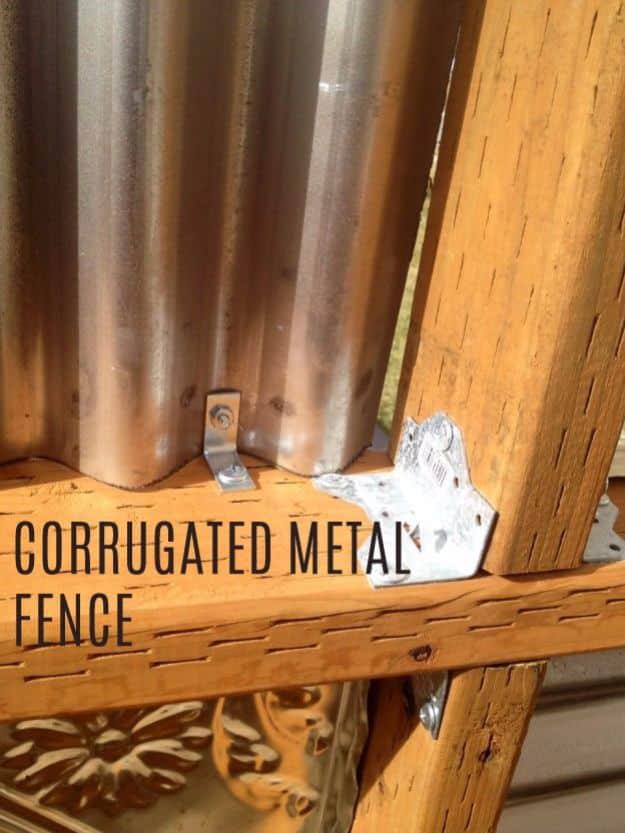
Pressed tin ceiling tiles and corrugated steel set into a wood frame, which is the most striking fence on this list and also the fiddliest. The tiles are 24 inch drop in squares, the corrugated panels are 22 gauge, and the framing is pressure treated 2x4s between 4×4 posts. The painting is what makes it: a latex house paint base goes on sprayed, then more colors are rolled on top so the roller only catches the raised relief of the pattern. Set all the tin first and the corrugated sections last. Cut with a circular saw and a metal blade, trim with snips rated for 22 gauge.
Get the full tutorial at Noelle O Designs.
7. Fence For Small Livestock
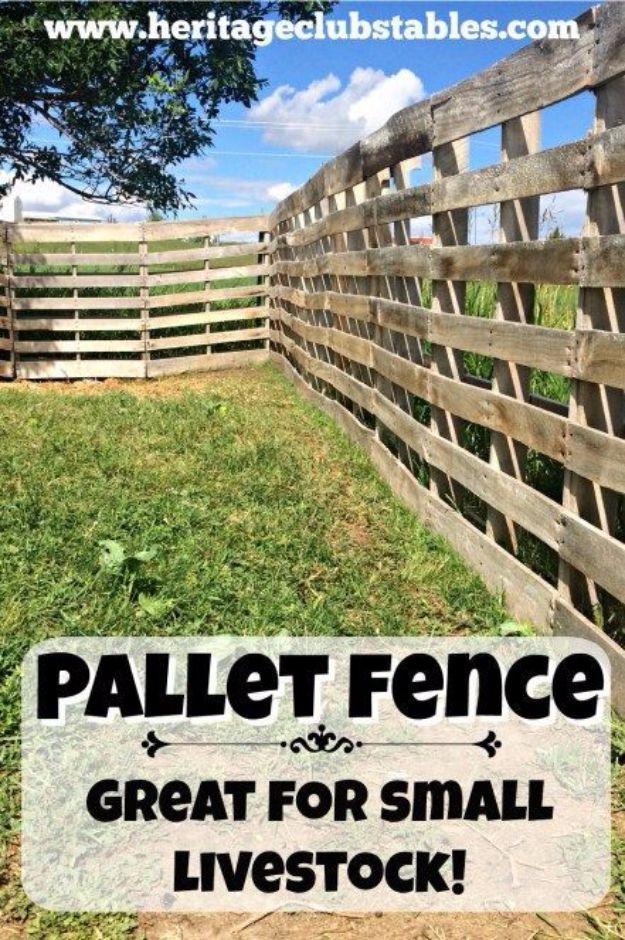
A pallet fence about four feet high that holds Nubian goats, which is a genuine endorsement given what goats do to fencing. Collect pallets that are all the same size, because mismatched ones make both the build and the finished run look wrong. Steel posts go in between, and here is the regret worth borrowing: the builder set hers every three pallets and says she would do every two if she started again. Screw each pallet to its neighbor three or four times. Check the board gaps before the kids arrive, since anything a young goat can get a hoof into becomes a ladder.
Get the full tutorial at A Life of Heritage.
8. Fence Gate
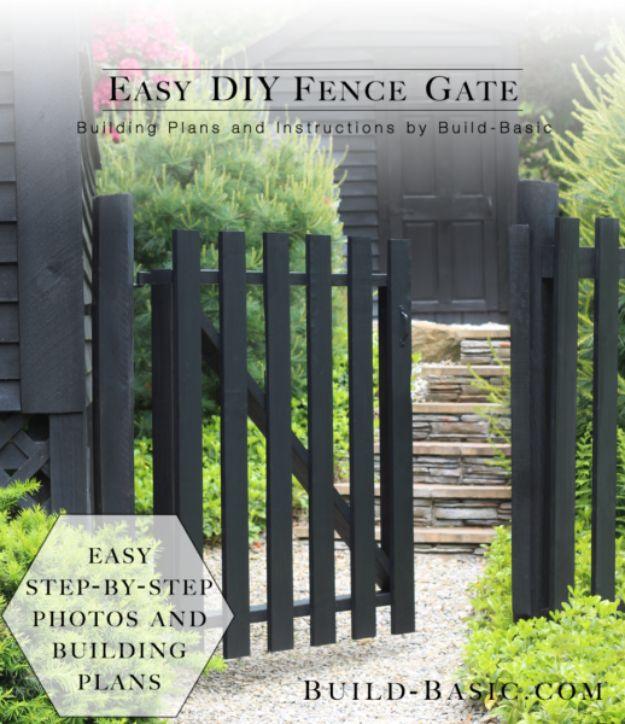
A black garden gate for about twenty dollars and roughly an hour of work, and it is genuinely a beginner project because every cut is square. The frame is four 2x4s, with the two side pieces cut three inches shorter than the full gate height, joined at the corners with pocket holes and 2-1/2 inch Kreg HD exterior screws. One diagonal 2×4 cut to fit across the frame is what stops the gate sagging into the latch two summers from now. Then 1×4 pickets, the two end ones flush with the frame edges, and a spacer block to keep everything between them evenly gapped.
Get the full tutorial at Build Basic.
9. Fence Table
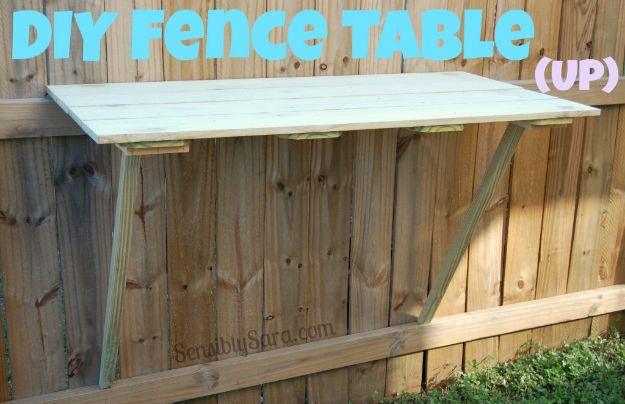
A table that hinges flat against the fence when you are not using it, which solves the small patio problem better than any folding furniture does. Four six foot dog ear pickets lie side by side with scrap wood as spacers, cross pieces screw on underneath, and two heavy duty four inch tee hinges mount the whole slab to the existing fence rails. The legs are cut from an 8 foot 2×2 and come off completely. Cut the fence boards 48 inches up from the bottom. About thirty dollars and a bit over an hour, and you need a second person to hold it level while the legs are marked.
Get the full tutorial at Sensibly Sara.
10. Garden Fence
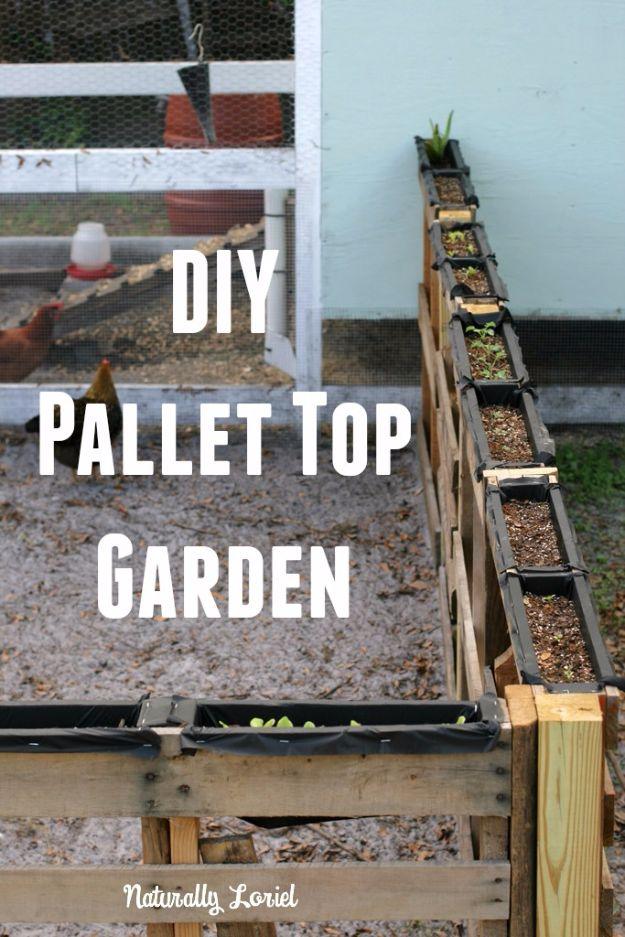
A pallet fence around a vegetable bed with the top rails converted into long narrow planters, which doubles the growing space and gives the chickens their own snack bar. Weed fabric cut about five inches longer than the opening gets stapled in as a cradle, bunched slightly on the inside so soil cannot escape through the corners. Fill with equal parts compost, vermiculite and peat plus potting soil and worm castings, roughly ten five gallon buckets for a full run. Water it heavily to settle it before planting. Stick to shallow rooted crops: lettuce, kale, spinach, arugula, chard, radishes.
Get the full tutorial at Naturally Loriel.
11. Iron Fence
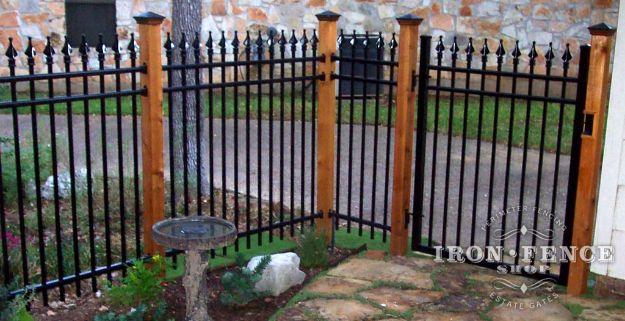
Ornamental iron and aluminum fencing is one of those jobs people assume needs a contractor, and the honest answer from the people who sell it is no. On the iron system a bracket slides over the horizontal rail, the panel and bracket are held against the post, and self tapping screws go in with a drill. The aluminum version is simpler still: the rail slides into a punched hole in the post and one supplied screw locks it. There are no special tools beyond a drill and a rented post hole digger, and panels that need shortening cut with a hacksaw, a bandsaw or a rotary tool.
Get the full tutorial at Iron Fence Shop.
12. 4 Rail Horse Fence
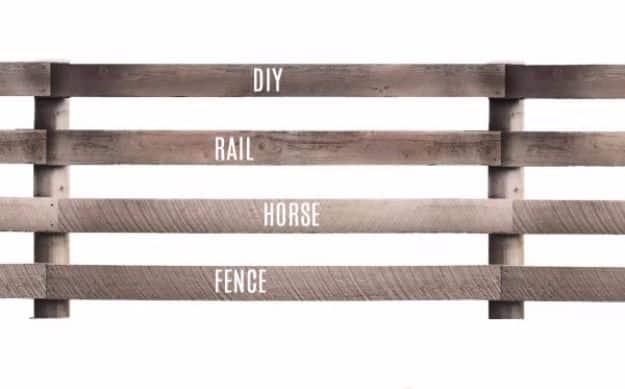
Classic four rail fence for horses, and every number here matters for safety. Posts should be at least five inches across, treated, and set 7.5 feet apart in holes dug below your local frost line, usually around three feet. Two 50 pound bags of quick set concrete go in per post, stopping just below ground level so water drains away instead of pooling. Give it 48 hours. Rails are 1 by 6 by 16 foot boards, oak or treated pine, fixed with galvanized 3 inch screws or 3.5 inch ring shank nails. Stagger the second and fourth rails so joints do not stack. Keep the bottom rail four inches clear of the ground.
Get the full tutorial at Modern Farmer.
13. Marble Fence
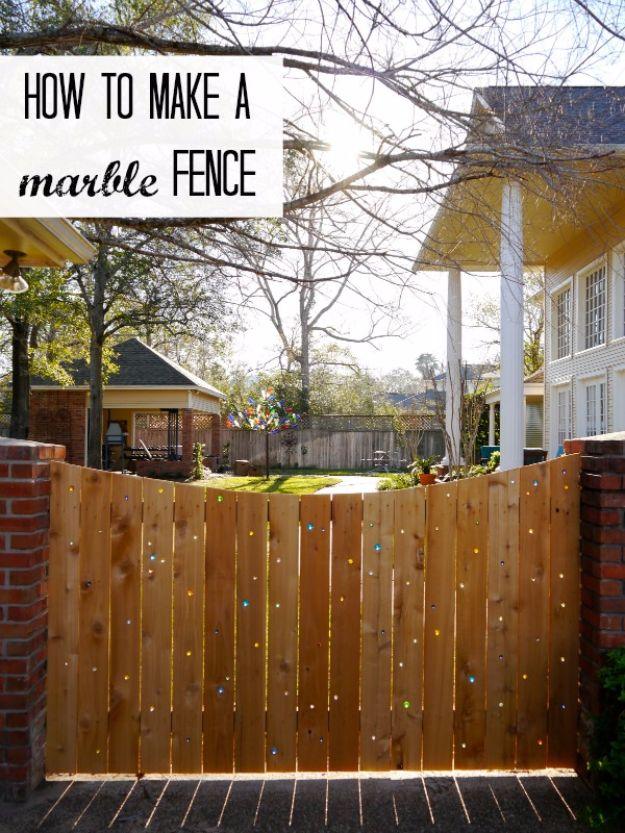
Glass marbles tapped into drilled holes in a cedar fence, so that from the right side at the right hour the whole run lights up in dots of color. The method is delightfully low tech: no glue anywhere, just a drill and a rubber mallet. Use a scrap as a practice board to find the bit that makes the snuggest hole for each marble size, because different marbles need different bits. Pick marbles light actually passes through, not the opaque ones. They will work loose as the wood swells and shrinks through the seasons, and they push straight back in, so this is a fence that needs a walk round every spring.
Get the full tutorial at Creating Really Awesome Fun Things.
14. Mesh Fence
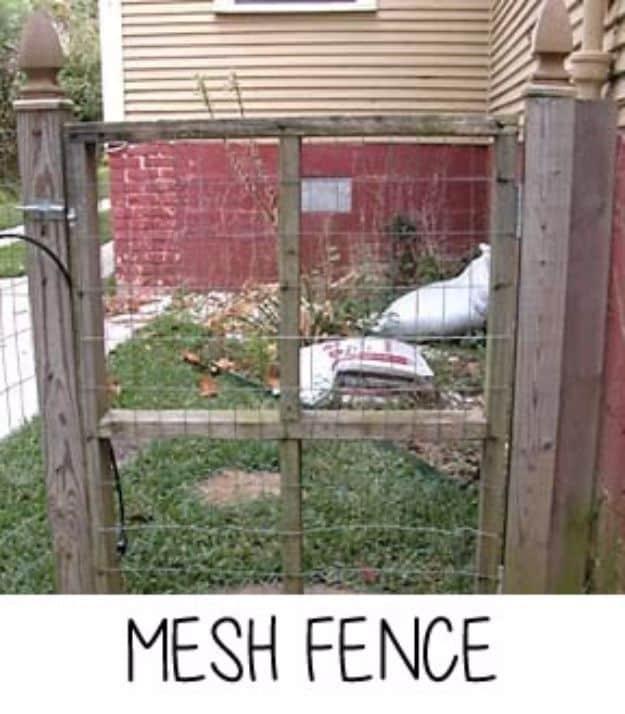
The cheapest way to get a dog off a chain and into a yard, built from welded wire mesh and posts and nothing else. Metal T posts or wooden posts go in 6 to 8 feet apart, closer if you want it stronger, driven down until the V at the bottom of the T post is buried. Buy the strongest mesh you can afford, welded rather than thin chicken wire. Attach it at the top, the middle and the bottom of every post with baling wire or wire ties, or a heavy duty staple gun on wooden posts. One person pulls the mesh tight against the post while the other fixes it. One 40 pound bag of concrete sets two gate posts.
Get the full tutorial at Unchain Your Dog.
15. Pallet Fence With Flowers And Herbs
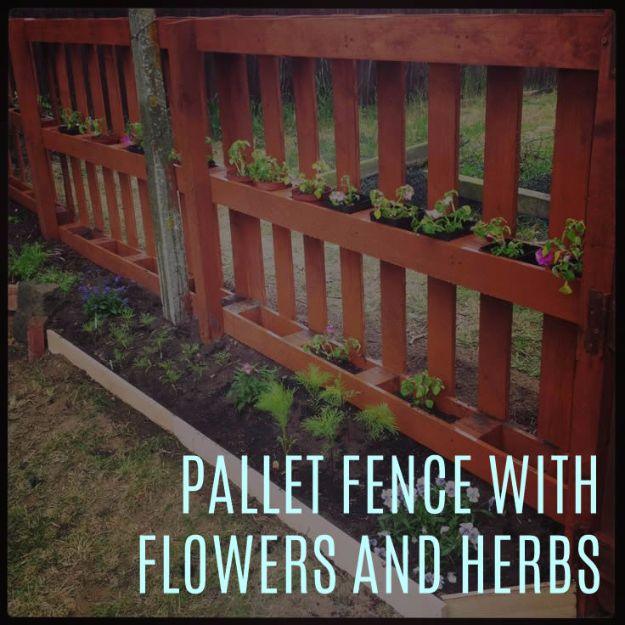
Pallets painted terracotta and stood upright, with the open bays along the bottom and middle rails filled with soil and planted out in bedding flowers and herbs. It is the cheapest fence on the list, since supermarkets and retailers give pallets away. If you are spanning between two walls, screw a supporting board to each wall and fix the first pallet to that, then each pallet to the one before it. With no walls to work from, sink a substantial pole or log deep in the ground at each end to do the same job. One pallet hung on hinges becomes the gate. Paint before you plant.
Get the full tutorial at Garden Edit.
16. Pallet Fence
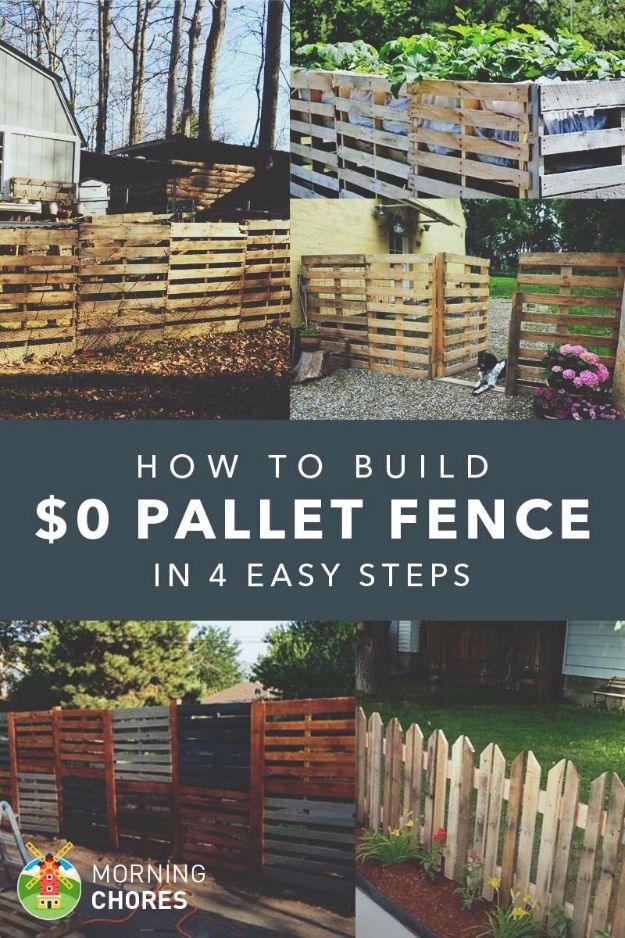
Four steps, and a materials list of free pallets plus a handful of bolts, which is how you end up with a fence that costs nothing. Ask small businesses first, because most companies pay to have pallets hauled away and will happily hand them over. Collect similar sizes so the run lines up neatly, and check the stamps so you know they are safe to reuse. Then line them up and bolt them to each other with 3 inch bolts or big roofing nails, or drive stakes into the ground and drop the pallets over them. Add hinges and a latch to one for a door, and staple chicken wire across the back if something is getting in.
Get the full tutorial at Morning Chores.
17. Patio Fence
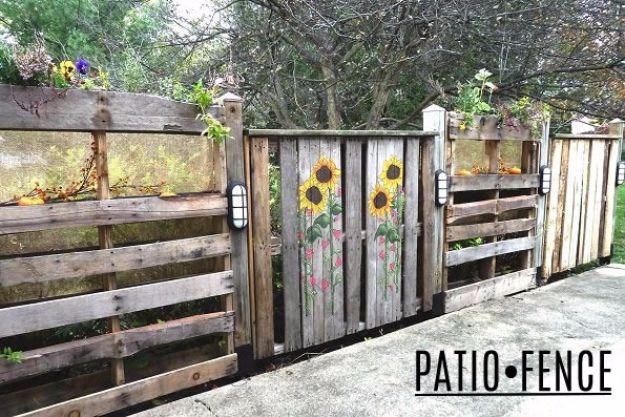
Five pallets stood up as a patio backdrop, one painted with sunflowers down the middle, two filled with soil for flowers and herbs, and two fitted with armrests cut from a dismantled children’s play fort. Instead of digging holes and pouring concrete, the uprights sit in metal ground spikes made to hold a 4×4, hammered 30 inches down, which is a Saturday afternoon rather than a weekend of mixing. Lights and post caps finish it. The whole thing took two unhurried weekends, and almost everything except the spikes, the lights and the caps came out of what was already in the yard.
Get the full tutorial at Recyclart.
18. Roll Bar Fence
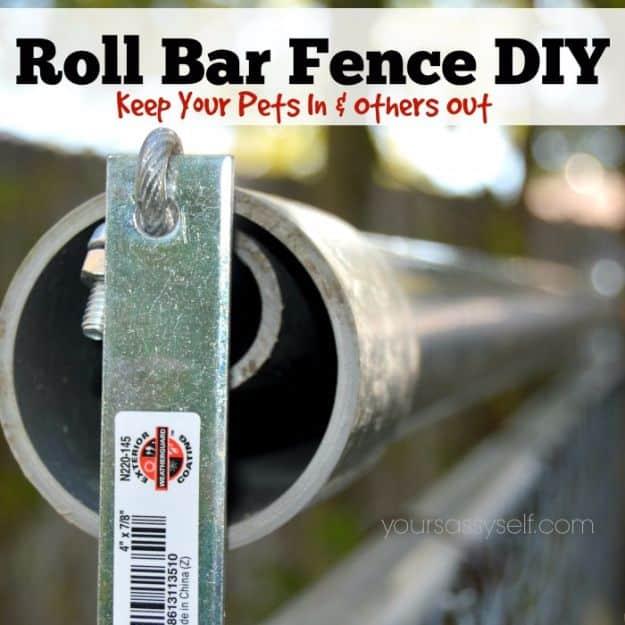
A spinning bar along the top of a fence so a dog cannot get a grip to climb over, built from two sizes of PVC and a length of wire. A 1 inch inner pipe carries the wire, a 3 inch outer pipe slides over it and spins free, and you leave about half to three quarters of an inch of slack so it keeps turning. L brackets, 4 by 7/8 inch, bolt to the fence with their openings facing the center of the wire run. Crimps lock the wire at each end. Work in 4 foot sections or shorter and keep real tension on the wire, because a slack run lets the pipes sag and stop spinning.
Get the full tutorial at Your Sassy Self.
19. Split Rail Fence
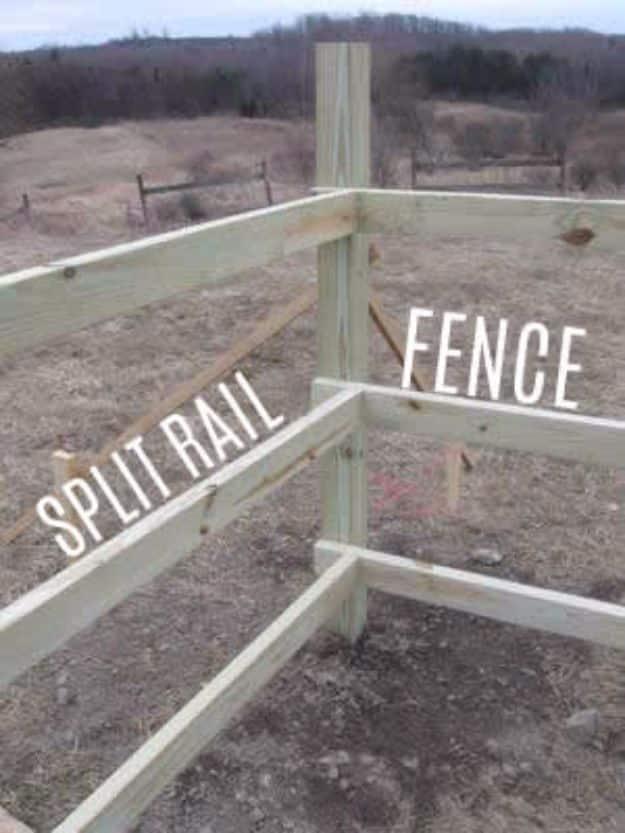
A split rail fence with wire mesh behind it, which gets you the look of a country fence and an actual barrier for dogs and rabbits. Posts are 4×4 by 8 foot pressure treated, set 6 to 8 feet apart, in holes dug to the local frost line, 42 inches on this build. One 60 pound bag of premixed concrete goes into each hole, cures most of the day, then gets backfilled. Rails are 2×4 by 16 foot, and the top rail is marked at 49 inches off the ground. Hang the top rail with one screw per post first so you can sight down it before committing. Mesh goes on last, stapled every foot or so, pulled taut between posts.
Get the full tutorial at Home Fixated.
20. Wattle Fence
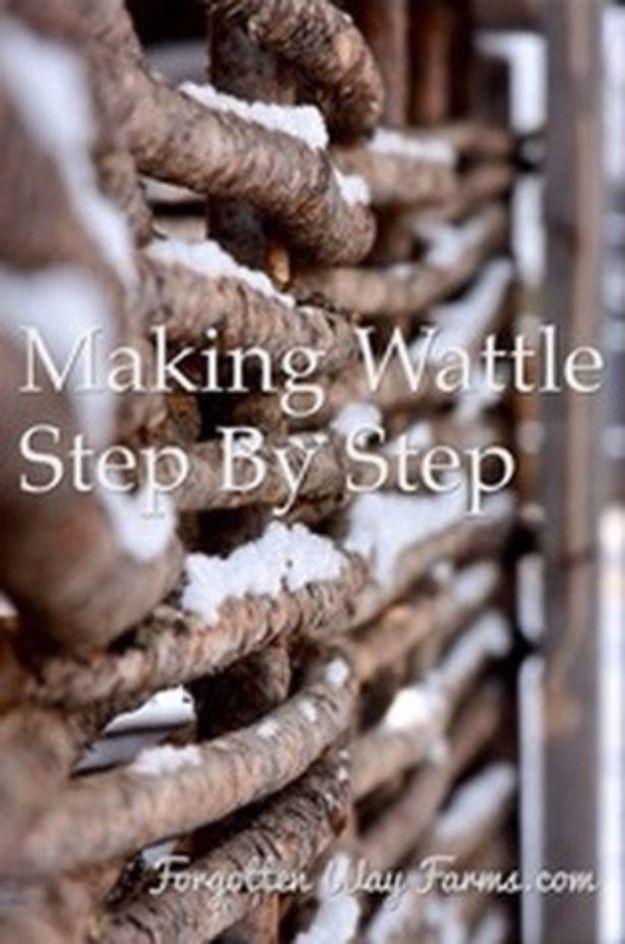
Wattle is the oldest fence on this list and there is not a nail or a screw anywhere in it, just upright stakes with green branches woven between them. Sort what you cut into two piles: anything an inch and a half thick or more becomes a stake, anything under an inch becomes the weave. Stakes get cut to three or four feet, tapered at one end with a drawknife and hammered into a jig drilled with holes sixteen to eighteen inches apart. Weave it all green, because dry wood snaps. Stop about four inches short of the stake tops so you have handles for carrying the finished panel.
Get the full tutorial at Forgotten Way Farms.
21. Wood Privacy Fence
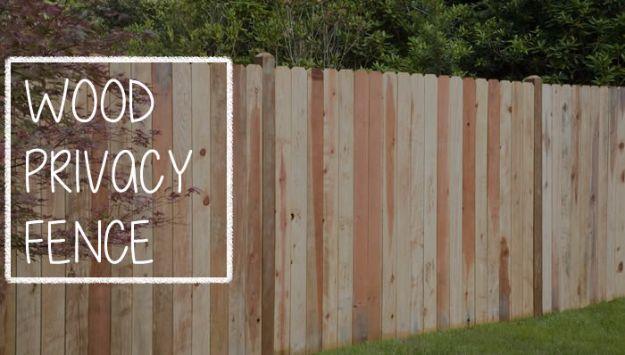
The plain board privacy fence, and the guide behind it is worth reading before you buy anything. Posts are 4×4 pressure treated, set in holes about three times the width of the post and dug below the local frost line. Rails are 2×4, with the lower edge of the top rail five feet four and a half inches up and the boards held an inch and a half clear of the ground on a 2×4 laid flat as a guide. Two fasteners at every rail. Butt the boards tight for a solid screen, or alternate them side to side for a shadowbox that still lets air through. Call 811 before you dig.
Get the full tutorial at Lowe's.