DIY Decor
18 Button Crafts to Empty Out the Button Jar
Button crafts that use up the jar: 18 tutorials for button art, bowls, clocks, coasters, keyrings, owls and pillows made from your spare buttons.
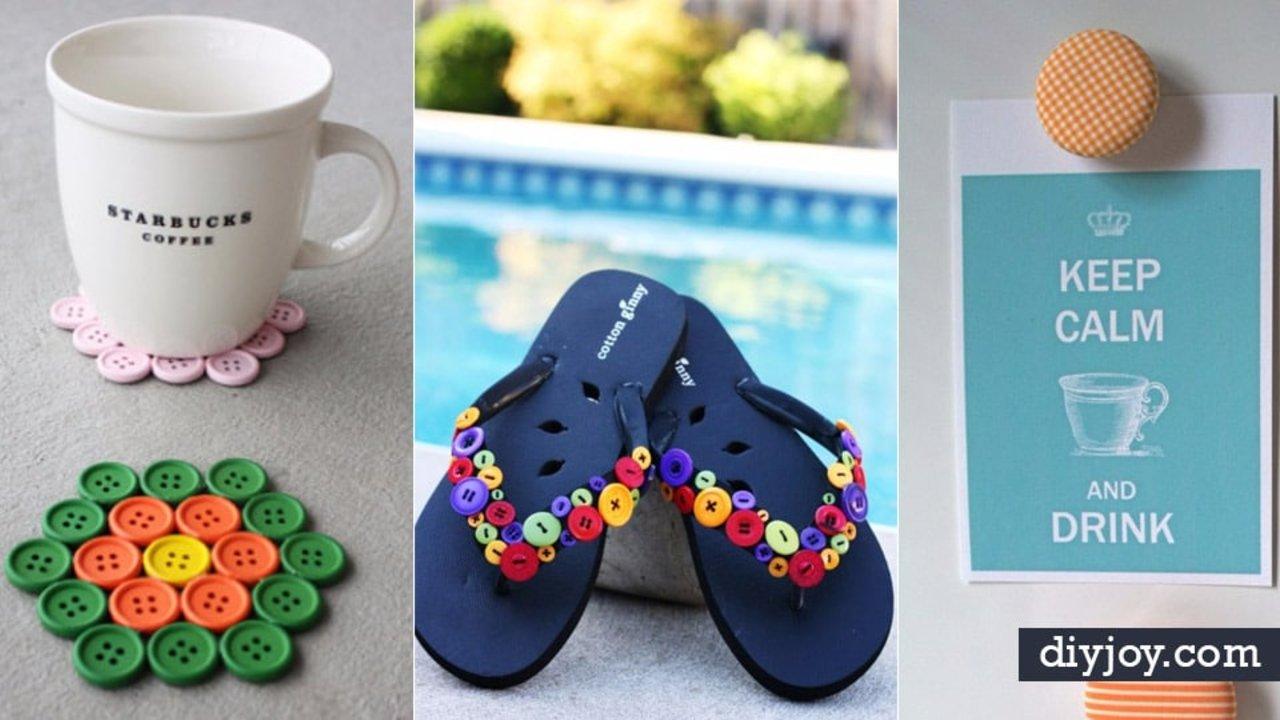
Every button jar in the country has the same problem. There is never a set of four that match, so it is useless for actually sewing, and nobody can bring themselves to throw it out. These 18 button crafts are the answer, and they fall into two camps. Some want a mass of mismatched buttons and do not care what is in it: a bowl formed over a balloon, a tray filled edge to edge, a monogram on canvas, a tree on a painted sky. The others want a handful of good ones, which is where the vintage buttons finally earn their keep, on a clock face, a keyring or a pillow. There is a headband in here a five year old can sew most of by herself. Tip the jar out and start sorting.
1. DIY Owl Button Craft
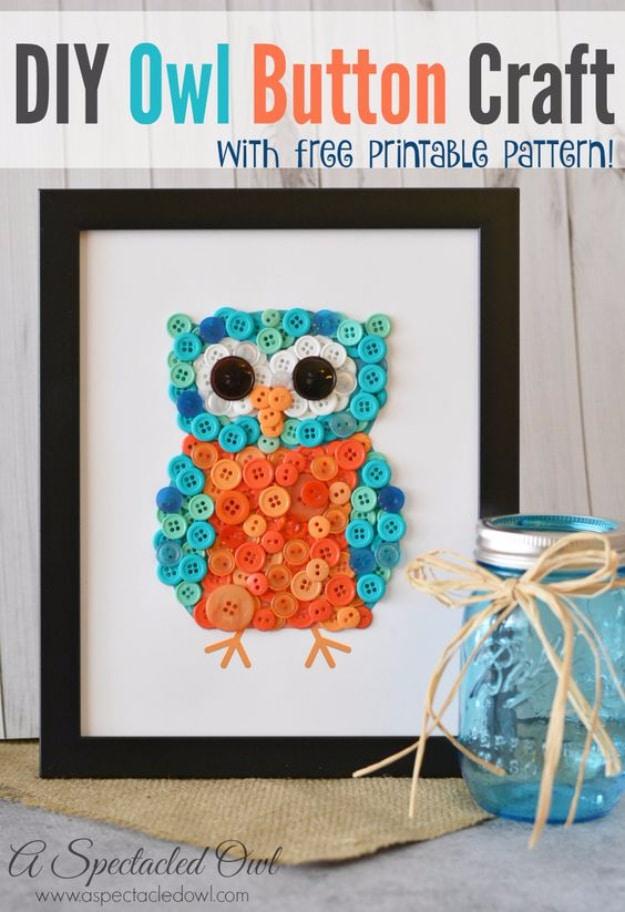
An owl packed out of buttons over a printed pattern, and the pattern is what makes it work: print the free template on card stock, trim it to eight by ten and glue straight onto it. Outline each area first with a hot glue gun, then fill the middle, and do not worry about gaps because a second layer covers them. Two bags of one hundred and thirty buttons in each colour is the real quantity. Two large black buttons make the eyes, small orange ones the beak. Sweep the glue strings off with a dry toothbrush at the end.
Get the full tutorial at A Spectacled Owl.
2. Button Globe
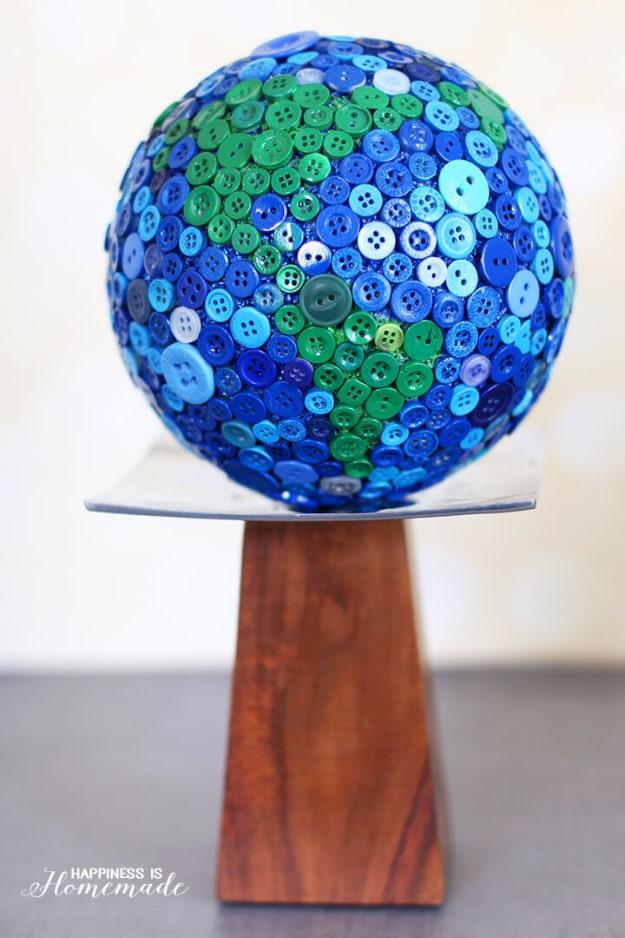
A foam ball turned into a globe, and the continents are painted on before a single button is glued. Start with an eight inch craft foam ball, paint the oceans blue and the land green with acrylics, and hold it steady on two bamboo skewers pushed into a block of foam while it dries overnight. Half a pound of buttons covers it, most of them about a quarter of an inch across. Use a glue made for foam or plain white glue, because plenty of adhesives dissolve it. Green continents first, dried overnight, then blue in small sections.
Get the full tutorial at Happiness is Homemade.
3. Button Crafting Tools Holder
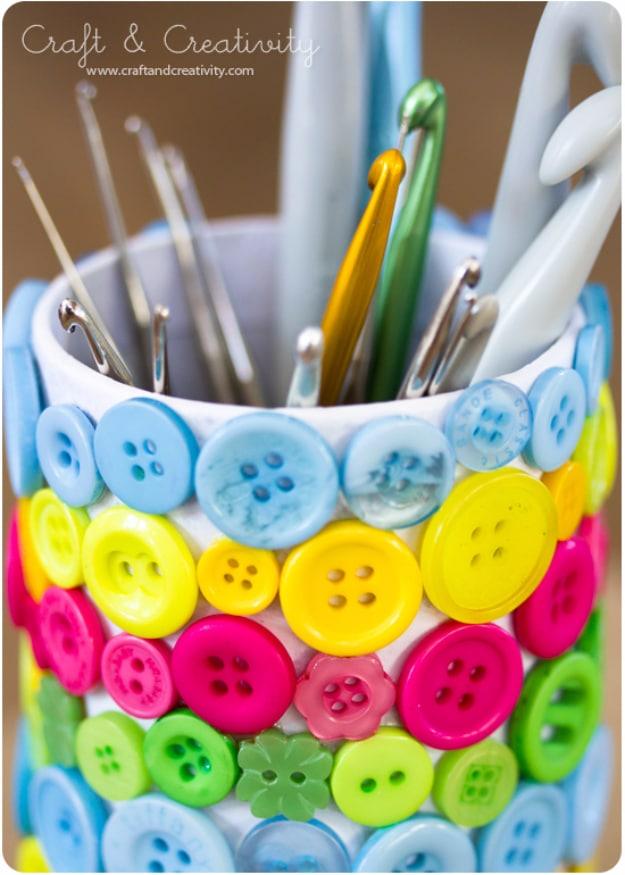
A plain tin or pen pot with its outside covered in buttons, used to stand crochet hooks in. Rows of one colour at a time is what lifts this above a jumble: a band of pale blue, then yellow, then pink, then green, each row overlapping the last slightly so no tin shows through. All purpose glue holds them and dries fast enough that you are not holding each button while it sets. Work one horizontal band all the way round and let it grab before starting the next, or the weight of the wet row above drags the one below out of line.
Get the full tutorial at Craft and Creativity.
4. DIY Button Butterfly Art
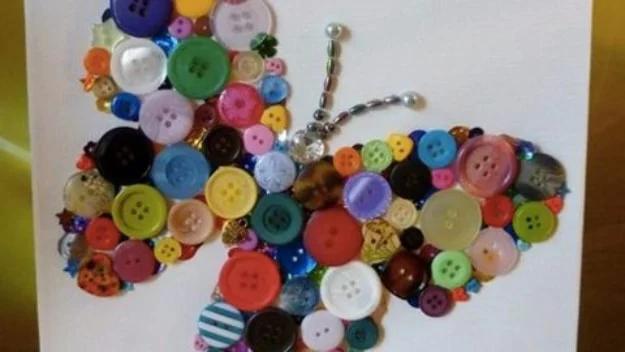
A butterfly laid out in mixed buttons on a plain canvas, with the body picked out in small clear beads and the wings filled in colour. Symmetry is the only hard part: lay one wing out completely, photograph it, then mirror it rather than trying to eyeball the second side, because a butterfly with uneven wings is the one thing everyone notices. Vintage buttons make this a different piece entirely, muted and shabby rather than bright. Draw the outline in pencil first and treat it as a boundary to fill, not a line to trace with buttons.
Get the full tutorial at Sueeye.
5. DIY Button Thumb Tacks
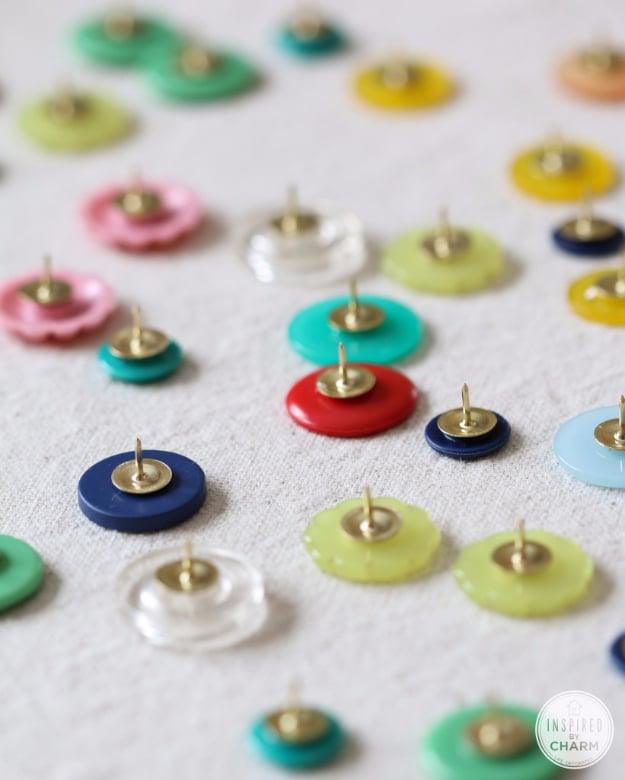
Buttons glued onto the flat heads of ordinary thumb tacks, and it takes about as long as it sounds. Set every button face down on the table first, put a small amount of glue on the tack head, and press it onto the back of the button, then leave the lot for a few hours rather than touching them. Dozens get done in one sitting. Use a glue with real long term hold rather than hot glue, because a tack gets pulled off a board repeatedly and hot glue lets go after a few months of that. Two holed buttons give the flattest seat.
Get the full tutorial at Inspired by Charm.
6. Button Cluster Key Ring
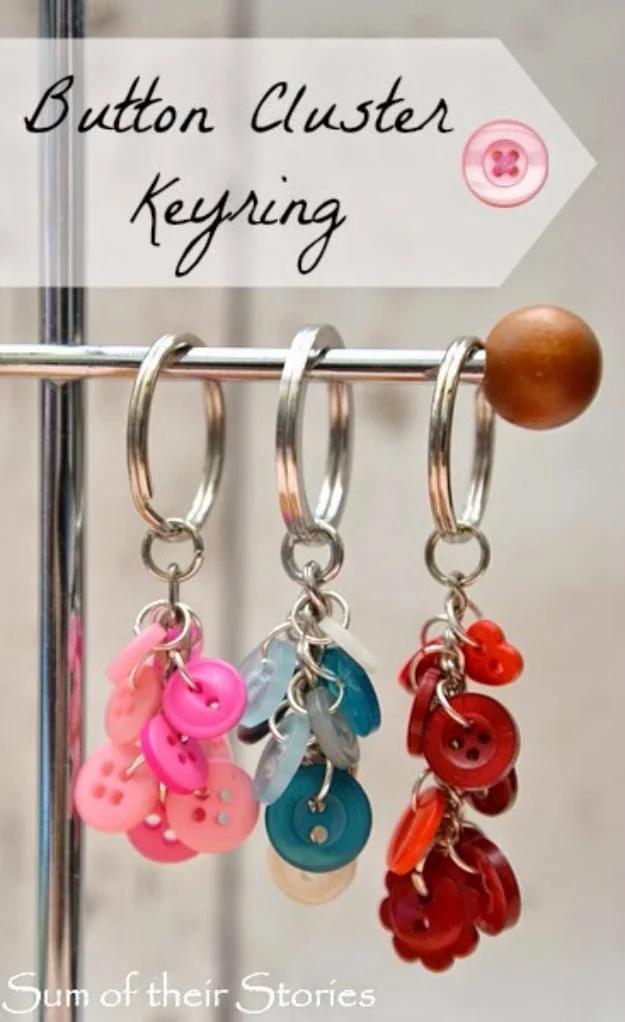
Small buttons hung straight onto the chain of a keyring with jump rings, five or six to a cluster in one colour family. There is exactly one thing to get right and it is the button: the gap between the hole and the outside edge has to be narrower than your jump ring, or the ring simply will not pass through. Seven millimetre rings suit most small buttons. Open each ring with pliers, thread it through a hole and onto the chain, close it, repeat. Old keyrings robbed for their chains cost nothing and the mismatched lengths look intentional.
Get the full tutorial at Sum of Their Stories.
7. Vibrant Button Tree On Canvas
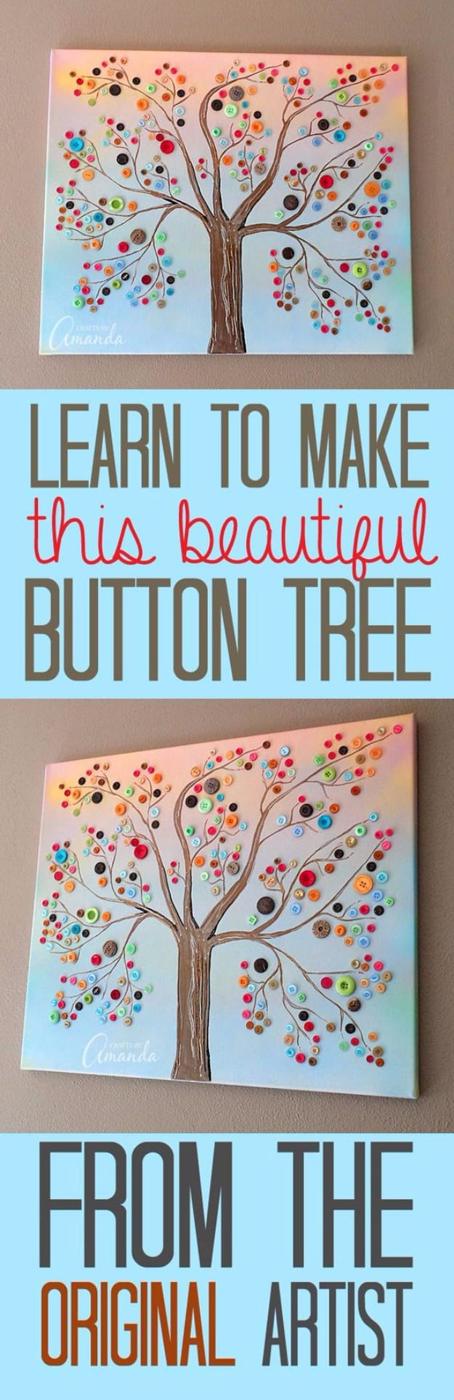
A tree on a canvas painted like a sunset, with buttons as the blossom. The background comes first and it is sprayed, not brushed: one end in sky blue, overlapped with robin’s egg and hyacinth, the other end in pink over-sprayed with yellow, then blue and purple dotted about until it looks right, and an hour to dry. Draw the trunk in pencil with five main branches and fill it with metallic brown, using a liner brush for the thin ones. Then the buttons, largest first, smallest saved for the outer edges, each one on a dot of strong adhesive.
Get the full tutorial at Crafts by Amanda.
8. Button Headband
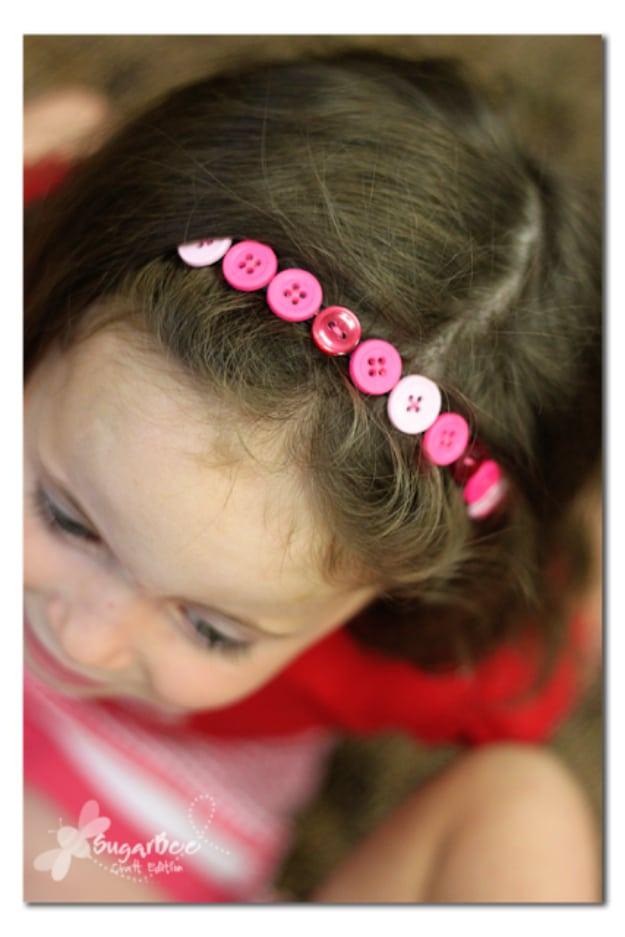
A row of buttons sewn onto flat elastic, and it is the project to teach a child to sew on a button. Flat elastic by the yard costs pennies, so a headband works out around twenty cents. Cut nineteen inches, lay out about eleven inches of buttons in the order you want them, then glue them down and let it dry for several hours before any needle comes out. That glue step is not in the original method and it is the one that makes it work for small hands, because the buttons hold themselves still while the sewing happens. Overlap the elastic ends half an inch and sew.
Get the full tutorial at Sugar Bee Crafts.
9. Easy Button Bracelet
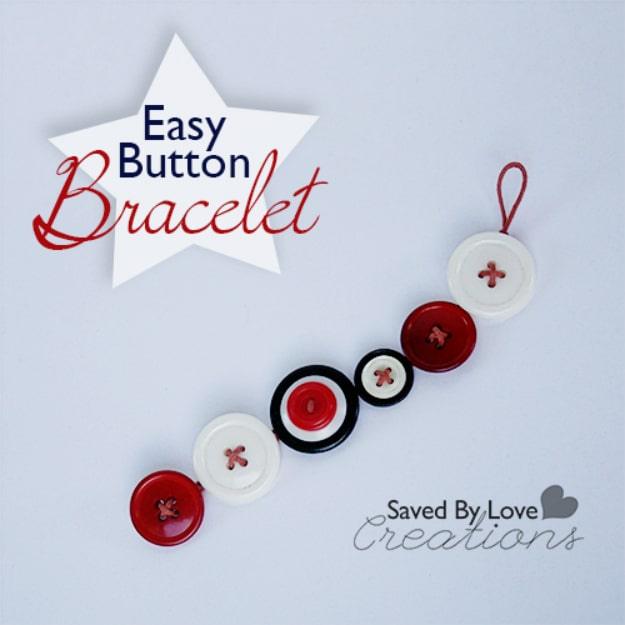
Vintage buttons threaded onto cord, which is the whole build and takes about ten minutes a bracelet. One millimetre cord is the right weight. Start by folding a loop at one end, big enough that your last button will just pass through it, and knot it so it holds. Then thread buttons along the cord to your wrist measurement and finish with the button that fastens into that loop. Alternating a wide pale disc with a narrow dark one gives a flat row some rhythm. Three of them came out of one half hour sitting.
Get the full tutorial at Saved by Love Creations.
10. DIY Button Clock
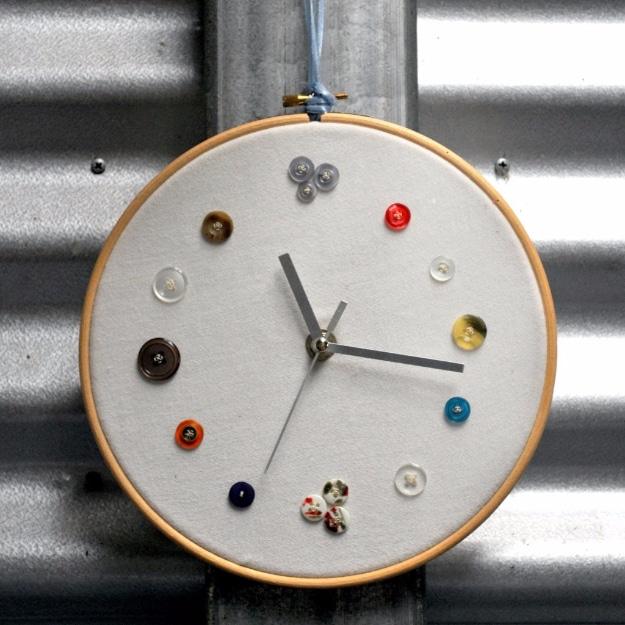
An embroidery hoop with fabric stretched in it, buttons where the numbers go, and the mechanism from a clock you took apart. Photograph the mechanism as you dismantle it, because remembering which washer goes where is not a thing anyone does. Old fabric wants doubling if it is brittle. Mark at least the twelve, three, six and nine with a ruler before you sew anything on, or the face ends up subtly wrong in a way you will notice every day. The mechanism needs backing with card or thin wood, because fabric alone will not hold its weight. An hour or two.
Get the full tutorial at Epheriell Designs.
11. Gift Wrap With Buttons
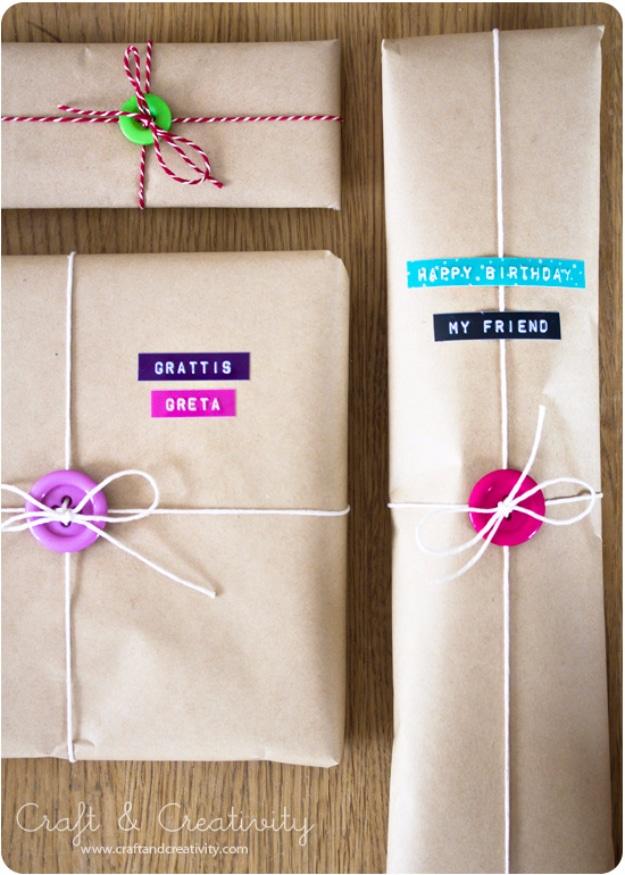
Plain kraft or white paper, string or baker’s twine, and one button threaded onto the tie where a bow would normally go. That is the entire idea and it is better than a bow, because a button lies flat enough to post. Thread both ends of the string through two holes from underneath so the button sits proud on the knot, then tie off on top of it. One bright button against brown paper is the version that works; a cluster starts to look like a craft project. Label maker tape instead of a gift tag finishes it.
Get the full tutorial at Craft and Creativity.
12. Burlap And Button Owls
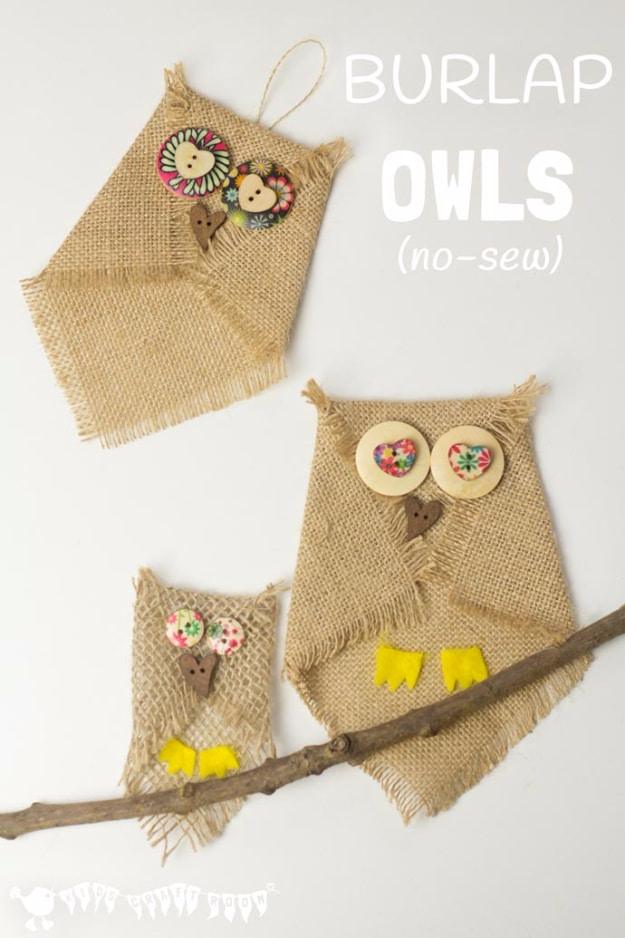
Burlap squares folded into owls, with buttons doing the eyes and a heart shaped button turned upside down for the beak. No sewing at all. Cut a square any size you like, fray the edges by pulling threads out, fold the top corners in and down, and hold the folds with a dab from a glue gun. Big round button, small round button on top, and you have an eye. Change the size of the square and you have a different owl, so a family of three comes out of the same five minutes. Yellow felt scraps make the talons.
Get the full tutorial at Kids Craft Room.
13. Monogram Button Wall Art
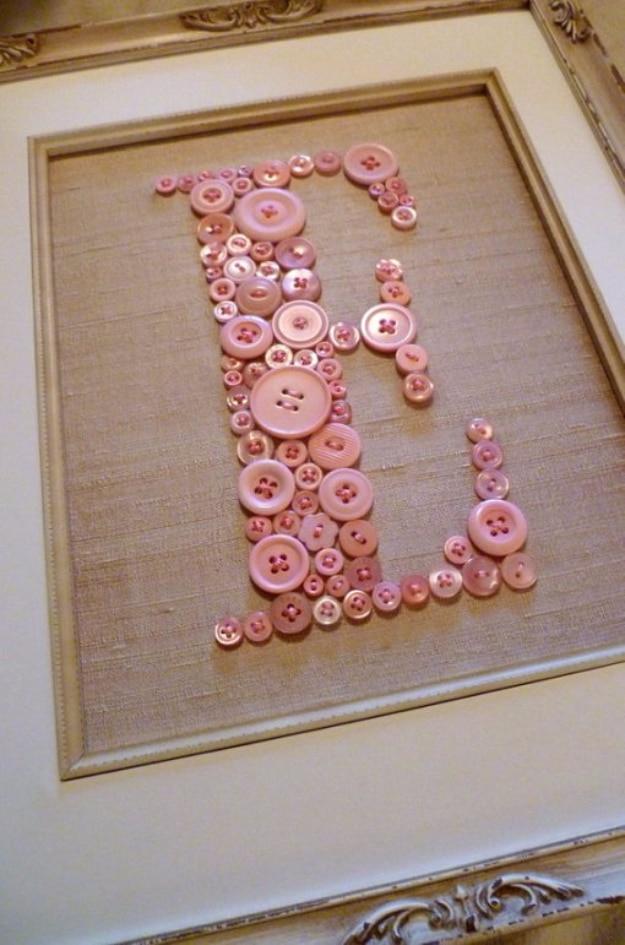
A single letter filled with pink buttons on fabric, stretched over a canvas and framed. The letter comes off your own computer: size the page to the canvas, pick a font, print it as large as it will go. Pin the cut-out letter to the fabric in an embroidery hoop and sew the buttons on around and over it, then pick the paper out afterwards with small scissors and tweezers, which is fiddly. Tracing the letter with an erasable fabric marker instead is far easier, but the finished piece then has to be washed. Beads fill the narrow strokes buttons cannot.
Get the full tutorial at Changing My Marbles.
14. Easy DIY Button Coaster
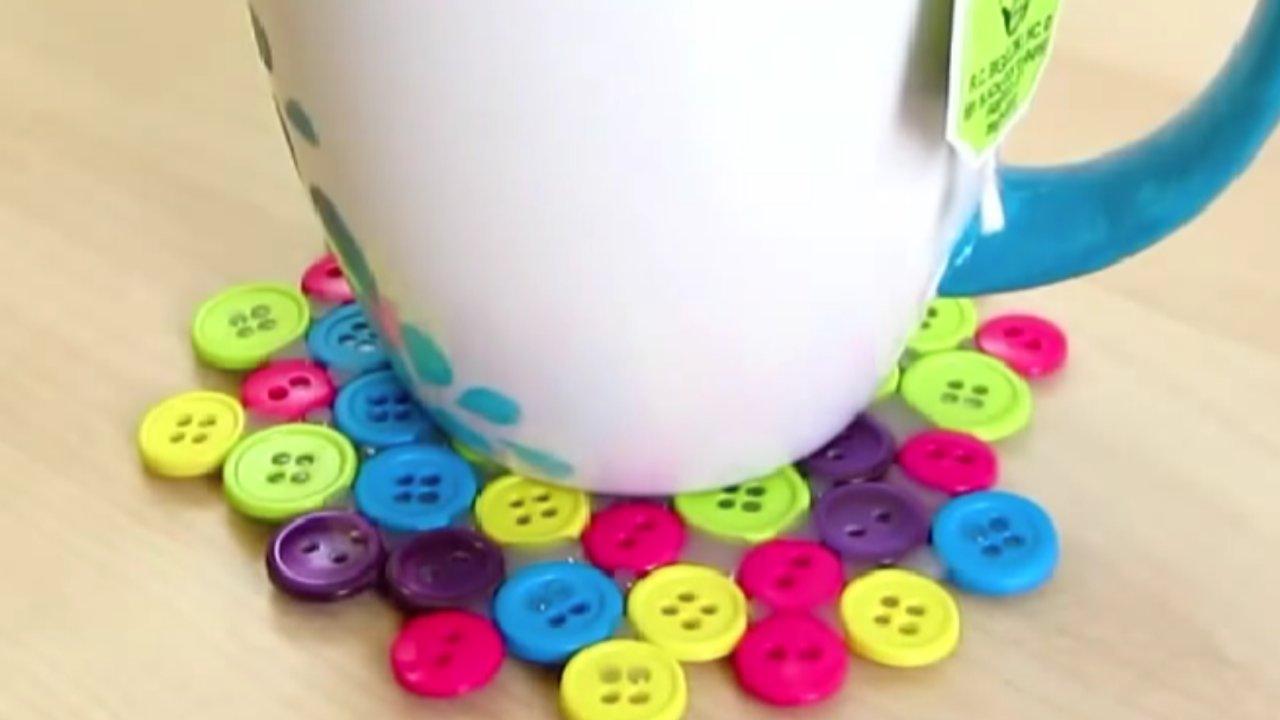
Buttons glued into a disc with no backing at all, which is the part that surprises people. Lay overlapping rows of painter’s tape sticky side up on a sheet of paper until you have a square about five inches across, then set the buttons face down onto the tape, working out from the middle to roughly three and a half inches, wide enough for a mug. Fill every gap with hot glue and build the back up in layers so it sits flat. Let it set hard, then peel the whole coaster off the tape.
Get the full tutorial at Sueeye.
15. Button Pillow
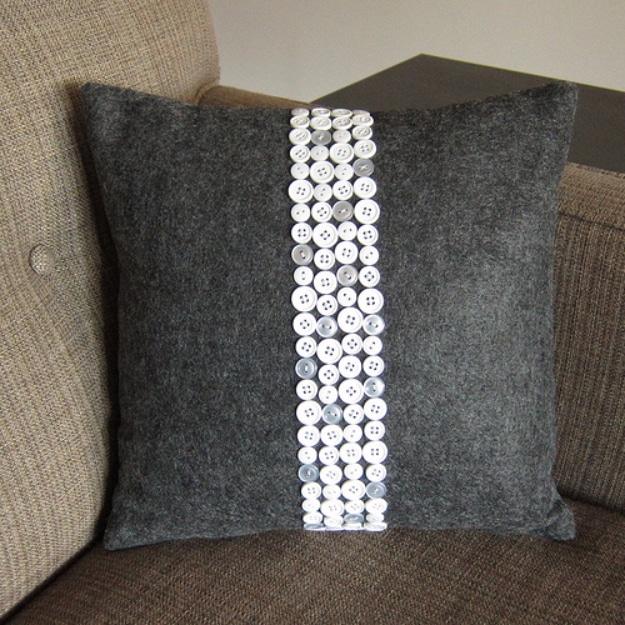
A dark felt cushion with a wide stripe of white buttons straight down the middle, and the whole difficulty is getting the lines straight. Cut two squares the same size as the insert rather than smaller, which is what gives a full pillow instead of a slack one. Rule a line down the centre of the front and lay two rows of buttons either side of it, keeping three quarters of an inch clear at the edges for the seam. Glue them with a dot each, keeping glue out of the holes, let it set, then sew without knotting off between buttons.
Get the full tutorial at Just Crafty Enough.
16. Simple And Cute Button Bookmarks
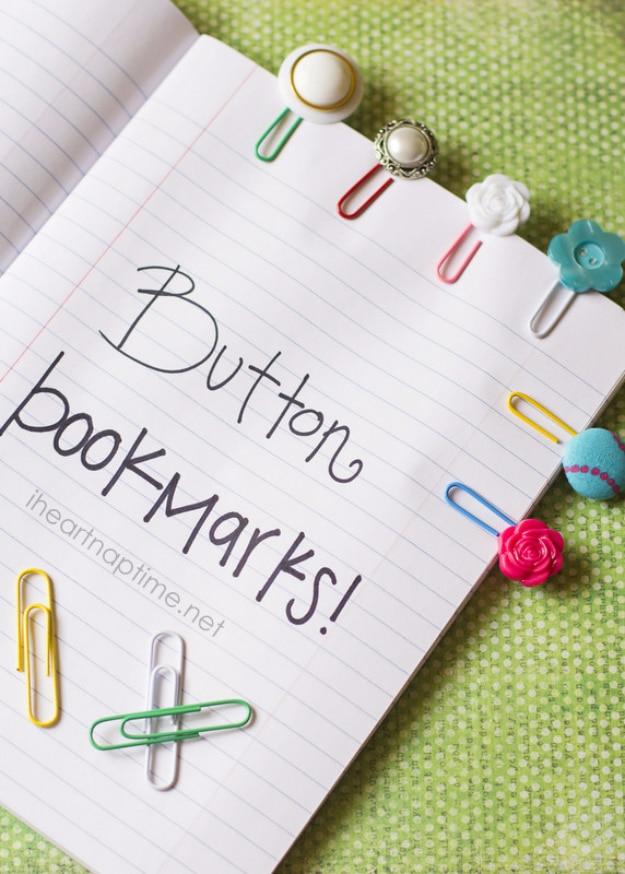
Paper clips with a button on the front, and there is one detail that makes them last: a scrap of felt over the back. Glue the clip to the underside of the button with hot glue or a strong craft adhesive, then cut a small piece of felt and press it on top of the join. It seals the glue in and leaves a smooth back that will not snag a page. Simple enough that a child can do the assembly with an adult on the glue gun. Slide one onto the top of a card and it becomes the gift.
Get the full tutorial at The Inspiration Board.
17. Button Tray
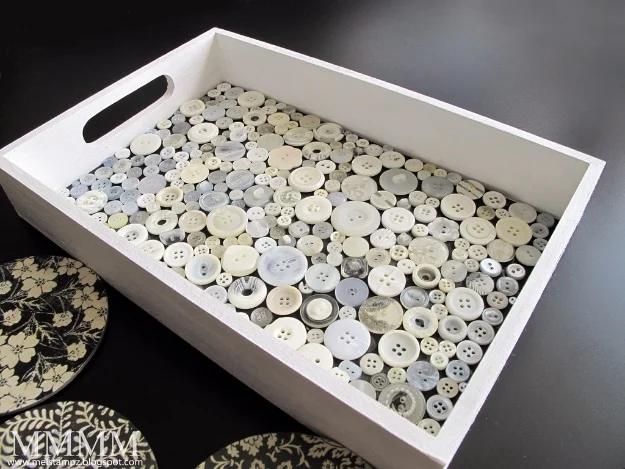
A cheap wooden tray with its base covered in cream and pearl buttons, all one palette, and the restraint is what makes it look expensive. Sand the bare wood lightly, paint it white, then cut black card to fit the base so the gaps between the buttons read as shadow rather than as gaps. Arrange the whole layout before a drop of glue comes out, then lift and glue each button individually with a clear drying glue. Keep a few tiny buttons back for the edges, because those are the only ones that will fill the last awkward inch against the sides.
Get the full tutorial at Mel Stampz.
18. Wonderful DIY Cute Button Bowl
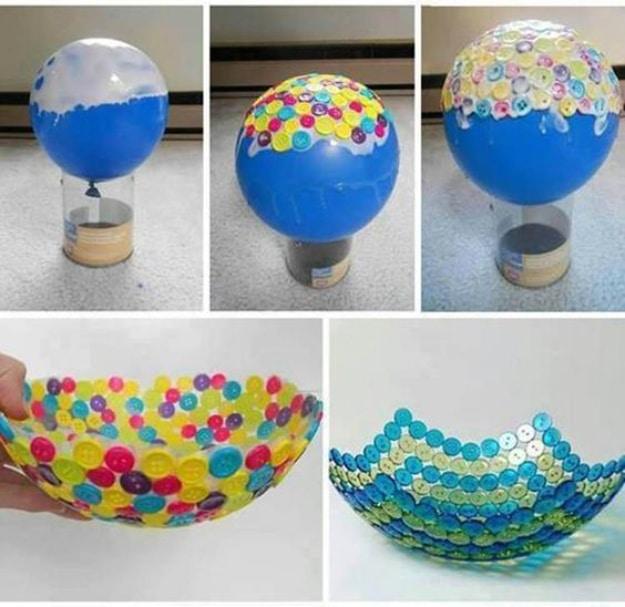
A balloon, a pile of flat buttons and white glue, and the bowl is what is left when you pop the balloon. Blow the balloon up, stand it in a cup or a can so it cannot roll away while you work, and glue buttons over the lower half only, overlapping each one enough to lock into its neighbours. Use a white glue that dries clear rather than anything that stays milky. Let it dry completely, which means longer than you think, then pop the balloon and peel it away. Holds tissues, sweets and jewellery. Not water.
Get the full tutorial at Wonderful DIY.