Life Hacks
20 DIY Photography Hacks and Cheap Camera Tricks
DIY photography hacks on the cheap: a lentil beanbag, a turkey pan beauty dish, a foil reflector board, a tea strainer shadow trick and plenty more.
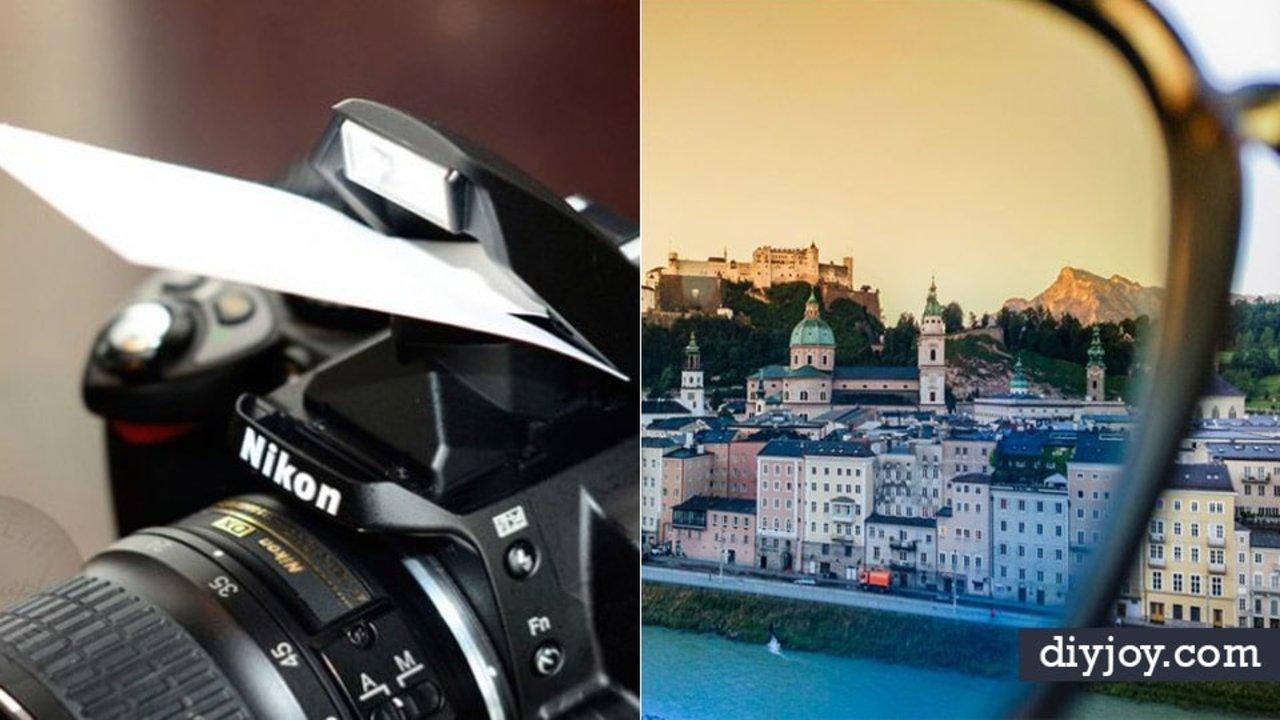
A bag of lentils, a foil turkey pan, a Pringles tube and a tea strainer out of the kitchen drawer. That is most of the shopping list for these 20 DIY photography hacks, and the gear they replace runs into the hundreds of dollars. Half of this list is something you build: a beanbag that kills camera shake, a reflector board made of foam board and kitchen foil, a cardboard box light table, a honeycomb snoot out of craft foam and black drinking straws, a ground pod so you can shoot a bird at its own eye level. The other half is a trick with nothing to buy at all, like taping greaseproof paper over a window for soft light or backing a portrait into a wall of leaves. Every one of them links back to the photographer who worked it out.
1. Convert DSLR To A Pinhole Camera
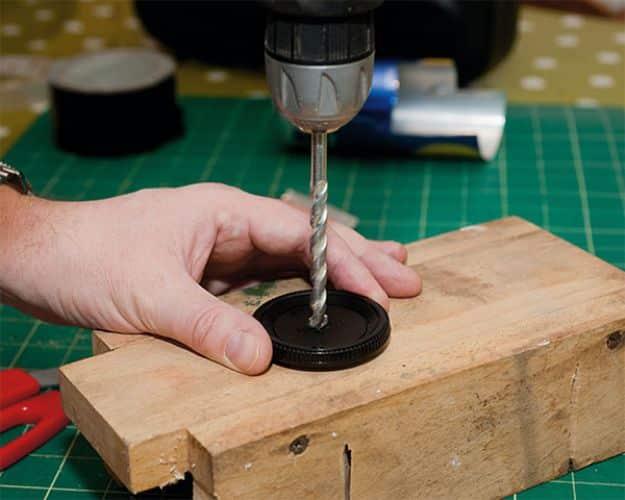
A spare body cap, a drill and a scrap of tinfoil turn a modern DSLR into a pinhole camera, and the reason to bother is that you still get to see the shot. Film pinhole work means waiting until the negatives come back to find out whether you were even pointing the right way. Do it on a digital body and you can adjust composition and exposure on the spot. The build starts by finding true center on the body cap, which matters more than anything else here, then drilling through and covering the hole with foil pricked by a fine needle.
Get the full tutorial at Behind The Shutter.
2. Use A Fishtank To Get That Underwater Shot
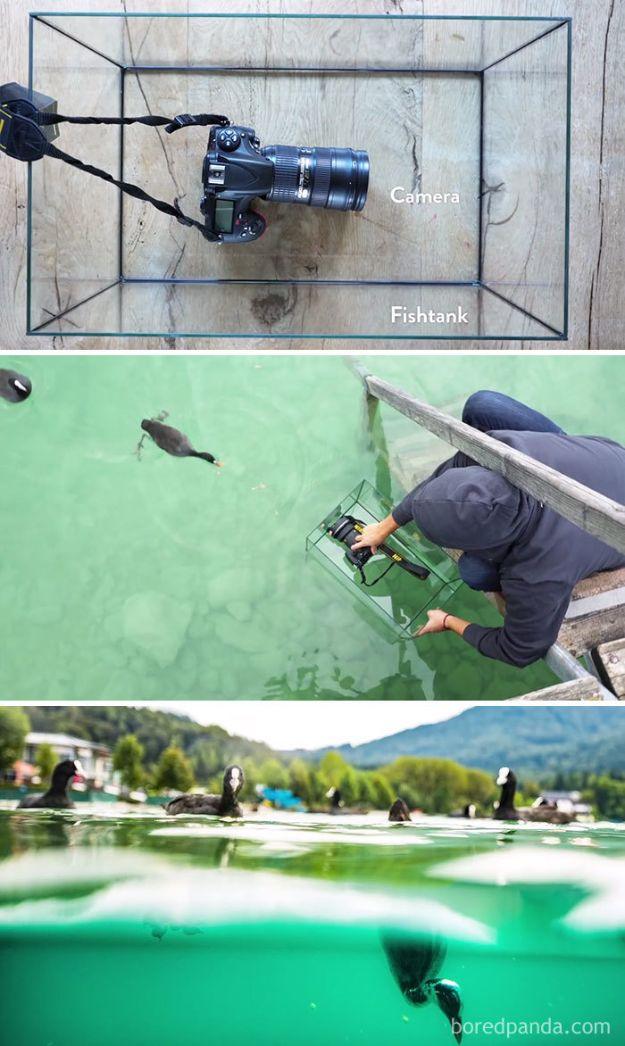
Half in, half out of the water is one of the hardest frames to get, and the usual answer is an underwater housing that costs more than the camera. This one is a small glass fishtank instead. The camera sits inside it on a strap or a frame, the tank goes into the water, and the glass keeps everything dry while the lens looks straight through it. Hold it at the waterline and you get the split shot, lake below and sky above, in one exposure. Keep the glass spotless and do this in calm shallow water where you can stand up.
Get the full tutorial at Bored Panda.
3. Boost Your Flash With Foam and Velcro
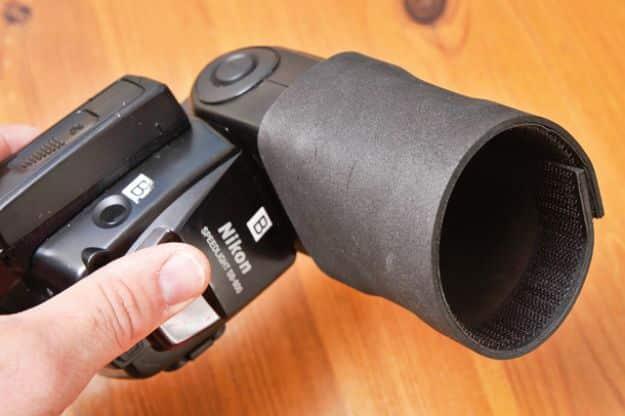
A snoot and a honeycomb grid are what turn a flashgun from a floodlight into a spotlight, and both of these are made from craft foam, black drinking straws and Velcro. Stick hooked self adhesive Velcro right around the top of the flash head with the seam on top. Cut a strip of thin black craft foam 8cm wide and long enough to wrap around, then Velcro that into a tube. Trim the straws so a bundle of them sits inside the open end as the grid. Black straws focus the beam hardest, which is the whole point.
Get the full tutorial at Tips DIY.
4. Use Trees

Trees make a backdrop you do not have to build, and the distance you stand at changes the job they do. Go wide and the foliage reads as negative space framing your subject. Move in close and it becomes a clean wall of green that takes every distraction out from behind them. Look for a tree or a bush somebody can back right into, because that is what opens up locations you would otherwise walk straight past, a hedge at the edge of a car park or the scrub at the end of a field. No gear, no permission, no setup at all.
Get the full tutorial at DIY Photography.
5. DIY Photography Reflector Board
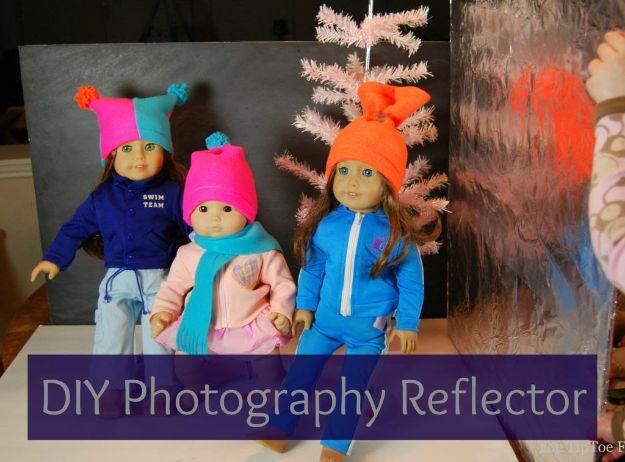
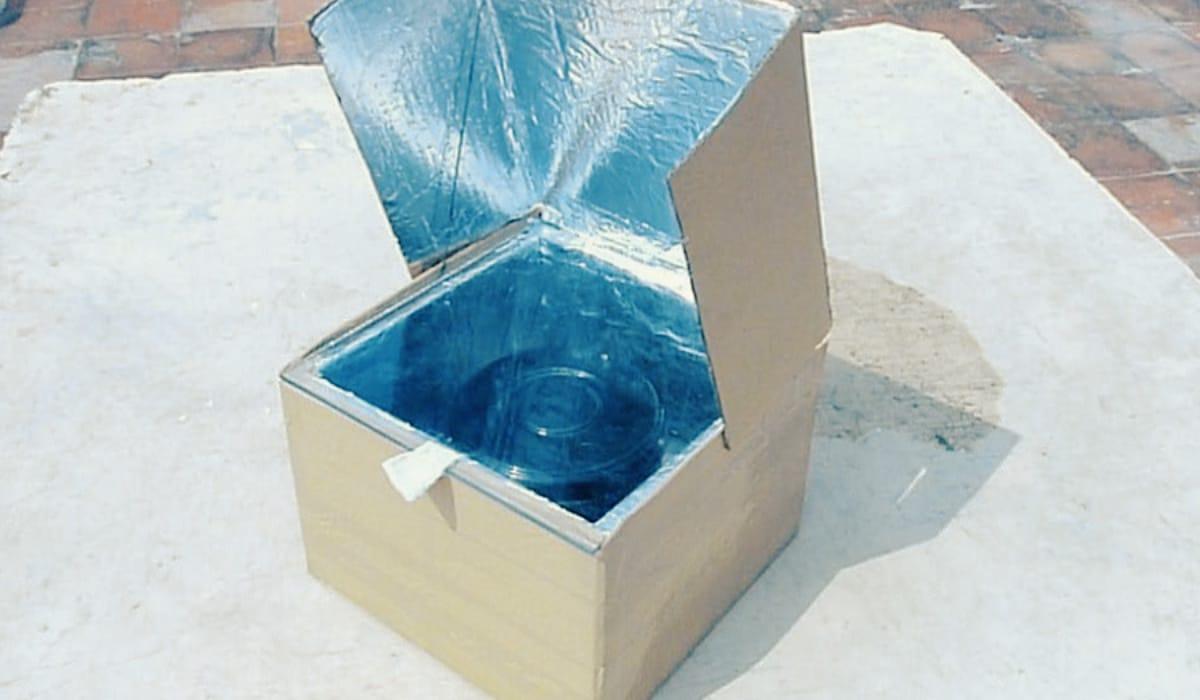
A sheet of foam board and a roll of kitchen foil make a reflector in about five minutes, and it does the thing every tabletop shot needs, which is fill the shadow on the dark side of the subject. Cover the front of the board with foil, leaving enough overhang to fold around the edges, tape the seams where the foil overlaps with clear packing tape, then flip it and tape the foil down on the back. Shiny side or dull side is your call. Prop it opposite your window and watch the shadows lift.
Get the full tutorial at The TipToe Fairy.
6. Add Steam With Regular Appliances
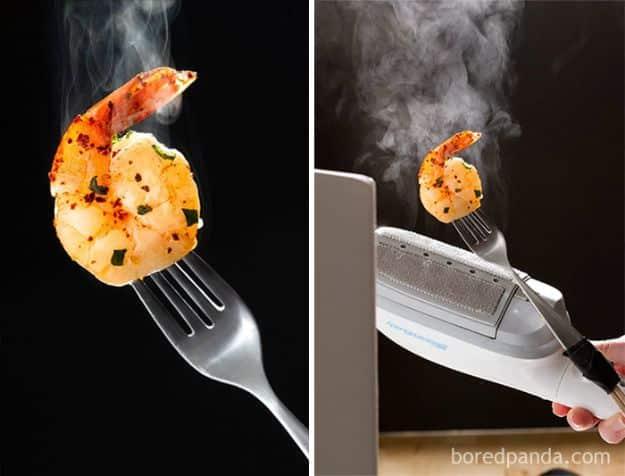
Hot food stops steaming long before the camera is ready, and the old workaround of microwaving cotton balls and tucking them behind the plate is as unpleasant as it sounds. A handheld clothes steamer does it better, costs about fifteen dollars, and never touches the food. Steam from the side, out of frame, and fire the shutter on a cable release while the plume is still thick. Light it from behind against a black background, because steam only reads on camera when it is backlit. Expect a lot of frames before one plume lands where you want it.
Get the full tutorial at Nicolesy.
7. DIY Ground Pod
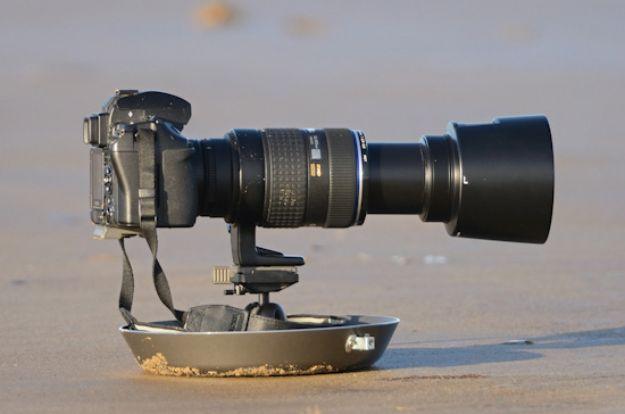
Photographing anything that lives near the ground means getting the lens down to its eye level, and a tripod splayed flat is a miserable thing to pan with. A ground pod is the answer: a shallow dish that the lens or a small head bolts onto, so the whole rig slides across sand or grass instead of standing on it. Household materials and a few dollars build one, and it behaves far better than the bought version costs would suggest. Your elbows stay out of the wet, the camera stays clean, and you can follow a bird across the frame by pushing.
Get the full tutorial at Digital Photography School.
8. Reduce Camera Shake
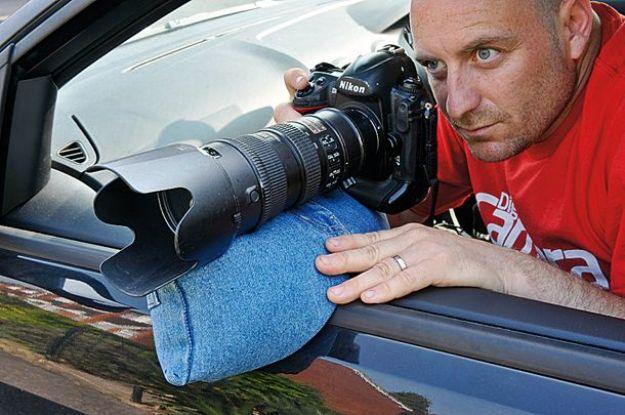
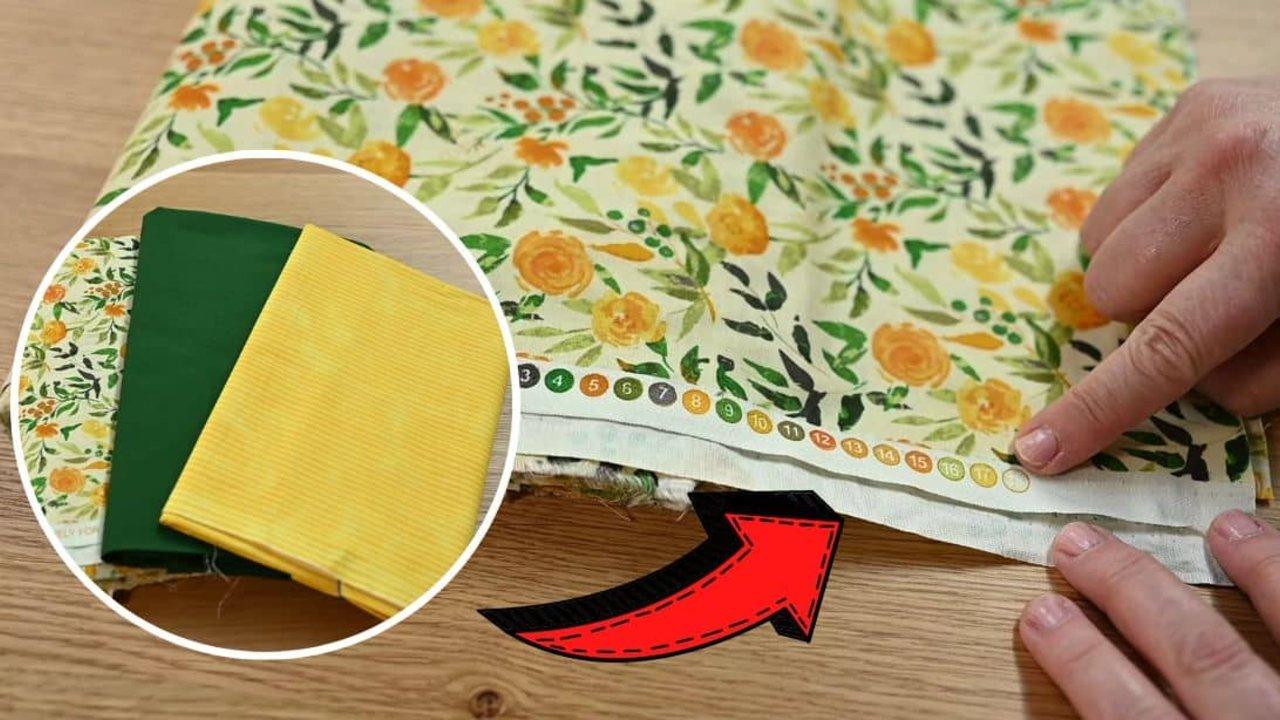
A beanbag under the lens steadies a long lens better than a tripod does when you are shooting out of a car window or lying on the ground, and this one is sewn from an old pair of jeans and filled with lentils. Cut the denim, run the seams and the zip area through a sewing machine, turn it right side out through the zipper hole, then poke a funnel in and pour. Lentils are the filling of choice because they feel fluid and supportive at the same time, settling around the lens barrel instead of resisting it.
Get the full tutorial at TechRadar.
9. Use A Sifter For A Genius Shadow Hack
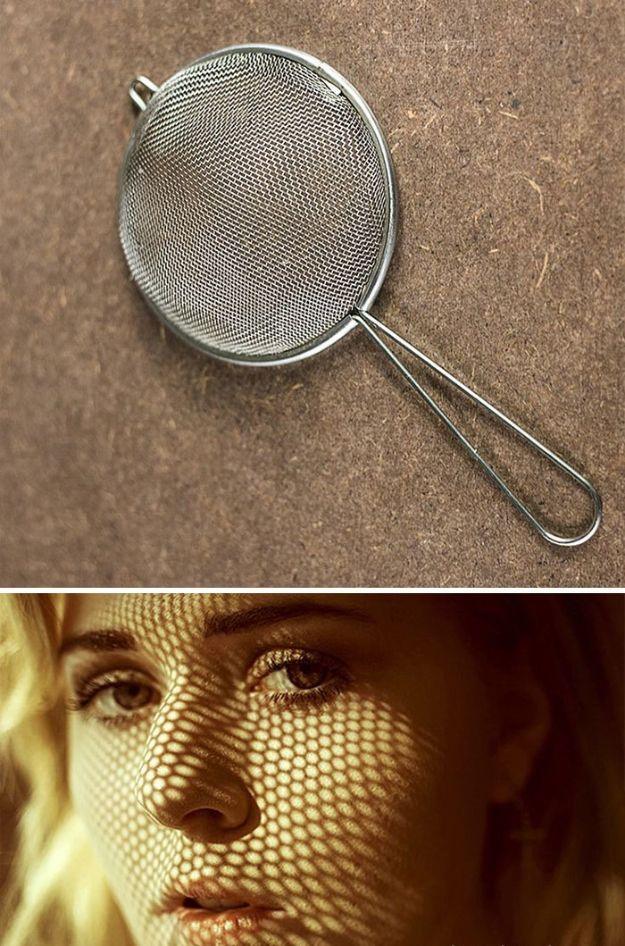
A tea strainer held between a hard light and your subject throws a fine mesh of shadow across the frame, and it is the cheapest set dressing in the house. It only works in hard light, so direct sun from above or a bare flash rather than an overcast afternoon, because soft light has no edges to cast. Move the strainer closer to the subject for a crisp pattern and further away for a vague one. The same source runs a second trick worth reading: cling film pulled tight over the front of the lens turns round bokeh into swirls.
Get the full tutorial at Christina Key.
10. Add a DIY Umbrella Holder to Your Tripod
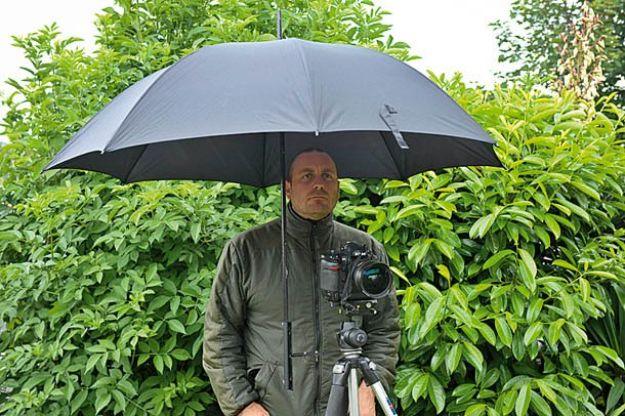
Shooting in rain usually means one hand on the camera and one hand holding an umbrella badly. A bracket clamped to the tripod fixes the umbrella directly above the camera and hands you both hands back. The parts list is a hardware store trip: a few brackets, a length of pipe to hold the shaft, and some nuts and bolts. Most of it bolts together easily, though you will need a way to cut the pipe to length. In any real wind an umbrella acts like a sail, so weight the tripod down and keep your hands on the camera to steady it.
Get the full tutorial at PetaPixel.
11. Smartphone Tripod
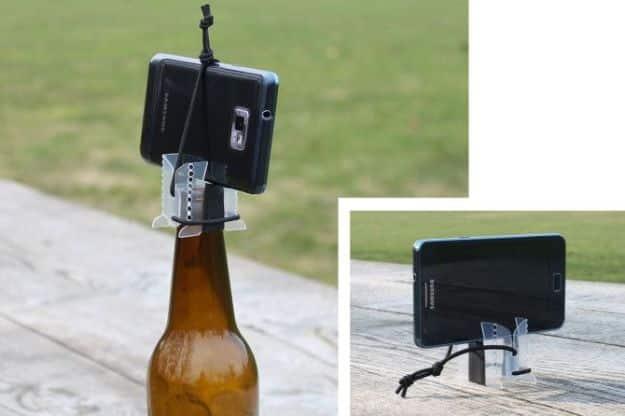
Two pieces of thin polypropylene cut out of an old plastic box, a loop of shock cord and a wrap of self fusing rubber tape, and the result sits on top of almost any bottle or stands up on its own. Print the template, tape it to the plastic, punch the holes and score the fold lines, then work each hinge back and forth until it goes soft. The rubber tape is what grips the bottle neck. It tilts the phone eight degrees one way and fifteen the other, folds flat, and doubles as a viewing stand when you are not shooting.
Get the full tutorial at DIY Photography.
12. Build Your Own Camera Guard
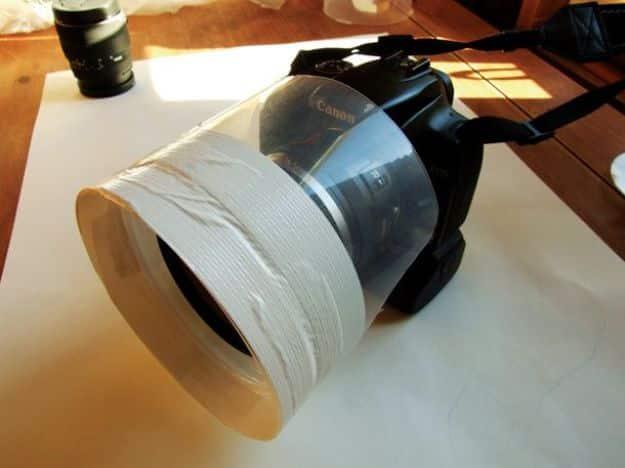
The clear plastic cover from a spindle of blank CDs becomes a rain guard that sits around the front of the lens like a short hood and keeps drizzle off the glass. Measure your filter thread diameter and halve it, set a compass to that figure, and scribe the circle on the plastic so the hole fits snugly over the barrel. Cut it out, tape or seat it on the lens, and it stays put. It costs nothing, it does not vignette if you size it right, and it lives in the bag taking up almost no room.
Get the full tutorial at TechRadar.
13. Do Wildlife Photography At Home
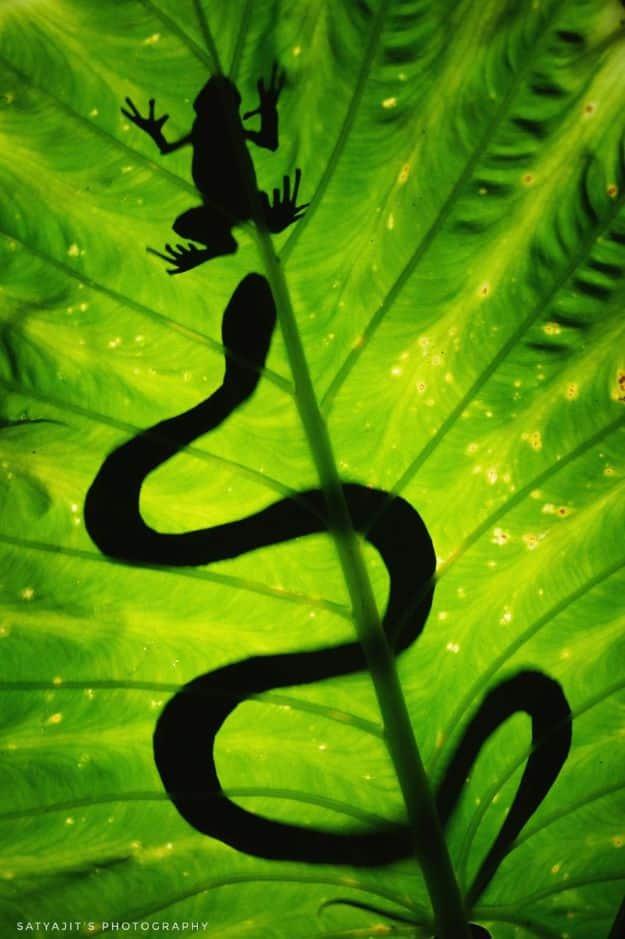
Wildlife photography does not have to mean a flight and a hide. A backlit leaf, a small frog and a patient afternoon on a balcony will give you a silhouette that reads as jungle. Put the light behind the subject rather than on it, so what the camera records is shape rather than detail, and work with whatever lives on your own doorstep. Snails, spiders, lizards and garden birds all photograph beautifully at close range. The thinking behind the picture is the whole hack here, not the gear, and the gear is usually whatever you already own.
Get the full tutorial at Bored Panda.
14. Turkey Pan Beauty Dish
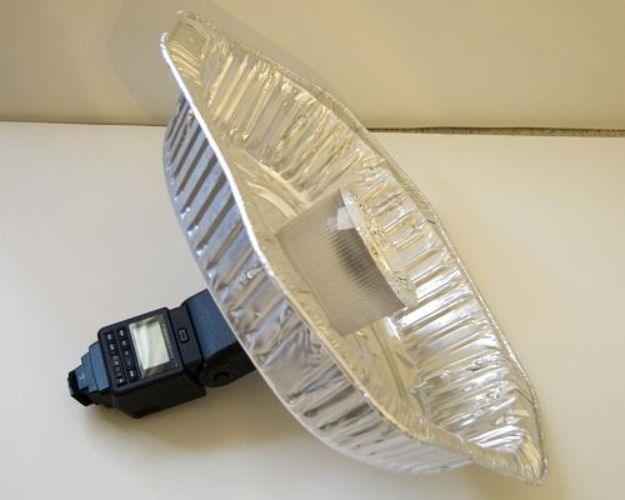
A beauty dish wraps light around a face and a real one costs a few hundred dollars. This one is a three dollar foil turkey roasting pan with a hole cut in the middle, dropped over the base of a dome flash diffuser, with the diffuser’s spare colored lid covered in kitchen foil and seated on top so the burst bounces back into the pan instead of going straight out. A little duct tape holds it together. It packs for travel as nothing but the diffuser, since the pan and the foil come from any supermarket at the other end.
Get the full tutorial at DIY Photography.
15. Colored Lens Filter DIY
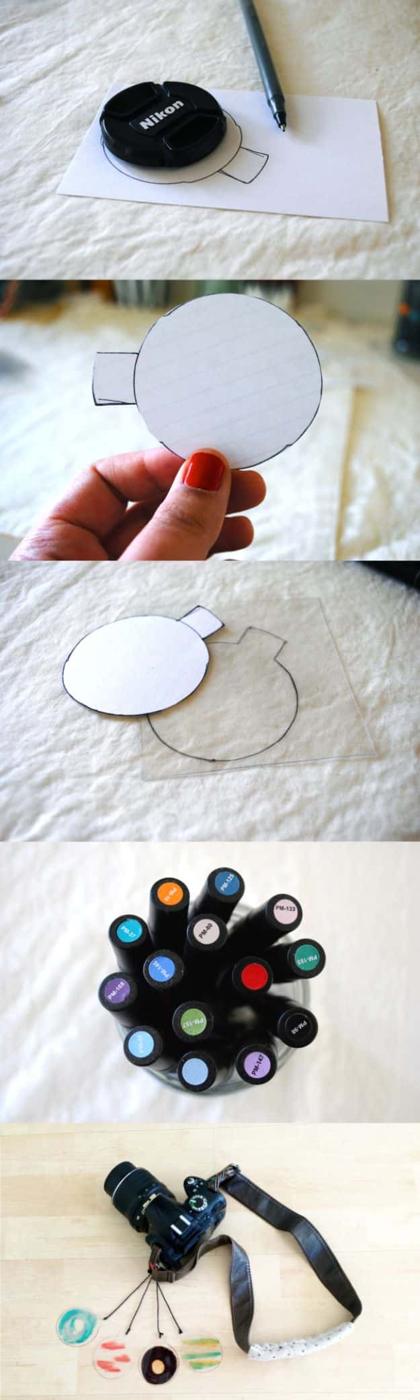
Film light leaks give a photo a red or orange wash, and you can fake the same thing on a digital body with a disc of colored plastic. Trace around your lens cap onto scrap paper, then add a small tab sticking off the circle, because that tab is what you punch a hole through later. Cut the template, trace it onto a clear plastic sheet and cut that out, then color each disc differently with marker. Punch the tab, run a length of string through, and tie the lot to the camera strap so your filters hang where you can reach them.
Get the full tutorial at My 23 Skidoo.
16. Make a Lightbox Using a Window and Paper
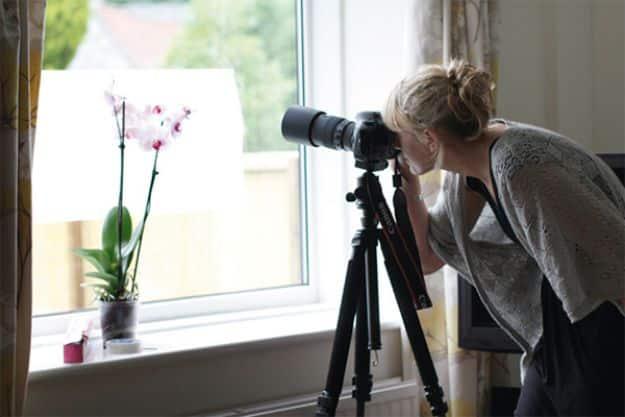
Greaseproof paper taped across a window turns ordinary daylight into a huge soft light source, and that is the whole build. Tape a sheet over the glass, then tape your subject straight onto the paper if it is flat enough, using clear tape and spreading petals or leaves out so the light comes through them. Backlit this way, a flower goes translucent and the veins show. Shoot from a tripod because the light level drops once the paper goes up, and pick an overcast day or a window that does not get direct sun.
Get the full tutorial at TechRadar.
17. DIY Macro Diffuser
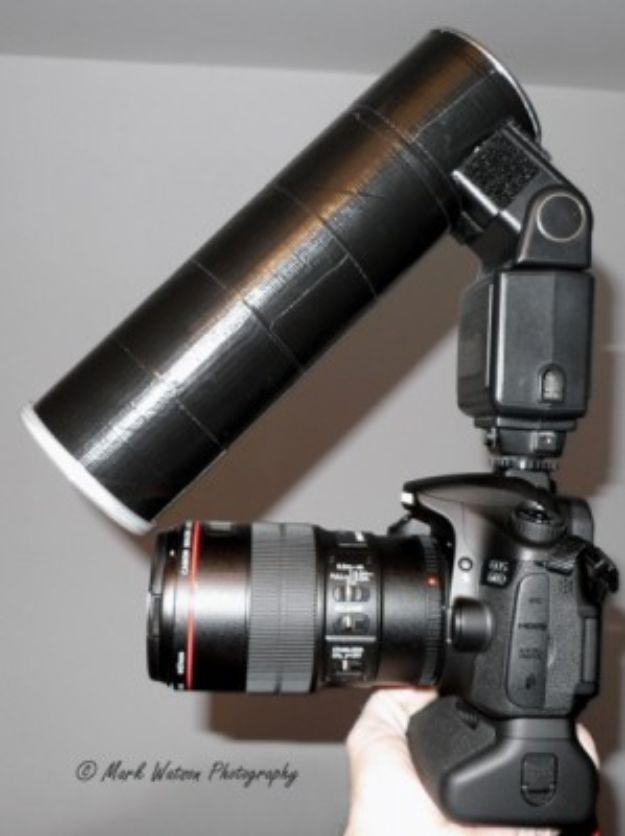
Macro work at close range means the flash is firing from inches away and burning out everything it touches. A Pringles tube fixes it for nothing. Mark the head of your speedlight on the tube and cut a hole that size, then make a front panel out of translucent sheet, sized a touch bigger than the tube so it caps the open end cleanly. Slide the tube onto the flash, tilt the head one click forward so the light aims out over the lens, and the whole beam arrives at the subject spread and even instead of as a hot spike.
Get the full tutorial at DIY Photography Stuff.
18. DIY Light Table
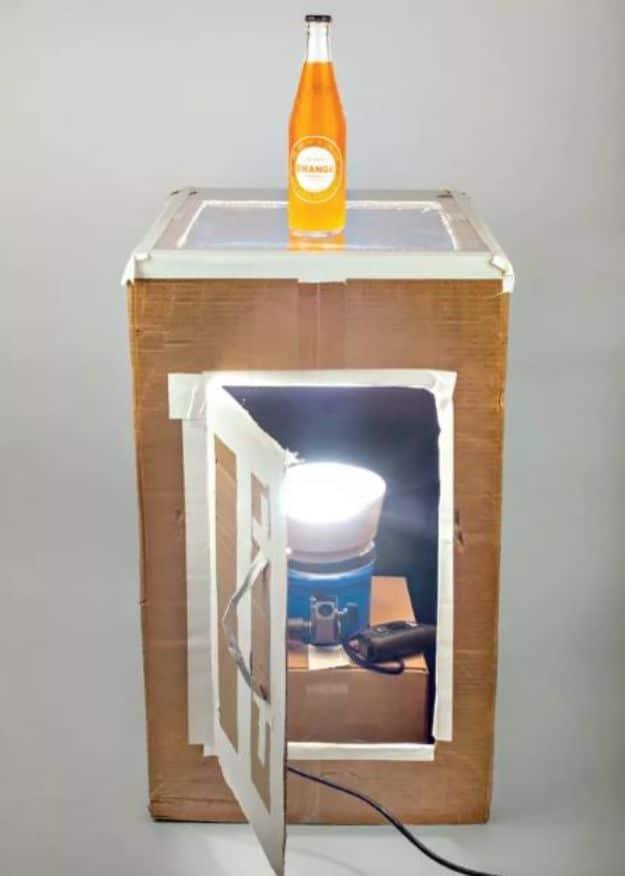
A light table lights a subject from underneath, which is what makes bottled drinks and glassware look like a magazine advert instead of a kitchen snapshot. This one is a cardboard box with a translucent panel let into the top and a lamp sitting inside it, firing up. The clever part of the design is that you can change the distance between the lamp and the panel, which is the single thing that decides whether the glow is even or hot in the middle. Bottom lit glass is the obvious use, and it is dramatic every time.
Get the full tutorial at Popular Photography.
19. Fluorescent Tube Light Beauty Light Thingy
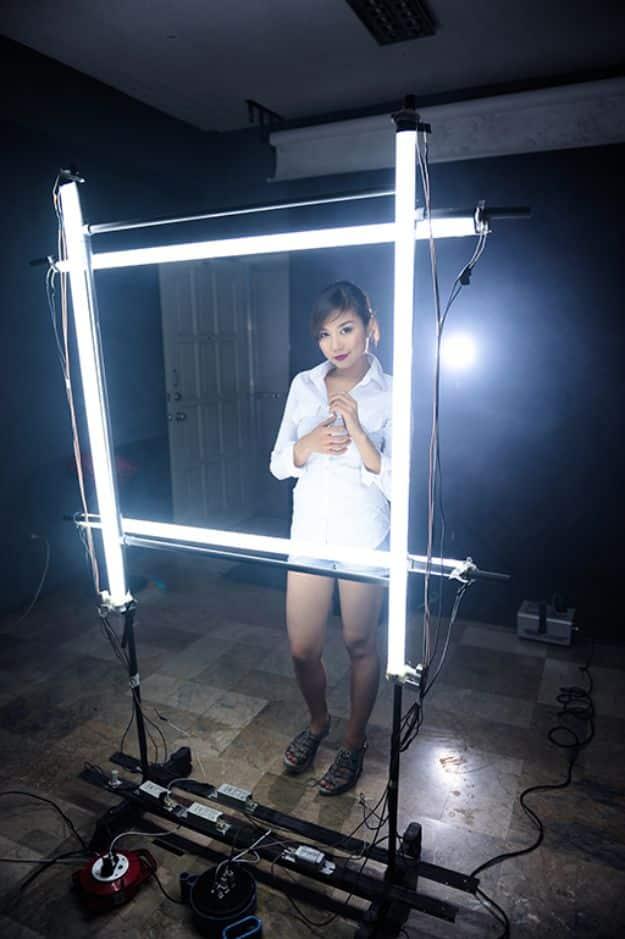
Fluorescent tubes make a big continuous light that runs cool and sips power, and the frame holding these up is a clothes rack on wheels. PVC pipe and T connectors brace it above and below the tubes and extend the frame where the tubes run longer than the rack itself. Hose clamps and electrical tape hold each tube on. It is not a handsome piece of kit and the builder says so, but the castors mean the whole light rolls wherever you want it, which no light stand manages.
Get the full tutorial at DIY Photography.
20. Learn to Shoot in Manual Mode
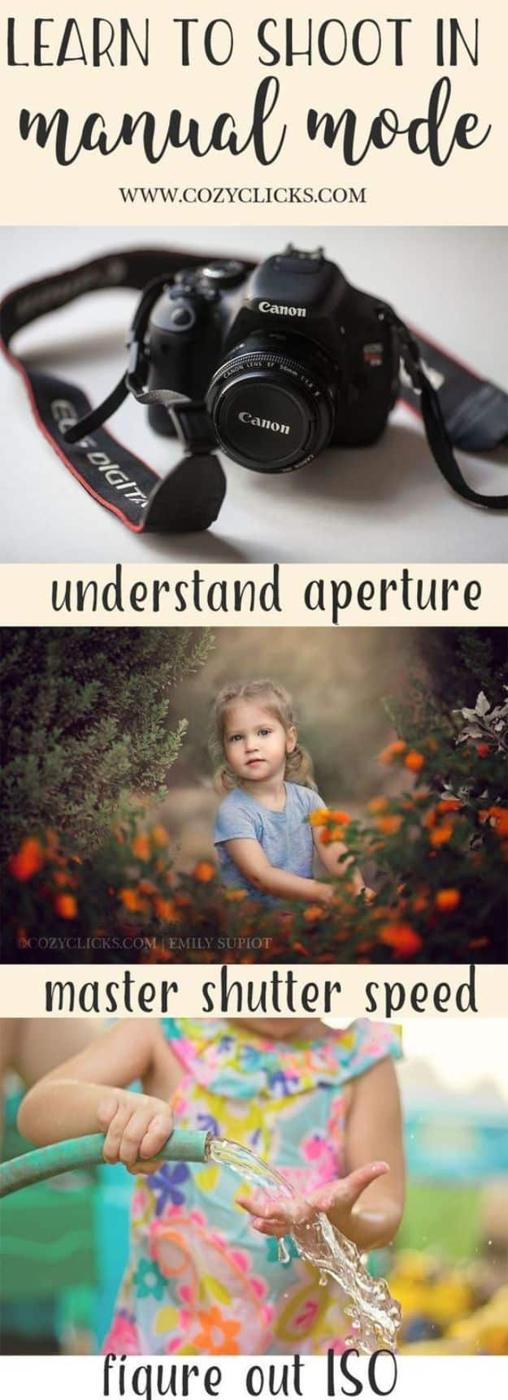
Everything else on this list is a workaround for a camera you are not fully driving yet, and manual mode is where that stops. It comes down to four settings and the order you learn them in: shutter speed, which is how long the shutter stays open, aperture, ISO, and then how the three balance against each other. Slower shutter means more light and more blur, and that trade is the whole game. It is intimidating for about a week and then it is simply how you shoot, with far more control than any automatic mode will hand you.
Get the full tutorial at Cozy Clicks.