
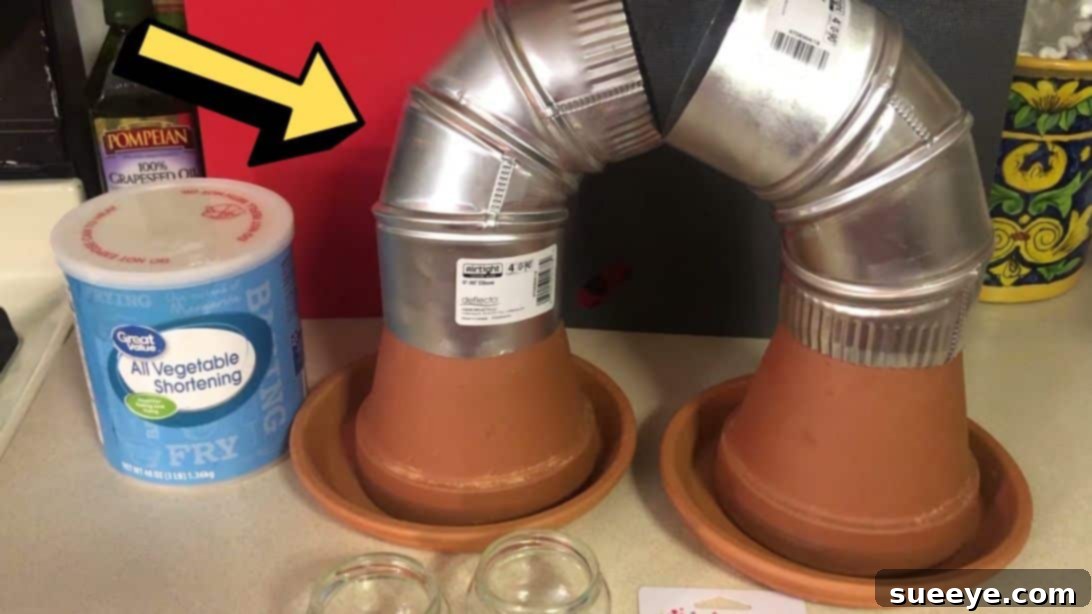
DIY No-Electricity Heater: Stay Warm Safely and Affordably with Terra Cotta Pots
As the colder months approach, or for those moments when unexpected power outages strike, staying warm can become a significant challenge. While modern heating systems rely heavily on electricity or complex fuel sources, there’s a brilliant, time-tested, and incredibly simple solution you can create right at home. This innovative DIY project, inspired by the clever ideas shared by Nica on YouTube, provides a practical and inexpensive way to generate warmth without any electricity. Imagine keeping yourself and your loved ones cozy, even when the grid is down, using just a few terra cotta pots and some common household items like vegetable shortening. This guide will walk you through the process of building your own no-electricity heater, offering a blend of ancient wisdom and modern preparedness. It’s an easy, budget-friendly, and remarkably effective alternative that every household should consider. Let’s dive into the instructions and empower you to create a reliable source of warmth for your home.
Why a DIY Terra Cotta Heater is a Must-Have
The concept behind a terra cotta pot heater is deceptively simple yet highly effective. Terra cotta, being a porous ceramic material, is an excellent insulator and heat radiator. When heated, it absorbs and then slowly releases warmth, creating a gentle, radiant heat that can significantly raise the ambient temperature in a small enclosed space. This makes it an ideal choice for emergency heating during power interruptions, or as a supplemental heater for areas like workshops, sheds, or even a cold bedroom where you want to conserve energy. Beyond its practical applications for warmth, building this heater offers a sense of self-sufficiency and preparedness, providing peace of mind during unpredictable weather events. It’s also an incredibly cost-effective solution, requiring minimal investment compared to purchasing electric or gas-powered heaters.
Essential Materials for Your Terra Cotta Heater:
Gathering the right materials is the first step to building your efficient, no-electricity heater. Ensure you have everything on hand before you begin to make the process smooth and enjoyable.
- Terra Cotta Pots: You’ll need at least two, preferably three, varying in size (e.g., 6-inch, 8-inch, 10-inch) so they can nest within each other. The more layers, the better the heat retention and radiation. Ensure they have drainage holes, as these will be crucial for airflow and wick access.
- Terra Cotta Plates (or Saucers): One for each pot, acting as a stable base for your heat source and to catch any drips. They should be slightly larger than the base of your pots.
- Heating Ducts (Optional but Recommended): These are usually metal or ceramic pieces designed to direct heat or provide stability. Small metal ducts or even a large washer can be used to create space between nested pots, improving heat circulation.
- Small Jars: Glass jars, like canning jars or small jam jars, are perfect for holding the shortening and candles. Choose ones that fit comfortably within the smallest terra cotta pot.
- Birthday Candles: Standard thin birthday candles are ideal. You’ll need several, as they will be embedded in the shortening to create your fuel source. Their small flame size is suitable for this type of heater.
- A Can of Vegetable Shortening: Solid vegetable shortening (like Crisco) serves as the primary fuel. It burns slowly and cleanly, making it a safe and economical choice for sustained heat.
- Scissors: For trimming candle wicks.
- Knife: A utility knife or butter knife for working with the shortening.
- Spoon: For scooping and pressing the shortening into the jars.
- Drill (Optional): If your pots don’t have adequate drainage holes, or if you wish to create additional vents for better airflow, a drill with a ceramic bit might be helpful.
Step-by-Step Guide: Crafting Your No-Power Heater
Step 1: Preparing Your Fuel Source – The Shortening Candles
The heart of your DIY heater lies in its unique fuel source: vegetable shortening candles. Preparing these properly ensures a long-lasting and consistent flame.
- Measure and Trim Candles: Begin by placing a birthday candle inside one of your small jars. Mark the height of the jar on the candle, then use scissors to trim the candle so that its wick is just above the rim of the jar when inserted. This ensures the flame stays within the jar’s confines and the wick burns efficiently. Prepare several trimmed candles, one for each jar you plan to use.
- Fill Jars with Shortening: Using your spoon or knife, carefully fill each small jar with vegetable shortening. Press the shortening down firmly to remove any air pockets and ensure a dense, solid mass. Fill the jars as completely as possible without overflowing.
- Melt the Shortening (with caution!): This step makes the shortening pliable for candle insertion. You have two options:
- Microwave Method: Place the shortening-filled jars in the microwave for approximately 30 seconds. The goal is to soften, not fully melt, the shortening so it becomes a creamy consistency.
- Pan Method: Alternatively, you can gently heat the shortening in a pan over low heat until it softens. If using this method, **never leave the shortening unattended as it is flammable.** Stir constantly to ensure even softening. Once soft, carefully spoon it into your jars.
- Insert Candles: While the shortening is still soft and pliable, gently push one of your trimmed birthday candles down into the center of each shortening-filled jar. Ensure the wick stands upright and the candle is securely embedded. The soft shortening will naturally flow around the candle, creating a stable base.
Step 2: Curing the Fuel and Assembling the Heating Unit
Once your shortening candles are prepared, the next crucial step is to allow them to set and then assemble the terra cotta pot structure that will harness and radiate the heat.
- Cool and Harden the Shortening: Leave the newly assembled shortening candles at room temperature for about 20 minutes to begin setting. For a quicker and firmer set, place them inside the refrigerator for approximately 30 minutes, or until the shortening has completely hardened. A firm fuel source will burn more evenly and prevent premature melting.
- Prepare the Terra Cotta Pots: Ensure all your terra cotta pots have drainage holes at the bottom. These holes are essential for allowing the candle wicks to draw oxygen and for heat to rise effectively within the nested pot system. If your pots lack sufficient holes, you may need to carefully drill additional ones.
- Ignite the Fuel: Place one or more hardened shortening candle jars onto a terra cotta plate. Space them evenly if using multiple jars. Carefully light the wicks of each shortening candle. Allow the flames to establish themselves for a few minutes.
- Assemble the Heater Structure:
- Take your smallest terra cotta pot and invert it (upside down) over the lit candle jars on the terra cotta plate. Ensure it completely covers the jars and rests stably on the plate.
- If using heating ducts or metal spacers, place them around the drainage hole of the inverted pot, then place the next larger terra cotta pot upside down on top of these spacers. This creates a gap between the pots, allowing hot air to circulate and transfer heat more efficiently.
- Continue nesting the pots in increasing size, using spacers between each layer, until all your pots are stacked. The topmost pot will be the largest. The heat will rise from the candles, get trapped and absorbed by the inner pots, and then radiate outwards from the outer pot.
- Position Your Heater: Carefully move your assembled terra cotta heater to the desired location. Place it on a stable, non-flammable surface, away from any curtains, drapes, or other combustible materials. Position it in an area where you feel the most cold, allowing the radiant heat to gently warm your space.
Maximizing Your Heater’s Efficiency & Essential Safety Precautions
Tips for Best Performance:
- Ventilation is Key: While this heater produces minimal smoke, ensure adequate ventilation in the room. This prevents CO2 buildup and provides fresh oxygen for the flames.
- Optimal Placement: Place the heater in the coldest part of the room or near where you are sitting. Remember, it’s a localized heat source, not a whole-house solution.
- Multiple Units: For larger rooms, consider building two or more smaller units rather than one very large one. Spreading them out can provide more even warmth.
- Wick Maintenance: Trim the wicks of your shortening candles if they become too long or start to produce excessive soot. A shorter wick yields a cleaner, more efficient flame.
- Insulate the Room: Close doors and windows to minimize heat loss, allowing your DIY heater to be more effective in a contained space.
Essential Safety Precautions:
While this terra cotta heater is designed to be relatively safe, it involves an open flame and heat. Always prioritize safety:
- Never Leave Unattended: Like any open flame, this heater should never be left unsupervised, especially when children or pets are present.
- Stable, Non-Flammable Surface: Always place your heater on a sturdy, heat-resistant surface away from anything that can catch fire (curtains, paper, wood furniture). A concrete slab, ceramic tile, or metal tray is ideal.
- Adequate Ventilation: Ensure the room is well-ventilated to prevent the buildup of carbon monoxide (CO) and to provide oxygen for the flame. Cracking a window slightly is often sufficient. Consider using a carbon monoxide detector.
- Keep Away from Children and Pets: The pots will become very hot. Keep the heater out of reach of curious hands and paws to prevent burns.
- Fire Extinguisher Nearby: It’s always a good practice to have a fire extinguisher or a bucket of sand/baking soda readily available when working with open flames.
- Do Not Overheat: Do not add extra fuel or attempt to intensify the flame beyond its intended design.
- Check for Cracks: Inspect your terra cotta pots for cracks before each use. Cracked pots can compromise the integrity of the heater and pose a safety risk.
Troubleshooting Common Issues
- Heater Not Producing Enough Heat: Ensure your pots are stacked correctly with good airflow between layers. Check if the wicks are too short or if the shortening needs to be refilled. Using more candles or slightly larger pots can also increase heat output.
- Flame Dies Out Quickly: This usually indicates insufficient oxygen. Check if the drainage holes in your pots are clear and not blocked. Ensure there is enough ventilation in the room.
- Excessive Smoke/Soot: The wick might be too long. Trim it to about 1/4 inch. Also, check the quality of your shortening; some types may burn less cleanly.
- Shortening Not Melting Evenly: Ensure the initial melting and mixing with the candles were thorough. A uniform fuel source will burn more consistently.
Frequently Asked Questions (FAQs)
- How long does a shortening candle last?
- The burn time can vary significantly based on the size of your jar, the amount of shortening, and the type of wick/candle used. Typically, a small jar filled with shortening can burn for several hours, often 6-8 hours or more, providing sustained warmth.
- Is this heater genuinely safe for indoor use?
- When built and used correctly with all safety precautions observed (ventilation, stable surface, never unattended), it is considered a relatively safe emergency heating method. However, it’s crucial to remember it involves an open flame and heat, so vigilance is paramount. Always monitor for carbon monoxide and have fire safety measures in place.
- How much heat does this DIY heater actually generate?
- It’s not designed to heat an entire large house but is highly effective at raising the temperature in a small room, tent, or enclosed space by a noticeable degree, typically 5-10 degrees Fahrenheit, depending on room size and insulation. It provides comforting radiant warmth rather than forced air heat.
- Can I use other types of fuel instead of vegetable shortening?
- While some sources suggest using other fats or oils, vegetable shortening is generally recommended due to its clean burn, low smoke, and safety profile. Using other fuels might introduce more smoke, unpleasant odors, or pose increased fire risks. Stick to vegetable shortening for reliability and safety.
- What size terra cotta pots are best?
- A combination of pots that can nest well, such as an 6-inch, 8-inch, and 10-inch diameter set, works great. The nesting creates air gaps that enhance heat transfer and radiation. Larger pots will store more heat but take longer to warm up.
Conclusion: Empowering Your Home with Radiant Warmth
This DIY no-electricity terra cotta heater is more than just a craft project; it’s a testament to ingenuity and a valuable tool for preparedness. Whether you’re facing a sudden power outage, looking for a cost-effective way to warm a specific area, or simply appreciate the satisfaction of a self-sufficient solution, this heater delivers. It harnesses the simple power of a contained flame and the natural properties of ceramics to provide comforting, radiant heat. Remember to always prioritize safety and follow the instructions carefully. Give this project a try, and you’ll not only equip your home with a reliable emergency heat source but also gain valuable skills in practical self-reliance. Stay warm, stay safe, and enjoy the peace of mind that comes with being prepared!
*These amazing images are all credited to Nica via YouTube. Check her other content and follow for more!