Furniture
21 Simple DIY Kitchen Makeover Ideas on a Budget
DIY kitchen makeover ideas on a budget: paint cabinets without sanding, add shaker style trim, pour concrete counters and build an open shelf island.
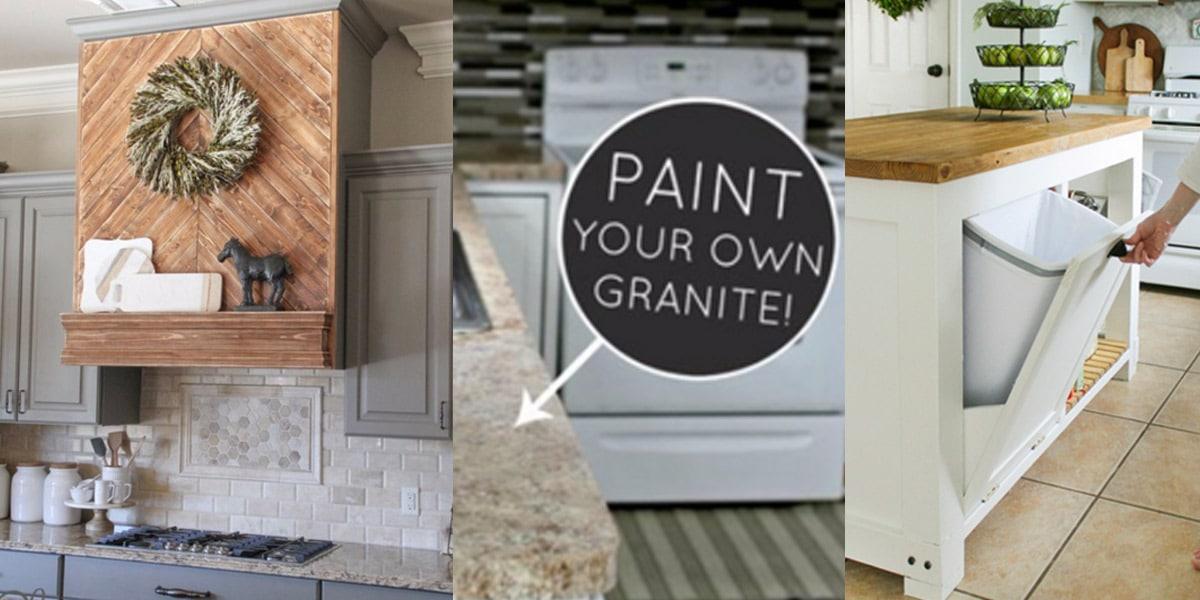
The gap between what a kitchen costs to remodel and what most people can actually spend is enormous, and that gap is where every project on this list lives. Nobody here ripped their kitchen out. They painted the cabinets they already had, glued strips of plywood onto flat doors to make them look like shaker fronts, skimmed concrete over laminate counters, and planked the side of a peninsula that had been staring at them for years. One of them did the whole thing for a hundred and twenty dollars. Another built an open shelf island from scratch for under a hundred and fifty. There are wood countertops stained and sealed at home, a range hood boxed in with trim and beadboard, and a microwave finally moved off the counter and into the end of an island. Every tutorial links back to the person who did the work.
DIY Kitchen Makeover Ideas
1. Paint Cabinets Without Sanding
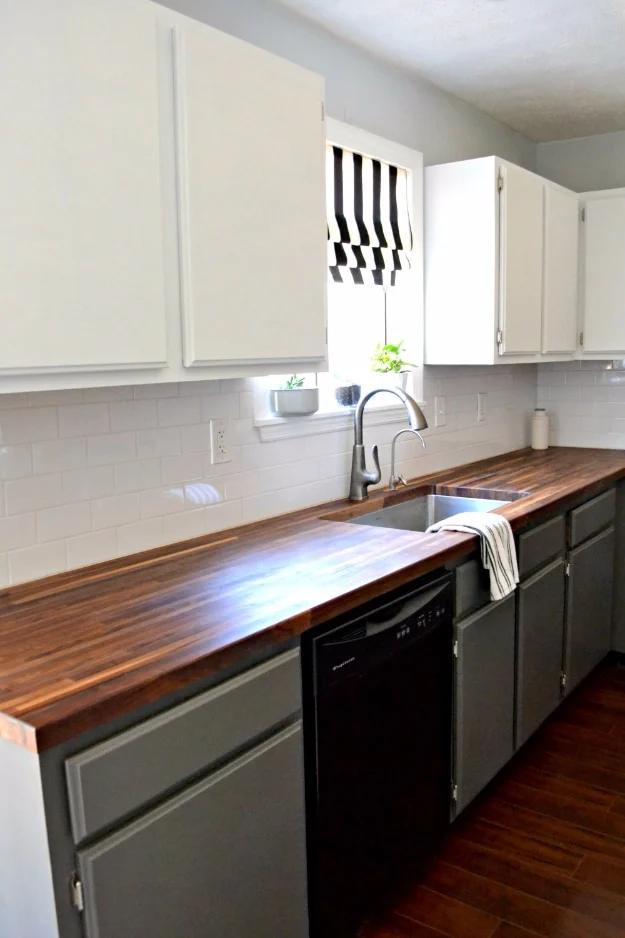
Pull the doors and hinges off first, then clean every surface with a TSP substitute, because grease and finger oils are the actual reason cabinet paint peels. Next comes liquid deglosser worked in circular motions with a scouring pad, which kills the shine without a single pass of sandpaper and leaves a filmy feel you paint straight over without rinsing. Two thin coats of Zinsser Smart Prime, tinted to hide dings, then Benjamin Moore Advance in satin. The detail people miss is cure time: in a humid climate she gives it sixty days to harden fully, and slamming doors before then is how a good paint job gets ruined.
Get the full tutorial at Ugly Duckling House.
2. DIY Overlay Concrete Countertops
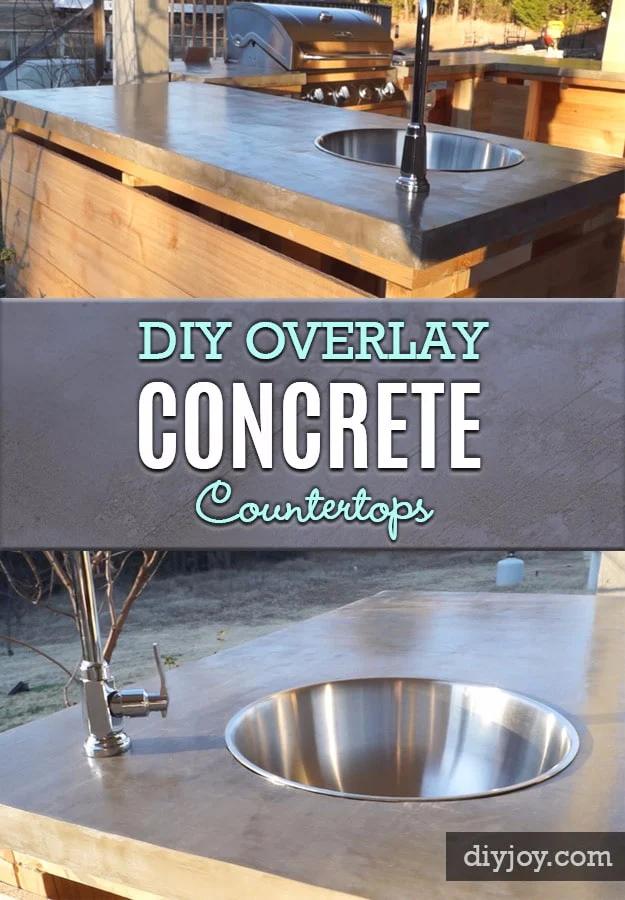
The overlay method skims a thin layer of concrete over the counter you already have, which removes the part that frightens everyone off: there is no pouring hundreds of pounds of wet concrete into a form and no worrying about whether the cabinets underneath can carry it. What you get is the same seamless grey surface with none of the structural work. The finish here is deliberately smooth and uniform rather than heavily mottled, cut around an undermount sink and a tall faucet. Concrete counters want sealing and resealing to stay presentable, so factor that in before committing a kitchen to them.
Get the full tutorial at Sueeye.
3. DIY Planked Peninsula With Corbels
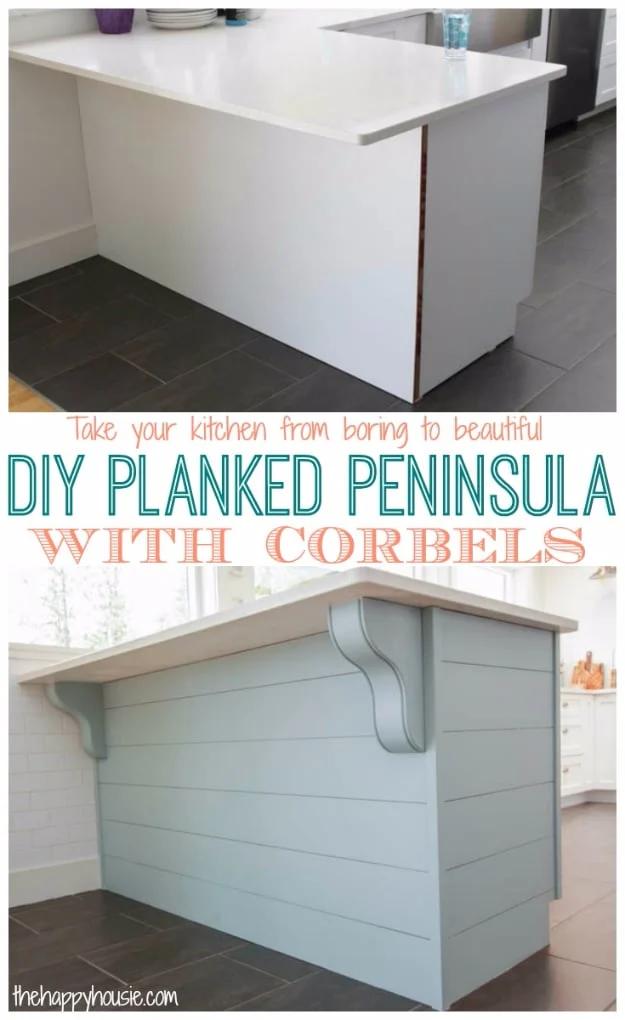
One four by eight sheet of quarter inch MDF cut into six inch strips, about twenty dollars of material, nailed straight into the plywood backing of a peninsula starting at the base and working up. The trick worth stealing: use pennies as spacers between the planks to get the gap even all the way up, which is what makes it read as planking rather than as panels. Corner trim and flat molding cap the ends, then fill, sand, prime and paint. Two Boston Bar corbels go on last, predrilled through the slimmest part, with adhesive on the back and top as well as screws. MDF has to be primed before it takes paint.
Get the full tutorial at The Happy Housie.
4. Gray And White Kitchen Makeover
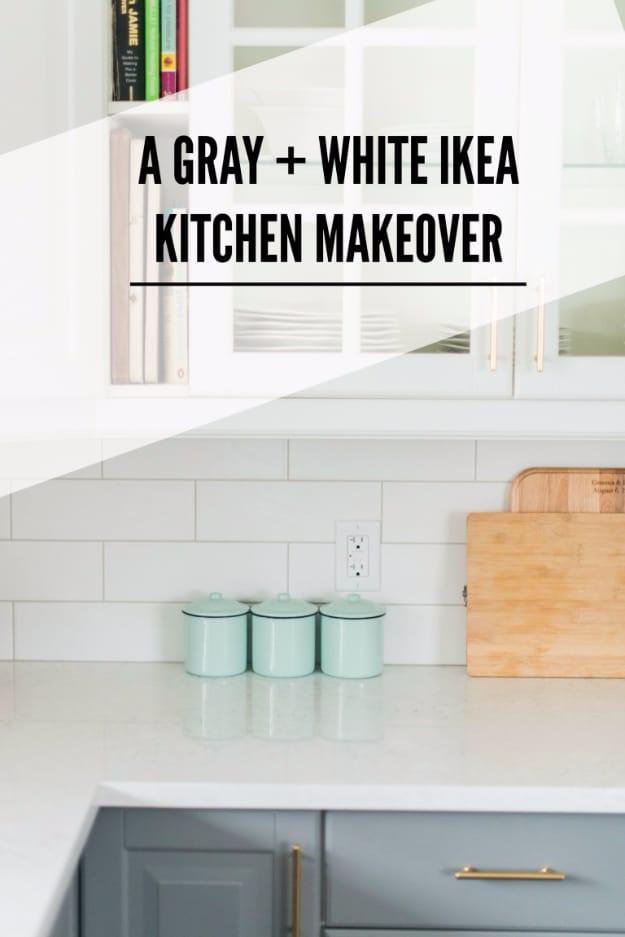
Two tone IKEA cabinetry, grey on the bottom and white on top including glass fronts, with a marble look quartz counter called the biggest splurge of the whole job and still on the low end of quartz pricing. Elongated subway tile on the backsplash instead of the single marble slab she actually wanted. Gold hardware at five dollars twenty five a handle does more work here than anything else in the room. What is genuinely worth copying is the drawer decision: lots of deep drawers for pots and pans rather than base cabinets, plus pull out recycling and integrated dishwasher fronts. They acted as their own general contractor.
Get the full tutorial at The Sweetest Digs.
5. DIY Shaker Style Cabinets
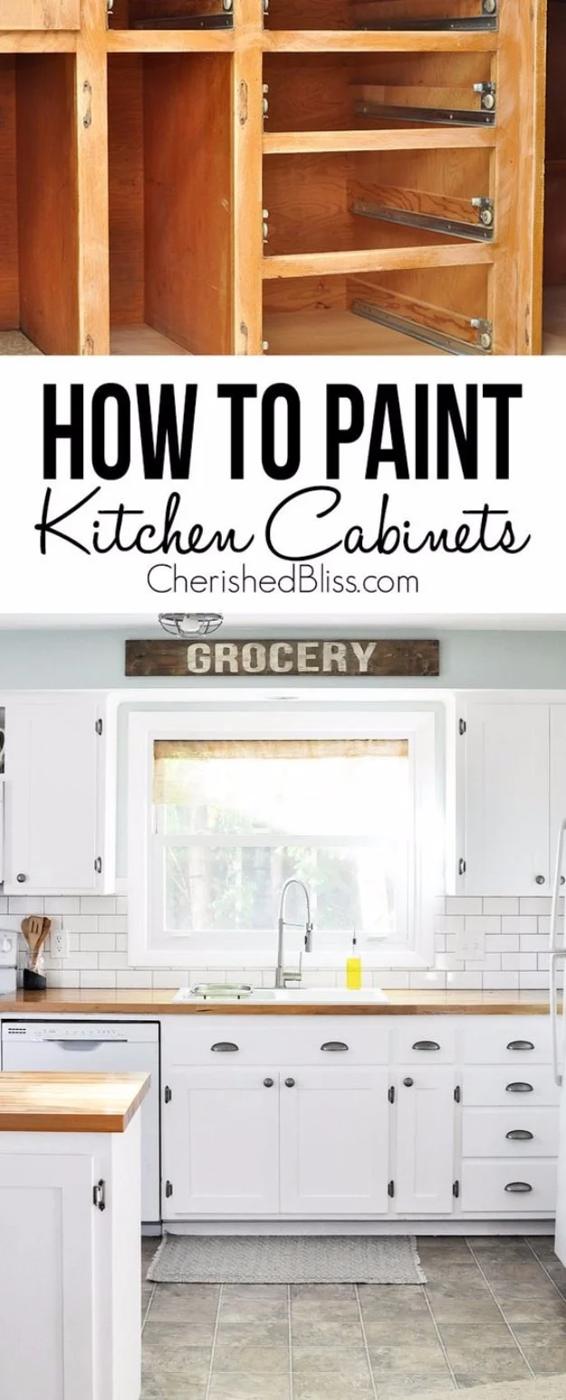
Do not buy new doors. One or two sheets of quarter inch plywood ripped into two and a half inch strips by the hardware store, nailed onto the flat doors you already have, turns them into shaker fronts. Measure every door individually rather than assuming they match. Sand the plywood strip edges before they go on, because that is where the roughness shows later. Vertical strips first, horizontals after, then wood filler into every nail hole and seam and sand it flush. Plywood ran about fifty dollars and paint about another fifty. The honest note is the timeline: several full days, not a weekend, depending on how many doors you have.
Get the full tutorial at The Crafty Blog Stalker.
6. DIY Kitchen Renovation
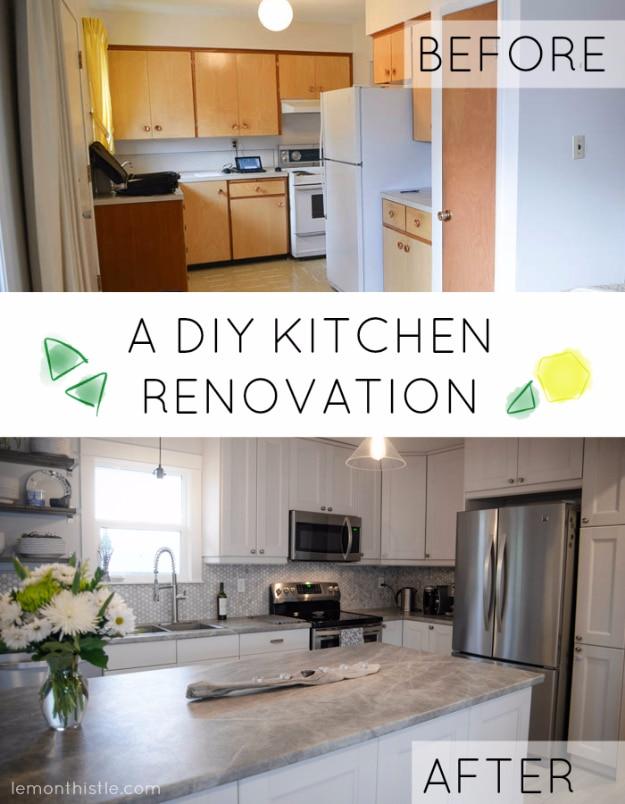
The whole kitchen came in around thirteen thousand dollars, and the two decisions that got it there were designing it herself and installing the IKEA Ramsjo cabinets as a family rather than paying for fitting. The counters are Formica 180fx in Soapstone Sequoia, a laminate, and the flat finish is genuinely convincing in photos. The clever bit is the pantry: IKEA did not make a full height twelve inch pantry, so they stacked three twelve inch upper cabinets to make one. Open shelving is IKEA brackets on cedar deck boards. Pendants were seventy nine dollars each from Home Depot and the backsplash is marble hexagon tile.
Get the full tutorial at Lemon Thistle.
7. Farmhouse Kitchen On A Budget
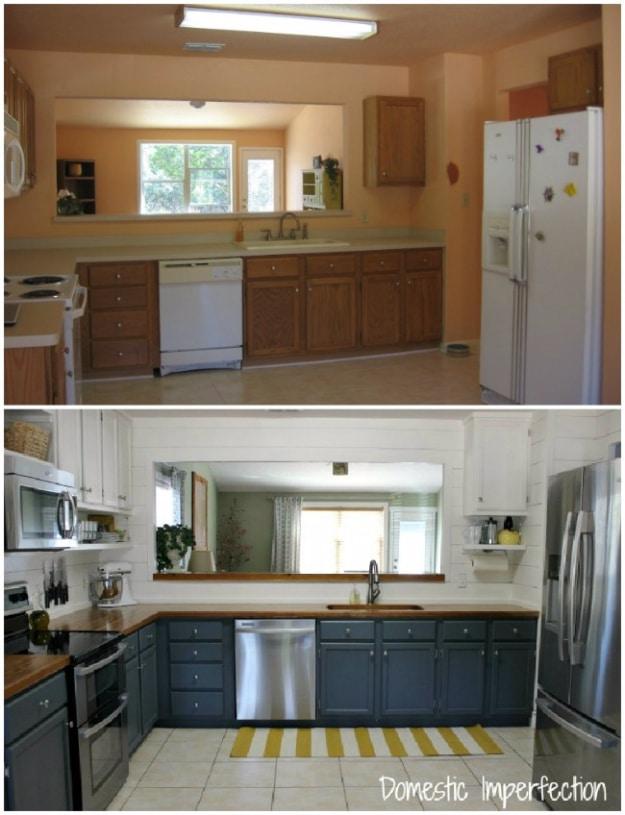
Sixteen hundred dollars total, and the breakdown is worth reading before you plan anything: seven hundred and fifty of that went on butcher block counters alone, three hundred and fifty on the sink and faucet, one hundred and fifty on all the cabinet work including paint, hinges, shelves and trim, one hundred and fifty on the plank walls and their paint, and about two hundred on supplies and decor. White uppers over navy lowers, floating shelves cut in below the wall cabinets, and plank shiplap walls. The lesson buried in those numbers is that paint is cheap and countertops are not, so spend where the surface gets touched.
Get the full tutorial at Wildfire Interiors.
8. Add Cabinet Molding
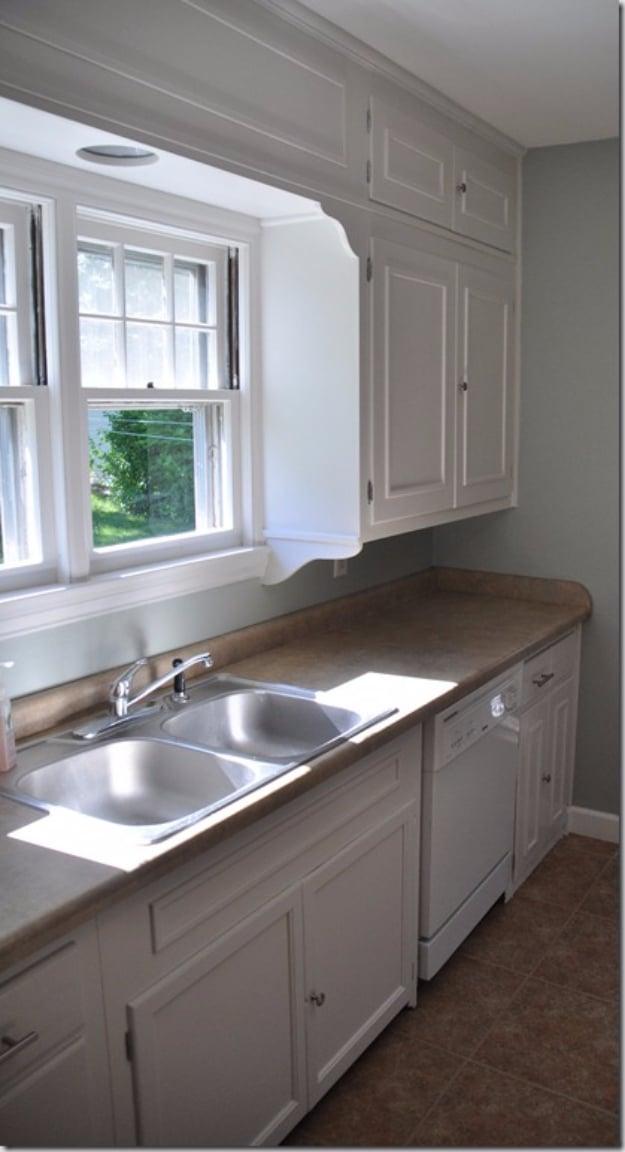
About fifty dollars of thin molding from Lowe’s, cut on a miter saw at forty five degrees, glued and pinned onto plain flat cabinet doors to give them a raised panel look. The measurement step is where people go wrong: they marked one inch in from the edge on a scrap first, decided it looked wrong, and moved to two and a half inches. Test on one door before cutting for the whole kitchen. Five eighths brad nails are the right length, long enough to bite into the door and short enough not to come out the other side. Wood glue under every piece, filler in the holes and corners, sand, then paint the whole lot.
Get the full tutorial at Decor and the Dog.
9. Range Hood Makeover
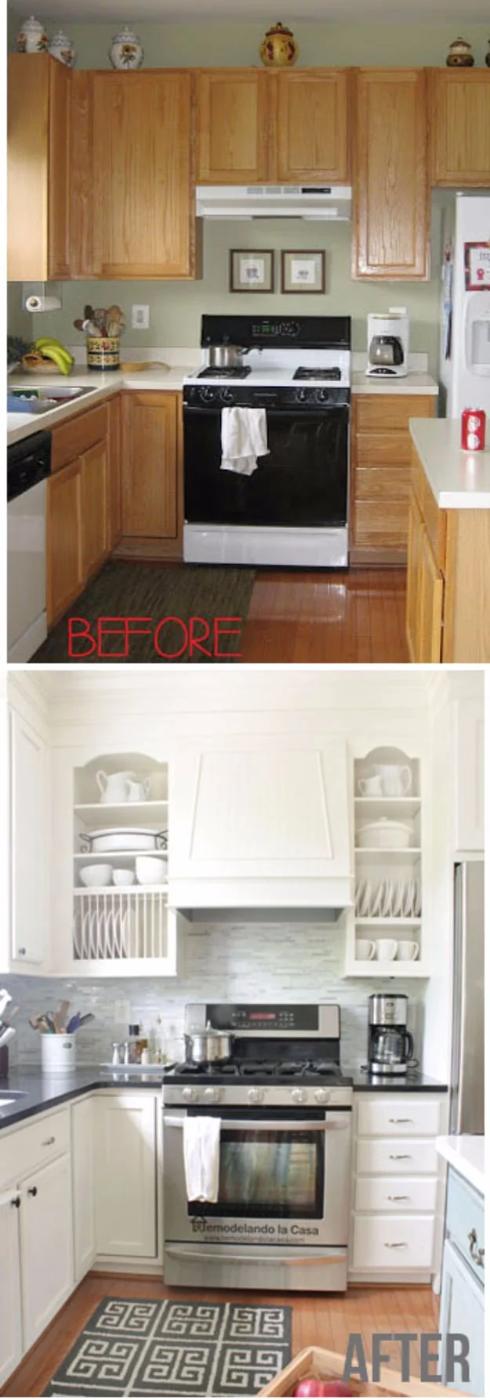
The old trim pieces on the hood were only glued on, so they came off with almost no damage to the surface underneath. Fill the holes, sand it back, then design the new trim to taper rather than sit square, which is the whole difference between a builder grade box and something that looks built in. She says it took trial and error to get the slope right without overdoing it. Superglue holds the small wooden trim pieces on. Beadboard wallpaper goes over the flat faces and is genuinely easy to apply, then caulk every join and paint the whole thing. A weekend changes the focal point of the room.
Get the full tutorial at Remodelando la Casa.
10. DIY Pot Rack
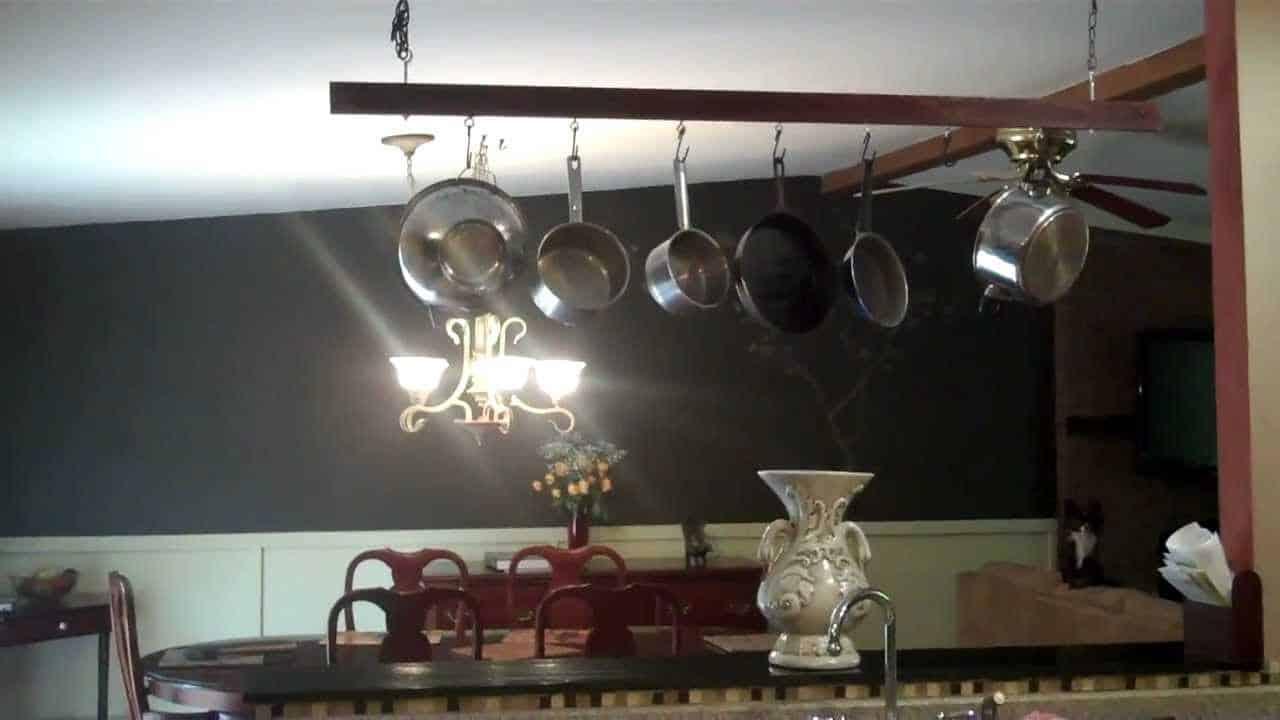
Six pieces of lumber, two cut to twenty four inches mitered, two to fifteen inches mitered and two to twelve inches, assembled into a frame and hung from the ceiling on chain with four hooks. It gets pots and pans out of the drawers and off the shelves, which frees up an entire cabinet in a small kitchen, and it adds something to a ceiling that was doing nothing. Hang it over an island or a peninsula rather than over a walkway, and find joists rather than trusting drywall anchors, because a rack full of cast iron is heavier than it looks from the ground.
Get the full tutorial at Sueeye.
11. $120 Kitchen Cabinet Makeover
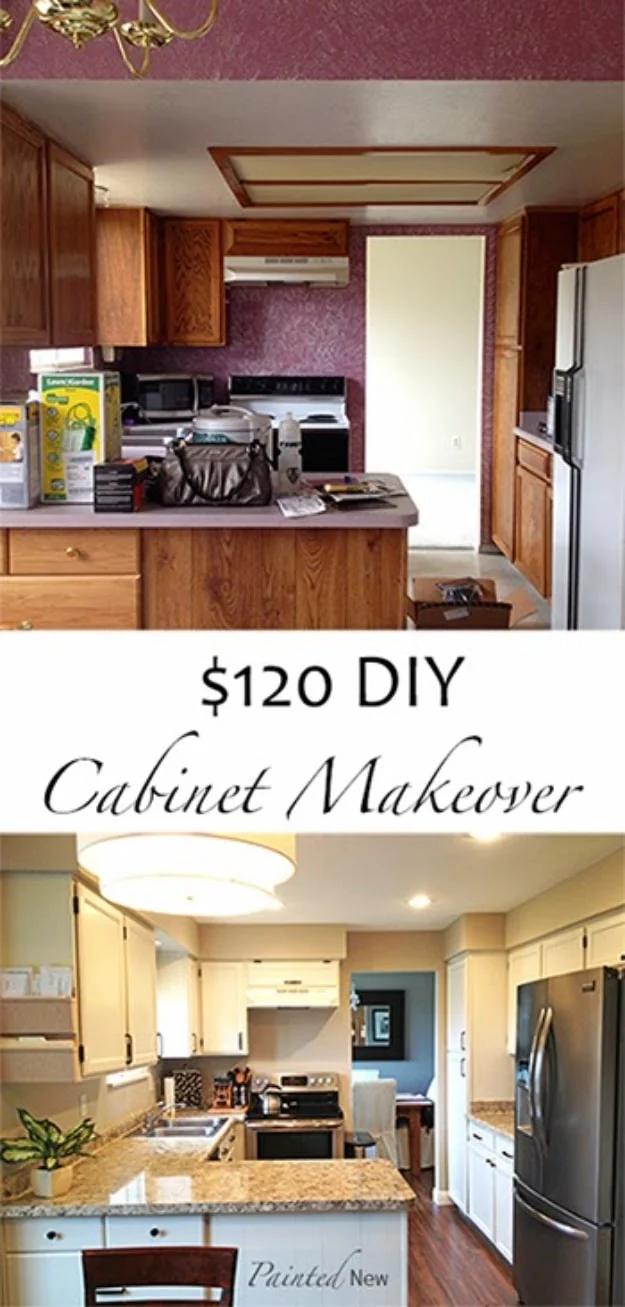
One hundred and twenty dollars, itemized down to the four dollars of TSP and the three dollars of tack cloth. The big lines are a twenty one dollar gallon of KILZ primer and a fifty dollar gallon of Sherwin Williams ProClassic bought with a forty percent coupon, plus a twelve dollar Purdy angled brush and a fourteen dollar mini roller system. Clean with TSP, sand medium, vacuum, tack cloth, then two primer coats and two paint coats with a sand between each. Her all caps warning deserves repeating: this is not a weekend project. It runs one to three weeks and it takes over your life. She later switched her recommendation to Benjamin Moore Advance.
Get the full tutorial at Painted New.
12. Awesome Kitchen Reveal
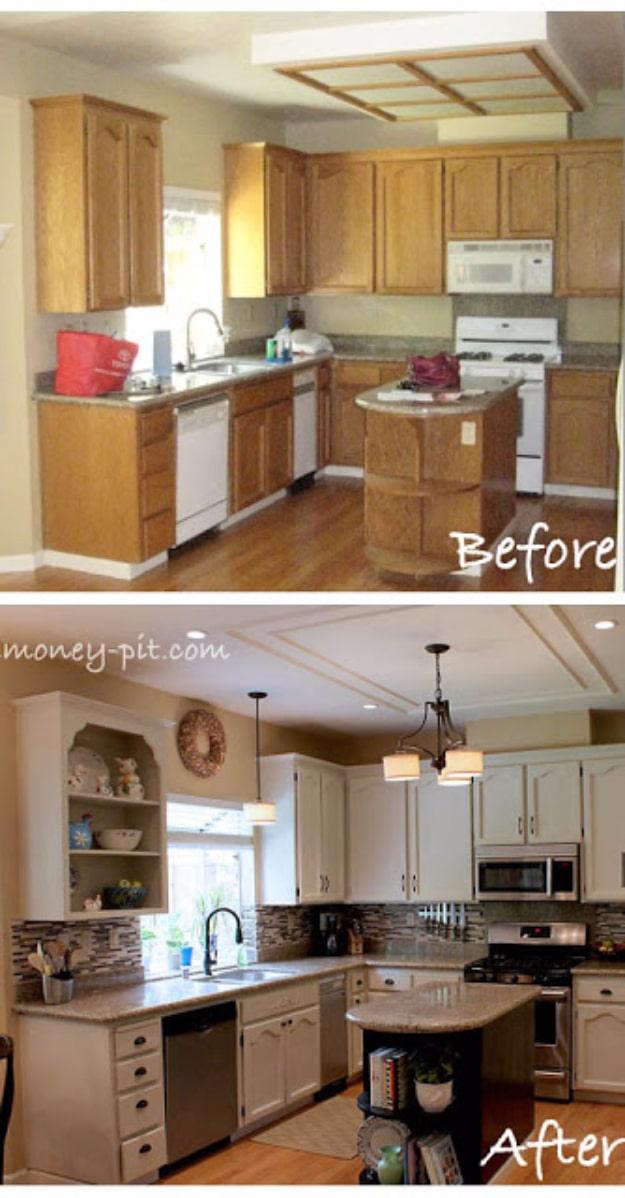
Under three and a half thousand dollars for the whole thing, and two thousand of that was new Bosch appliances, which leaves roughly fifteen hundred for everything else. Cabinets painted Manchester Tan with the island cabinets stained instead, pencil tile backsplash sourced from Costco of all places, new hardware, new lighting, a new faucet and one cabinet converted to open shelves. What makes this one stand out is that she did one hundred percent of the work herself, including the electrical and the plumbing, and reckons contractor labor would have doubled the cost. An eighties oak kitchen with white tile counters turned into something clean and current.
Get the full tutorial at The Kim Six Fix.
13. Gray Themed Kitchen Makeover
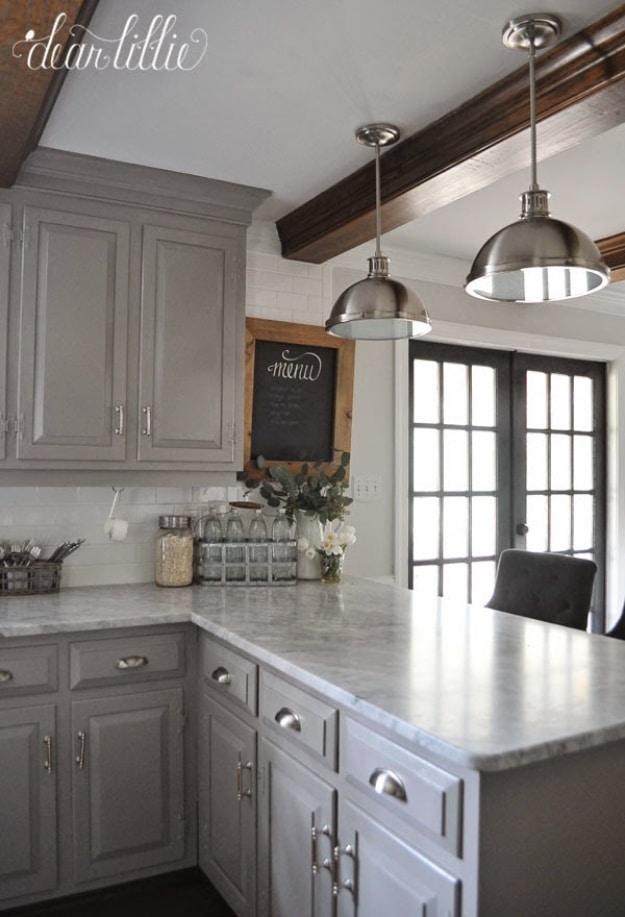
Grey painted raised panel cabinets under exposed stained wood ceiling beams, with a marbled counter wrapping a peninsula and two large brushed nickel dome pendants over it. The pairing is what to steal here: warm stained wood on the ceiling against cool grey cabinets stops the whole room going flat and cold, which is the usual failure of an all grey kitchen. Polished nickel cup pulls and round knobs rather than bar handles keep it traditional. A small framed chalkboard menu and a row of glass bottles do the styling, and a pair of French doors keeps daylight coming into what is otherwise a dark palette.
Get the full tutorial at Dear Lillie Studio.
14. Chippy Farmhouse Style Buffet
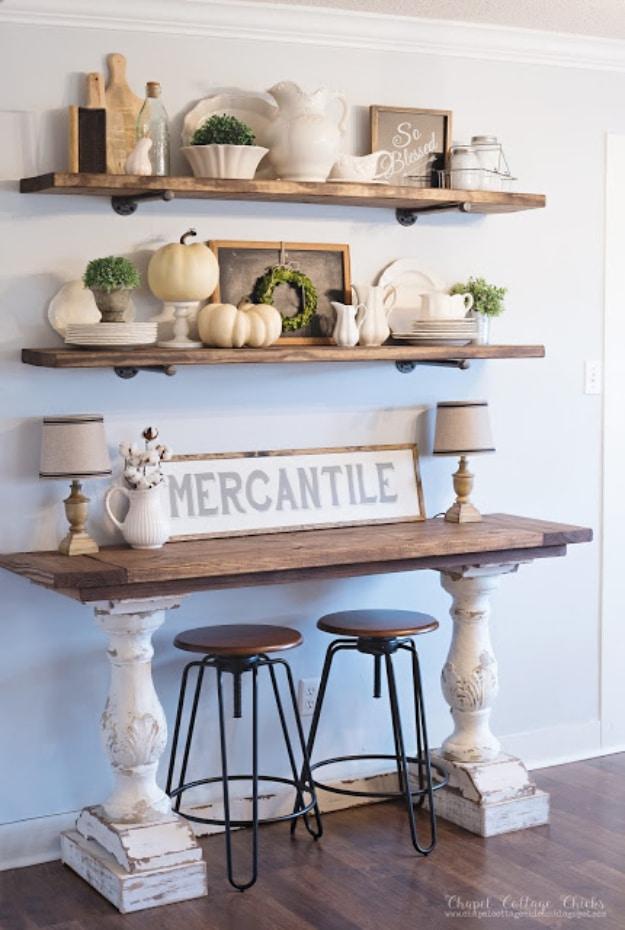
An Amazon console table with a much larger top built for it, standing on two heavy chippy white pedestals, under two industrial pipe shelves. The shelf boards were cut to size at Home Depot and stained at home, then hung on pipe flanges and end caps. This is the piece that solves a dining wall rather than a kitchen wall: it gives you serving space, display space and two stools tucked underneath without needing a sideboard the size of a car. The chippy finish on the pedestals is doing a lot of work, because the contrast between distressed white and clean stained wood is the entire look.
Get the full tutorial at Chapel Cottage Chicks.
15. DIY Cast In Place White Concrete Countertops
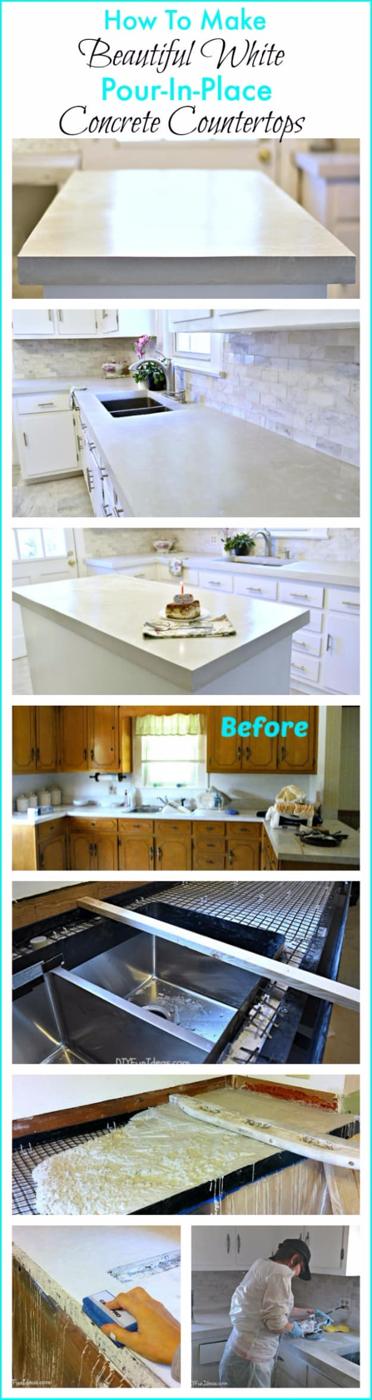
The real cast in place system, and the numbers are honest: twenty fifty pound bags of Z Counterform white concrete mix at twenty nine dollars each is five hundred and eighty dollars of concrete alone, with a total around fifteen hundred and ninety five once the edge forms and shipping are in. Durock cement board goes down first, sink and faucet openings get cut, then the Z edge forms screw on with number ten by five eighths screws over fiberglass mesh. Mix in a nineteen gallon bucket, not a five, starting with one quart of water and working up to two and a half. Wait at least twenty four hours before popping the faucet knockouts.
Get the full tutorial at DIY Fun Ideas.
16. DIY Feather Finish Concrete Countertops
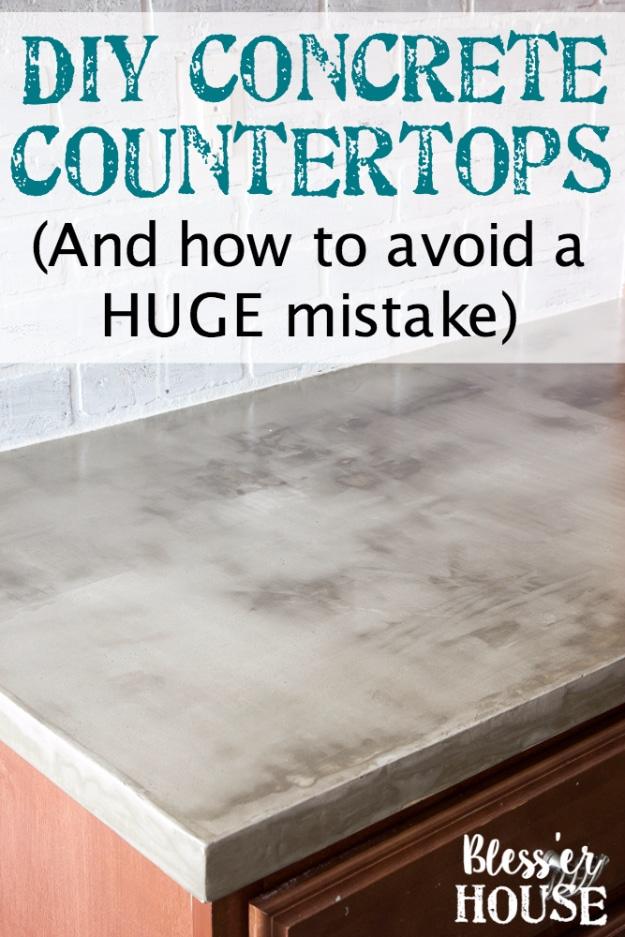
Two hundred and fifty dollars covered sixty square feet, using about four boxes of Henry Feather Finish at roughly twenty dollars a box. Rough the existing laminate up with fifty grit first, then mix small batches, about a quart at a time, at one part powder to one part water. Apply with a twelve inch taping knife on the main surface and a six inch on the tight spots, sand after about three hours, repeat. The lesson she learned the hard way is the one to take: thin coats only. Her first thick application needed three extra correction coats to fix. Sealer goes on last, with twenty four hours between coats.
Get the full tutorial at Bless'er House.
17. DIY Belart Style Clock And Cozy Kitchen Snack Bar
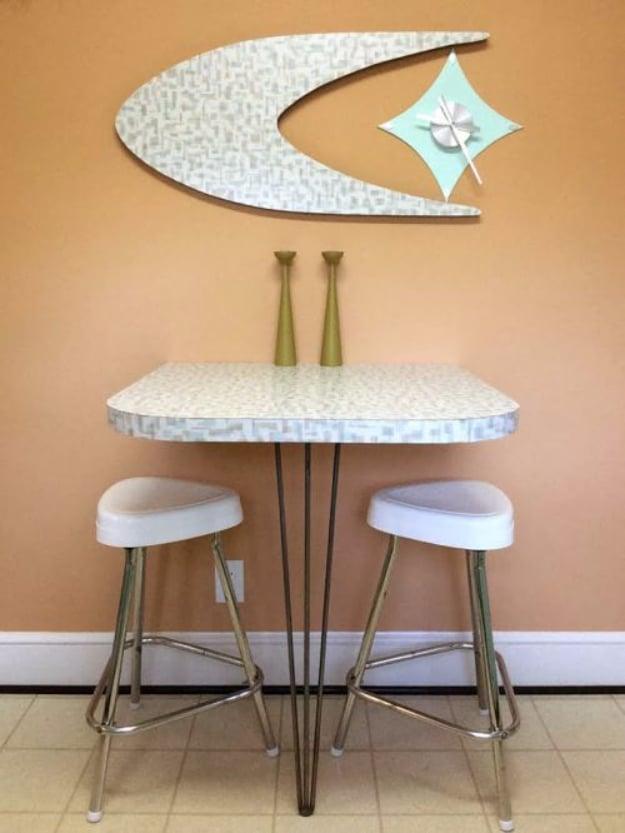
Two projects out of leftovers, both under a hundred dollars in new materials. The boomerang clock is scrap Masonite and leftover laminate from the kitchen reno, drawn freehand and cut out, with the clock mechanism bought on Amazon for ten dollars. The twelve, three, six and nine markers are biscuit joiner biscuits wrapped in aluminum foil, and the smaller hour marks are dots made with the wooden end of a paintbrush dipped in silver paint. The snack bar is three quarter inch particle board cut down to a thirty inch square, fixed to studs on leftover shelving corners with a hairpin leg from eBay on a one by four spacer.
Get the full tutorial at Retro Renovation.
18. DIY Open Shelf Kitchen Island
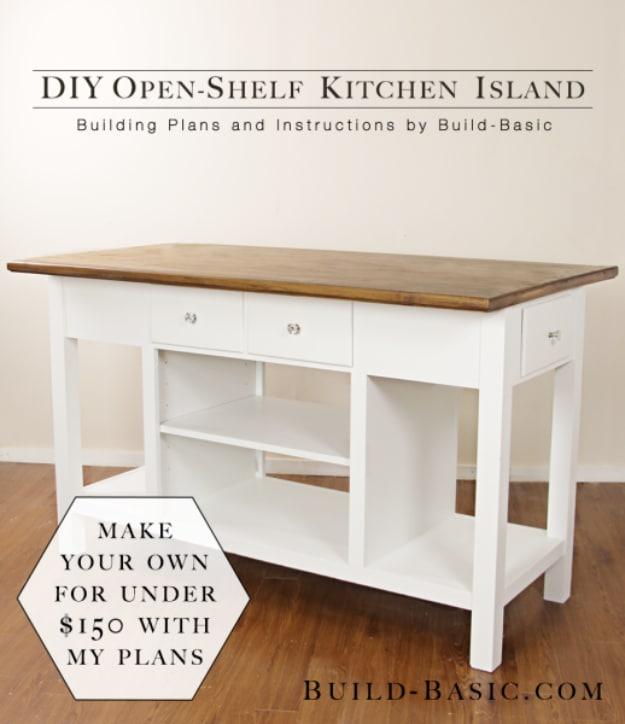
A hundred and fifty dollars and eight hours, with a full cut list published, which is rare and worth a lot. Four legs at thirty five and a half inches, plywood aprons, a plywood base at fifty six and three eighths by twenty and a quarter, and a top built from six two by sixes at forty nine inches plus two at thirty three. Pocket screws throughout. The detail that makes this a properly designed plan rather than a sketch is the figure eight fasteners holding the top down, which let solid wood expand and contract across the seasons instead of warping. Her own warning: the cuts are easy but the parts are large and you will want a second pair of hands.
Get the full tutorial at Build Basic.
19. DIY Kitchen Island Cart
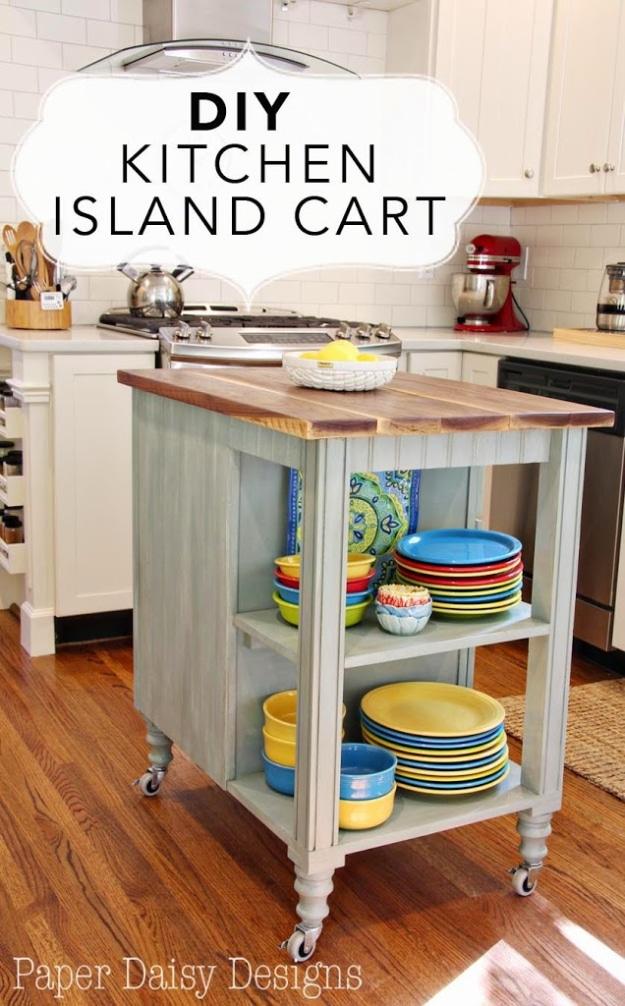
A salvaged base cabinet on casters with a rough cut walnut top, which is the approach to copy even if you do not have a spare cabinet, since a Habitat for Humanity ReStore or any home center will sell you one. Take the toe kick off first so the legs can go on, add Chippendale legs with threaded brass inserts, then a base shelf in MDF and a middle shelf on L-brackets. Beadboard panels the sides. The walnut top gets sanded from sixty grit up to two hundred and then six coats of poly. Thirty six inches is the target height, matching the counters around it so it can work as extra prep space.
Get the full tutorial at Deeply Southern Home.
20. Kitchen Island With Built In Microwave Storage Shelf
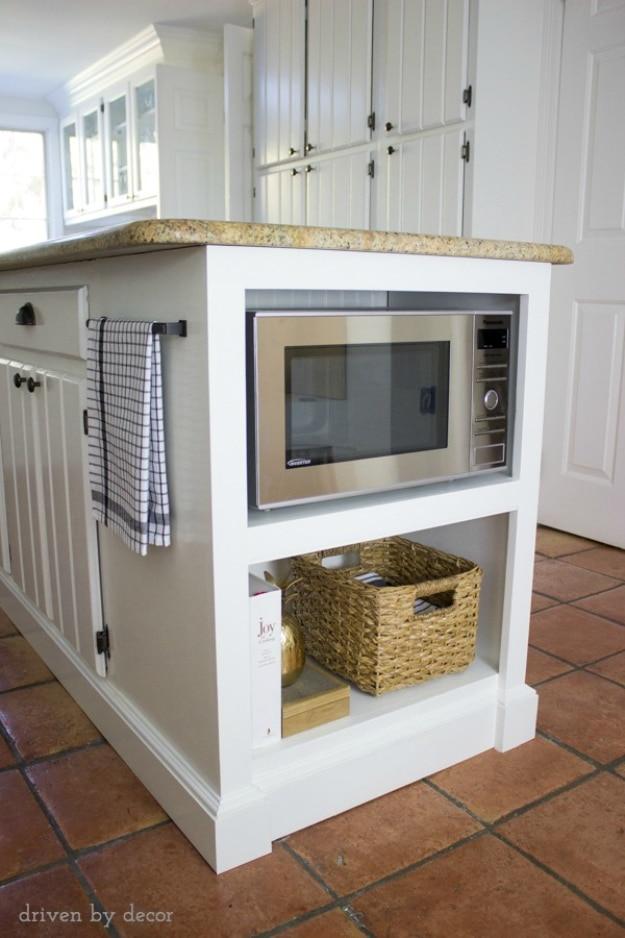
A framed box built into the end of an existing island, with the microwave slotted in at counter level and an open shelf below it for baskets. Beadboard on the back and new baseboard around the base make it read as original rather than added. The sizing note is the useful one: take your microwave’s depth and add about two inches, both for airflow and so the cord has somewhere to go behind it. Check the outlet situation before you build anything. A twelve inch appliance pull on the front holds dish towels, which she found cheaply, since long pulls usually start at a hundred dollars.
Get the full tutorial at Driven by Decor.
21. Staining And Waterproofing A Wood Countertop
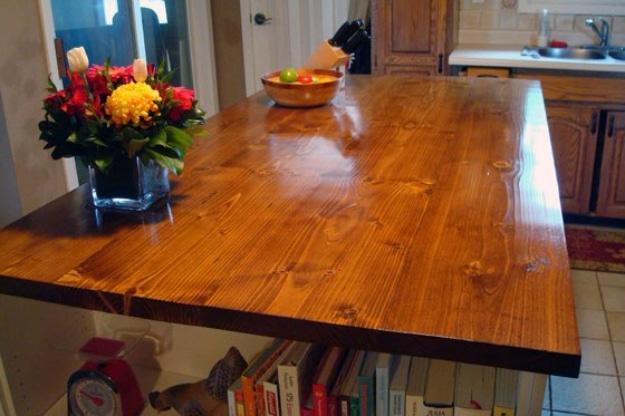
Minwax Early American brushed on, left to sit, wiped off, matched to the existing cabinets. Then four coats of Waterlox Original Sealer Finish laid on liberally with a natural bristle brush, twenty four hours between each. The counterintuitive step is that she does not sand between coats; she wipes the surface with mineral oil before each one instead. Fine steel wool comes out once, between the second to last and the final coat. Then a full week of curing before anything is put on it. Her practical warning is worth heeding: Waterlox stinks while it is wet, so do it before bed with the windows open.
Get the full tutorial at Home on 129 Acres.