Every jewelry enthusiast knows the struggle: a growing collection of beautiful pieces, but nowhere stylish or organized to store them. Tangled necklaces, missing earrings, and scratched bracelets are common woes when storage solutions are inadequate. While department stores offer various jewelry boxes, they often come with hefty price tags, questionable craftsmanship, and designs that simply don’t match your unique aesthetic. This is where the magic of DIY comes in! Crafting your own jewelry storage isn’t just a cost-effective alternative; it’s an opportunity to create personalized, functional, and stunning pieces that truly reflect your style and showcase your cherished accessories.
From elegantly designed boxes to ingenious wall-mounted displays and clever repurposed items, the world of DIY jewelry storage is brimming with creative possibilities. Whether you’re looking for a quick 10-minute project or a more involved crafting session, you’ll find ideas suitable for every skill level and every type of jewelry – be it delicate rings, statement necklaces, or a collection of earrings. Dive into these inspiring DIY jewelry box and organizer ideas, and transform your cluttered collection into a beautifully curated display.
1. DIY Mod Podge Wooden Jewelry Boxes
Unleash your artistic side with these customizable wooden jewelry boxes. Using Mod Podge, you can transform a plain wooden box into a vibrant, personalized storage solution. Choose your favorite patterned papers, fabric scraps, or even printed photos to create a decoupage design that perfectly complements your decor. This project is ideal for adding a touch of whimsy or elegance, making each box truly unique while keeping your rings, earrings, and small trinkets safe and sound.
2. DIY Crystal Geode Jewelry Box
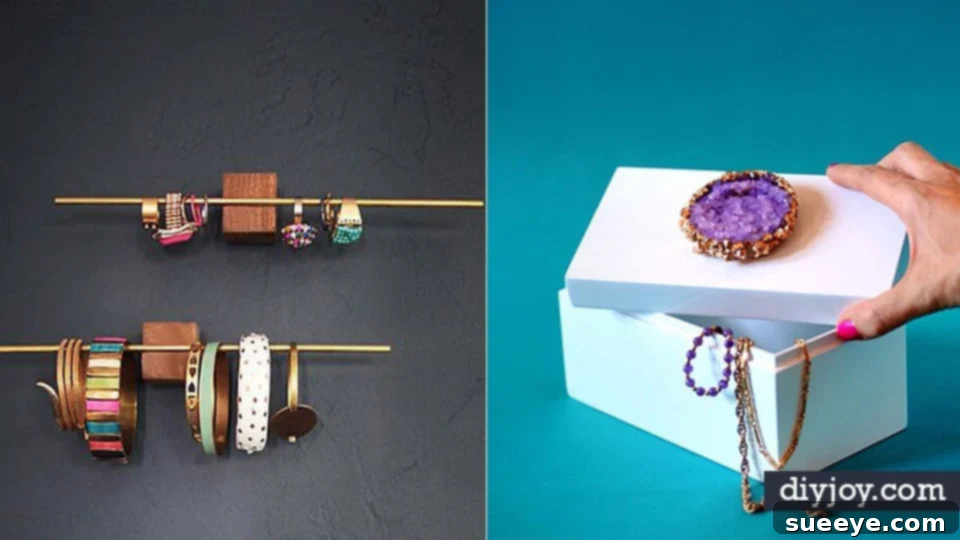
Add a touch of natural elegance to your dressing table with a DIY crystal geode jewelry box. This project involves adorning a simple box with sparkling faux crystals, mimicking the intricate beauty of real geodes. The result is a luxurious and eye-catching piece that not only organizes your jewelry but also serves as a stunning decorative accent. It’s a fantastic way to elevate a basic box into something truly special and opulent.
3. Cigar Box Ring Holder
Repurpose an old cigar box into a charming and functional ring holder. Cigar boxes, with their sturdy construction and often attractive finishes, make excellent bases for small storage projects. By adding a soft insert, such as velvet or foam, you can create perfectly cushioned slots for all your rings, keeping them secure and easily accessible. This DIY is a clever way to upcycle and add vintage flair to your jewelry collection.
4. 10 Minute DIY Jewelry Box
Short on time but big on need? This 10-minute DIY jewelry box is your perfect solution. Often involving simple techniques like folding paper, assembling pre-cut pieces, or quickly adhering decorative elements to a basic container, these projects are designed for instant gratification. They’re ideal for creating a temporary solution or a charming small gift box for a special piece of jewelry. Quick, easy, and effective!
5. DIY Marbled Jewelry Box
Achieve a sophisticated, high-end look with a DIY marbled jewelry box. Marbling techniques, often using nail polish or specialized paints in water, create unique swirling patterns on the surface of your box. This craft allows for endless color combinations and truly original designs, turning a simple storage unit into a work of art. It’s a chic way to store your precious items while adding an elegant touch to your vanity or dresser.
6. Shabby Chic Dangly Earring Display
If you have a collection of beautiful dangle earrings, a shabby chic display is a fantastic way to keep them organized and showcased. Often crafted from repurposed frames, lace, or mesh, these displays combine functionality with a charming, vintage aesthetic. Your earrings will no longer be tangled in a box but elegantly hanging, easy to see, and adding to the room’s decor. It’s perfect for those who love a rustic yet refined style.
7. DIY Framed Jewelry Storage
Transform an old picture frame into a stunning piece of jewelry storage. By adding wire mesh, hooks, or a corkboard backing, you can create a beautiful wall-mounted organizer for necklaces, earrings, and even bracelets. This project helps clear clutter from your dresser while turning your jewelry into decorative art. It’s an elegant and space-saving solution, especially for smaller rooms or for those who appreciate seeing their collection at a glance.
8. Decorative Wall Hooks As Jewelry Storage
Sometimes the simplest solutions are the most effective. Decorative wall hooks offer a minimalist yet highly functional way to store your necklaces and larger bracelets. Choose hooks that match your room’s aesthetic – from antique brass to modern geometric designs – and mount them on a wall or the inside of a cabinet door. This method keeps your necklaces untangled and prevents damage, all while adding a stylish accent to your space.
9. Burlap Jewelry Box
Infuse a rustic or natural vibe into your jewelry organization with a burlap jewelry box. Burlap can be used to cover an existing box, line compartments, or even create soft rolls for rings and earrings. Its textured, earthy appeal adds warmth and a touch of farmhouse charm. This project is excellent for giving an old box a complete makeover with a unique and tactile finish, perfect for storing a variety of jewelry items.
10. DIY Wood Ring Box
For those with a cherished collection of rings, a dedicated DIY wood ring box offers both protection and display. These can range from simple carved blocks with slots to more elaborate lidded boxes with soft velvet inserts. Crafting your own allows you to customize the number and size of the slots, ensuring a perfect fit for every ring. It’s a timeless and elegant solution for keeping your precious rings organized and safe from damage.
11. DIY Jewelry Organizer
This general DIY jewelry organizer encompasses a wide range of creative solutions tailored to various jewelry types. It often involves creating a multi-functional piece that can hold necklaces, earrings, and bracelets simultaneously. Think wall-mounted boards with hooks and small shelves, or tiered displays made from repurposed materials. The beauty of this DIY is its adaptability, allowing you to design an organizer that perfectly fits your specific collection and space requirements.
12. Wooden Circle Jewelry Box
Move beyond traditional rectangular boxes with a stylish wooden circle jewelry box. These unique designs can feature multiple rotating tiers, compartmentalized sections, or a simple, elegant single compartment. The round shape adds a modern and artistic flair to your storage, making it a statement piece on its own. It’s a sophisticated choice for neatly tucking away different jewelry types, from delicate chains to chunky rings.
13. DIY Rotating Jewelry Storage Using Cereal Box
Who knew a simple cereal box could be so versatile? This ingenious DIY transforms everyday cardboard into a functional rotating jewelry storage unit. With a bit of cutting, folding, and decorating, you can create multiple compartments or hangers that spin, making all your jewelry easily accessible. It’s an incredibly budget-friendly and eco-conscious way to organize, perfect for teens or anyone seeking a clever upcycling project.
14. Geometric Trinket Boxes
Embrace modern design with DIY geometric trinket boxes. These small, sculptural boxes are perfect for holding individual rings, a pair of earrings, or other tiny treasures. Using techniques like paper crafting, wood cutting, or even 3D printing (or simply painting existing boxes with geometric patterns), you can create minimalist yet striking storage pieces that double as decorative objects. They add a contemporary edge to any space.
15. DIY Miniature Card Catalog Jewelry Box
For a truly unique and charming storage solution, create a DIY miniature card catalog jewelry box. This project involves crafting tiny drawers, much like an old library catalog, to store different types of jewelry. Each drawer can be labeled for easy categorization, making it simple to find what you need. It’s a whimsical, organized, and space-efficient way to house a diverse collection, offering a touch of vintage appeal.
16. DIY Jewelry Display Cones
Showcase your rings and bracelets with elegance using DIY jewelry display cones. These simple yet effective organizers can be crafted from various materials like paper, cardboard, or clay, then decorated to match your style. Rings slip neatly onto the tip, while bracelets can be stacked around the base. They’re perfect for a boutique-style display on your dresser and keep your circular pieces easily visible and accessible.
17. Jewelry Blocks
For a minimalist and modern approach to jewelry storage, consider DIY jewelry blocks. These are typically solid blocks of wood, concrete, or even painted bricks with strategically placed holes, grooves, or pegs to hold various items. They’re perfect for showcasing a few key pieces, like a favorite necklace, a pair of stud earrings, or a statement ring, adding an architectural element to your display.
18. DIY Table top Jewelry Holder from Scrap Wood
Give new life to leftover wood pieces by crafting a functional and stylish table-top jewelry holder. Scrap wood can be cut, sanded, stained, and assembled into creative shapes with dowels or hooks for hanging necklaces and bracelets. This project is not only environmentally friendly but also allows for unique, custom designs that fit perfectly on any dresser or nightstand, adding a handcrafted touch to your space.
19. DIY Clothes Hanger Jewelry Storage
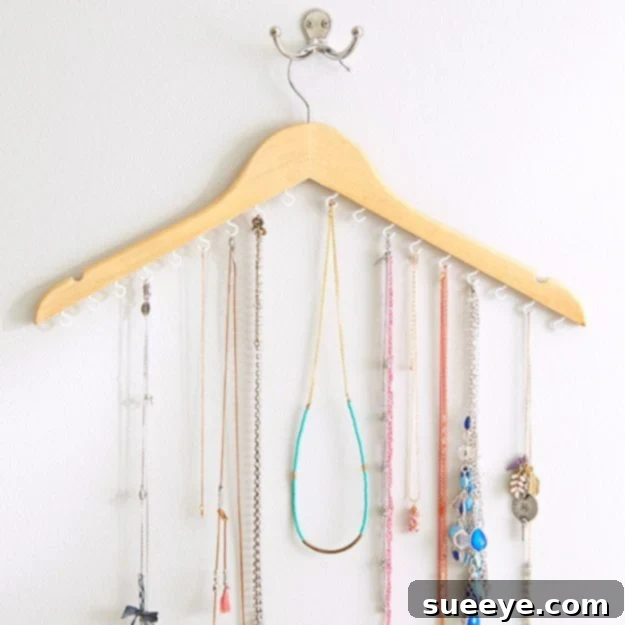
Maximize closet space and keep your necklaces untangled with a clever DIY clothes hanger jewelry storage solution. By adding hooks, screw eyes, or even small loops to a sturdy wooden or plastic hanger, you can create an instant organizer for multiple necklaces and bracelets. This method keeps your jewelry visible and easily accessible within your wardrobe, freeing up precious dresser top real estate.
20. DIY Geometric Industrial Jewelry Holder
Combine raw materials like copper pipes or metal rods with a geometric design for a striking industrial-chic jewelry holder. This style is perfect for those who appreciate modern aesthetics and a touch of urban edge. Such organizers often feature clean lines and open structures, allowing your jewelry to become part of the decor. It’s a bold and artistic way to display your collection, particularly suited for necklaces and bangles.
21. DIY Ring & Earring Jewelry Storage
Dedicated storage for rings and earrings is essential to prevent loss and damage. This DIY project focuses on creating specialized compartments or padded inserts within a box or tray. Materials like foam, felt, or velvet can be shaped and glued to provide soft slots for rings and neat rows for stud or hoop earrings. The result is a highly organized system that keeps these smaller, easily misplaced items secure and visible.
22. Secret Compartment Jewelry Case
For those who value discretion or want to add an element of intrigue, a secret compartment jewelry case is an exciting DIY. This project involves cleverly building hidden drawers or false bottoms into a seemingly ordinary box or furniture piece. It’s not just about storage; it’s about creating a personal treasure chest where your most valuable or sentimental pieces can be kept out of sight, adding a layer of security and fun.
23. Easy DIY Cabinet Hardware Jewelry Storage
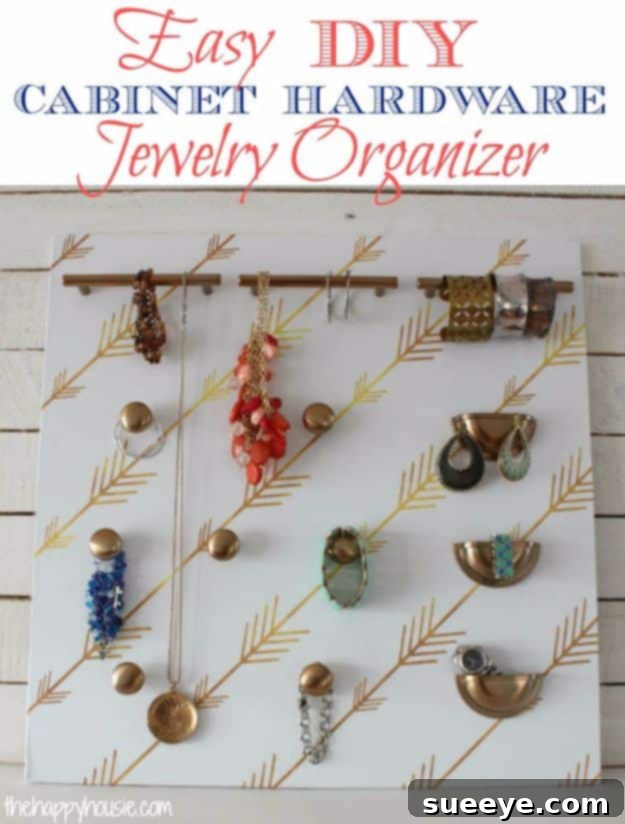
Repurpose elegant cabinet knobs, pulls, and handles into stylish jewelry organizers. Simply mount these pieces of hardware onto a decorative board or directly onto a wall. The various shapes and sizes of hardware provide perfect hooks and pegs for hanging necklaces, bracelets, and even large hoop earrings. This DIY is incredibly simple, budget-friendly, and allows you to match your jewelry storage to your room’s existing hardware for a cohesive look.
24. Weathered Wooden Jewelry Box
Achieve a charming, timeworn aesthetic with a DIY weathered wooden jewelry box. Techniques like dry brushing, sanding back layers of paint, or using specific stains can give new wood an aged, distressed look. This style adds character and a sense of history to your storage, making it feel like a cherished antique. It’s a great project for creating a rustic or shabby-chic piece that elegantly holds your jewelry.
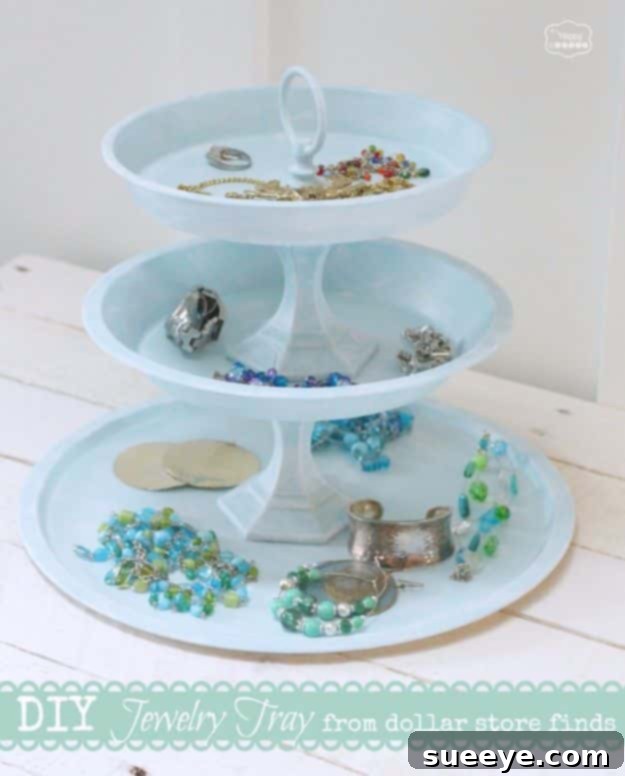
25. DIY Jewelry Tray
For those who prefer open storage and easy access, a DIY jewelry tray is an ideal solution. These trays can be crafted from wood, ceramic, or even repurposed serving trays. Add dividers, felt lining, or decorative elements to create sections for different jewelry types. They’re perfect for keeping everyday pieces organized on a dresser or nightstand, offering both functionality and a touch of curated style.
26. DIY Vintage Rose Jewelry Box
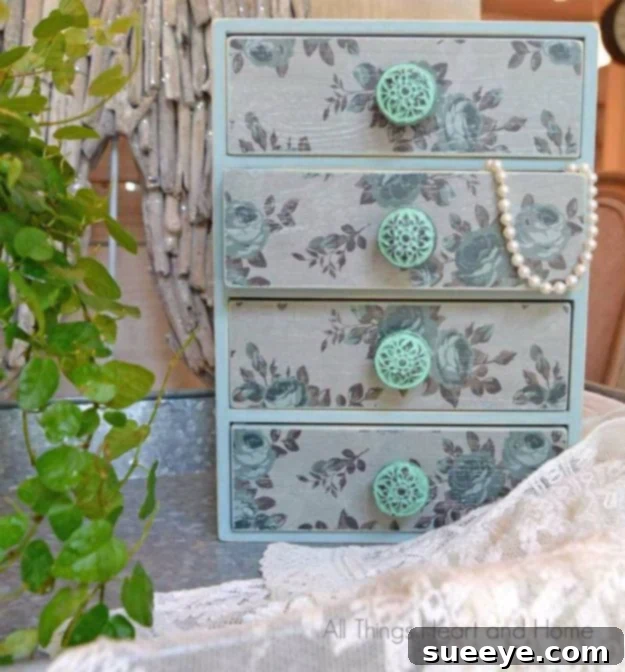
Embrace classic romance with a DIY vintage rose jewelry box. This project typically involves decorating a box with delicate rose motifs, often through decoupage, hand-painting, or applying patterned paper. The soft colors and timeless floral design create a beautiful, sentimental piece that perfectly complements a romantic or traditional decor scheme. It’s a charming way to store your precious jewelry with an air of old-world elegance.
27. Crystal-Topped Jewelry Box
Elevate a simple jewelry box by adorning its lid with beautiful crystals. This DIY can involve gluing raw crystal pieces, geode slices, or even faceted glass gems to the top of a box, creating a luxurious and mystical aesthetic. The sparkling addition transforms an ordinary container into a captivating decorative object that holds your jewelry and catches the light beautifully, adding a touch of glamour to your space.
28. Jewelry Holder from a Cutlery Tray
An everyday cutlery tray can be cleverly repurposed into an efficient jewelry organizer. The existing compartments are perfect for sorting rings, earrings, and smaller pendants, while added hooks or dowels can hold necklaces and bracelets. This upcycling project is incredibly practical and budget-friendly, making use of a common household item to create a customized and organized home for your accessories, either in a drawer or on a shelf.
29. DIY Jewelry Box Altoid Can
For minimalist storage or travel-friendly options, a DIY jewelry box crafted from an Altoid can is both ingenious and adorable. These small metal tins are perfect for holding a few cherished rings, stud earrings, or small charms. Decorate the exterior with paint, paper, or fabric, and line the inside with felt for a soft landing. It’s a fantastic miniature project, perfect for a personalized touch or a thoughtful small gift.
30. DIY Book Jewelry Box
Give an old book a secret new life as a charming jewelry box. This classic DIY involves cutting out a cavity within the pages of a hardcover book, creating a hidden compartment perfect for rings, small necklaces, or other precious trinkets. It’s a wonderfully discreet storage solution that blends seamlessly into a bookshelf, adding an element of surprise and vintage appeal to your decor.
31. Stenciled Jewelry Box
Personalize any plain jewelry box with elegant stenciled designs. Whether you prefer geometric patterns, floral motifs, or intricate mandalas, stenciling allows for precise and beautiful decoration. This technique is an easy way to customize a store-bought box or refurbish an old one, transforming it into a unique piece that perfectly matches your individual style and adds a polished finish to your storage solution.
32. DIY Super Simple Jewelry Box
Sometimes, the best DIY projects are the simplest. This “super simple” jewelry box concept focuses on basic construction and minimal materials, often involving a pre-made box and quick decorative touches or a straightforward assembly of wood or cardboard. These projects are perfect for beginners, children, or anyone looking for a fast and functional storage solution without complex techniques or extensive tools.
33. Leather And Wood Jewelry Box
Combine the warmth of wood with the sleekness of leather for a sophisticated and durable DIY jewelry box. This project involves integrating leather accents, such as a leather-covered lid, straps, or interior lining, into a wooden box. The contrasting textures create a rich, tactile experience, resulting in a high-quality, elegant storage piece that’s both stylish and protective for your cherished jewelry.
34. Easy Jewelry Box
Concluding our list with another approachable option, the “easy jewelry box” project emphasizes straightforward design and readily available materials. These designs are often perfect for upcycling everyday containers like small tins, cardboard boxes, or even decorative bowls with added soft inserts. The focus is on quick transformation and immediate functionality, proving that effective and attractive jewelry storage doesn’t have to be complicated or expensive.