DIY Lighting Ideas
21 DIY Ideas With Wallpaper Scraps Worth Saving
DIY ideas with wallpaper scraps: 21 projects for lampshades, stair risers, framed art, paper letters, gift bags, blinds and decoupaged furniture.
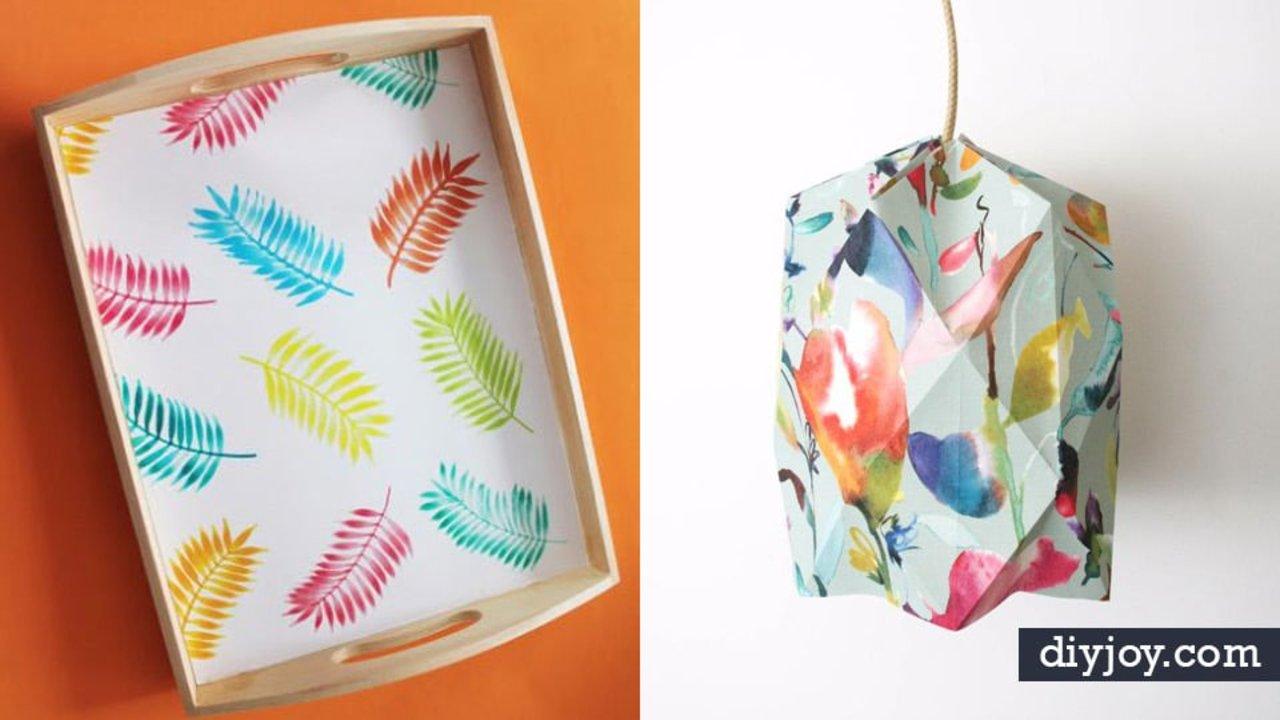
Wallpaper is the one leftover nobody can bring themselves to bin. It is beautiful, it cost real money, and there is never enough of it left to paper anything. So here are 21 DIY ideas with wallpaper scraps that use exactly the amount you have: a single sample squares up into framed art or a papered letter, a metre covers a lampshade or the back of a bookcase, and a spare roll folds into window blinds in an afternoon. Stair risers, a papered fridge, gift bags, a decoupaged table top, a cut paper skyline. Some of these are five minute jobs and some will take a Saturday, but every one of them starts with the offcuts already in your cupboard.
1. DIY Wallpaper Blinds
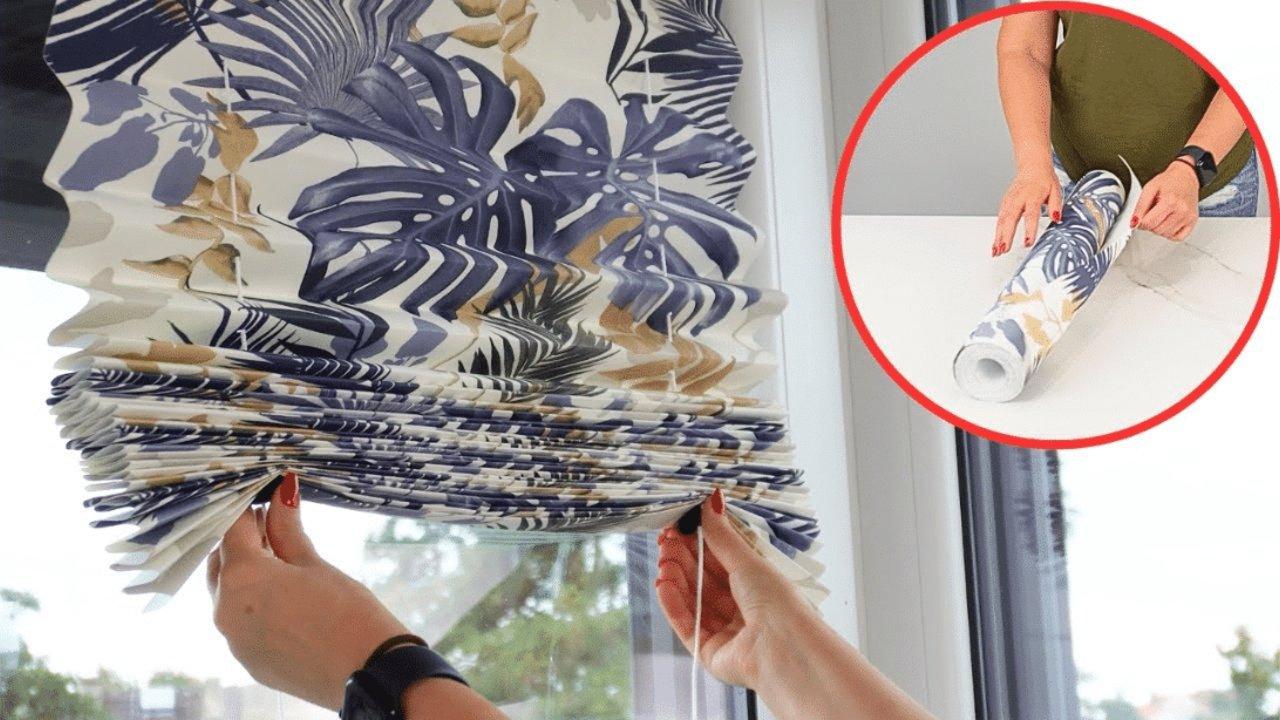
A whole window blind out of one roll of wallpaper, and the only tools are a ruler, a drill bit and some tape. The paper gets cut to about eighty three inches, then folded into a one inch concertina all the way down, reversing direction on every fold. Two holes go in about four inches from each end, a string threads through each with a cord lock on the end, and the top edge sticks to the window frame with double sided tape. Pull the strings and it gathers into a scalloped fan. Choose a heavier weight paper, because a thin one will not hold a crease.
Get the full tutorial at Sueeye.
2. Freshen Up your Fridge
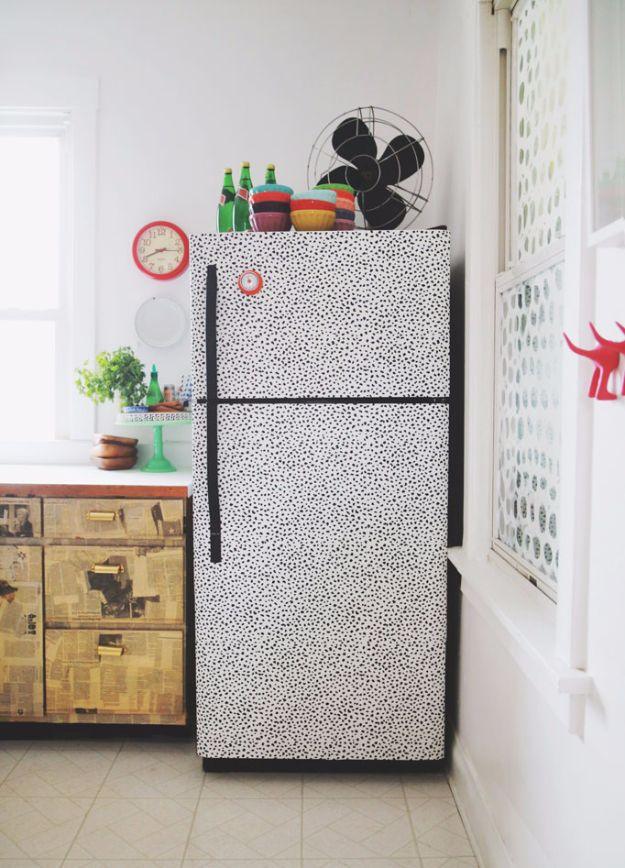
Papering a fridge sounds mad until you see one done. A big white appliance is the largest blank surface in most kitchens, and a small scale speckled print turns it into something closer to furniture. Peel and stick is the sensible choice here because the doors are magnetic steel, perfectly flat and easy to squeegee, and because you will want it off again before the landlord sees it. Run the paper as one piece per door, cut around the handle rather than trying to paper over it, and leave the seam between the doors visible so the fridge still looks like it opens.
Get the full tutorial at Aunt Peaches.
3. DIY Vintage Wallpaper Letters
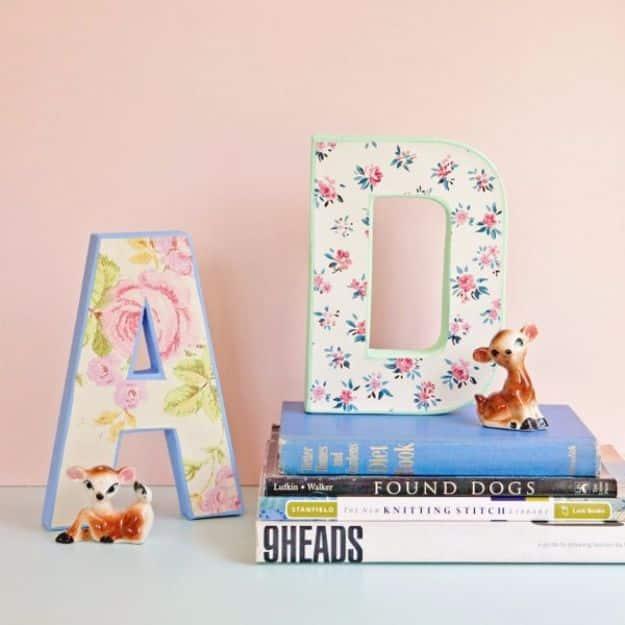
Paper mache letters are cheap, they come in every size, and a scrap of vintage wallpaper is exactly enough for one. Paint the letter first and let it dry, because the painted edge is what you will see all around the front face. Then lay the letter face down on the back of the wallpaper, draw round it, and cut just inside the line so a thin border of paint shows. Matte Mod Podge goes on the back of the paper, press it down and work the bubbles out, then a second coat over the top to seal it. Start to finish it is under an hour.
Get the full tutorial at My So Called Crafty Life.
4. An Affordable Wallpaper Trick
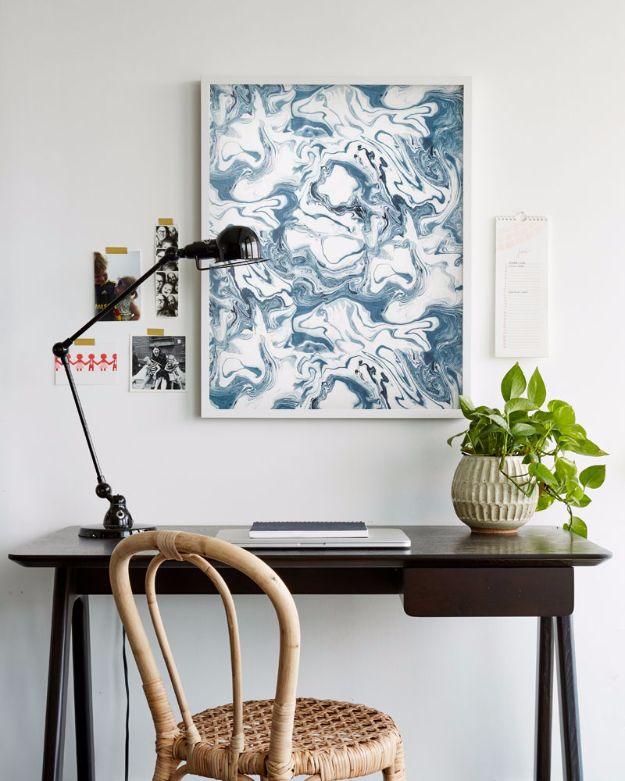
Designer wallpaper is unaffordable by the roll and nearly free by the sample, which is the entire trick. Shops send samples for about five dollars and sometimes for nothing, and one sample framed is a piece of art for the price of the frame. Choose a frame that opens easily from the back, because the whole appeal is swapping the paper for a different one in two minutes when you are bored. Glass is optional. One thing worth knowing before you order: a sample can shrink to around six inches square of usable pattern once you trim the printed margins off.
Get the full tutorial at Cup Of Jo.
5. DIY Blinds Using Wallpaper
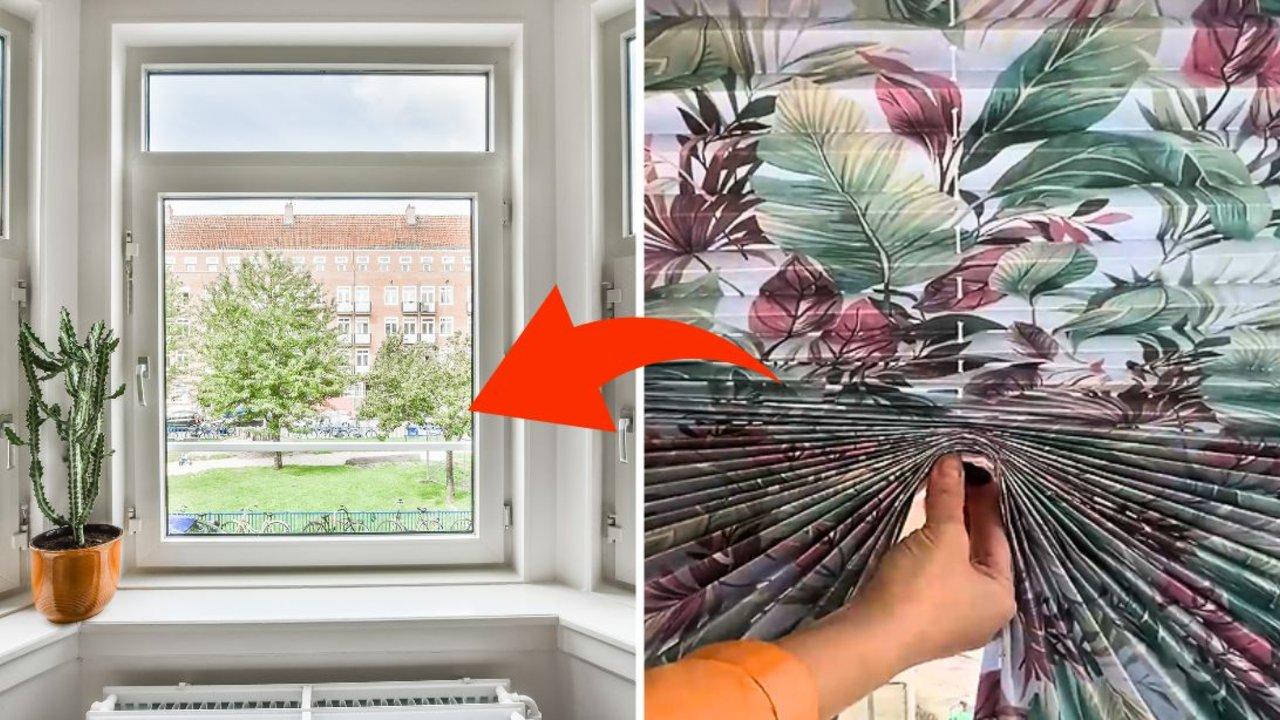
The same idea as a paper blind but measured off your own window rather than a fixed length, which matters if the window is wide or short. Measure the width and the drop, add a few inches to the drop, and cut. Fold the whole length into a z-fold concertina, mark the centre of the folded stack and drill one hole straight through it with a thin bit. One string goes through, taped at the top end, with a long bead threaded on at the bottom to give you something to pull. Double sided tape along the top edge sticks it to the upper frame, and it is done.
Get the full tutorial at Sueeye.
6. Make Pinwheel Decorations
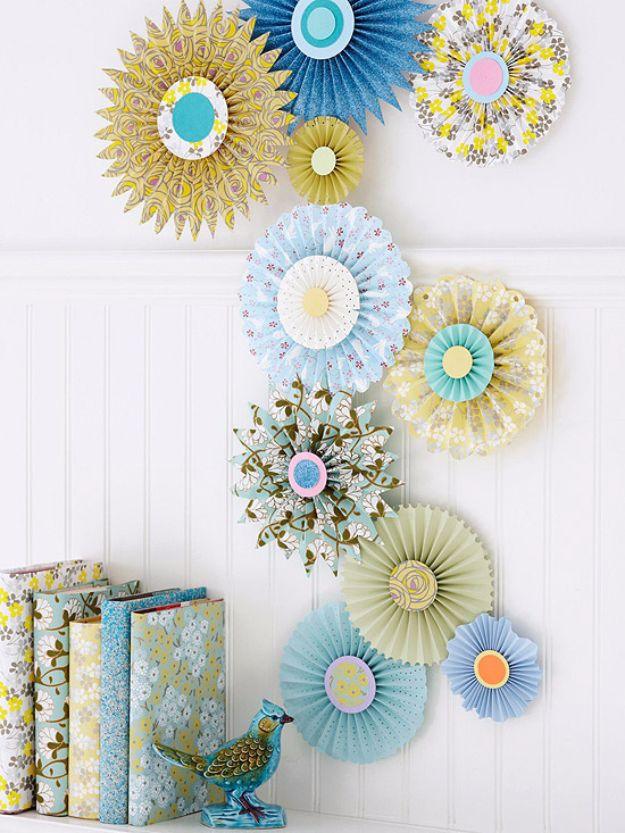
Paper rosettes are the cheapest wall decoration there is and wallpaper makes far better ones than craft paper, because the weight holds a crease and the pattern is already doing the work. Concertina a strip, join the ends into a ring, press the centre flat and stick a covered circle over the join to hide it. Vary the diameters wildly rather than making them all the same size, because a wall of identical medallions looks like bunting and a mix of large and small looks composed. Hang them in a loose vertical drift rather than a grid.
Get the full tutorial at Behance.
7. Wallpaper Backed Bookcase
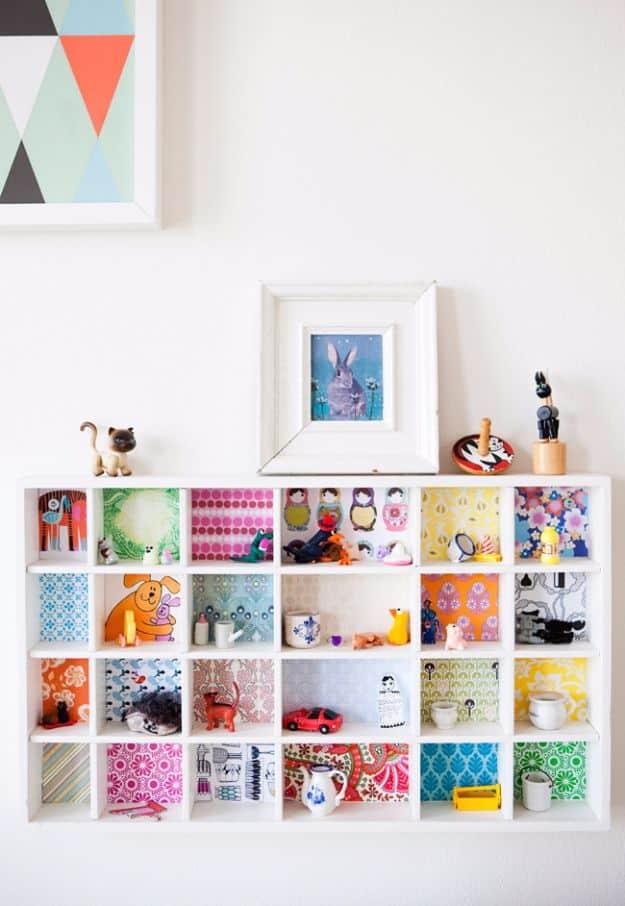
A plain white grid shelf with every compartment papered a different colour is the single best use for a drawer full of tiny offcuts. Cut a rectangle to fit the back of each cube, glue it in, and suddenly a cheap pigeonhole unit reads as something collected over years. Because each square is separate you can use pieces far too small for anything else, including the ends of rolls and the sample cards. Mix busy prints with plain blocks of colour so the objects on the shelves still stand out, and keep the outside of the unit white so the colour stays inside the frame.
Get the full tutorial at My Scandinavian Home.
8. DIY Origami Lampshade
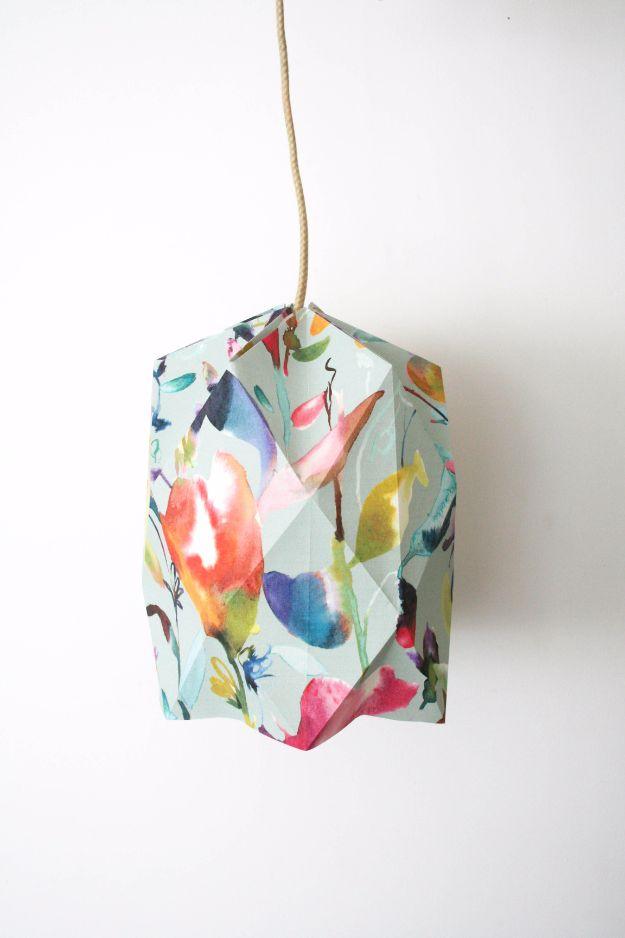
This is the most technical thing on the list and also the most impressive. A piece of wallpaper roughly twenty nine and a half by seventy seven and a half centimetres gets thirteen vertical lines ruled five and a half centimetres apart on the reverse, then diagonals across them, and every one of those lines is scored before anything is folded. Always fold in on itself so the printed side stays facing out. Punch holes along the top, thread twine, tape the ends together with an eleven centimetre overlap, then pull the twine to draw the top closed. Use a cool bulb only. A hot one this close to paper is not worth the risk.
Get the full tutorial at Apartment Apothecary.
9. DIY Wallpaper Stools
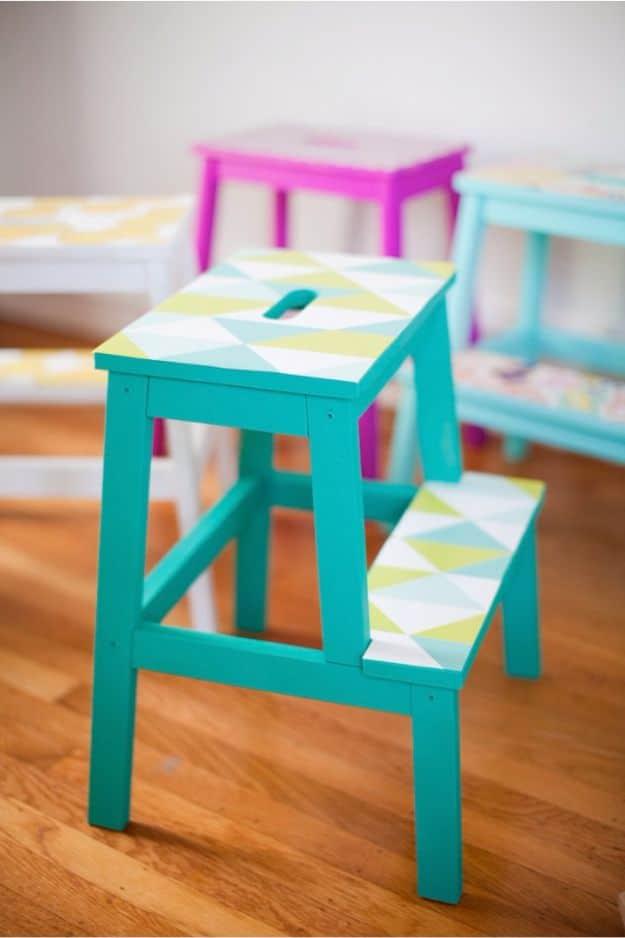
The plain wooden step stool everyone owns takes paint and paper better than almost any other piece of furniture, because both surfaces you actually see are flat rectangles. Paint the frame a strong colour, then paper only the top step and the lower tread so the pattern sits where the eye lands and the legs stay solid. A geometric print in the same palette as the paint keeps it looking designed rather than crafty. Seal the trodden surfaces properly, because a step stool gets stood on in shoes and an unsealed paper edge lifts within a week.
Get the full tutorial at This Little Street.
10. Framed Vintage Wallpaper Art
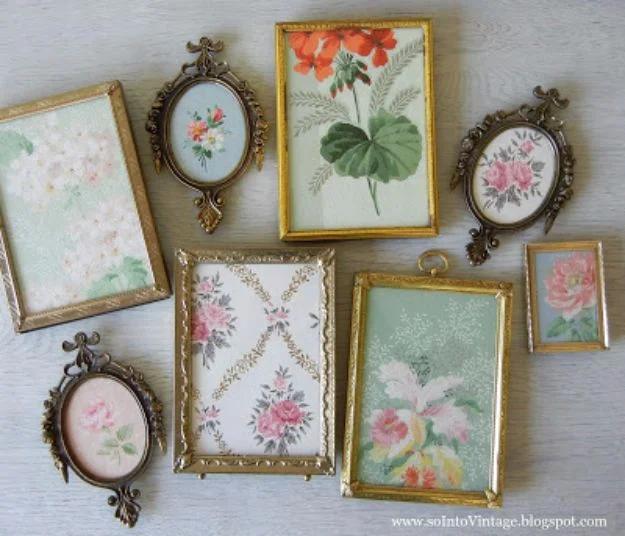
A cluster of small ornate frames filled with floral wallpaper gives you a gallery wall for the price of a car boot morning. Brass and gilt frames are the ones to look for, they turn up in twos and threes for pocket money, and they are all different, which is exactly what makes the group work. Use the backing board as your template, draw round it on the reverse of the paper, and cut a hair inside the line so nothing catches when you close the frame. Group them tight, ovals mixed with rectangles, and hang the heaviest at the bottom.
Get the full tutorial at So Into Vintage.
11. Vintage Wallpaper Covered Book Boxes
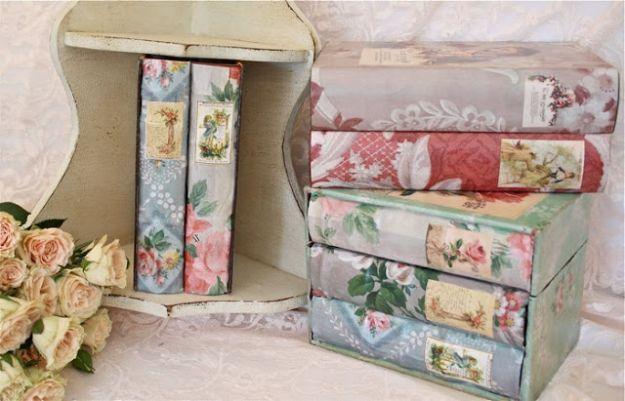
Those hollow book shaped boxes from charity shops look far better covered in paper than they do as they come. Work with a genuinely thin coat of decoupage medium applied with a craft sponge, because a thick one makes printed ink run and you will only find that out after it is stuck down. Let any printed paper dry completely before it goes anywhere near glue. The spine label is the detail that sells it: shrink the front image down to spine width and stick it on. Finish with two light top coats rather than one heavy one.
Get the full tutorial at The Polka Dot Closet.
12. Upcycled Wallpaper Covered Radio Revamp
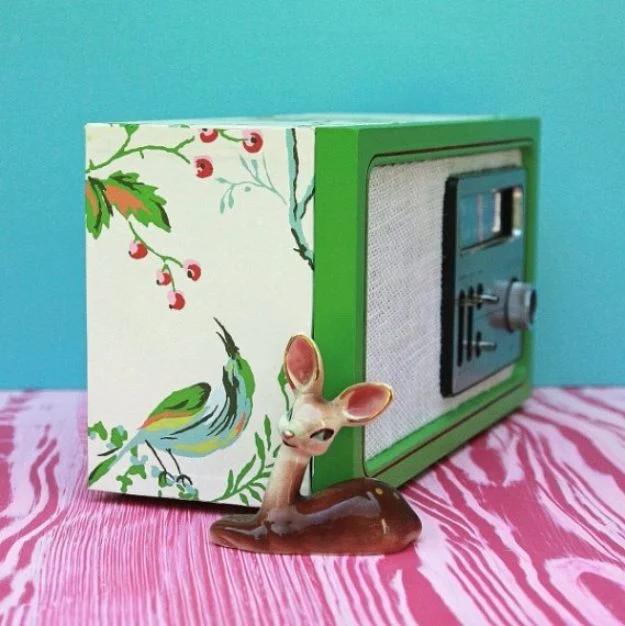
A flea market radio taken completely apart is the right way to start, because you cannot paper neatly around knobs and a speaker grille. The face and the feet get paint, the box gets wallpaper measured surface by surface with a quarter inch added to each width so it can wrap round to the back and hide the join. Matte all surface decoupage medium lays down without brush marks, which matters on something this small where every stroke would show. The speaker plate gets covered in burlap with spray adhesive, then everything goes back together. An afternoon, start to finish.
Get the full tutorial at My So Called Crafty Life.
13. Wallpaper Cityscapes
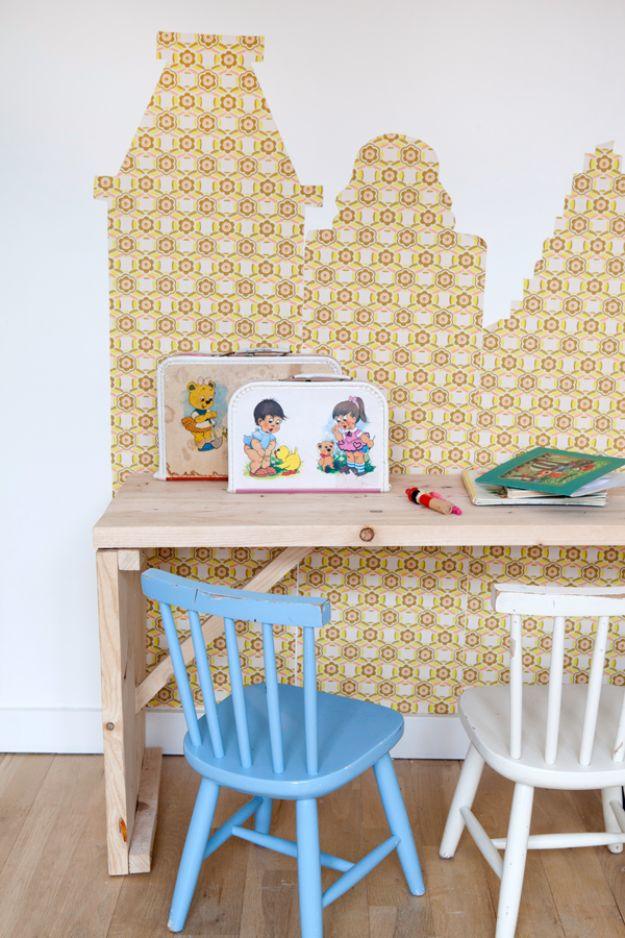
Cut a skyline out of wallpaper and stick it to the wall and you have the effect of a mural for the cost of a metre. Pitched roofs, a domed tower, a couple of chimneys, and because the cut edge is the shape, a small scale repeating pattern works better than a big motif that would get chopped in half. Sketch the outline on the back of the paper first, cut with scissors rather than a blade, and run the row along the bottom of the wall behind a desk or a bed so furniture anchors it. Peel and stick means you can move the whole city.
Get the full tutorial at Pimpelwit.
14. Bookshelf Makeover
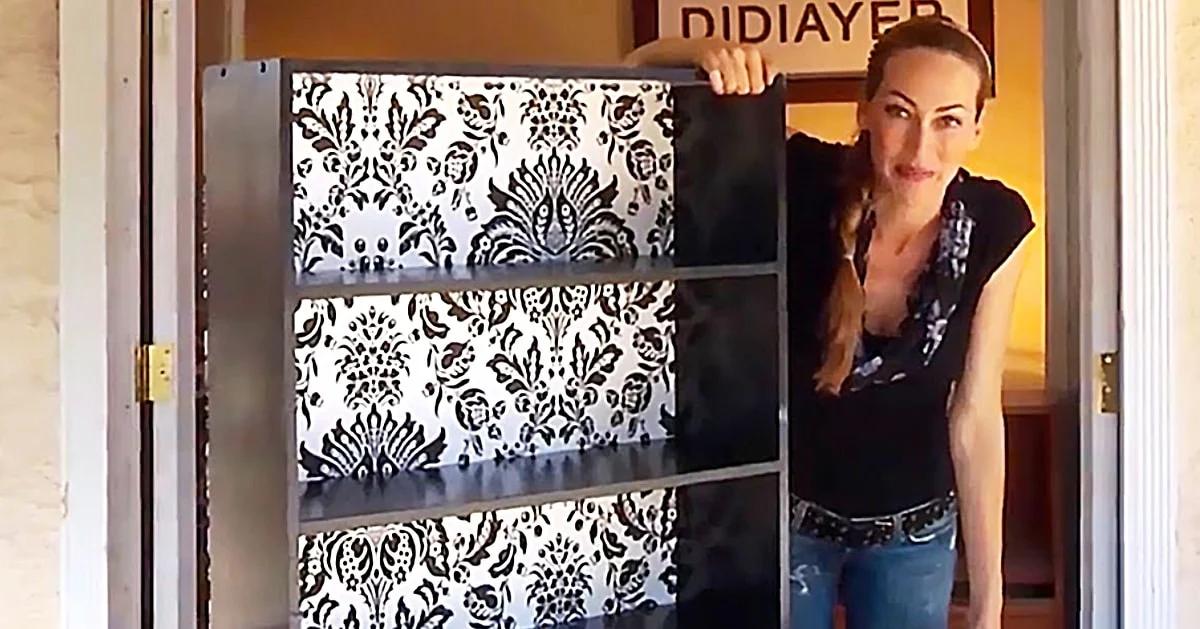
Wallpapering the back panel of a bookcase is the highest return per hour in furniture makeovers, because the front of the piece barely changes and the whole thing looks new. Take the back board off first, which is the step people skip and regret, then paper it flat on the floor where you can smooth properly and trim to the edges cleanly. Paint the carcass while the paper dries, then nail the board back on. Gloss lacquer or chalk paint both work on the frame, and a high contrast pattern behind pale shelves is what makes the books look arranged rather than stacked.
Get the full tutorial at Sueeye.
15. Wallpaper Kid's Table
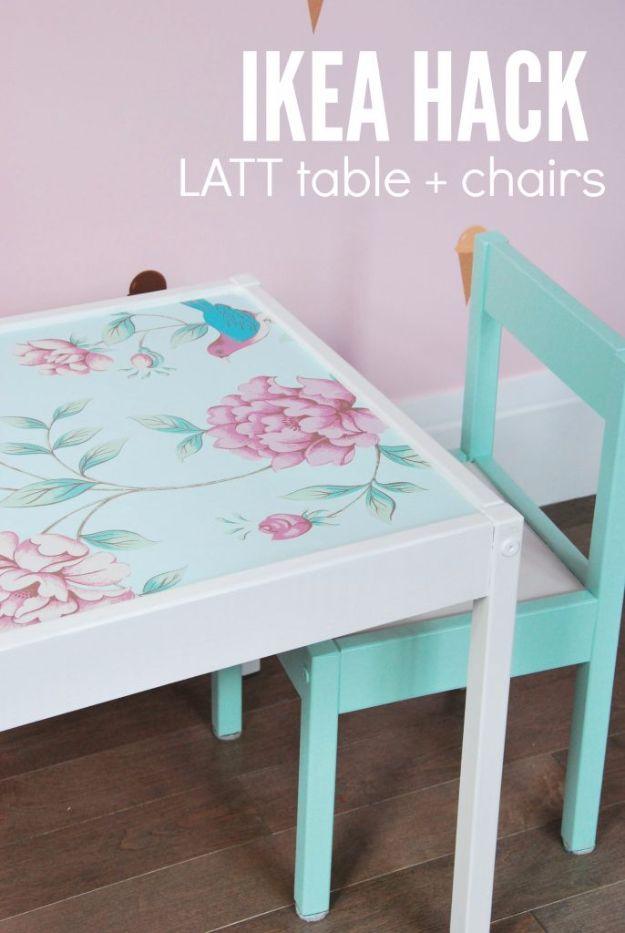
A secondhand children’s table for a couple of dollars and one sheet of good wallpaper is a complete transformation. High gloss white on the table frame, a soft colour on the chairs, then the wallpaper on the table top. Cut it slightly oversize, press the creases in with your fingers where the edges fall, and trim with a craft knife right on the table rather than measuring twice. White glue does the sticking and the sealing here, two coats with drying time between, smoothed with your hands and then a credit card to chase the bubbles out. Proper wallpaper survives this; wrapping paper does not.
Get the full tutorial at The Sweetest Digs.
16. Step Up Your Stairs
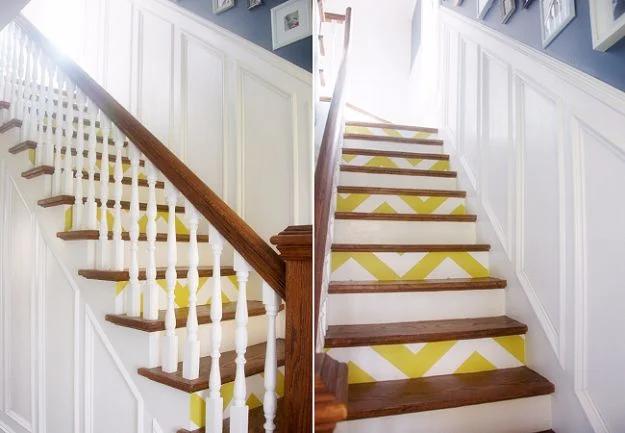
Stair risers are dead vertical surface that nobody decorates, which is exactly why papering them looks so good. Peel and stick makes it a job you can do in an evening with scissors and a tape measure, and more importantly a job you can undo, so a bold chevron stops feeling like a lifetime decision. Measure every riser individually rather than cutting fourteen the same, because old stairs are never identical, and work from the top down so you are never standing on wet paper. Keep the pattern running the same direction on every step.
Get the full tutorial at Pretty Plain Janes.
17. Marimekko Stair and Lampshade Upcycle
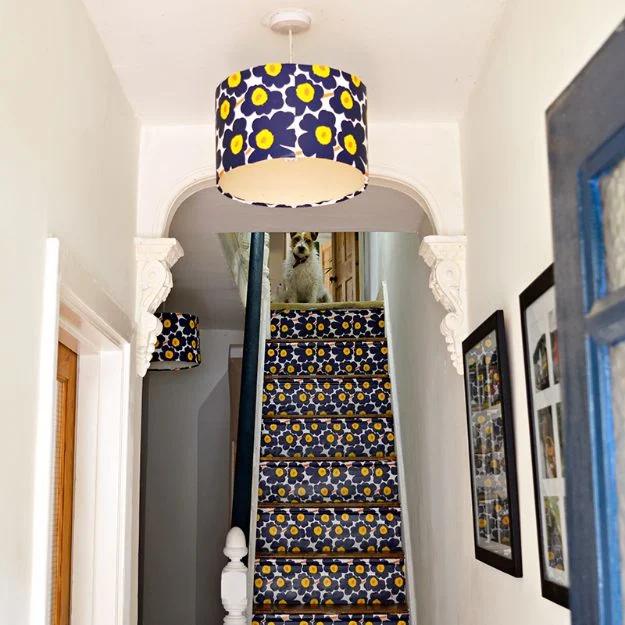
Covering a lampshade sounds harder than it is, as long as the shade is a drum. Measure the circumference and the height, add five to ten millimetres to the circumference for the overlap and seven millimetres at the top and bottom to fold over the wire rims. Run double sided tape round both rims with half of it hanging proud, lay the paper out, peel the outer layer and roll the shade slowly across it. Join the ends with more tape and fold the overhangs round the rims. Cone shades need a paper template and a curved cut, so start with a drum. Wallpaper beats fabric here because you can reposition it.
Get the full tutorial at Pillar Box Blue.
18. Stairs Decorated With Scraps Of Wallpaper
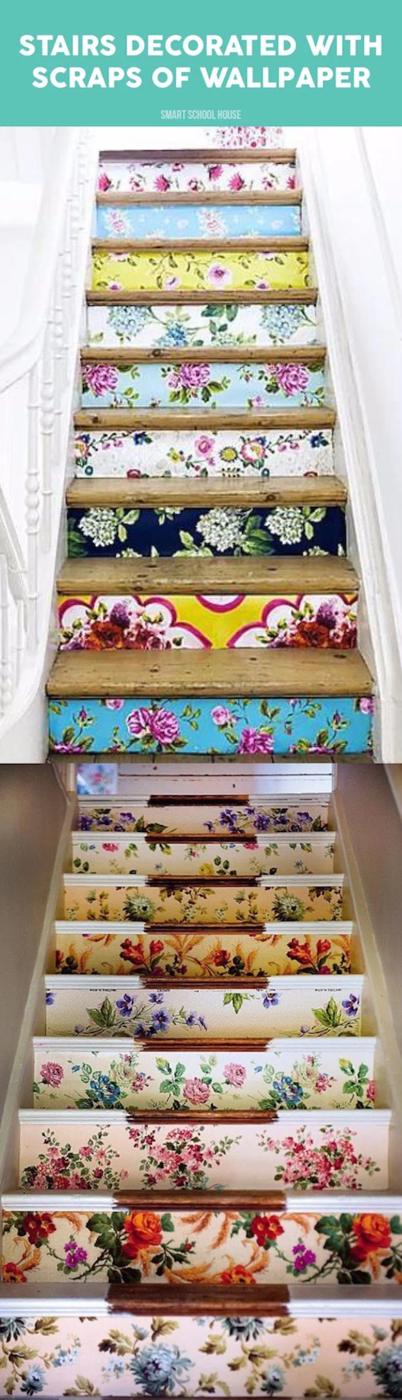
This is the maximalist version and it only works if you commit. Every riser gets a different floral, no two the same, and the effect is a stack of pattern that reads as one deliberate thing rather than as leftovers. It is the perfect home for a collection of odd pieces, because you need only the width of a step by about seven inches. Keep to one palette or one era, all pinks and blues or all sixties golds, or it tips into chaos. On old bare timber, size the wood first, because raw pine drinks paste and the edges will lift.
Get the full tutorial at Smart School House.
19. DIY Wallpaper Dresser
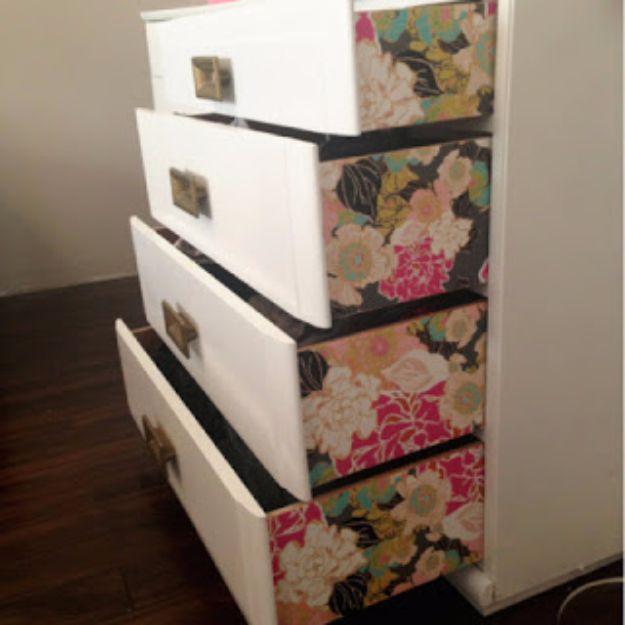
The cleverest small idea here. Instead of papering the fronts of the drawers, paper the outside faces of the drawer boxes, the bits you only see when the drawer is open. Pre-pasted samples are ideal, four twenty four by twelve sheets covered a whole chest for about twenty five dollars. Lay the sheet over the drawer side, crease where the edges fall, trim, then run only the back of the paper under the tap for a few seconds to wake the paste and keep the printed side dry. There is enough slide in it to reposition before it sets, then flatten it with a credit card.
Get the full tutorial at Chelsey Life And Design.
20. Decoupage Furniture With Wallpaper
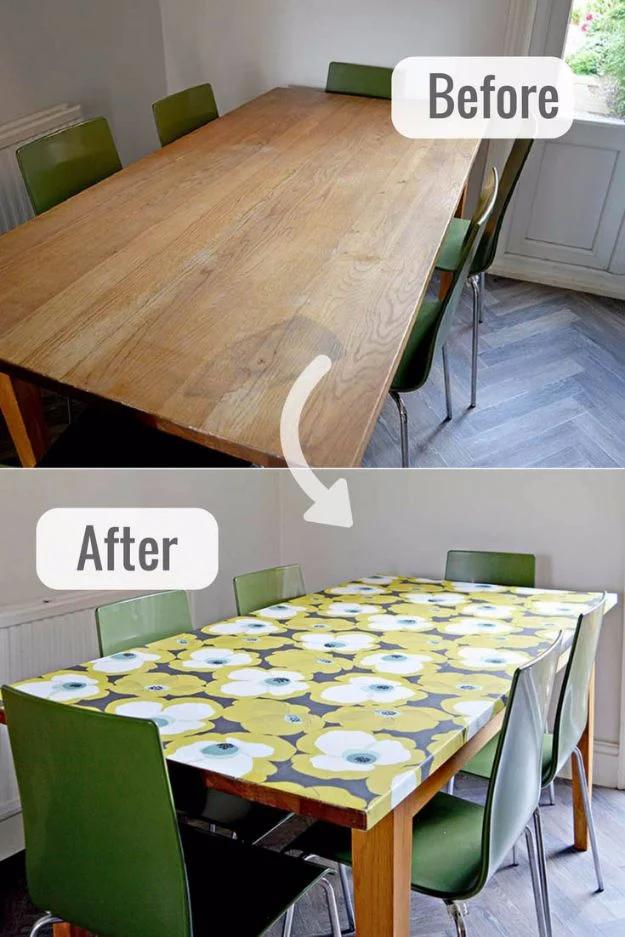
A tired table top disappears under wallpaper and paste, and the result survives daily use. Start clean, dry and dust free, no sanding needed. Paste the back of the paper and the table separately and let each sit a moment before they meet, which gives the paste a key and stops the paper sliding. Lay the centre strip first and work outwards so the pattern matches and the bubbles have somewhere to go, then wrap the edges. Leave it hours to dry. Then two coats of crystal clear varnish, and it has to say crystal clear, because plain clear varnish dries with a yellow cast over the whole thing.
Get the full tutorial at Pillar Box Blue.
21. Wallpaper Samples Gift Bags
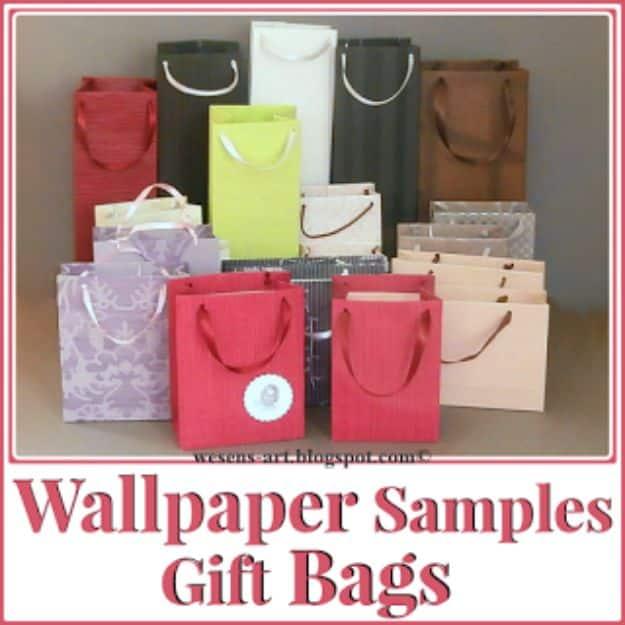
Wallpaper sample books are free from most shops and every page in one is a gift bag waiting to happen. The paper is already the right weight, already patterned on one side and already cut to a usable rectangle, so there is nothing to do but fold, glue and punch. Twenty in one evening is a realistic pace once you have the first one right, which makes this the project to do in October if you give handmade presents. Old calendars and any other heavy paper work the same way. Reinforce the handle holes with a punched circle of the same paper.
Get the full tutorial at Wesens Art.