DIY Lighting Ideas
23 DIY Sea Shell Ideas for Easy Beach House Decor
Sea shell crafts anyone can make: resin coasters, a shell wreath, drilled shell jewelry, candles poured into scallops and a garland tied with twine.
html PUBLIC "-//W3C//DTD HTML 4.0 Transitional//EN" ""
A bag of shells sits in a drawer in almost every house that has ever been near an ocean, and that is where most of them stay. These 23 sea shell ideas are the cure for that drawer. Some are five minute jobs, a scallop painted with nail polish, a shell glued to a thrift store candlestick. Some take a weekend and a lot of glue sticks, like the wreath or the shell covered lamp. A few need one skill nobody tells you about, which is how to get a hole through a shell without cracking it, and there is a tutorial here for exactly that. Craft stores sell bags of shells if you are nowhere near a coast, and almost every project below links back to the person who worked it out.
1. Simple Beach Garland
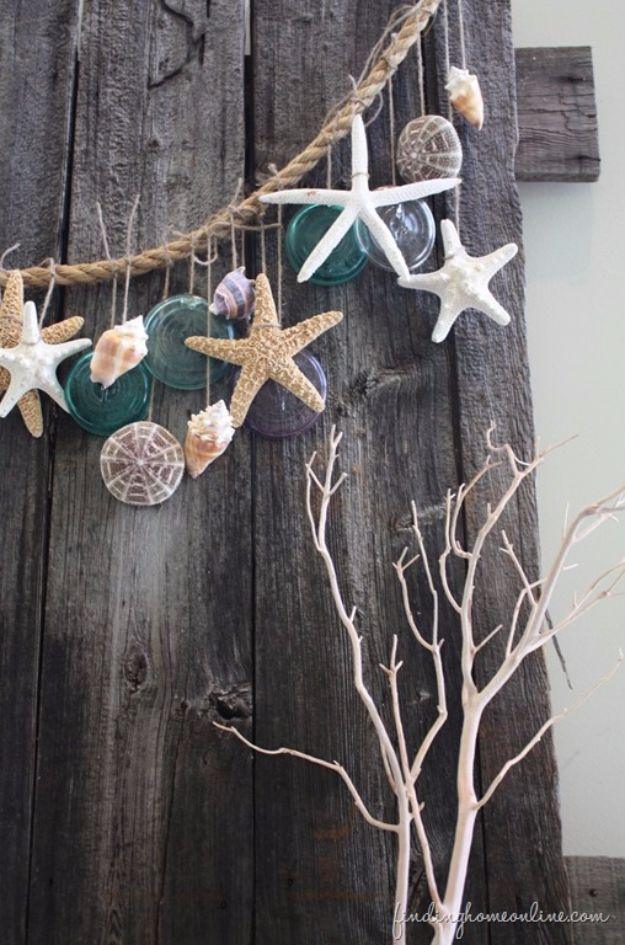
Shells, starfish and a handful of vintage mason jar lids tied along a length of plain rope, which is about as simple as summer decorating gets. Finding Home Farms hot glues a short length of twine to each piece, though anything with a natural hole can simply be tied on, then knots every strand onto the rope at whatever spacing looks right. The jar lids are the surprise, a boxful bought at an auction and hung the same way, and they break up the run of shells beautifully. Hers hangs across a salvaged barn door, but a mantel, a staircase, a fence or the edge of a mirror all work.
Get the full tutorial at Finding Home Farms.
2. Seashell Windchimes
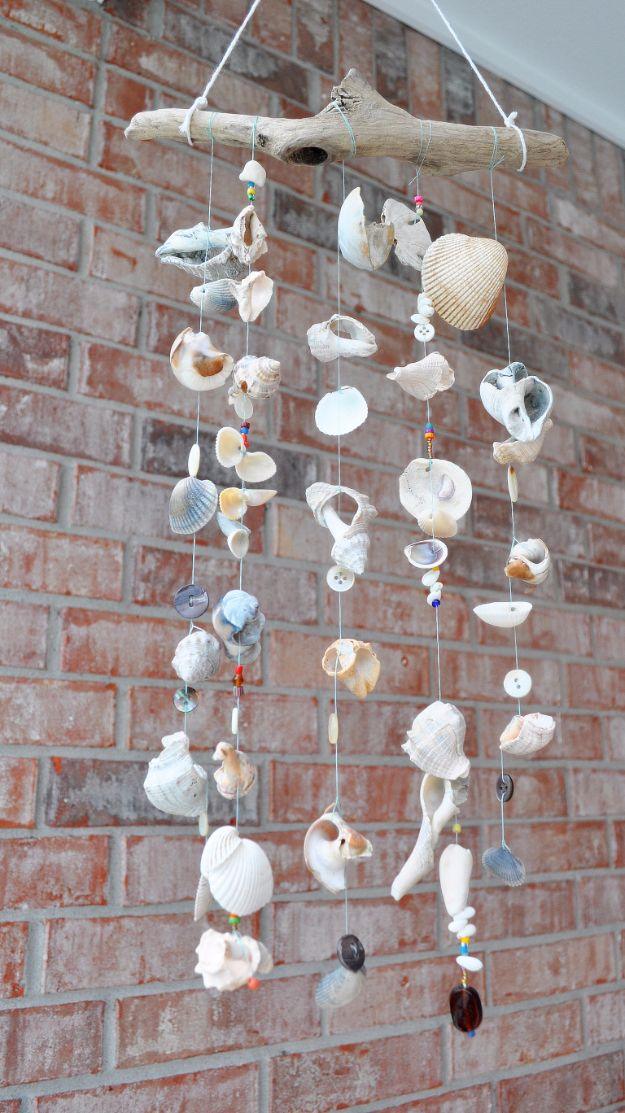
A piece of driftwood, a handful of shells and a few bright beads, and the payoff is that soft clinking sound whenever the porch catches a breeze. Home Sweet Homemade strung shell fragments and intact pieces together with buttons and beads, letting the broken bits carry as much of the look as the perfect ones. The trick everybody asks about is getting the string through a solid shell: readers in the comments recommend a glass drill bit, or the smallest bit you own and very little pressure, because forcing it is how shells break. Fragments with natural holes need no drilling at all.
Get the full tutorial at home sweet homemade.
3. Seashell Coasters Made With Resin
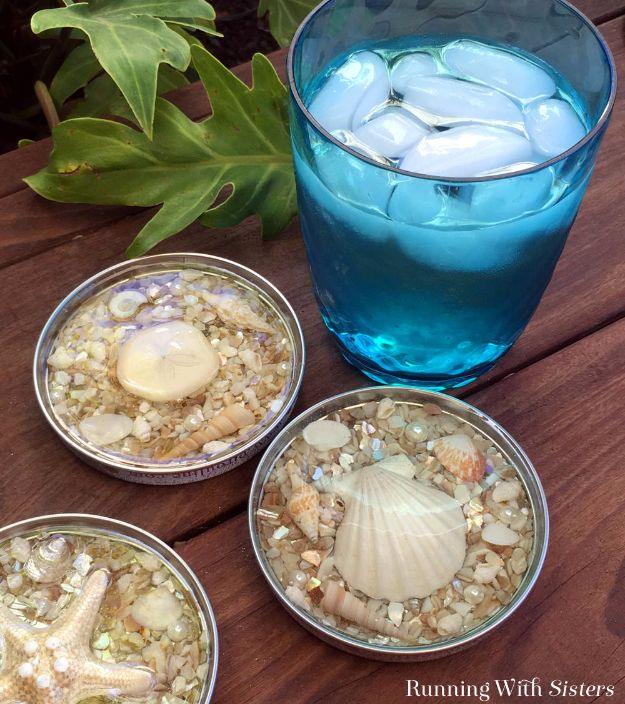
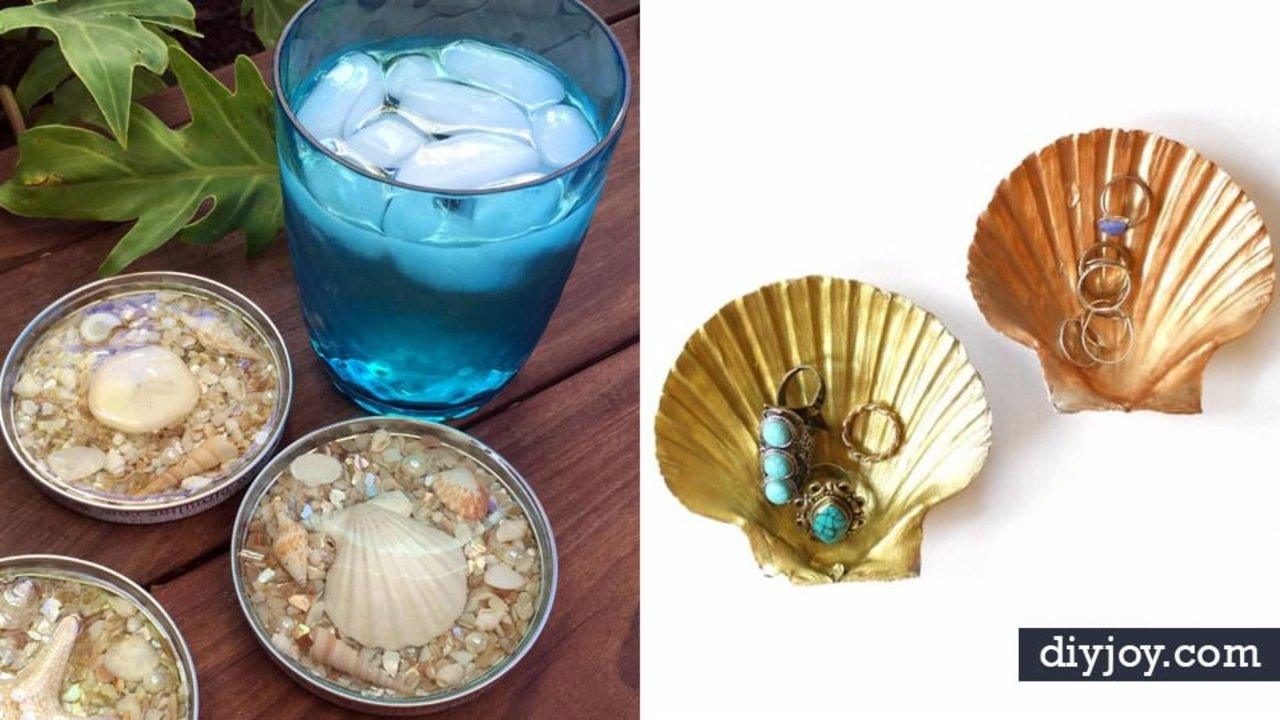
Jar lids spray painted silver, filled with shell chips, one big flat shell and a few pearls, then flooded with clear resin so the whole arrangement sits under glass. Running With Sisters use a lid three and a quarter to three and a half inches across, and the detail that saves the project is checking the height: swipe a ruler across the top of the lid first, because a shell taller than the rim will poke through the resin. They used Pirouette cookie lids because the sides are unthreaded and look neater. One eight ounce Envirotex Lite kit pours two or three coasters, and felt pads on the underside finish them.
Get the full tutorial at Running With Sisters.
4. DIY Seashell Wreath
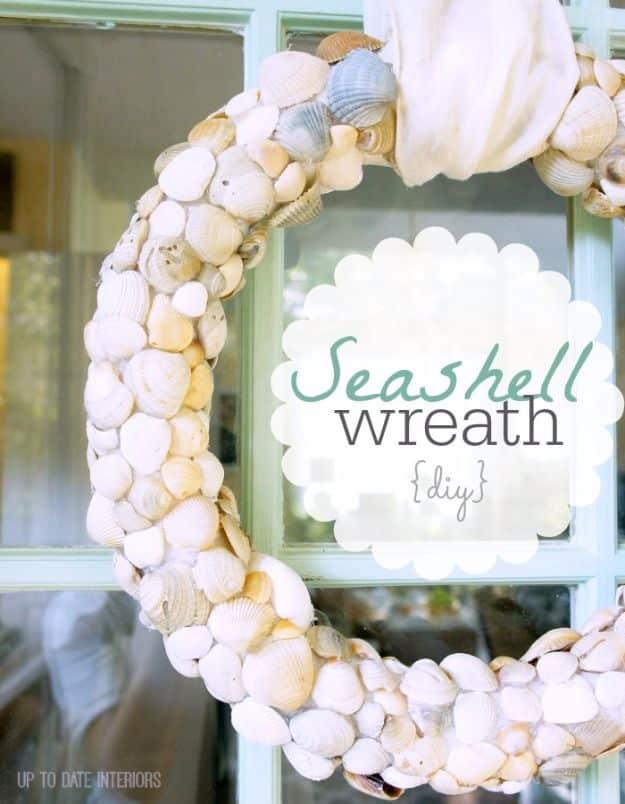
A styrofoam wreath form covered edge to edge in shells, sorted by type and overlapped in small sections until no foam shows. Up To Date Interiors calls it super easy but a little time consuming, which is the honest version: expect to want about four times as many shells as you first put out, and a lot of glue sticks. Run the glue gun on low heat, because a hot gun melts styrofoam straight through. Fill the gaps with the smallest shells or pebbles, pick off the glue strings, and add ribbon at the top. If it is going on a glass door, cover both sides.
Get the full tutorial at Up To Date Interiors.
5. DIY Seashell Planter
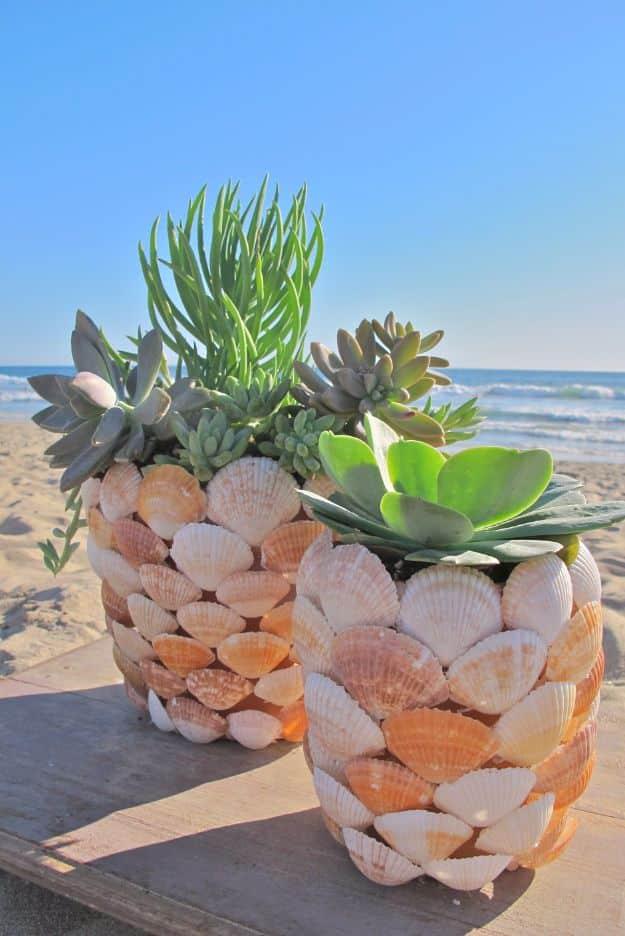
Terra cotta pots covered so completely in flat shells that nothing of the pot shows, planted up with succulents. Billabong sorts the shells largest to smallest before any glue comes out, which is what makes them sit together neatly, then glues the first row around the rim so each shell hangs slightly over the top edge. Every row after that goes on between the shells of the row above, the way brickwork staggers, until the pot has disappeared. Cacti mix goes into the base, the succulent’s roots get gently loosened, and a little more soil on top finishes it. Buy two sizes and make a pair.
Get the full tutorial at Billabong.
6. Hanging Seashell Garden
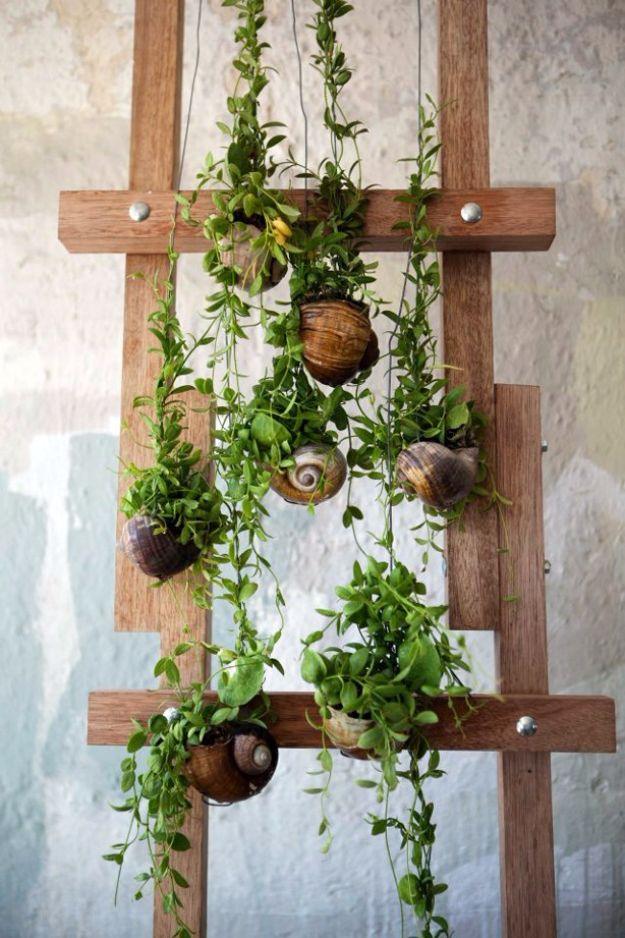
Plants bedded in moss and mud, cradled in shells and hung on string down a wooden trellis, which is the Japanese kokedama technique wearing a beach costume. Urban Gardens Web profiles Marissa Pretorius of Opus, who left advertising in 2010 to do this full time after a childhood watching her mother garden. The method strips the root system, wraps the lower half in mud and moss and hangs the whole ball from string. Philodendrons and succulents suit it, and orchids do particularly well in the suspended environment. It is a profile rather than a step by step, so treat it as the idea and the reasoning behind it.
Get the full tutorial at Urban Gardens Web.
7. Beachcomber Seashell Candleholder
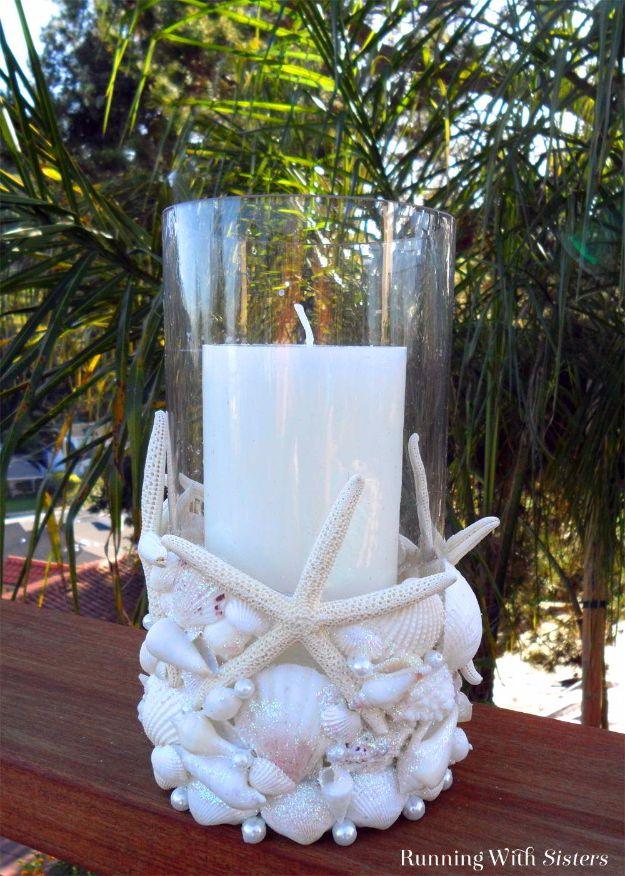
A plain glass candleholder buried under sixty to seventy five shells, four starfish, a scatter of pearls and a dusting of iridescent glitter, which is a great deal more elegant than that description makes it sound. Running With Sisters used an eight by four inch glass holder, the kind that turns up in dollar stores, and Beacon’s Quick Grip for the shells, holding each one for a minute while the glue grabbed. The glitter is the clever part: water down tacky glue, paint it into the gaps between the shells only, dust immediately, then brush the excess off the shell tops once everything is dry.
Get the full tutorial at Running With Sisters.
8. DIY Sea Shell Owls
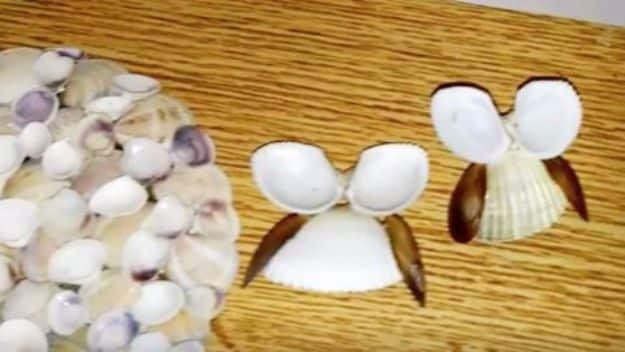
Shells glued onto an old CD to make a little round owl, and the whole appeal is that no two come out with the same expression. Shape the body from one big shell, the wings from two curved ones and the face from whatever pair of small shells looks most like eyes, and the personality follows automatically from the shells you happen to pick up. It is an ideal project to put in front of bored children, because it keeps them busy for hours and the only real rule is that the glue has to dry. It also makes a lovely gift for anybody with a beach house.
Get the full tutorial at Sueeye.
9. Restoration Hardware Inspired Seashell & Starfish Stands
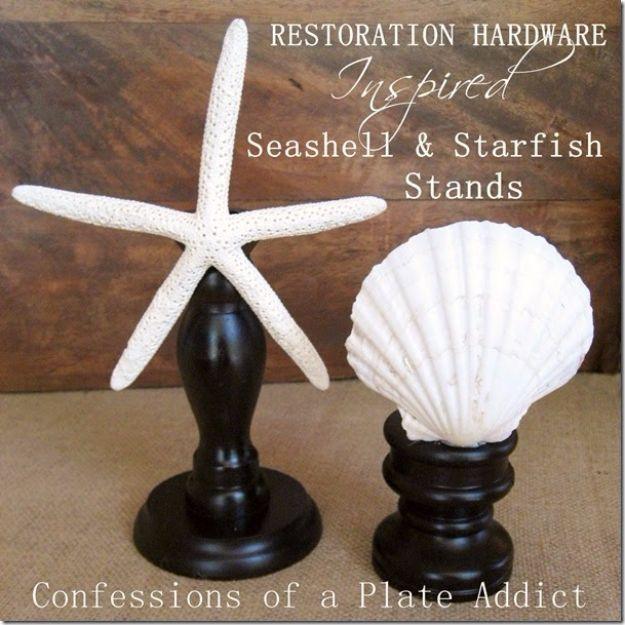
Thrifted wooden candlesticks, sprayed black, with a starfish on one and a scallop shell on the other, standing in for a Restoration Hardware pair that sold for one hundred and forty nine dollars. Confessions of a Plate Addict paid two dollars for both candlesticks at Goodwill and used shells already in her summer collection, which brings the finished stands to about a dollar each. Her own summary is hard to argue with, “waaay better than $149”. The only work is spray paint and hot glue. Height variation between the two candlesticks is what makes the pair look intentional rather than mismatched.
Get the full tutorial at Confessions of a Plate Addict.
10. DIY Shell Ring Dish
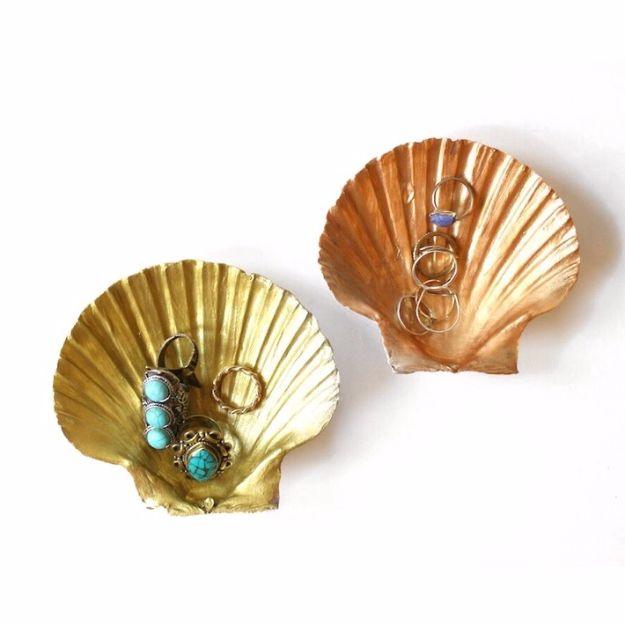
One big scallop painted gold or copper on the inside, and suddenly there is somewhere to put your rings at night that is not the edge of the sink. Twinspiration used Martha Stewart Crafts multi-surface metallic acrylic in Copper and Gold with a foam brush, and the whole job is two coats: paint the inside of the shell, let it dry fifteen minutes, paint again and give it fifteen to thirty. Their shells came in a pack from Hobby Lobby. Foam brushes go on sale ten for a dollar at Michaels, which is worth knowing before you pay two dollars for one.
Get the full tutorial at Twinspiration.
11. Seashell Dangle Earrings
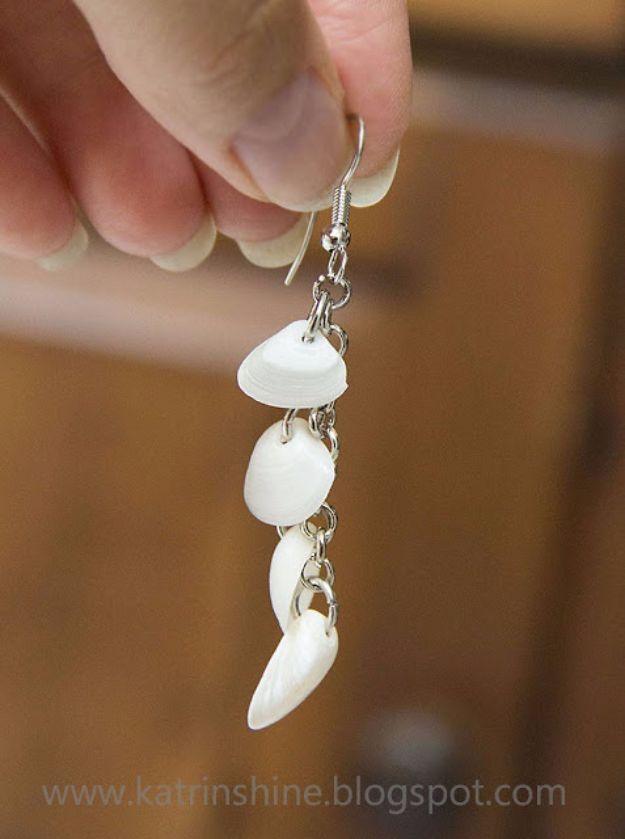
Four to eight small shells hung off two short lengths of chain, and that is genuinely the whole build. Katrinshine used about five centimetres, two inches, of chain per earring, five millimetre jump rings, one per shell, flat nose pliers and a pair of earring hooks. Open a jump ring, thread it through the hole in the shell, catch a link of chain and close it, then space the shells evenly down the length and fix the last one at the bottom end. She got lucky with shells that already had holes in them, which is worth hunting for on the beach before you reach for a drill.
Get the full tutorial at Katrinshine.
12. Easy-to Make Decorative Seashell Bottles
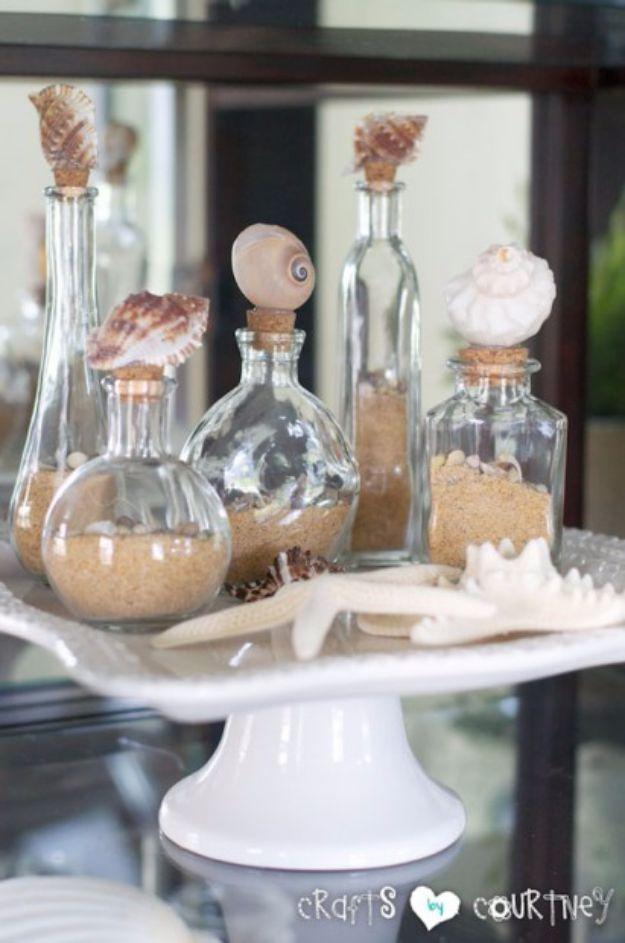
Glass bottles filled with sand and a scatter of mini shells, with a big shell hot glued to each cork stopper, standing in for a set Crafts by Courtney priced at seven to thirteen dollars each in TJ Maxx. She walked next door to Michaels, bought everything for under fifteen dollars, bottles at a dollar twenty apiece and a forty percent coupon on the sand and mini shells, and had the whole set done in under ten minutes. The one tip that matters: fill the sand about halfway and drop the shells on top, because sand over the shells kills the look entirely.
Get the full tutorial at Crafts by Courtney.
13. Drill A Hole In A Seashell
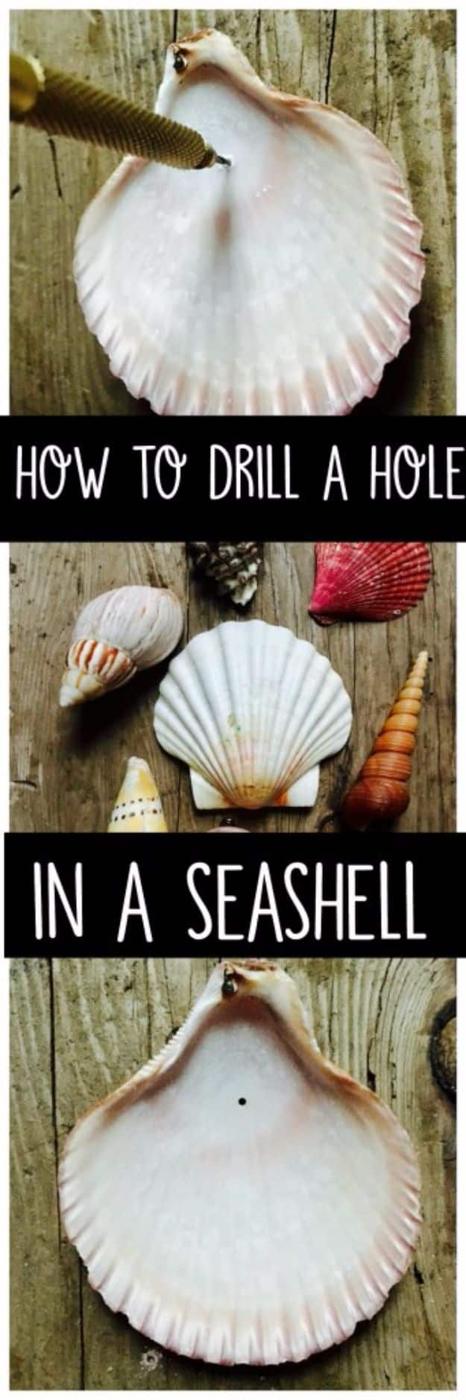
The technique that unlocks half the projects on this page, and Crafty Little Gnome gives it fifteen minutes and about ten dollars. A regular drill is too heavy and will crack the shell, so use a small hand drill turned clockwise under light pressure, or a Dremel. With a Dremel there are two rules: build pressure up slowly rather than starting hard, and keep water running over the spot, because dry drilling cracks shells. Lay the shell on a washcloth in the sink and either trickle the tap over it or dampen it. And a warning worth having: craft store shells smell appalling when the bag is opened, so wash them.
Get the full tutorial at Crafty Little Gnome.
14. Silver Leaf Seashell Necklace
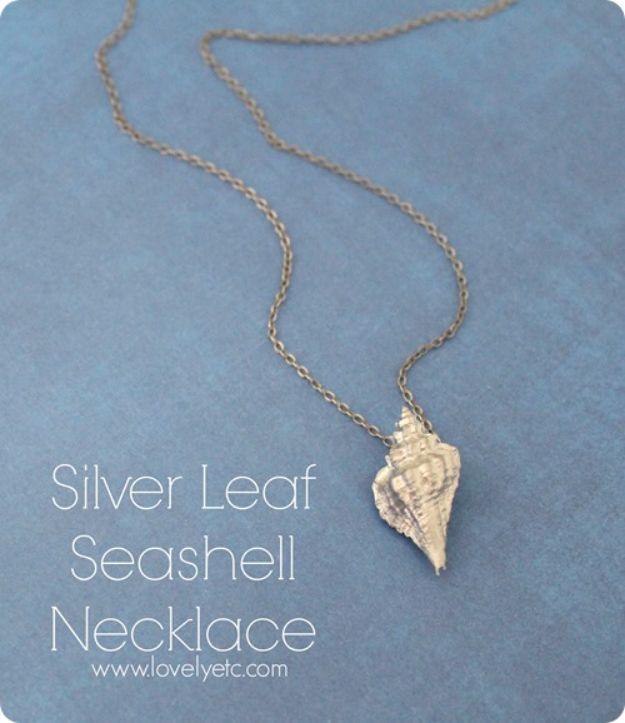
Tiny shells finished in liquid silver leaf and hung on a chain, which is Lovely Etc’s answer to shell jewelry that usually reads a bit hippie. The shells she used are no bigger than the end of a little finger, too small to sit on a mantel and too pretty to leave in a jar. Seal the shell first with paint or sealer, in any color, since none of it shows. Brush on Liquid Leaf silver with a soft brush, seal again with clear acrylic spray, then glue a pendant bail to a flattish spot on the back. Gluing avoids drilling, which would destroy shells this small.
Get the full tutorial at Lovely Etc.
15. DIY Shell Lamp
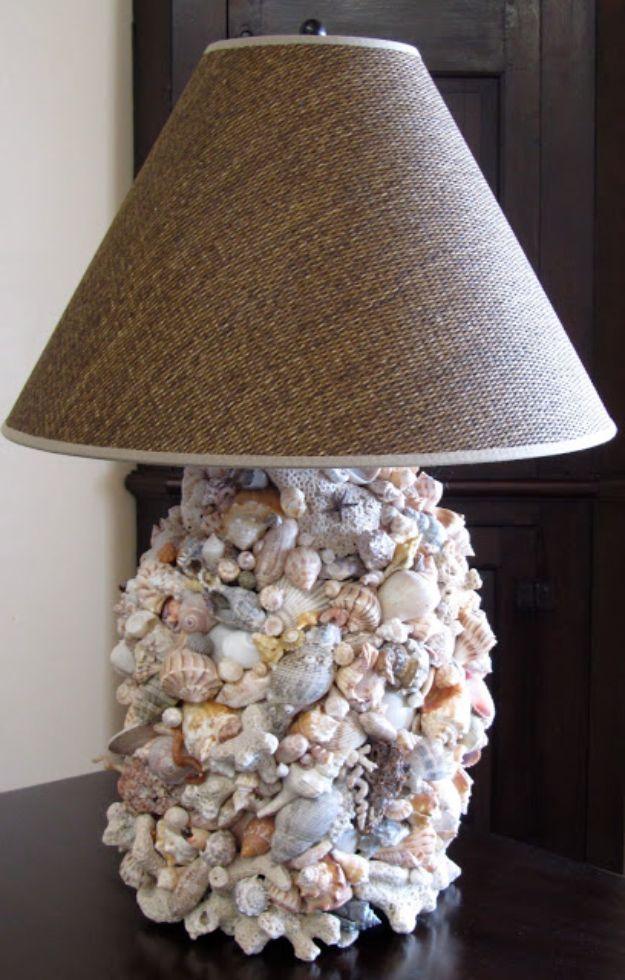
A plain lamp base buried completely under shells, coral and the occasional small crab, until there is no lamp left showing. Connecting Pieces used E6000 because the bond goes permanent after twenty four hours while still allowing a few minutes to move a shell, and painter’s tape to hold each new section in place while the glue sets. Work in a well ventilated spot, because the glue is strong smelling. Start with the coral and the heaviest shells, tape, move up, tape again, and expect the whole thing to take several days. Buy the shade last, because the lamp is going to grow.
Get the full tutorial at Connecting Pieces.
16. DIY Seashell Candle
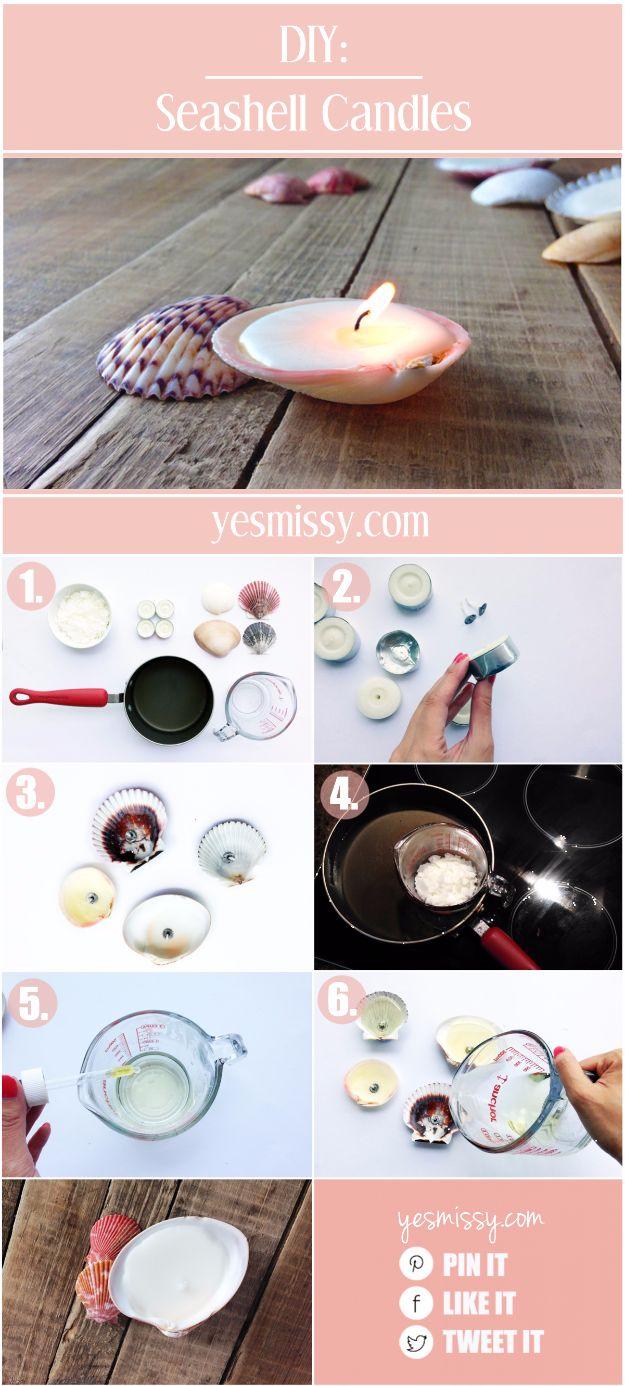
Tea lights melted down and poured back into shells, which YesMissy puts at about fifteen minutes and nothing you do not already own. Pop the wax discs out of their metal tins and work the wicks free with your fingers. Stand a wick upright in the deepest part of each shell, then melt the wax in a glass container set in a half filled saucepan as a double boiler, keeping the water low enough that it cannot splash in. Five to eight drops of essential oil is optional. Pour to a third of an inch below the rim and let them set.
Get the full tutorial at YesMissy.
17. Painted Seashell Accessories
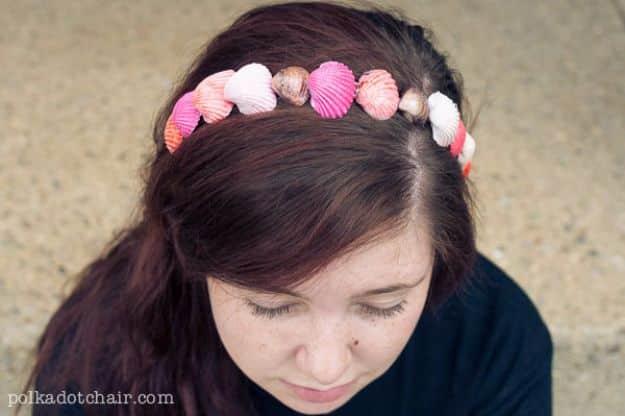
Shells painted with nail polish and hot glued onto headbands, bobby pins and ring blanks, which Polka Dot Chair came up with for a rainy afternoon on holiday. Nail polish is the right paint here for a reason: it dries fast, comes in every color and still lets the texture of the shell show through, which craft paint tends to bury. Fill the shell with hot glue before attaching a ring or a clip so it holds properly, but glue the headband shells along their edges first, and work slowly, because too much hot glue will bend the band out of shape.
Get the full tutorial at The Polka Dot Chair.
18. DIY Shell Topped Bottles
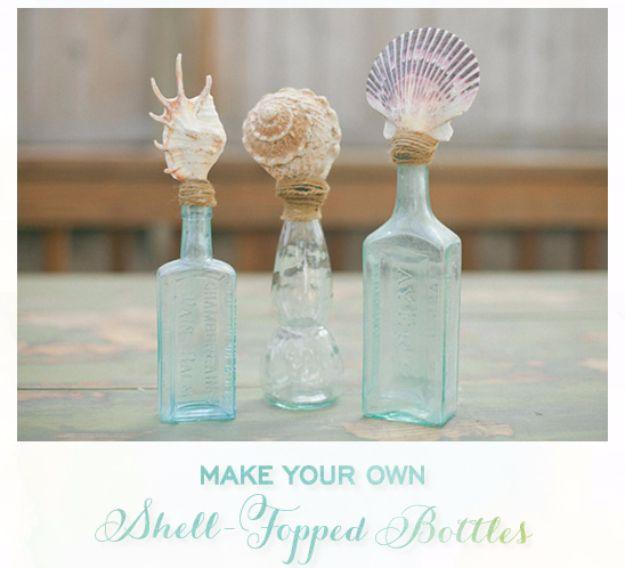
Vintage glass bottles with a shell set into the mouth of each and the join wrapped in twine, made for a Maui wedding and built with the one material nobody expects, car body filler. Wedding Chicks mix a half dollar sized amount of Bondo with its hardener, drop it onto the bottle opening, press the shell in and hold for five minutes, moulding the filler around the shell with the mixing stick. It goes rock solid. Once it has set, fifteen to twenty minutes, brush clear tacky glue over the hardened filler and wrap it with twine until the glue dries.
Get the full tutorial at Wedding Chicks.
19. Seashell Flower Art
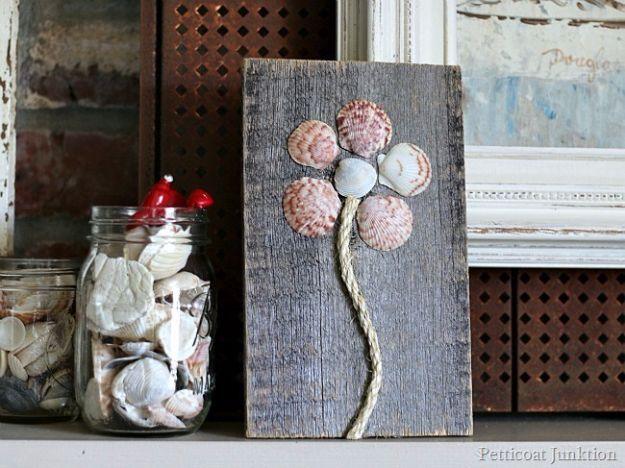
A flower built out of shells on a piece of reclaimed wood, with sisal rope for the stem and a pop top from a can as the hanger, and Petticoat Junktion puts the whole build at five minutes. Her advice on gluing shells is the useful part and it applies far beyond this project: start with the big shells and work the smaller ones in around them, and do not try to line them up, because lining shells up looks bad. Perfectly imperfect is the goal. She is also honest that she hates the glue gun and burns herself every single time.
Get the full tutorial at Petticoat Junktion.
20. Seashell Garland
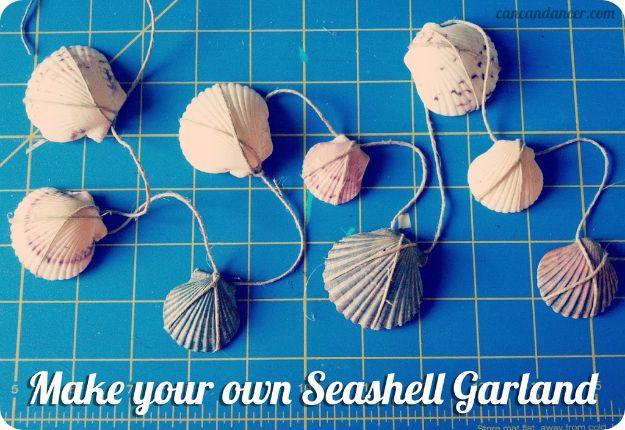
Shells wrapped into a length of hemp twine with no drilling at all, which Can Can Dancer worked out because she had no power tools. Pick shells with a bulge at the top so the twine has something to grip. Lay the shell on the twine, wrap around the front and loop behind to make an upside down V, cross back over the front into an uneven X, then pull both ends tight at the top and knot, trapping the V in the knot. Feed a stray end under the knot to flatten it. Leave three or four inches between shells. Her bag of shells cost two dollars at a thrift shop.
Get the full tutorial at Can Can Dancer.
21. Pottery Barn Knock-Off Shell Chargers
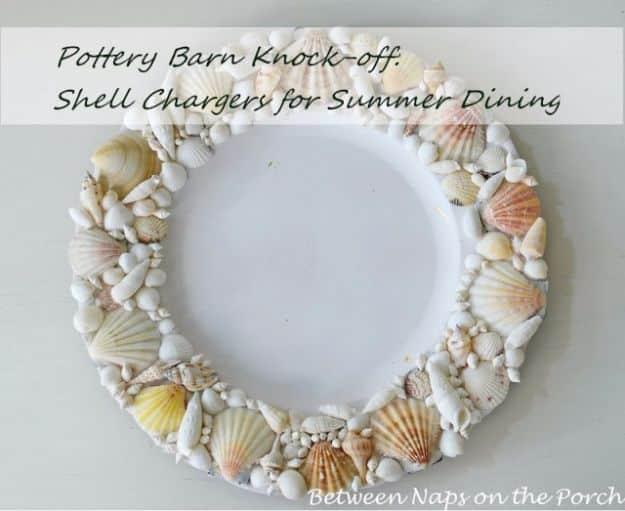
Chargers ringed edge to edge in shells, made after Between Naps on the Porch watched six Pottery Barn originals sell on eBay for two hundred and thirty three dollars with shipping. She counted the shells on one finished charger and got two hundred and thirty one. The last five took most of a Sunday, and all six ran roughly ten to twelve hours. The thing she noticed along the way is worth stealing: the more she worked, the more three dimensional they became, and she added taller shells around the outer edge of the later ones where they would not interfere with a plate.
Get the full tutorial at Between Naps on the Porch.
22. Seashell Heart Door Hanger
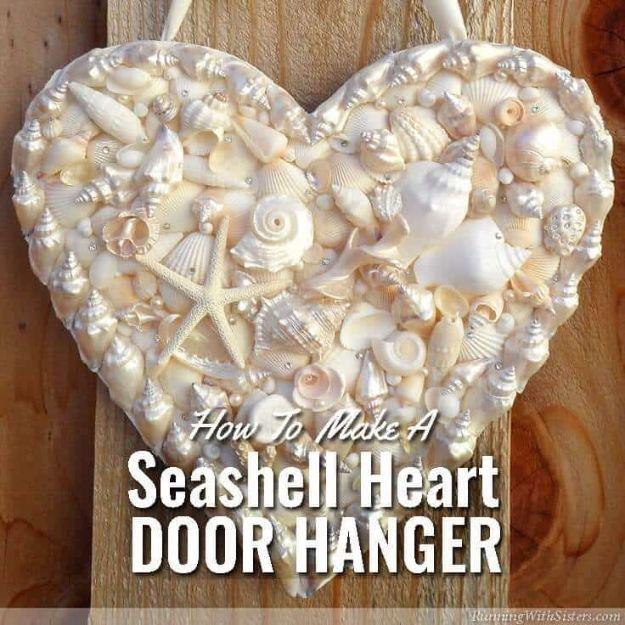
A ten inch wooden heart covered in about a hundred and twenty shells, two and a half inch starfish, pearls and flatback rhinestones, hung on ivory ribbon. The step that makes it look professional is priming the wooden heart with gesso and painting it Mother Of Pearl first, then painting any shell that is not already white the same shade, so nothing underneath shows through as a different color. E6000 sets quickly but still lets you wiggle a shell into place. Turn a few small scallops upside down between the others to make little cups, then glue a pearl into each one.
Get the full tutorial at Kenarry.
23. Crystal Seashells
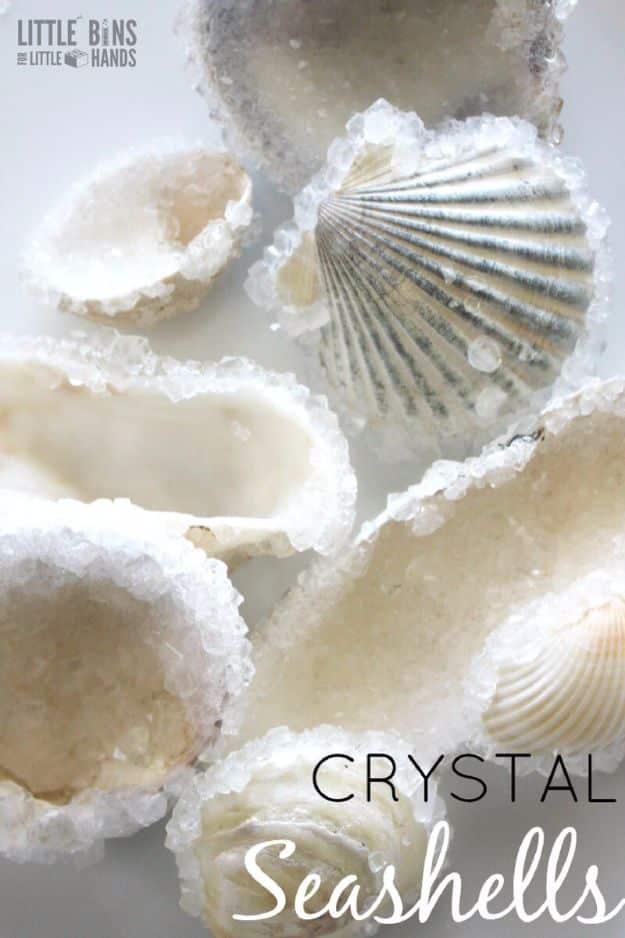
Shells left overnight in a hot borax solution and pulled out furred with crystals, which is a chemistry lesson dressed up as a craft. Little Bins for Little Hands uses two ingredients, water and powdered borax from the laundry aisle, plus a flat container and shells arranged so they do not touch each other. Boil the water first and stir in three to four tablespoons of borax, because hot water holds far more of it and that saturated solution is what lets the crystals form slowly and properly. Set it aside and leave it alone. About twenty four hours later the change is obvious. Growing salt crystals is the safer option for younger children.
Get the full tutorial at Little Bins for Little Hands.