DIY Decor
26 Perler Bead Crafts Worth Making
Perler bead crafts worth making: fuse bead coasters, magnets, jewelry, bookmarks and trivets, each one with a full step by step tutorial to follow.
Crafts to Sell For ProfitDIY Giftsgifts for herroundups
html PUBLIC "-//W3C//DTD HTML 4.0 Transitional//EN" ""
Perler beads get written off as a rainy afternoon for seven year olds, and then you see what people actually do with them. These perler bead crafts are the grown up end of the tub: fruit coasters and a fused trivet, sushi magnets, tiny stud earrings in muted grey and blush, a Mickey bookmark, a key holder, a bowl built from stacked rings. The beads cost almost nothing and an iron is the only equipment, so the whole hobby runs on about ten dollars and a pegboard. Every project here links back to the maker who worked it out, and several come with a free printable pattern.
DIY Perler Bead Ideas
1. Fruit Perler Bead Magnets
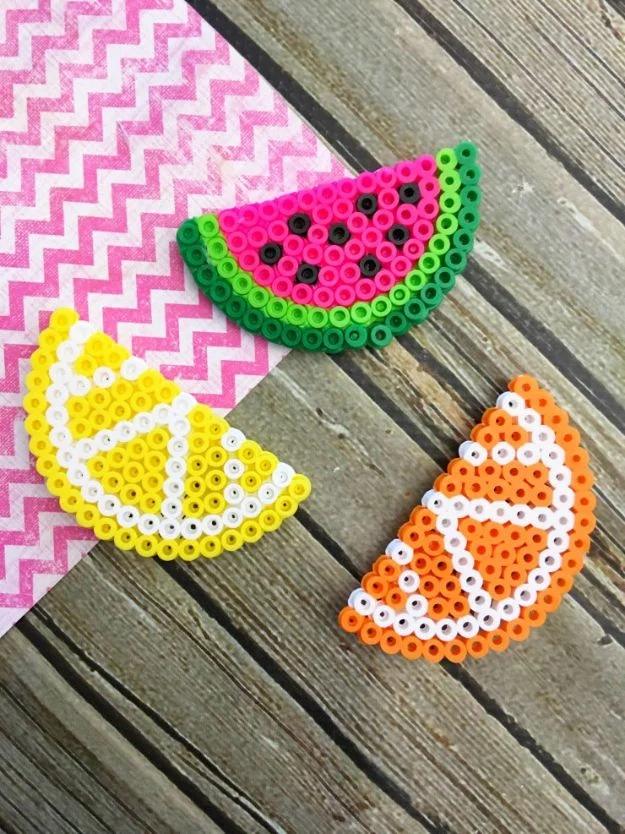
Fifteen minutes of actual work, using a small circular pegboard and printable templates for a watermelon, a lemon and an orange. Work the outer peel shape first, then the dividing lines and seeds, then fill the interior, because building outside in keeps the circle true. The fusing is where people go wrong: iron through the paper for about twenty seconds, peel the paper away, lay a fresh sheet and iron another fifteen seconds so both faces are properly fused rather than one side melted flat. A self adhesive magnet goes on the back once everything is cool. Tweezers help but are not essential.
Get the full tutorial at Frugal Mom eh.
2. DIY Perler Bead Key Holder
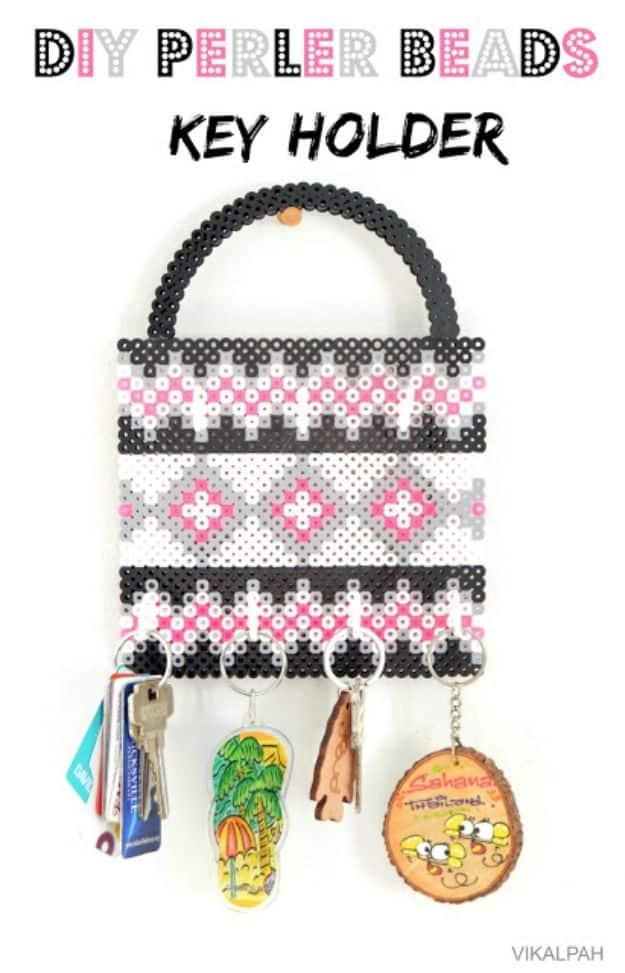
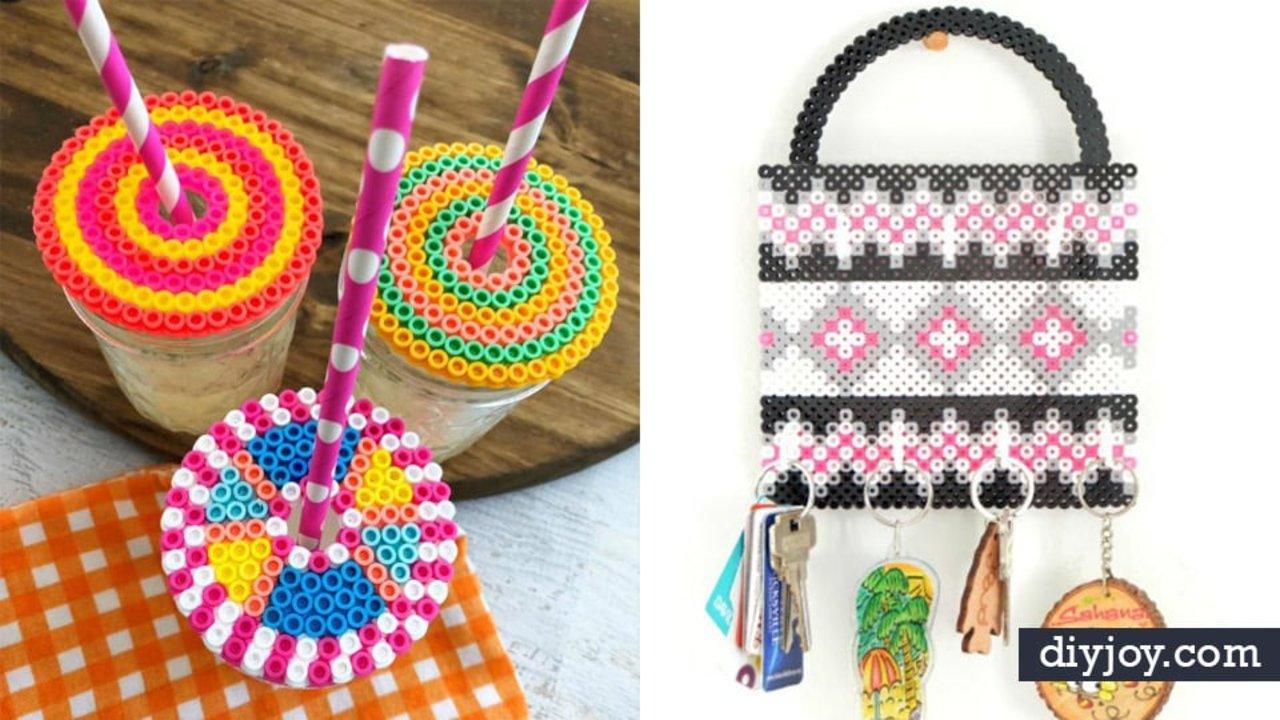
This is the project that proves perler beads can make furniture rather than fridge decoration. Square pegboards are beaded side by side to build one wide panel, a patterned border framing a center design or a word, then ironed on both faces so it is rigid. Half a circle pegboard beaded in two lines of black makes the handle, which also reads as the shackle of a padlock and gives you somewhere to hang the whole thing. Cup hooks screw straight into the cooled beads at intervals, with beads on the back to stop the screws marking the wall. Hot glue joins handle to panel.
Get the full tutorial at Vikalpah.
3. Perler Bead Trivet
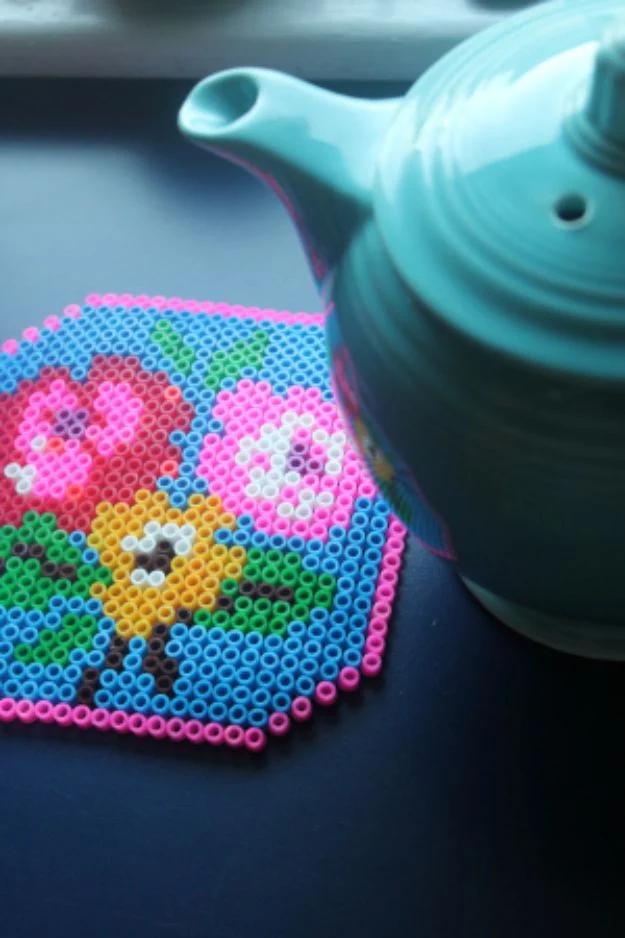
A hexagonal trivet with a floral design that came straight out of a Cath Kidston stitch book, and that is the useful insight here: needlepoint and cross stitch charts translate directly into fused bead patterns, one stitch to one bead, so decades of free charts are suddenly available to you. The ironing is deliberately uneven, lightly on the visible face so the beads keep their shape and definition, and deeply fused on the underside for strength. The maker confirms the beads stay solid and firm under a hot cup of tea or coffee, though she is not certain about a casserole dish straight from the oven.
Get the full tutorial at Homemade City.
4. Perler Beads Drink Topper
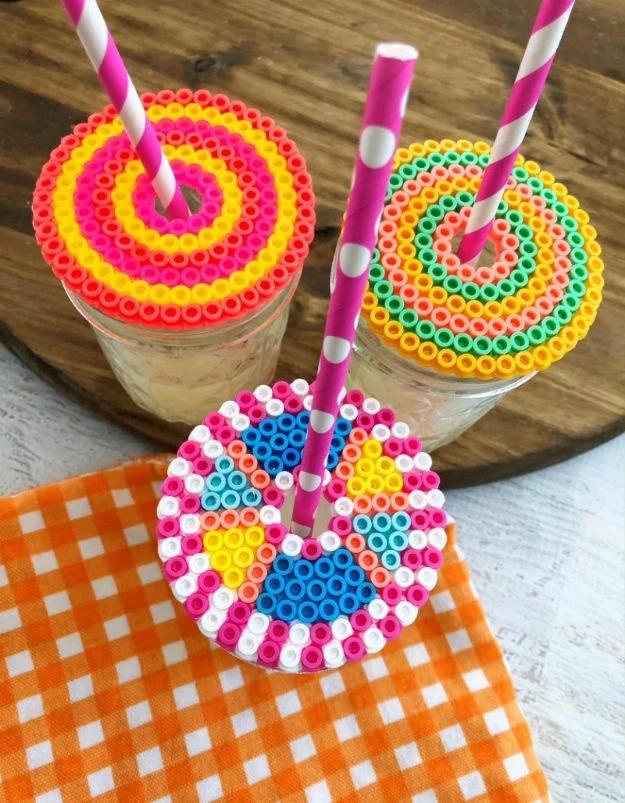
A beaded disc that sits on top of a mason jar with a paper straw through the middle, keeping bugs and anything else out of a drink at an outdoor table. Bead the circle pegboard with tweezers, leaving the center peg and the ring of pegs around it empty so the straw hole is built in rather than cut afterwards. Iron with no water and no steam, only for a few seconds until the beads just start to fuse, because overdoing it closes the hole. Peel the paper back carefully since the beads will cling to it at first, then let it cool completely.
Get the full tutorial at I Save A2Z.
5. Perler Bead Candle Holder
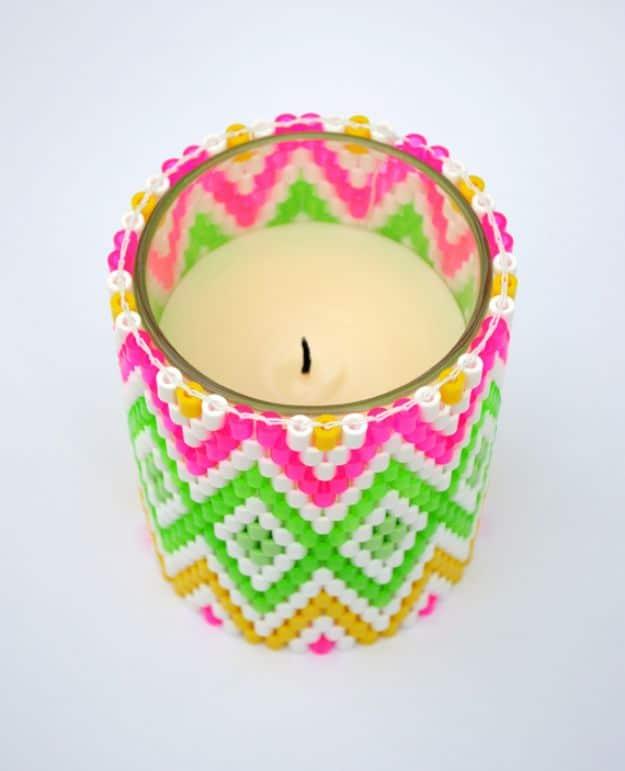
This one is not ironed at all. The beads are woven with shirring elastic and a darning needle in a peyote stitch, producing a flexible band that slides over a glass jar with a tea light inside, and the light coming through changes it completely. Sketch the pattern before you start rather than improvising, because a woven grid is much harder to unpick than a pegboard is to rearrange. The first few rows are genuinely fiddly and the maker says so plainly; after that it becomes easy. Neon semi transparent beads against opaque white are the combination that glows best.
Get the full tutorial at Mini Eco.
6. Perler Bead Notebook Covers
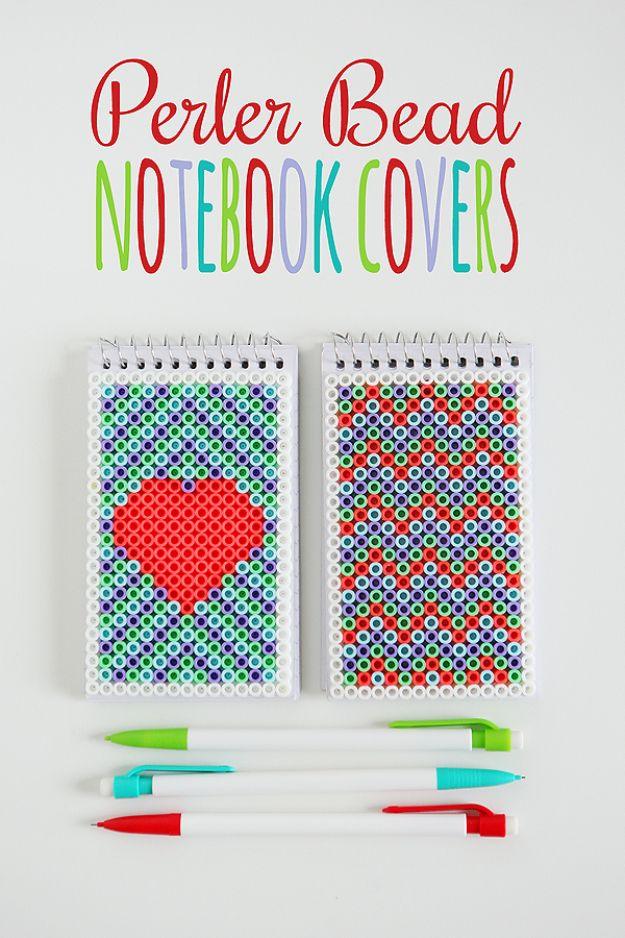
Beaded panels glued onto the backs of three by five inch notebooks, using tacky glue rather than hot glue so nothing warps or sits proud. The border in the version shown is a white frame fifteen beads across by twenty four down, which is a useful starting grid for anyone sizing a design to a small notebook, and the interior is filled with hearts, chevrons or whatever pattern you like. One detail worth stealing: the beaded pieces were attached to the notebook backs rather than the fronts, because the reverse face of a fused panel comes out flatter and neater than the side you ironed first.
Get the full tutorial at eighteen25.
7. Perler Bead Placemats
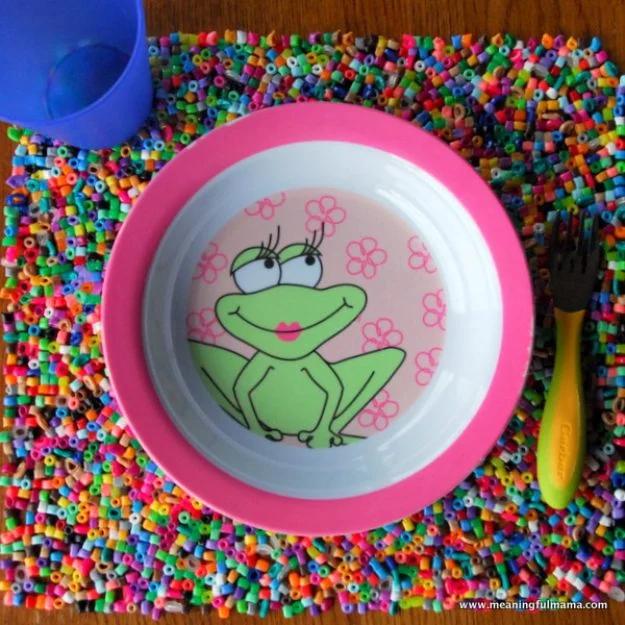
Not a pegboard project at all: this one goes in the oven. Line a jelly roll pan with wax paper, lay a wooden dowel across it to give a straight edge, pour the beads in loose and pat them down flat with your hands, then bake at 350F for somewhere between five and ten minutes with your eye on it the whole time. Pull the dowel out after about three minutes so the beads fuse to each other but not to the dowel. Cool completely in the pan before lifting. Parchment or a spray of oil both work if wax paper sticks.
Get the full tutorial at Meaningful Mama.
8. Perler Purse
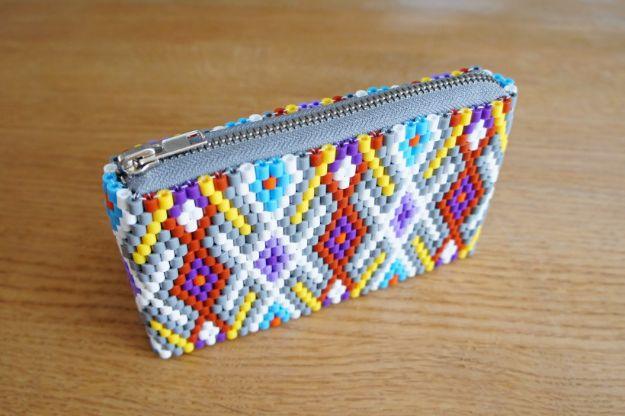
A proper zip up purse with a slightly rounded body, worked in a dense diamond pattern in browns, blues, oranges and cream, and it does not look like a bead craft at all. The palette is doing a lot of that work: a kilim style repeat in earthy tones reads as woven textile rather than as plastic, where the same shape in primary brights would read as a toy. It is a bead weaving project rather than an ironing one, so the panel stays flexible enough to curve and take a zip.
Get the full tutorial at Style Design Create.
9. DIY Perler Beads Fruit Bowl
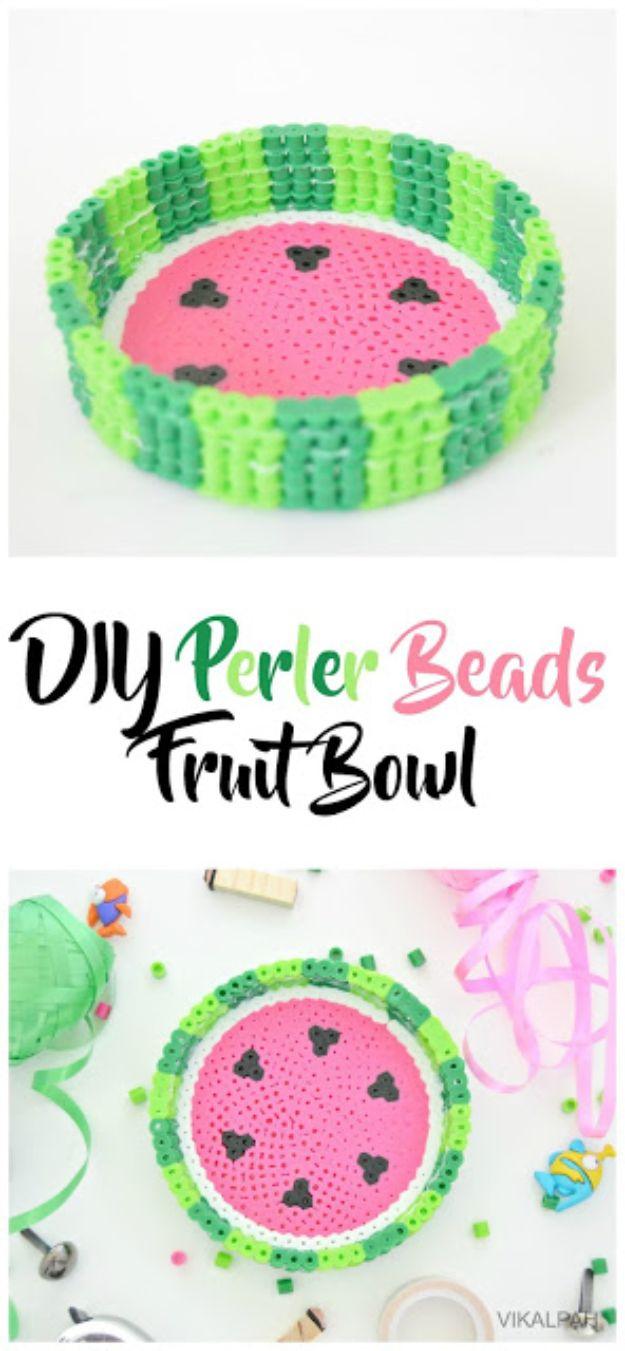
A genuinely three dimensional bowl, built from stacked layers rather than folded. The base is a full circle for the watermelon or a half circle for the grapefruit, ironed in a circular motion for thirty to forty five seconds a side, then five single color outline rings are beaded and fused separately, stacked and glued to form the walls. Use clear E6000 rather than white, because the maker found the white version shows at the joins, and avoid hot glue entirely since it leaves bulges between the layers. It holds keys and small things on a desk rather than actual fruit.
Get the full tutorial at Vikalpah.
10. Perler Bead Sushi Magnets
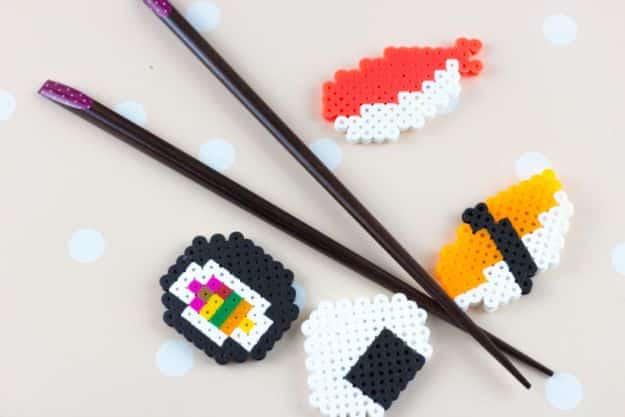
Under ten dollars and about an hour, and all four sushi patterns fit on a single large square pegboard, which is why this one moves quickly. Beads in black, white, red, green, brown, pink and yellow cover every piece. Iron evenly with consistent pressure for around fifteen seconds per piece, let each cool completely before you lift it, then repeat on the reverse. The magnet advice is worth heeding: skip the self adhesive kind, which the maker found was not durable enough, and hot glue two small round magnets to the back of each piece instead.
Get the full tutorial at Do It Your Freaking Self.
11. Fruit Perler Beads Coaster
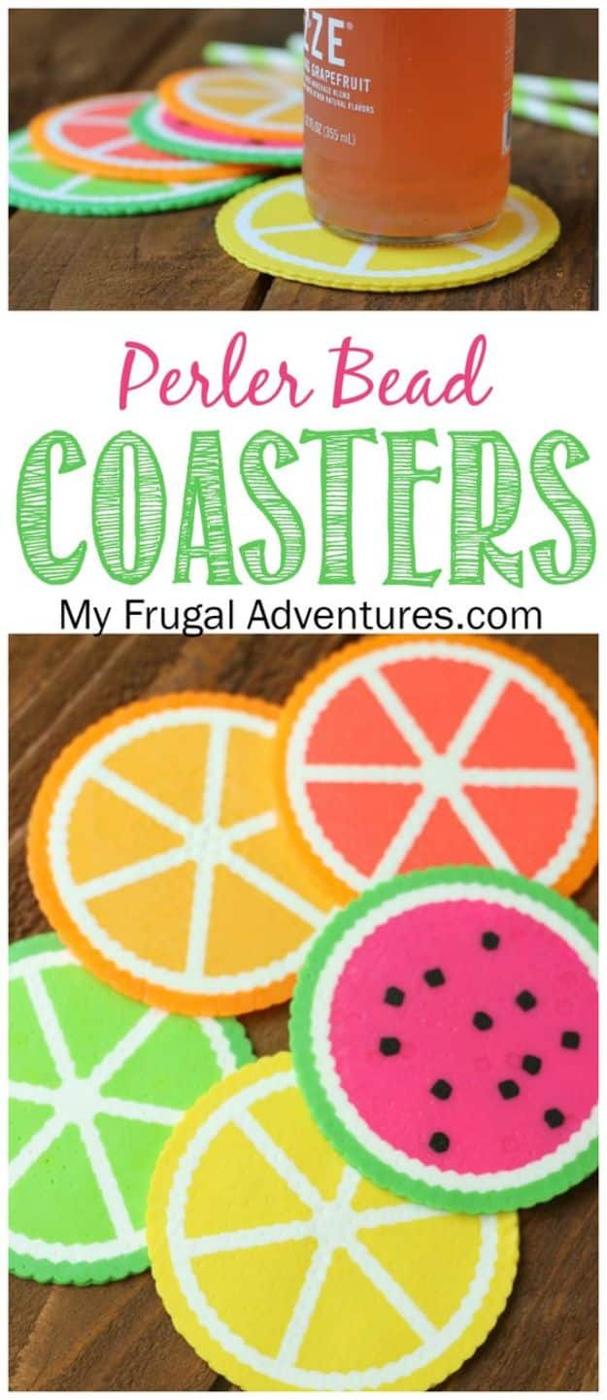
The sizing note here is the one to keep: eleven beads counted from the center point outward gives a coaster the right size for an actual glass, which saves a first attempt that comes out too small to be useful. Circle pegboards, citrus cross sections in lime, lemon, orange, grapefruit and watermelon, colored centers with a darker rim. Iron firmly through the paper, flip and do the reverse, then set something hard and heavy on top, a candle, a mug or a book, while they cool, because a coaster that cools unweighted will warp and rock on a table forever.
Get the full tutorial at My Frugal Adventures.
12. Switch Plate Covers
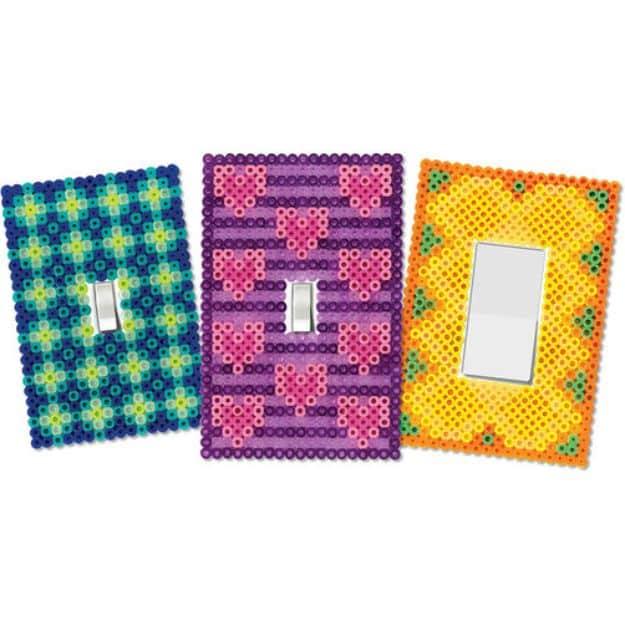
A beaded panel taped over an existing switch plate, which is the only safe way to do this and the tutorial is explicit about it: double stick tape only, and nothing touching the electrical switch itself. Three patterns are given with full bead counts, including a blue plaid that uses glow in the dark green so the plate is findable in a dark room, which is a genuinely good idea. Work on a large square pegboard, set a household iron to medium, fuse for roughly ten to twenty seconds, then flip and fuse the reverse so the panel is even and rigid.
Get the full tutorial at Perler.
13. Perler Bead Tray
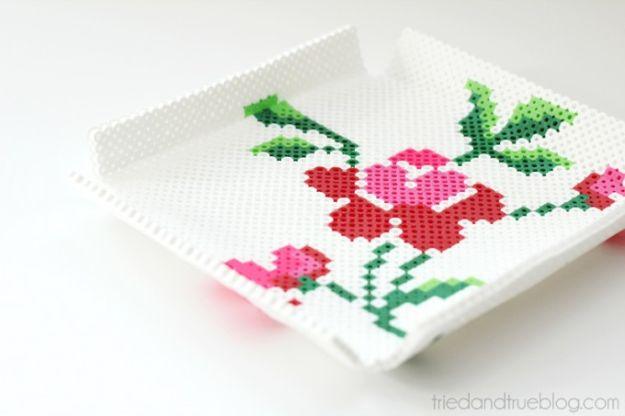
About eight inches square, and the folding is what makes it a tray rather than a mat. A vintage roses pattern is beaded on a super sized clear pegboard with the printable template slipped underneath as a guide, leaving notched corners that fold up to form the sides. Fuse on low heat, because high heat warps a panel this large. Then heat each side along a table edge until the plastic goes pliable, fold it up and hold it there while it cools and sets. Any cross stitch or pixel art chart can replace the roses without changing the method.
Get the full tutorial at Tried and True.
14. Perler Bead Buttons
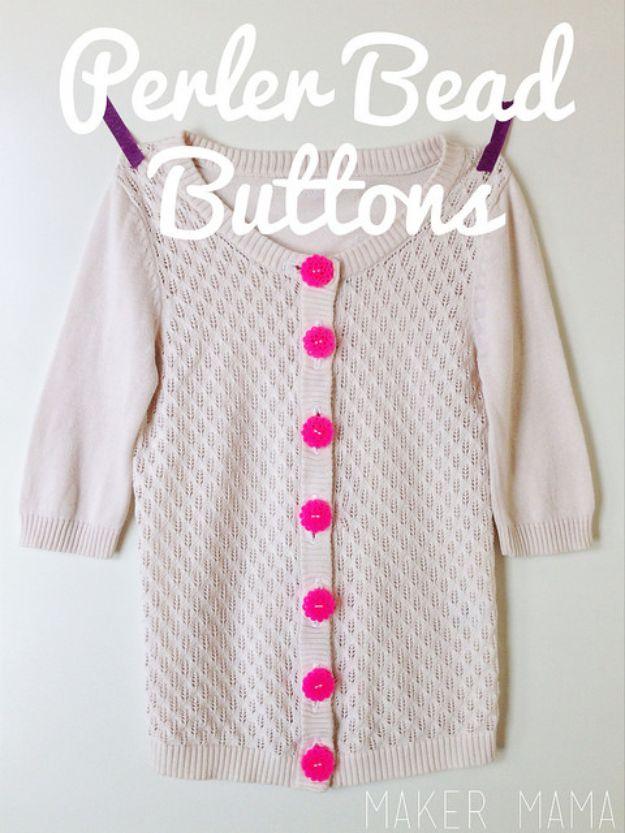
Oversized round buttons beaded on a circle pegboard and stitched onto a plain cardigan, and they are the fastest possible way to turn a thrifted sweater into something that looks intentional. Because they are much bigger than the originals, the buttonholes have to be opened up to fit, which is done by stitching new holes over the old ones. The extra size is also genuinely useful for small hands. One warning that decides whether this survives: hand wash the garment and air dry it, because a washer or a dryer will melt fused beads.
Get the full tutorial at Maker Mama.
15. DIY Perler Bead Rainbow Wind Spinners
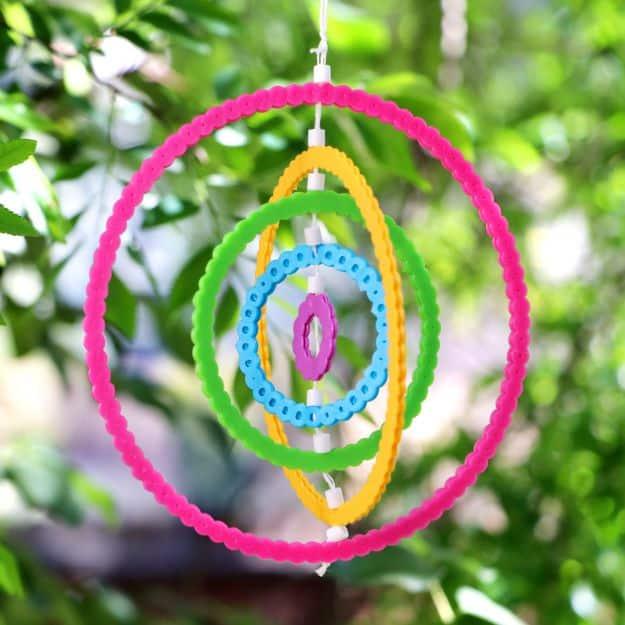
Beaded rings in graded rainbow colors, nested one inside another and hung so they rotate independently in the breeze, throwing color around a porch or a garden all summer. Fused plastic is the right material for this because it is waterproof and it will not fade or rot the way paper or fabric would outdoors. Hanging them somewhere with real air movement is the whole point, so a porch, a tree branch or an open window is where they earn their keep rather than indoors on a hook.
Get the full tutorial at Karen Kavett.
16. Perler Bead Earrings
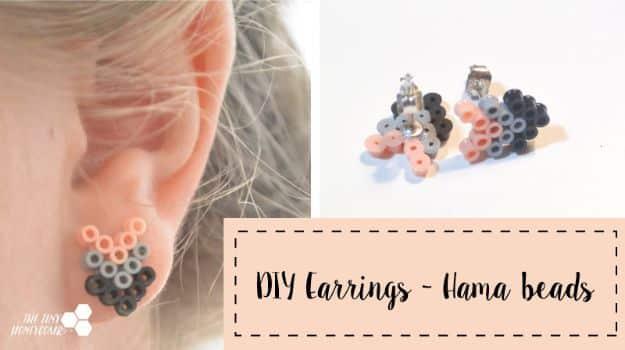
Tiny stud earrings, only a handful of beads each, in a muted grey, black and blush palette that looks nothing like a children’s craft. That restraint is the entire point: at this scale and in these colors they read as proper minimal jewelry, whereas the same studs in primary brights would read as a toy. The build takes about five minutes. Mini beads go on the pegboard alternating color by row, an iron on medium fuses them through the ironing paper until you can see the melt, and a dot of super glue sticks an earring backing on. A glue gun works if super glue is not in the house.
Get the full tutorial at The Tiny Honeycomb.
17. Mini DIY Kaleidoscope
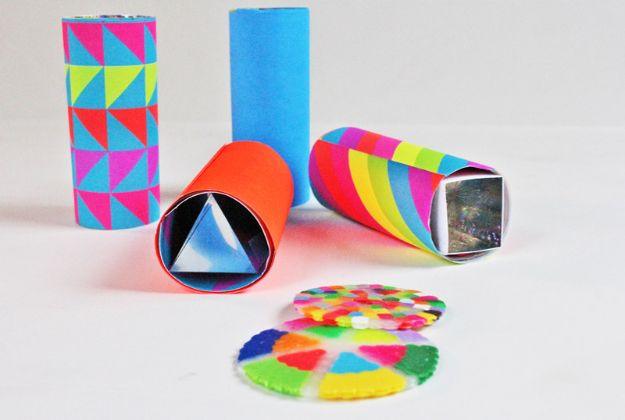
The kaleidoscope body is a cardboard tube lined with mirrored plastic sheet and papered on the outside; the beads are the part that makes it endless. Bead a disc on the circular pegboard using a lot of translucent beads, fuse it with the enclosed paper, then hold the finished disc at the open end of the tube and rotate it while looking through. A new pattern every time. Translucent beads are not optional here, because opaque ones block the light and the view goes dark. Make several discs and swap them, since each one is a different kaleidoscope.
Get the full tutorial at Babble Dabble Do.
18. DIY Mickey Mouse Perler Bead Bookmarks
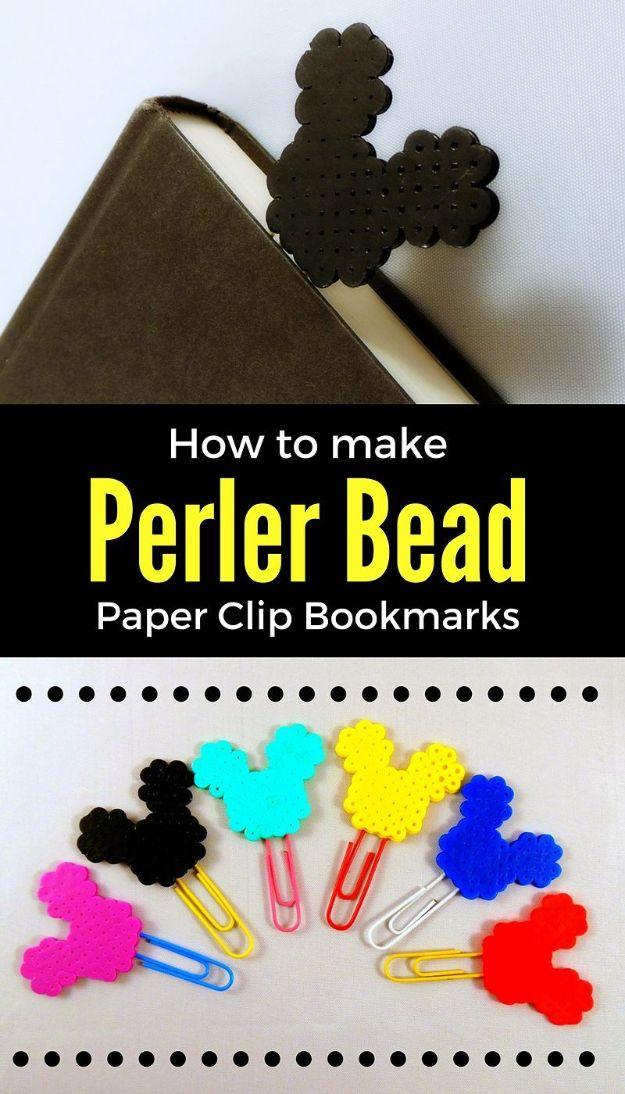
Fused shapes glued onto two inch plastic coated paper clips, so the bookmark clips onto a page rather than sliding out of the book. Two details make or break it. Put a heavy book on the beaded shapes while they cool, or they curl and will not sit flat against a paper clip. Then use a pea sized dollop of E6000 on the back, position the clip centrally, cover with wax paper and weight it down again while it cures. Give it roughly twenty four hours to cure fully, though overnight is usable. E6000 goes tacky within minutes and rubs away cleanly if you misplace one.
Get the full tutorial at Krysanthe.
19. Perler Bead Bracelet
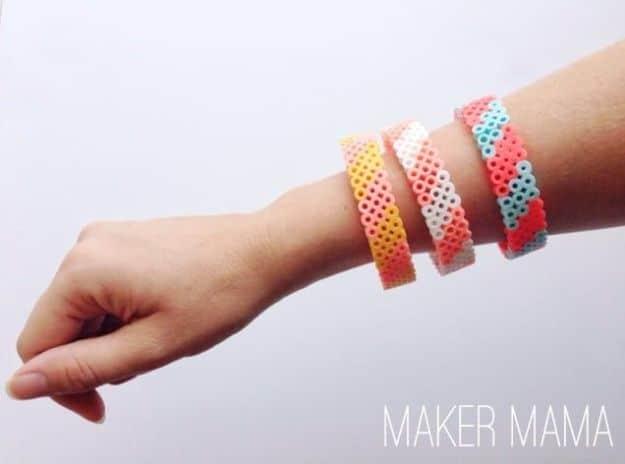
A flat beaded strip about eight and a half inches long, with the two ends beaded at matching angles so they meet cleanly when the strip is curved into a loop. That angle matching is the step people skip and then wonder why the join is ugly. Iron the strip through parchment, then, while it is still warm, wrap it around a glass to form the bracelet and iron the joined ends together. Leave it to cool on the glass so it holds the curve. Clear acetate glued to the back adds strength, and a jump ring takes a charm. Around two and a quarter hours.
Get the full tutorial at DIY Candy.
20. Perler Beads GameBoy Fridge Magnets
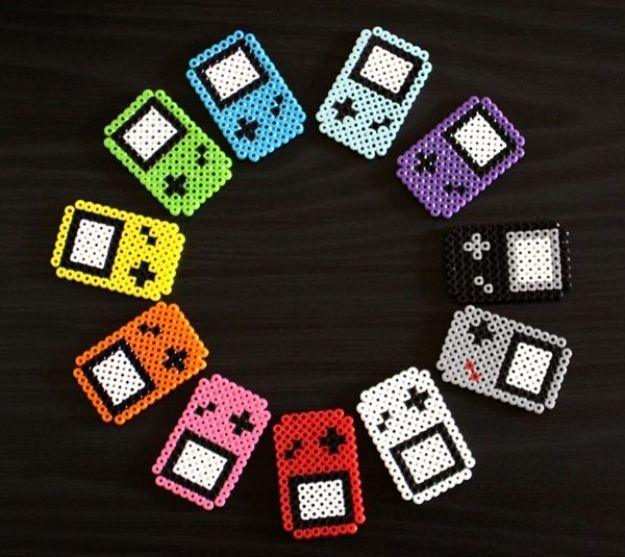
Handheld console shapes, about two by three inches each, beaded in a ring of colors from the classic grey with red buttons through to hot pink, green and purple. The joke in the original write up is a good one: had the console actually shipped in colors like these, it might have sold even better. Two magnetic strips go on the back rather than a single round magnet, which is what stops a piece this size from sliding down a fridge door under its own weight. A full rainbow set arranged in a circle is more striking than any single one on its own.
Get the full tutorial at Gadgetsin.
21. DIY Perler Bead Planter
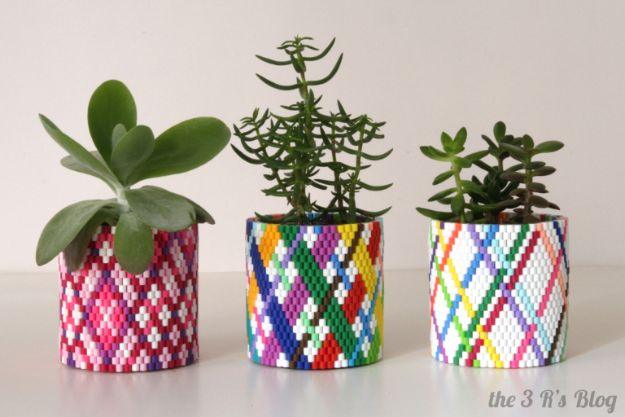
Plastic gelato tubs, the Talenti kind, hidden inside a woven bead sleeve. The beads are woven with a needle and thread into a flat rectangle and then the final row joins the two ends into a tube, which slides straight over the container, so nothing is glued and the sleeve can come off to be washed. Sketch the pattern on graph paper with colored pencils first, and mark your rows with a Sharpie as you go, because a complicated pattern is very easy to lose your place in. Start with stripes or plaid before attempting anything diagonal.
Get the full tutorial at The 3 R's Blog.
22. Blooming Perler Cacti
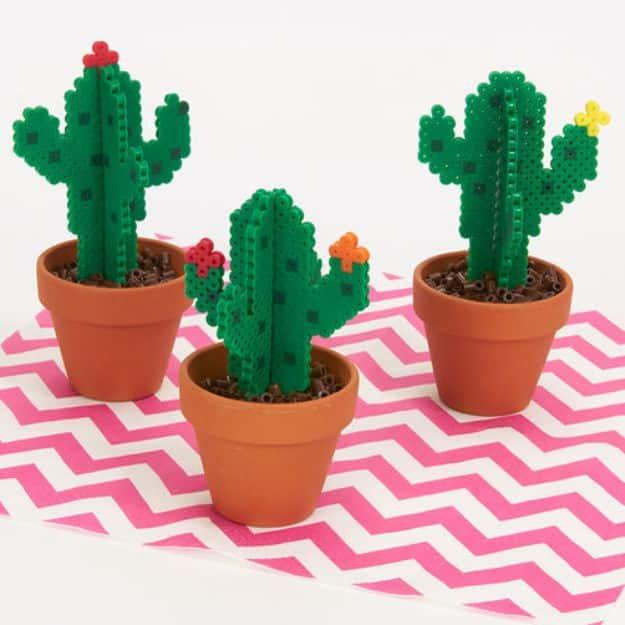
Three dimensional cacti built from fused bead panels slotted together, set into real terracotta pots, complete with tiny beaded flowers on the arms. The slotted construction is what gives them volume from every angle, so they read as objects rather than flat cut outs. The pots are the detail worth copying and it is not soil: a block of floral foam oasis holds each cactus upright, and a thousand brown beads get poured over the top to read as earth at a glance. They want no water and no light, which makes them the correct houseplant for a windowless bedroom, a dorm or a desk under strip lighting.
Get the full tutorial at Perler.
23. Colorful Cuffs
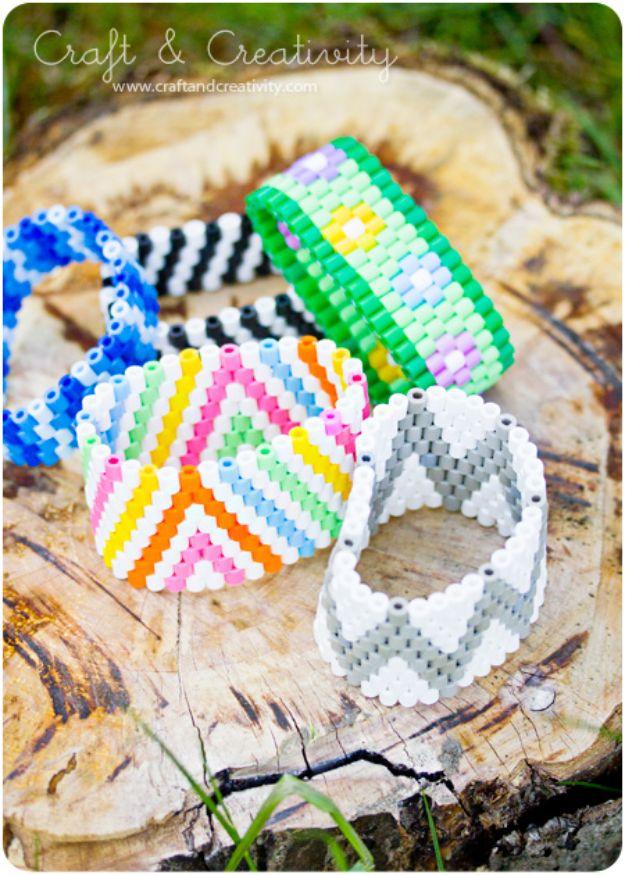
Wide beaded cuffs in chevrons, diamonds and stripes, strung on elastic beading cord rather than ironed, which is why they flex over a hand and sit comfortably on a wrist. The maker is refreshingly honest that she does not give step by step instructions and points instead at the many existing tutorials, which is a fair position when the technique is this well documented. Worth knowing: her daughter made one entirely on her own, so the skill level is genuinely low. Three or four worn together in different palettes is the way to do it, since the effect is cumulative.
Get the full tutorial at Craft and Creativity.
24. Beaded Zip Tie Necklace
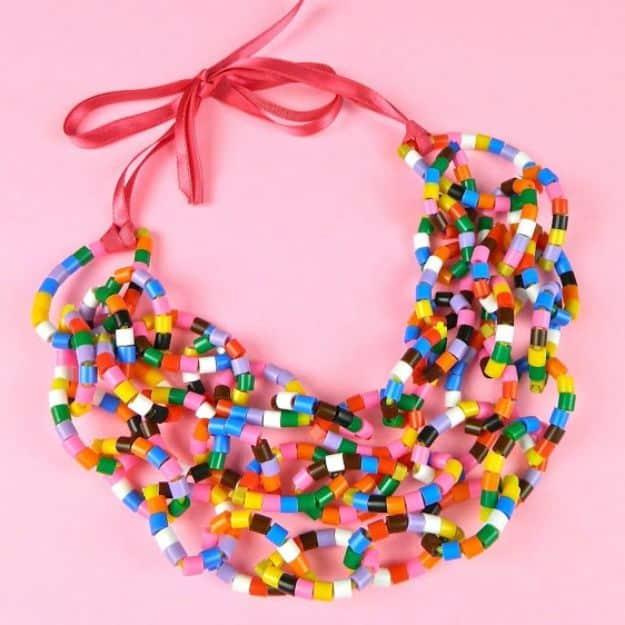
Fuse beads threaded onto zip ties rather than string, which is the whole trick, because a zip tie is stiff enough to hold a curve and loose enough to drape, so the multi strand necklace keeps its shape instead of collapsing into a heap. Strands of mixed random color are layered together and finished with a pink ribbon tie at the back rather than a clasp. The maker’s own framing is that this is the ideal rainy afternoon make for kids and adults alike, and that it is a genuine use for the beads that otherwise keep getting sucked up by the vacuum.
Get the full tutorial at Mark Montano.
25. Perler Flower Notebook
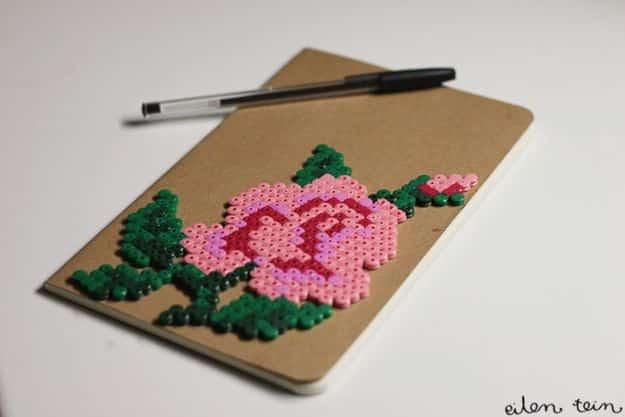
A beaded rose worked in five shades of pink and green, glued onto the cover of a brown kraft notebook, roughly thirteen by twenty one centimeters. Two practical notes from the maker are worth carrying over. The cover needs to be stiff card or hardback, because a flexible cover will bend and pop the panel off. And the glue matters twice over: it has to be seriously durable, she used a quick setting epoxy, but also thick enough that it does not run straight through the holes in the beads when you spread it. Google image search for pixel or cross stitch roses gives you a pattern.
Get the full tutorial at eilen tein.
26. Perler Beads Phone Cover
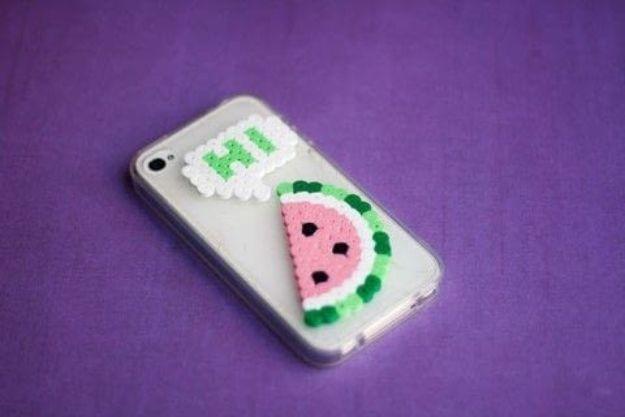
A watermelon slice and a small letter fused flat and hot glued onto a clear phone case, taking about two hours and costing almost nothing. Size the beaded design against the actual case before you fuse it, since a piece that is a few beads too wide will overhang the edge and catch on everything in a pocket. Iron both faces, let it cool completely, then glue. Because the case underneath is clear, the beaded shapes read as floating, which looks considerably better than covering the whole back. Adult supervision on the iron if a younger sibling is helping.
Get the full tutorial at Cut Out + Keep.