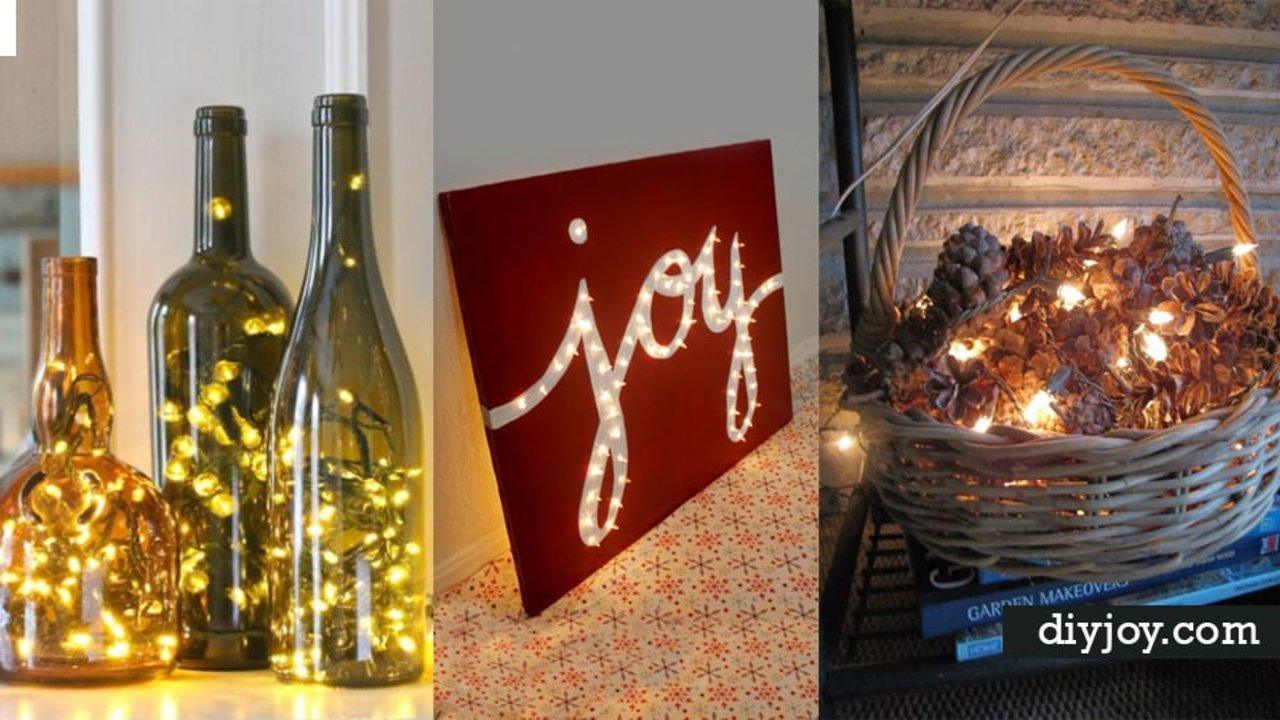
DIY Lighting Ideas
22 DIY Faux Flower Crafts That Never Wilt
DIY faux flower crafts that never wilt: a flower covered bag, felt fascinator, monogram letter, pressed petal art and a wreath you build in one sitting.
html PUBLIC "-//W3C//DTD HTML 4.0 Transitional//EN" ""
Faux flowers used to be the thing you hid when company came. Not any more. A bag of fake stems from the craft aisle costs less than one real bouquet, survives a summer on a front door, and gets cut apart with wire cutters instead of arranged. These DIY faux flower crafts go from a five minute napkin ring to a paper mache letter packed with floral foam, and along the way there are pressed petals behind picture glass, a fascinator sewn from wool felt, a clutch covered in turquoise peonies, and egg carton blossoms with a fairy light pushed through the middle of each one. Some use silk stems straight off the rack. Some build the flower from scratch out of book pages, felt or canvas. Every tutorial links back to the maker who worked it out.
DIY Ideas With Faux Flowers
1. DIY Flower Covered Backpack
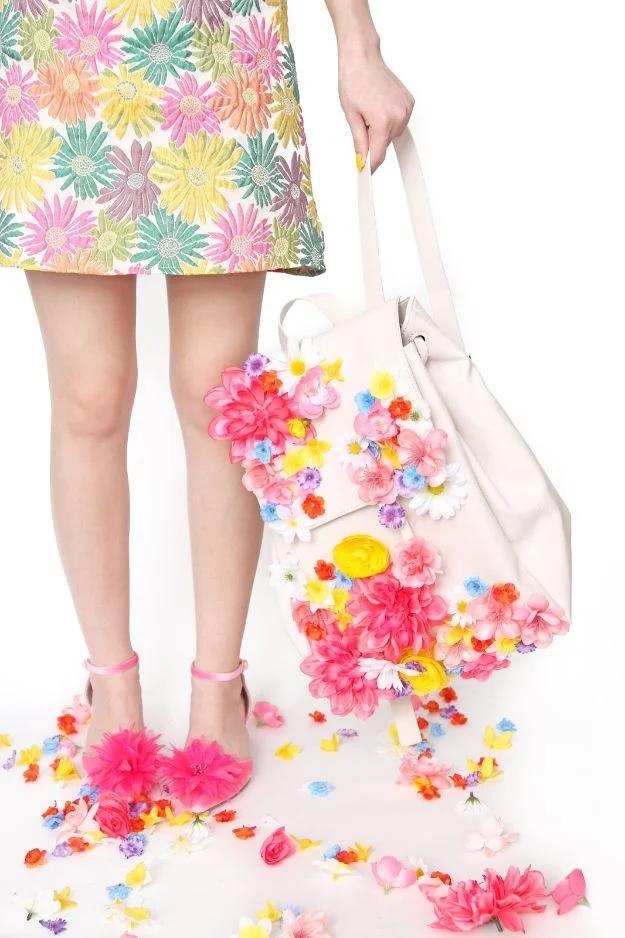
Pull or snip the blooms off their stems first, and cut as close to the flower head as you can, because any stub left behind stops the flower sitting flat against the bag. After that it is glue on the back of each one, press, hold for a minute, move to the next. Tacky craft glue or super glue both work on a coated bag. The trick worth copying from the maker is not covering the whole thing evenly: the flowers crowd at one corner and scatter out from there, which is what makes it look designed rather than stuck on.
Get the full tutorial at Aww Sam.
2. Floral Cake Topper
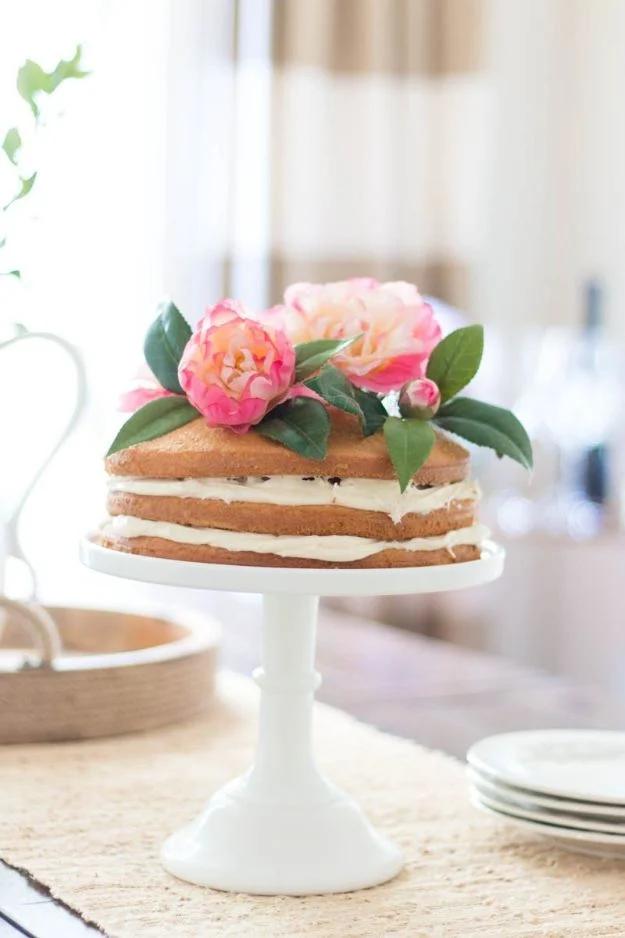
Cut each bloom away from the main stem and leave about half an inch behind, which is just enough to sit in the frosting without tipping over. Wrap that half inch in a scrap of plastic wrap before it goes anywhere near the cake. The whole arrangement here came off a single faux stem, and mixing full open blooms with the little unopened buds from the same stem is what stops it looking plastic. The real argument for faux over fresh is timing: you can ice the cake the day before, cover it, and press the flowers in as guests arrive.
Get the full tutorial at A Thoughtful Place.
3. Floral Napkin Rings
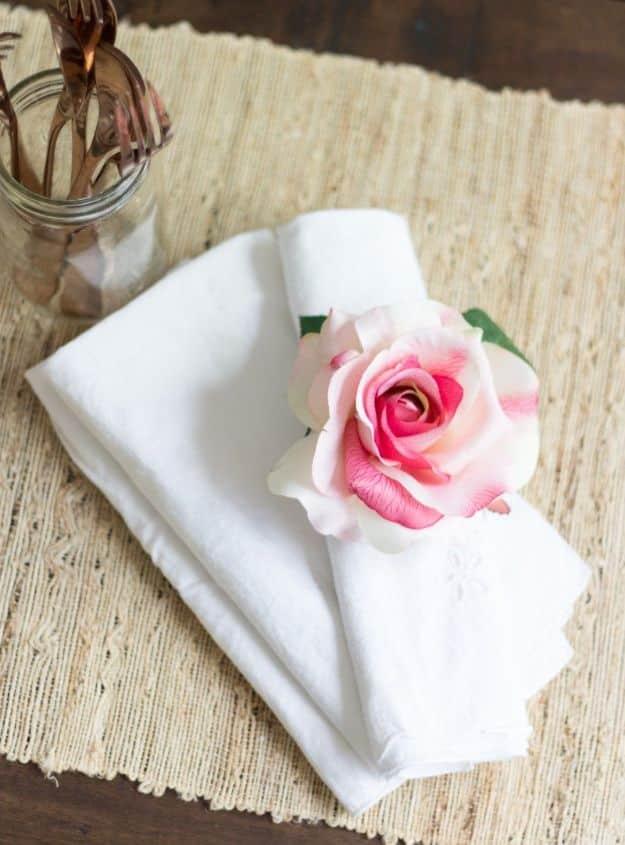
Ten inches of wired twine, twisted into a circle, with the leftover ends formed into a second smaller loop that gives the flower something to sit on. Pull the bloom straight off its stem, which comes away easier than you would think, snip a leaf or two, then hot glue the leaves to the back of the flower and the flower to the middle of the ring. The reason wired twine and not a rigid ring: you can squeeze the whole thing flat so it lies down on the napkin instead of standing up like a hotel place setting.
Get the full tutorial at A Thoughtful Place.
4. DIY Faux Flower Clutch
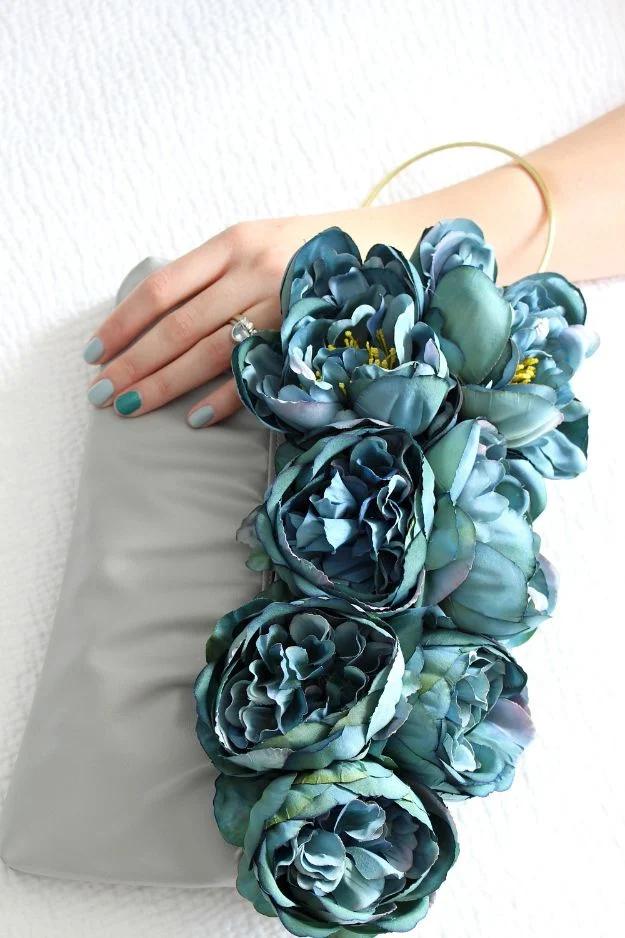
The base was a three dollar yard sale vinyl envelope purse from the 1980s, strap removed. Every leaf and scrap of greenery got cut away, because the leaves were the part that read as fake and stripping them makes the blooms go sculptural instead of floral. Give each flower a tug first; any that want to come apart get a dab of fabric glue near the stem to fuse the petal layers, hidden underneath. Then epoxy the blooms down a couple at a time, hold five minutes, and clamp with a clothespin while they set. A one dollar brass hoop goes on with jump rings through the old strap loops.
Get the full tutorial at Dans le Lakehouse.
5. Faux Flower Wreath
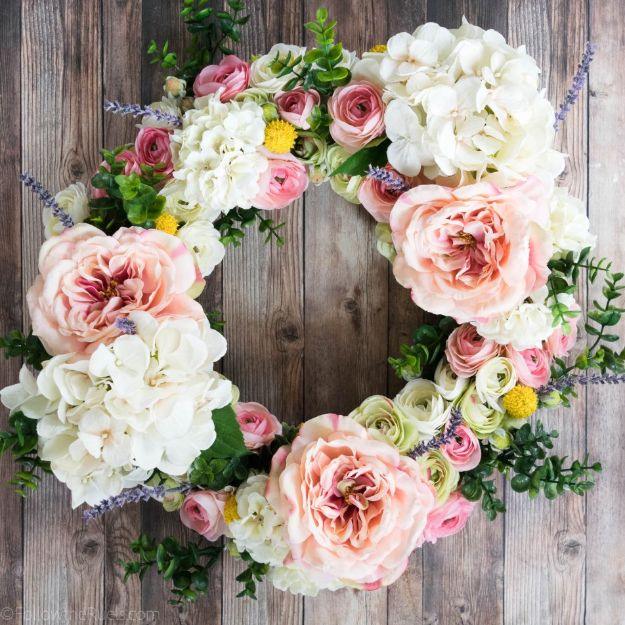
A fourteen inch foam wreath form and a pile of stems cut short with wire cutters, and the assembly takes no time at all. What takes time is deciding where things go, so borrow the maker’s rules. Use odd numbers of any one flower, three peonies and five hydrangeas rather than four of each, because odd numbers sit better with the eye. Do not aim for symmetry, use a loose triangle instead. Pick two or three main colors and then add one or two sharp accents, which is where the yellow billy buttons and the lavender come in. Nothing is permanent until you decide it is, so keep moving flowers.
Get the full tutorial at Follow the Ruels.
6. DIY Flower Monogram Letter
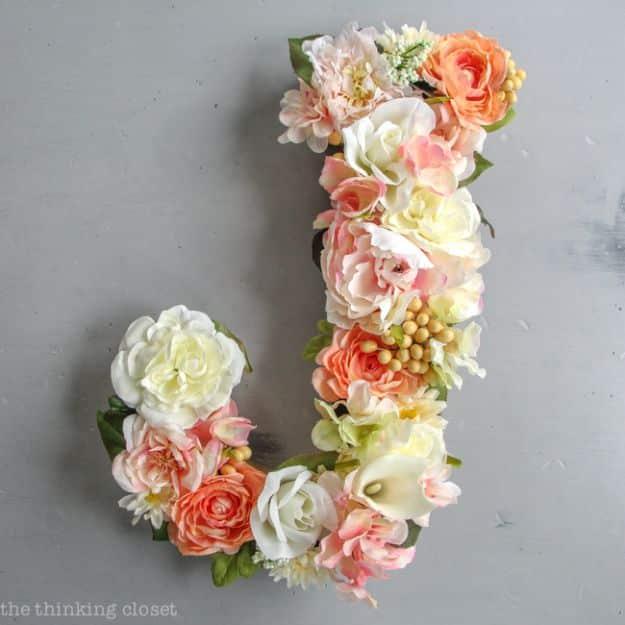
Start by gutting the letter. An x-acto knife takes the top face and the cardboard filling off a paper mache letter so it is completely hollow, then floral foam bricks get cut with a bread knife or an electric carving knife to fill the cavity and hot glued to the base. Stems come down short with wire cutters, short enough to still push into the foam, and then you simply fill it. The maker had never arranged a flower in her life and finished this in an hour and fifteen minutes. Tuck leaves around the outside edge, because green foam peeking through is the only way this goes wrong.
Get the full tutorial at The Thinking Closet.
7. Adjustable Floral Headband
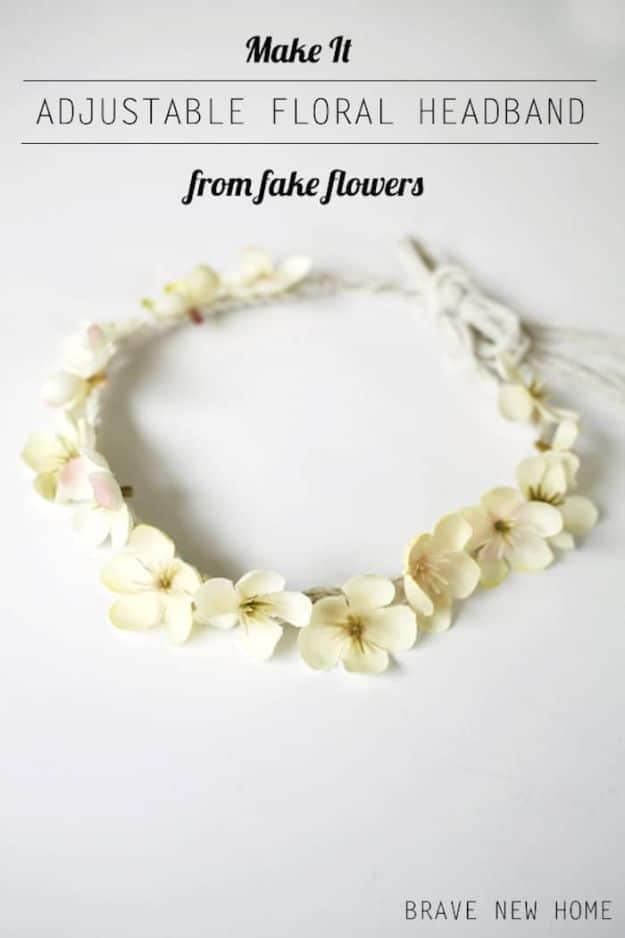
The band is six lengths of twine, each about four feet, knotted together at one end and taped to a table so you can braid without fighting it. A fishtail braid with two lengths per section gives you a wider, flatter surface than a three strand braid, and a wider surface is easier to glue flowers onto. Knot the far end, trim, pull the blooms off their stems, and hot glue them along the band spaced apart rather than packed. Total cost about three dollars and forty five minutes of actual work. The long tails are what make it adjustable, since it ties at the back of the head.
Get the full tutorial at DIY Candy.
8. Pressed Faux Flower Petal Artwork
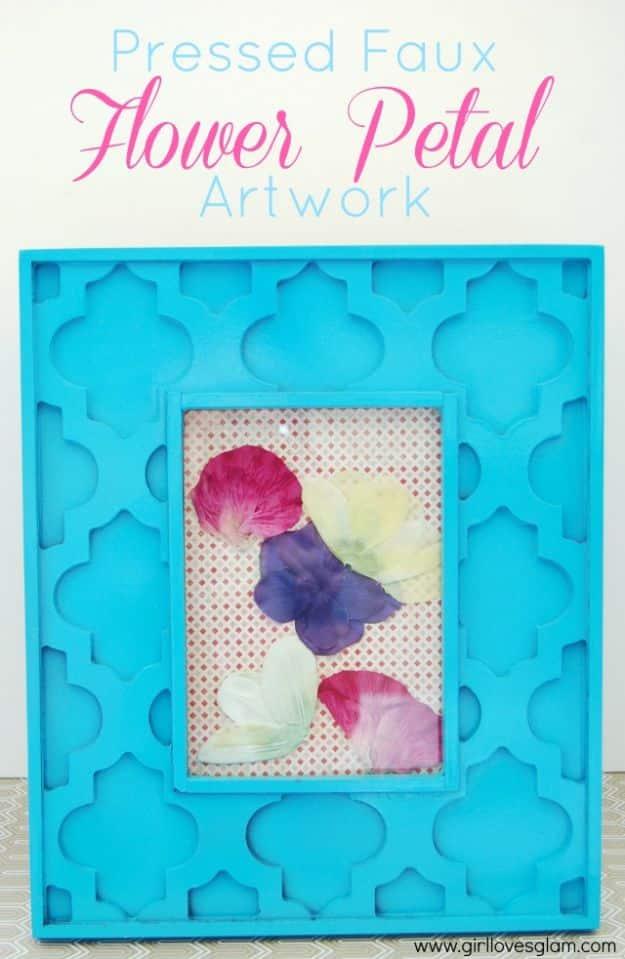
Pressed flower art without the six weeks of pressing, and it turns out silk petals flatten under picture glass almost as convincingly as real ones. A frame, some faux flowers, a sheet of paper cut to the frame size and a paper cutter is the whole supply list. Lay the petals out on the paper first to work out the arrangement, then transfer them onto the glass itself and here is the catch worth reading twice: anything with a direction has to go down mirrored, because you are building the picture from the front. Paper behind, back on, done.
Get the full tutorial at Girl Loves Glam.
9. Easy DIY Flower Halo

A length of ribbon, a handful of fake flowers, scissors and a glue gun. Cut the blooms off as close to the head as possible so they will lie flat against the ribbon rather than standing proud, lay the whole arrangement out along the ribbon before any glue comes out, then work along gluing each one down. The ends stay bare so they tie in a bow at the back, which means one halo fits everybody and it goes flat in a bag afterward. Mixing sizes and two or three flower types along the length stops it looking like a machine made it.
Get the full tutorial at Mash Elle.
10. Blooming Belt
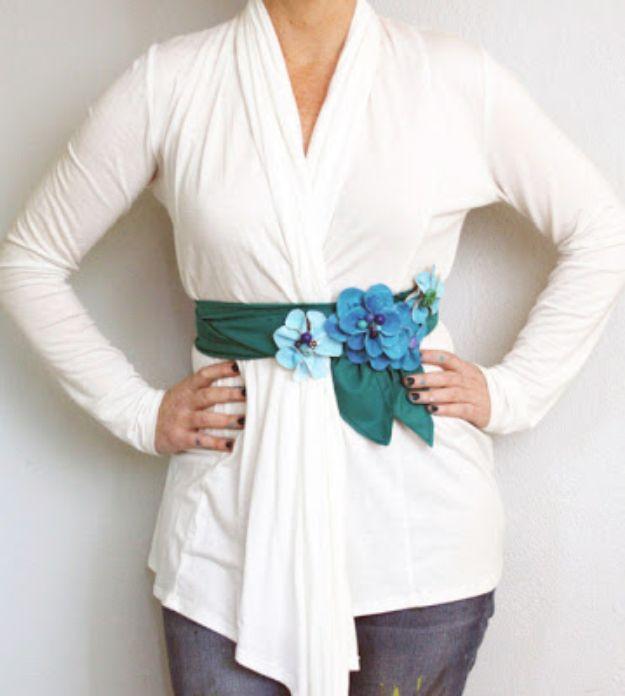
These flowers are built, not bought. Paint a sheet of canvas whatever color you want, cut petal shapes out of it once dry, then put a drop of glue at the base of each petal and pinch it so the petal cups instead of lying flat. That pinch is the whole technique. Glue petals side by side into a flower, stack more on top to build depth, and drop beads into the center. The sash is a strip of fabric long enough to wrap your waist twice, about six inches wide folded in half and sewn, with the ends trimmed to a leaf shape.
Get the full tutorial at Alisa Burke.
11. Burlap and Pearls Rosette Wreath
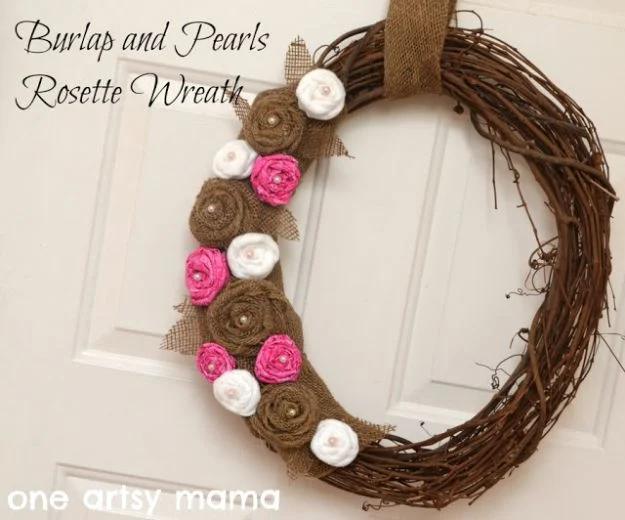
A grapevine wreath with burlap wrapped around one side only, which is a good deal less work than wrapping the whole thing and looks better anyway because the bare vine stays visible. The roses are rolled rosettes: cut long strips of burlap, felt and fabric, fold each in half lengthwise, then roll while twisting as you go, and glue a pearl into the middle of each finished one. Burlap leaves fill the gaps. This wreath used four burlap flowers, four fabric and five felt, though the count depends entirely on your wreath size.
Get the full tutorial at Amy Latta Creations.
12. Rosette Bobby Pins
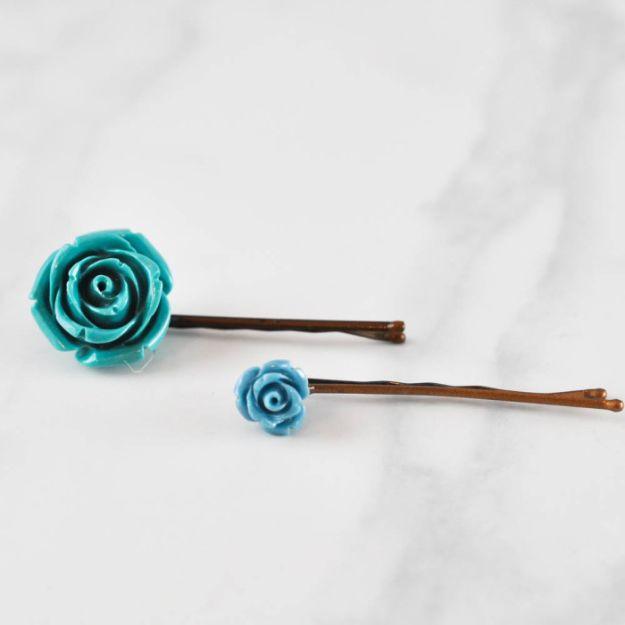
Two supplies and one step. Flower shaped cabochons from the beading aisle, a bobby pin each, and a dot of hot glue holding one to the other. That is genuinely it, and the reason it is here is that it takes five minutes and solves the gift problem when you have nothing and need something. Slide the finished pins onto a strip of card to hand over, or push them into a low bun at the back of the neck where they read as a scatter rather than an accessory. Make them in one color family so they work together.
Get the full tutorial at Suburble.
13. Flower Fairy Lights DIY
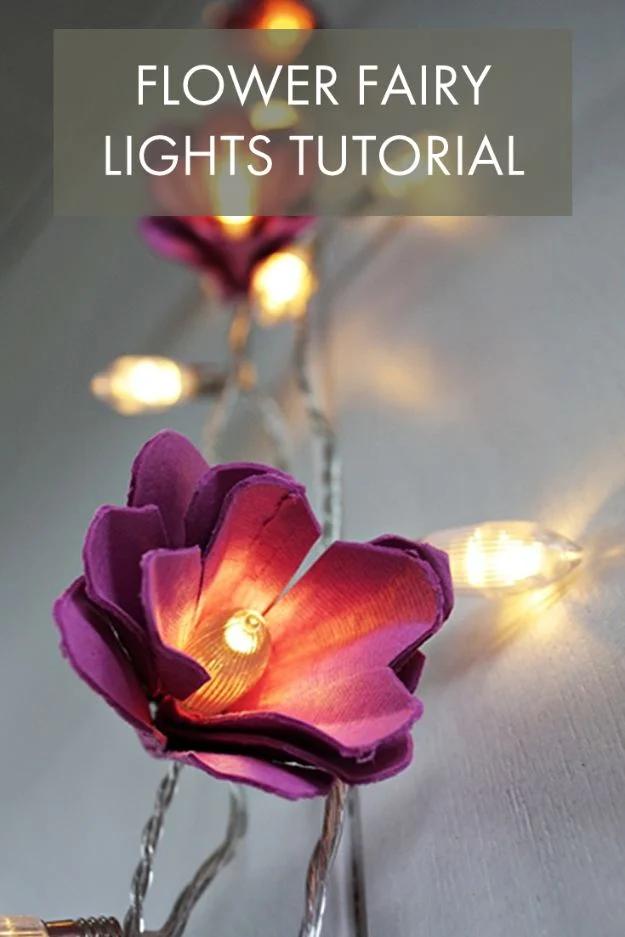
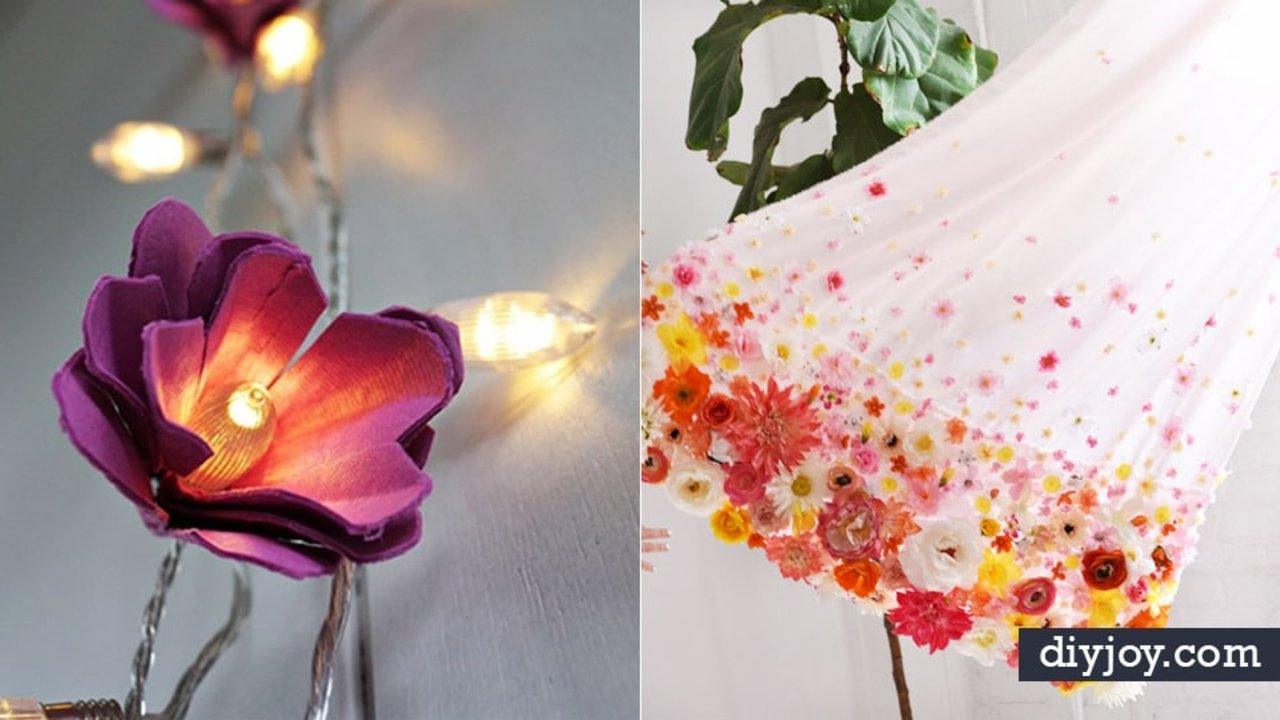
Egg cartons, scissors and wire, and the flowers cost nothing at all. Cut the excess cardboard away from the cup strips, round the edges of each cup into petal shapes, and then nest three cut cups inside one another to build up a layered bloom, leaving the innermost one uncut so it forms the center. Run wire through the hole in the middle and pinch it tight, leaving a long tail so the flower can be pinned onto a branch. A short slit either side of each cup opening lets one fairy light push in from behind.
Get the full tutorial at Sendo Invitations.
14. Paper Flowers
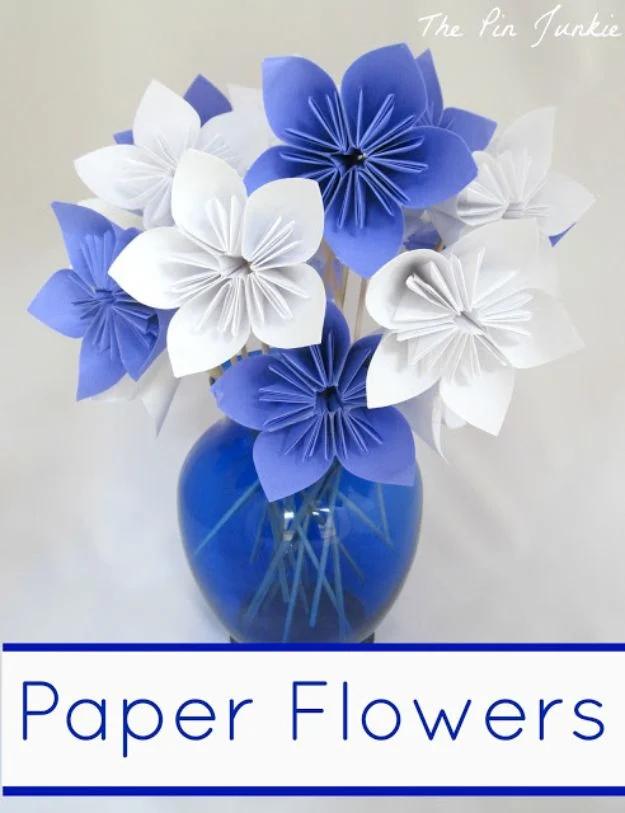
Each petal is one square of paper folded eight or nine times, and once you have done the first one your hands know it and the rest go quickly. Diagonal fold, corners up, triangles folded in half so the tips point out, tips down, unfold, hold one side closed and refold along the existing creases, tips down again, corners in, roll and tape. Five of those taped together makes a flower, and a skewer pushed into the back makes the stem. Use invisible or matte tape, never glossy, because glossy tape catches the light and shows.
Get the full tutorial at The Pin Junkie.
15. Book Hugger Bookmark
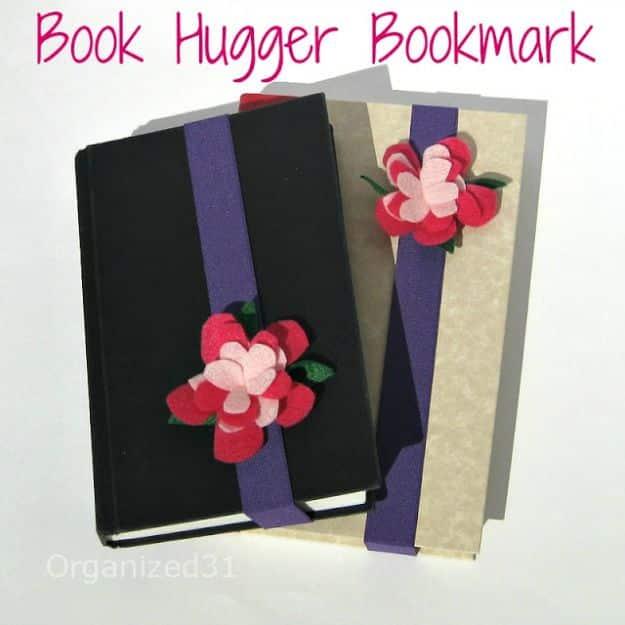
An elastic band that stretches around a closed book with a felt flower sitting on the front, so it marks your page and holds the covers shut in a bag at the same time. The flower is layers of felt cut freehand in gradually larger sizes, stacked smallest on top and hand stitched through the middle, with green felt triangles folded in half at the base and sewn behind as leaves. Then the whole flower is hand sewn onto the elastic. The maker made two of them in under an hour, and freehand means no pattern to print.
Get the full tutorial at Organized 31.
16. Felt Flower Fascinator
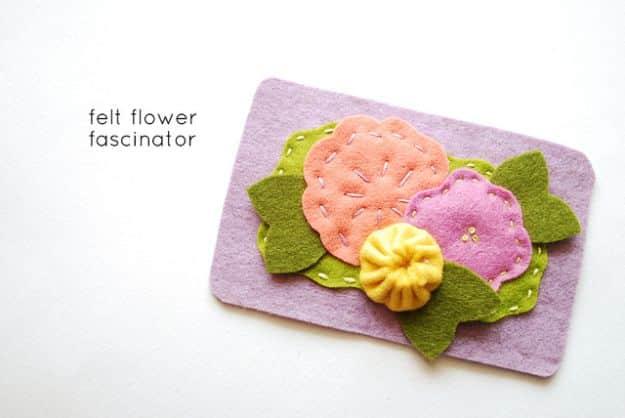
A felt base with bobby pin holes punched right into it, which is the detail that makes this stay in hair all day instead of sliding out by lunchtime. Cut a base shape from wool felt and a smaller one in the same shape, punch holes in the base far enough in from the edge that the smaller piece covers them, then sew the smaller piece over the top. The flowers stitch down through both layers afterward. One warning from the maker worth heeding: use fewer stitches than you want to, because a densely stitched base will not let the bobby pins through.
Get the full tutorial at Wild Olive.
17. Hanging Flower Heart
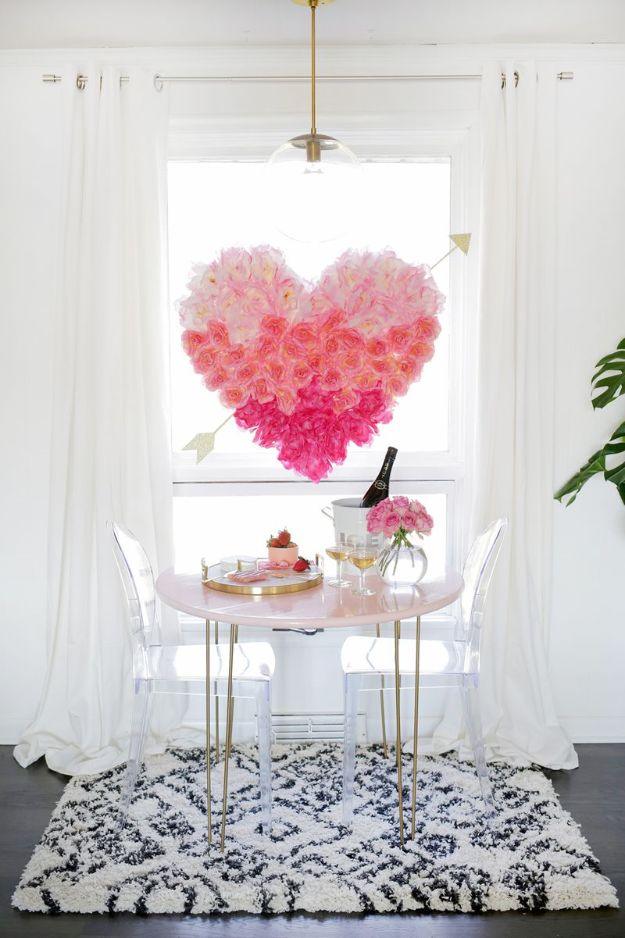
Sheets of styrofoam hot glued edge to edge, a heart traced onto them and cut out with a serrated bread knife, an electric carver or a jigsaw. Then pull or cut the blooms off their stems and glue them straight onto the foam. Three shades of pink are what make the gradient: the lightest go across the top third first, the darkest fill the bottom third, and the middle band is done last. An arrow of balsa wood backed with glitter paper pushes in at either side. Cup hooks and fishing line hang it, and because it is faux it packs away for next year.
Get the full tutorial at A Beautiful Mess.
18. DIY Book Page Paper Flower
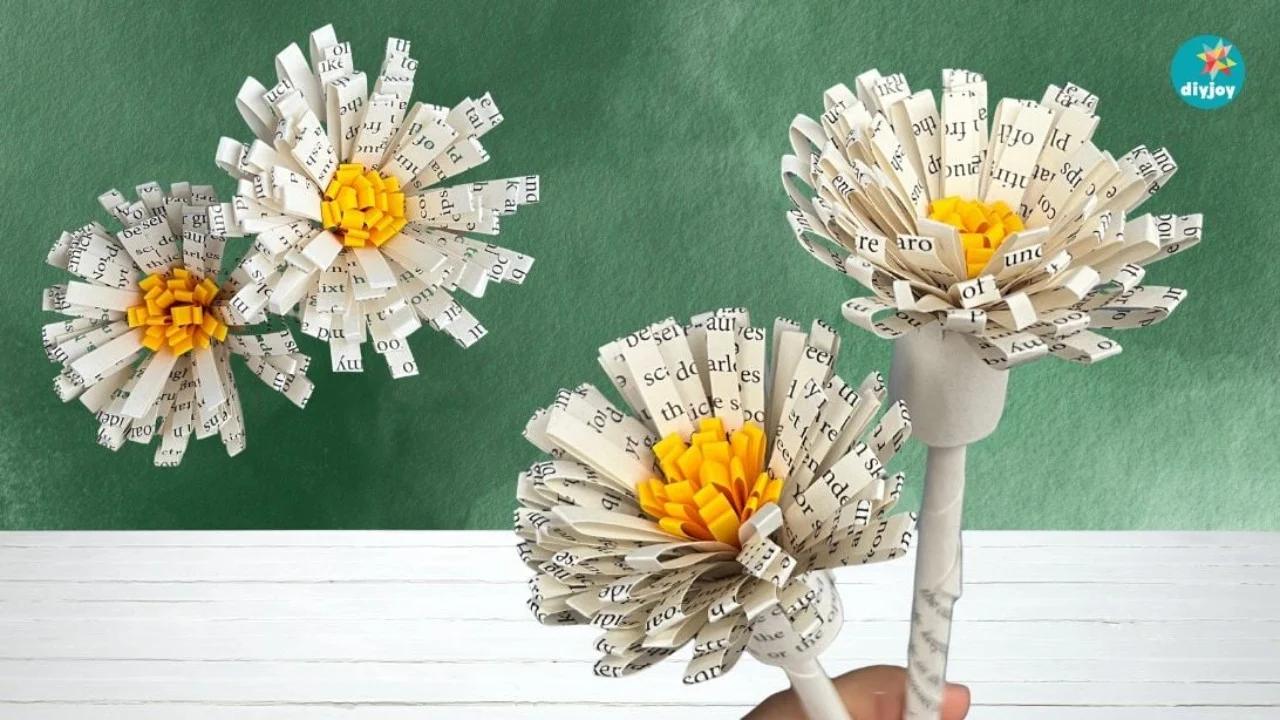
Old book pages, a pair of scissors and a sticky note, and you get a flower that costs nothing and lasts indefinitely. A page measuring nine and a quarter by six and an eighth inches gets cut in half crosswise, each half folded lengthwise and cut into evenly spaced slits. A yellow sticky note, cut the same way, rolls up into the center. The stem is another half page rolled around a skewer and glued. Then the center goes on first and the slit book pages wrap around it. Perfect for a book too dated to read but too nice to bin.
Get the full tutorial at Sueeye.
19. DIY Book Flower Vase
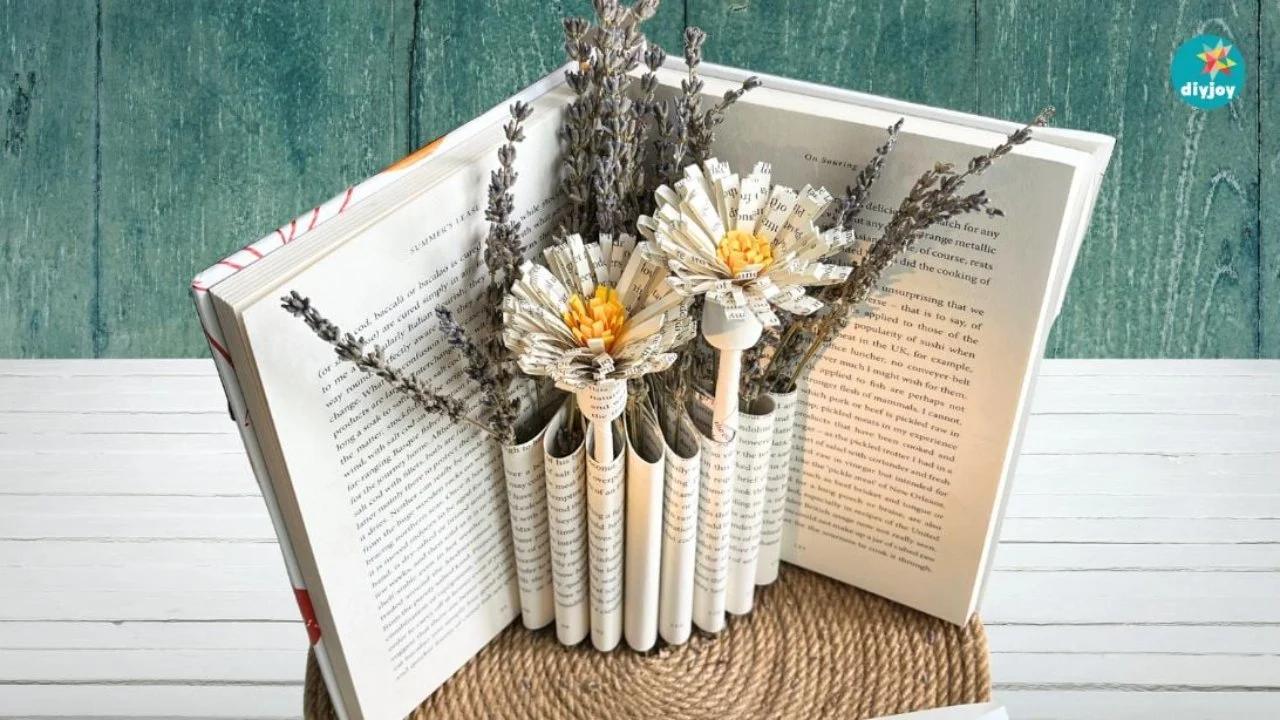
The vase is the book itself, folded rather than cut into a shape. Open an old hardback to its center, mark the middle of the page and draw a line, then count twelve pages in from each side and mark those spots. Slide a piece of cardboard behind the section you are cutting so the blade does not go through everything, cut along the line, and tear the top half away. Then the cut pages get shifted, taped three at a time with double sided tape and folded into the vase wall. No special tools beyond a blade and a ruler.
Get the full tutorial at Sueeye.
20. DIY Flower Light
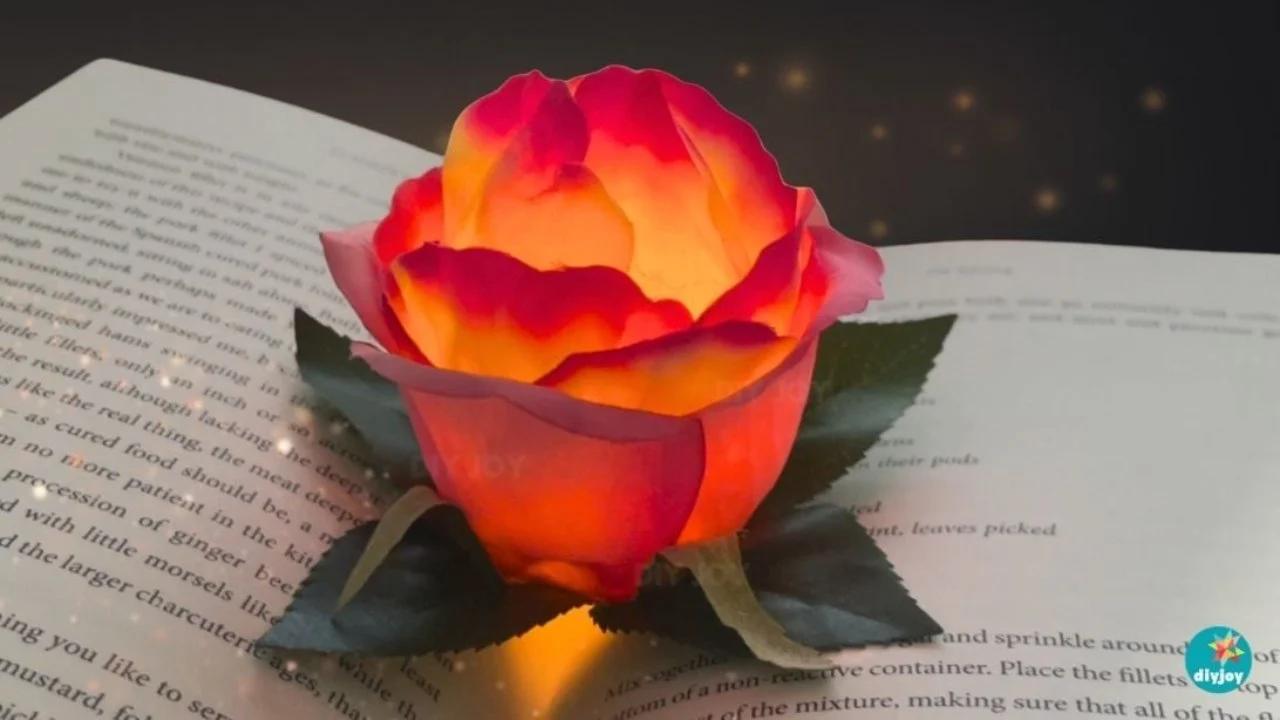
Four plastic spoons with their handles cut off, a battery tealight, and one large faux rose taken apart petal by petal. Glue a large petal to the back of each spoon without covering it completely, then glue the spoons one at a time around the tealight so the light sits inside the cup they form. More petals close the bottom, the pink ones go on last, and the sepals from the base of the original rose get cut into pieces and glued around the bottom to finish it. Twelve yellow petals and four pink built the one in the photo.
Get the full tutorial at Sueeye.
21. Easy DIY Floral Lighted Art
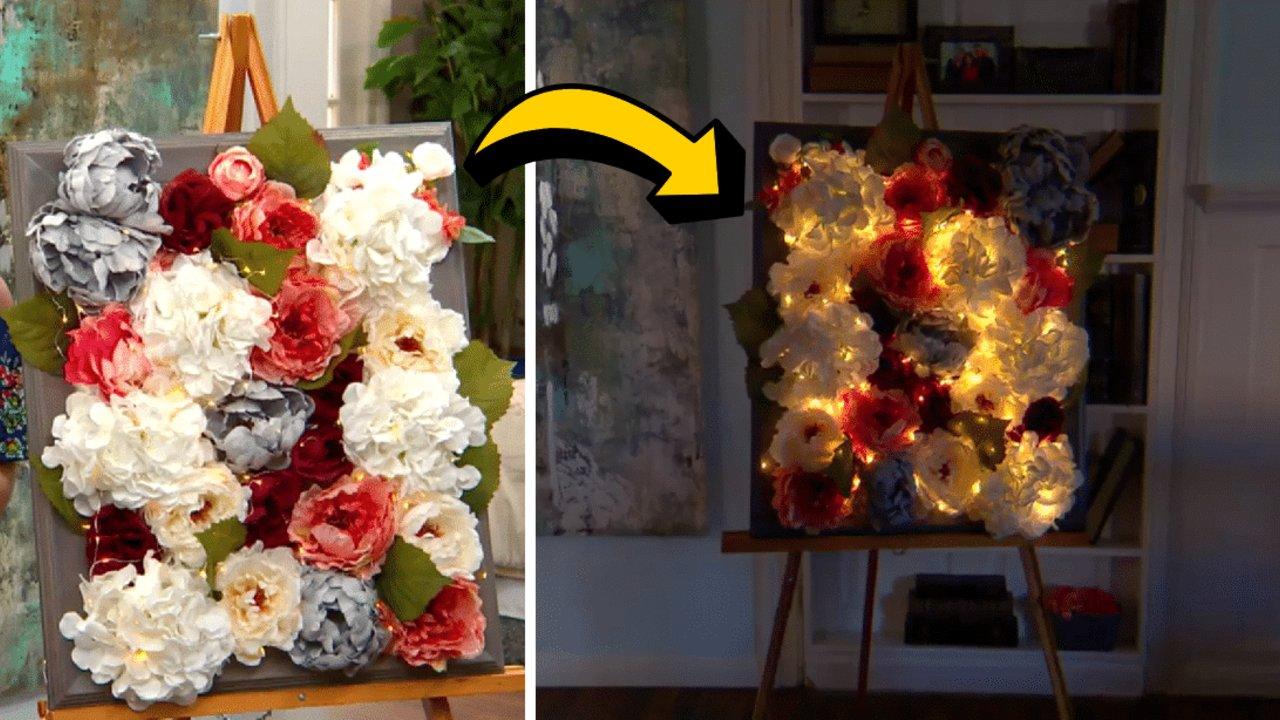
Take the backing and glass out of a large picture frame so only the border remains, cut a piece of garden fencing to that size, and staple it across the opening. The fencing is the whole trick, because the holes give every stem somewhere to go: push the flowers in from the front, fold the stems over behind, and tape them down. Then run fairy lights over and around the back of the blooms, taping as you go, so the light comes through the flowers from behind rather than shining at them. Turned off it is still art.
Get the full tutorial at Sueeye.
22. How to Make Allium Flowers Using Golf Balls and Nails
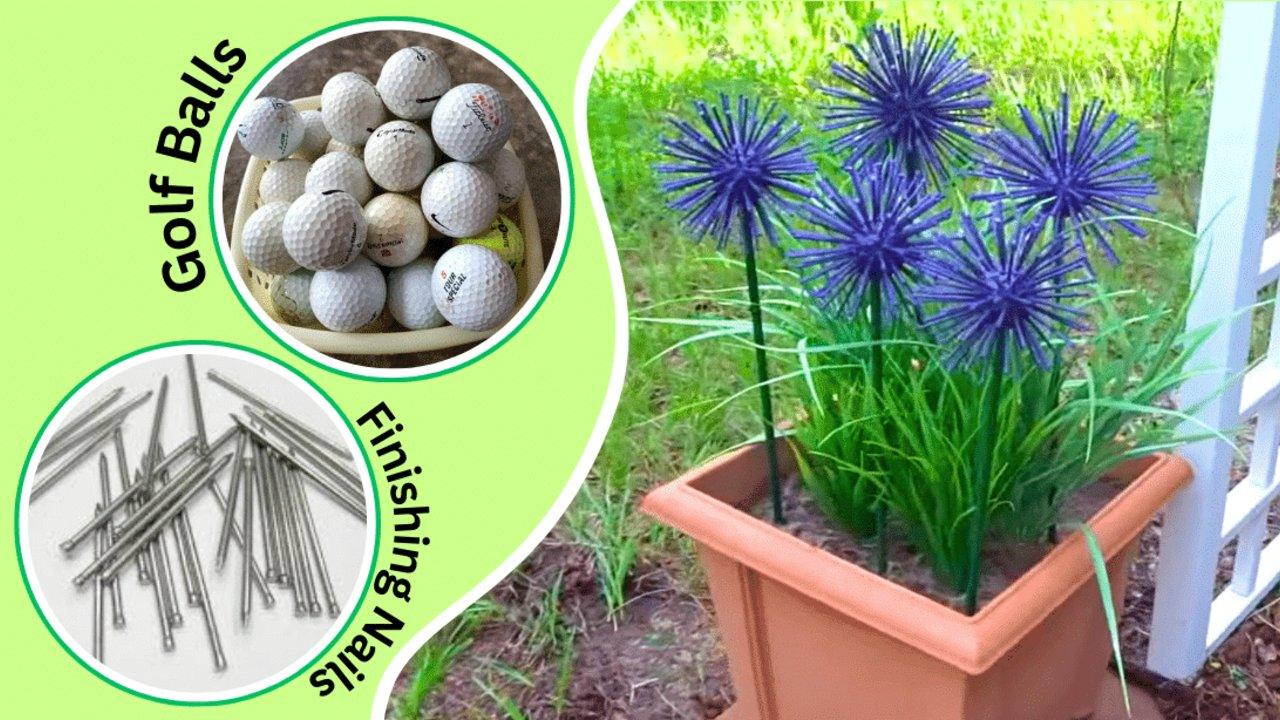
Allium are the tall purple globes that cost a fortune as bulbs and then flower for two weeks. These are golf balls on dowels, studded with two and a half inch finishing nails and sprayed purple, and from more than a few feet away the illusion is very good indeed. Drill one large hole in the bottom of each ball for the dowel and a field of smaller ones around the rest of it for the nails, glue everything with E6000, then spray the nails purple once the stem is masked off with painter’s tape.
Get the full tutorial at Sueeye.