Clothes Sewing Projects
19 DIY Boot Ideas to Paint, Glitter and Upcycle
DIY boot ideas to revive a tired pair: glitter star boots, painted leather booties, crochet boot cuffs, monogrammed rain boots, boot planters and shapers.
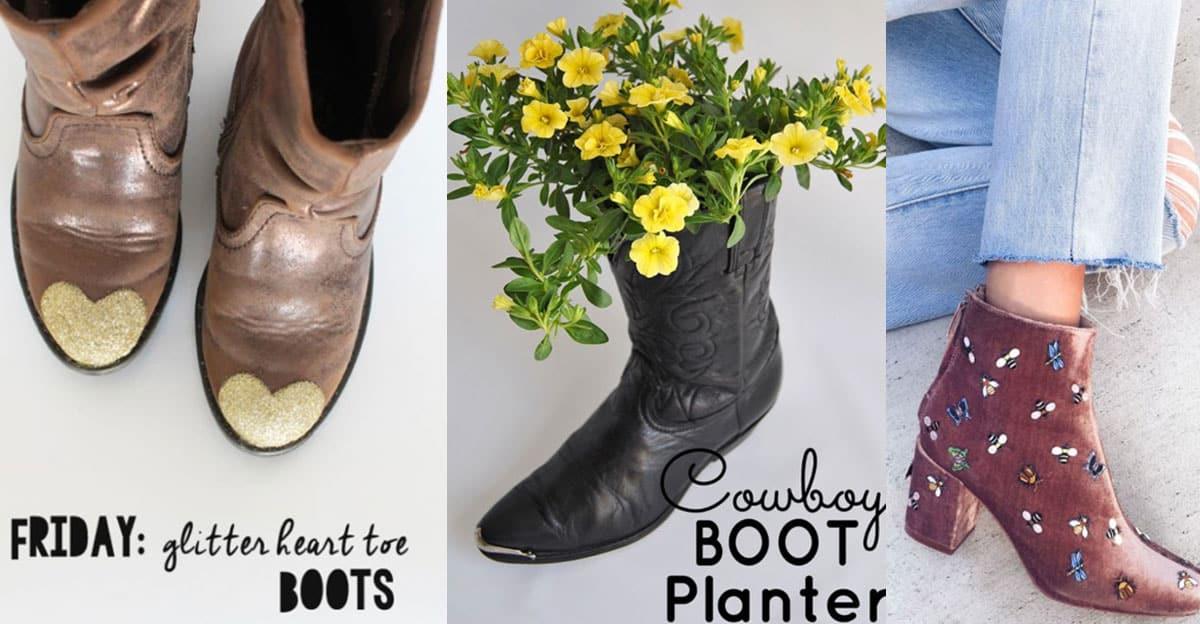
Boots are the one thing in the closet that never quite wear out, they just stop looking like anything. That is the good news, because a scuffed toe, a faded shaft and a heel you have walked flat are all fixable in an afternoon. These 19 DIY boot ideas cover both halves of the job: the makeovers, where iron on glitter stars, leather paint, vinyl monograms, craft stencils and Mod Podge turn a tired pair into something nobody else owns, and the upkeep, where beeswax, a leather patch kit and a pool noodle boot shaper keep a good pair going for years. There are also crochet cuffs and sweater toppers for the boots that are fine as they are, and cowboy boots given a second life as planters and flower vases. Every tutorial links back to the maker who worked it out.
1. Monogrammed Rubber Boots
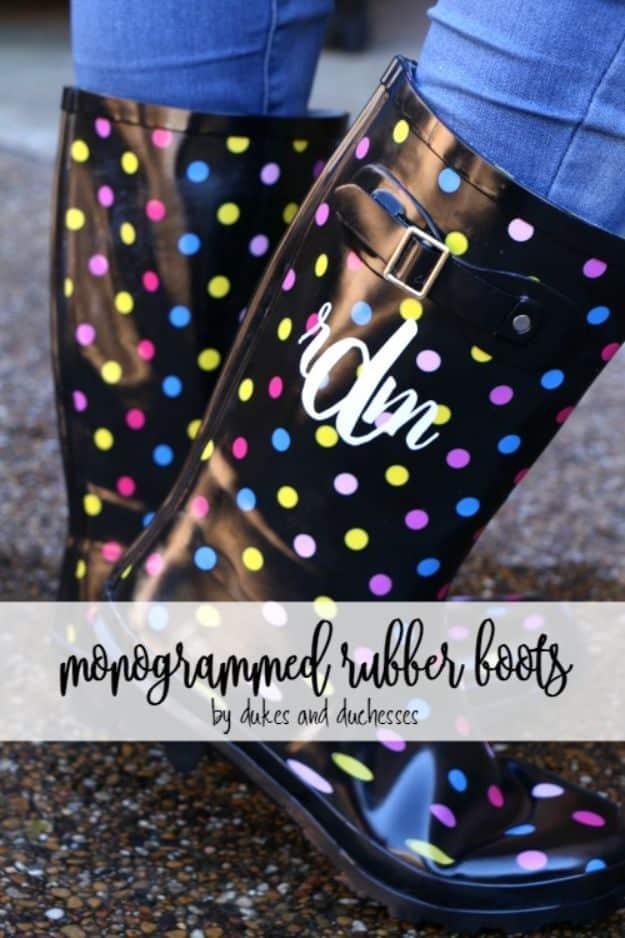
Polka dot rain boots with a white script monogram on the outer side of each one, and the placement is the part worth copying. The side stays flat while the front of a rubber boot buckles as you walk, which is exactly where vinyl lifts. Cut the letters from white glossy outdoor vinyl rather than indoor, type them in Design Space and move them close together so they weld into one shape, then lift the whole monogram with transfer tape. Before it goes on, scuff the spot with 300 grit or higher and wipe it with rubbing alcohol. Skip that and it peels.
Get the full tutorial at Dukes and Duchesses.
2. Cowboy Boot Planter
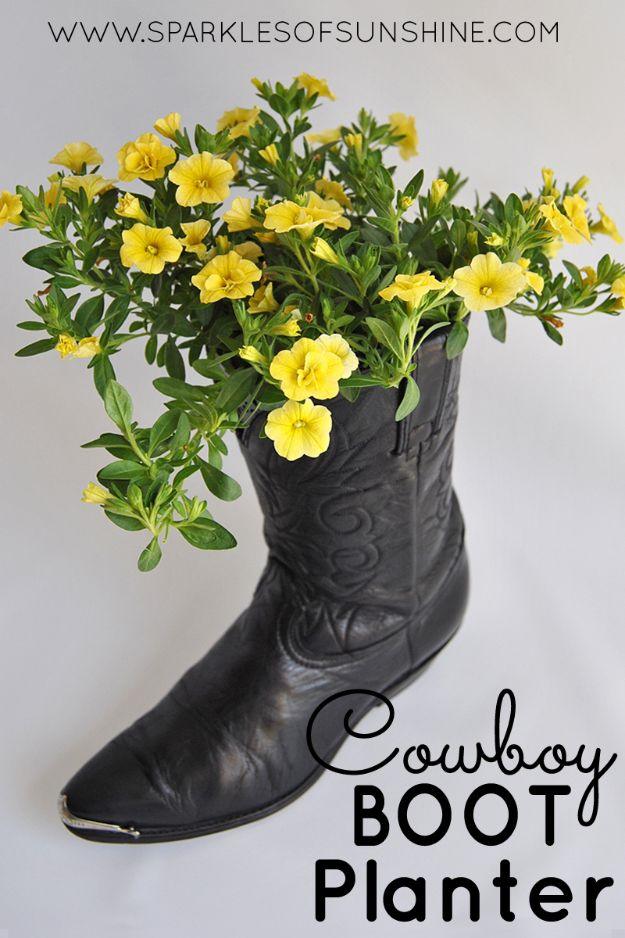
An old cowboy boot with a potted plant dropped inside it, and the trick that makes it work costs nothing: an old pillowcase stuffed down into the foot to lift the pot to the right height. Add or remove fabric until the rim of the pot sits just below the boot top. Pick a trailing variety so the flowers spill over the sides rather than sitting up like a bouquet, Calibrachoa Superbells in yellow in the version shown. Plant the pot first, outside, then lower it in. If the boot leans, push a pin into the sole to level it.
Get the full tutorial at Sparkles of Sunshine.
3. Easy Crocheted Boot Cuff
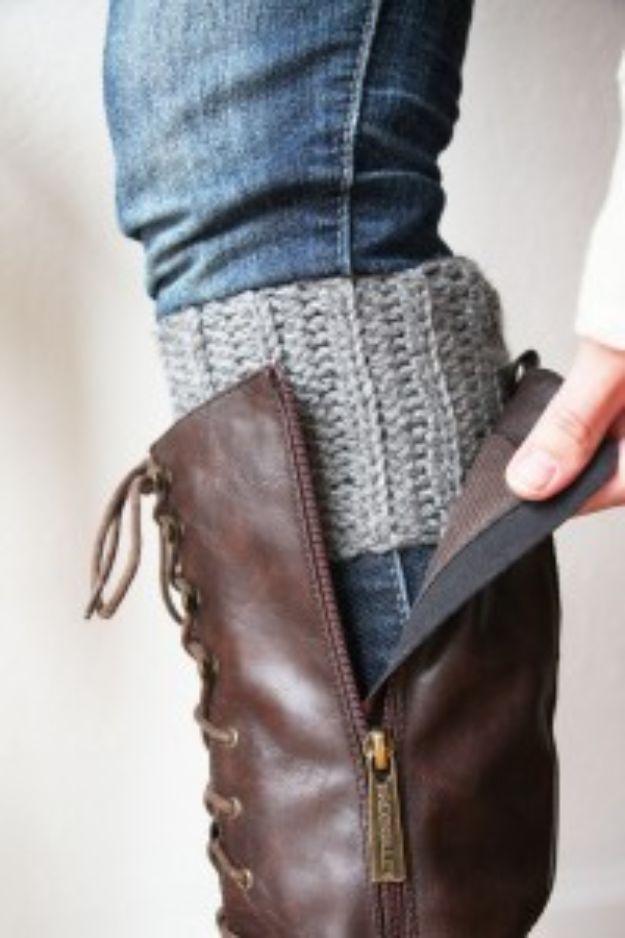
Worsted weight yarn, a 6mm J hook and two stitches, chain and half double crochet, which makes this about as short a skills list as crochet offers. Chain 25 loosely, skip two, then half double crochet across. From the next row on you work into the back loops only, and that single change is what produces the ribbing that grips the calf instead of sliding down. Twenty four rows fits a 13.5 inch calf. Sew the ends together, weave in the tails, done. Start it snug, because the ribbing relaxes with wear.
Get the full tutorial at Skip To My Lou.
4. Glitter Star Boot Tutorial
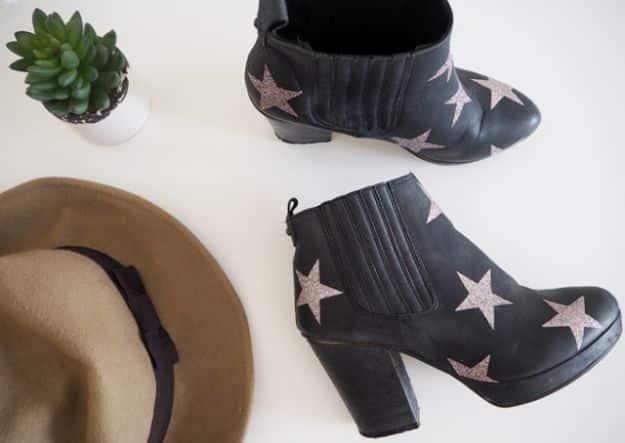
Iron on glitter stars scattered up a pair of black ankle boots, and there is no glue, no paint and no drying time anywhere in it. The stars are HotFix transfers, three packs of five covered both boots for about seven pounds fifty. Wipe the boots and let them dry, lay a star shiny side up, cover it with a scrap of clean cotton so the iron never touches the plastic, and press on the hottest setting, moving slowly for about a minute. Peel the plastic film back to check. The clever bit is cutting some stars in half near the sole so the pattern looks printed on.
Get the full tutorial at Made Up Style.
5. Rubber Rain Boot Decor
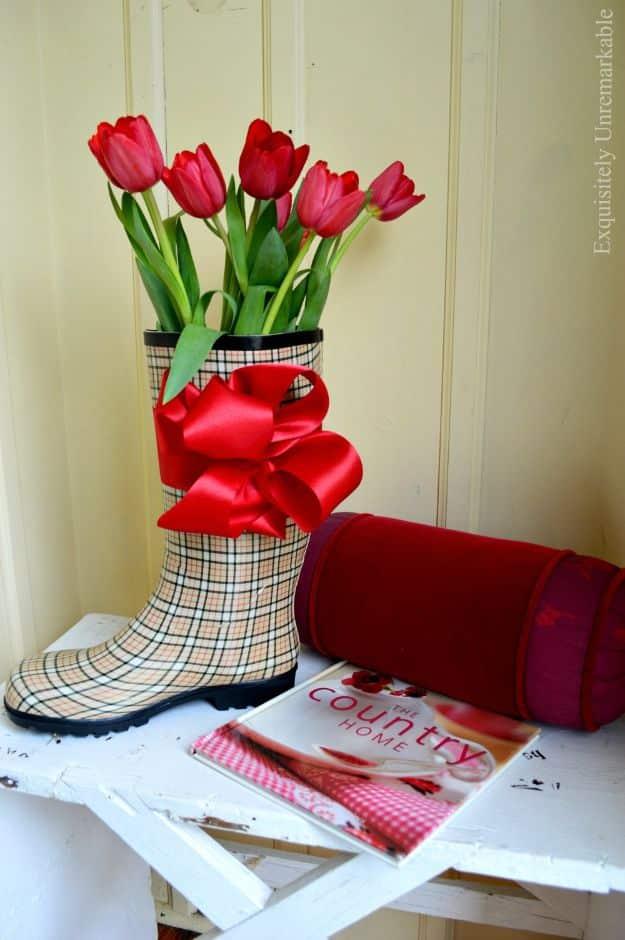
A rain boot used as a vase, on a bench in a mudroom or hanging on the front door, which is a much better use for outgrown boots than a bin bag. The original was a pair of tiny navy boots from the back of a closet, dressed with flowers and ribbon and hung up to welcome April showers, and it cost almost nothing. A buckle is the detail to look for if you want to hang one, since it gives you something to hook over the door without putting a hole anywhere. Faux stems for the door, live ones for a bench.
Get the full tutorial at Exquisitely Unremarkable.
6. Update Old Boots with Paint

Thrifted leather booties repainted white, which is the makeover with the biggest before and after on this whole list. The system matters more than the brush: Angelus Leather Preparer and Deglazer strips the old finish first, Angelus Leather Paint goes on in thin coats, and Angelus Acrylic Finisher seals it in matte, satin or high gloss. Wear gloves for the deglazing step, especially over a dark glossy finish, or you will spend the evening scrubbing your hands. The glam version adds matte Mod Podge and extra fine glitter in the same shade as the paint. Mask anything you do not want painted.
Get the full tutorial at Paper Michey.
7. Personalized Rain Boots
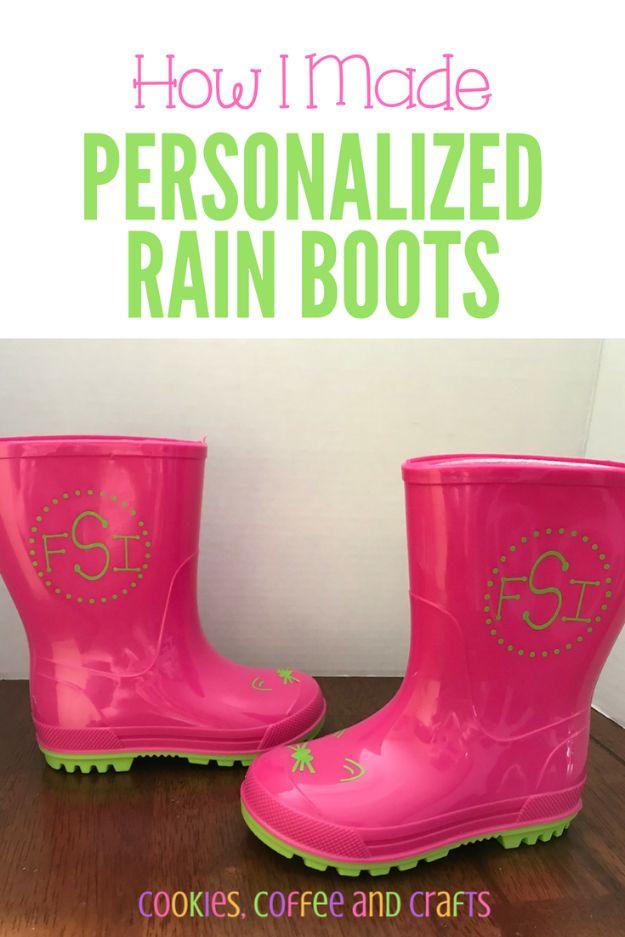
Plain pink rain boots from Walmart, under ten dollars, given a kitty face and a monogram in permanent vinyl. Worth knowing before you start: the whiskers will not survive as cut vinyl, they are simply too thin to weed, even in reverse. The workaround is to build the face from shapes instead, a heart for the nose with rectangles welded on either side for whiskers, which cuts and weeds cleanly every time. Match the vinyl to a color already on the boot, the green sole in this case, and the whole thing looks factory made. Check the letter order before the transfer tape goes down.
Get the full tutorial at Simply Crafty Life.
8. Weather-Proof Your Leather Boots
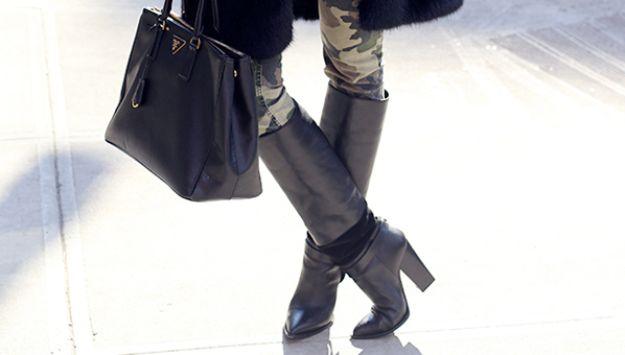
Not a makeover, a rescue, and it takes ten minutes. Salt stains and discoloration ruin more leather boots than wear ever does, and beeswax is the cheap fix nobody does until the year after they need it. Clean the boots first, a vegetable brush shifts dried grime. Take the laces out and tape over buckles and any metal, because wax ruins the finish on hardware, and keep the wax off anything that is not leather. Then glove up and rub it generously over one boot at a time. The leather goes dark and shiny at this stage, which is alarming and completely normal. It dries back.
Get the full tutorial at SheFinds.
9. Coachella Boots
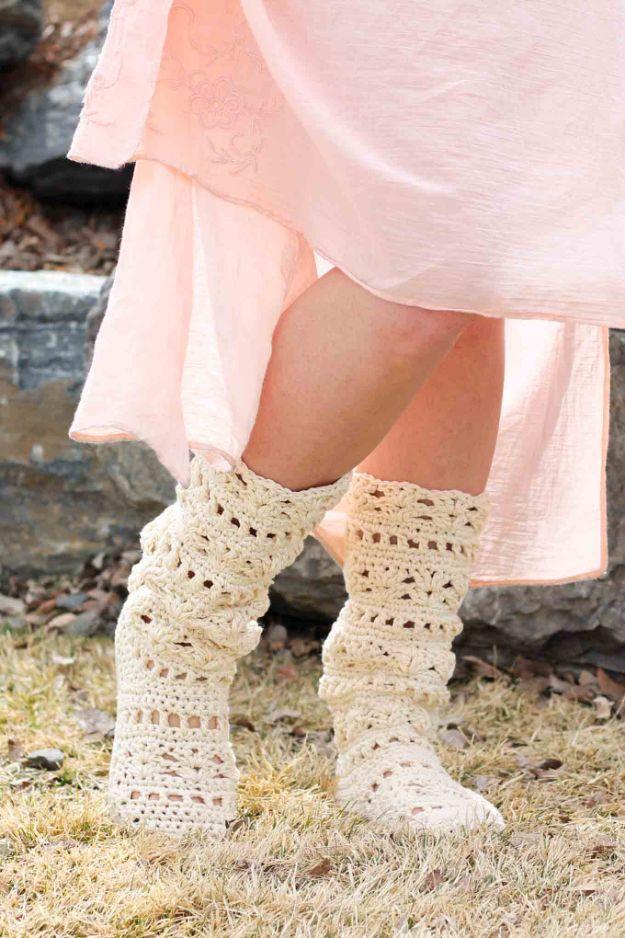
Lacy crochet boots built on a pair of flip flop soles, so the finished thing has a real sole under it rather than a slipper base. Two hooks do two jobs: a tiny 2.25mm B hook, or whatever fits through the holes you punch, to attach the crochet to the flip flop, then a 5mm H hook for the boot itself. It takes roughly four skeins of Lion Brand 24/7 Cotton, about 744 yards, with a size 9 sample using nearer 625. The pattern is free on the page, with a paid ad free PDF and a printable hole punching guide if you want it.
Get the full tutorial at Make and Do Crew.
10. Fur Boot Covers
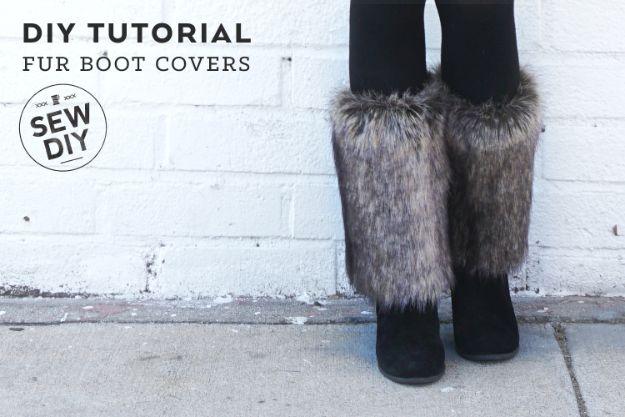
Faux fur tubes with elastic at the top, which is genuinely all they are, and they came out of the fur left over from a vest. The measuring is the whole pattern: measure your leg where you want the top of the cover to sit, add seam allowance plus an inch or two of ease, decide the height, add half an inch, and cut two pieces of fur to those numbers. Elastic is cut to the leg circumference plus half an inch, overlapped and stitched into a ring, then zig zagged to the top while you stretch it to fit. Make them taller than you think. Short ones slide down.
Get the full tutorial at Sew DIY.
11. Easy DIY Boot Toppers from a Sweater
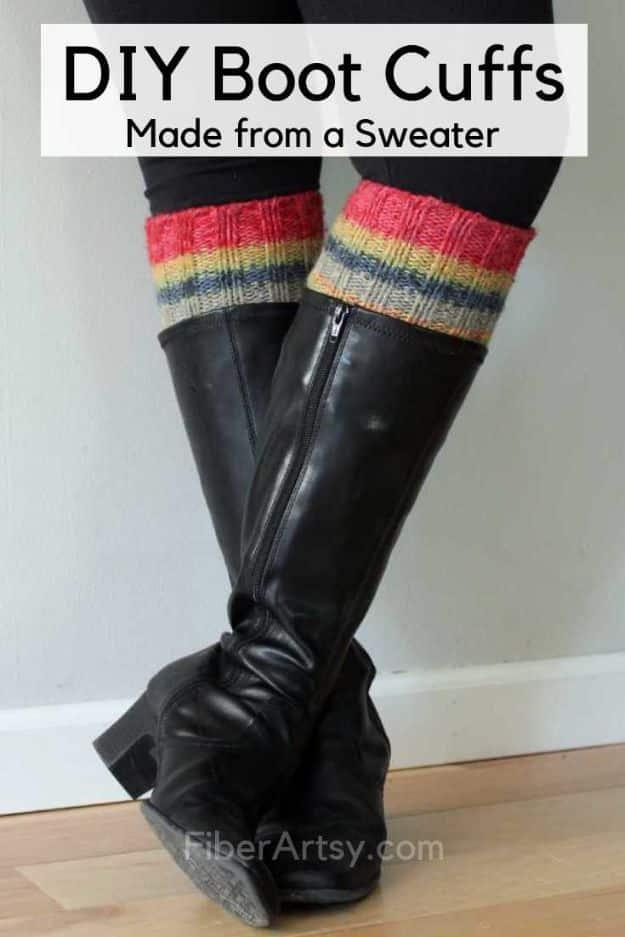
Two sleeves off a thrift store sweater, and that is the entire materials list. Length is up to you, but the part that folds over the boot needs to be at least three or four inches or it looks like an accident; the pair shown runs about twelve inches total for tall boots. Cut each sleeve roughly two inches longer than the finished size so you have room if the knit starts to ravel. Pin your sewing line first, then stitch right around the sleeve, and take care to catch only one layer. Check the sleeve is not too tight before you cut anything.
Get the full tutorial at FiberArtsy.
12. Rain Boot Flower Arrangement

Two small rain boots, two small Mason jars and a length of ribbon, which is about as fast as a centerpiece gets. Drop a jar into each boot, clip the pair together with a large clip so they stay put, tie the ribbon around both and then start arranging. The one instruction not to skip is the order: work out the height and placement of every stem before any water goes into the jars, because rearranging afterwards is how the water ends up inside the boots. The version shown was made for an April Showers baby shower, and the boots double as a gift for the mother.
Get the full tutorial at Giggles Galore.
13. Easy Boot Shapers
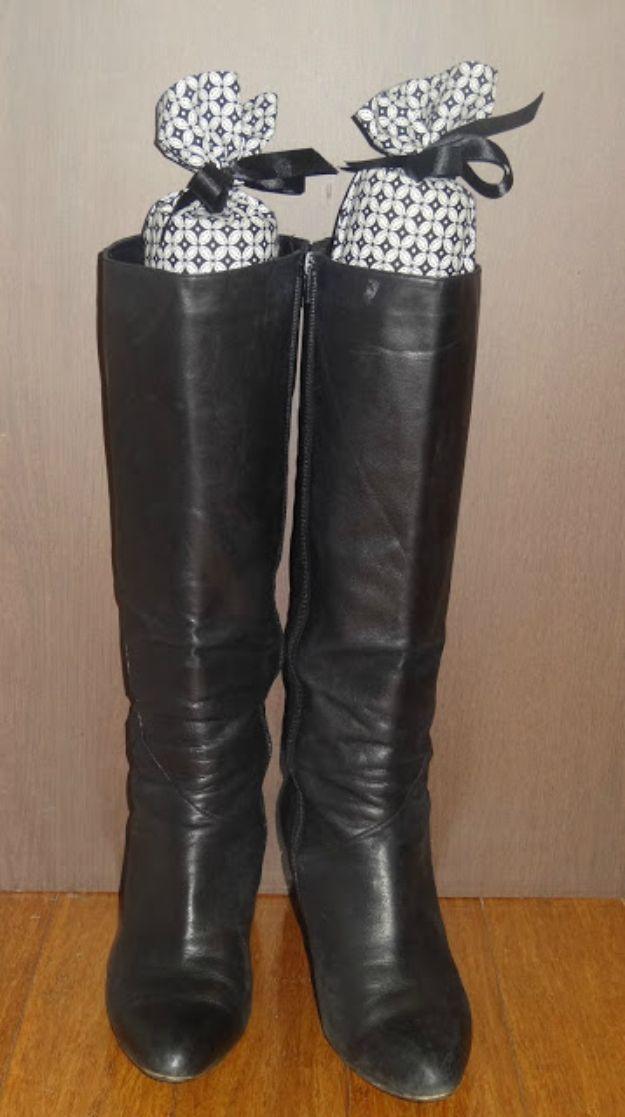
A pool noodle, some fabric and a bit of ribbon, and a pair of tall boots stops flopping over in the closet. Cut the noodle to suit the boot, forty centimetres in the pair shown. Cut two fabric pieces twenty five centimetres wide by the noodle length plus ten, fold each one in half with the right side inward, sew across the bottom and up the side, then turn it and press. Slide the noodle in, tie ribbon around the top. Keep the selvedge at the top edge and you never have to hem it, which is exactly the kind of shortcut worth passing on. Under thirty minutes.
Get the full tutorial at The Old Fat Hen.
14. DIY Boot Stands
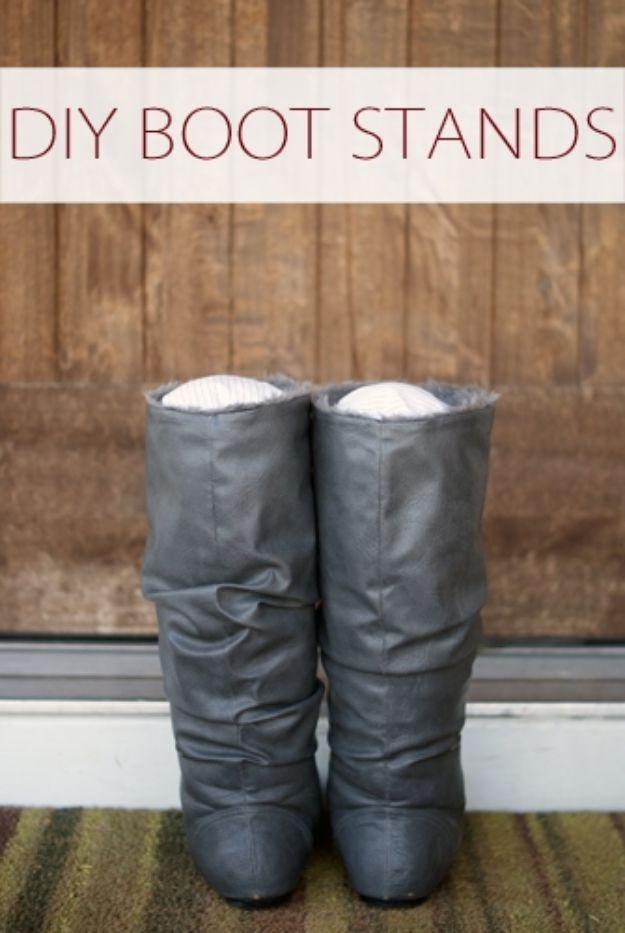
Padded fabric tubes that slide down inside tall boots and hold the shaft straight, so it never creases across the ankle. The pattern is four circles and two rectangles. Cut the circles four inches across plus about half an inch of seam allowance, tracing round a five inch bowl or a compass set to two and a half inches, and cut the rectangles thirteen by seventeen. Pin a circle to each short end of a rectangle, right sides together, curving the fabric round as you go, then sew the long edges shut leaving a two inch gap. Turn it out, stuff it with batting and stitch the gap closed.
Get the full tutorial at Life Your Way.
15. Mod Podge Star Wars Boots
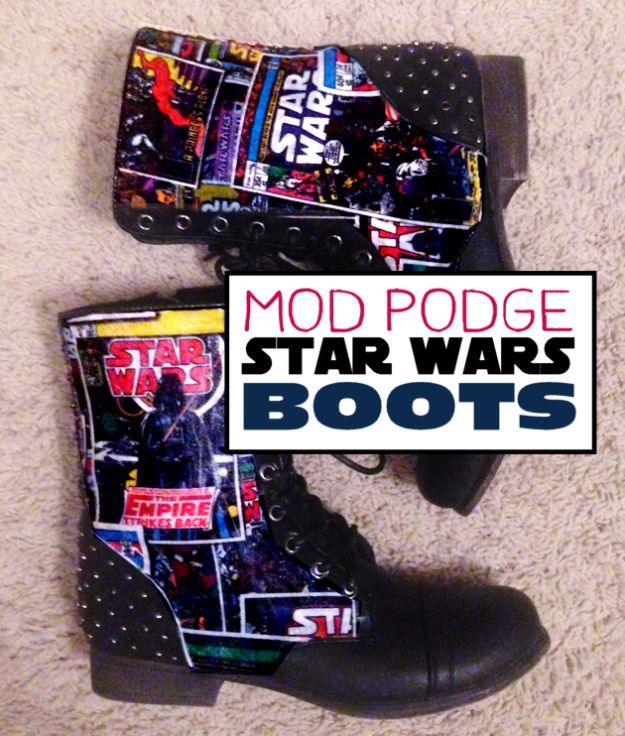
Printed cotton decoupaged straight onto leather combat boots, and the supply list really is two things plus the boots. Lay paper over the panel you want to cover and trace it, then cut the fabric slightly larger so you have something to trim back for a clean fit. Coat the boot with Mod Podge, lay the fabric down, then coat over the top of it, and build up several thin coats with drying time in between rather than one thick one. One warning the maker repeats twice and is worth repeating again: Mod Podge is not waterproof, so these are not the boots for a wet day.
Get the full tutorial at Craft Your Happiness.
16. Festive Pom Boot Cuffs
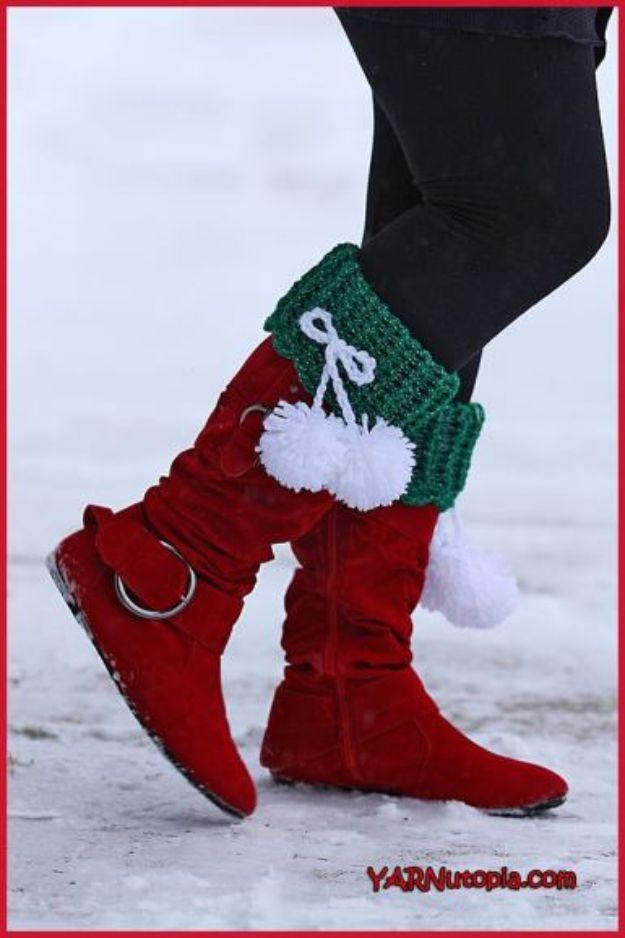
Reversible crochet cuffs in green and silver with white pom poms dangling off them, finishing about six and a half inches long and twelve inches around. Chain 36, or any even number that fits your calf, slip stitch into a ring and work double crochet all the way round. From there it is fifteen rounds alternating front post and back post double crochet, which is what produces the deep rib, and the last round adds shells and single crochets for a scalloped edge. Four pom poms and two chains of forty finish it. Roll them down for casual, pull them up for less so.
Get the full tutorial at YARNutopia.
17. Patch Leather Boots
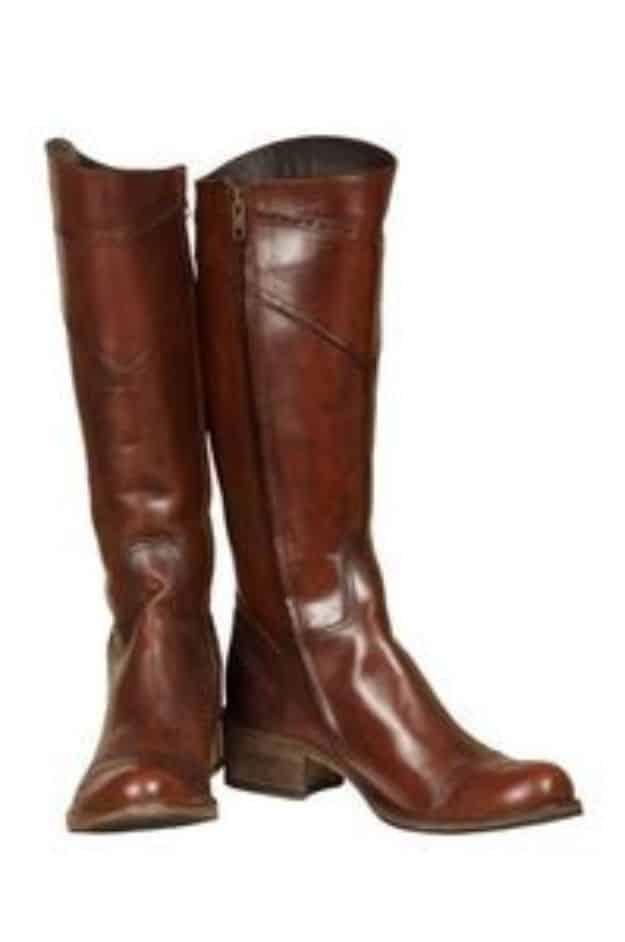
A hole in a good pair of leather boots is a repair, not a funeral, and a leather patch kit costs a fraction of replacing them. Clean the boots with a damp rag first, or a leather cleaner and conditioner if they are properly grubby, and let them dry all the way through, because adhesive will not grip dirty leather. Cut the patch a little larger than the hole or tear on every side. Spread the adhesive evenly across the patch. Then the detail that decides how it looks: put the patch on the inside of the boot, or between the leather and the lining if you can reach, so it never shows.
Get the full tutorial at Our Everyday Life.
18. Unisex Crochet Slipper Boots
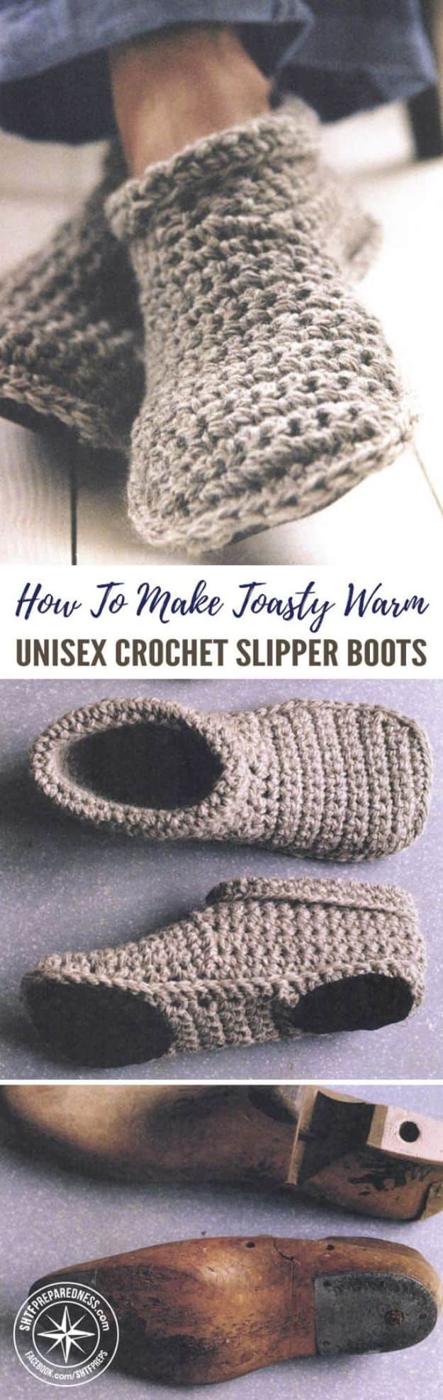
Thick crochet slipper boots that come up over the ankle, made to be worn indoors through a long winter when the floorboards are freezing by six in the morning. They work in adult, men’s and children’s sizes off the same idea, which makes them a sensible project when several people in one house need a pair. Chunky yarn in a plain oatmeal or gray looks more like something bought than a novelty slipper. Worth knowing before you click: this page is a short introduction and a link, and the pattern itself is a free PDF sitting on another site at the end of it.
Get the full tutorial at SHTF Preparedness.
19. Make Baroque-Inspired Boots
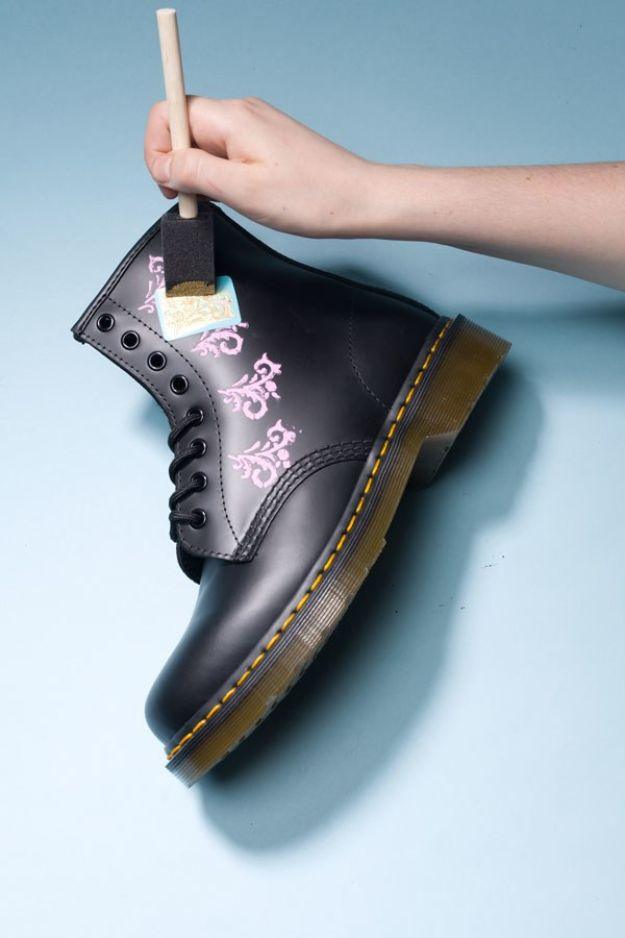
Reusable adhesive stencils and two colors of acrylic craft paint turn a pair of Dr. Martens into something baroque, and the technique is the only thing that matters. Dab, do not brush. Load a one inch foam brush lightly, tap the excess off on the side of the plate so it is never drippy, then stamp softly inside the stencil until the shape fills in. Brushing pushes paint under the edge and the outline goes fuzzy. Start beside the laces and work down, rinsing and drying the stencil between uses. Once a section dries, overlap the next stencil slightly, mirrored, so the pattern flows instead of repeating in blocks.
Get the full tutorial at Teen Vogue.