Life Hacks
23 DIY Flooring Projects That Could Transform The Home
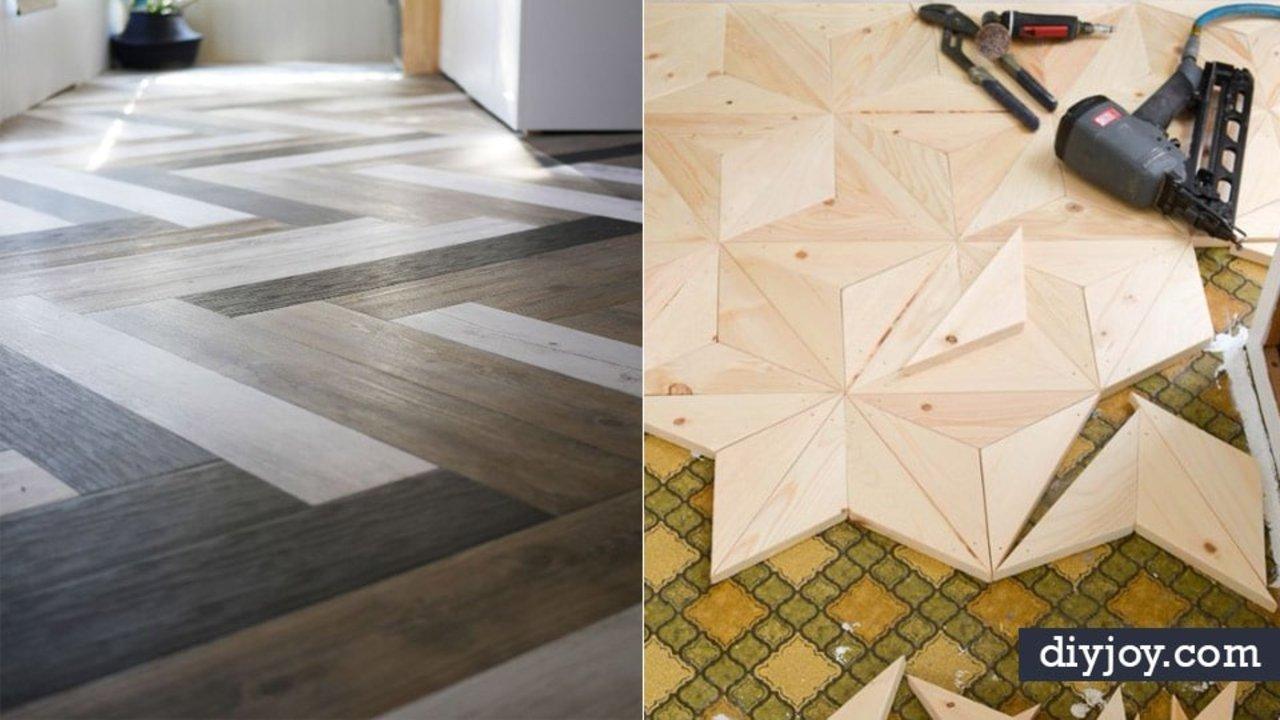
DIY flooring projects on a budget: plywood planks, stenciled concrete, peel and stick vinyl, a penny floor and a paper floor for fifty cents a foot.
New floors are the single most expensive thing on most people’s wish list and the single biggest change to a room, which is a deeply annoying combination. So here are 23 DIY flooring projects that get around it. Some of them are proper installations you could live on for twenty years, laminate, wide plank pine, heated tile under porcelain. Some of them are paint and a stencil over the ugly vinyl you cannot afford to rip out yet. And one of them is brown craft paper glued down and sealed, which costs about fifty cents a square foot and genuinely looks like leather. Costs run from under a hundred dollars to a proper weekend budget, and the skill levels are all over the map.
1. DIY Laminate Flooring
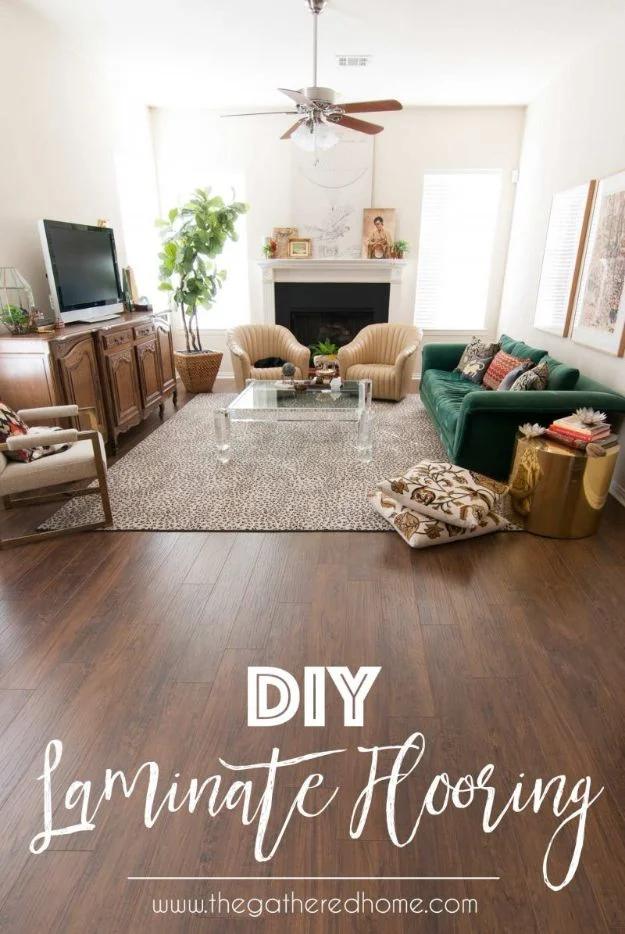
Dark walnut laminate planks floated over concrete subfloors, replacing the beige carpet through the whole main living area. The Gathered Home calls it the biggest project she had ever taken on, and the run-up is the useful bit: hardwood and engineered hardwood were out of budget, a glue-down install was out on smell alone, and the subfloors were concrete, which narrowed the field fast. Laminate cleared all three hurdles. The work itself was ripping carpet, prepping the slab and a crash course in several new power tools, paid for out of a summer of reselling vintage furniture.
Get the full tutorial at The Gathered Home.
2. DIY Geometric Wood Flooring for $80
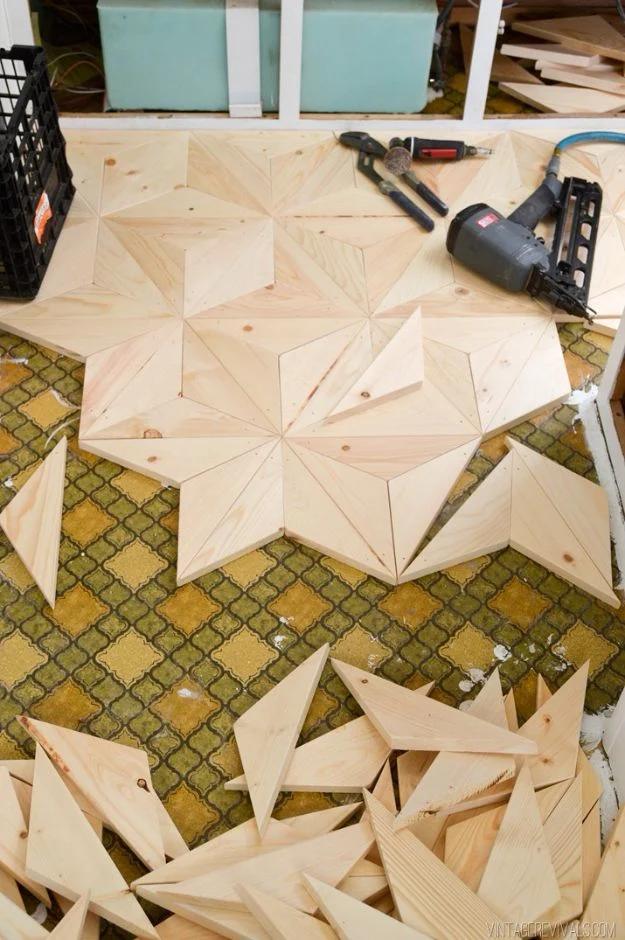
Hand cut pine triangles laid into six point stars over the old tile of a 1972 travel trailer, and the whole floor came to eighty dollars and two days. Vintage Revivals started out wanting hardwood in a herringbone pattern, then talked to the manufacturer and learned that hardwood hates the temperature swings a trailer lives through. Pine is not the most durable thing on the planet, which she says plainly, but in a space this small a completely crazy floor is actually manageable. The triangles need 30 and 120 degree angles, and on a miter saw a 30 degree cut means setting the blade to 60.
Get the full tutorial at Vintage Revivals.
3. DIY Kitchen Flooring
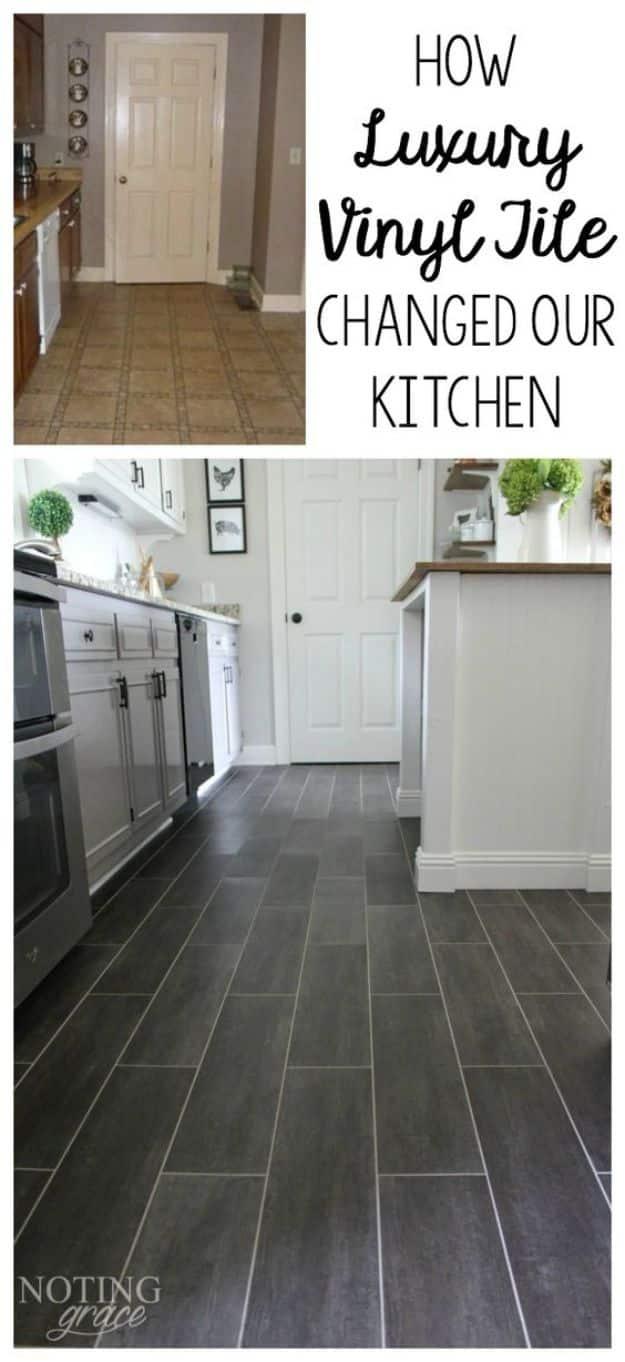
Luxury vinyl tile grouted like real tile, over a peachy faux mosaic linoleum that had been hated daily for years. Noting Grace did the whole kitchen and laundry in three days for under four hundred dollars, and the timings are the part worth copying: one evening to lay all the tiles, a few hours the next day to grout them. The kitchen alone is about 135 square feet. Grout is what sells it, because vinyl tile laid tight reads as vinyl and vinyl tile grouted reads as stone from three feet away. It started as a mudroom job and simply kept going.
Get the full tutorial at Noting Grace.
4. DIY Brown Paper Floor
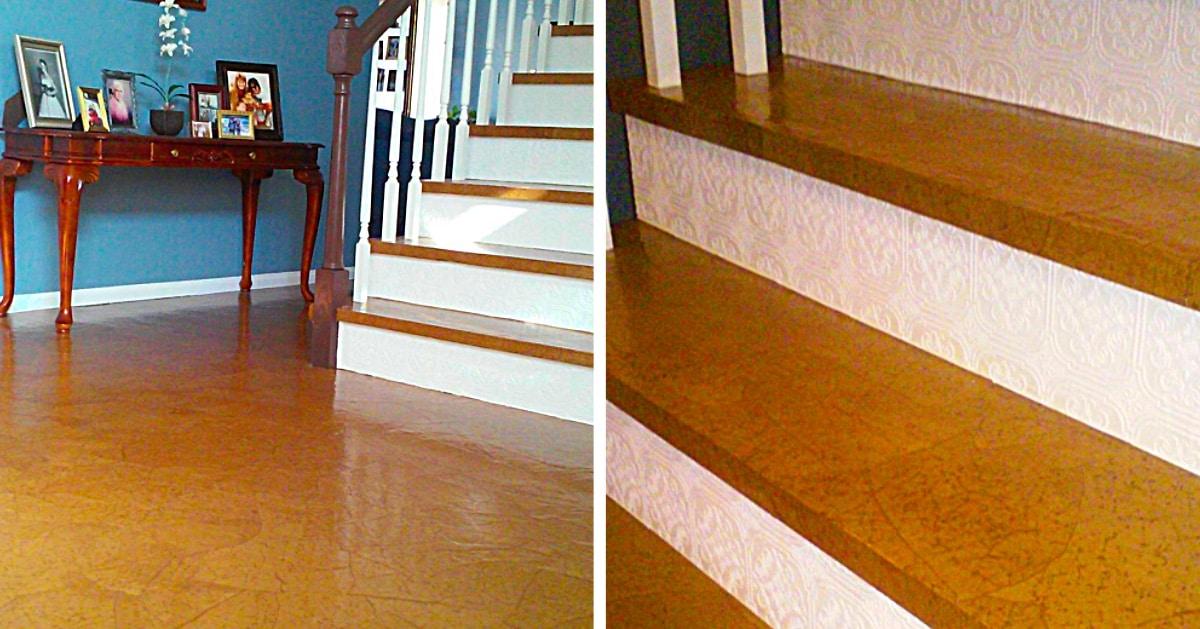
Torn brown craft paper glued down in overlapping squares and sealed under polyurethane, which comes out looking uncannily like tooled leather for about fifty cents a square foot. Tear the paper jaggedly into rough one foot squares and rumple it as you go, because the creases are what make the grain. Mix Elmer’s Glue All with a little water until it is the consistency of heavy cream, brush it on and lay the pieces down random and overlapping. There is no right or wrong pattern here, and that is the charm of it. Let the floor dry completely, then put down about five coats of polyurethane.
Get the full tutorial at Sueeye.
5. DIY Wide Plank Floors
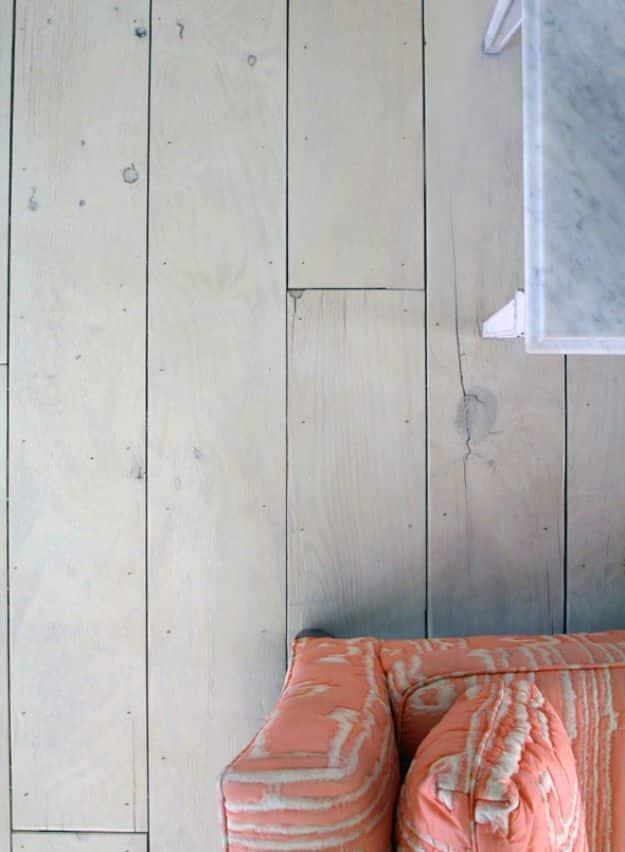
Sheets of plywood ripped lengthwise into eight inch planks, glued and nailed down and whitewashed pale, for about fifty cents a square foot. Jenny Komenda got exactly six planks out of every four by eight sheet, which is the detail that makes the sums work, because nothing is wasted and a sheet costs less than eighteen dollars. The planks go down on lines of subfloor adhesive with a brad every eight to ten inches along both edges, gaps anywhere from a thirty second of an inch to a quarter. The wash is one part water based primer to two parts water, two coats, then polyurethane over the top.
Get the full tutorial at Jenny Komenda.
6. Farmhouse Vinyl Plank Flooring
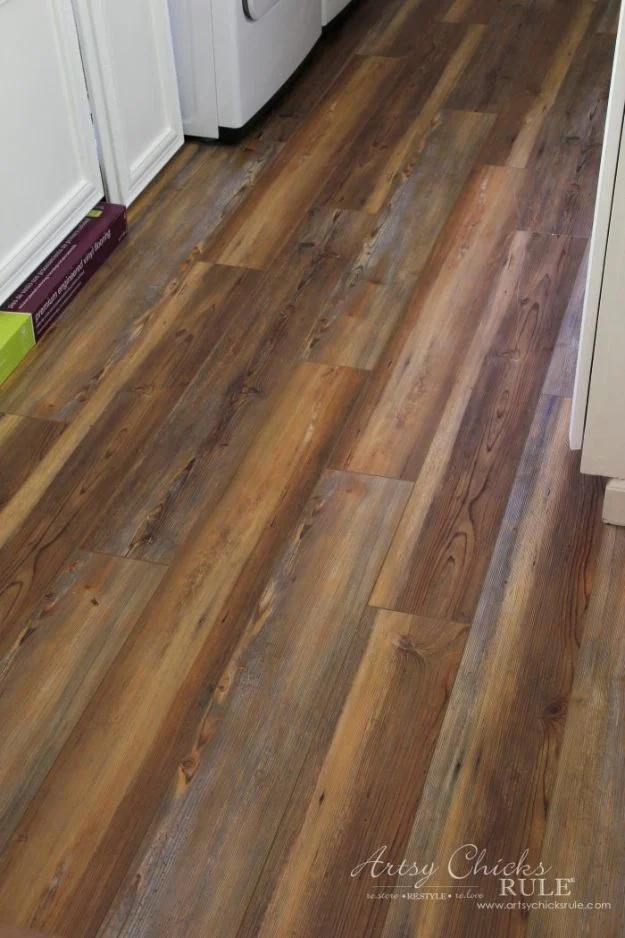
Rustic multi-toned vinyl plank in a laundry room, chosen specifically because it does not look fake, which is the whole problem with faux flooring. Artsy Chicks Rule went in wanting gray weathered planks and ended up with Blue Ridge Pine instead, because the room opens onto a family room floor and a walnut stained door and gray was going to fight both of them. That is the lesson worth stealing: match the floor to what it butts up against, not to the look you had in your head. She also had to drive to several stores to collect enough boxes, since the color sells out constantly.
Get the full tutorial at Artsy Chicks Rule.
7. Modern Vinyl Plank For Bathroom Floor
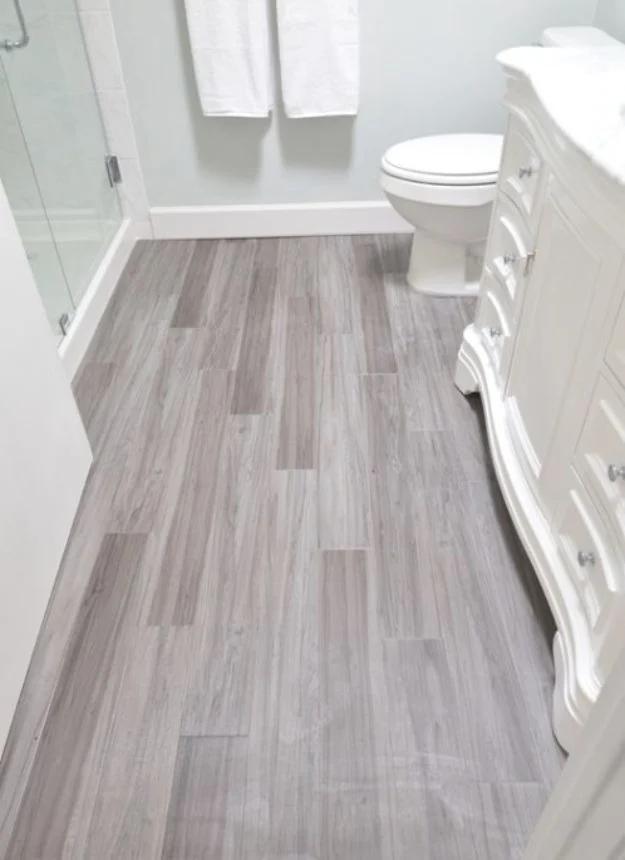
Gray wood look vinyl plank run through a small bathroom in a random offset pattern, exactly the way hardwood is laid rather than in the lazy repeating stagger most people default to. Centsational Style put it in as part of a full remodel done for resale, which is why the choices are deliberately broad rather than bold: no dramatic color, no statement wallpaper, nothing that narrows the buyer pool. Vinyl plank is the right call in a bathroom for a reason nobody mentions until it matters, which is that it does not care about standing water the way laminate and real wood do.
Get the full tutorial at Centsational Style.
8. DIY Farmhouse Plywood Flooring
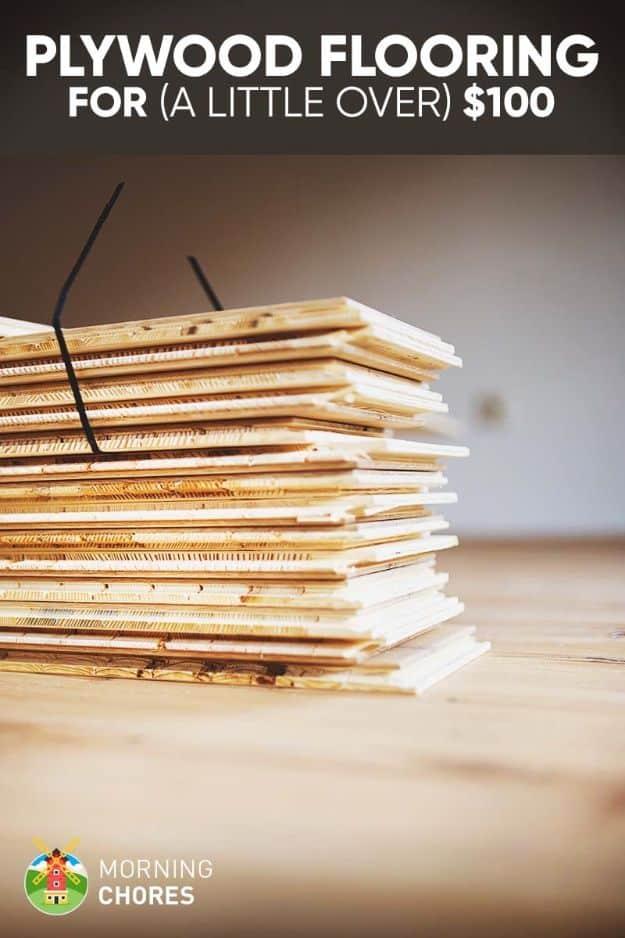
Sanded plywood ripped into planks and nailed down over the subfloor of a kitchen, for a little over a hundred dollars where laminate had been quoted at nearly six hundred. Morning Chores measured a kitchen at 15 by 8 feet, priced laminate, added the padding underneath and decided the numbers did not work on a thousand dollar whole-house budget. The choice that matters is which plywood: pre-sanded costs roughly double, rough cut costs half and buys you a great deal of sanding. Their earlier cheap laminate had cracked easily, which is what sent them looking for plywood in the first place.
Get the full tutorial at Morning Chores.
9. DIY Penny Flooring
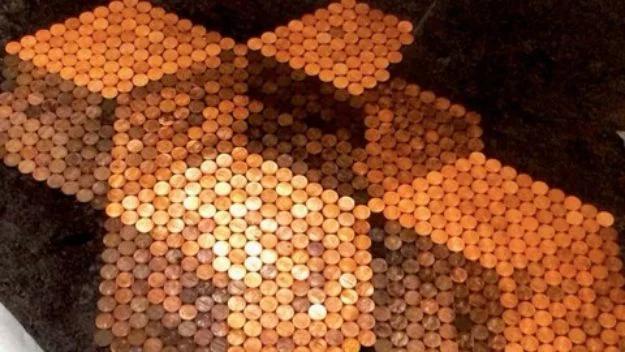
Hundreds of copper pennies laid face up and sealed under clear epoxy, which is the single most talked about floor on this whole list and one of the cheapest by square foot if you have a jar of change sitting around. The pennies go down in a pattern or at random depending on how much patience you have, and the epoxy pour is what turns a pile of coins into a hard, glossy, genuinely walkable surface. It works best in a small footprint, a powder room, an entryway, a bar floor, because the laying is slow and the effect is strongest where people stand still.
Get the full tutorial at Sueeye.
10. Painted Floor Tiles
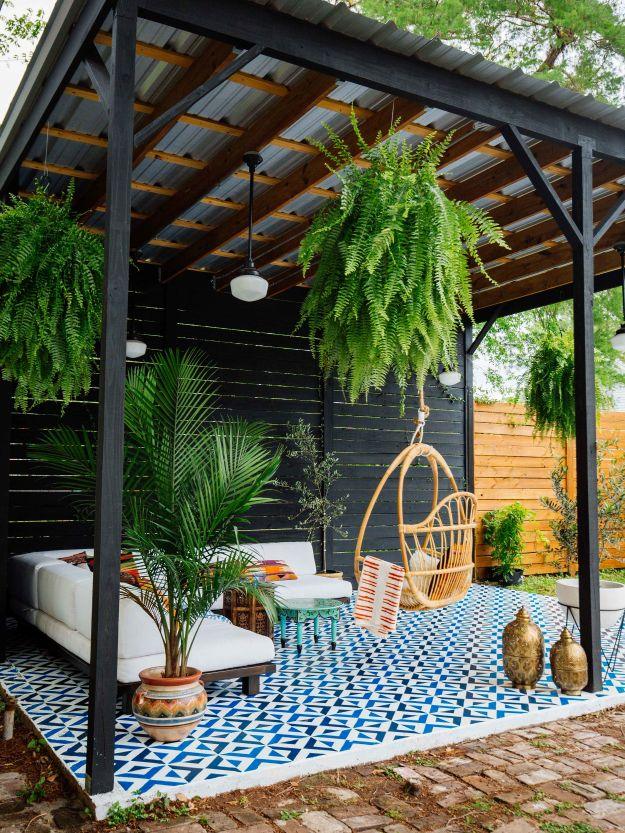
A 300 square foot concrete patio stenciled into blue and white Moroccan tile, on a floor that had gone grimy six months after it was poured. Old Brand New priced actual tile at about five thousand dollars, more than the patio itself had cost to build, and painted it instead over two full days. Two coats of paint through each stencil, wiping the back of the stencil after every single pass so the extra paint does not smear the floor, then four coats of clear matte sealer with an hour of drying between. The edges are not crisp, because old concrete is porous and bumpy, and it does not matter at all.
Get the full tutorial at Old Brand New.
11. DIY Plywood Floors
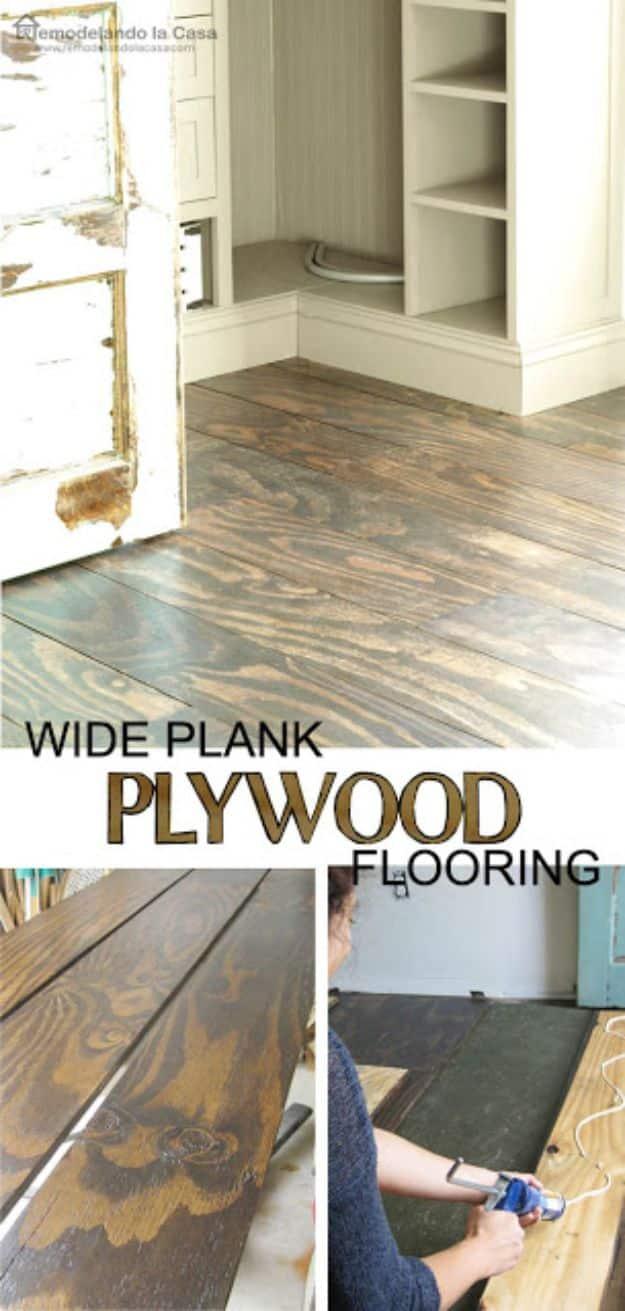
Plywood planks stained dark and glued and nailed over a second story bedroom subfloor, for a fraction of what real wood would have cost in the same room. Remodelando la Casa strips the carpet, pad, tack strips and every last staple first, then paints the bare subfloor dark so the gaps between planks read as shadow rather than as plywood. The planks go down perpendicular to the joists, glued in a squiggly line and nailed with two inch brads at the corners and along the sides. The spacer story is the useful one: nickels kept getting swallowed between boards, so quarters went in instead.
Get the full tutorial at Remodelando la Casa.
12. Stencil a Concrete Floor Like a Pro
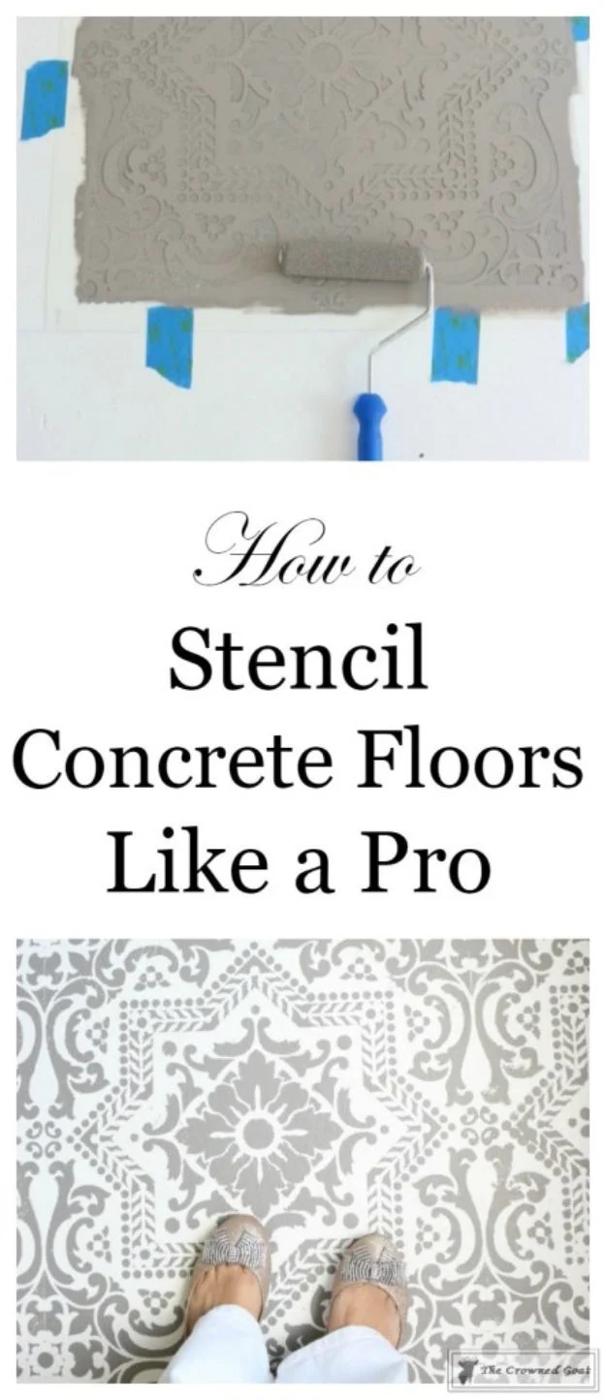
A bedroom’s bare concrete floor painted white and stenciled into a gray Portuguese tile pattern, which is the highest payoff project on this list for the smallest material cost. The Crowned Goat spent roughly four days on the base alone, cleaning, prepping and rolling two coats of Valspar Porch, Floor and Patio Paint in Ultra White, all of it before a single stencil went down. That sounds like a lot until you accept that the base coat is the whole foundation of the finish. The center of the room gets marked with a tape measure and a chalk reel first, so the pattern runs true rather than drifting toward one wall.
Get the full tutorial at The Crowned Goat.
13. Acid Stained Concrete Floor
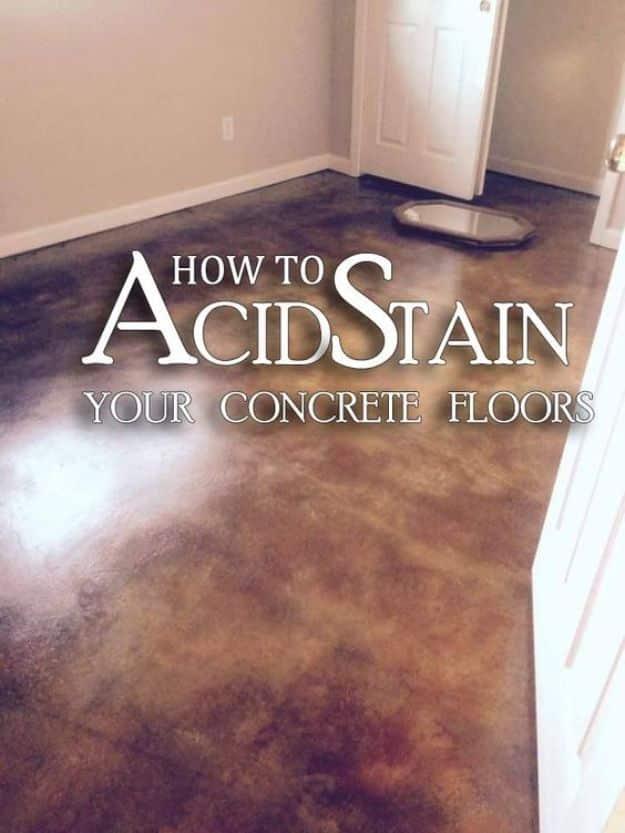
Acid stain worked into a bare concrete floor until it goes mottled brown and amber like polished stone, which is a chemical reaction rather than a coat of color sitting on top. Direct Colors describes it as a translucent, penetrating stain that slightly etches and permanently changes the color by reacting with the lime in the slab. Preparation is the whole job, because the stain simply cannot react through adhesive, paint, oil or old sealer. Expect a chalky residue as it dries, give it four to eight hours to develop, then neutralize it properly, because sealer will not bond to a floor you skipped that on.
Get the full tutorial at Direct Colors.
14. Paint Vinyl & Linoleum Floor With Stencils
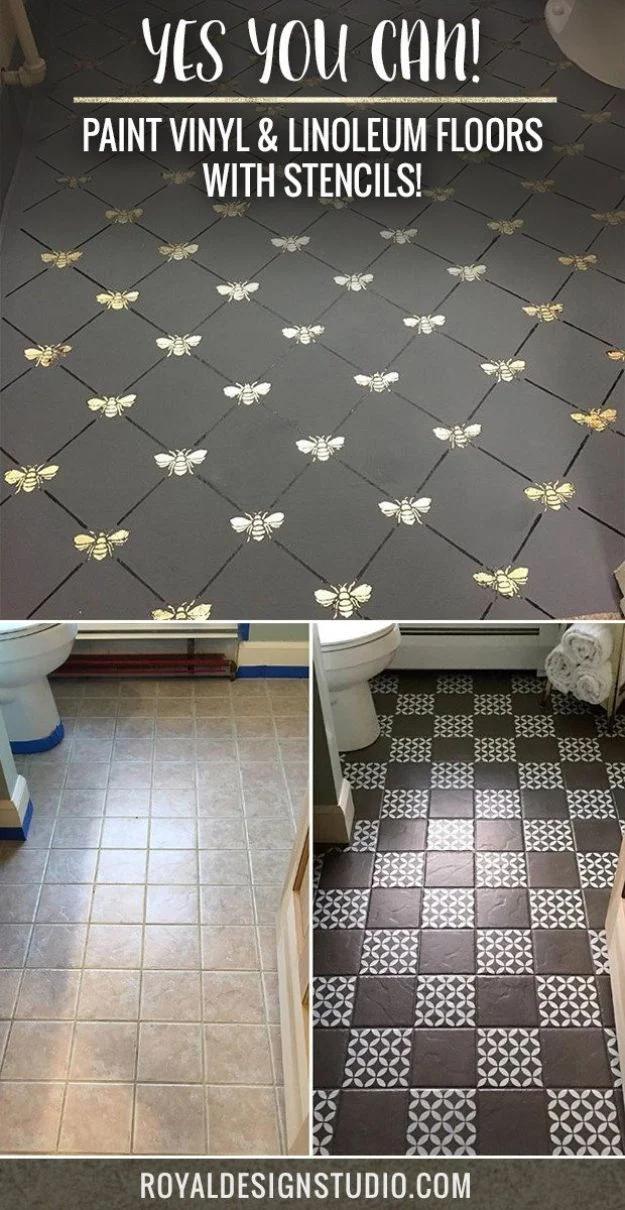
Old vinyl and linoleum floors painted and stenciled rather than torn out, which is the answer for everyone stuck living with an ugly floor while they save for a nice one. Royal Design Studio’s own framing is the sensible bit: ripping out vinyl is expensive and time consuming, and nobody wants to stare at something hideous for two years in the meantime. Paint and a stencil can be a temporary fix or a permanent one depending on how well you prep and seal. The examples run from gold bees scattered over charcoal squares to a full cement tile pattern faked across a bathroom.
Get the full tutorial at Royal Design Studio Stencils.
15. DIY Peel And Stick Vinyl Floors
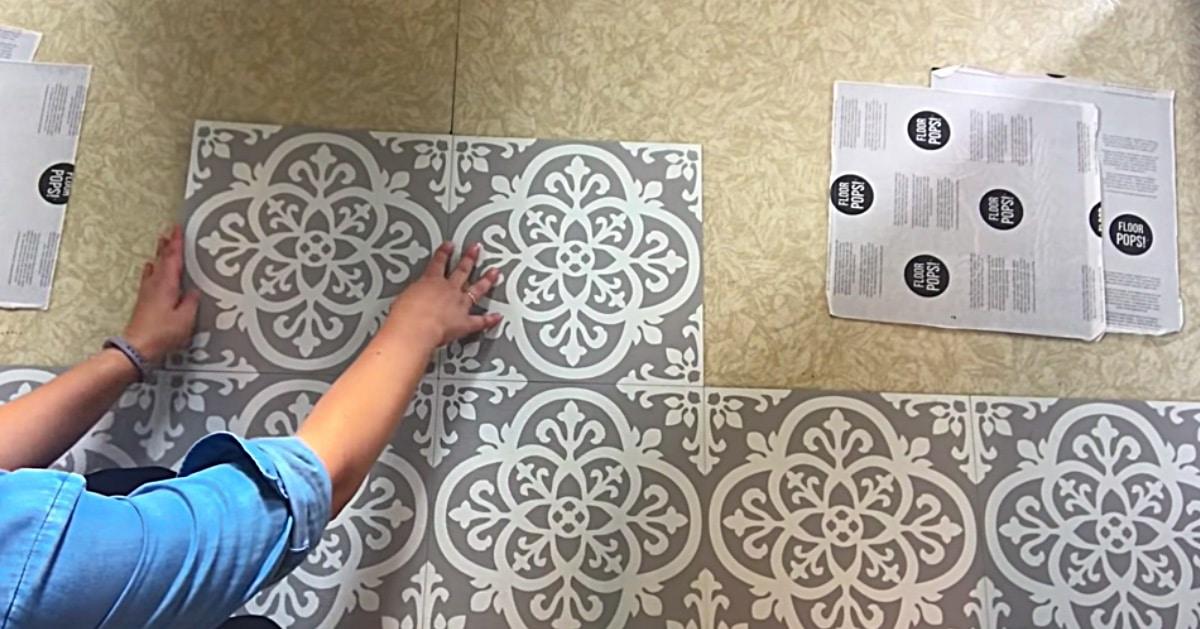
Peel and stick vinyl tiles laid straight over old linoleum, with no pulling up and no resurfacing, which is the whole reason this route wins in a kitchen. The tiles cut with a utility knife, so there is no saw and no wet cut involved at all. Start in the middle of the room rather than at a wall and work outward in groups of four, which is what keeps the pattern lining up and the joins even. Steam clean and disinfect the old floor first, because anything left under the adhesive will telegraph through within a week.
Get the full tutorial at Sueeye.
16. Install Laminate Flooring
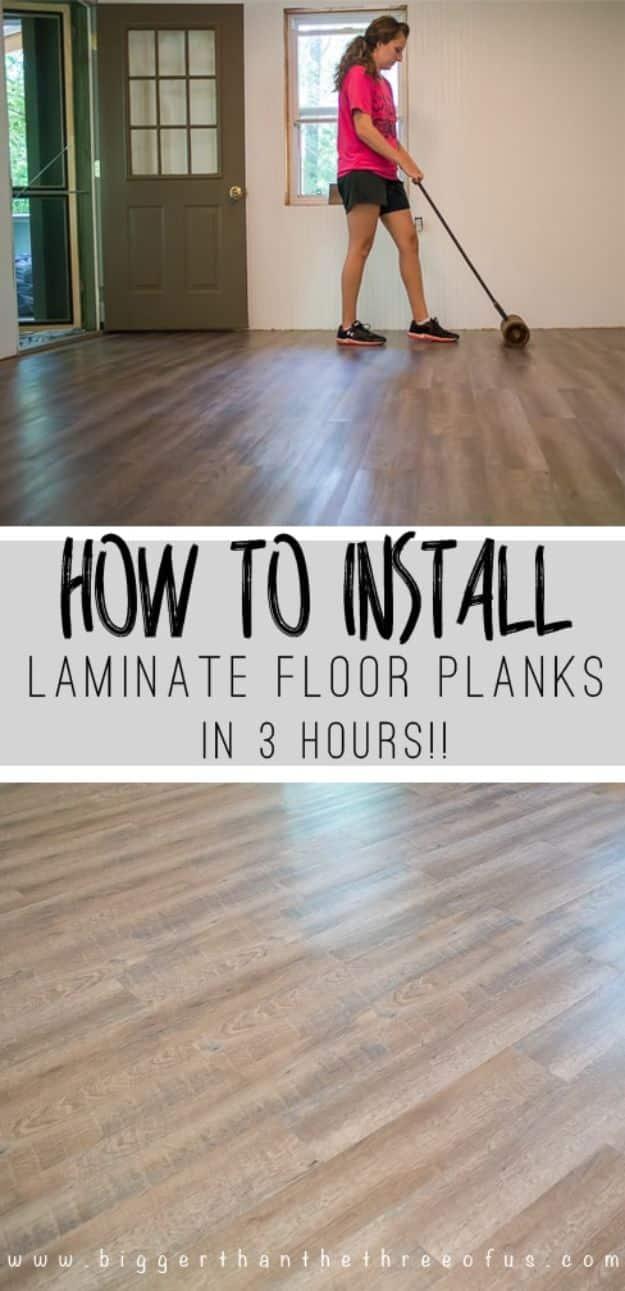
A whole cabin room of laminate planks laid in about three hours, which sounds like a boast until you read the method and realize it is a peel and stick product with no underlayment stage to slow it down. Bigger Than the Three of Us primes the swept subfloor, snaps a chalk line for the starting edge, then peels backings and lays planks with every arrow pointing the same way. Go back over them with a rubber mallet as you go. Cuts come from a paper cutter or a straight edge razor, and the whole floor gets a heavy duty roller run in both directions at the end.
Get the full tutorial at Bigger Than the Three of Us.
17. DIY Colored Paper Floor
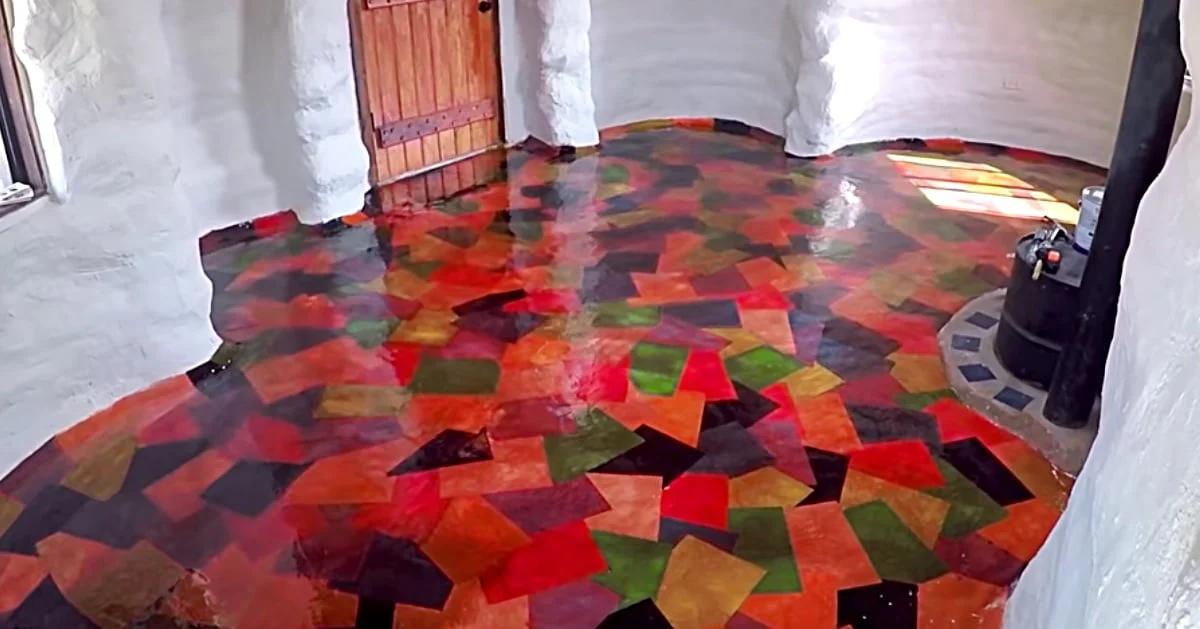
Construction paper in reds, greens, oranges and blacks glued down in overlapping shapes and flooded with epoxy, which turns a plain slab into something closer to stained glass for around fifty cents a square foot. Mix one part glue to three parts water in a wide flat bucket, then soak the paper a sheet at a time for about a minute before laying it. Stick the pieces down in a random overlapping pattern and brush more glue over as you go to work the bubbles out. Once everything is completely dry, brush stain over the whole floor, then seal it with epoxy, possibly two coats.
Get the full tutorial at Sueeye.
18. DIY Painted Kitchen Floor For $50
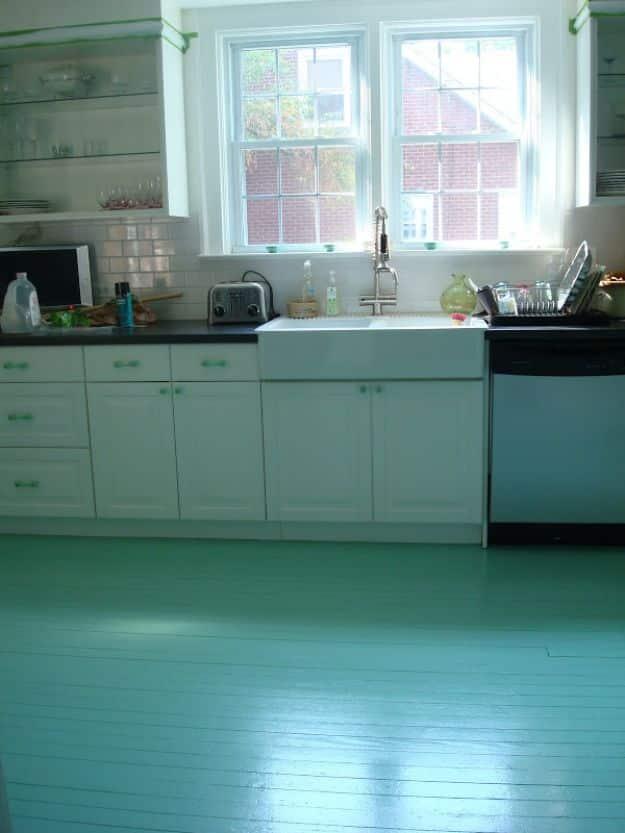
Plain kitchen floorboards painted a glossy sea green for about fifty dollars, in what Effortless Style calls one of the easiest projects they had ever done. The paint is the whole story. Valspar’s oil based porch and floor paint was the most recommended product and was not legally sold in New York, so Benjamin Moore Break-through went down instead: low VOC, tacky in about thirty minutes, recoatable within two hours, and hard as baked enamel once cured, at $44.99 a gallon in a custom color. Fill the dog-chewed holes with wood filler first, sand, then vacuum, and pull the painter’s tape while the paint is still wet.
Get the full tutorial at Effortless Style.
19. Install Heated Floors
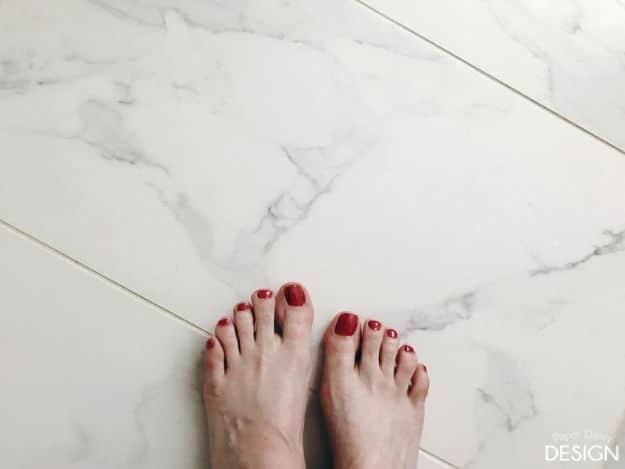
An electric floor warming system laid under bathroom tile, which Deeply Southern Home fairly calls the most luxurious part of a remodel that is completely invisible until you stand on it barefoot. The system is an uncoupling membrane, heating cables, power modules and a thermostat, and the membrane earns its keep twice over, because it also stops tile cracking as the substrate moves. Two warnings from someone on their second install: measure exactly when you order, because the cable length cannot be altered, and hire a certified electrician, since the system needs a dedicated circuit and testing with a meter most people do not own.
Get the full tutorial at Deeply Southern Home.
20. DIY Wide Plank Pine Floors
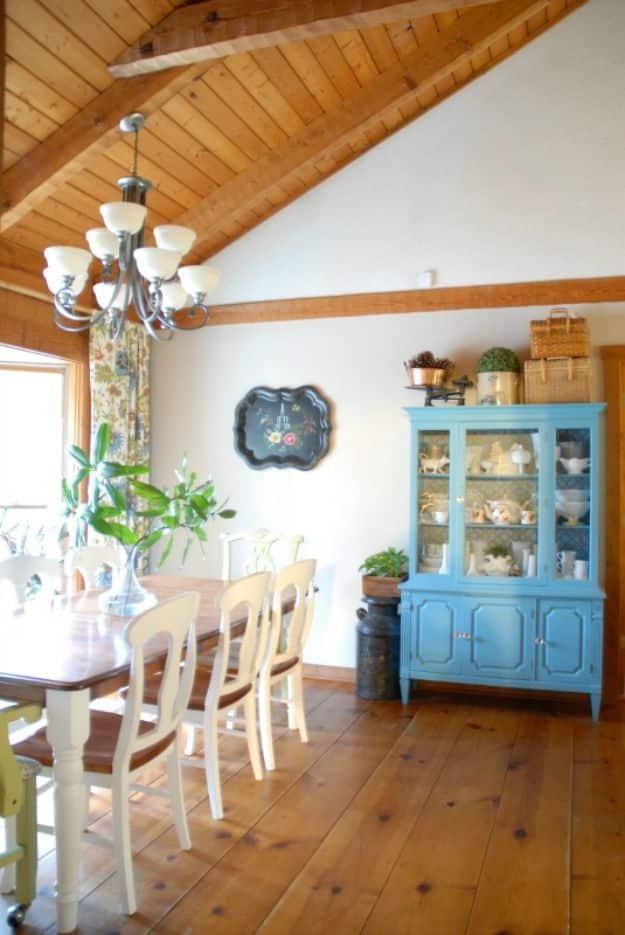
Twelve inch #3 grade Ponderosa pine boards top nailed straight down, sourced through a local wood supplier at a dollar a square foot. The Roots of Home replaced the flooring in a whole great room and kitchen with them, matching an original 1980s pine floor elsewhere in the house. Two pieces of hard-won advice come out of it. Let the boards sit in the room about two weeks to acclimate before a single nail goes in, and grade them yourself from best to worst first, marking every knot, warp and bad edge with blue tape, because halfway through the install every board starts to look identical and you will waste hours finding the defects again.
Get the full tutorial at The Roots of Home.
21. Small Balcony Makeover
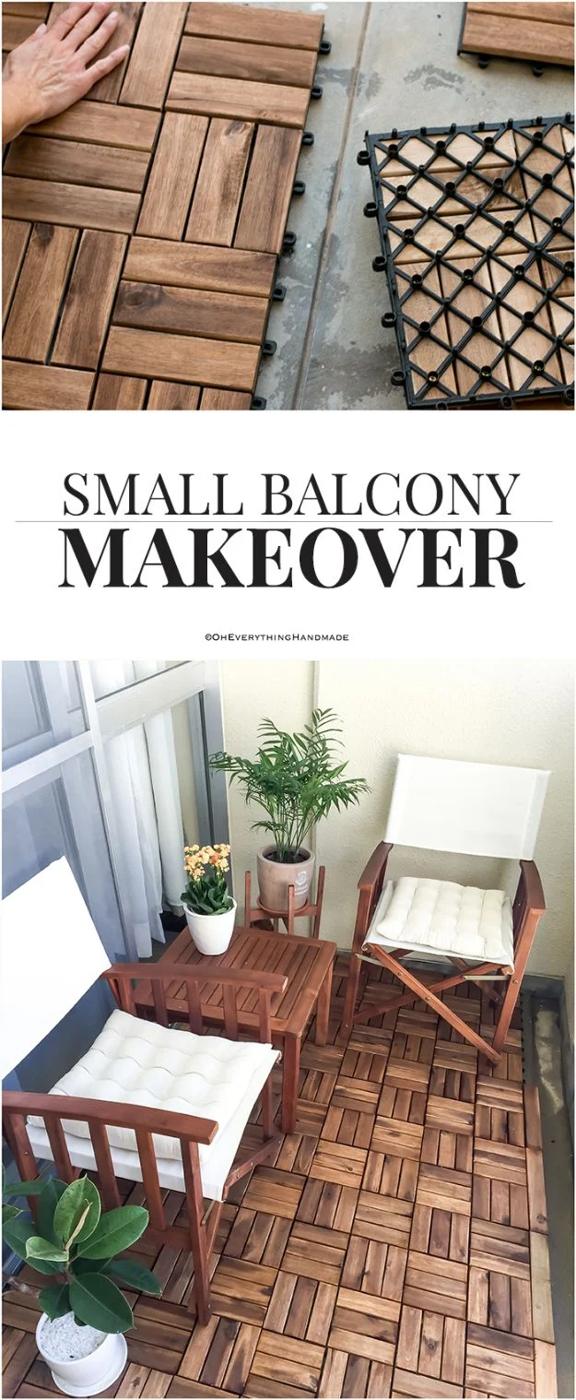
Interlocking wooden deck tiles clicked over a bare concrete balcony slab, which turned a spray painting area into the nicest spot in a military housing apartment for about two hundred dollars. The tiles are the entire project: they snap together over their own plastic grid and simply sit on top, no fixing, no adhesive, no permission needed from a landlord. Oh Everything Handmade bought hers at a local hardware store and notes they are also sold through Amazon and Ikea. Cleaning is a bucket of warm soapy water and a scrub brush, and you rinse by tipping clean water straight over the lot.
Get the full tutorial at Oh Everything Handmade.
22. Herringbone Bathroom Tile Floor
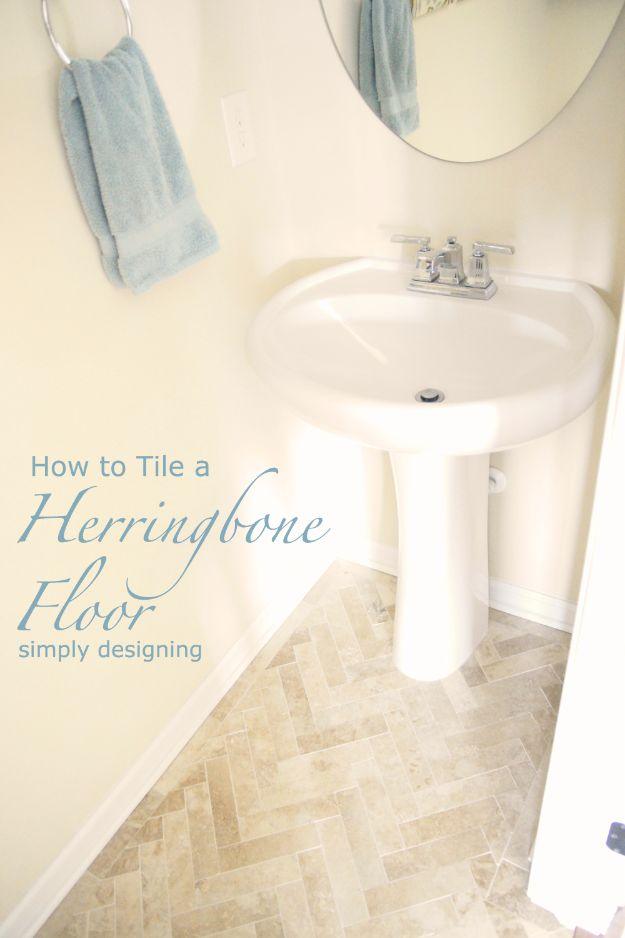
Rectangular travertine tile laid in a herringbone across a downstairs half bath, replacing perfectly decent linoleum that simply looked wrong next to the wood floors it met at the door. Simply Designing calls it labor intensive and slow and then says it was completely worth it, which is the honest summary of every herringbone floor ever laid. The prep is where the real decision sits: on a wood subfloor you have to buy and install concrete backer board before any tile goes down. A mortar mixing paddle for a power drill and three separate buckets, for mortar, grout and water, make the day far less miserable.
Get the full tutorial at Simply Designing with Ashley.
23. Faux Cement Tile Painted Floors
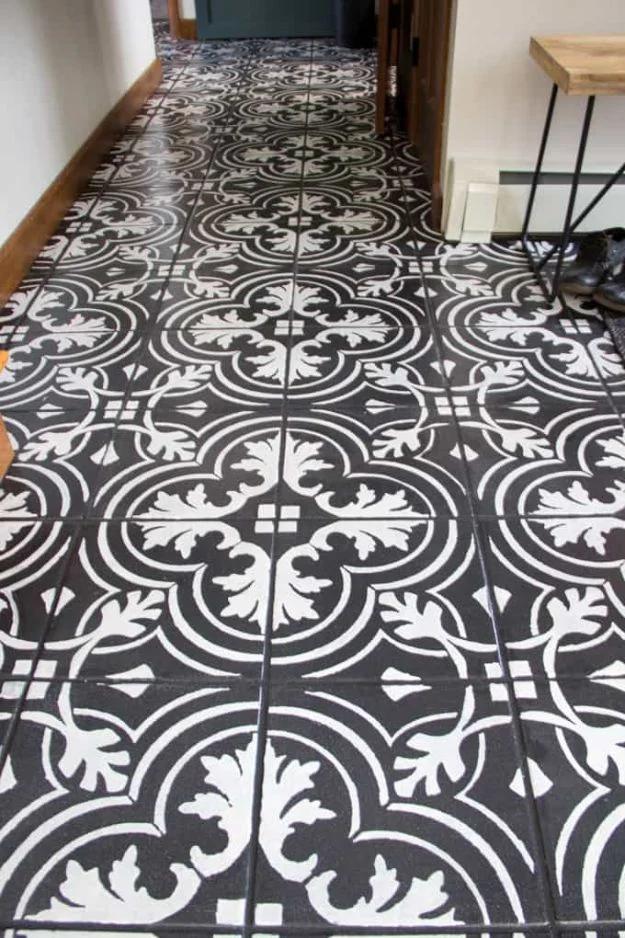
A dated peachy tile floor painted over and stenciled into an ornate black and white cement tile pattern, running from the entry all the way into the mudroom. Bright Green Door rolled one coat of a blue toned chalk style paint, decided it was too blue and mixed black into it, then very nearly stopped there because the dark floor looked like slate. The stencil is a custom one, made to the exact twelve inch size of the existing tiles, and the pattern is rolled on in a soft buff rather than white. Then six coats of sealer, in stages, as each section was finished.
Get the full tutorial at Bright Green Door.