
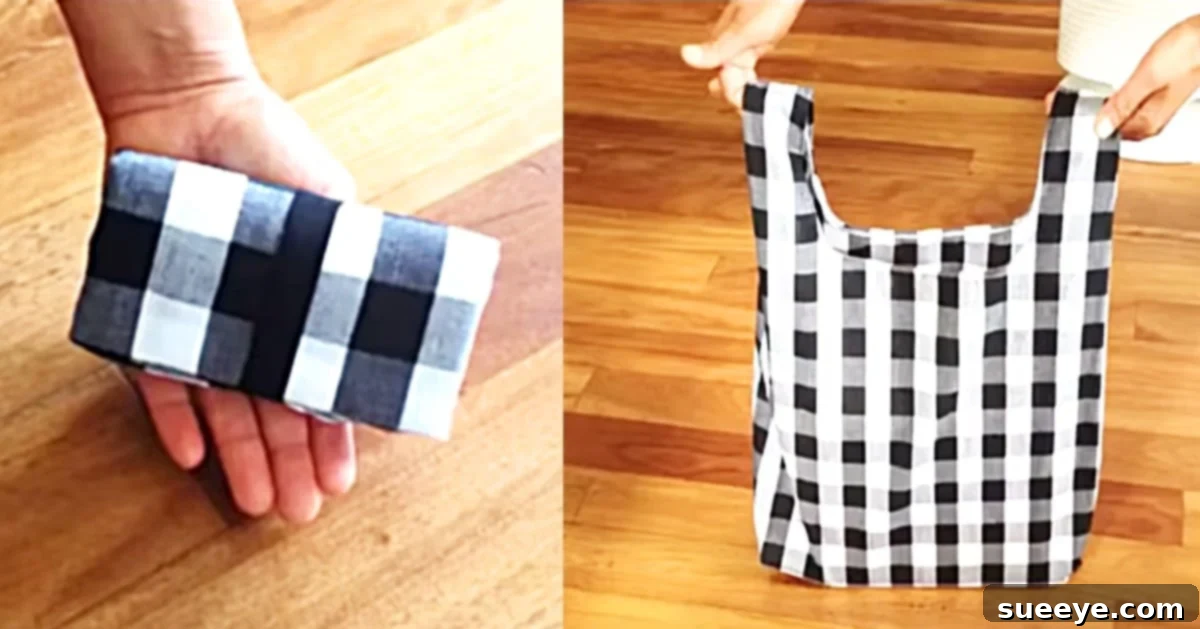
How to Sew a Stylish Reusable Fabric Grocery Bag: An Eco-Friendly DIY Guide
Embrace sustainable living and add a touch of personal style to your shopping routine by crafting your very own reusable fabric grocery bags. These handmade totes don’t just reduce your environmental footprint; they also offer a chic, distinctly European aesthetic and remarkable durability far superior to flimsy plastic alternatives. Whether you’re a seasoned seamstress or just starting your sewing journey, creating these practical and fashionable bags is surprisingly straightforward.
We recently discovered an exceptional video tutorial by the Ezi2make Channel on YouTube, showcasing a design that instantly captured our hearts. This particular reusable tote bag is demonstrated using a medium-weight quilting cotton, with edges neatly finished using a serger to prevent fraying. However, fret not if you don’t own a serger; a standard sewing machine with a simple zig-zag stitch will achieve excellent results, ensuring your bag is just as functional and long-lasting.
Beyond their practical utility, handmade reusable bags make wonderful gifts, personalized keepsakes, or even a fun, creative project for a weekend afternoon. Dive into this comprehensive guide where we’ll walk you through the process, provide essential tips, and inspire you to customize your very own collection of eco-friendly shopping companions.
Why Make Your Own Reusable Fabric Grocery Bag?
In an age increasingly focused on sustainability, making your own reusable fabric grocery bags offers a myriad of benefits that extend far beyond simply carrying your groceries. Here’s why this DIY project is a worthwhile endeavor:
- Environmental Impact: The most significant benefit is reducing plastic waste. Billions of single-use plastic bags end up in landfills and oceans each year, harming wildlife and polluting our planet. By switching to reusable fabric bags, you actively contribute to a cleaner, healthier environment.
- Cost-Effectiveness: While there’s an initial investment in fabric and supplies, making your own bags often proves more economical in the long run than repeatedly purchasing reusable bags from stores, especially if you have a stash of fabric already.
- Personalization & Style: This is where your creativity shines! You get to choose the fabric, color, pattern, and even add embellishments. Create bags that perfectly match your style, reflect your personality, or complement specific outfits. Forget boring, generic bags – yours will be unique.
- Durability & Strength: Homemade fabric bags, especially when made with sturdy materials like quilting cotton, canvas, or denim, and properly sewn with reinforced seams, are far more durable than most store-bought options. They can withstand heavy loads and countless trips to the market.
- Versatility: These bags aren’t just for groceries. They’re perfect for farmers’ market visits, beach trips, carrying books, gym clothes, craft supplies, or as an everyday tote. Their multi-purpose design makes them incredibly useful.
- Gift Giving: A handmade reusable bag filled with goodies makes a thoughtful and practical gift for friends, family, or colleagues. It’s a gift that keeps on giving, encouraging others to embrace sustainable habits.
- Satisfaction of DIY: There’s immense satisfaction in creating something with your own hands. The process of choosing fabric, cutting, sewing, and seeing your project come to life is incredibly rewarding.
Materials For Your Reusable Fabric Grocery Bag
Gathering your materials is the first exciting step in bringing your eco-friendly vision to life. This project requires basic sewing supplies, making it accessible even for beginners. Here’s a detailed list:
- Fabric:
- Approximately one yard (or meter) of medium-weight fabric.
- Recommended Types: Quilting cotton (as seen in the tutorial), canvas, duck cloth, denim, linen, or even some upholstery fabrics are excellent choices due to their durability and ability to hold shape. Consider fabrics that are washable and have a tight weave to prevent stretching.
- Pre-washing: Always pre-wash and dry your fabric before cutting and sewing. This prevents shrinkage later on and ensures your finished bag maintains its size and shape.
- Sewing Machine: A standard household sewing machine capable of straight stitches and, ideally, a zig-zag stitch.
- Serger Machine (Optional): If you have access to one, a serger (or overlocker) will create professional-looking, durable seam finishes that prevent fraying very effectively. If not, a zig-zag stitch on your regular sewing machine is a perfectly adequate alternative.
- A Pair of Fabric Scissors: Invest in a good pair of sharp scissors dedicated solely to cutting fabric. This ensures clean, precise cuts which are crucial for successful sewing projects.
- Tailor’s Chalk or Fabric Marker: Essential for accurately marking your fabric for cutting and sewing lines. These marks are usually temporary and will disappear or wash out.
- Thread: High-quality polyester all-purpose thread that matches or complements your fabric color. Polyester thread is strong and durable, ideal for a bag that will see frequent use.
- Sewing Pins or Fabric Clips: To hold fabric pieces together securely before sewing. Fabric clips are particularly useful for thicker fabrics that pins might struggle with.
- Iron and Ironing Board: Crucial for pressing seams open or flat, which gives your finished bag a crisp, professional appearance.
- Optional: Rotary Cutter and Cutting Mat: For experienced sewers, these tools can make cutting fabric faster and more precise.
Directions: Crafting Your Eco-Chic Tote
Creating this cute and highly functional grocery bag is a rewarding process, broken down into a few manageable steps. The Ezi2make Channel’s video tutorial serves as an excellent visual guide, and we’ll elaborate on the key stages here. You’ll be surprised at how quickly your basic pattern transforms into a practical accessory.
Step 1: Fabric Preparation and Cutting
Begin by ensuring your chosen fabric is pre-washed, dried, and thoroughly ironed. This crucial step prevents any future shrinkage and removes wrinkles, making it much easier to cut and sew accurately. The Ezi2make tutorial features a very simple cutting pattern, typically involving a large rectangle for the main body of the bag and possibly separate pieces for handles (though some designs integrate handles directly into the main body). Follow the video’s specific cutting instructions carefully for dimensions. Precision here ensures your bag comes together neatly.
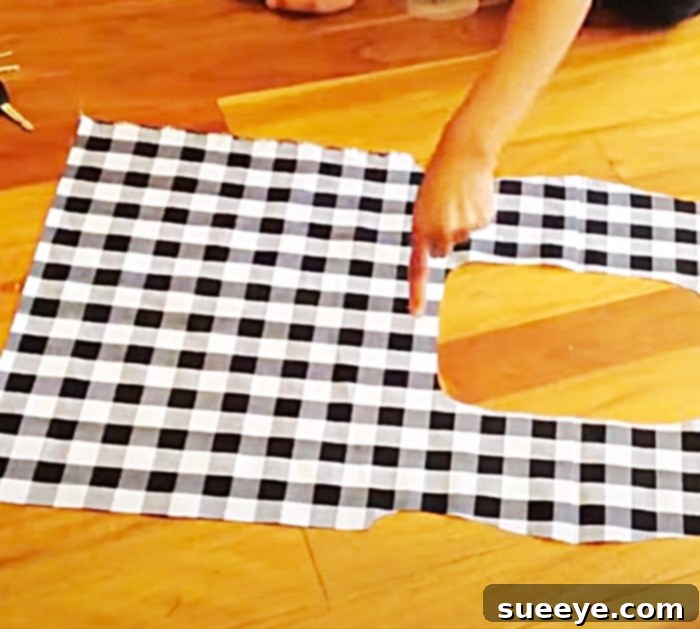
Once your fabric is cut, it will likely resemble the basic pattern pieces shown in the video. Use your tailor’s chalk or fabric marker to transfer any necessary markings from the pattern onto your fabric, such as seam allowances or folding lines. Remember, straight and accurate cuts are the foundation of a well-made bag.
Step 2: Finishing All Raw Edges
This is a critical step for durability and preventing your fabric from fraying over time, especially since reusable bags undergo frequent washing and heavy use. You will proceed to finish all raw edges of your cut fabric pieces.
- Using a Serger Machine: If you own a serger, this is the ideal tool for creating neat, professional, and robust finished edges. Simply serge all raw edges according to your machine’s instructions. This creates a beautifully bound edge that completely prevents fraying.
- Using a Standard Sewing Machine (Zig-Zag Stitch): For those without a serger, a zig-zag stitch on your regular sewing machine works wonderfully. Set your machine to a medium-width and medium-length zig-zag stitch. Sew along each raw edge, ensuring the needle swings just off the edge of the fabric on one side, encapsulating the raw edge within the stitch. This secures the fibers and prevents them from unraveling. Alternatively, you can also use a mock overlock stitch if your machine has one.
Step 3: Assembling the Bag Body
With all edges secured, you’re ready to sew the main body of the tote bag. Following the tutorial, you will typically place the fabric pieces “right sides together” – meaning the printed or “good” sides of the fabric are facing each other. Pin or clip these pieces securely along the seams that will form the sides and bottom of your bag. Using a straight stitch, sew these seams, adhering to the seam allowance specified in the tutorial (usually 1/2 inch or 5/8 inch).
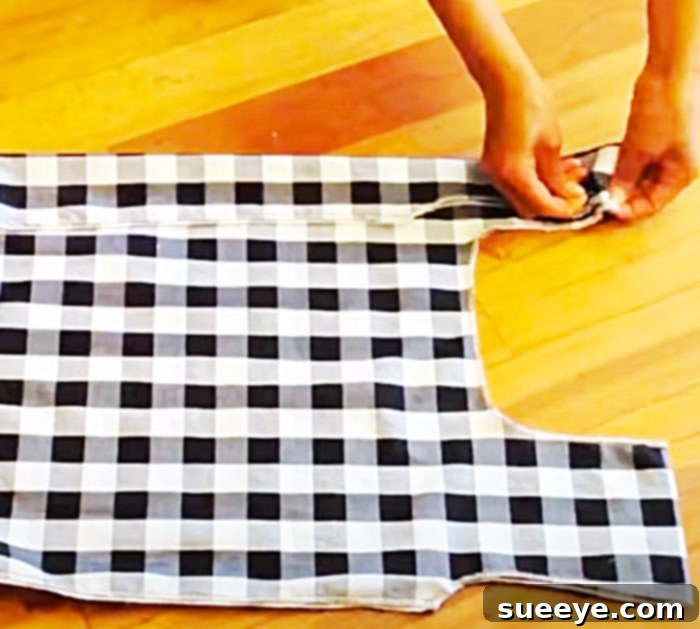
Once the seams are sewn, you will then turn the bag “right sides out.” At this stage, your bag will begin to take its familiar shape. The tutorial also suggests that you can topstitch the edges for a clean, professional finish and added durability. Topstitching involves sewing a line of stitching on the outside of the bag, close to the seam, often around the opening or handles. However, the Ezi2make design often leaves the serged or zig-zagged edges exposed, creating a charming, rustic, and distinctly homemade look that is very appealing. The choice is yours, depending on the aesthetic you prefer!
Step 4: Creating the Handles (If Separate)
Many fabric tote patterns involve sewing separate handle pieces. If your pattern includes this, you’ll typically fold the handle fabric strips lengthwise, press them, and sew along the raw edge to create strong, enclosed straps. You will then attach these handles to the top opening of your bag. Ensure they are evenly spaced and securely reinforced with multiple lines of stitching, as the handles bear the brunt of the bag’s weight.
Step 5: Forming the Bag Base (Optional Boxed Corners)
To give your grocery bag more depth and structure, preventing items from pooling at the bottom, you might consider creating “boxed corners.” This involves carefully flattening the bottom corners of the bag and sewing across them to create a flat base. The video tutorial will guide you on how to do this if it’s part of the design. Boxed corners are a fantastic feature for grocery bags, allowing them to stand upright and hold more items efficiently.
Step 6: Final Touches and Pressing
Once all the sewing is complete, give your entire bag a good press with an iron. This will smooth out any wrinkles, flatten seams, and give your handmade reusable bag a crisp, professional finish. Trim any loose threads, and your beautiful, eco-friendly shopping companion is ready for its first trip to the market!
Tips for Success and Customization
Making your own reusable grocery bags is not just about following instructions; it’s an opportunity to infuse your creativity and maximize functionality. Here are some tips to help you succeed and personalize your project:
- Experiment with Fabric: While quilting cotton is great, don’t shy away from other sturdy fabrics. Consider laminated cotton for a water-resistant interior, or mix and match prints and solids for a unique look. The possibilities are endless!
- Reinforce Key Areas: For heavy-duty use, consider adding an extra line of stitching where handles attach to the bag body. You can also sew a small rectangle with an ‘X’ through it at these stress points for maximum strength.
- Add Pockets: Integrate small internal pockets for your keys, phone, or shopping list. External pockets can be useful for reusable produce bags or a water bottle.
- Vary Handle Lengths: Create different bags with varying handle lengths. Shorter handles are great for hand-carrying, while longer handles are perfect for slinging over your shoulder. You can even use sturdy webbing for handles instead of fabric.
- Embellish Your Bag: Personalize your bag with embroidery, fabric paint, appliqué, or iron-on patches. Make it truly yours!
- Consider Bag Linings: For an even more professional finish and added durability, you could add an interior lining. This also allows you to hide all raw seams completely.
- Batch Sewing: Once you get the hang of it, cut multiple bags at once and sew them in an assembly line fashion. This is a time-efficient way to build a collection of bags for your family or for gifting.
- Wash and Care: Remember that fabric bags will get dirty. Choose washable fabrics and plan to wash your bags regularly to keep them hygienic. Most cotton bags can be machine washed and dried.
This grocery bag is truly adorable, and I absolutely adore mine! In fact, I’ve decided to craft one for each of my family members this Christmas. They’ll serve as charming holiday favors, perfect for bringing their gifts home in, and a subtle nudge towards more sustainable habits. There’s immense joy in creating something useful and beautiful by hand, and these reusable fabric grocery bags are the perfect embodiment of that spirit. Happy sewing!