
There are few frustrations quite as universal and immediate as the sinking feeling of realizing you’ve left your keys behind or, worse, lost them entirely. Whether it’s your car keys, house keys, or the trusty padlock keeping your shed secure, keys are fundamental to our daily security and access. The inconvenience, stress, and potential cost of being locked out can disrupt an entire day. But what if there was a resourceful, albeit temporary, solution you could craft from common household items?
This comprehensive guide delves into an ingenious DIY method for creating an emergency spare key using something as simple as a can lid. This technique, popularized by channels like DaveHax, offers a fascinating glimpse into emergency preparedness. While not a permanent replacement for a professionally cut key, this homemade version can be a lifesaver in a pinch, especially for simpler locks like padlocks. Dive in to discover how you can replicate your key’s pattern and regain access with this clever hack.
RELATED: Make an Emergency Candle That Never Goes Out – Another fantastic survival hack for unexpected situations.
The beauty of this method lies in its accessibility. With just a few basic tools – namely, an old can lid, some transparent tape, a lighter, and a pair of sharp scissors – you can fashion a functional, albeit fragile, spare key. It’s crucial to understand that this is a stopgap measure, designed for temporary access, particularly for less complex locking mechanisms such as those found on many padlocks. It will not possess the durability or security of an original key, so handle your creation with extreme care to prevent bending or snapping. Safety is paramount throughout this process; handling sharp metal requires caution. Consider wearing protective gloves to minimize the risk of cuts. For more ingenious key-related tricks, you might also find this interesting: How to Open a Wine Bottle With a Key.
Why a DIY Emergency Key? Your Temporary Lockout Solution
The scenarios where an emergency key comes in handy are numerous. Imagine you’re at home, needing to get into a locked garden shed, only to realize you’ve misplaced the padlock key. Or perhaps you’re on a camping trip, and the key to your cooler or gear box has gone missing. In these situations, waiting for a locksmith or forcing the lock can be costly, inconvenient, or both. A DIY emergency key provides an immediate, low-cost alternative for regaining access.
However, it’s vital to manage expectations. This method is primarily effective for simple pin-tumbler locks, commonly found on padlocks. Complex security locks, like those on your front door or car, have intricate internal mechanisms and tighter tolerances that a homemade key simply cannot replicate with sufficient accuracy or strength. The thin aluminum of a can lid is prone to bending and breaking, making it unsuitable for applications requiring significant torque or repeated use. Think of this as a “one-shot” key for a truly desperate situation.
Essential Tools and Materials for Your Can Lid Spare Key
Before embarking on this creative endeavor, gather all your components. Having everything ready ensures a smooth and safe process. You’ll be surprised at how common these items are, making this a truly accessible hack.
- Transparent Tape: This is crucial for capturing a clear, detailed impression of your original key’s bitting. Scotch tape or any clear adhesive tape will work well. The transparency allows for easy alignment later.
- Lighter: A standard butane lighter is perfect for this task. Its flame will be used to create a soot coating on the original key, which is essential for transferring the pattern.
- Pliers: Pliers (needle-nose or combination pliers) provide a safe way to hold the key while heating it. This prevents burns and offers a stable grip.
- Lid of a Can: This is the “blank” for your new key. An aluminum can lid from a soda can or even a food can (ensure it’s clean and flat) is ideal due to its pliability and relative thinness.
- Sharp Scissors: Precision is key when cutting the intricate shape. Craft scissors or very sharp utility scissors will make the task easier and more accurate. Be extra cautious when handling them.
Remember, the quality of your materials can influence the success of your emergency key. A flat, uncreased can lid and very sharp scissors will yield the best results.
A Step-by-Step Guide to Crafting Your Emergency Can Lid Key
Follow these instructions carefully to maximize your chances of success. Precision and patience are vital at each stage.
Step 1: Preparing the Original Key for Impression
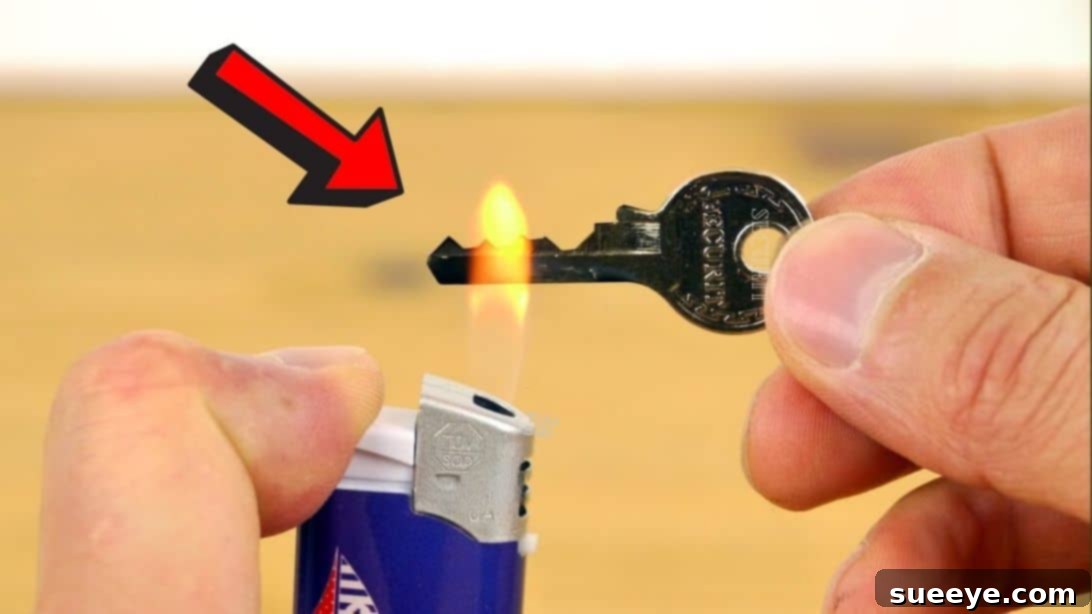
Begin by securing your original key. Using your pliers, firmly grip the top (the bow) of the key, ensuring it’s stable and won’t slip. Now, take your lighter and carefully apply the flame to the bottom portion of the key – specifically, the bitting (the jagged edge that engages with the lock pins). Heat the key until a uniform black, sooty coating develops across the entire bitting surface. This soot acts as a temporary ink, making the key’s profile visible for the impression. Once sufficiently coated, gently place the key on a heat-resistant surface to cool down. Avoid touching the heated part directly, as it will be hot.
The goal here is not to melt the key, but to cover its working surface with carbon residue. This layer will be crucial for creating a crisp, visible outline on your tape. Ensure the soot is even and covers all the “teeth” of the key for an accurate representation.
Step 2: Capturing the Key’s Unique Profile
Once your original key has cooled and is thoroughly coated with soot, take a strip of transparent tape. Carefully align the tape over the sooty bitting of the key and press it down firmly. The goal is to transfer the black soot onto the adhesive side of the tape, creating a perfect mirrored impression of the key’s profile. Apply even pressure across the entire key bitting to ensure every curve and notch is captured. Then, with utmost care, slowly and steadily peel the tape off the key. You should now have a precise, sooty duplicate of your key’s profile on the tape. The clarity of this impression will directly impact the functionality of your emergency key.
Step 3: Transferring the Impression to the Can Lid
Lay your clean, flat can lid on a stable, flat surface like a table. Take the piece of tape with your key’s impression and carefully stick it onto the can lid. Position it so that the key profile is clearly visible and aligned neatly on the metal surface. Make sure the tape adheres well to the can lid without any air bubbles or creases, as this will prevent distortion during the cutting phase. The smoother and flatter your can lid, the easier it will be to get an accurate cut. This step essentially turns your can lid into a temporary “key blank” with the desired pattern marked out.
Consider placing the tape near the edge of the can lid to give you more material to grip while cutting, but ensure there’s enough metal surrounding the pattern to allow for easy manipulation with scissors.
Step 4: Precision Cutting the New Key
This is arguably the most critical and potentially dangerous step. Using your sharp scissors, meticulously cut out the key shape from the can lid, following the impression on the tape. Work slowly and with extreme precision. Small, careful snips are better than large, ambitious cuts, as the aluminum can bend easily if too much force is applied. Pay close attention to the intricate details of the key’s bitting – even minor inaccuracies can prevent the key from working.
Safety Warning: Aluminum can be very sharp when cut, posing a significant risk of cuts. Wear protective gloves to shield your hands, and consider eye protection. Take frequent breaks if needed to maintain focus. After cutting, your original key may have some residual black soot; gently clean it off with a piece of paper or cloth, ensuring it’s ready for normal use.
Testing and Important Considerations for Your DIY Key
Once your can-lid key is complete, the moment of truth arrives: testing it. Approach this step with gentleness. Insert your newly crafted key into the lock it’s intended for. Do not force it. If it doesn’t turn easily, remove it and carefully examine the bitting for any imperfections or areas that need slight trimming. Remember, this key is extremely fragile. Applying excessive force will almost certainly cause it to bend or snap inside the lock, creating a much worse problem.
This emergency key is best suited for simple, low-security locks such as those found on toolboxes, older padlocks, or basic internal doors. It is highly unlikely to work on high-security locks, complex cylinders, or vehicle ignitions. Always keep the limitations of this method in mind. It’s a quick fix, not a robust, long-term solution.
For storage, consider keeping your emergency can-lid key in a safe, dry place where it won’t be accidentally crushed or damaged. Its primary purpose is to get you out of an immediate bind, so having it accessible but protected is ideal.
Safety First: Essential Precautions When Making and Using Your DIY Key
While this DIY project is relatively simple, it involves tools and materials that can cause injury if not handled properly. Your safety should always be the top priority.
- Cuts from Metal: The edges of a cut can lid are incredibly sharp. Always wear thick work gloves to protect your hands, especially during the cutting phase. Handle the finished key with care.
- Burns from Lighter: The original key will become hot during the heating process. Use pliers to hold it firmly and allow ample time for it to cool before handling it directly.
- Eye Protection: When cutting metal, small fragments can sometimes fly off. Wearing safety glasses or goggles is a wise precaution.
- Supervision: If children are curious about this project, ensure they are under strict adult supervision and do not handle sharp objects or lighters themselves.
- Ethical Considerations: This technique should only be used to create keys for locks you legally own or have explicit permission to access. Using it for illicit purposes is illegal and unethical.
Beyond the Can Lid: Other Emergency Key Solutions
While the can-lid method is a fascinating demonstration of ingenuity, it’s just one of many approaches to dealing with lost or inaccessible keys. For more robust or permanent solutions, consider these alternatives:
- Professional Locksmith: For house keys, car keys, or any important lock, a professional locksmith is always the safest and most reliable option. They have specialized tools and expertise to create new keys or gain entry without damage.
- Key Hiding Solutions: Invest in a secure, disguised key holder for your spare house key. These range from fake rocks to magnetic boxes that attach to discreet spots. Ensure it’s truly hidden and not easily discoverable by others.
- Trusted Neighbor/Friend: Entrust a spare key to a reliable neighbor, friend, or family member who lives nearby. This is often the simplest and most effective solution for house lockouts.
- Key Duplication Services: Have multiple spare keys made for all your important locks. Stores often offer key cutting services that are quick and affordable.
- Smart Locks: For home security, consider upgrading to a smart lock. Many allow keyless entry via codes, smartphones, or biometrics, eliminating the need for physical keys altogether.
Each of these options offers different levels of convenience, security, and cost. The can-lid key serves a very niche purpose, but understanding the broader landscape of key solutions is always beneficial for comprehensive preparedness.
The Convenience of Being Prepared: Why Every Home Needs a Spare Key Strategy
The ability to create a makeshift key from a can lid is a testament to human resourcefulness, but it also underscores a more important lesson: the value of being prepared. While this DIY hack can get you out of an immediate jam for a simple lock, a well-thought-out spare key strategy for all your important locks is indispensable.
Having multiple, properly cut spare keys for your home, vehicle, and other vital areas provides peace of mind. Store one with a trusted neighbor, keep another in a secure, hidden outdoor key box, and perhaps one in a designated spot within your home. Regularly checking the functionality of your spare keys and updating them when locks are changed or re-keyed is also a good practice. Preventing a lockout is always preferable to reacting to one, no matter how clever the emergency solution.
In conclusion, the can-lid emergency key is an impressive demonstration of DIY ingenuity, offering a clever way to regain access to simple locks when traditional keys are nowhere to be found. It’s a temporary fix that showcases how everyday items can be repurposed in surprising ways to solve common problems. Remember to prioritize safety during its creation and understand its limitations. While it might not open your front door, it could certainly save your day by opening that stubbornly locked shed or toolbox. Why not try this intriguing hack and add another layer to your emergency preparedness toolkit? Share your results and thoughts with us!