
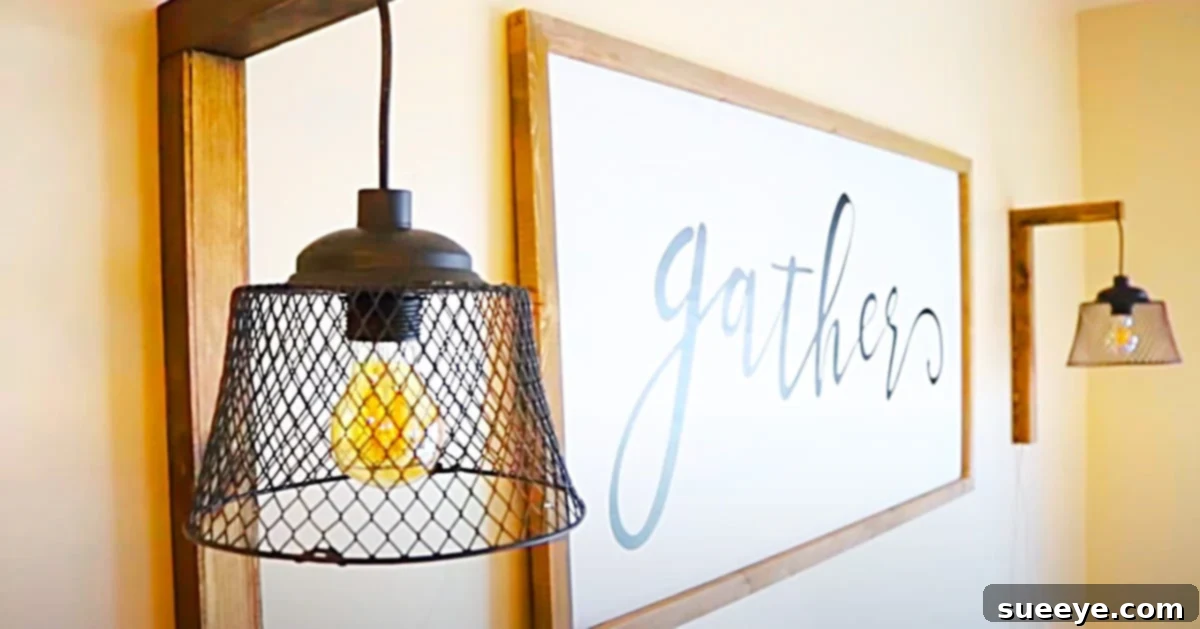
How To Make DIY Dollar Tree Wall Sconces: Affordable Farmhouse Charm
There’s an undeniable allure to wall sconces. They effortlessly elevate the ambiance of any room, lending an air of sophistication and warmth often associated with high-end decor. Yet, achieving this polished look doesn’t have to come with a hefty price tag. If you’re dreaming of adding elegant, functional lighting to your home without breaking the bank, then diving into the world of DIY wall sconces is your perfect solution.
Like many homeowners, I recently embarked on a mission to refresh my bedroom, aiming for that inviting, cozy farmhouse style. Central to my vision was finding the perfect set of wall sconces to flank my bed, providing both task lighting for reading and a soft, ambient glow. After scouring countless online stores and local shops, I stumbled upon an absolute gem: an ingenious Dollar Tree DIY wall sconce idea shared by The Crafty Couple on YouTube. Their creative approach instantly resonated with my desire for beautiful, budget-friendly decor. I knew these charming sconces would be the ideal accent for my newly transformed farmhouse-themed bedroom. Not only are they incredibly stylish, but they also prove that stunning home decor can be achieved with a little creativity and a handful of affordable materials.
Why Choose DIY Wall Sconces for Your Home?
Opting for a DIY approach to home lighting offers a plethora of benefits that extend far beyond simple cost savings. Crafting your own wall sconces allows for unparalleled personalization. You get to choose the exact colors, finishes, and accents that perfectly complement your existing decor, ensuring a cohesive and unique look that store-bought items often can’t match. This project, in particular, leverages incredibly inexpensive materials like Dollar Tree fruit baskets and common paint stirring sticks, transforming them into pieces that look far more expensive than they truly are. It’s a testament to the power of upcycling and creative crafting.
Beyond the aesthetic appeal, there’s immense satisfaction in creating something with your own hands. These handmade sconces can infuse your space with a genuine sense of warmth and character, making your home feel truly lived-in and loved. Whether you’re aiming for rustic farmhouse charm, a touch of industrial chic, or a more bohemian vibe, this versatile project can be adapted to suit various interior design styles. Plus, the process itself is a rewarding creative outlet, proving that functional art can be easily accessible to anyone, regardless of their crafting experience.
Essential Materials for Your DIY Dollar Tree Wall Sconce Project:
Gathering your materials is the first exciting step in bringing your vision to life. The beauty of this project lies in its accessibility, utilizing items that are either free, incredibly inexpensive, or easily found at your local craft and hardware stores. Remember, shopping smart can further reduce your costs; for instance, I found my black chalk spray paint at Michael’s craft store, where a savvy 60 percent off coupon from their app made the purchase even more economical. Michael’s makes saving simple, often allowing cashiers to scan coupons directly from your phone for instant discounts. Here’s everything you’ll need:
- 8 Paint (21-inch) Stirring Sticks: These are the backbone of your sconce frame. You can often get these for free from paint departments at hardware stores like Home Depot or Lowe’s, or purchase them affordably at Walmart.
- 2 Fruit Baskets (from Dollar Tree): These form the decorative top or base of your sconce, adding a unique texture and structure. The Dollar Tree is your go-to for these budget-friendly gems.
- 2 Light Plug Mechanisms: Essential for functionality, these provide the light source. Look for simple plug-in kits at Ikea, Lowe’s, or Home Depot. Ensure they are suitable for your intended bulbs.
- 2 Sink Plungers: Surprisingly, the handles of these plungers (or similar wooden dowel-like items) are repurposed here to create a sturdy and decorative central element for your sconces. Find them at Lowe’s or Home Depot.
- Minwax Stain (or similar wood stain): To give your paint sticks a rich, finished look that complements farmhouse aesthetics. Choose a shade that matches your desired wood tone.
- A Few Rags: For applying and wiping off excess wood stain. Old t-shirts or cotton cloths work perfectly.
- Black Chalk Spray Paint (from Michael’s craft store or similar): This will be used to give your plungers and light mechanisms a matte, sophisticated finish. Chalk paint provides a lovely, slightly distressed look if desired.
- A Hot Glue Gun: Your primary tool for assembly, providing quick and strong bonds.
- Glue Sticks: Stock up on these, as you’ll be doing a fair amount of gluing.
- 2 Wall Brackets: For securely mounting your finished sconces to the wall. Choose a style and strength appropriate for your sconce’s weight and wall type.
Step-by-Step Directions to Craft Your Elegant Wall Sconces:
This Dollar Tree DIY wall sconce idea by The Crafty Couple on YouTube is remarkably straightforward, allowing you to create beautiful, functional lighting in just a few easy steps. Patience and a steady hand are your best tools here. Let’s get started!
Step 1: Prepare and Stain Your Paint Sticks
Begin by laying out your 8 paint stirring sticks on a protected surface in a well-ventilated area. Using a clean rag, apply your chosen Minwax stain evenly to all sides of each stick. Work in the direction of the wood grain for the best results. Allow the stain to penetrate for a few minutes, then wipe off any excess with a clean portion of the rag. If you desire a deeper, richer color, you can apply a second coat after the first has dried completely. Ensure the sticks are thoroughly dry before moving to the next step, which typically takes a few hours.
Step 2: Paint Your Hardware
Next, it’s time to transform the sink plungers and light plug mechanisms. In a well-ventilated area (preferably outdoors), place these items on a drop cloth or newspaper. Using your black chalk spray paint, apply even, thin coats. It’s better to apply several light coats than one thick coat to avoid drips and achieve a smooth, professional finish. Allow each coat to dry according to the manufacturer’s instructions before applying the next. The chalk paint will give them a lovely matte appearance that perfectly complements the farmhouse aesthetic.
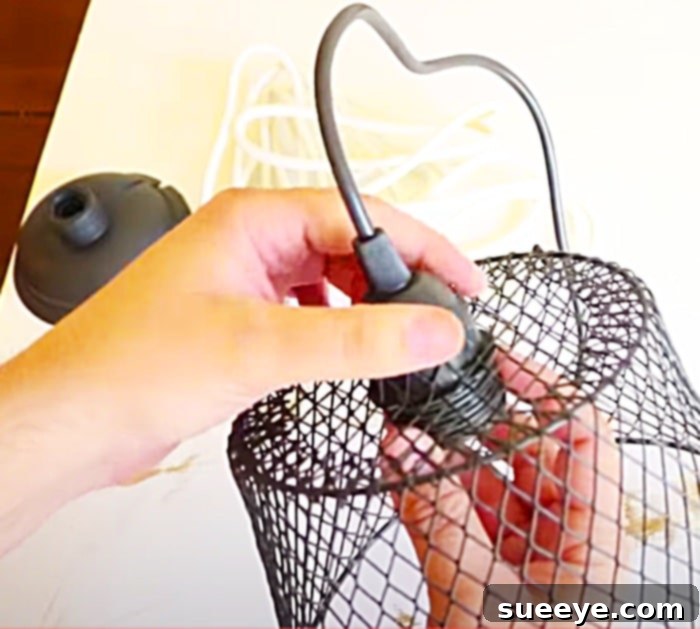
Step 3: Assemble the Sconce Frame with Paint Sticks
Once your stained paint sticks are dry, you’ll begin constructing the main body of the sconce. Lay out four paint sticks in a square or rectangular pattern to form the base, using your hot glue gun to secure the corners. Then, you’ll start building upwards. A common method involves gluing the sticks in an alternating pattern, creating an open, slatted box or basket-like structure that will house your light mechanism. Be meticulous with your glue application to ensure strong, clean bonds. Work slowly, allowing the hot glue to set as you go, to ensure the structure is square and stable. Repeat this process for the second sconce.
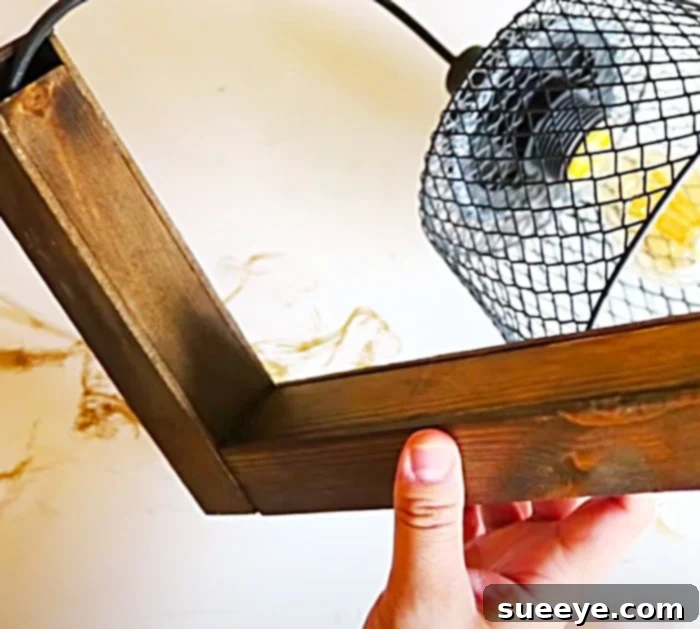
Step 4: Incorporate the Plunger Handle and Light Mechanism
Now, carefully integrate the painted plunger handle into your paint stick frame. This piece will act as a central support and decorative element. You’ll hot glue the plunger handle securely inside the top or middle of your assembled paint stick frame, ensuring it stands straight. Next, thread the light plug mechanism through the frame, positioning the bulb socket where you want the light to emerge. Secure the mechanism firmly in place using hot glue, making sure it’s stable and not wobbly. You may need to create a small opening or notch in your paint stick structure to allow the cord to pass through neatly and inconspicuously.
Step 5: Attach the Dollar Tree Fruit Baskets
The Dollar Tree fruit baskets will serve as a lovely decorative shade or a base for your sconce, adding texture and interest. Depending on your desired look, you can attach them to the top or bottom of your paint stick structure using ample hot glue. Ensure they are centered and securely fastened. These baskets are surprisingly versatile and contribute significantly to the rustic, handcrafted aesthetic.
Step 6: Final Touches and Mounting
Once both sconces are fully assembled and the glue has dried, it’s time for the final touches. Insert your chosen light bulbs into the mechanisms. Then, attach the wall brackets to the back of your sconces, positioning them for secure mounting. Carefully choose the appropriate hardware for your wall type (e.g., drywall anchors for drywall). Before permanently mounting, plug them in briefly to ensure everything is working correctly. These beautiful wall sconces are not only incredibly cute and easy to make, but the light they provide is also excellent, especially for reading in bed or adding a soft glow to any corner of your home.
Customizing Your Sconces: Personalize Your Design
While the farmhouse style is undeniably charming, this DIY wall sconce project is incredibly adaptable. Don’t be afraid to experiment with different finishes and embellishments to match your personal taste and home decor. Consider using different shades of wood stain, from light natural tones to dark espresso, or even a whitewash technique for a shabby chic look. Instead of black chalk paint, try a metallic spray paint for an industrial edge, or a bright pop of color for a playful, modern twist.
You can also enhance your sconces with decorative elements. Wrap twine or jute rope around the paint sticks for added rustic texture, or adorn them with artificial greenery, small flowers, or even dried lavender bundles for a touch of bohemian flair. Different light bulbs can also dramatically change the mood; vintage Edison bulbs evoke a warm, antique feel, while modern LED bulbs offer energy efficiency and a crisp, clear light. By thinking outside the box, you can transform these simple Dollar Tree materials into truly bespoke lighting fixtures that reflect your unique style.
Conclusion: Illuminate Your Home with Handmade Charm
The journey of creating your own DIY Dollar Tree wall sconces is a truly rewarding one. From humble paint sticks and affordable fruit baskets, you can craft elegant, functional lighting that brings a touch of farmhouse charm or your preferred style into any room. This project is a testament to the fact that beautiful home decor doesn’t require a hefty investment, just a spark of creativity and a willingness to get hands-on.
These sconces not only serve as excellent reading lights but also add a warm, inviting glow, making your space feel more cozy and personalized. So, gather your materials, follow these easy steps, and prepare to bask in the warm, satisfying glow of your very own handmade masterpieces. Happy crafting, and enjoy the unique character your new DIY wall sconces bring to your home!