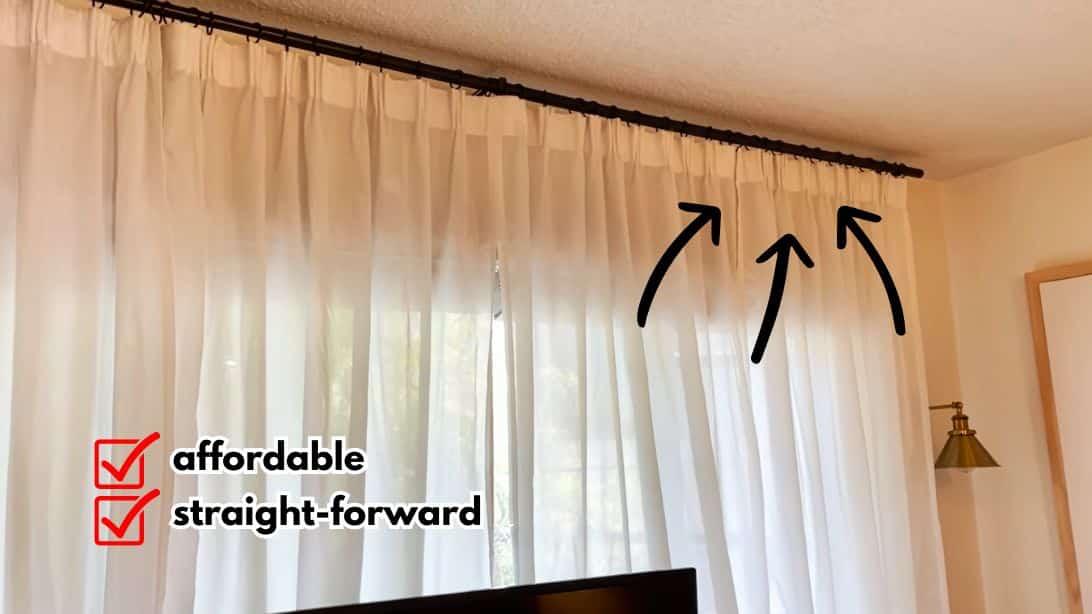
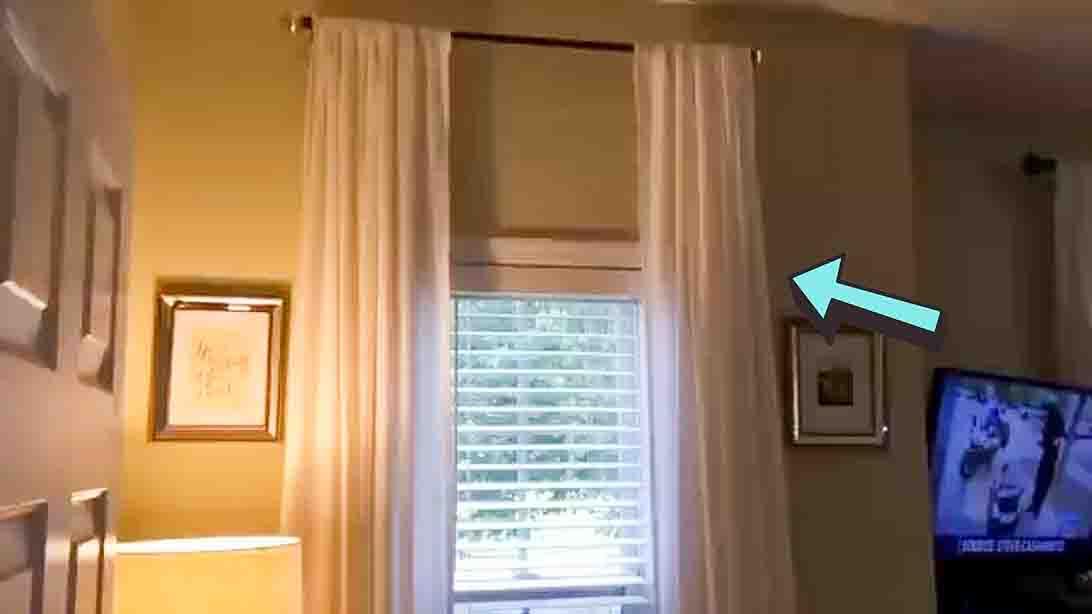
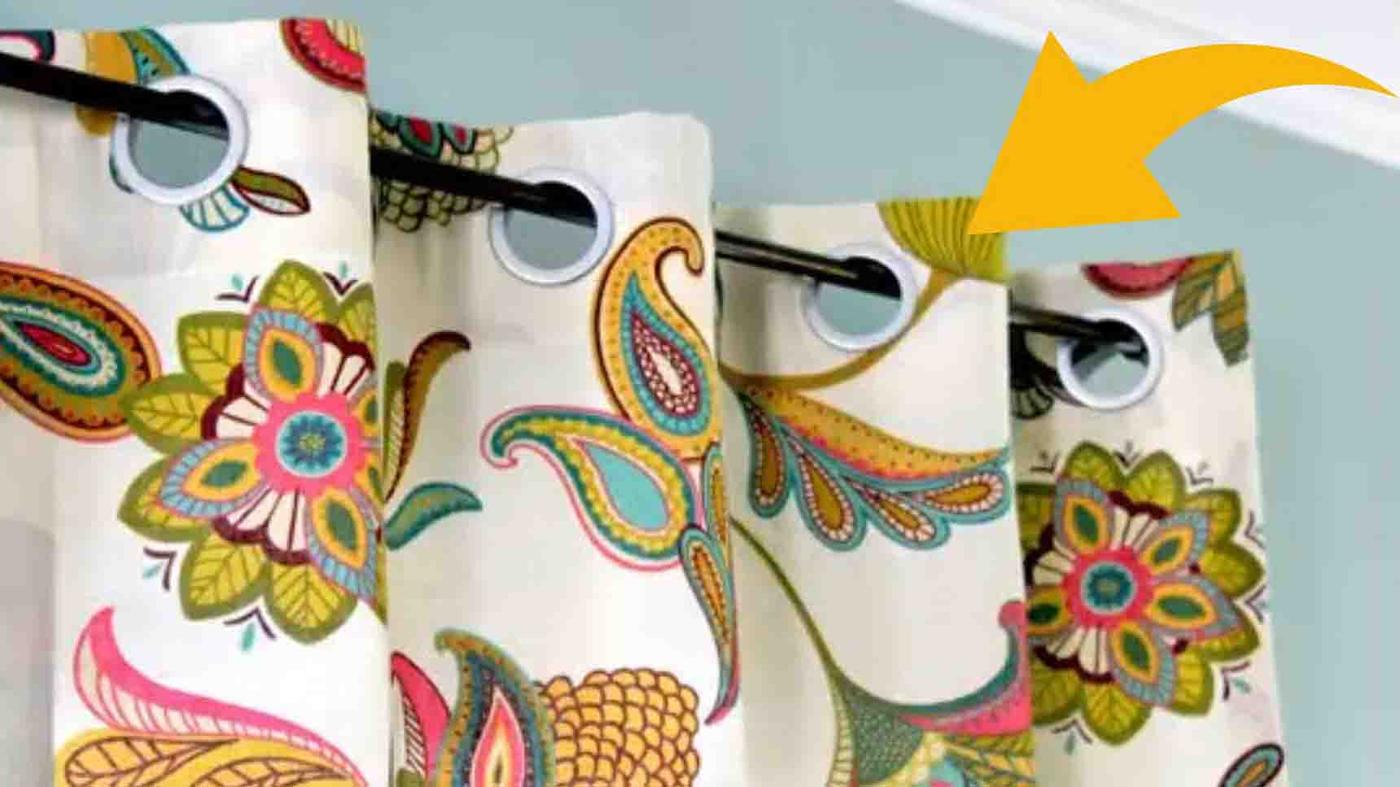
Curtains
41 DIY Curtains and Drapery Ideas to Make at Home
DIY curtains and drapery ideas, 41 of them: no sew panels, painted drop cloths, roman shades, valances and pleats, all with free step by step tutorials.
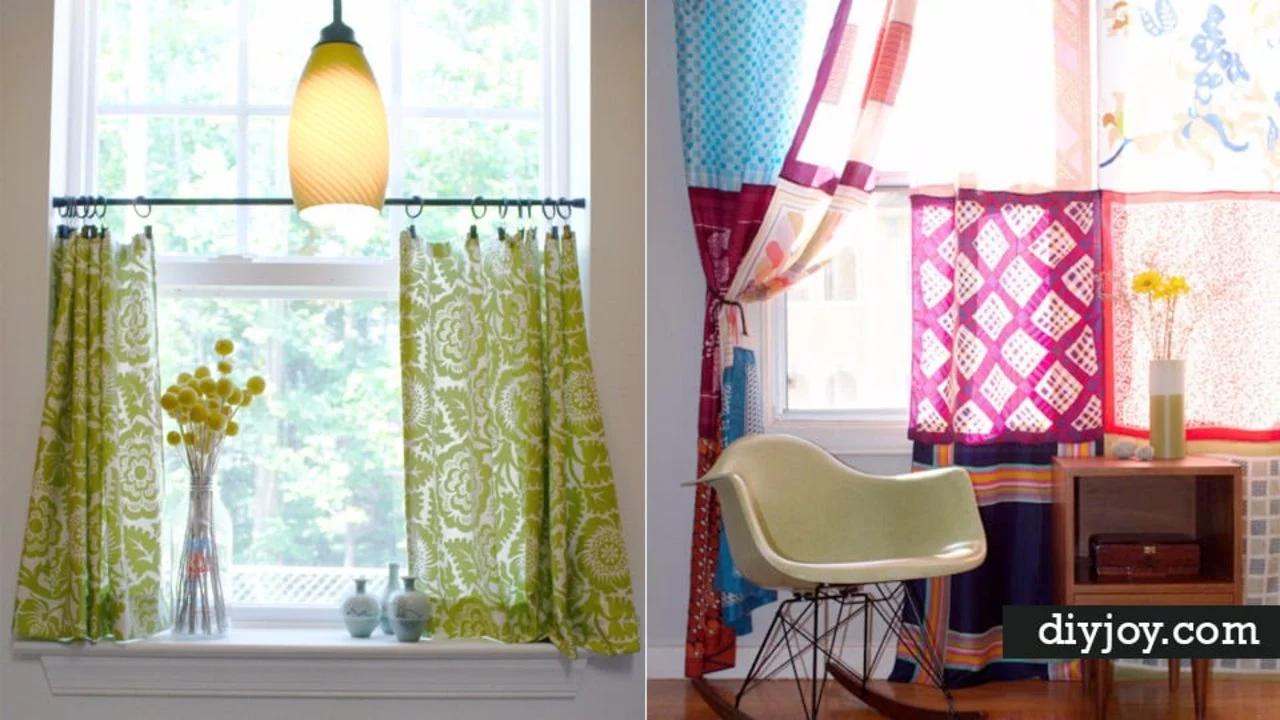
Window treatments are the thing everybody leaves for last and then pays the most for. These 41 DIY curtains and drapery ideas are the fix, and a good half of them never touch a sewing machine. There are drop cloths from the paint aisle painted into wide stripes, twin flat sheets turned into panels for about five dollars, mini blinds rebuilt into roman shades, vintage pillowcases clipped straight onto a tension rod, and burlap that costs a dollar fifty a yard with a coupon. Some want a serger and a free weekend. Others want an iron, a roll of fusible tape and a cup of coffee. Pick by the tools you already own and the light you actually want in the room.
1. No Sew DIY Greek Key Curtain Panels
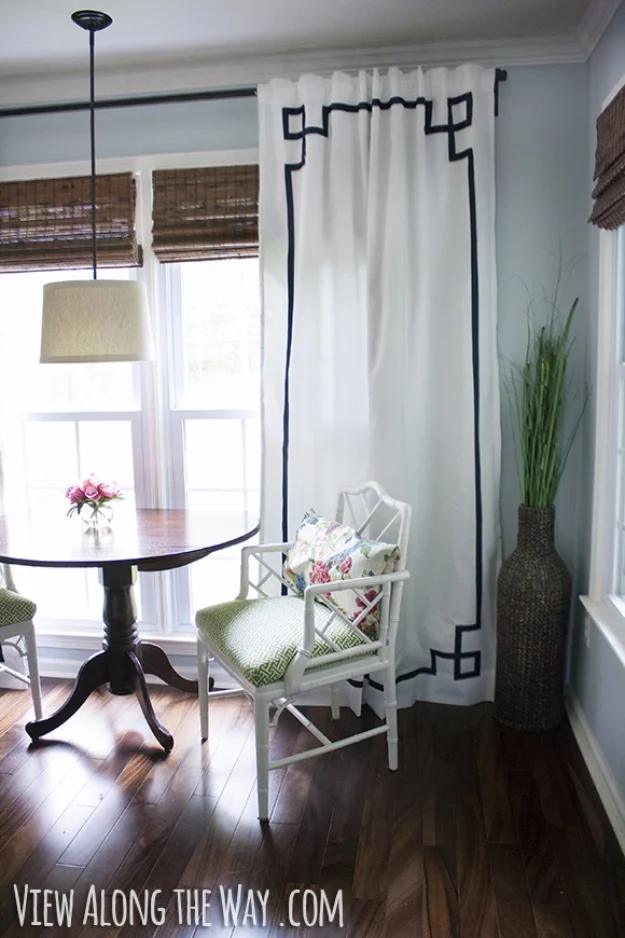
Two plain IKEA Vivan panels, about ten dollars for the pair, carry a navy grosgrain border that reads like custom drapery. The whole thing is ironed on with heat activated bonding tape, no stitches anywhere. A small cardboard square cut to roughly four and a quarter inches sets both the spacing between the ribbon runs and the size of the corner motif, so the pattern stays honest all the way down. Lay the tape under the ribbon, cover with a damp cloth, press about ten seconds, then flip and press the back the same way. At the corners, overlap the ribbon ends instead of trying to miter them. Buy more ribbon than you think.
Get the full tutorial at View Along the Way.
2. DIY Gold Leaf Embellished Curtains
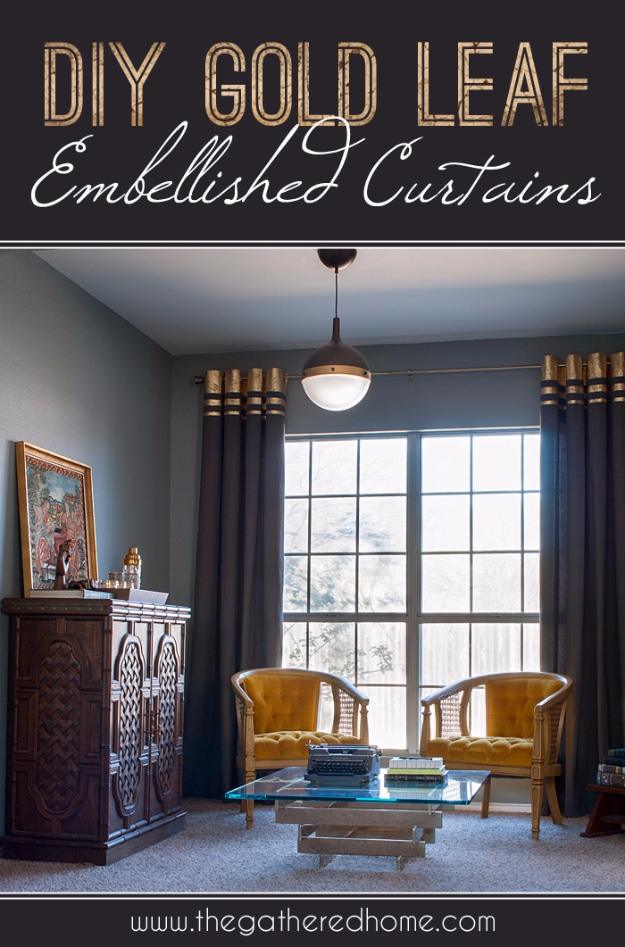
Dark grey IKEA Merete panels, about thirty dollars, get bands of real metal leaf across the top and hem. Iron the panels flat first, because leaf will not sit down on a wrinkle. Tape out the bands, then tuck paper towels under the tape edges so the spray adhesive cannot drift onto the rest of the fabric. Once the adhesive goes tacky, lay the tissue backed leaf on and buff it through the tissue with a cloth. Rub a little harder in places if you want the cracked, worn look. Seal while the tape is still down. Two or three packs per panel, and these never go in the wash.
Get the full tutorial at The Gathered Home.
3. Wood Beam And Lace Curtains
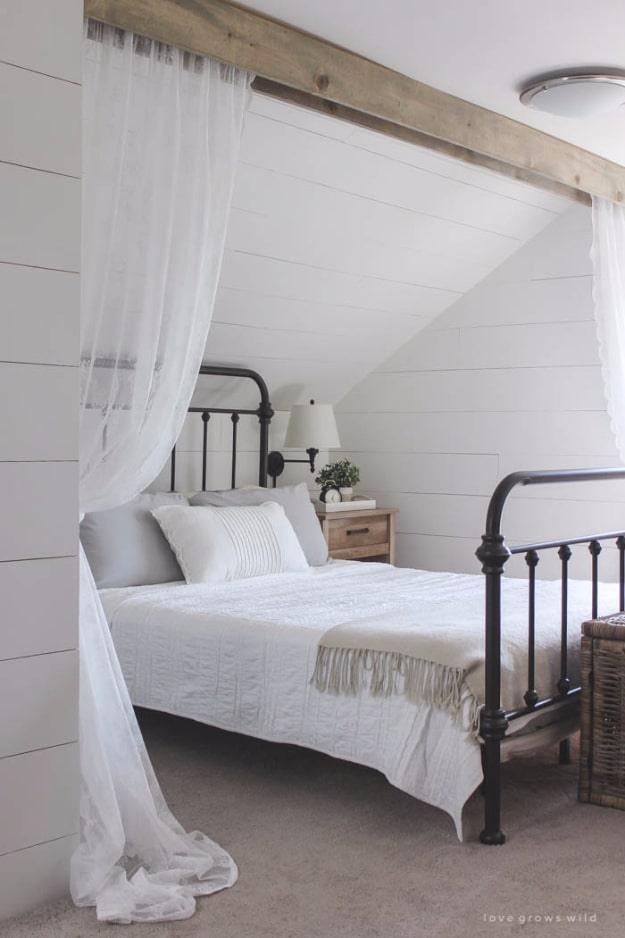
This one is a ceiling mounted canopy rather than a window panel, and the frame is cheap lumber doing a convincing job of being a beam. A 1×4 goes up first, predrilled about every foot and fixed into drywall anchors. Two 1×6 boards, stained a soft grey, get brad nailed to it with their long face out. The rod is three quarter inch PVC joined with a connector and dropped into closet pole brackets, which is why it costs nothing and why an extra bracket in the middle matters, or it sags. Lace panels thread straight on. Small gaps at the ceiling read as rustic, so leave them.
Get the full tutorial at Love Grows Wild.
4. DIY Faux Roman Shades
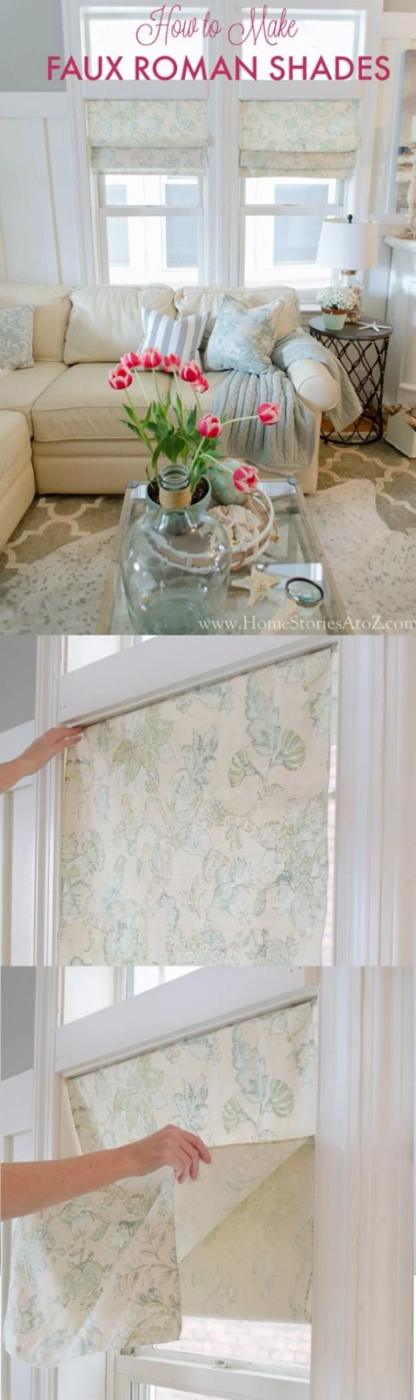
No hardware, no cords, no holes in the window frame, which makes this the rental answer. Two small spring tension rods go inside the frame roughly eight inches apart. The fabric goes over the top rod, either tucked above it or through a rod pocket, then drapes over the lower rod with most of the length pooling behind. Pull the back length forward over the bottom rod and fold it, and the signature soft pleat appears. Fluff until it sits right. It still works: drop the fabric for privacy, lift it for light, and swap the whole thing out when the season changes.
Get the full tutorial at Home Stories A to Z.
5. Vintage Pillowcase Curtain
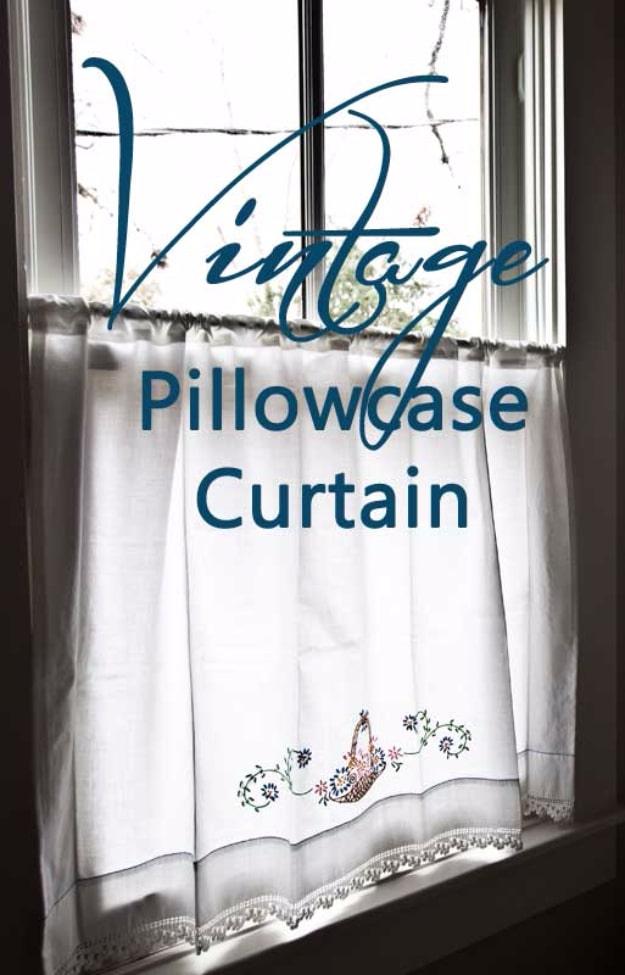
An embroidered pillowcase becomes a cafe curtain for a bathroom window, which is exactly the room where you want privacy at eye level and daylight above it. The pillowcase is already hemmed and already finished with a crocheted lace edge, so most of the work is done. Cut the closed top off to suit the drop of your window, then cut up the back so the tube opens out into a flat rectangle. Hem the two cut edges, fold a rod pocket along the top, and slide it onto an inexpensive tension rod. Inherited linens with hand embroidery look extraordinary with light behind them.
Get the full tutorial at Cedar Hill Farmhouse.
6. DIY Painted Drop Cloth Curtains
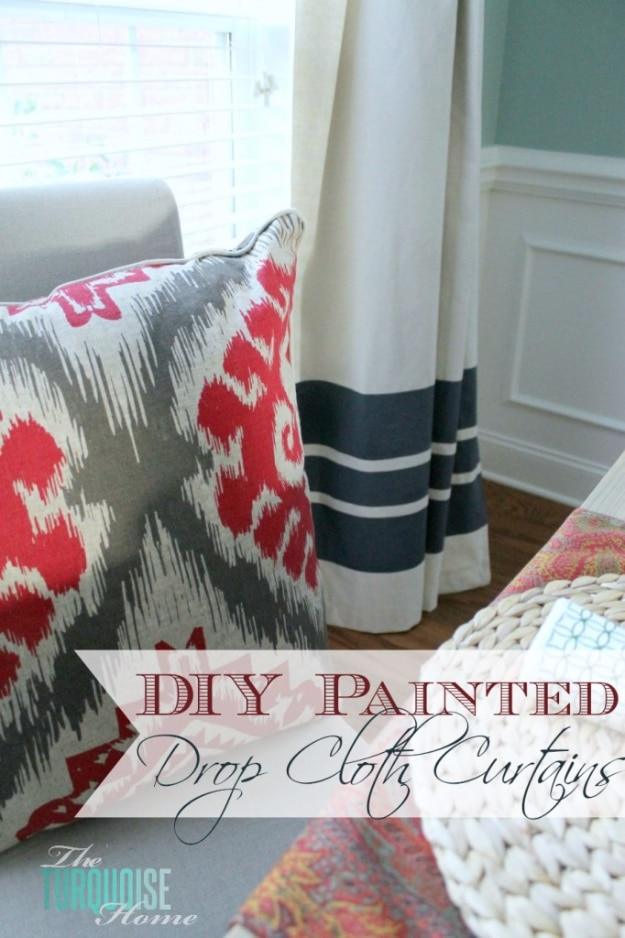
Two nine by six foot canvas drop cloths from the paint aisle, about ten dollars each, and the finished pair came in around twenty five. Wash and dry them first, which softens the canvas considerably, then iron. Drop cloths arrive hemmed on the long edges, so only the cut edge needs attention. For the stripes, measure up from the bottom rather than down from the top, because the bottom is the edge your eye actually reads. Cut cardstock spacers to keep the tape parallel, burnish the tape down hard with something rigid, and roll the paint away from the tape edge so nothing creeps underneath.
Get the full tutorial at The Turquoise Home.
7. No Sew Dining Room Turned Bedroom Curtains
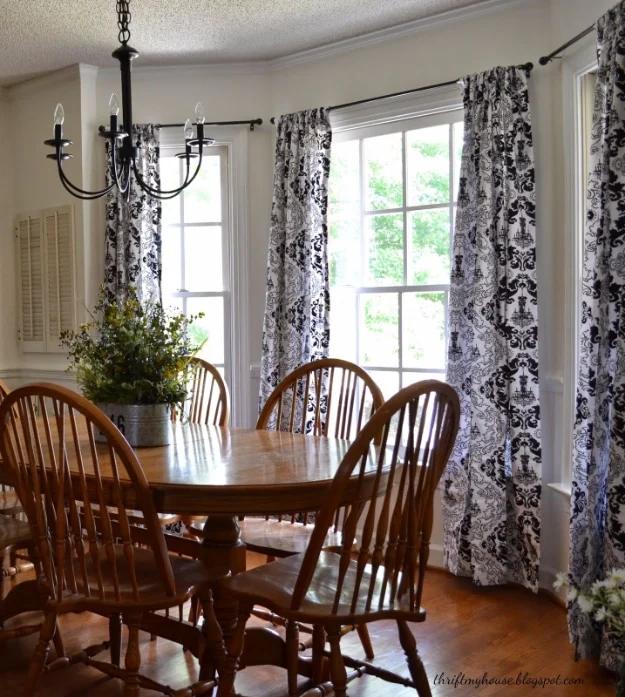
Wide panels get cut down the middle to make two narrower ones, which is how one set of curtains covers a second room. Rule a pencil line first and follow the fabric’s own print as a straightness guide. The part people miss: unpick a few inches of the existing rod pocket hem at the top, or you cannot fold the new raw side over cleanly. Iron heat bond tape down the cut edge, let it cool, peel the top layer off the strip, fold the fabric over and press again to bond it. Repeat for the rod pocket. Hang the finished pair wider than the window.
Get the full tutorial at Thrift My House.
8. Fabric Trimmed Curtains
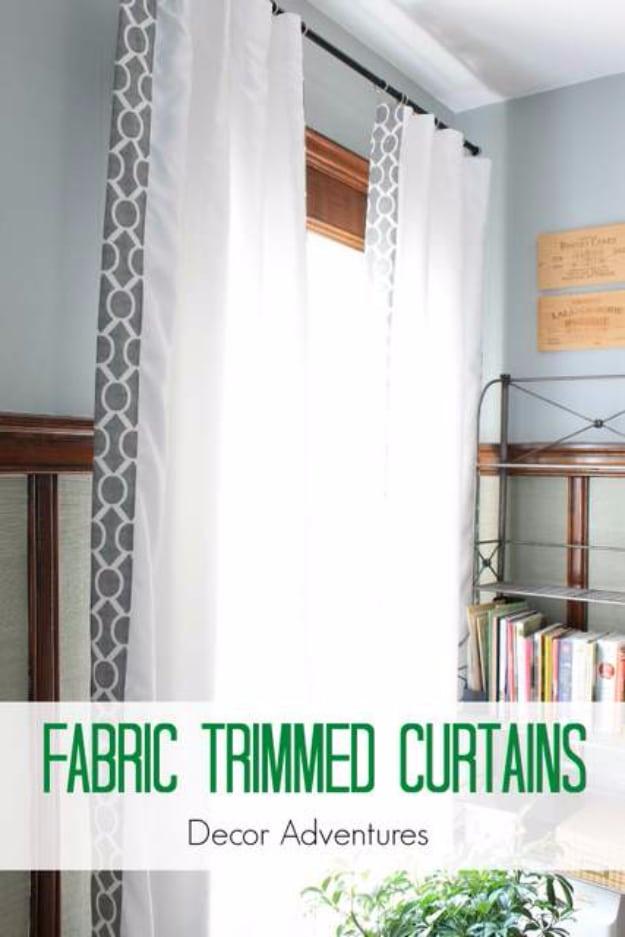
Plain white lined panels get a band of grey geometric print down both edges and across the hem, and the reason is length rather than decoration: these stopped short of the floor, which is what happens under nine foot ceilings. Cut the trim fabric into seven inch strips with a rotary cutter, fold the fabric several times first so one cut does the whole strip, then join the strips end to end. Iron each strip in half, then iron a half inch under along both raw edges. Pin the trim on while the panel is still hanging. Sew the back side down first and the front second, so the first line of stitching never shows.
Get the full tutorial at Decor Adventures.
9. $12 DIY Roman Shade Made From A Mini Blind
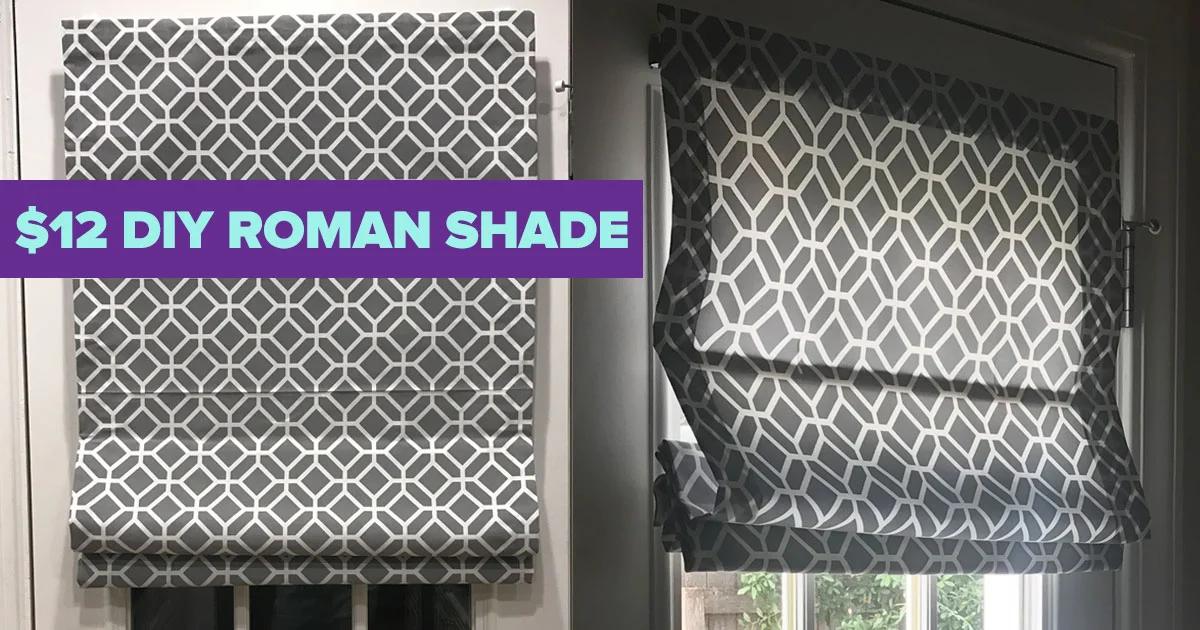
A mini blind is already a working shade mechanism, so this rebuilds one with fabric over the top instead of buying a custom shade. Get a blind cut to your window, cordless if you can. Lay the fabric out under the extended blind and allow a three inch overhang on all four sides, then fold and iron a crease with a one and a half inch margin on each side and glue the creases down with Fabri-tac. Pull the cords out of the blind, tying two buttons on to stop them reeling back in, cut away the ladder cord, and keep only the top rail, three slats and the bottom rail. Glue those to the fabric evenly spaced.
Get the full tutorial at Sueeye.
10. Anthropologie Knock Off Flutter Curtains
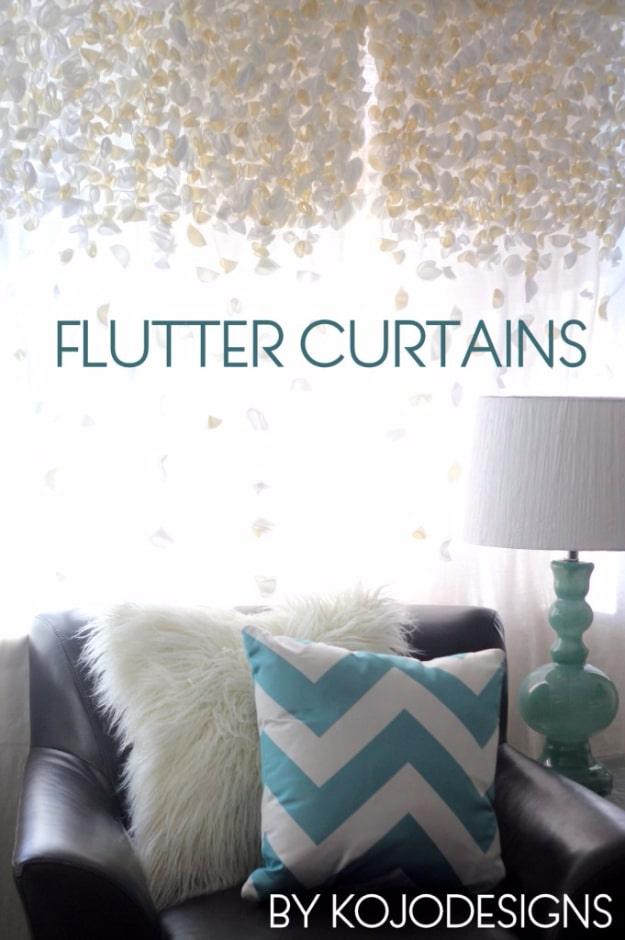
Hundreds of small fabric circles hand stitched onto a panel, and the creator’s own verdict is that it is a ton of work. Two IKEA flat sheets make the panels; more sheets, cut into circles between about an inch and a half and two and a half inches across, make the flutters. Roughly three small circles to every large one keeps it from looking uniform. Fold each circle in half and in half again, then stitch through the folded point with invisible thread so it stands off the fabric. Pack the top twenty inches densely and space them out below. A circle cutter is worth owning here.
Get the full tutorial at Kojo Designs.
11. DIY Easy Pleated Curtains
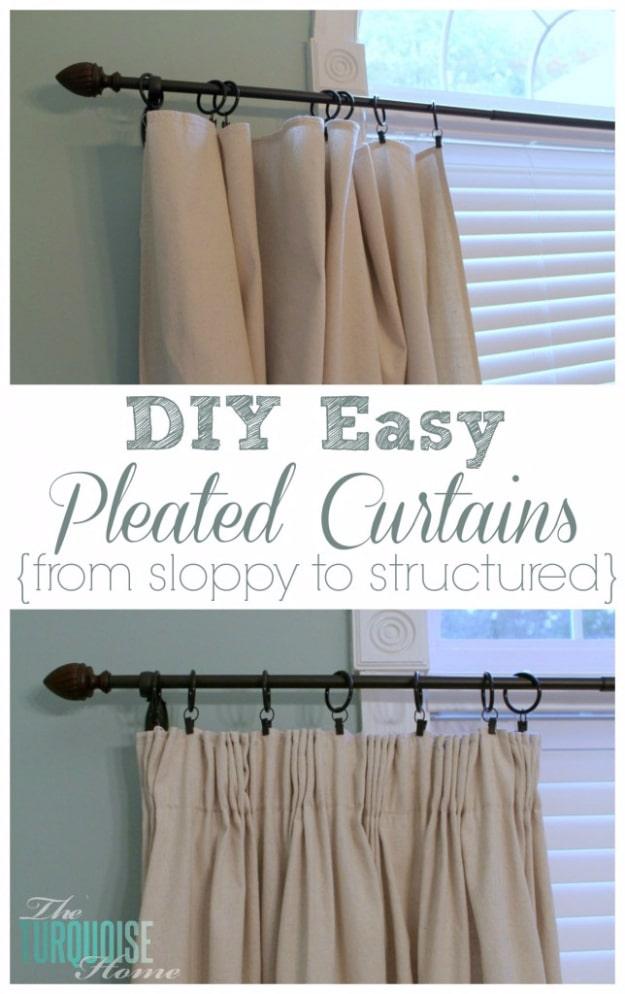
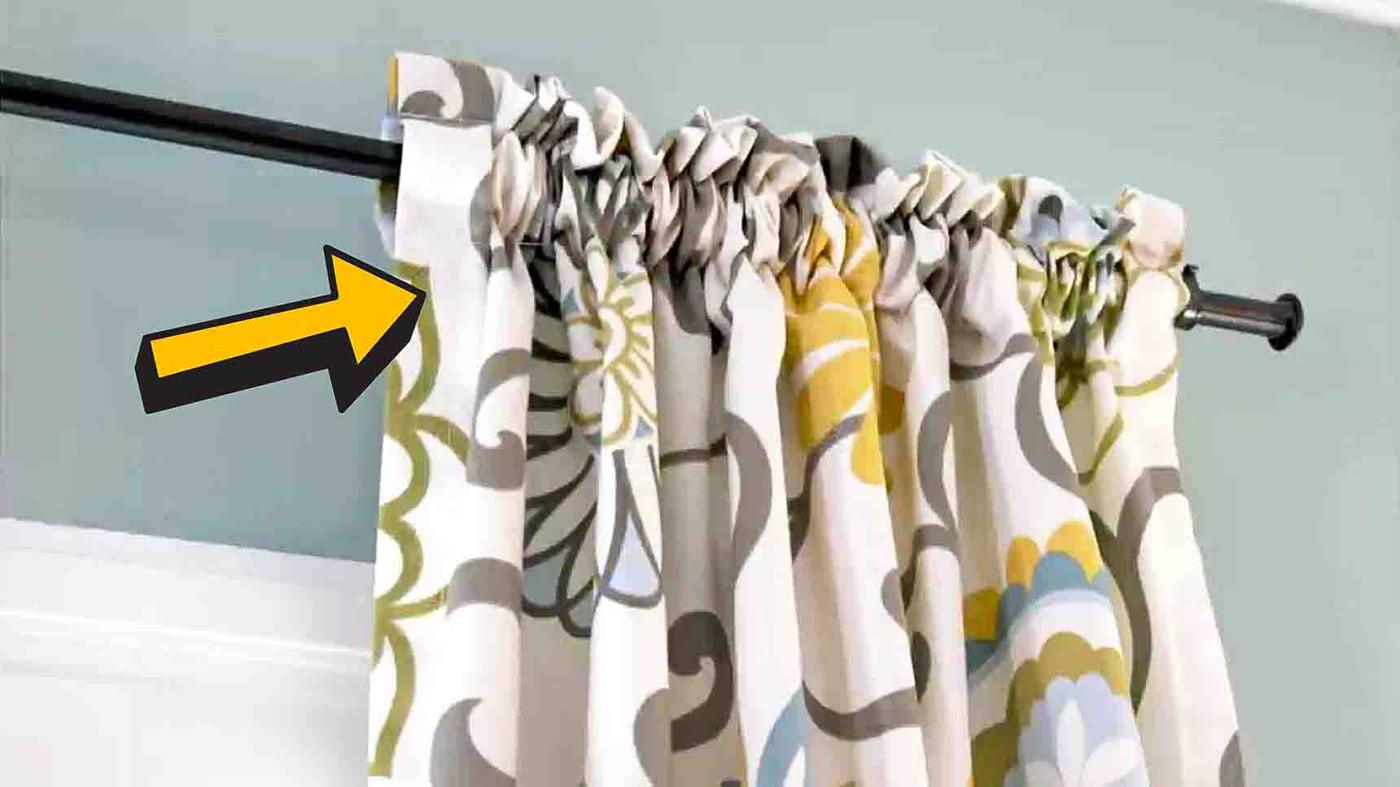
Pleater tape turns a floppy panel into a structured one for a dollar or two a yard, and this is the least intimidating way to use it. Lay the tape across the top of the panel and pin it down so it sits below the existing top hem rather than over it, then trim the ends. Knot the cords at both ends before you do anything else, because an unknotted cord pulls straight out of the tape. Stitch along the guide lines on both edges of the tape, then work across pulling every cord until the pleats gather. Loosen or tighten until it looks right and hang on rings.
Get the full tutorial at The Turquoise Home.
12. DIY Bamboo Shades
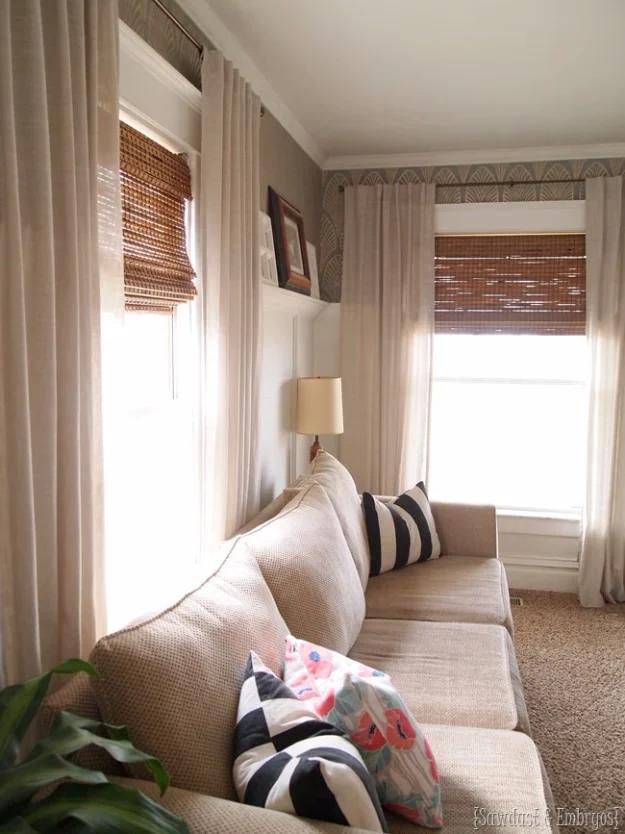
Clearance bamboo shades are cheap because they are never the right width, and a miter saw fixes that. Measure the window and subtract an inch. Find the center point between two of the blind’s strings, then mark half your finished width out to each side, which is what keeps the grommets centered rather than drifting to one edge. Cut the string back to the third pulley in whatever section is coming off. Bundle the blind tightly with the strings clear of the blade and take several shallow passes instead of one deep cut, or the bamboo splinters. A small slot in the mounting board sorts the hardware.
Get the full tutorial at Reality Daydream.
13. DIY Ruffled Curtains
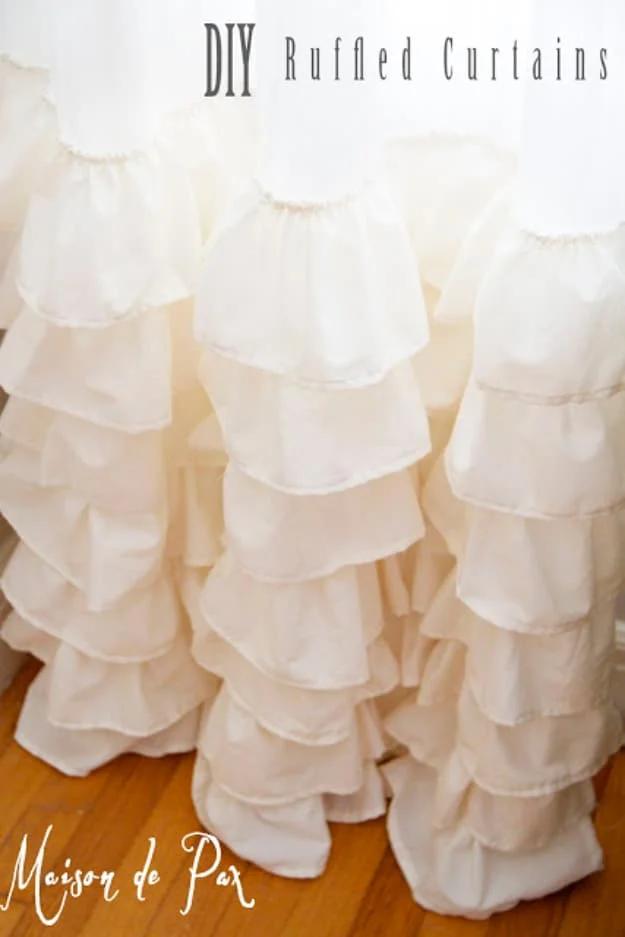
Unbleached muslin at ninety six inches wide is the whole trick here: the fabric width becomes the curtain length, so about eight yards makes three full panels. Each panel finishes around forty inches across, a little wider than the window for fullness. The ruffles are strips six and a half inches tall, seven per curtain, hemmed on three sides, with the top one cut a half inch wider so it folds over the raw edge. Gather with a loose machine stitch a half inch from the top and do not backstitch, and leave yourself long thread tails to pull. Ribbon tabs cut eight inches long tie onto the rod.
Get the full tutorial at Maison de Pax.
14. DIY 5-Minute Curtains Out of Sheets
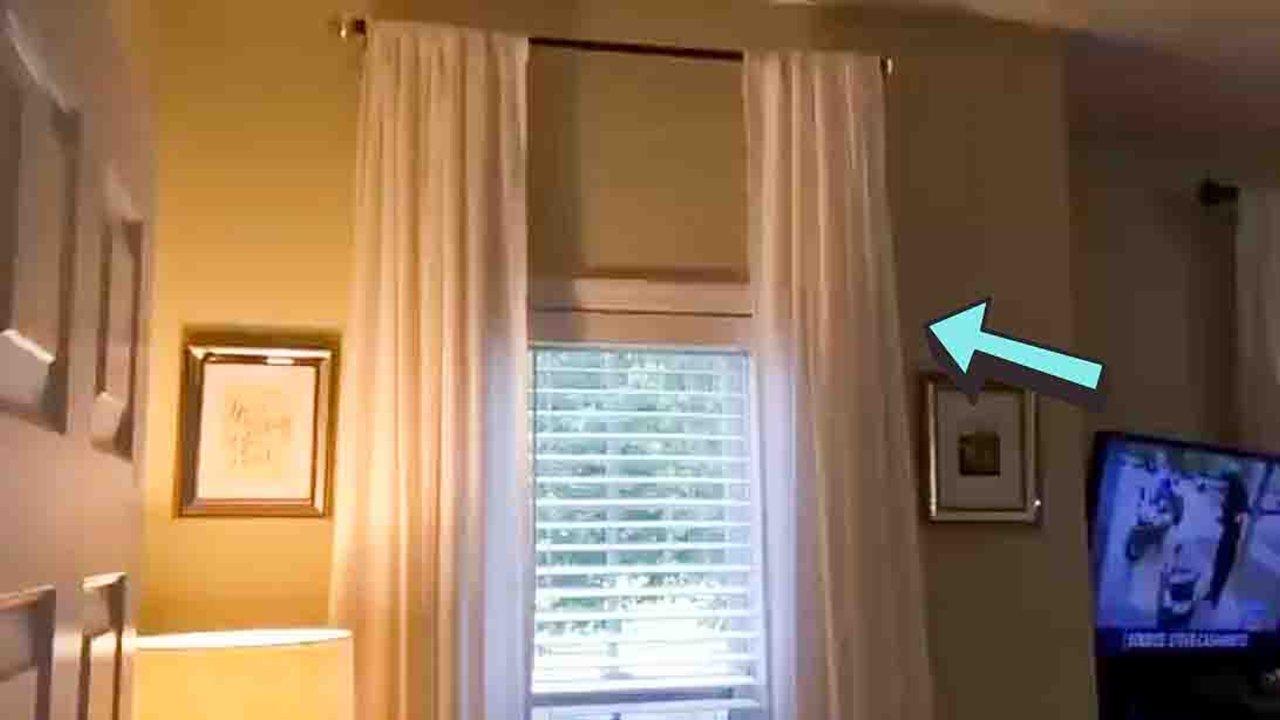
Twin flat sheets are already hemmed on all four sides and already wider than a standard curtain panel, which is why this takes five minutes and no sewing at all. Find the deep hem along the top edge of the sheet and cut a slit at each end of it, opening the hem into a channel that runs the width of the sheet. Slide the curtain rod straight through those two openings. Make a second one the same way so you have a pair, then press them with an iron or steam them once they are already hanging, which is considerably easier than wrestling a whole sheet on an ironing board.
Get the full tutorial at Sueeye.
15. Curtains Out Of Burlap
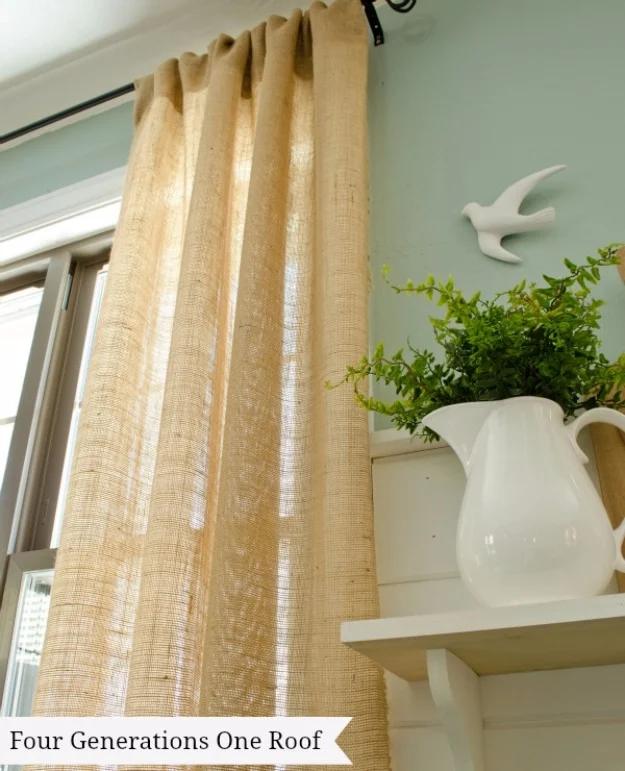
Burlap from the utility section of a fabric store, about three and a half yards per panel, and with a coupon the creator paid a dollar fifty a yard and finished each panel for around seven dollars. It comes in wide, usually forty five to fifty four inches, so one width is a panel. Lay it flat on the floor, fold the top over about ten inches and pin, which gives you a deep, generous rod pocket rather than a mean little one. Run fusible bonding tape where you would otherwise sew and press with a hot, steamy iron. Let the fused hem cool completely before you move it.
Get the full tutorial at Four Generations One Roof.
16. Bold Striped DIY Drapes
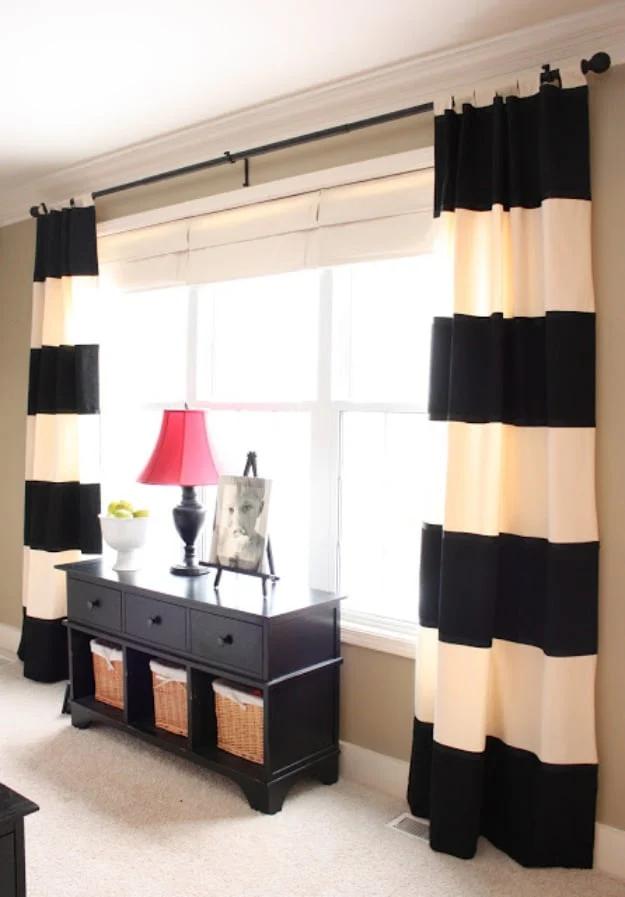
Plain cream cotton twill panels get wide black stripes without a single stitch, and the method is reversible, which matters when the panels underneath were expensive. Black twill is cut into fourteen inch wide strips and fused onto the cream panels with fabric webbing. The raw edge of each strip is then covered with black grosgrain ribbon, fused the same way, which is what turns a rough edge into a crisp line. Because nothing is sewn, nothing is permanent, and the panels can go back to plain. Ready made panels cut into strips and sewn together would get you the same look the harder way.
Get the full tutorial at The Yellow Cape Cod.
17. Easy DIY Stenciled Drapes
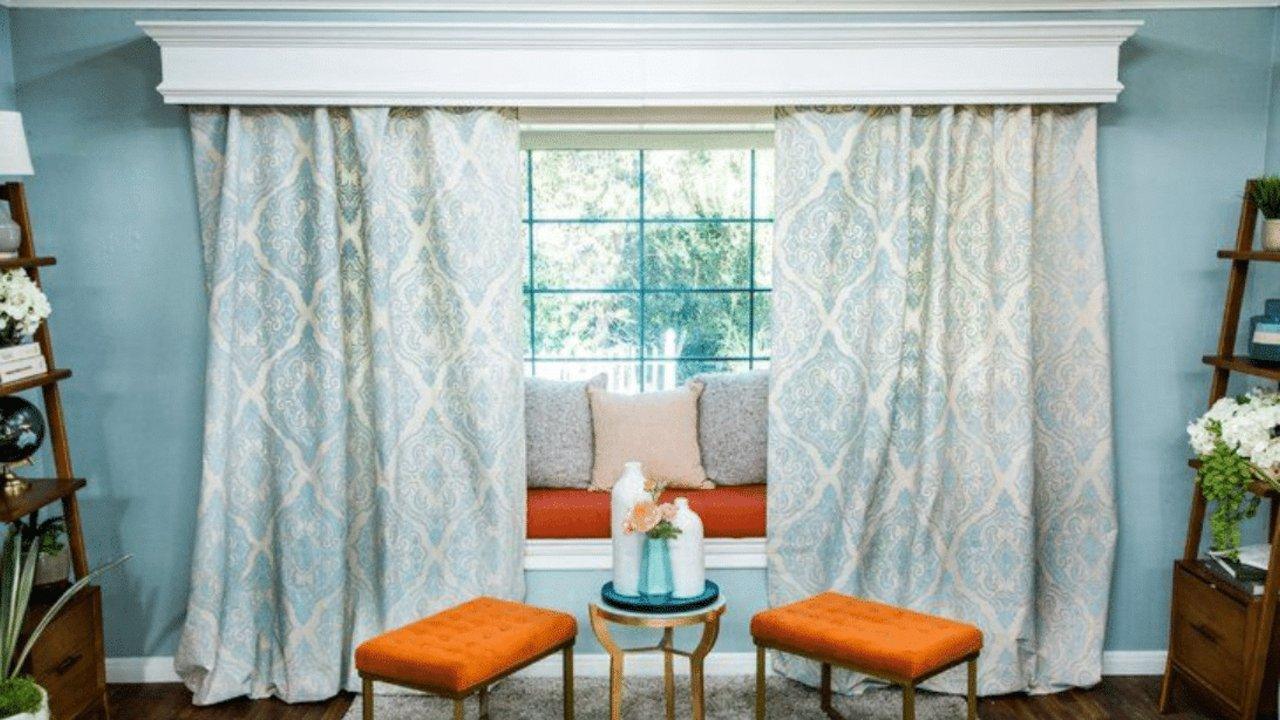
A six by nine foot drop cloth and an oversized wall stencil, and the finished panels read as high end pattern rather than a painted craft. Lay the drop cloth flat, smooth it out and fold the top edge over to the back to make a loop for a wooden rod, then stitch that fold to hold it. Lay the stencil to the far end and chalk mark its edge so you know where the next repeat starts. Weight the stencil edges so it cannot shift mid pass, then dab chalk paint on with a stencil brush in an up and down motion rather than brushing sideways, which is what stops paint creeping under.
Get the full tutorial at Sueeye.
18. DIY No Sew Roman Shades
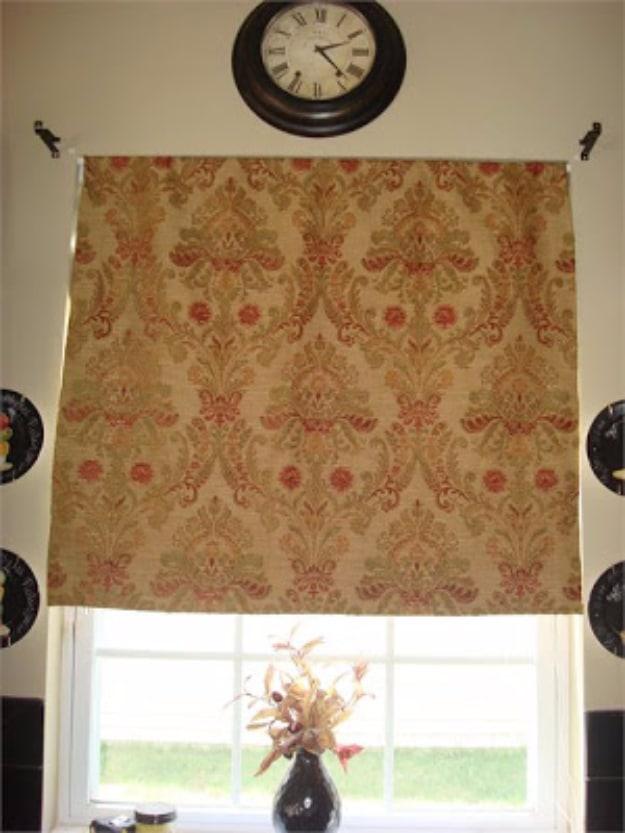
A yard of fabric covers a standard window, and the lifting mechanism is ribbon and a couple of cup hooks. Cut the fabric, hem the sides with hemming tape, and make the top into a rod pocket for a tension rod that costs under two dollars. Set the cup hooks on the wall above the window, higher than you think, so the folded shade does not eat into the glass. Hand sew a ribbon to each side of the fabric at exactly matching heights, anchored with a button. Take each ribbon up behind the fabric and loop it over its hook, one fold at a time. Shorter ribbons make the upper folds.
Get the full tutorial at Thrifty Decor Chick.
19. Cute DIY Cafe Curtains
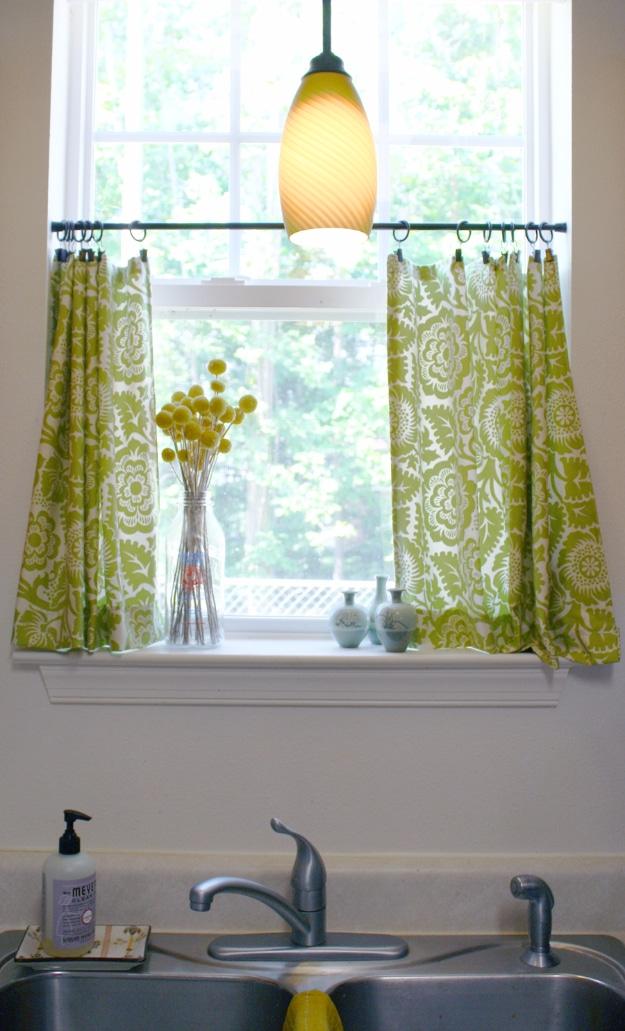
A tension rod, clip on rings and two hemmed rectangles, finished in a nap. Measure your own window before you cut anything; the panels here came out at twenty seven and a half inches long by just under forty three inches wide, which suits that window and probably not yours. Press and stitch double fold hems on all four sides, two inches along the bottom and one inch on the top and sides, so the bottom edge carries a little weight and hangs straight. Clip the rings on and drop the rod into the frame. Nothing is screwed to anything, which is why it suits a rented kitchen.
Get the full tutorial at Jen Woodhouse.
20. Greek Key Shades With Duct Tape
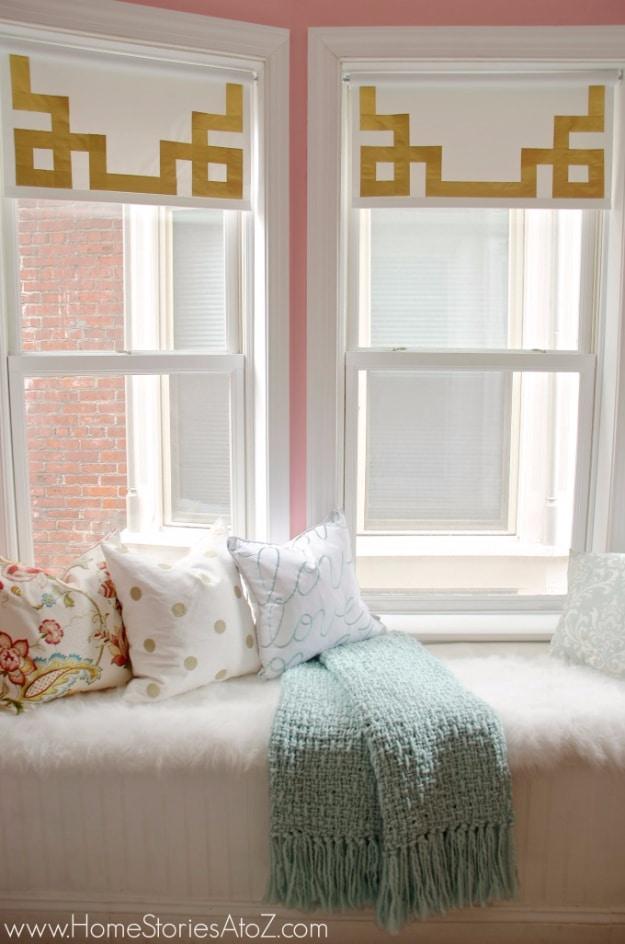
Plain white room darkening roller shades, under ten dollars each, get a gold Greek key border made entirely from duck tape, and three windows came in under forty dollars. The pattern is drawn to fit the tape width, just under two inches, and traced lightly in pencil an inch in from every edge. Roll the tape onto the drawn line and score it with a utility knife rather than cutting all the way through, then pull firmly and it snaps clean without gumming the blade. Overlap the tape at the corners instead of mitering. Measure the drop first so the pattern finishes where you want it.
Get the full tutorial at Home Stories A to Z.
21. Easy No Sew White Curtains
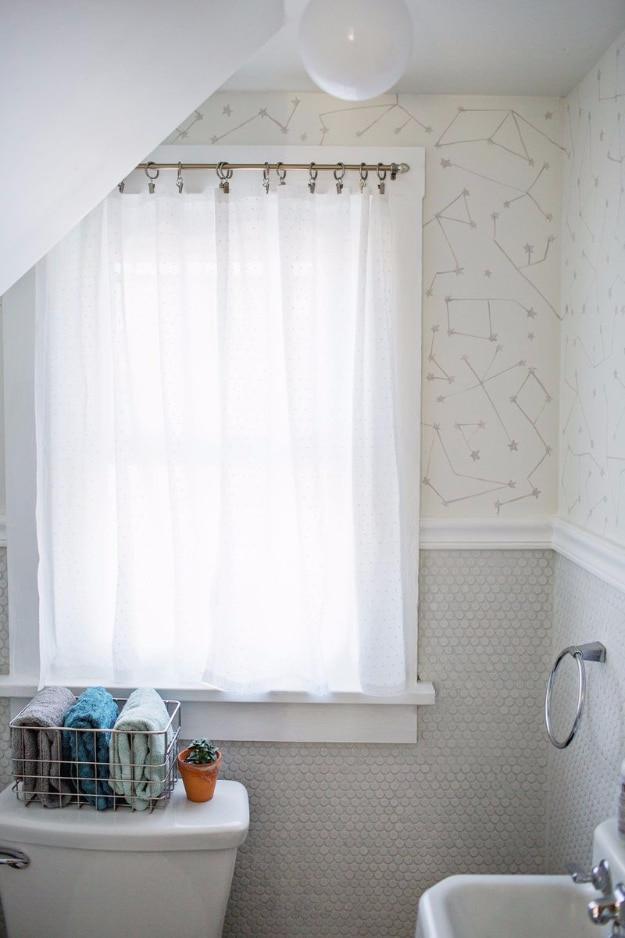
Swiss dot cotton and a roll of fusible fabric tape, for a small bathroom window that needs light and privacy at the same time. Cut the fabric one and a half times the width of the window so the panels still fold when they are closed, and add two inches to the height and four to the width for the hems. Fold and press a one inch seam down each side, slide the tape under the fold, lay a damp thin cotton towel over it and hold the iron in place for ten seconds before moving on. Flip and press the other side too, then hang from clip rings.
Get the full tutorial at A Beautiful Mess.
22. Lined Back Tab Curtains
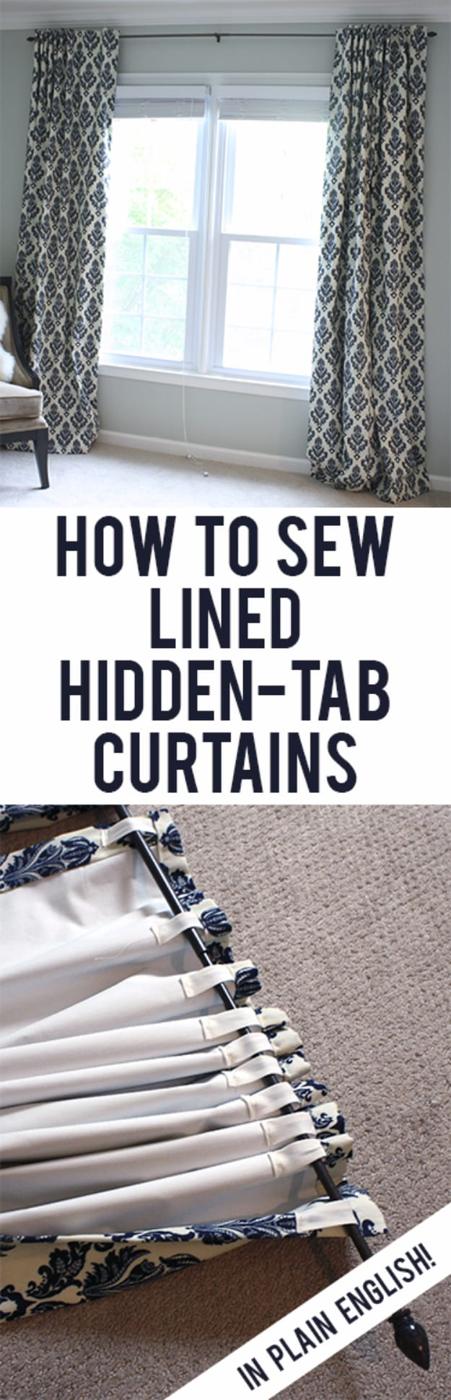
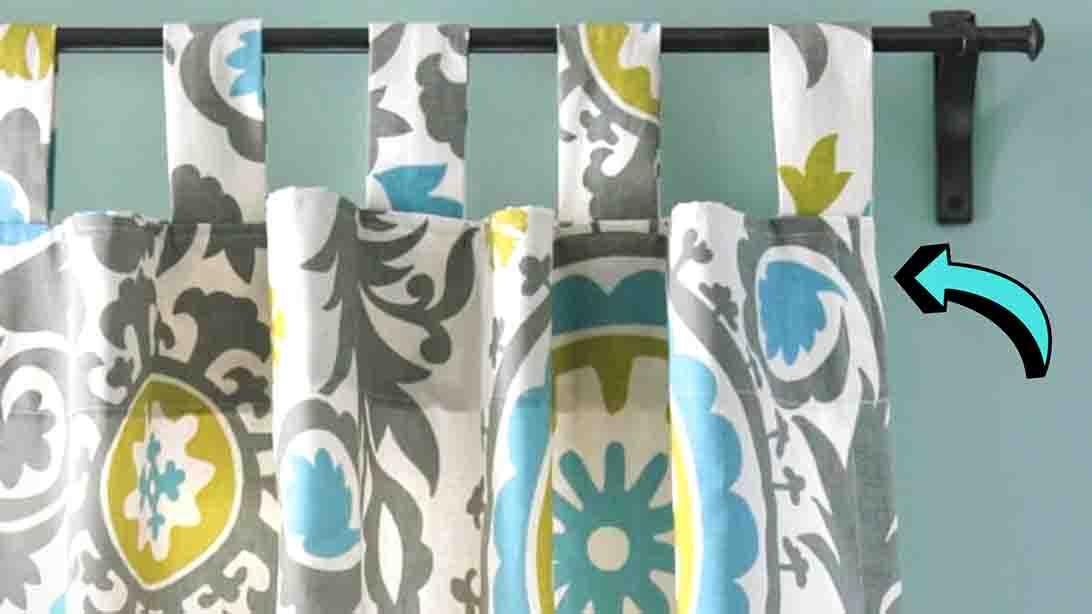
Properly lined panels with hidden tabs, and the measurements are the whole tutorial. Cut the curtain fabric ten inches longer than the finished drop and the lining two and a half inches longer, with the lining six inches narrower across. Hem the bottoms separately, folding four inches twice on the curtain and two inches twice on the lining. Lay the lining on so it sits an inch and a half up from the curtain’s bottom edge, right sides together, sew both sides and turn it out like a pillowcase. Fold the top down an inch twice, tuck in bias tape tabs cut two and a half inches long about five inches apart, and stitch.
Get the full tutorial at View Along the Way.
23. No Sew Cafe Curtains
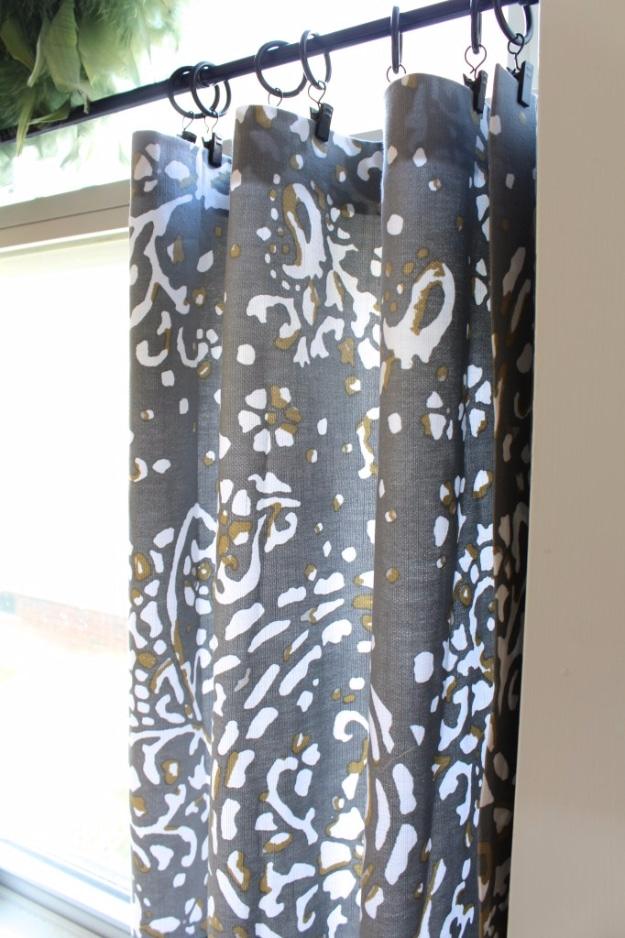
A ready made curtain panel gets cut down and both halves become cafe curtains, which is how one panel covers a window twice. Measure the width and the height you want, then cut a strip straight across the bottom of the panel and divide it in two. Hem the cut edges with iron on hemming strips: fold the raw edge over, slip the adhesive strip into the crease, press. Clip drapery clips along the top about three and a half inches apart and hang on a small tension rod. The creator spray painted her white rod oil rubbed bronze, which is what stops it reading as hardware store plastic.
Get the full tutorial at Simple Stylings.
24. Drop Cloth Smocked Curtains
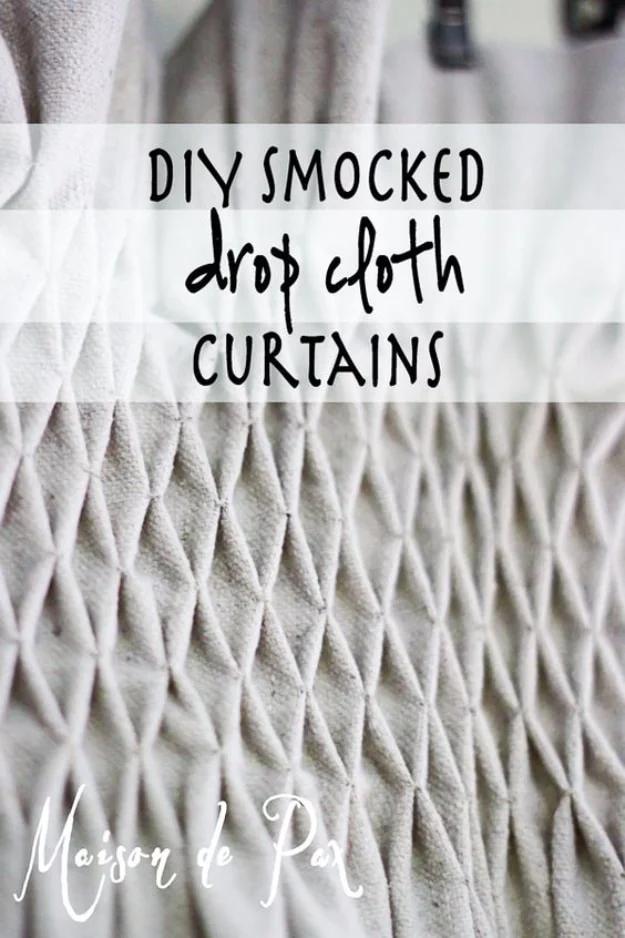
Honeycomb smocking across the header turns plain canvas into something that looks expensive, and there is one number you must know before cutting: smocking halves the width of the fabric. If you want a finished panel three feet wide, start with six. Buy drop cloths to match your wall height so the pre hemmed edges do most of the work, then hang the rod four to eight inches below the ceiling for a little pooling at the floor. Hem all four sides, start the smocking a few inches down from the top so there is a ruffle above the clips, and work on a three quarter inch grid.
Get the full tutorial at Cedar Hill Farmhouse.
25. Make Your Own Striped Curtains With Paint
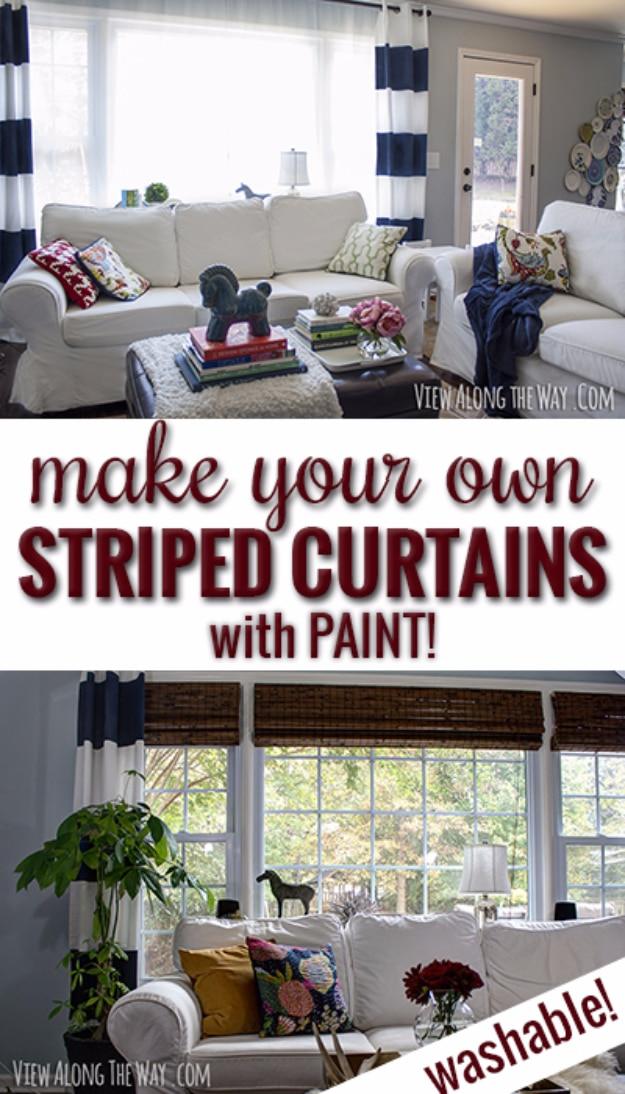
Painted stripes on plain sailcloth panels, and because there is textile medium in the mix they actually wash. Mix one part black into nine parts blue to get the navy, then cut that with textile medium at two parts paint to one part medium. Measure the real length of the panels rather than trusting the package, mark your stripe intervals down both sides, and tape the outside edges of every stripe you intend to paint. Thirteen inches is a good wide stripe. Roll the paint on slowly, lapping slightly onto the tape, and pull the tape while the paint is still wet. Two or three coats, then iron the back to set it.
Get the full tutorial at View Along the Way.
26. DIY Pinch Pleat Curtains (No Sewing)
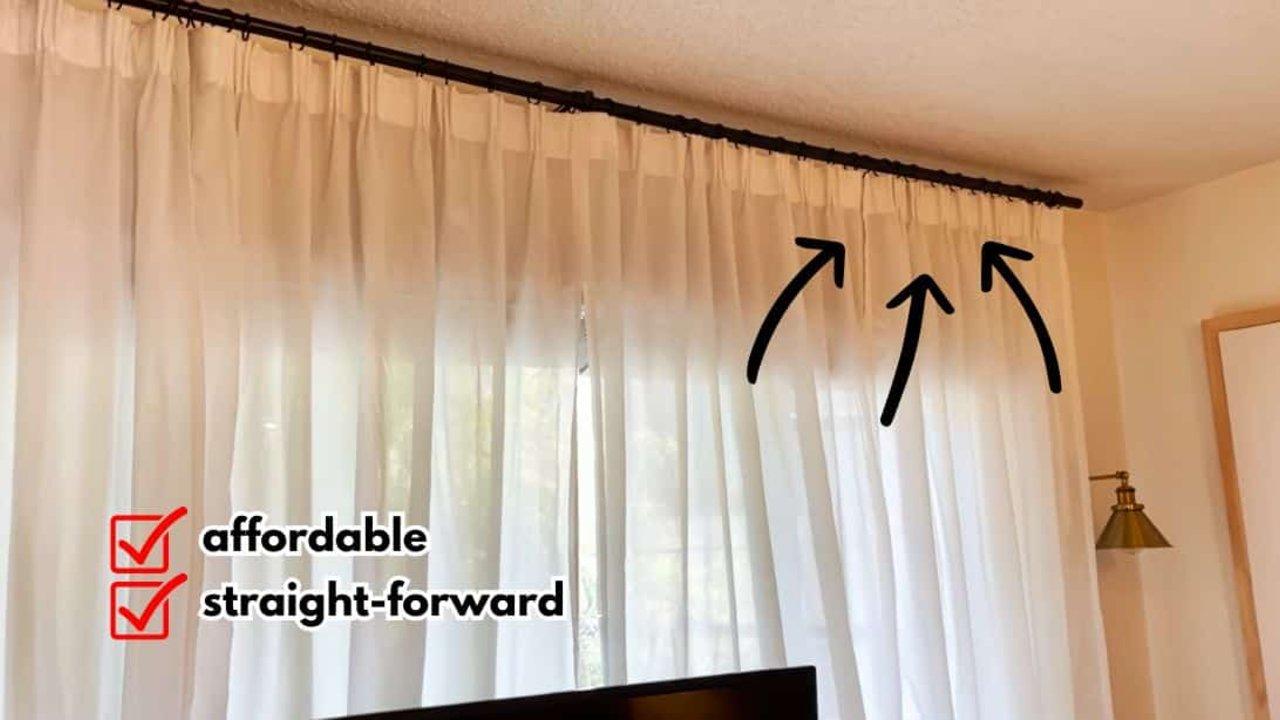
Pinch pleats are normally stitched in permanently, and this gets the same tailored header out of four pronged pleater hooks and a panel that already has pleater tape built into its top hem. Start at the outer edge of the first pleater section, insert all four prongs at once, one row at a time, and work inward. The spacing pattern is four, three, three, three: count four slots from the end for the first prong, then three for each of the next three. A toothpick helps push a stubborn end row through. Hook the pleaters onto rings and drop the rings on the rod.
Get the full tutorial at Sueeye.
27. $5 Curtains
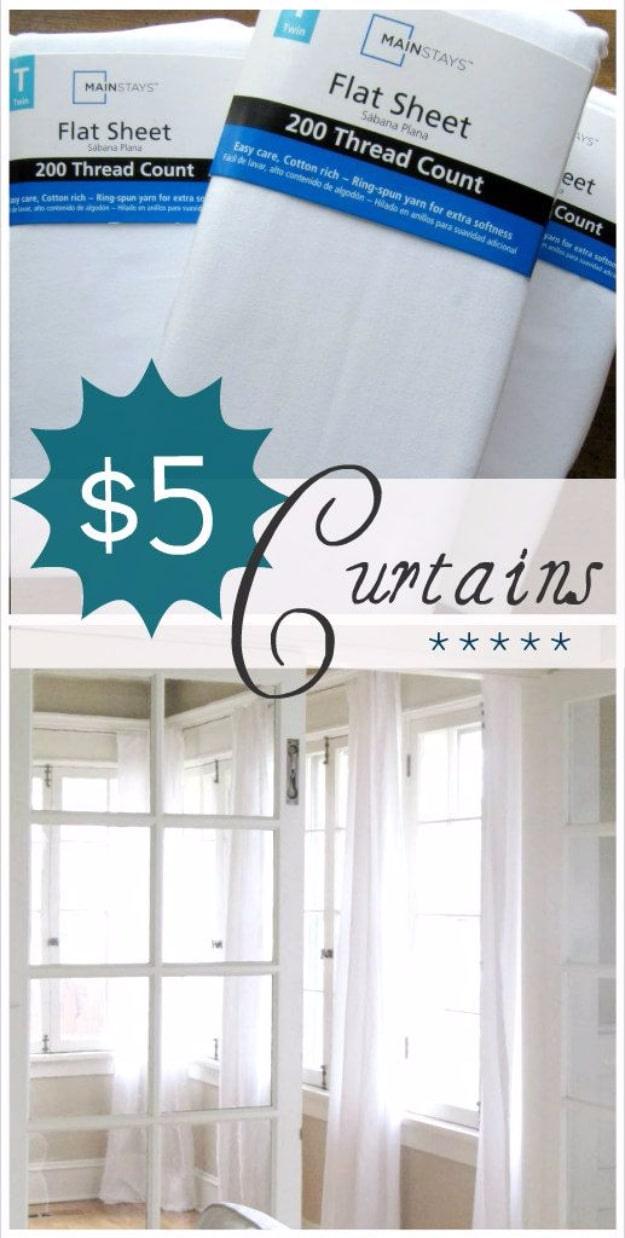
Twin flat sheets from the discount store bedding aisle, five dollars each, and one sheet makes two panels for an average window. Prewash every sheet before you cut, then cut each one in half lengthwise. Iron and hem the raw edges. The header is the clever part: cut slits through the top layer of the existing hem only, every couple of inches, starting and ending with a slit, and the rod threads in and out through them so the panel falls into even pleats by itself. Five sheets covered a whole sunroom including a set of French doors.
Get the full tutorial at The Wicker House.
28. 5 Minute No Sew Drop Cloth Curtains
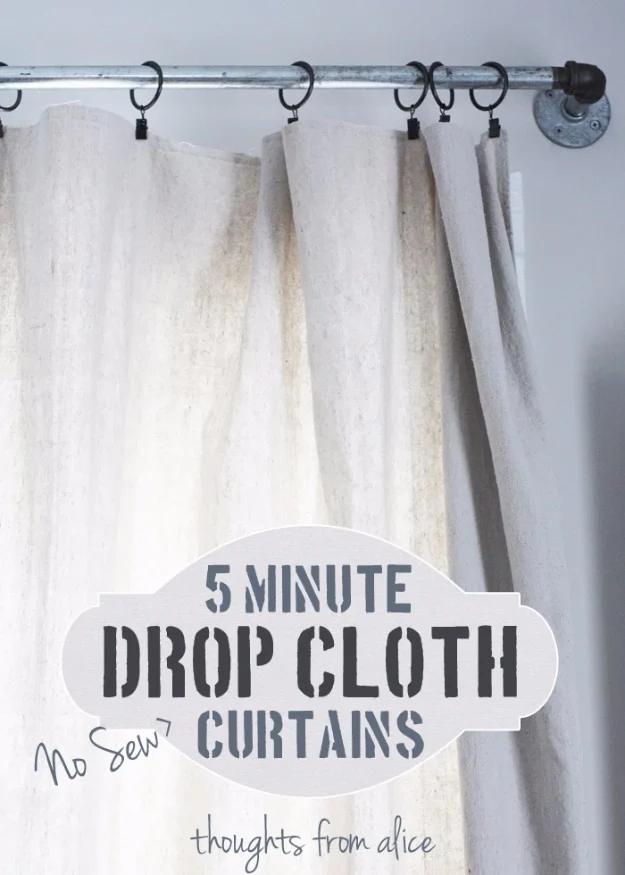
One canvas drop cloth makes both panels. A single four by fifteen foot cloth from the hardware store covers a window that wants panels about seven feet long and four feet wide, which is why the cost per panel is so low. Run it through the washing machine with no detergent to loosen the weave, dry it, fold it in half and cut as straight as you can down the center. That is the whole build, because the edges are left unhemmed on purpose and the rustic edge is the look. Seven drapery clip rings per panel, spaced by folding the top edge in half and in half again.
Get the full tutorial at Thoughts From Alice.
29. Easy To Make Back Tab Curtains
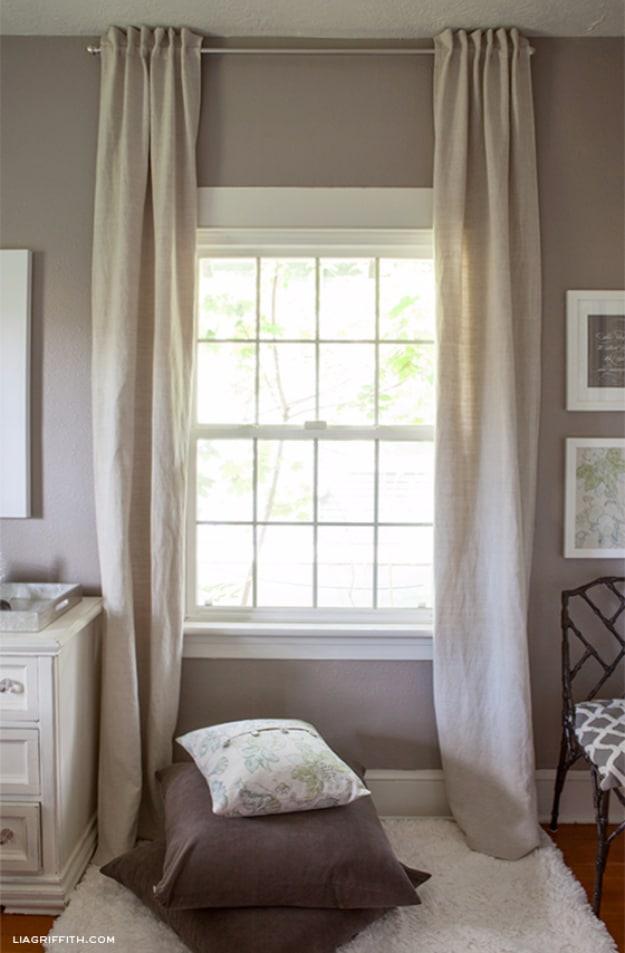
Natural linen panels with twill tape tabs, and the guidance here is more about proportion than construction. Measure from the ceiling rather than the top of the window frame, and add six inches so there is a little header standing above the tabs. Resist the urge to double the fabric width; that is the advice for gathered headers and it is far too much fabric for a back tab panel, which is meant to hang in soft, shallow folds. Hide every raw edge by turning it in rather than leaving it exposed, and cut the twill tape loops long enough that the panel slides on a thick rod instead of gripping it.
Get the full tutorial at Lia Griffith.
30. White Pillowcase Curtains
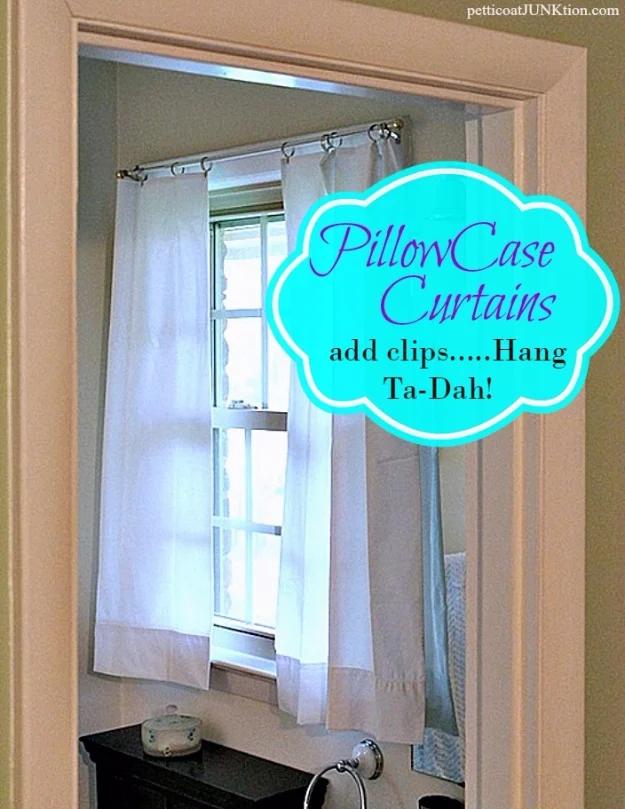
Pillowcases straight out of the package, clipped to a rod, finished. King size cases suit a window around thirty six inches high by twenty six wide, which is the kind of odd size an older house throws at you and a store bought panel never fits. They arrive hemmed with decorative open stitching along the opening, so that finished edge becomes your bottom hem and there is nothing to sew. Metal curtain clips go along the top, thrift store or department store, and the whole thing hangs on whatever rod is already up. The double layer of cotton filters light beautifully and gives real privacy.
Get the full tutorial at Petticoat Junktion.
31. DIY Burlap Curtains
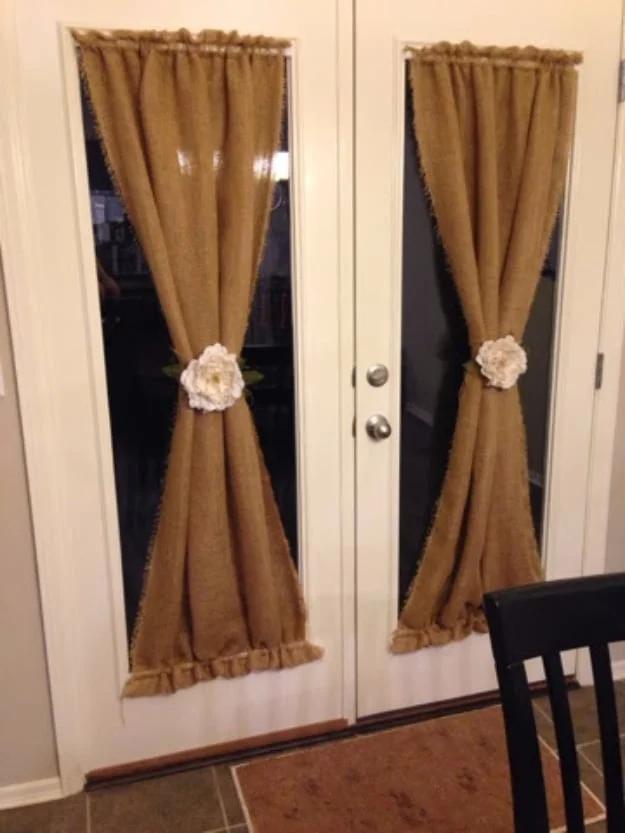
One roll of burlap, about ten dollars, cut in half makes two equal panels for a kitchen door. The header is a double seam: fold the top over and stitch roughly an inch and a half from the fold, then stitch again an inch and a half from that, which makes a rod pocket with a small ruffle standing above it. The bottom gets the same treatment, because a door curtain needs a tension rod at both ends so it cannot swing. Measure carefully for exact door length, then press the seams flat. Fair warning from the creator: burlap has no straight grain, it itches, and it smells.
Get the full tutorial at Morris 6411.
32. No Sew Burlap And Lace Curtains
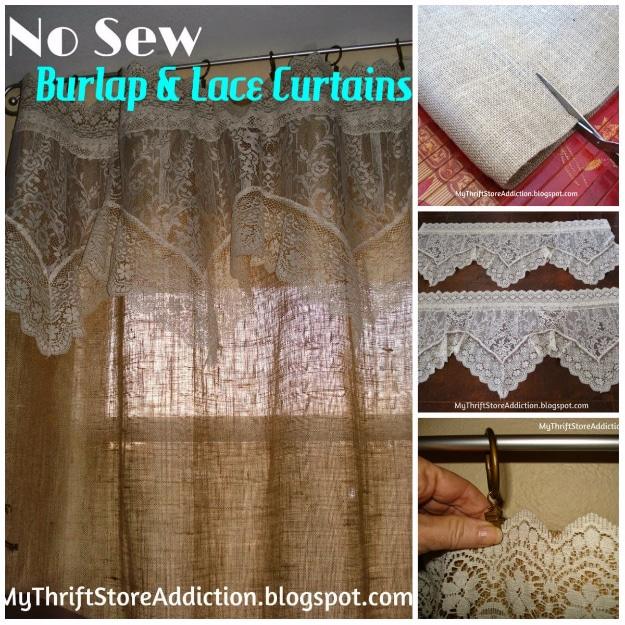
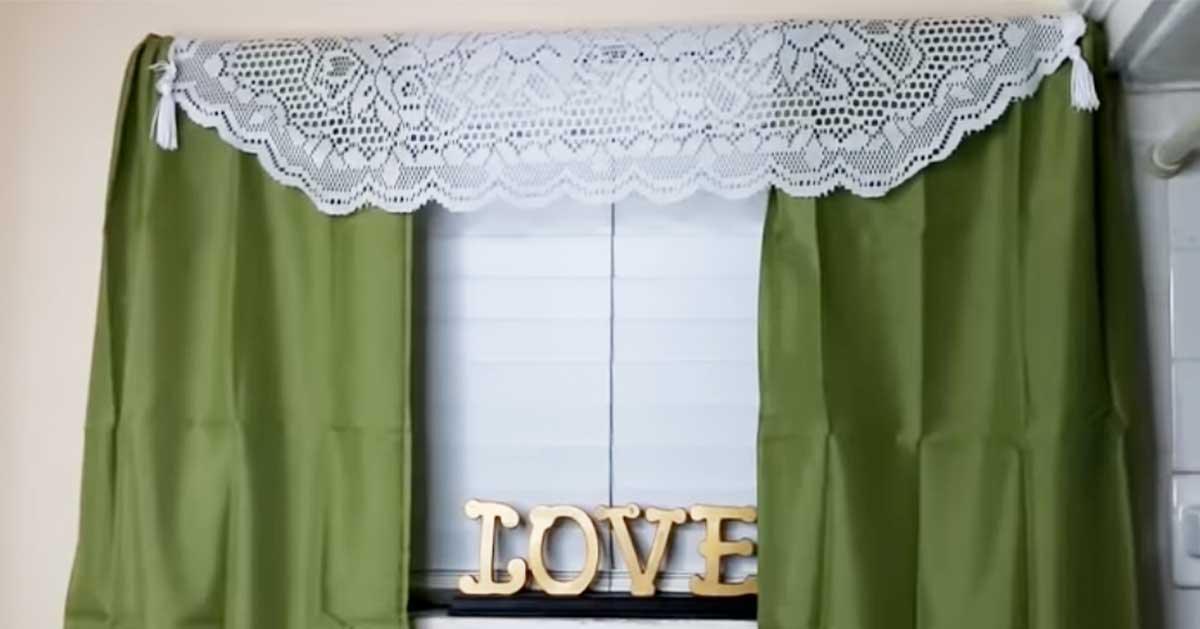
Six yards of burlap and a thrifted lace tablecloth, and the total came in under twenty dollars for two full length panels. The creator’s own hindsight is that five yards would have done a six foot window, so measure before you buy. There is no construction at all: fold the burlap in half, cut two equal lengths, then lay the lace across the top of each panel and clip both layers together with clip on curtain rings. Fourteen clips covered two panels on a standard window. Space the end clips first and then fill in evenly. Vintage hankies and table runners work the same way.
Get the full tutorial at My Thrift Store Addiction.
33. Stenciled Drop Cloth Curtains
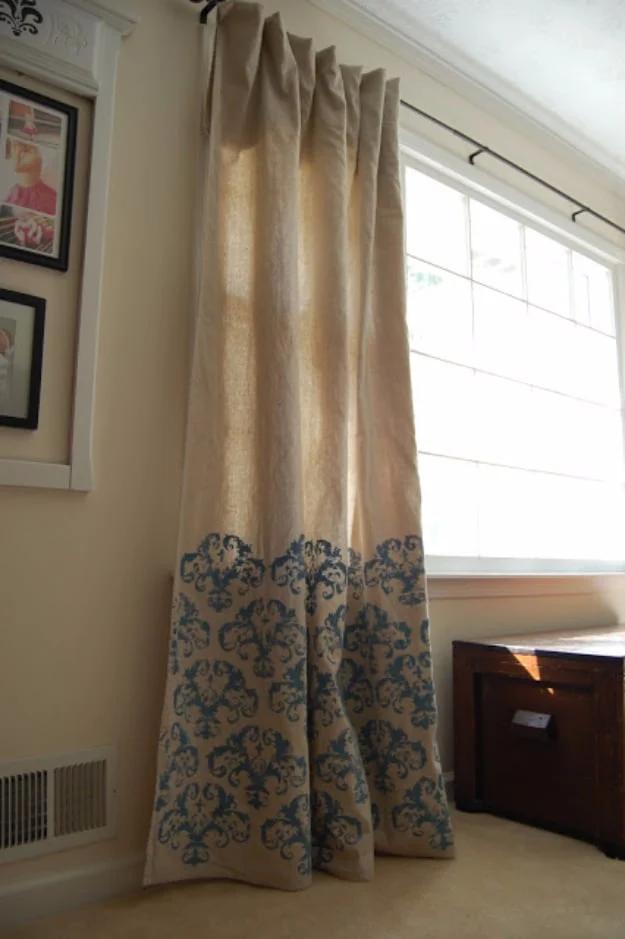
Canvas drop cloths at two for ten dollars, a craft store stencil and bottles of acrylic craft paint at fifty nine cents each, roughly one bottle per row. The two details that matter are both about the stencil. Spray adhesive on the back of it holds it flat against the canvas so paint cannot bleed under the edges, and a sea sponge rather than a brush pushes color into the weave without flooding it. The creator lined each row up by eye rather than measuring, on the theory that a hanging curtain’s natural folds hide any drift, and she is right. Budget about two hours a panel.
Get the full tutorial at Creative Outlets of a Thrifty Minded Momma.
34. Extra Long Curtains DIY
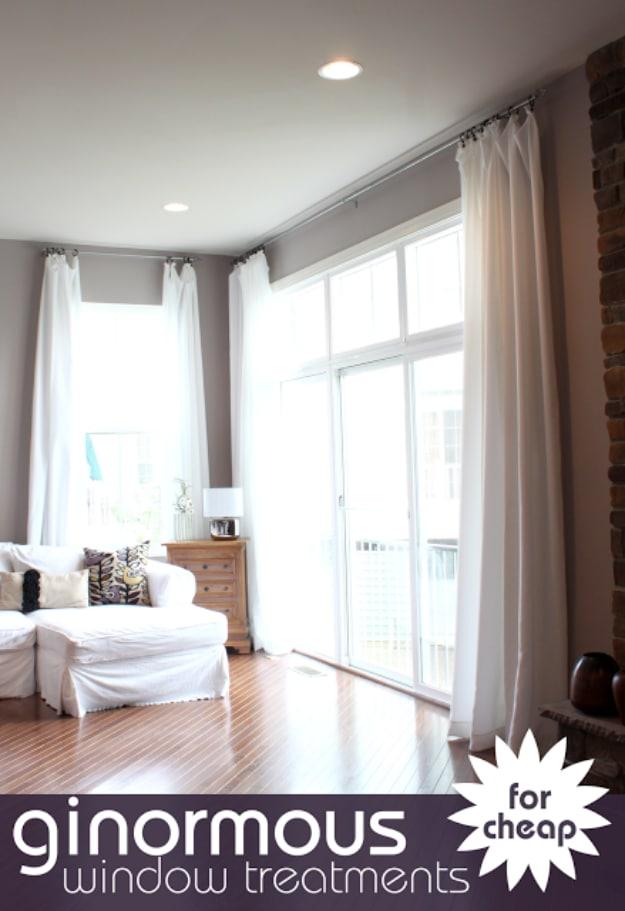
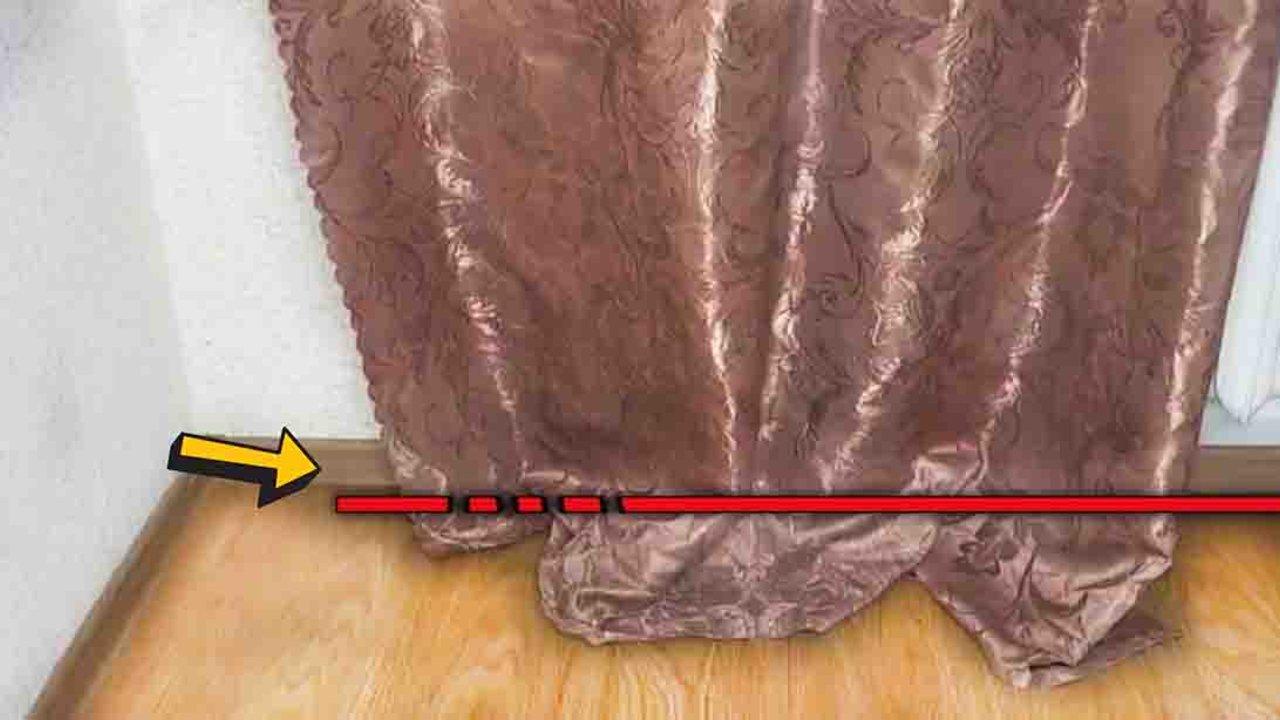
Tablecloths, not curtain panels, which is the whole insight. A one hundred and twenty inch tablecloth is exactly what a ten foot ceiling needs and no curtain aisle stocks that length at a sane price. These ran about thirteen dollars each and came down to roughly ten with a store coupon. Hem the bottom so they do not puddle too heavily on the floor, then build faux pinch pleats into the top and hang the lot from ring clips. Multiple windows came in around sixty five dollars total. If a pair needs to actually close, a chip clip holding them together is the creator’s own honest fix.
Get the full tutorial at The Creative Imperative.
35. Easy No Sew Curtain Panels
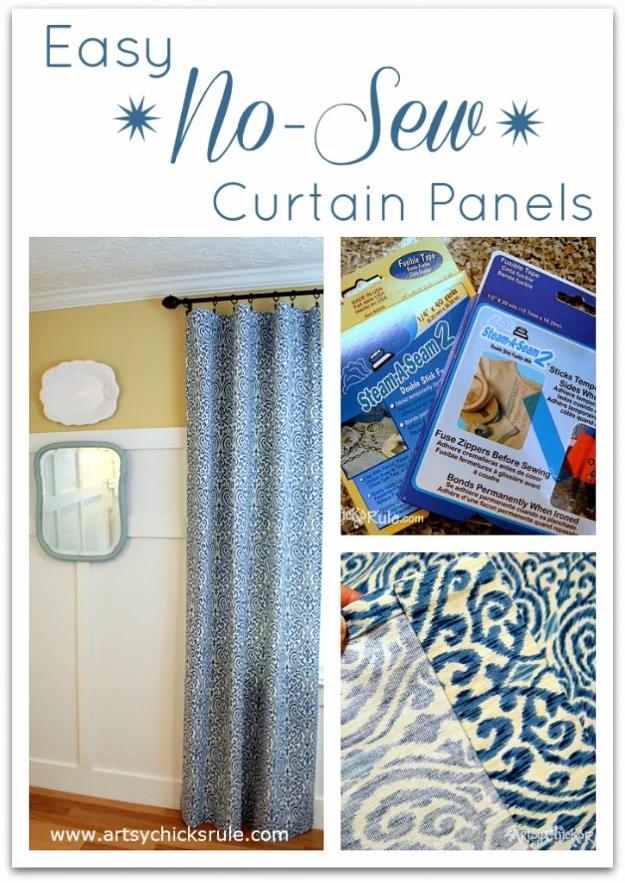
Two panels in one evening with a roll of double stick fusible tape. Work out the drop from rod to floor, subtract your hem allowances, and cut. Down each side, fold the frayed edge inward once for cleanliness and then fold again to make the hem, press the tape in between and iron. Do the bottom the same way. If you plan to use a rod through the top rather than clips, leave an opening in the top hem; otherwise skip it entirely. Without pins, use the fabric’s printed pattern as your straight line. Wash cold on delicate and lay flat, and re press any seam that opens.
Get the full tutorial at Artsy Chicks Rule.
36. Super Easy No Sew DIY Curtains
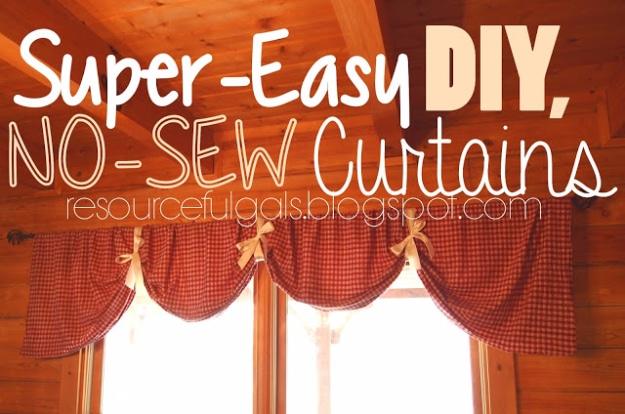
No cutting, no hemming, no adhesive: fabric gets draped over the rod and tied into swags. Measure the rod first, because the fabric needs to be at least that long and a good deal longer if you want deep gathers. Standard forty four inch fabric suits most windows. Lay the length over the rod with both ends hanging even, decide how many swags you want, then gather the fabric gently and wrap a ribbon around both the fabric and the rod at each gathering point. Eyeball the depth, not too tight against the rod and not too slack. Pinking shears stop the exposed ends fraying.
Get the full tutorial at Resourceful Gals.
37. Shaker Pullback Curtain
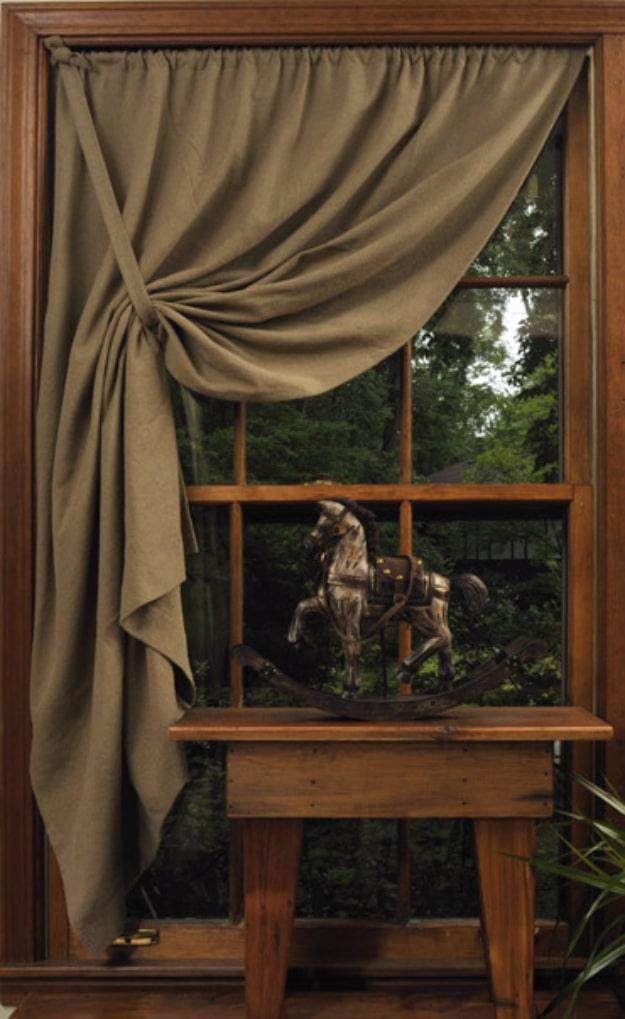
Two and a half yards of taupe prairie cloth, used at its full forty five inch width so there is no side seam to worry about. The window here is fifty eight inches; cut to suit yours. Press before you sew, which is the step that makes the whole thing go quickly: half inch tucks at each side, a two inch bottom hem, and the top hem doubling as the rod pocket. The tieback is two strips, four by forty five and four by five and a half, joined into one four by fifty length, then folded sides to middle and folded again into a strip about an inch wide. Tie it to the rod with a slip knot.
Get the full tutorial at Mom's Secret Recipe.
38. No Sew Grommet Curtains Tutorial
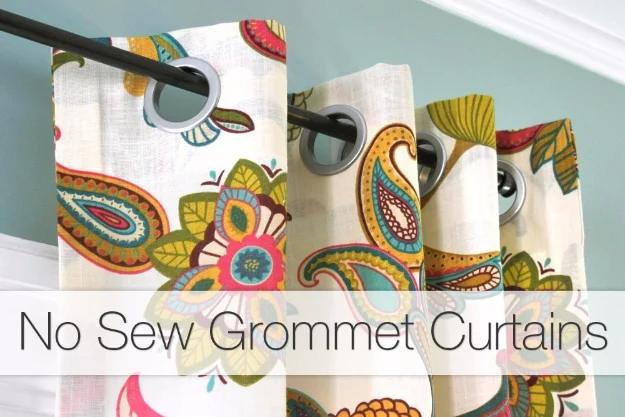
Grommet tape and snap together grommets mean a tailored grommet panel with no machine anywhere. Work out the finished size first, multiply the window width by about two for fullness, then add four inches to the width and sixteen to the height for the hems. Fold each side over one inch, press, fold again, slide fusible bonding web under the fold and hold a steamy iron on each section for ten seconds. The top and bottom hems fold over four inches twice. Keep the grommet count even, or the panel starts in front of the rod at one end and behind it at the other.
Get the full tutorial at OnlineFabricStore.
39. DIY Custom French Pleat Curtains
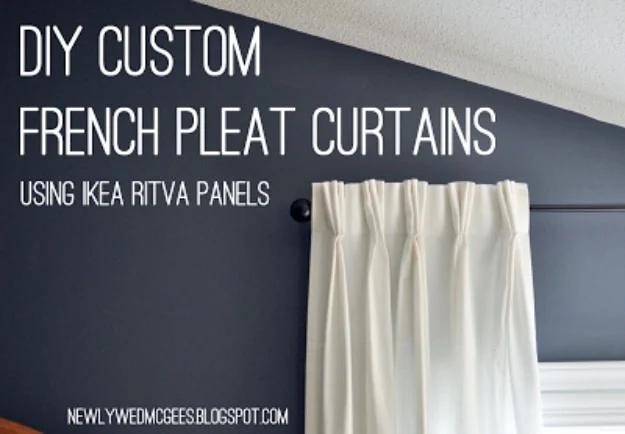
IKEA Ritva panels, sold in ninety eight and one hundred and seventeen inch lengths, already have pleater tape built into the header, which removes the only fiddly part of a French pleat. The hardware is four pronged triple pleat hooks from a fabric store. Decide the pleat depth and spacing before you start, because the hooks set the pattern permanently. Put the first prong into a slot, count along to the depth you want and set the second, and keep going until the pleat closes. Five pleats, each made from eight inches of panel width with about three inches between them, suited a standard window here.
Get the full tutorial at Newlywed McGees.
40. DIY No Sew Valance Tutorial
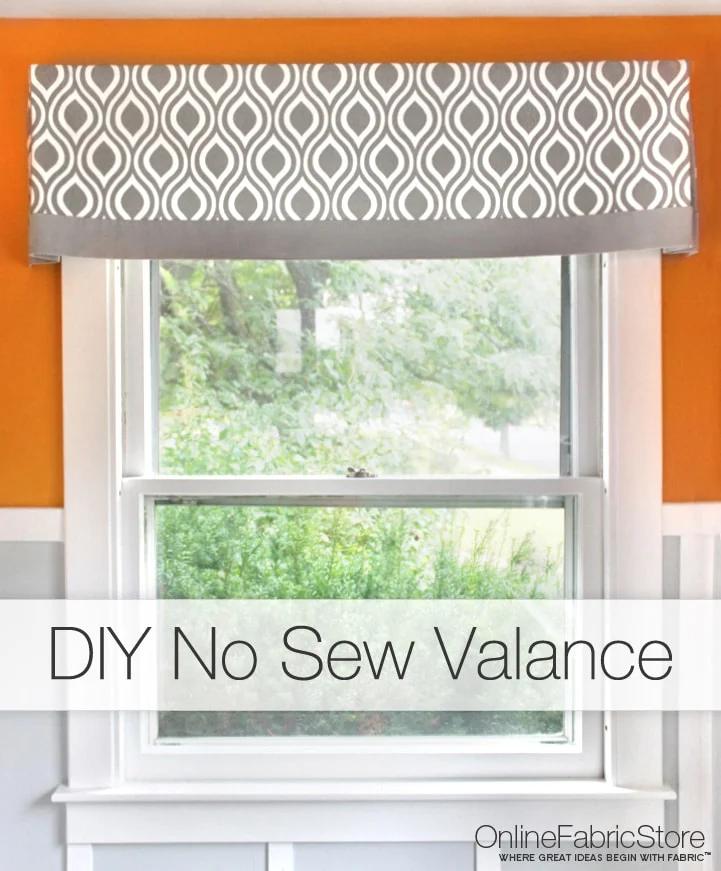
A flat valance with pleats at the corners and a contrast band along the bottom, built on a board and bonded rather than sewn. Cut a piece of wood to the width you want, two and a half to three and a half inches deep, which a two by four gives you exactly. The front, the two sides, the two pleats and the band are all cut separately and joined with quarter inch bonding tape under a steam iron. Work left to right so the pleats land in the corners. Hot glue the finished cover round the board and hang it on L brackets above the frame.
Get the full tutorial at OnlineFabricStore.
41. Ruffled Burlap Curtain Tutorial
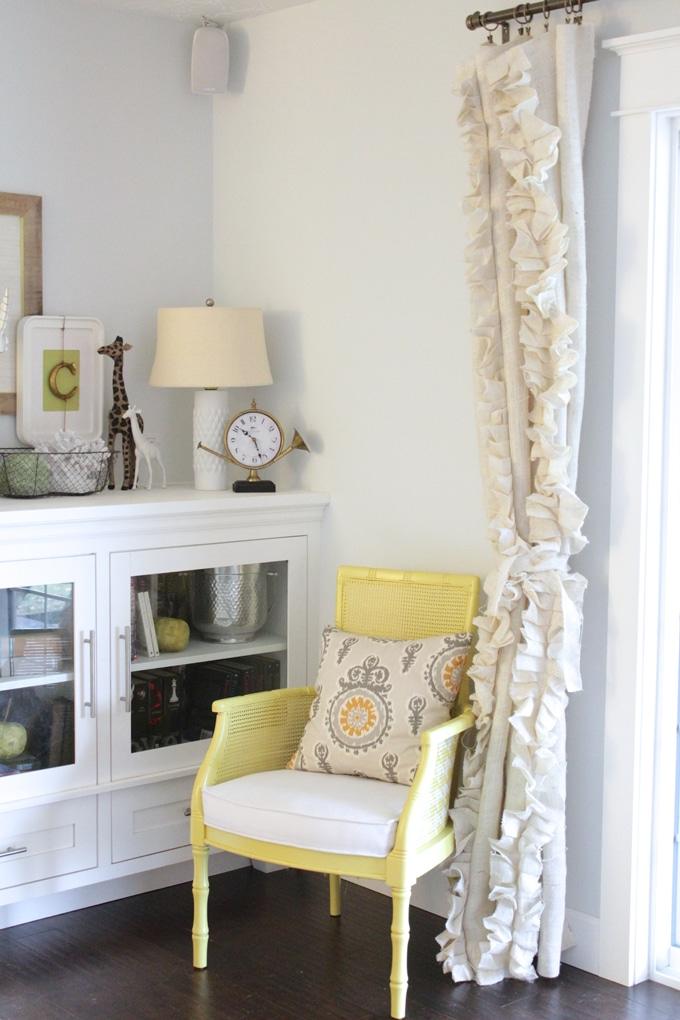
Eleven yards of burlap, two panels at sixty three inches each covering a sixty nine inch door with twelve inches of overhang on either side, and about eighty dollars all in including the rod and rings. Never cut burlap on what looks like a square edge; pull a single thread out of the weave and cut along the gap it leaves. Ruffle strips get cut six to seven inches wide and three times the finished curtain length, joined with a zigzag stitch and a half inch overlap because the weave is too open for a straight seam. Pleat by hand an inch or two at a time, baste, then stitch down the center.
Get the full tutorial at The Caldwell Project.