
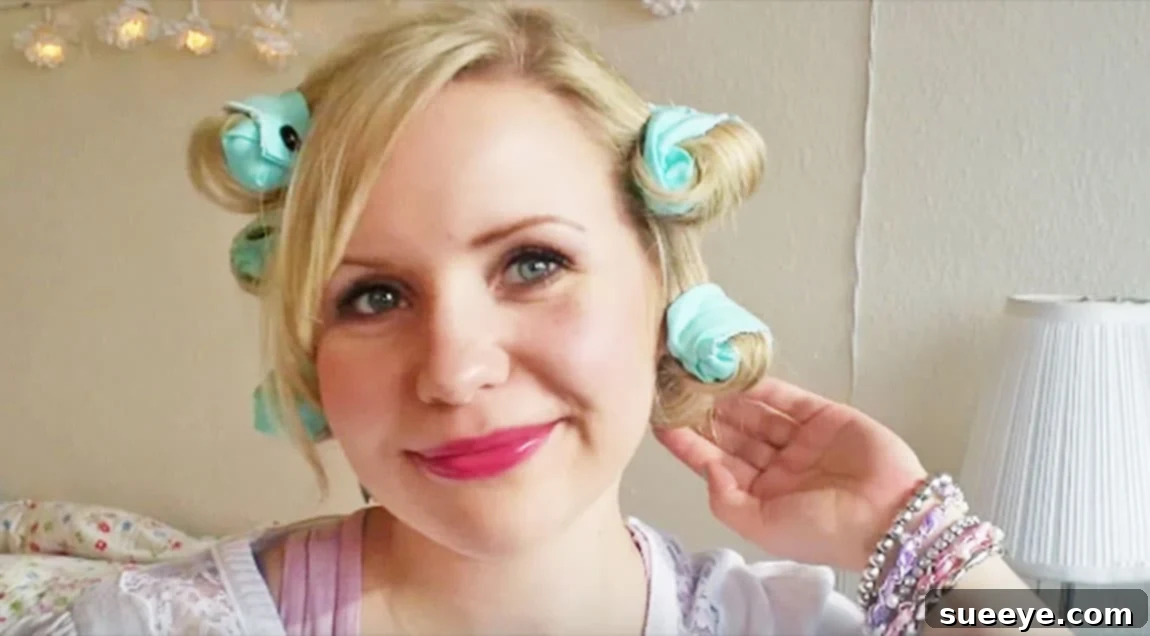
Effortless Curls Overnight: Your Ultimate Guide to DIY Heatless Curlers
Are you tired of the endless battle with heat styling tools? The constant fear of burning your scalp, the time-consuming process, and the irreversible damage to your precious strands? If you’re like countless others, you’ve probably wished for a magical solution to achieve beautiful, bouncy curls without any fuss. The good news is, that magic exists, and it’s surprisingly simple, incredibly gentle, and completely DIY. Say goodbye to singed ends and hello to gorgeous, healthy curls that form while you sleep!
For years, I struggled with the same dilemma. My desire for perfectly styled hair often clashed with my reluctance to spend hours in front of the mirror, wielding a scorching hot curling iron. The endless cycle of heat damage and the constant need for repair products felt like a losing battle. I yearned for a method that was not only effective but also kind to my hair and incredibly convenient. It was during this search that I stumbled upon a game-changing idea – the concept of DIY heatless curlers.
The Inspiration Behind the Magic: Discovering DIY Hair Curlers
My journey to heatless curls began with a serendipitous discovery. I found a delightful blog post from Life After Laundry that showcased the most adorable vintage-style fabric curlers. The images instantly captivated me; they looked like miniature, soft pillows designed specifically to cradle my hair into perfect waves. Being a visual learner, I immediately scoured YouTube for tutorials and found an incredibly helpful one by MalikaGodt. Combining insights from the blog post and the visual guidance from the video, I felt empowered to create my own set of these remarkable curlers. And indeed, with a little fabric and some basic sewing skills, I had a personalized set ready in no time!
What I quickly realized was that these homemade fabric curlers weren’t just a fun craft project; they were a complete game-changer for my beauty routine. They are super simple to make, incredibly comfortable to wear, and have since become a new staple in my hair care arsenal. Beyond personal use, their charm and practicality make them an incredibly thoughtful and unique gift. Imagine gifting your friends or family a set of these during the holidays – it’s a present that truly keeps on giving, offering the gift of healthy, beautiful hair.
Why Embrace Heatless Curls? The Unmatched Benefits
The appeal of heatless curls extends far beyond mere convenience. This method offers a multitude of benefits that traditional heat styling simply cannot match:
- Preserve Hair Health: This is arguably the most significant advantage. Constant exposure to high temperatures from curling irons, straighteners, and blow dryers can strip your hair of its natural moisture, leading to dryness, breakage, split ends, and a dull appearance. Heatless methods completely eliminate this damage, allowing your hair to thrive, grow stronger, and maintain its natural luster.
- Save Time & Simplify Your Routine: Who doesn’t want more time in the morning? With heatless curlers, your hair styling happens while you sleep. Simply wrap your hair before bed, wake up, unwrap, and you’re greeted with beautiful curls. This frees up precious minutes in your morning routine, allowing you to hit that snooze button one more time or enjoy a leisurely breakfast.
- Cost-Effective Beauty: Investing in high-quality heat styling tools can be expensive, not to mention the cost of heat protectants and repair treatments. DIY heatless curlers require minimal materials, most of which you might already have or can purchase affordably. This is a budget-friendly approach to achieving salon-worthy curls at home.
- Comfort & Versatility: Unlike rigid rollers, these fabric curlers are soft and pliable, making them incredibly comfortable to sleep in. They are also lightweight and portable, perfect for travel. You can even wear them around the house during the day if you’re working from home or just relaxing.
- Suitable for All Hair Types: Whether your hair is fine, thick, straight, wavy, or even slightly coarse, heatless curlers can work wonders. The technique can be adjusted to create various curl patterns, from loose, beachy waves to tight, defined spirals, making them universally adaptable.
- Eco-Friendly Option: By reducing reliance on electric appliances, you’re also making a small, positive impact on your energy consumption. Plus, reusable fabric curlers minimize waste compared to disposable options.
Crafting Your Own: A Step-by-Step Guide to DIY Heatless Curlers
Making your own set of fabric curlers is a straightforward process, even for beginner sewers. The satisfaction of using something you’ve created yourself adds an extra layer of enjoyment to your beauty routine. Here’s everything you’ll need and a detailed guide to get started:
Materials You’ll Need:
- Fabric (12 – 3 in x 10 in pieces): Opt for soft, smooth fabrics like cotton, flannel, satin, or even an old silk scarf. Satin or silk are particularly beneficial as they cause less friction, reducing frizz and protecting hair cuticles. Choose fun patterns or colors to personalize your curlers!
- Fiberfill: This is the soft, fluffy stuffing typically used for pillows or toys. It provides the necessary cushioning and shape for your curlers, making them comfortable and effective.
- Velcro: You’ll need about 1/2 inch to 1 inch wide velcro strips. This will act as the closure for your curlers, securing your hair in place. Both sew-on or iron-on velcro can work, though sew-on tends to be more durable.
- Marking Tool: A water-soluble pen, chalk, or a tailor’s pencil will help you mark your fabric accurately for cutting and sewing lines. These marks will disappear or wash out easily.
- Something Pointy: A chopstick, a thin dowel, or a fabric turner tool will be invaluable for turning your fabric pieces right side out after sewing and for stuffing them evenly with fiberfill.
- Sewing Machine and Basic Sewing Supplies: While a sewing machine will make the process much faster, these can also be hand-stitched if you’re patient. Basic supplies include scissors, thread matching your fabric, and sewing pins.
Detailed Sewing Instructions:
- Prepare Your Fabric: Start by cutting your chosen fabric into 12 rectangular pieces, each measuring approximately 3 inches by 10 inches. Ensure your cuts are as straight as possible for a neat finish.
- Fold and Sew: Take one fabric rectangle. Fold it lengthwise, right sides together, so it measures 1.5 inches by 10 inches. Pin along the raw edge. Using your sewing machine (or needle and thread), sew a straight seam along the long raw edge, leaving about a 1/4 to 1/2 inch seam allowance. Crucially, leave both short ends open and also leave a small opening (about 1.5-2 inches) in the middle of the long seam. This opening will be used for turning and stuffing.
- Turn Right Side Out: Now for the magic! Use your pointy tool to carefully push the fabric through the opening you left, turning the tube right side out. Take your time to push out the corners gently, ensuring neat edges.
- Stuff with Fiberfill: Begin stuffing the fabric tube with fiberfill. Use your pointy tool to push the fiberfill evenly into both ends of the tube, ensuring it’s firm but still soft and pliable. Avoid overstuffing, as you want the curler to bend easily.
- Prepare and Attach Velcro: Cut two small pieces of velcro for each curler, one “hook” piece and one “loop” piece, each about 1 inch long. Position one velcro piece on the outside of one short end of the curler, and the other velcro piece on the *opposite side* of the *other* short end. This ensures they will connect when you roll the curler. Securely sew these velcro pieces into place.
- Close the Opening: Once stuffed and with velcro attached, carefully hand-stitch the small opening you left on the long seam. Use an invisible stitch (ladder stitch) for a clean finish. Repeat these steps for all 12 fabric pieces.
Achieving Flawless Curls: How to Use Your DIY Heatless Curlers
Making the curlers is only half the fun; the real joy comes from using them! Here’s how to get the best results for beautiful, long-lasting curls:
- Hair Preparation: Start with freshly washed, towel-dried hair. It should be slightly damp, not dripping wet. If your hair is too wet, it may not dry completely overnight, and if it’s too dry, the curls won’t set well. For extra hold and frizz control, apply a lightweight mousse or setting spray evenly through your damp hair.
- Sectioning Hair: Divide your hair into manageable sections. The number of sections will depend on your hair thickness and the size of curls you desire. Generally, smaller sections lead to tighter curls, while larger sections create looser waves. You’ll typically use all 12 curlers for a full head of hair.
- Wrapping Technique: Take a small section of hair and comb it smooth. Place the end of the fabric curler at the tip of your hair section. Starting from the ends, roll your hair upwards around the curler towards your scalp. Ensure the hair is wrapped smoothly and firmly, without tangles. Once you reach your desired height (close to the scalp for full curls, mid-length for waves), bend the fabric curler into a U-shape or a circle and secure it by attaching the velcro ends together. Repeat this process for all sections of your hair.
- Overnight Magic: Once all your hair is wrapped, it’s time to sleep! The soft fabric curlers are designed for comfort. You might want to sleep on a silk pillowcase to further reduce friction and frizz. Allow your hair to air dry completely overnight.
- The Grand Reveal: In the morning, gently unwrap each curler. Take care not to pull or tug. Once all curlers are removed, lightly shake your head to loosen the curls. Avoid brushing, as this can cause frizz. Instead, gently separate the curls with your fingers for a softer, more natural look. Finish with a light spritz of hairspray to set your beautiful, heatless curls in place.
Tips and Tricks for Heatless Curl Success
To ensure you get the best possible results every time, keep these expert tips in mind:
- Experiment with Dampness: Hair porosity varies, so what’s “damp” for one person might be too wet or dry for another. Experiment with slightly more or less damp hair to find your perfect sweet spot.
- Use Quality Fabric: As mentioned, silk or satin fabrics are excellent choices not just for comfort but because their smooth surface helps prevent frizz and reduces tension on the hair, leading to smoother curls.
- Vary Curl Size: Don’t be afraid to try different sized sections of hair to achieve various curl patterns. You can even make some curlers slightly wider or narrower for more styling versatility.
- Secure Properly: Ensure the velcro is firmly attached. If your curlers unravel during the night, your curls won’t set.
- Consider a Bonnet: If you’re worried about frizz or your curlers shifting while you sleep, a silk or satin sleep bonnet can provide an extra layer of protection.
- Troubleshooting Frizz: If you experience frizz, it might be due to your hair being too dry when wrapping, using a non-smooth fabric, or separating curls too aggressively. A light serum applied to your fingers before separating curls can also help.
Beyond Personal Use: A Thoughtful and Unique Gift Idea
These DIY heatless curlers aren’t just for you; they make an incredibly thoughtful and practical gift! Imagine assembling a set for a friend who loves to curl her hair but struggles with damage, or for a busy mom who needs a quick, overnight solution. You can personalize them by choosing fabrics that match their favorite colors or patterns. Present them in a cute pouch or box with a small tag explaining their benefits and use, and you’ve got a gift that truly shows you care about their hair health and convenience. They’re perfect for birthdays, holidays, or just a ‘thinking of you’ gesture!
Embrace the Revolution: Healthy, Beautiful Curls Await!
The journey to beautiful, healthy curls doesn’t have to involve damaging heat or complicated techniques. By investing a little time into crafting your own set of DIY heatless curlers, you’re not just making a beauty tool; you’re adopting a sustainable, hair-friendly lifestyle that will reward you with gorgeous, bouncy curls every single morning. It’s an empowering step towards nurturing your hair and simplifying your routine, all while unleashing your inner crafter.
We absolutely love seeing your creations and results! Once you’ve made your set and achieved those perfect curls, be sure to share your experience with us. Tag your friends and spread the word – because everyone deserves the secret to glam, damage-free hair. Get ready to wake up to a good hair day, every day!