
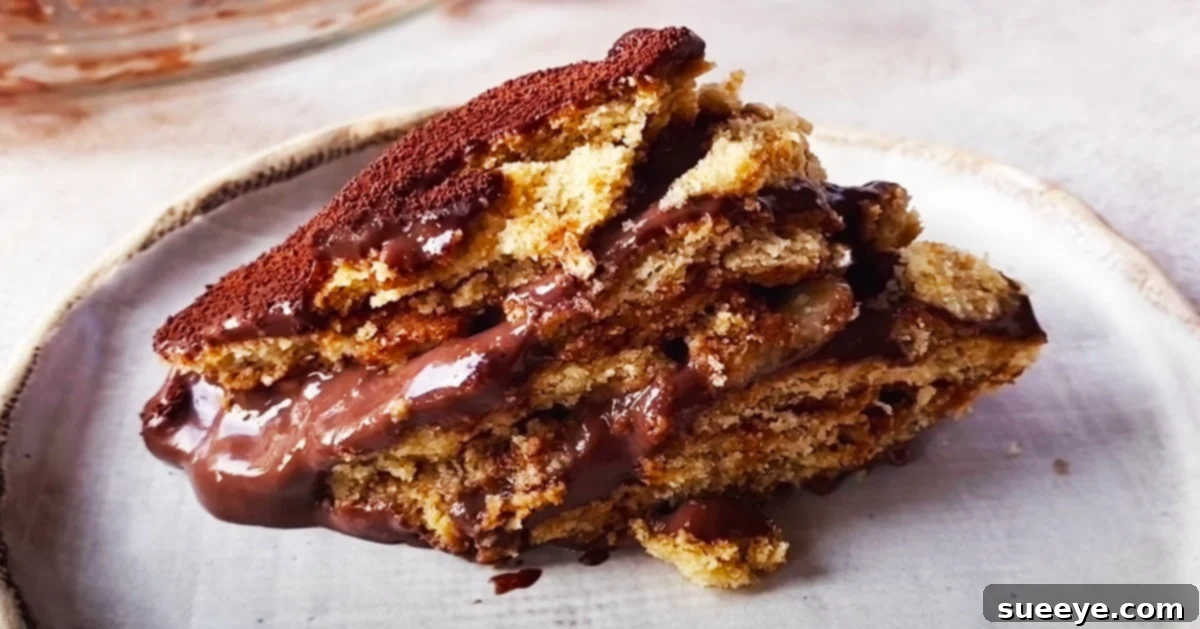
Indulge in the sheer delight of a truly irresistible dessert that promises rich flavors without the hassle of baking: the Eggless Chocolate Biscuit Pudding. Inspired by the captivating visuals and straightforward method shared by Bake with Shivesh on YouTube, this no-bake wonder layers creamy chocolate with crisp biscuits and fresh bananas to create a symphony of textures and tastes. It’s a dessert that perfectly balances ooey-gooey richness with a satisfying bite, making it an instant classic for any occasion.
The beauty of this recipe lies in its simplicity and the fact that it requires absolutely no oven time, saving you precious minutes and effort. For anyone seeking a quick yet impressive dessert, this eggless chocolate biscuit pudding is a game-changer. Imagine a dessert so elegant and flavorful, yet made entirely from scratch with ingredients you likely already have stocked in your pantry. It’s a convenient, budget-friendly, and incredibly delicious solution to satisfy any sweet tooth, reminiscent of a tiramisu but with significantly less work involved, making it perfect for both novice and experienced dessert makers alike.
This comprehensive guide will walk you through every step of crafting this delightful dessert, ensuring you achieve perfect results every time. We’ll delve into the role of each ingredient, provide detailed instructions for preparing the creamy chocolate pudding, and share expert tips for assembling and chilling your masterpiece. Get ready to impress your family and friends with a dessert that looks sophisticated but is surprisingly effortless to create.
Essential Ingredients for Your No-Bake Delight
One of the most appealing aspects of this eggless chocolate biscuit pudding is its reliance on readily available kitchen staples. You won’t need any exotic items or specialized equipment, making it an accessible recipe for everyone. Here’s what you’ll need to gather:
- Milk: 4 cups for the pudding base, plus an additional 1 cup. Full-fat milk is recommended for a creamier texture, but you can also use skim milk or even plant-based alternatives like almond or oat milk for a vegan-friendly version.
- Cornflour (Cornstarch): 4 tablespoons. This is the magical thickening agent that gives our chocolate pudding its luxurious, smooth consistency without the need for eggs.
- Cocoa Powder: 1/2 cup. Opt for good quality unsweetened cocoa powder for the best chocolate flavor. The darker the cocoa, the richer your pudding will taste.
- Sugar: 1/2 cup. Granulated sugar works perfectly here. Feel free to adjust the amount to your preference; you might add a little more if you prefer a sweeter dessert, or less if your biscuits are already very sweet.
- Water: 1 cup. Used to prepare the coffee syrup for dipping the biscuits.
- Coffee Powder: 2 tablespoons. Instant coffee powder is ideal. The coffee enhances the chocolate flavor beautifully without making the dessert taste overtly like coffee. It adds a subtle depth and sophistication.
- Bananas: 2 medium-sized, ripe but firm, sliced. Bananas add a lovely freshness, natural sweetness, and a soft texture that complements the rich chocolate and crisp biscuits. Ensure they are not overly ripe to prevent them from becoming mushy.
- Biscuits (Cookies): Approximately 30 biscuits of your choice. Digestive biscuits, rich tea biscuits, or even plain butter cookies work wonderfully. Choose a relatively plain biscuit that can absorb the coffee syrup without crumbling too quickly and provides a good textural contrast to the soft pudding.
Step-by-Step Guide to Crafting Your No-Bake Masterpiece
Creating this chocolate biscuit pudding is a joyous and straightforward process. Follow these detailed instructions to ensure a perfect, mouth-watering result every time. For visual guidance, remember to consult the original Bake with Shivesh tutorial on YouTube, which offers excellent insights into the technique.
Part 1: Preparing the Velvety Chocolate Pudding
- Combine Dry Ingredients: In a small bowl, whisk together the cornflour and cocoa powder. This helps prevent lumps when introduced to liquid.
- Create a Slurry: Add a small amount of the 1 cup of milk (about 1/4 cup) to the cornflour and cocoa mixture, stirring well until a smooth, lump-free slurry is formed. Set aside.
- Heat the Milk: In a medium-sized saucepan, add the remaining 4 cups of milk. Place it over medium heat and let it come to a gentle simmer. Be careful not to let it boil over.
- Sweeten the Milk: Once the milk is simmering, add the 1/2 cup of sugar to the saucepan. Stir continuously until the sugar has fully dissolved.
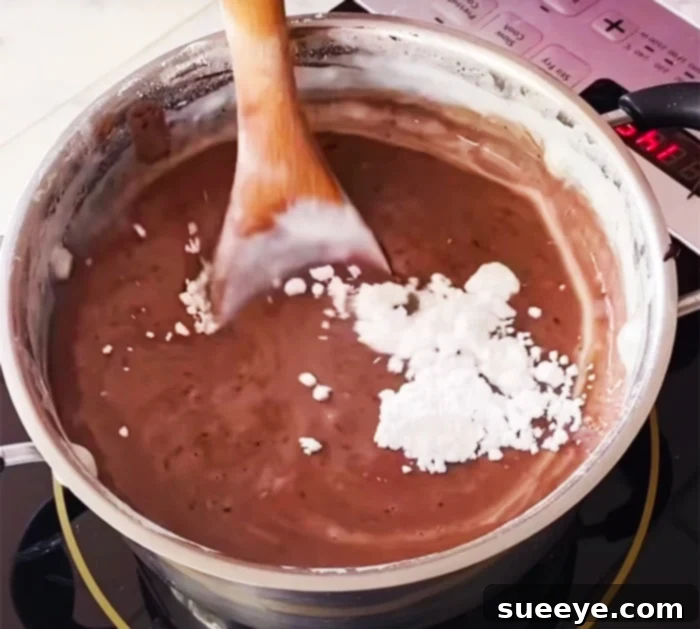
- Thicken the Pudding: Gradually pour the prepared cornflour and cocoa slurry into the simmering milk, whisking constantly. This is crucial to prevent lumps from forming.
- Cook to Perfection: Continue to cook the mixture over medium-low heat, stirring frequently with a whisk or rubber spatula, for about 5-7 minutes, or until the pudding visibly thickens to a consistency similar to custard or thick gravy. It should coat the back of a spoon. Do not let it boil vigorously after adding the slurry.
- Cool Down: Once thickened, remove the saucepan from the heat. Allow the chocolate pudding to cool down slightly at room temperature, stirring occasionally to prevent a skin from forming. For faster cooling, you can place the saucepan in an ice bath, stirring every few minutes. The pudding should be warm, but not piping hot, when you start assembling.
Part 2: Crafting the Aromatic Coffee Syrup
- Mix Ingredients: In a separate shallow bowl or dish, combine the 1 cup of water with the 2 tablespoons of coffee powder. Stir thoroughly until the coffee powder is completely dissolved.
- Optional Sweetness: If you prefer a slightly sweeter coffee flavor, you can add a teaspoon or two of sugar to the coffee syrup and stir until dissolved. This syrup will be used to lightly moisten the biscuits, adding another layer of flavor.
Part 3: Assembling Your Chocolate Banana Biscuit Pudding
Now comes the fun part – assembling all the delicious components into a beautiful layered dessert! You’ll need a rectangular or square serving dish, approximately 8×8 inches or similar in size, for best results.
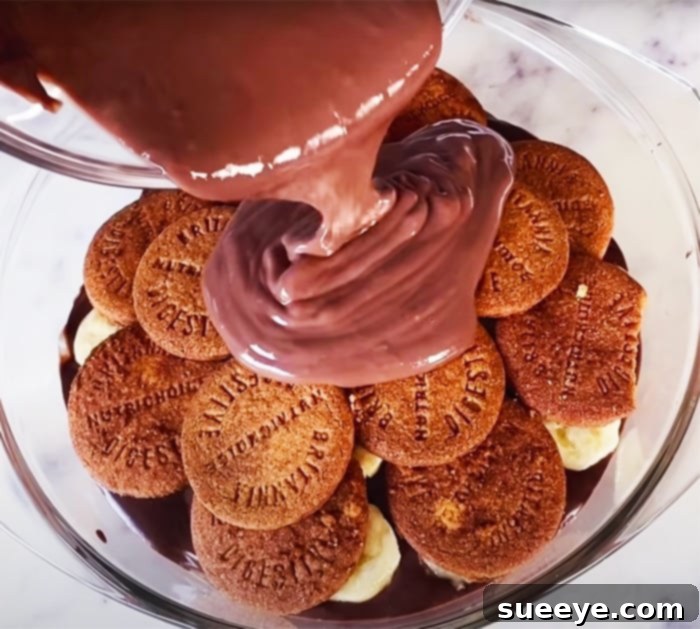
- Prepare Your First Biscuit Layer: Take each biscuit and quickly dip it into the prepared coffee syrup. Be swift – you want the biscuits to be moistened, not soggy. Arrange these dipped biscuits in a single, even layer at the bottom of your serving dish, covering the entire base. If needed, break some biscuits to fit into gaps.
- Add a Layer of Chocolate Pudding: Spoon about one-third of your cooled chocolate pudding evenly over the biscuit layer. Gently spread it to cover all the biscuits.
- Introduce the Bananas: Carefully place a layer of your sliced bananas over the chocolate pudding. Ensure the banana slices are distributed evenly across the pudding.
- Repeat the Layers: Continue this layering process:
- Dip biscuits in coffee syrup and create a second layer.
- Spoon another third of the chocolate pudding over the biscuits.
- Add another layer of sliced bananas.
- Final Layer: Finish with a third layer of coffee-dipped biscuits, topped with the remaining chocolate pudding. Use a spatula to smooth the top layer of pudding for a neat finish.
Part 4: Chilling and Serving Your Delight
- Refrigerate: Once assembled, cover the dish tightly with plastic wrap and transfer it to the refrigerator. This step is crucial. Allow the pudding to chill for a minimum of 4-6 hours, or ideally, overnight. Chilling allows the flavors to meld beautifully and the pudding to set completely, resulting in firm, clean slices.
- Garnish and Serve: Before serving, you can enhance the presentation. Dust the top with a light layer of cocoa powder, add a few chocolate shavings, or adorn with a couple of fresh banana slices or even a sprig of mint. Serve chilled, slicing into generous portions.
Pro Tips for a Perfect Eggless Chocolate Biscuit Pudding
- Prevent Lumps: Always mix cornflour and cocoa powder with a small amount of cold milk or water to create a smooth slurry before adding it to hot milk. This prevents lumps.
- Don’t Over-Soak Biscuits: A quick dip is all you need. Over-soaked biscuits will become too mushy and won’t provide the desired texture.
- Even Layers: Try to spread each layer of pudding and bananas as evenly as possible for a beautiful presentation and balanced taste in every bite.
- Chilling is Key: Do not rush the chilling process. This allows the biscuits to soften perfectly and the pudding to firm up, making it easier to slice and enhancing the overall flavor and texture.
- Customization: Feel free to experiment with different types of biscuits (like Graham crackers or even crushed Oreos), other fruits (berries or sliced strawberries could be lovely), or toppings (whipped cream, chocolate syrup, nuts).
Why This No-Bake Eggless Chocolate Biscuit Pudding is a Must-Try
There are countless reasons why this particular dessert stands out and deserves a spot on your go-to recipe list:
- Effortless & No-Bake: Perfect for hot summer days when you don’t want to turn on the oven, or for those busy weeknights when you crave a homemade treat without the fuss.
- Eggless & Vegetarian-Friendly: This recipe naturally caters to those with egg allergies or who follow a vegetarian diet, making it a crowd-pleaser. With plant-based milk, it can easily be made vegan.
- Rich & Complex Flavors: The combination of deep chocolate, subtle coffee notes, and fresh bananas creates a harmonious blend that tantalizes the taste buds.
- Delightful Textural Contrast: The creamy, smooth pudding, the slightly softened yet still structurally sound biscuits, and the tender banana slices offer an exciting interplay of textures in every spoonful.
- Budget-Friendly Ingredients: Made with common pantry staples, this dessert is economical without compromising on taste or quality.
- Highly Customizable: While the recipe is fantastic as is, it serves as a wonderful base for experimentation. Add a sprinkle of cinnamon, a dash of rum essence, or swap bananas for raspberries to make it your own.
Overall, while I might not typically gravitate towards banana pudding, the inclusion of rich chocolate in this recipe makes it utterly irresistible. I’m genuinely thrilled to try my hand at this chocolate biscuit banana pudding. It promises to be a refreshing take on traditional desserts, offering all the decadence of a homemade treat with none of the baking stress. This recipe is a fantastic way to explore new flavor combinations and enjoy a truly satisfying dessert experience. Give it a try – you won’t be disappointed!