
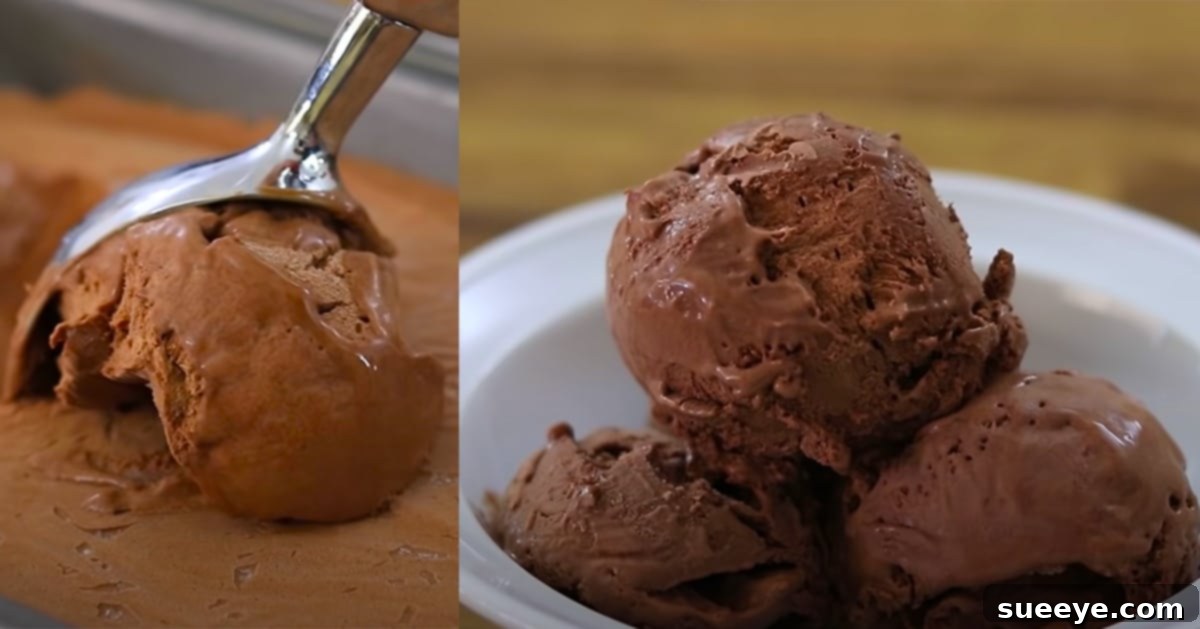
Indulge in Homemade Bliss: The Easiest 3-Ingredient Chocolate Ice Cream Recipe
As a devoted chocolate fanatic, my eyes are always scanning for anything that promises a rich, decadent chocolate experience. So, when I stumbled upon a recipe for homemade ice cream that boasted a mere three ingredients and glorious chocolate flavor, I was instantly captivated. The idea of crafting a creamy, smooth, and deeply satisfying chocolate ice cream right in my own kitchen, with minimal effort and no fancy equipment, felt like discovering a hidden treasure. The allure of knowing exactly what goes into my dessert, free from artificial additives and preservatives, makes homemade treats undeniably superior.
The journey to this delightful discovery led me to The Cooking Foodie’s recipe on YouTube. The video itself is a masterpiece of clarity and simplicity, perfectly complementing the ease of the recipe. The close-up shots of each step, the clear instructions, and the perfectly chosen background music all combine to create an inspiring and approachable tutorial. It instantly conveys that this is an easy, fuss-free recipe, making it perfect for both seasoned bakers and complete novices. I was genuinely surprised by how fast and inexpensive this homemade chocolate ice cream recipe truly is – a true game-changer for anyone craving a quick and delicious dessert.
Why Choose Homemade Ice Cream? The Benefits of DIY Sweet Treats
In a world brimming with processed foods, the appeal of homemade goodies has never been stronger. Crafting your own desserts, especially something as universally beloved as ice cream, offers a multitude of benefits. Firstly, you gain complete control over the ingredients. This means you can opt for high-quality components, avoid artificial flavors, colors, and preservatives, and even adjust sweetness levels to your preference. For those with dietary restrictions or allergies, homemade offers peace of mind.
Secondly, homemade ice cream often proves to be more cost-effective than its store-bought counterparts, especially when you consider the quality you’re producing. With just a few staple ingredients, you can create a generous batch that tastes infinitely better than most commercial options. Lastly, there’s an undeniable joy and satisfaction that comes from creating something delicious with your own hands. The process itself can be a relaxing and rewarding experience, culminating in a fresh, flavorful dessert that’s tailor-made for your taste buds.
The Magic Behind Three Simple Ingredients: A No-Churn Marvel
The brilliance of this recipe lies in its elegant simplicity and the ingenious interplay of its three core ingredients. This “no-churn” method bypasses the need for an ice cream maker, relying instead on the unique properties of heavy cream and sweetened condensed milk to achieve that coveted creamy texture.
- Heavy Cream: This is the secret to the ice cream’s airy, light, and voluminous texture. When whipped, heavy cream incorporates air, transforming into a stable, cloud-like base. This whipped cream acts as a natural emulsifier, preventing the formation of large ice crystals that can make ice cream gritty.
- Sweetened Condensed Milk: This thick, sweet milk serves multiple critical functions. It provides the necessary sweetness, eliminating the need for granulated sugar. More importantly, its high sugar content and syrupy consistency lower the freezing point of the mixture, ensuring a smooth, scoopable ice cream that doesn’t freeze solid like a block of ice. It also adds a wonderful richness and depth of flavor.
- Unsweetened Cocoa Powder: The star of the show for all chocolate lovers! Unsweetened cocoa powder delivers that intense, authentic chocolate flavor without adding extra sugar, allowing the sweetened condensed milk to manage the sweetness balance perfectly. The quality of your cocoa powder can significantly impact the final taste, so opt for a good brand if possible.
Together, these three humble ingredients create a synergistic effect, resulting in a luscious, full-bodied ice cream that rivals artisanal creations. It’s a testament to how simple culinary principles can yield extraordinary results.
A Chocolate Lover’s Dream: Why This Recipe is Irresistible
For those of us who consider chocolate a fundamental food group, this recipe is nothing short of a dream come true. Chocolate holds a unique place in the hearts of millions, offering comfort, indulgence, and a burst of rich flavor. Its versatility allows it to be enjoyed in countless forms, but in ice cream, its appeal is truly amplified. The cool, creamy texture perfectly complements the deep, sometimes bittersweet, notes of cocoa.
This 3-ingredient homemade chocolate ice cream recipe celebrates pure chocolate in its most delightful form. It’s not overly sweet, allowing the robust flavor of the cocoa to shine through. Whether you prefer milk chocolate, dark chocolate, or something in between, this recipe provides a fantastic base that can be customized to your exact preferences. It’s the kind of dessert that brings an instant smile to your face, making it a perfect pick-me-up on a long day or a celebratory treat for any occasion. Prepare to fall in love with its smooth consistency and intense chocolatey goodness!
Ingredients You’ll Need for Your No-Churn Chocolate Ice Cream
Gathering your ingredients for this easy homemade chocolate ice cream is straightforward. High-quality ingredients, even in such a simple recipe, can elevate the final taste significantly. Make sure your heavy cream is very cold; this is crucial for proper whipping.
- 1 can (14oz / 400g) Sweetened Condensed Milk: This provides both sweetness and that incredibly smooth, no-churn texture. Do not confuse this with evaporated milk.
- 2 cups (480ml) Heavy Cream, Cold: Also known as whipping cream, it should be chilled thoroughly for best results.
- 1/2 cup (60g) Unsweetened Cocoa Powder: For that rich chocolate flavor. Dutched-process cocoa powder can offer a darker color and milder flavor, while natural cocoa powder is often more intensely chocolatey and slightly acidic. Choose your preference!
- Mini Chocolate Chips (optional): Extra for topping or mixing into the base for added texture and chocolate bursts.
Step-by-Step Directions to Heavenly Chocolate Ice Cream
Making this homemade chocolate ice cream is a surprisingly simple process that requires minimal fuss. Follow these easy steps, and you’ll be on your way to a delightful frozen treat.
Preparation is Key: Gather Your Tools
Before you begin, ensure you have a large mixing bowl (preferably chilled in the freezer for 10-15 minutes, especially if your kitchen is warm) and an electric mixer (either hand-held or stand mixer) with a whisk attachment. Having everything ready makes the process seamless.
Step 1: Whip the Heavy Cream to Perfection
Pour the cold heavy cream into your large, chilled mixing bowl. Using an electric mixer on medium-high speed, begin whipping the cream. This process will take a few minutes. Continue beating until the cream forms stiff peaks. You’ll know it’s ready when the cream holds its shape firmly when the whisk is lifted, and the peaks don’t collapse. Be careful not to over-whip, or it could turn grainy.
Step 2: Infuse the Chocolatey Goodness
Once your heavy cream is perfectly whipped, gently add the unsweetened cocoa powder and the sweetened condensed milk to the bowl. Switch your mixer to a low speed to avoid a cloud of cocoa powder. Beat just until all the ingredients are fully incorporated and the mixture is smooth and uniform in color. Overmixing at this stage can deflate the whipped cream, so mix only until just combined.
Step 3: The Freezing Transformation
Carefully transfer the rich chocolate ice cream mixture into an airtight freezer-safe container or a loaf pan. If desired, you can gently fold in some mini chocolate chips at this point or sprinkle them on top for an extra chocolatey crunch. Smooth the top with a spatula. Cover the container tightly to prevent freezer burn and place it in the freezer. Allow it to freeze for at least 6 hours, or preferably overnight, to achieve the perfect firm yet scoopable consistency. Patience is key for this step, as it allows the flavors to meld and the texture to set beautifully.
Serving Suggestions and Customization Ideas for Your Ice Cream
Once your easy homemade chocolate ice cream is perfectly frozen, the fun truly begins! While it’s utterly delicious on its own, there are countless ways to elevate this simple treat and make it uniquely yours.
Delightful Toppings:
- Classic Combinations: Drizzle with warm fudge sauce or caramel, a dollop of whipped cream, or a sprinkle of colorful sprinkles.
- Nutty Crunch: Add chopped roasted peanuts, almonds, walnuts, or pecans for a textural contrast.
- Fruity Freshness: Top with fresh berries like raspberries or strawberries, which pair wonderfully with chocolate.
- Extra Chocolate: More chocolate chips, chocolate shavings, or a dusting of cocoa powder for the ultimate chocolate indulgence.
- Cookie Crumbs: Crushed oreos, graham crackers, or shortbread cookies add another layer of flavor and texture.
Creative Customizations:
- Mint Chocolate Chip: Add 1/2 to 1 teaspoon of peppermint extract (start with less and add more to taste) along with a few drops of green food coloring when mixing in the condensed milk and cocoa. Fold in chocolate chips at the end.
- Coffee Kick: Dissolve 1-2 tablespoons of instant espresso powder or strong instant coffee in a tablespoon of hot water, then cool it completely before adding it to the cream mixture for a mocha-flavored ice cream.
- Citrus Zest: A touch of orange zest can brighten the chocolate flavor beautifully.
- Rocky Road Inspiration: Fold in mini marshmallows, chopped nuts, and extra chocolate chips before freezing.
- Swirls of Flavor: After transferring half of the mixture to your container, dollop in spoonfuls of peanut butter, caramel, or fruit jam, then cover with the remaining ice cream mixture and swirl gently with a knife.
Tips for the Perfect Homemade Ice Cream Experience
Achieving that perfectly creamy, scoopable, and intensely flavored homemade chocolate ice cream is easy with a few simple tricks:
- Keep Everything Cold: Ensure your heavy cream is very cold, and if possible, chill your mixing bowl and whisk attachment before you start. Cold ingredients whip faster and hold their volume better.
- Don’t Overmix: While whipping the heavy cream to stiff peaks is important, be careful not to overmix it into butter. Similarly, when incorporating the condensed milk and cocoa, mix only until just combined to retain the airiness.
- Quality Cocoa Matters: The flavor of your ice cream is largely dependent on the cocoa powder. Invest in a good quality unsweetened cocoa powder for the best chocolate taste.
- Airtight Container: Always freeze your ice cream in an airtight container. This prevents ice crystals from forming on the surface and keeps your ice cream fresh and smooth.
- Patience is a Virtue: Allow adequate time for the ice cream to freeze. While 6 hours is a minimum, overnight freezing often yields the best, most solid results.
- Soften Before Serving: For the ultimate scoop, take your ice cream out of the freezer and let it sit at room temperature for 5-10 minutes before serving. This allows it to soften slightly, making it easier to scoop and enhancing its creamy texture.
Storage: Keeping Your Dessert Fresh
Proper storage is essential to maintain the quality and deliciousness of your homemade chocolate ice cream. Always transfer the ice cream to an airtight container immediately after preparation. This minimizes exposure to air, which is the primary cause of ice crystal formation and freezer burn. When stored correctly in the coldest part of your freezer, this no-churn chocolate ice cream can last for up to two weeks, though it rarely lasts that long in my house! Enjoy it fresh for the best flavor and texture.
A Treat for Every Occasion
This 3-ingredient homemade chocolate ice cream isn’t just a recipe; it’s an invitation to create joy. Whether it’s a simple weeknight dessert, a treat for a child’s birthday, a comforting indulgence after a long day, or a crowd-pleasing addition to a dinner party, its ease and deliciousness make it suitable for any occasion. It’s a testament to the fact that extraordinary flavor doesn’t always require complicated steps or exotic ingredients. It’s a classic for a reason, and now, with this incredibly simple method, everyone can enjoy the rich, creamy goodness of homemade chocolate ice cream.
I genuinely can’t wait for you to try this incredibly creamy, smooth, and richly flavored homemade chocolate ice cream. It’s a delightful journey from just three ingredients to a truly unforgettable dessert. Give it a try, and prepare to be amazed by the deliciousness you can create with so little effort!