
The Ultimate Guide to Making Delicious Homemade Caramel Corn
There’s something undeniably magical about caramel corn. That perfect blend of sweet, salty, and crunchy creates an utterly irresistible snack that truly stands in a league of its own. For me, when it comes to popcorn, caramel isn’t just a flavor; it’s *the* flavor. It transforms simple popcorn into a gourmet treat that captivates both kids and adults alike. Lately, that craving for golden, buttery caramel popcorn has been intense, leading me on a quest to master the art of making it right in my own kitchen. The goal? Unlimited portions of this delightful confection, whenever the mood strikes!
My search for the perfect recipe led me to an absolute gem: a delicious caramel corn recipe by Heartway Farms on YouTube. This isn’t just regular caramel popcorn; it’s a step above, promising a taste and texture that will have your entire family raving. Get ready to experience a homemade version so good, you’ll find yourself reaching for ‘just one more handful’ again and again.
Why Homemade Caramel Corn is a Must-Try
While store-bought caramel corn can be convenient, making it at home offers a multitude of benefits that elevate the experience. You have complete control over the quality of ingredients, ensuring a fresher, more wholesome treat. It’s often more cost-effective than gourmet alternatives, and the aroma alone that fills your kitchen while it bakes is a reward in itself. Plus, it’s a fun and engaging activity, whether you’re making it for a cozy movie night, a festive gathering, or as thoughtful homemade gifts. Once you master this simple recipe, you’ll never look back!
RELATED: Explore other fun and unique popcorn ideas with our guide on How To Make Kool-Aid Popcorn!
Essential Ingredients for Your Perfect Caramel Corn
Crafting exceptional caramel corn begins with a few simple, yet high-quality ingredients. Each component plays a crucial role in achieving that signature rich flavor and satisfying crunch. Here’s what you’ll need to gather:
- 30 cups of popped popcorn: This is a substantial amount, so consider using an air popper for best results. Ensure your popcorn is freshly popped and completely free of unpopped kernels.
- 2 cups of brown sugar: Dark brown sugar works beautifully, lending a deep, molasses-rich flavor to the caramel. It’s essential for that classic caramel taste.
- 2 sticks of salted butter: (That’s 1 cup or 226g). Butter adds unparalleled richness and helps achieve a smooth, creamy caramel. Using salted butter perfectly balances the sweetness. If using unsalted, you might add a pinch more salt to the recipe.
- ½ cup of corn syrup: A key ingredient for preventing the sugar from crystallizing, ensuring your caramel remains silky smooth and glossy. It also contributes to the chewy yet crisp texture.
- ½ tsp of salt: This small amount of salt is vital. It doesn’t make the caramel salty, but rather enhances and balances the intense sweetness, bringing out a more complex flavor profile.
- 1 tsp of baking soda: The secret ingredient! When added to the hot caramel, baking soda reacts with the acidic brown sugar and corn syrup, creating tiny air bubbles. This process lightens the caramel, making it fluffy, porous, and wonderfully brittle once cooled, rather than rock-hard.
Kitchen Tools You’ll Need
Before you begin, ensure you have the following kitchen tools ready. Having them organized will make the caramel-making process smooth and enjoyable:
- A very large mixing bowl or a couple of large baking sheets to spread the popcorn.
- A medium-sized heavy-bottomed saucepan (at least 3-4 quart capacity) for making the caramel.
- Measuring cups and spoons.
- A sturdy wooden spoon or heat-resistant silicone spatula for stirring.
- Parchment paper (highly recommended for lining baking sheets, preventing sticking, and easy cleanup).
- At least two large baking sheets (13×18 inches) with raised edges.
- An oven.
Step-by-Step Guide: Crafting Your Delicious Caramel Corn
Now that you have all your ingredients and tools prepared, let’s dive into the simple yet rewarding process of making this phenomenal caramel corn. Follow these steps carefully for the best results!
Step 1: Prepare Popcorn and Begin the Caramel Base
First, ensure your popcorn is popped and ready. If you’re using an air popper, simply pop your kernels according to its instructions. For stove-top popping, use a large pot with a lid, a little oil, and heat until kernels pop. Once popped, gently transfer the popcorn to a very large mixing bowl or spread it evenly over large baking sheets lined with parchment paper. Set this aside, making sure no unpopped kernels are present, as they can be a hazard.
Next, it’s time to start the caramel. In a medium-sized, heavy-bottomed saucepan, combine the brown sugar, salted butter, corn syrup, and salt. Place the saucepan over medium heat. Stir the mixture continuously with a wooden spoon or spatula until the butter has completely melted and all the ingredients are well incorporated and smooth. Continue to heat the mixture, stirring occasionally, until it comes to a rolling simmer. Once simmering, let it continue to cook for precisely 5 more minutes. During this time, it’s crucial to stir constantly to prevent the caramel from scorching or sticking to the bottom of the pan. The caramel will begin to thicken slightly and deepen in color.
Step 2: Incorporate Baking Soda and Coat the Popcorn
After the 5-minute simmer, carefully remove the saucepan from the heat. Immediately add the baking soda to the hot caramel mixture. Stir vigorously and continuously. You’ll notice a remarkable transformation: the caramel will begin to foam, lighten in color, and increase significantly in volume, becoming thick and fluffy. This is the baking soda working its magic, creating those tiny air pockets that will give your caramel corn its signature crisp and tender texture.
Once the baking soda is thoroughly incorporated and the caramel is light and airy, swiftly pour this molten caramel mixture evenly over your prepared popcorn. Working quickly, use a sturdy spatula or spoon (or even clean, gloved hands if the caramel has cooled slightly) to gently but thoroughly mix the popcorn, ensuring every single piece is beautifully coated with the luscious caramel. This step requires a bit of patience to achieve even coverage.
Step 3: Bake to Crispy Perfection and Cool
Now, it’s time for the oven. If you haven’t already, preheat your oven to a low 200°F (95°C). Spread the caramel-coated popcorn evenly in a single layer across your lined baking sheets. It’s important not to overcrowd the sheets, so you may need to use two or even three, depending on their size. This allows for even baking and crisping.
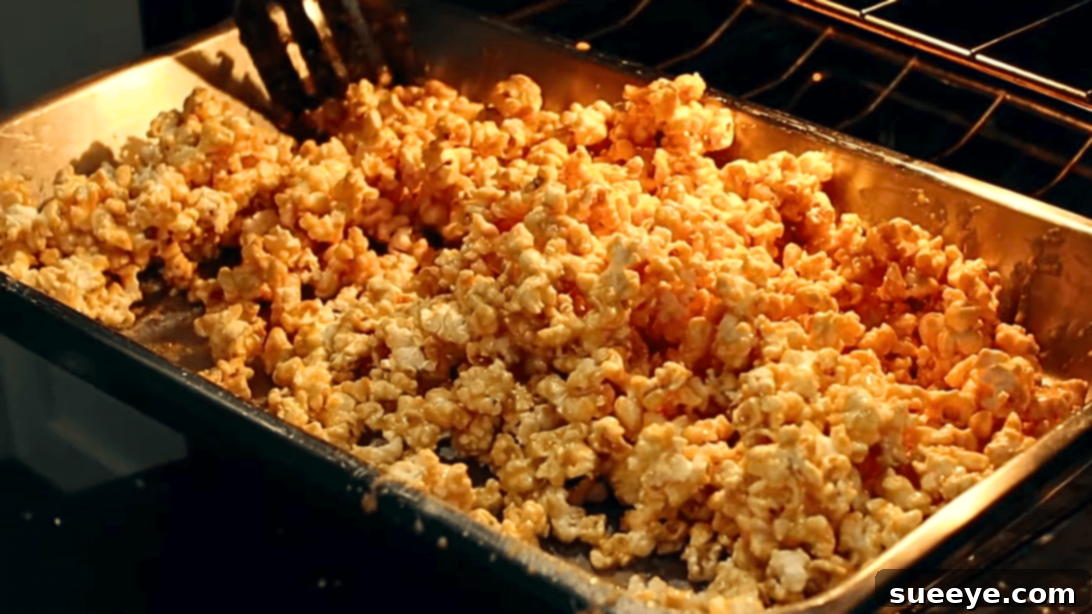
Place the baking sheets in the preheated oven and let the caramel corn bake for approximately 1 hour. This low and slow baking process is essential. It helps the caramel set, dry out, and become wonderfully crisp, rather than chewy or sticky. The key to perfect caramel corn during this stage is to stir the popcorn every 15 minutes. This ensures that the caramel bakes evenly, prevents sticking, and helps all sides of the popcorn get that beautiful golden crispness. Once the hour is up, remove the baking sheets from the oven.
Allow the caramel corn to cool completely on the baking sheets. As it cools, the caramel will firm up and become delightfully brittle. Once fully cooled, break apart the large clusters into smaller, bite-sized pieces. Now, your homemade caramel corn is ready to serve and enjoy! Prepare for an explosion of flavor and crunch.
Pro Tips for Caramel Corn Success
Achieving consistently perfect caramel corn is easy with a few expert tricks up your sleeve:
- Use Fresh Popcorn: Stale popcorn won’t absorb the caramel as well and can result in a less crisp end product.
- Don’t Skip the Parchment Paper: This is a lifesaver for cleanup and ensures your caramel corn doesn’t stick to the baking sheets.
- Patience with the Caramel: Don’t rush the simmering process. Those 5 minutes of constant stirring ensure the caramel reaches the right consistency for optimal coating and texture.
- Baking Soda is Crucial: It’s the magical ingredient that transforms dense caramel into a light, airy, and brittle coating. Don’t omit it!
- Stir During Baking: This step is non-negotiable. Stirring every 15 minutes prevents the caramel corn from clumping too much and promotes even baking and crispness.
- Cool Completely: Resist the urge to dig in too early! Allowing the caramel corn to cool completely is vital for it to achieve its signature crunch.
- Adjust Salt to Taste: If you love a sweet and salty contrast, you can sprinkle a little extra flaky sea salt over the caramel corn right after it comes out of the oven.
Exciting Variations & Add-ins to Try
While classic caramel corn is divine, it also serves as a fantastic base for creative flavor combinations. Here are some ideas to customize your next batch:
- Nutty Caramel Corn: Fold in roasted pecans, almonds, or cashews along with the popcorn before coating with caramel.
- Chocolate Drizzle: Once the caramel corn is completely cooled, melt some dark, milk, or white chocolate and drizzle it generously over the top for an extra layer of indulgence.
- Spiced Up: Add a pinch of cinnamon, nutmeg, or pumpkin spice to your caramel mixture for a warm, aromatic twist.
- Sea Salt Flakes: For an enhanced sweet-and-salty experience, sprinkle a few pinches of high-quality flaky sea salt over the caramel corn immediately after removing it from the oven.
- Candy Mix-ins: After the caramel corn has cooled, you can mix in small candies like mini M&M’s, sprinkles, or crushed candy pieces for added color and texture.
Storing Your Homemade Caramel Corn
Proper storage is key to maintaining the crispness and freshness of your homemade caramel corn:
- Airtight Container: Once completely cooled, transfer your caramel corn to an airtight container. This will protect it from humidity, which can make it sticky.
- Room Temperature: Store the container at room temperature, away from direct sunlight or heat.
- Shelf Life: Properly stored, homemade caramel corn can stay fresh and crispy for 1 to 2 weeks.
- Re-crisping (if needed): If your caramel corn starts to lose its crispness over time, you can spread it on a baking sheet and bake it again at 200°F (95°C) for 10-15 minutes. Let it cool completely afterwards to regain its crunch.
Frequently Asked Questions (FAQs) About Caramel Corn
Why is my caramel hard or sticky?
If your caramel is too hard, it was likely overcooked. The sugar cooked for too long or at too high a temperature. If it’s sticky, it was likely undercooked and didn’t reach the correct temperature or simmer duration, or it absorbed too much moisture from the air due to high humidity.
Can I use microwave popcorn for this recipe?
While you technically can, it’s best to use plain, unsalted, and unbuttered microwave popcorn. Air-popped or stove-popped popcorn yields the best results as it has a neutral base, allowing the caramel flavor to truly shine without competing with artificial butter or salt flavors.
How do I prevent the caramel from burning?
The key is constant stirring, especially during the simmering phase. Using a heavy-bottomed saucepan helps distribute heat more evenly, reducing hot spots. Keeping the heat at medium and not letting it get too high is also crucial.
Is this caramel corn recipe gluten-free?
Yes, typically, all the ingredients used in this caramel corn recipe (popcorn kernels, brown sugar, butter, corn syrup, salt, and baking soda) are naturally gluten-free. Always double-check ingredient labels if you have severe gluten sensitivities.
*All images for this recipe are credited to Heartway Farms via YouTube. We highly recommend visiting their channel and subscribing for more fantastic recipes and creative ideas!
The Joy of Sharing Homemade Caramel Corn
There’s immense satisfaction in creating something delicious from scratch, and this homemade caramel corn recipe is no exception. From the rich aroma filling your kitchen to the satisfying crunch with every bite, it’s an experience that delights all the senses. Whether you’re planning a cozy family movie night, preparing snacks for a party, or looking for a thoughtful homemade gift, this caramel corn is guaranteed to be a hit.
So, gather your ingredients, follow these simple steps, and prepare to impress everyone with your culinary skills. This recipe from Heartway Farms is truly a keeper, promising perfect, crispy, and utterly delicious caramel corn every time. Enjoy the process, and most importantly, enjoy your incredible homemade treat!