
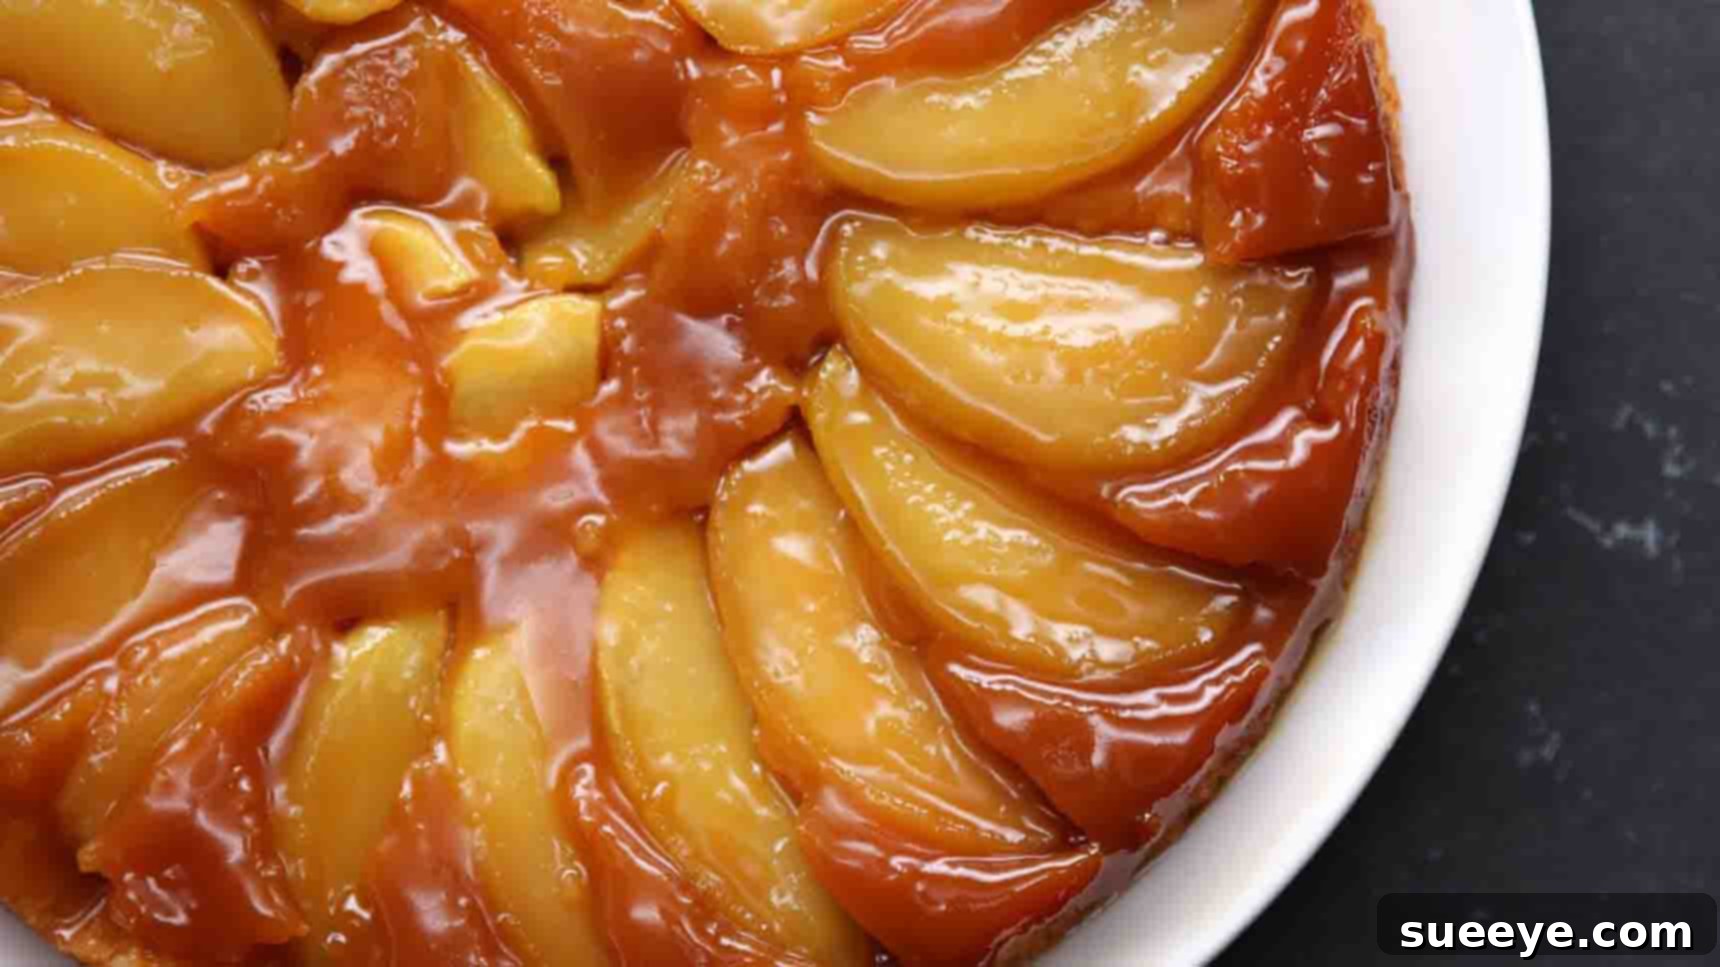
The Ultimate Guide to Baking a Mouthwatering Caramel Apple Upside-Down Cake
Are you searching for a dessert that’s both spectacularly impressive and surprisingly simple to create? Look no further! This Caramel Apple Upside-Down Cake is a true showstopper, perfect for holiday gatherings, cozy family dinners, or any occasion that calls for a touch of sweet indulgence. Inspired by the genius creators at Tasty, this recipe transforms humble ingredients into a rich, flavorful masterpiece that will have everyone asking for seconds. Imagine tender, tart apples caramelized in a luscious dulce de leche sauce, crowned with a moist, fluffy cake—all baked upside-down to reveal a stunning presentation.
This dessert isn’t just about incredible taste; it’s also about convenience. Designed to come together in less than an hour of active preparation time, it’s an ideal choice for busy bakers who still want to deliver homemade goodness. Whether you’re a seasoned chef or a beginner in the kitchen, our detailed guide will walk you through every step, ensuring a perfect bake every time. Get ready to impress your loved ones with this irresistible caramel apple delight!
Why You’ll Love This Caramel Apple Upside-Down Cake
There’s something inherently comforting and celebratory about an apple dessert, and when you add the magical touch of caramel and the unique “upside-down” technique, you get a cake that stands out. This recipe offers a delightful balance of sweet and tart flavors, with the warmth of baked apples complementing the creamy richness of dulce de leche. It’s a versatile cake that fits seamlessly into autumn celebrations, winter holidays, or even a spring brunch. The visual appeal alone, with its glistening caramelized apples, makes it a centerpiece-worthy dessert.
Beyond its aesthetic and flavor, the ease of preparation is a major draw. Many perceive “upside-down” cakes as complex, but this recipe simplifies the process without compromising on taste or texture. By following our clear instructions, you’ll achieve a bakery-quality result right from your own kitchen. It’s truly a rewarding baking experience that yields delicious returns.
Ingredients for a Perfect Caramel Apple Upside-Down Cake:
Crafting this delightful cake requires a few pantry staples and key fresh ingredients. The quality of your ingredients significantly impacts the final taste and texture, so opt for fresh and good quality items where possible.
- 1 & 1/2 cups All-Purpose Flour: The foundation of our cake batter. All-purpose flour provides the perfect structure for a tender, moist crumb.
- 1/3 cup Granulated Sugar: Sweetens the cake batter, balancing the tartness of the apples.
- 1 tsp Baking Powder: Our primary leavening agent, ensuring the cake rises beautifully and achieves a light, airy texture.
- 2 Large Eggs: Act as a binder, provide moisture, and contribute to the cake’s richness and structure. Ensure they are at room temperature for better emulsion with other ingredients.
- 1/3 cup Neutral Oil (e.g., Vegetable, Canola): Adds moisture and creates a wonderfully tender crumb. Oil-based cakes often stay moist longer than butter-based ones.
- 1/3 cup Milk (whole or low-fat): Contributes to the cake’s tenderness and moisture. Room temperature milk mixes more easily into the batter.
- 1 tsp Vanilla Extract: A crucial flavor enhancer that complements both the apples and the caramel, adding a warm, aromatic note to the cake.
- 2 tbsp Unsalted Butter: Used to create the initial caramel base in the pan. Unsalted butter allows you to control the salt content in your dessert.
- 1 cup Dulce de Leche (or Brown Sugar Syrup / Caramel Sauce): The star of the show! Dulce de leche offers a rich, creamy, and deeply caramelized flavor. If you can’t find dulce de leche, a thick brown sugar syrup or a good quality store-bought caramel sauce can be excellent substitutes.
- 3 Granny Smith Apples, peeled and thinly sliced: Granny Smiths are ideal for baking due to their firm texture that holds up well during cooking and their tartness, which provides a fantastic contrast to the sweet caramel.
- Vanilla Ice Cream (optional): The ultimate accompaniment! A scoop of cold vanilla ice cream melting into a warm slice of cake is pure bliss.
Pro Tip on Ingredients:
For the best results, ensure your eggs and milk are at room temperature. This helps them incorporate more smoothly into the batter, leading to a more uniform and tender cake. When slicing apples, aim for even thickness to ensure they cook consistently.
Essential Equipment for Baking Success:
Having the right tools makes the baking process smoother and more enjoyable. Here’s what you’ll need:
- 9-inch Round Baking Pan: A standard size that works perfectly for this recipe. Ensure it’s deep enough to hold the cake batter and apple layer.
- Large Mixing Bowl: For preparing the cake batter.
- Small Saucepan: For melting the butter and combining it with the dulce de leche.
- Whisk or Electric Mixer: For blending the batter ingredients smoothly.
- Rubber Spatula: Essential for scraping bowls and spreading the batter evenly.
- Measuring Cups and Spoons: For accurate ingredient measurement.
- Paring Knife and Peeler: For preparing the apples.
- Serving Plate: Large enough to invert the cake onto.
Step-by-Step Directions: Crafting Your Caramel Apple Upside-Down Cake
Baking this cake is a delightful process, broken down into simple, manageable steps. Pay attention to each stage, and you’ll be rewarded with a magnificent dessert.
Step 1: Prepare the Cake Batter and Caramel Base
Begin by preheating your oven to 350°F (175°C). It’s crucial to have your oven at the correct temperature before the cake goes in, ensuring even baking and proper rise. Lightly grease and flour your 9-inch round baking pan, or line the bottom with parchment paper for easier release. This preparatory step is vital for ensuring your beautiful cake slides out effortlessly after baking.
In a large mixing bowl, combine the dry ingredients for your cake batter: the 1 & 1/2 cups of all-purpose flour, 1/3 cup of granulated sugar, and 1 tsp of baking powder. Whisk them together briefly to ensure they are well combined and evenly distributed. This prevents lumps and helps the leavening agent work uniformly throughout the cake.
Next, add the wet ingredients to the dry mixture: 2 large eggs, 1/3 cup of neutral oil, 1/3 cup of milk, and 1 tsp of vanilla extract. Using a whisk or an electric mixer on low speed, mix these ingredients until they are just combined. Be careful not to overmix the batter; overmixing can develop the gluten in the flour too much, leading to a tough or dense cake. A few small lumps are perfectly acceptable.
Set your cake batter aside. Now, turn your attention to the luscious caramel base. In a small saucepan, melt 2 tablespoons of unsalted butter over medium heat. Once the butter is fully melted and slightly fragrant, add 1 cup of dulce de leche. Stir constantly with a spatula or whisk, allowing the dulce de leche to warm through and combine smoothly with the butter. Bring this mixture to a gentle boil for about 1 to 2 minutes, stirring continuously. This brief boiling helps to thicken the caramel slightly and intensifies its flavor, ensuring it sets beautifully when the cake is inverted.
Step 2: Assemble, Bake, and Serve Your Masterpiece
Carefully pour the warm dulce de leche mixture into your prepared round baking pan. Using a spatula or the back of a spoon, gently spread the caramel evenly across the entire bottom of the pan. This layer will become the stunning top of your cake once inverted.
Next, it’s time to arrange the thinly sliced Granny Smith apples. Artfully place the apple slices in a circular pattern over the caramel, slightly overlapping each other. Start from the outer edge of the pan and work your way inwards until the entire caramel layer is covered with apples. Don’t worry if it looks a bit crowded; the apples will soften and settle during baking. The goal is to create a beautiful, uniform layer that will be revealed when the cake is flipped.
Once your apple layer is complete, gently pour the reserved cake batter evenly over the apples, spreading it nicely with a spatula to ensure the apples are completely covered. Be careful not to disturb the apple arrangement too much. The batter should form a smooth, even layer over the fruit and caramel.
Place the baking pan into your preheated oven at 350°F (175°C) and bake for 25 to 30 minutes, or until a wooden skewer or toothpick inserted into the center of the cake comes out clean. The cake should be golden brown on top and spring back lightly when touched. Baking times can vary depending on your oven, so keep an eye on it.
Once baked, remove the cake from the oven and let it cool in the pan on a wire rack for about 10 to 15 minutes. This cooling period is crucial! It allows the caramel to set slightly but not harden completely, making the inversion process much easier and preventing the apples from sticking to the pan. Do not let it cool completely, as it might become difficult to release.
After the brief cooling period, place a large serving plate (larger than your cake pan) upside-down over the cake pan. With oven mitts or kitchen towels, carefully and confidently flip the cake pan and plate together. Gently lift the cake pan off, and behold your beautiful caramel apple upside-down cake! If any apples stick to the pan, carefully reattach them to the cake. Serve your cake warm, preferably with a generous scoop of vanilla ice cream or a dollop of whipped cream.
Tips for Caramel Apple Upside-Down Cake Success
Even though this recipe is straightforward, a few key tips can elevate your baking and ensure a perfect outcome every time:
- Do Not Overmix the Batter: As mentioned, overmixing develops gluten, which can lead to a tough cake. Mix until just combined, with a few small lumps being acceptable.
- Uniform Apple Slices: Slicing your apples to a consistent thickness ensures they cook evenly. Too thick, and they might be crunchy; too thin, and they might turn to mush. Aim for about 1/8 to 1/4 inch thickness.
- The Critical Cooling Time: Resist the urge to flip the cake immediately after removing it from the oven. The 10-15 minute cooling period is crucial for the caramel to set slightly and for the cake to firm up, preventing it from falling apart upon inversion.
- Proper Pan Preparation: Greasing and flouring your pan (or using parchment paper) is non-negotiable for an upside-down cake. This is your best defense against sticking.
- Toothpick Test: Always rely on the toothpick test to confirm doneness. Every oven is different, and exact baking times can vary.
- Room Temperature Ingredients: For the cake batter, ensure eggs and milk are at room temperature. This helps them emulsify better with the oil, resulting in a smoother, more uniform batter and a finer crumb.
Delicious Variations and Customizations
While the classic caramel apple upside-down cake is perfect on its own, don’t hesitate to experiment with these ideas to make it your own:
- Spiced Sensation: Add 1/2 teaspoon of ground cinnamon, 1/4 teaspoon of nutmeg, and a pinch of allspice to your cake batter for a warmer, more autumnal flavor profile. You can even toss the apple slices with a tiny bit of cinnamon before arranging them.
- Nutty Crunch: Sprinkle a layer of chopped pecans or walnuts over the caramel sauce before arranging the apples. These nuts will toast beautifully as the cake bakes, adding a delightful crunch and nutty flavor.
- A Hint of Citrus: A teaspoon of lemon zest in the cake batter can brighten the flavors and provide a subtle tang that complements the apples.
- Different Fruits: While apples are traditional, this cake works wonderfully with other fruits like ripe pears, thinly sliced pineapple (for a classic upside-down cake twist), or even peaches during their season. Adjust baking times as needed for softer fruits.
- Homemade Caramel: If you’re feeling ambitious, you can make your own caramel sauce from scratch instead of using dulce de leche. Just ensure it’s thick enough to hold its shape when poured into the pan.
Serving Suggestions for Maximum Enjoyment
A warm slice of Caramel Apple Upside-Down Cake is heavenly on its own, but these serving suggestions can elevate the experience:
- Classic Vanilla Ice Cream: The quintessential pairing! The cold, creamy ice cream perfectly contrasts with the warm, rich cake.
- Freshly Whipped Cream: A light, airy dollop of unsweetened or lightly sweetened whipped cream adds a touch of elegance and balances the cake’s richness.
- Extra Caramel Drizzle: For the ultimate caramel lovers, warm up a little extra dulce de leche or caramel sauce and drizzle it over individual slices just before serving.
- Dusting of Powdered Sugar: A simple dusting of confectioners’ sugar adds a refined touch and a hint of extra sweetness.
- Coffee or Tea: Serve alongside a freshly brewed cup of coffee, a robust espresso, or your favorite herbal tea for a sophisticated dessert experience.
Storage and Reheating
To keep your cake fresh and delicious:
- Room Temperature: Store leftover cake, well-covered with plastic wrap or in an airtight container, at room temperature for up to 2 days.
- Refrigeration: For longer storage, or if your kitchen is particularly warm, refrigerate the cake for up to 4-5 days. Allow it to come to room temperature or gently reheat before serving for the best texture.
- Reheating: To reheat, place individual slices in the microwave for 15-30 seconds, or warm larger portions in a preheated oven at 275°F (135°C) for 10-15 minutes, until just warm through.
Frequently Asked Questions (FAQ)
Here are answers to some common questions about baking this delightful cake:
- What kind of apples are best for an upside-down cake?
- Granny Smith apples are highly recommended due to their tartness, which balances the sweetness of the caramel, and their firm texture, which holds up well during baking without turning mushy. Other good options include Honeycrisp, Fuji, or Braeburn.
- Can I use store-bought caramel sauce instead of dulce de leche?
- Yes, absolutely! A good quality, thick store-bought caramel sauce can be used as a substitute for dulce de leche. Ensure it’s a sauce meant for topping or baking, not a thin syrup.
- How do I know if my cake is done?
- The best way to check for doneness is to insert a wooden skewer or toothpick into the center of the cake. If it comes out clean with no wet batter attached, the cake is done. The cake should also be golden brown and spring back slightly when lightly touched.
- Can I make this cake ahead of time?
- Yes, this cake is great for making ahead! It tastes wonderful on the day it’s baked, but its flavors also meld beautifully overnight. Store it at room temperature, covered, for up to 2 days, or in the refrigerator for longer.
- Why did my cake stick to the pan?
- Cake sticking to the pan is usually due to insufficient greasing/flouring, or not allowing the cake to cool for the recommended 10-15 minutes before inverting. The cooling period allows the caramel to set and the cake to pull away from the sides of the pan slightly.
- Can I use a different size baking pan?
- You can, but you may need to adjust the baking time. For a larger pan (e.g., 10-inch), the cake will be thinner and might bake faster. For a smaller pan, it will be thicker and require more baking time. Always use the toothpick test for doneness.
Embrace the Joy of Baking
This Caramel Apple Upside-Down Cake recipe is more than just a list of ingredients and steps; it’s an invitation to create something truly special. The combination of sweet, gooey caramel, tender, tart apples, and a perfectly moist cake makes for an unforgettable dessert experience. Whether you’re baking for a festive holiday dinner, a casual get-together, or simply to treat yourself, this cake promises to deliver joy with every single bite.
So, gather your ingredients, preheat your oven, and prepare to embark on a delightful baking adventure. You’ll be amazed at how easily you can create a dessert that looks like it came straight from a gourmet bakery. Don’t forget to serve it warm with your favorite scoop of ice cream – it’s the perfect finishing touch. Happy baking!