Rugs & Pillows
19 Cute Sewing Projects for Boys to Make
Sewing projects for boys with free patterns: a dino tail, boxer briefs, a messenger bag, pajamas from a men’s shirt, and a monster hooded towel too.
html PUBLIC "-//W3C//DTD HTML 4.0 Transitional//EN" ""
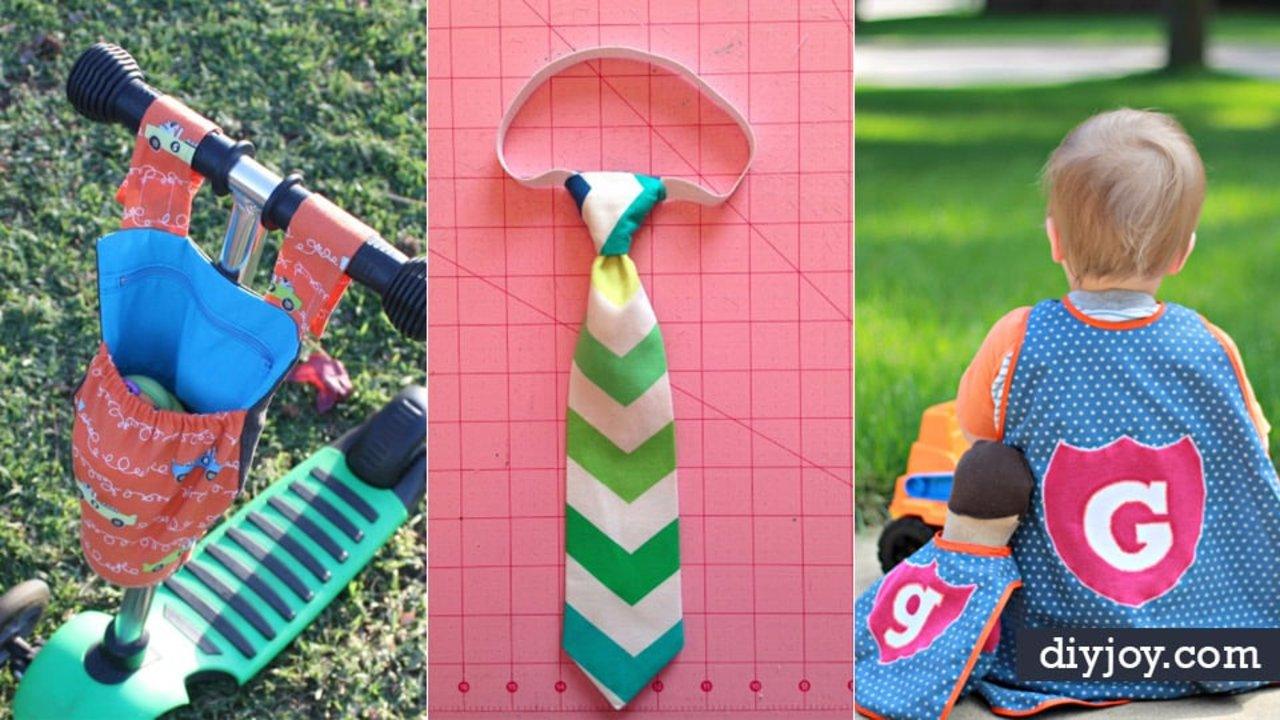
Walk the boys’ section of any store and count how many things you would actually want to make instead. That gap is why this list exists. Here are 19 sewing projects for boys, most of them with a free pattern attached, and almost all of them faster than the trip to buy the sad version. A dinosaur tail that velcros around the waist in under two hours. Boxer briefs from half a yard of knit with no elastic anywhere. Pajamas cut out of a fifty cent men’s polo, sleeves becoming pant legs, collar becoming cuffs. A hooded towel with felt horns and cartoon eyes. There are quilts and blankets here too if you want something slower, and a few small things, a scarf with pockets, a stuffed fox, a magnetic fishing game, that sew up in an evening from what is already in your scrap bin.
Sewing Projects for Boys
1. Superhero Toy Cape
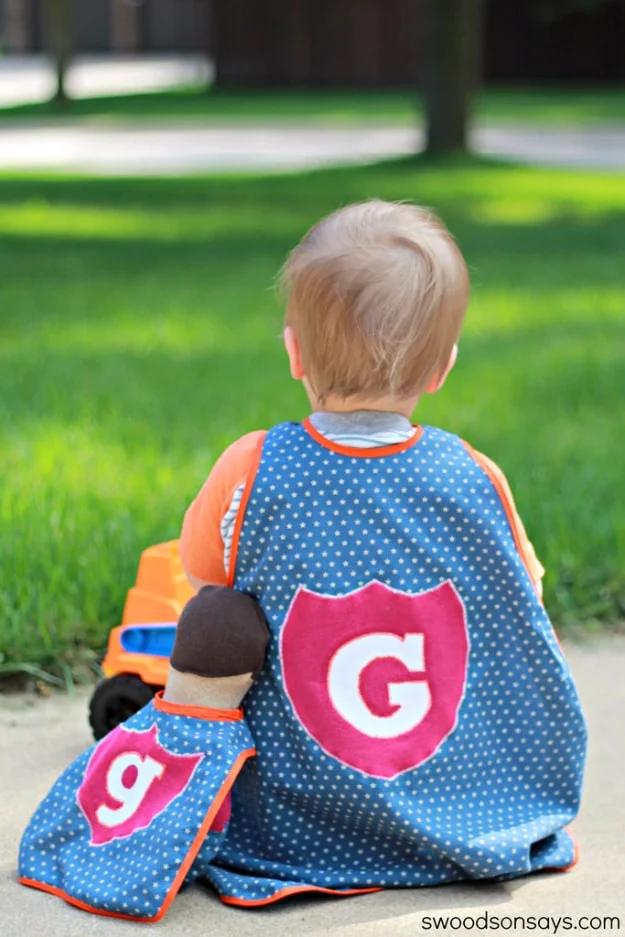
Read this one carefully before you cut, because it is not what it looks like. The free pattern is for a cape ten inches long, sized to fit dolls and stuffed animals roughly eight to fourteen inches tall, not the child-size cape in the photograph. Quarter of a yard of quilting cotton makes the body, scraps make the shield and the appliqued letter, and a half inch piece of velcro closes it at the neck. Paper-backed fusible holds the applique down before you stitch it. The pattern includes the letters reversed as well as forward, which saves the classic mistake of a mirror-image monogram.
Get the full tutorial at Swoodson Says.
2. Kid's Sleeping Bag
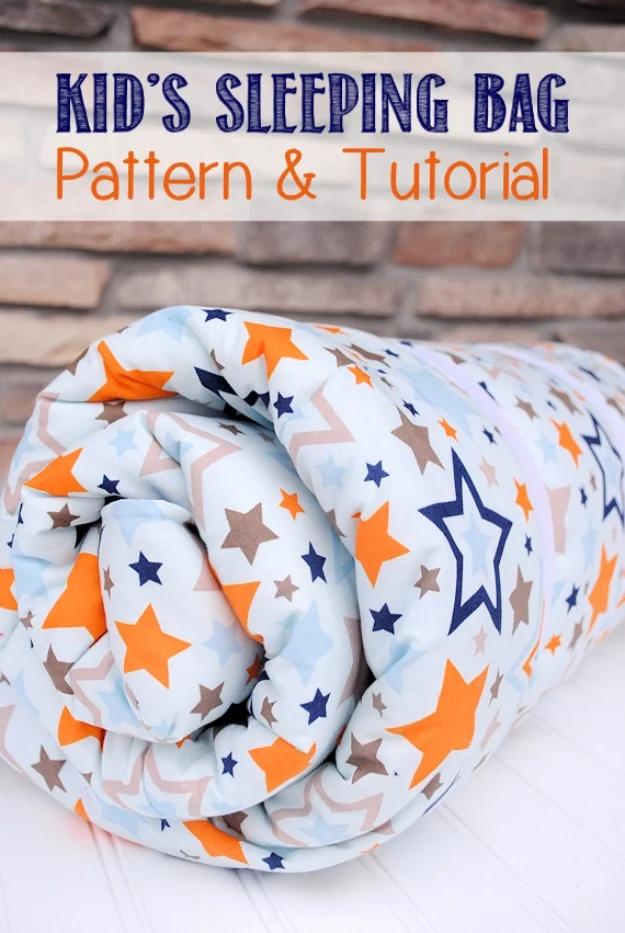
Three yards each of two coordinating cottons, three yards of high loft batting and one extra long zipper, and a child gets a sleeping bag in a fabric somebody actually chose. The fabric is cut in half and trimmed to about thirty four inches wide, which fits a five year old. The zipper is sandwiched between the outer and inner layers and topstitched, then the bag is sewn down one side, across the bottom and up the other. Batting goes into each half, pinned flat and quilted along two horizontal lines so it cannot bunch.
Get the full tutorial at Crazy Little Projects.
3. DIY Dino Hoodie
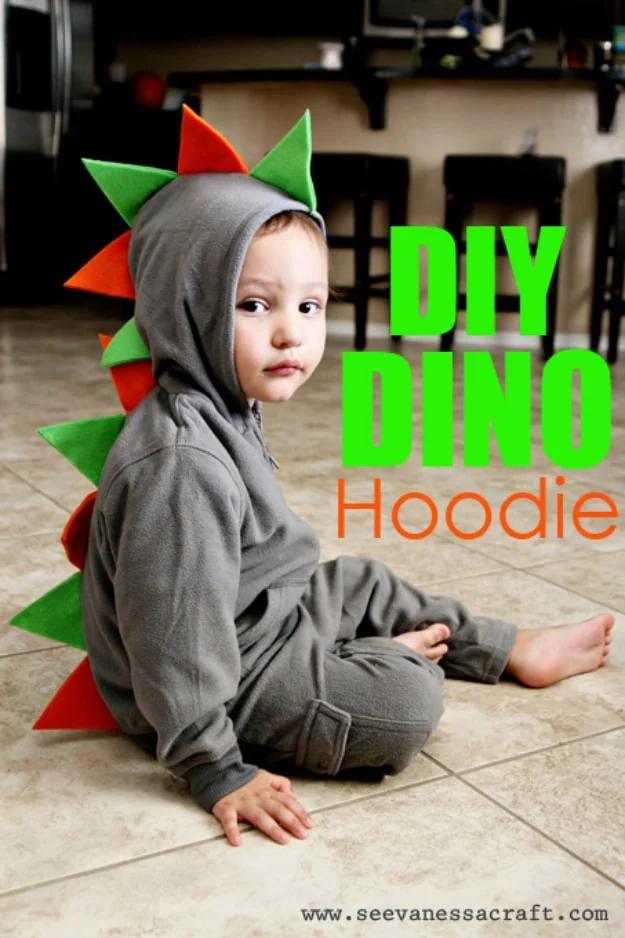
A plain zip-up hoodie, two colors of craft felt and about half an hour. Trace the spike template onto felt, cut them out, fold each one in half and press a crease so it holds its shape, then pin the whole row down the center back from hood to hem and sew. After that you either stitch or glue the two halves of each spike together so they stand up as triangles rather than lying flat. A toddler hoodie takes about ten spikes and an adult one about twelve. Use ordinary soft craft felt, not the stiff kind, or the spikes will not fold.
Get the full tutorial at See Vanessa Craft.
4. DIY Drawstring Backpack
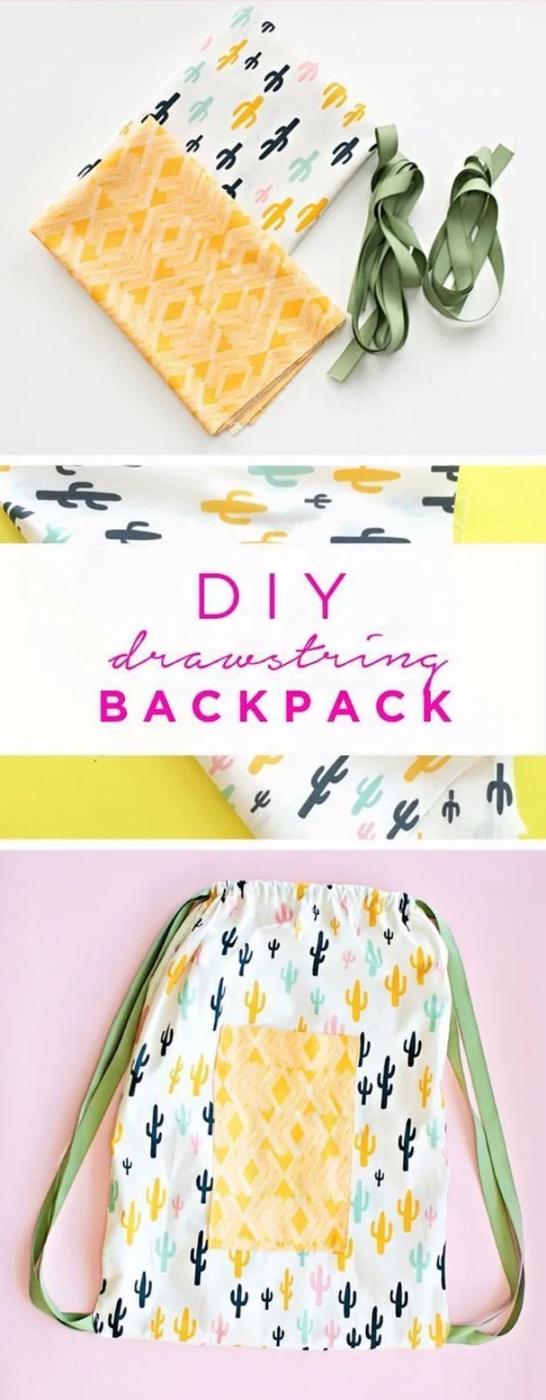
Thirty minutes, start to finish, which makes this the project to reach for when a school bag is needed by tomorrow. The photograph shows it in a cactus print with a plain yellow front panel and pale green cord straps, and that two-fabric split is what lifts it above a plain sack. A drawstring backpack is also the rare sewing project that a child can genuinely help make, since it is all straight lines and no fitting. The source page is a landing page that hands off to the full free tutorial, so follow through to the linked instructions for the cutting measurements.
Get the full tutorial at Sewing 4 Free.
5. Boys Boxer Briefs
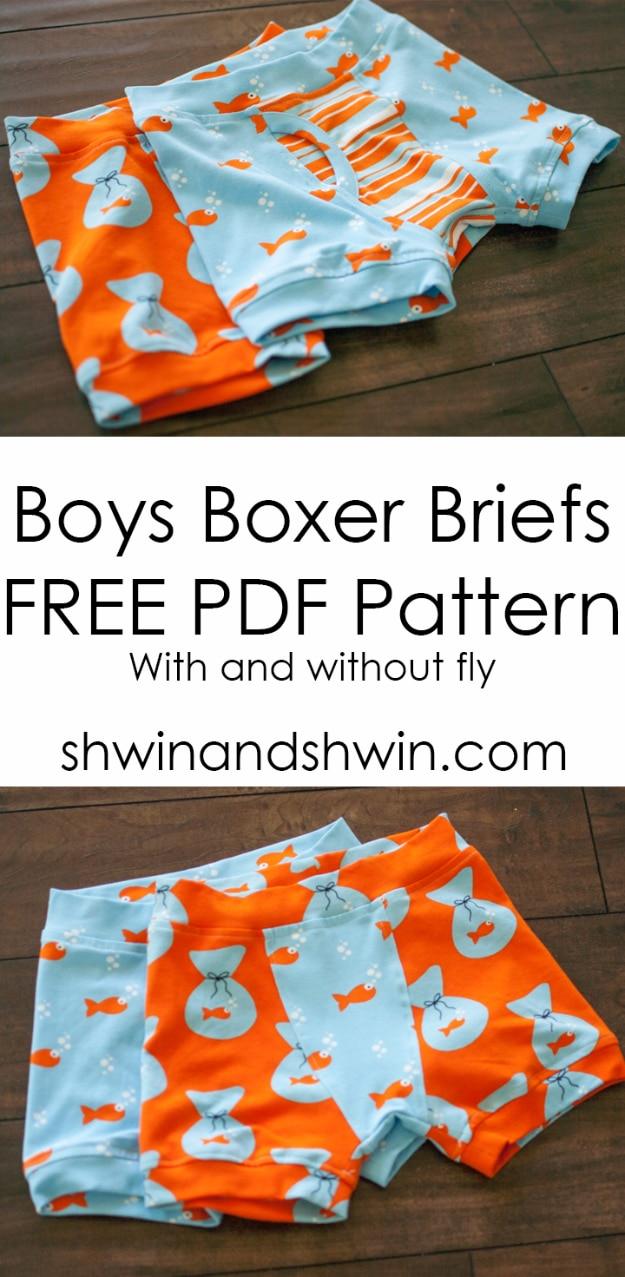
Half a yard of knit with fifty percent stretch or better, and there is no elastic in this pattern anywhere. The waistband and both leg bands are folded knit, sewn into a loop, then stretched to fit as you attach them, which is why these end up more comfortable than the bought pair they are replacing. The seam allowance is three eighths of an inch. You do not need an overlocker: lengthen your stitch slightly, stretch the fabric a touch as you sew, then steam it, and the seam gains enough give to wear. The free PDF comes with and without a fly panel.
Get the full tutorial at Shwin and Shwin.
6. Sew A Dino Tail
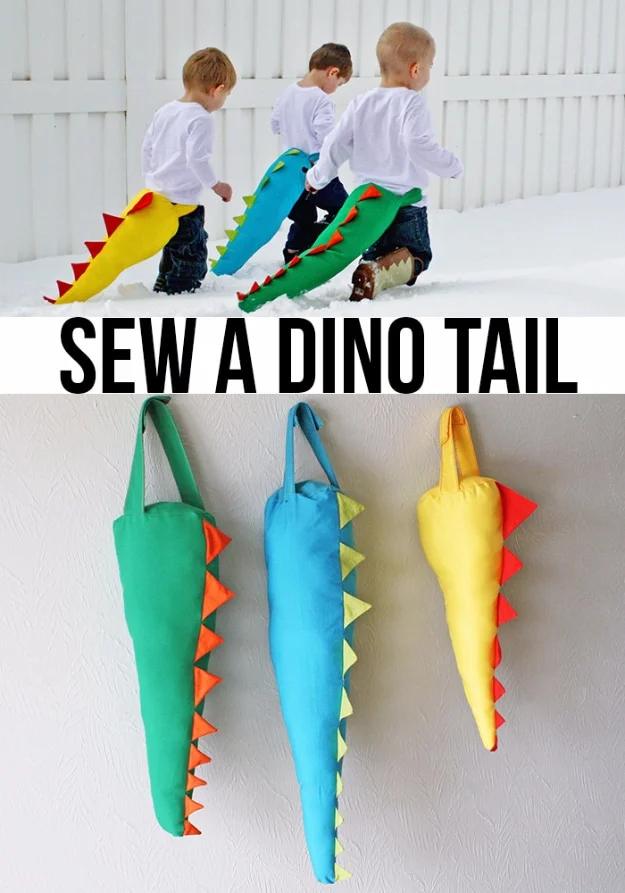
Under two hours and the pattern pieces are all rectangles, which is the good news buried in a project that looks complicated. Two tail pieces at twenty two by eleven inches, four waist straps at twelve by three, a seven inch circle for the end, and two spike strips at twenty two by three and a half. The spike strip gets sewn, turned, pressed flat and then sandwiched between the two tail pieces as you sew the half inch seam, which is how the spikes end up standing along the top. Velcro on the straps, polyfill inside, and the end circle closes it.
Get the full tutorial at Andrea's Notebook.
7. Boys Messenger Bag
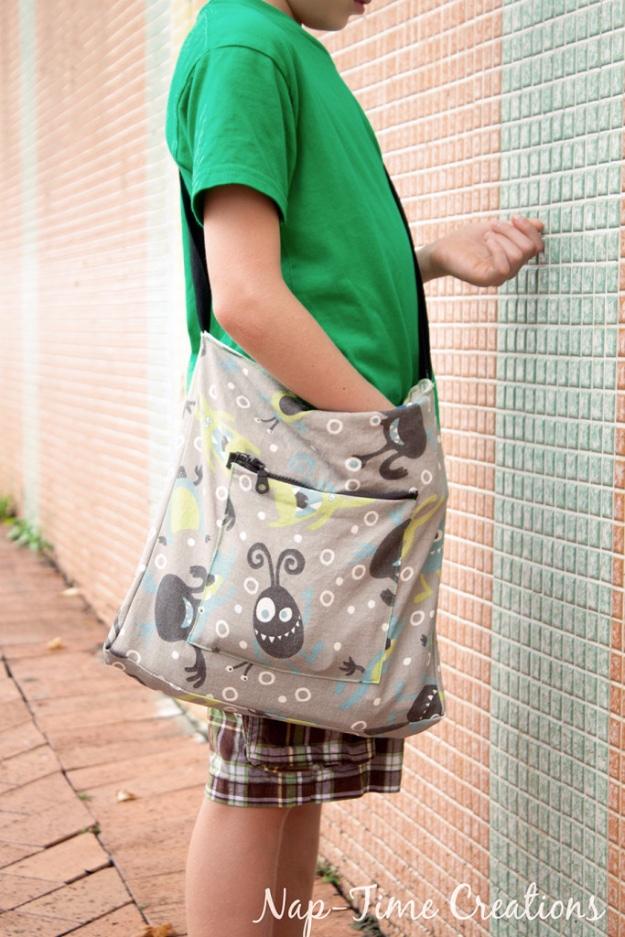
Half a yard of main fabric and half a yard of lining, a six inch zipper for the side pocket and a quarter inch seam allowance throughout. The construction is friendlier than a messenger bag sounds: long strips get sewn to the main panels to build the outer shell, the same thing happens again in lining fabric, and then the two are joined through a four inch gap and turned. You choose the closure, either a magnetic clasp or a flap. If your strap is wider than the side of the bag, fold it over before attaching rather than trying to ease it in.
Get the full tutorial at Life Sew Savory.
8. Log Slice Pouf
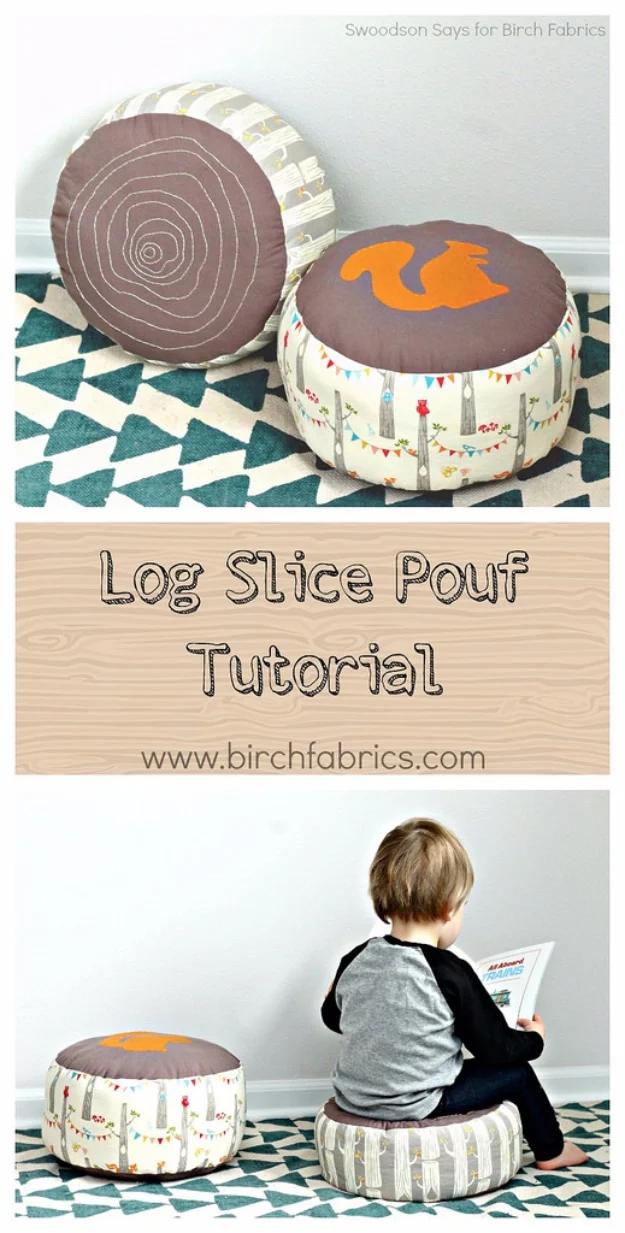
Two round floor poufs printed to look like log slices, one with growth rings and one with a squirrel, sitting on a patterned rug. The cut is simple enough: four fabric circles and four fleece circles, plus strips at seven by forty two and a half inches and six by forty two and a half, sewn into a cylinder with a circle on each end. Fusible fleece gives the sides their body. Stuff it with a thirty two ounce bag of polyfill and pack fabric scraps into the middle for weight, keeping the polyfill toward the outside, then close it with a ladder stitch.
Get the full tutorial at Birch Fabrics.
9. Monster Hooded Towel
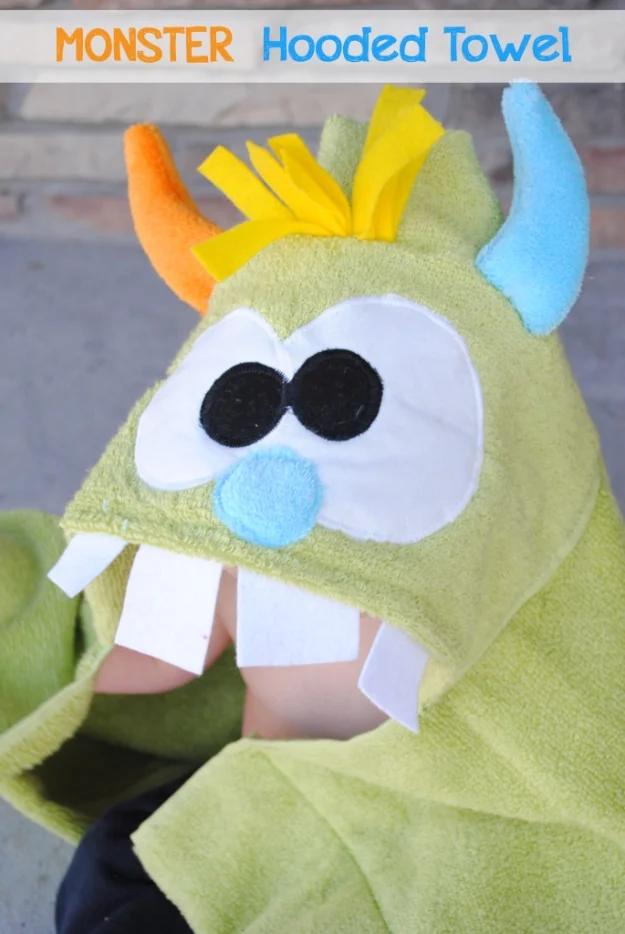
A bath towel plus a matching hand towel cut in half for the hood, and the monster is whatever you decide it is: one eye or two, one horn or a pair, a row of sharp felt teeth or a few crooked ones. The eyes get fused on with Heat n Bond and then appliqued around. The horns are the clever part. You sew two shapes together, turn and stuff them, cut a small slit in the towel, push the horn down into that slit and stitch it closed underneath so the horn stands up.
Get the full tutorial at Crazy Little Projects.
10. DIY Toy Or Lego Bag And Playmat
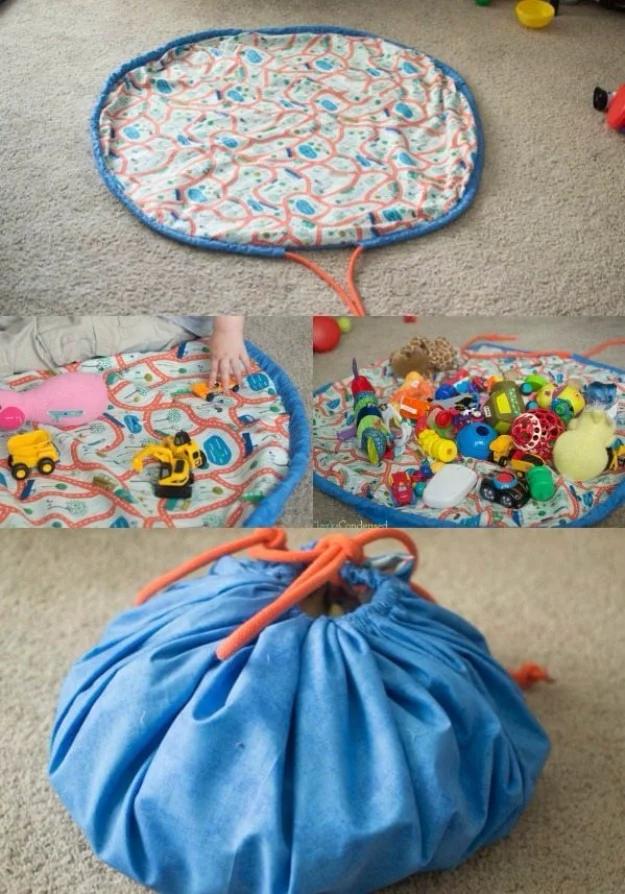
One circle of fabric that lies flat as a play surface and pulls up into a sack when it is time to stop, which solves the loose brick problem better than any box. It finishes at about forty inches across, cut from two coordinating fabrics roughly forty three by fifty six inches each. Three strips at forty by three inches get sewn together into one long tube, that tube is attached to one circle, then the circles go face to face and get sewn with a quarter inch seam through a five or six inch gap. Paracord runs through the tube, knotted at both ends. One to three hours.
Get the full tutorial at Clarks Condensed.
11. Little Man's Pajamas
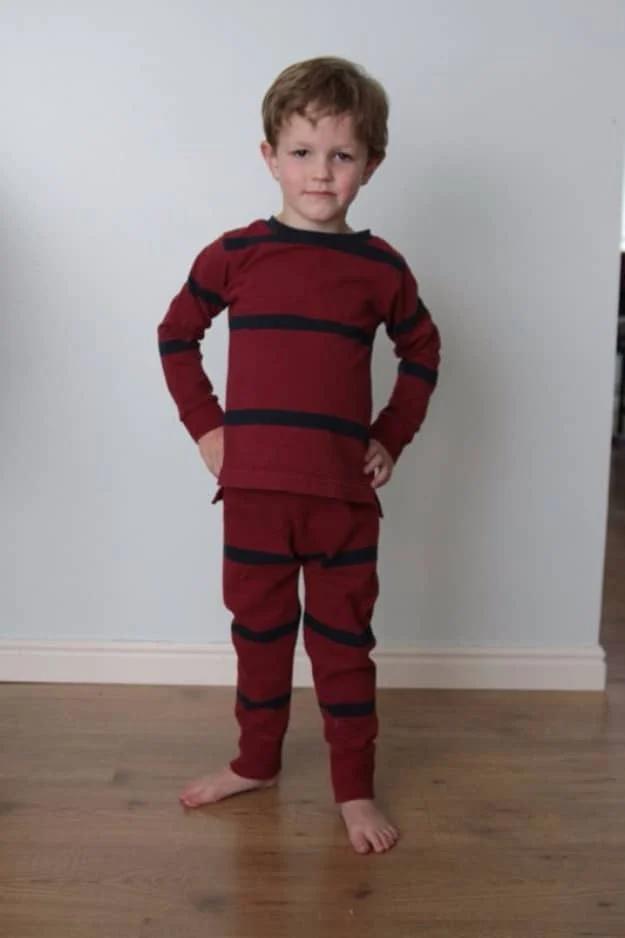
A men’s XXL polo bought for fifty cents becomes a full pajama set, and the cutting plan is the clever bit. The sleeves become the pant legs, which means the hems are already finished before you start. The collar gets cut up and reused as the sleeve cuffs and the neckband. The body of the shirt becomes the top. There is no pattern to download; you trace around pajamas the child already owns, which is more accurate than any size chart anyway. The waistband is a yoga-style fold rather than an elastic casing. Three seams finish the pants.
Get the full tutorial at It's Always Autumn.
12. Car Organizer
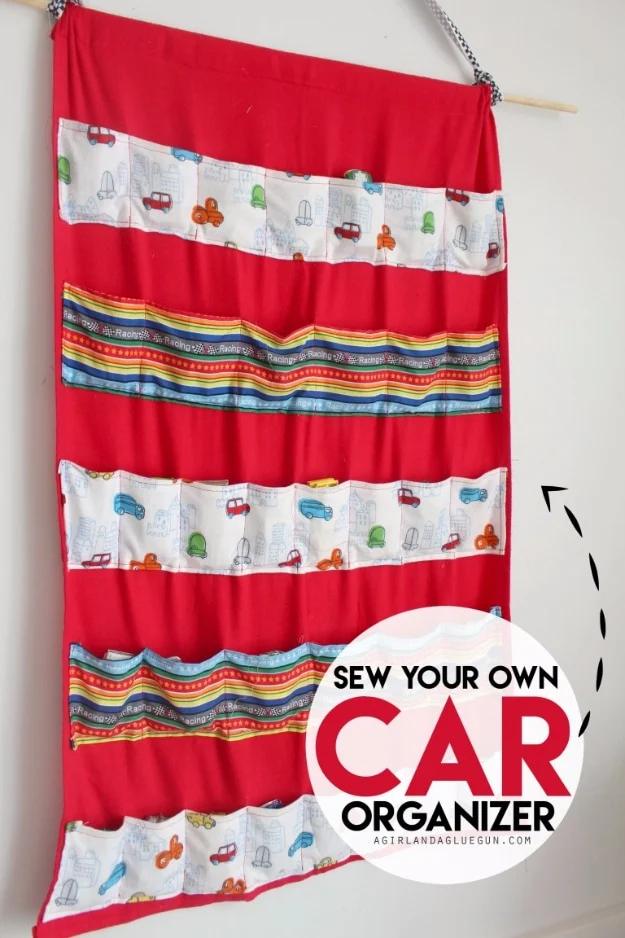
A hanging panel of pockets sized to hold toy cars, which turns a drawer full of loose vehicles into something a child can actually choose from. Rows of pocket fabric are stitched across a flannel base and then divided with vertical seams roughly two and a half inches apart, measured against the actual cars rather than guessed. A wooden dowel trimmed to about ten inches goes through the top with ribbon tied or glued to each end for hanging, and iron-on interfacing stiffens the top so it does not sag. The creator notes flannel pulls once loaded and would pick something heavier next time.
Get the full tutorial at A Girl and a Glue Gun.
13. Stuffed Fox
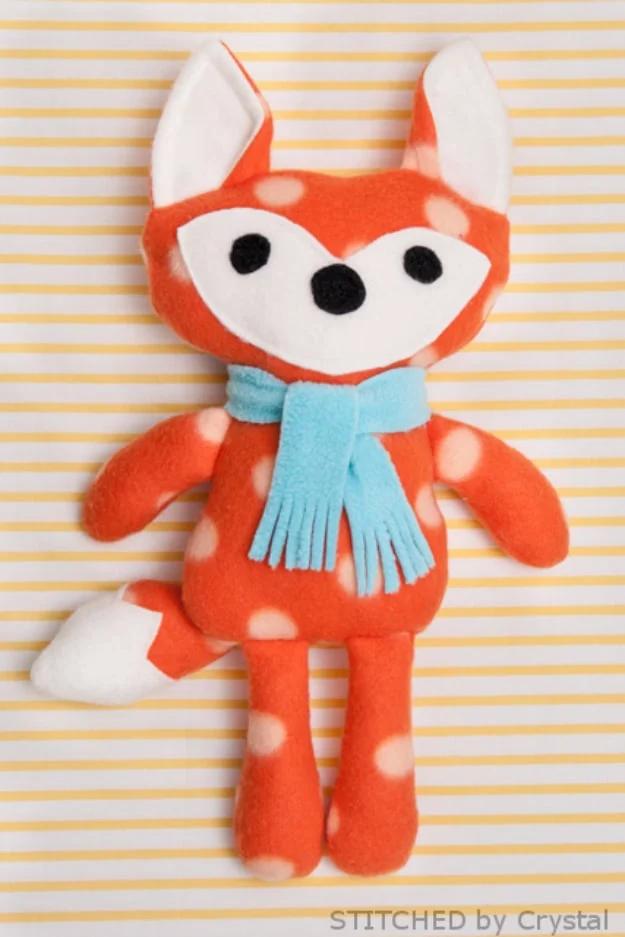
About fifteen inches tall, sewn from soft fleece with a fuzzy scarf, and the free PDF includes quarter inch seam allowances so you are not guessing. The detail worth copying is the face: instead of buttons for the nose and eyes, everything is appliqued in fleece, which makes the toy safe for a baby and means nothing can be pulled loose and swallowed. If you are giving one to a very small child, stitch the scarf down too or leave it off entirely. Fleece is forgiving to sew and does not fray, so raw edges on the applique are fine.
Get the full tutorial at Stitched by Crystal.
14. Angry Birds Blanket
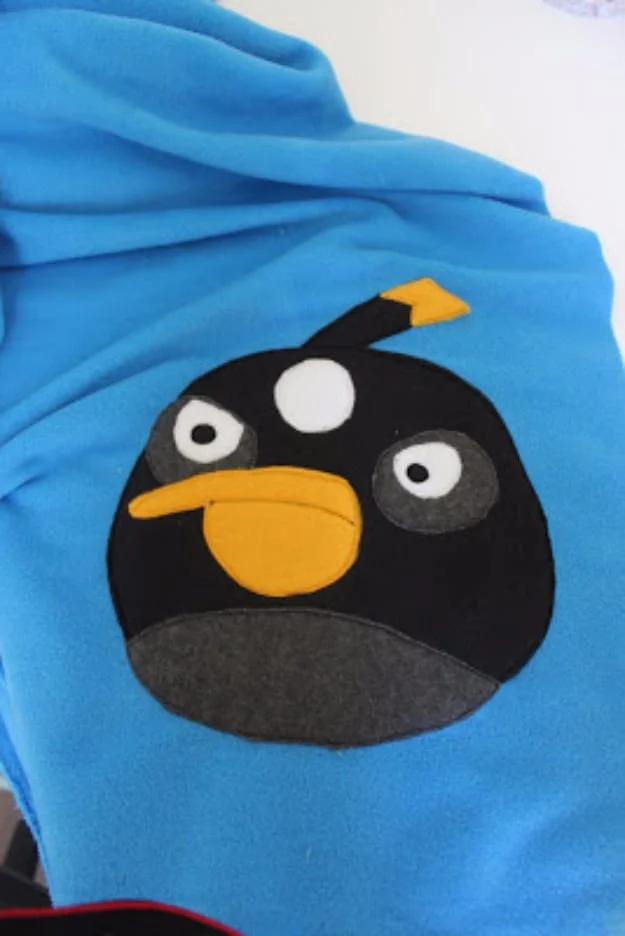
Fleece applique done with free-motion stitching, and the method is genuinely clever. You sketch each character onto tissue paper at full size, pin the tissue to the back of the blanket, lay the colored fleece on the front, then sew along the drawn lines from the back. Trim the excess fleece close to the stitching, add the next color and repeat until the face is built up. Fleece does not fray, so no edge needs finishing at any point. A yard and a half of blue makes the base and scraps make the birds. Tear the tissue away at the end.
Get the full tutorial at Obsessively Stitching.
15. Boyish Looking Quilt
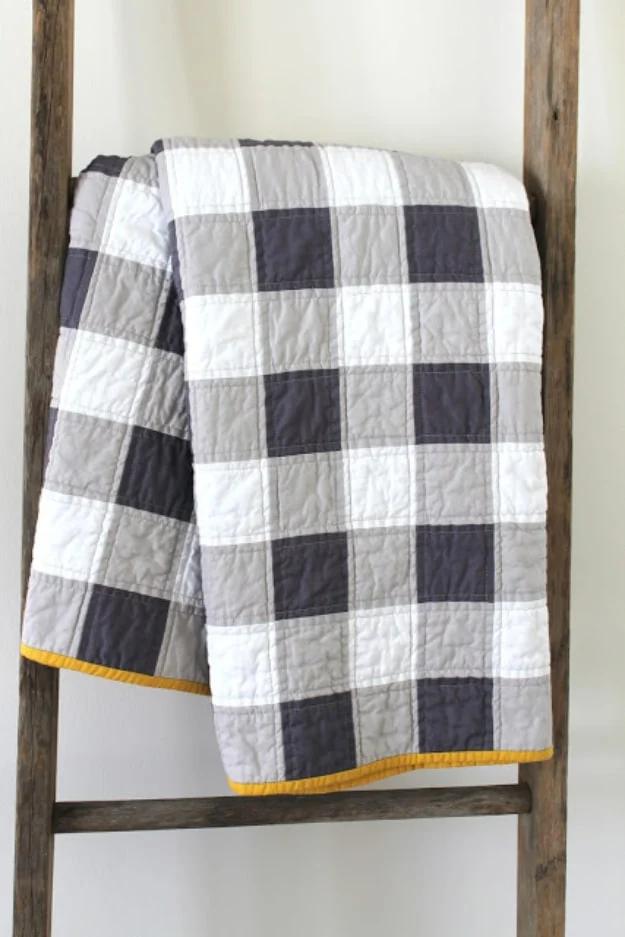
A big gingham check built out of solids, which is a smarter piece of design than it first appears. Gingham gets its look from overlapping light and dark, so the quilt uses three tones of the same idea, white, a pale ash and a dark coal, arranged so the eye reads a woven check rather than a checkerboard. A curry yellow runs around the binding and it is the only warm thing in the quilt, which is exactly why it works. All cotton, fabric and batting both. Deliberately oversized for actual snuggling rather than for a cot.
Get the full tutorial at Crafty Blossom.
16. Dump Truck Applique
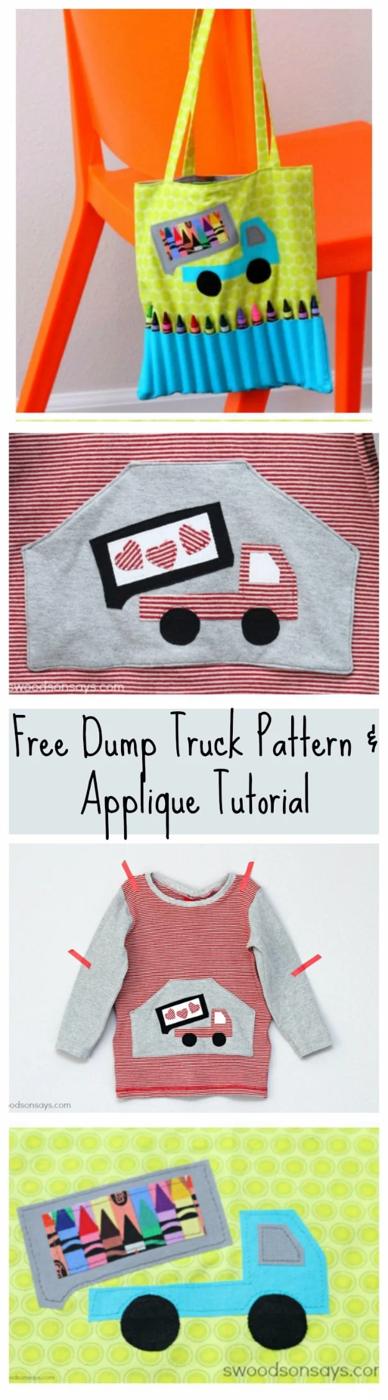
The applique technique that turns a plain shop-bought tee into something a truck-obsessed child will refuse to take off, and the free file gives you the shapes. Trace them onto the dull side of paper-backed fusible, cut roughly, press onto the wrong side of your scraps, then cut precisely and peel the backing. Build from the bottom layer up as you press each piece down, or a wheel ends up on top of a wheel arch. Finish with a topstitch around every edge, or a narrow zigzag if you want the factory look and a hold that survives more washes.
Get the full tutorial at Swoodson Says.
17. Pocket Scarf
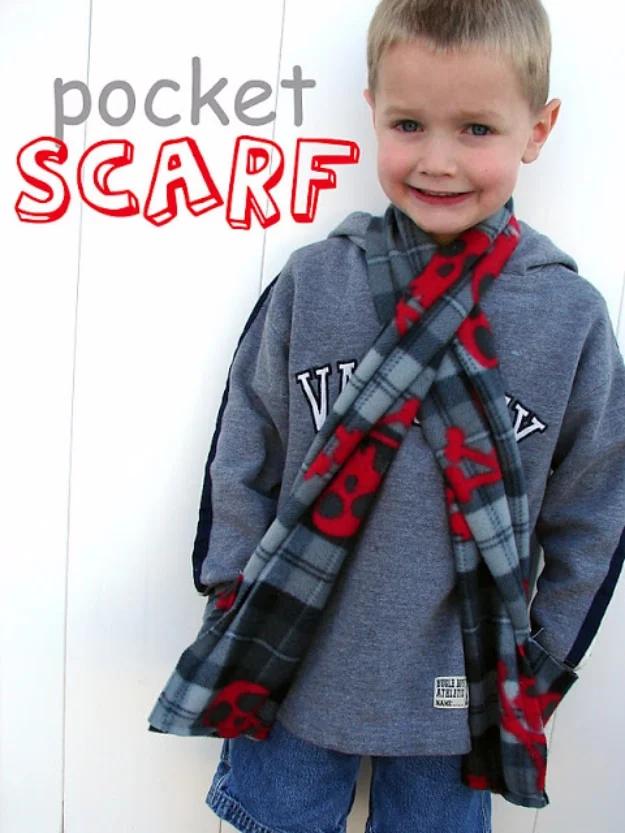
Three quarters of a yard of fleece, cut into strips about nine inches wide, with pockets at both ends so cold hands have somewhere to go. Fleece is the right call because it does not fray, which means no edge on this whole project needs finishing. There are two ways to make the pockets: fold each end up and sew the sides, which is fastest, or cut separate pocket pieces and stitch three sides down, which lets you place a print exactly where you want it. One strip suits ages two to five and two strips sewn together suits eight and up.
Get the full tutorial at A Girl and a Glue Gun.
18. Magnetic Fishing Toy
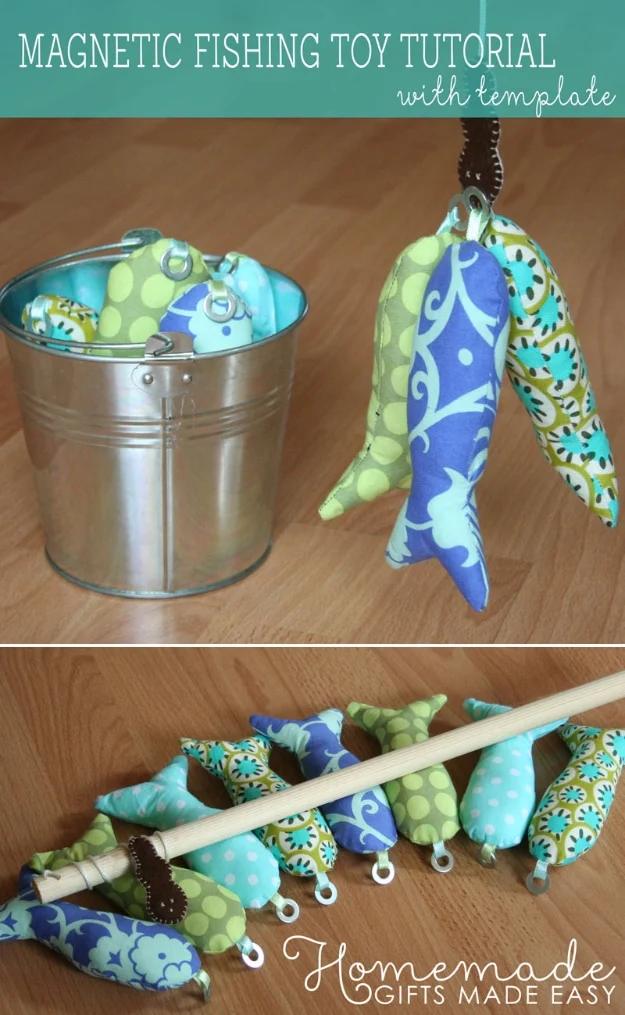
Fabric fish with a metal washer sewn into the head, and a felt worm with a magnet inside it on the end of a string. That is the whole mechanism, and it is a better one than the usual magnet-on-magnet version because a washer never repels. Each fish takes a square of fabric just under eight inches, two inches of thin satin ribbon threaded through the washer, and a little stuffing; sew with about a third of an inch allowance, leave an inch gap, turn, stuff and ladder stitch it shut. The worm is two felt shapes blanket stitched with the magnet sealed inside.
Get the full tutorial at Homemade Gifts Made Easy.
19. Boys Short From A T-Shirt
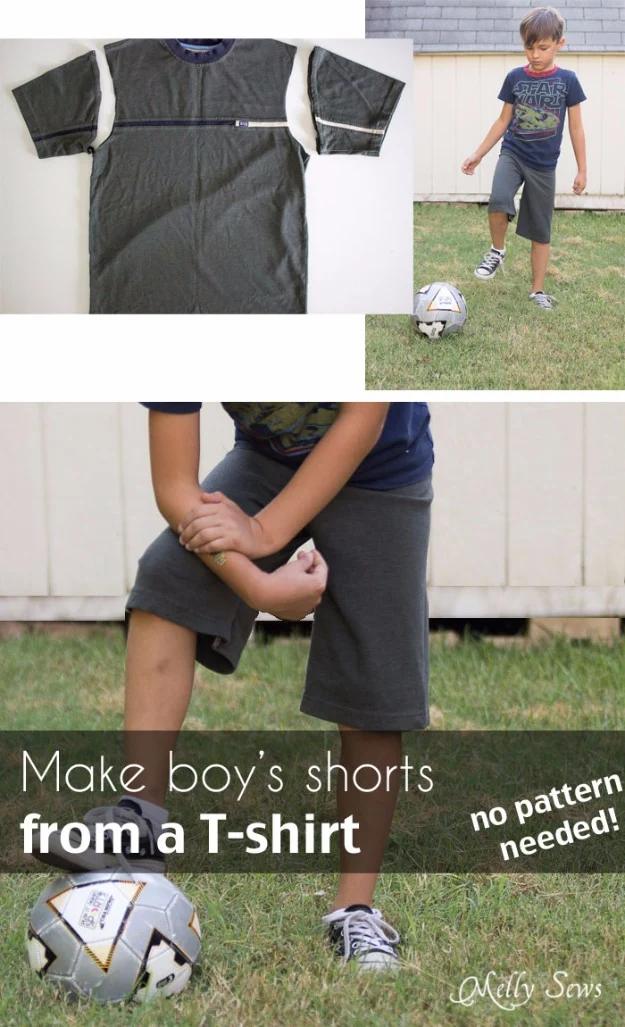
An adult t-shirt becomes a pair of shorts, and the tutorial is really about the waistband, which is the part everyone gets wrong. One inch elastic is cut to the waist measurement, folded in half and joined with a three eighths inch seam, and here is the key: you leave a three eighths inch gap in the middle of that seam, which becomes the hole the drawstring threads through later. No buttonholes, no eyelets. The elastic is then zigzagged straight onto the shorts while stretched, folded inside and stitched along the bottom edge. No pattern needed at all.
Get the full tutorial at Melly Sews.