
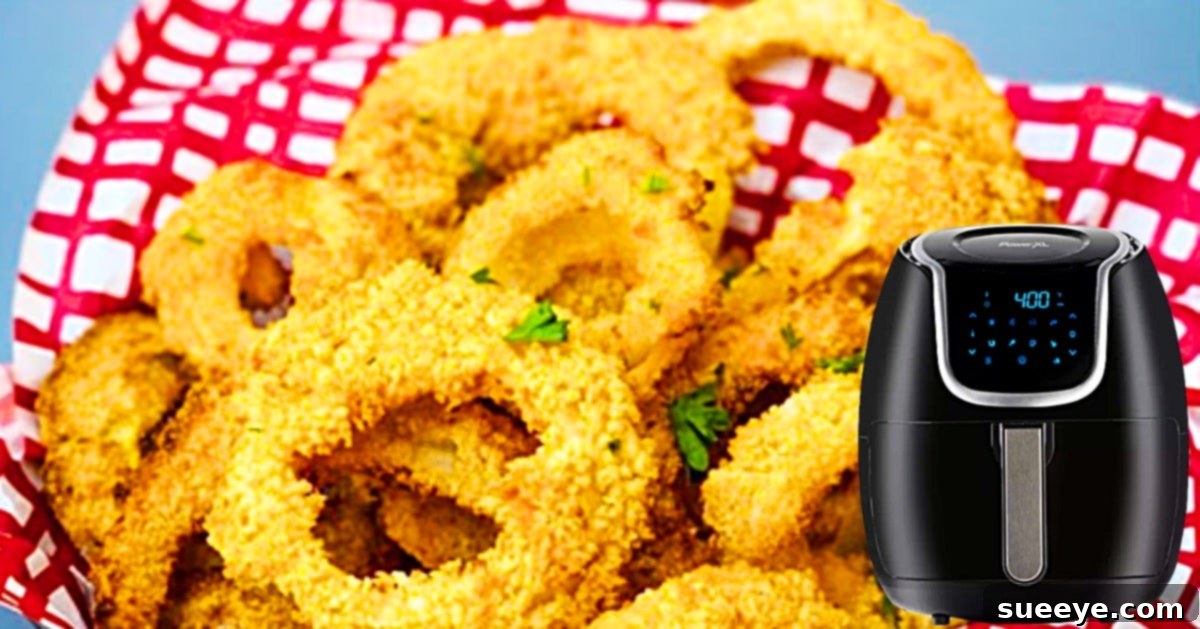
There’s an undeniable charm to golden, crispy onion rings. They are a quintessential side dish, offering that perfect blend of sweet onion and savory crunch, making them an ideal companion to a juicy burger, a flaky piece of fried fish, or succulent chicken. However, the traditional deep-fried method often comes with a hefty dose of oil and guilt, leading many of us to enjoy them far less frequently than we’d like. But what if there was a way to achieve that irresistible crispiness and flavor with significantly less fat? Enter the air fryer – a kitchen marvel that has revolutionized how we approach our favorite ‘fried’ foods. I recently received an air fryer, and it has quickly become one of my favorite kitchen appliances, constantly inspiring me to explore healthier versions of classic dishes. The quest for the perfect, guilt-free onion ring led me to an amazing tutorial by Stay Snatched on YouTube. This video promised homemade air fryer onion rings that delivered on taste without the excessive oil, and I couldn’t wait to try it. The ability to indulge in beloved fried foods, knowing you’re significantly cutting down on unhealthy fats, is truly game-changing. This recipe is not just about making onion rings; it’s about reclaiming the joy of comfort food in a healthier, more convenient way.
Essential Ingredients for Crispy Air Fryer Homemade Onion Rings
Crafting the perfect batch of air fryer onion rings starts with a selection of fresh, high-quality ingredients. Each component plays a crucial role in achieving that sought-after texture and flavor. Here’s what you’ll need to prepare these delightful golden rings:
- 1 large onion (preferably a sweet variety like Vidalia or yellow onion for optimal flavor)
- 1 1/2 cups Panko breadcrumbs (Panko is key for extra crispiness!)
- 1 cup of buttermilk (essential for tenderizing the onion and helping the coating adhere)
- 1 large egg, beaten (to create a binding wash for the breadcrumbs)
- 1 cup of all-purpose flour (the initial coating layer)
- 1 teaspoon paprika (for a subtle warmth and beautiful color)
- 1 teaspoon of garlic powder (adds depth of savory flavor)
- Salt and freshly ground black pepper to taste (season generously)
- Cooking oil spray (olive oil, avocado oil, or a neutral vegetable oil spray works best)
Choosing a large, firm onion is vital, as it provides substantial rings that hold up well during the cooking process. Panko breadcrumbs, with their larger, flakier texture, are superior to regular breadcrumbs for achieving an extra-crispy exterior. Buttermilk is a secret weapon, not only providing a tangy flavor but also tenderizing the onion slices and creating an ideal surface for the flour and breadcrumbs to cling to. Don’t skip the seasoning; paprika and garlic powder elevate the flavor beyond a simple fried onion, adding a gourmet touch.
Step-by-Step Guide: How to Make Air Fryer Homemade Onion Rings
Making these delicious air fryer onion rings is surprisingly straightforward, thanks to the ingenious method shared by Stay Snatched on YouTube. The process involves a simple three-stage breading station, followed by efficient air frying. Here’s how you can achieve perfectly golden and crispy onion rings in your own kitchen:
1. Prepare Your Onions
Begin by peeling your large onion. For uniform rings, it’s best to slice the onion into 1/4 to 1/2-inch thick rings. Thinner slices might become too flimsy, while thicker slices may not cook evenly. Separate the rings carefully, discarding the very small inner pieces or saving them for another recipe. Lay them out on a baking sheet lined with paper towels to absorb any excess moisture, which helps the coating stick better.
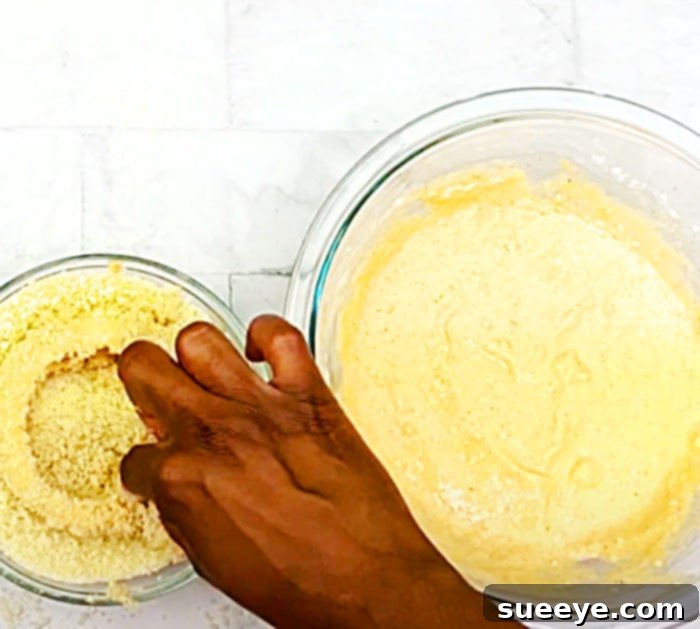
2. Set Up Your Breading Station
A well-organized breading station is crucial for a smooth and mess-free process. You’ll need three shallow dishes or bowls:
- Bowl 1 (Flour): In the first bowl, combine the all-purpose flour, paprika, garlic powder, salt, and pepper. Whisk these dry ingredients together until thoroughly mixed. This seasoned flour provides the foundational layer.
- Bowl 2 (Wet): In the second bowl, whisk together the buttermilk and the beaten egg until well combined. This wet mixture acts as the glue for the breadcrumbs.
- Bowl 3 (Panko): Pour the Panko breadcrumbs into the third bowl. These flaky breadcrumbs are essential for creating the signature crispy texture of your onion rings.
3. Coat the Onion Rings
Working with one onion ring at a time, follow this sequence:
- First, dredge the onion ring in the seasoned flour mixture, ensuring it’s fully coated. Gently shake off any excess flour. This step helps to absorb surface moisture and provides a dry base for the wet coating.
- Next, dip the floured onion ring into the buttermilk and egg mixture, making sure it’s completely submerged and coated. Allow any excess liquid to drip off briefly.
- Finally, transfer the wet onion ring to the Panko breadcrumbs. Press the Panko gently onto the onion ring to ensure it adheres well on all sides. A thick, even coating of Panko is what will give you that glorious crunch.
Place the coated onion rings on a clean plate or baking sheet as you finish them. Do not stack them, as the coating may stick together.
4. Air Fry to Golden Perfection
Preheat your air fryer to 370°F (188°C) for about 3-5 minutes. Preheating ensures an even cook and immediate crisping upon contact. Once preheated, arrange the coated onion rings in a single layer in the air fryer basket. Do not overcrowd the basket; air circulation is crucial for achieving crispiness. You may need to cook them in batches.
Once the onion rings are in the basket, lightly spray them with cooking oil. This step is vital for developing that golden-brown color and truly crispy texture, mimicking the results of deep-frying without the excess oil. Cook for 10 to 12 minutes, or until golden brown and crispy. Halfway through the cooking time (around the 5-6 minute mark), shake the basket or flip the onion rings to ensure even cooking and browning on all sides.
The exact cooking time may vary slightly depending on the thickness of your onion rings and your specific air fryer model. Keep an eye on them during the last few minutes to prevent burning. They should be beautifully golden and feel firm to the touch when done.
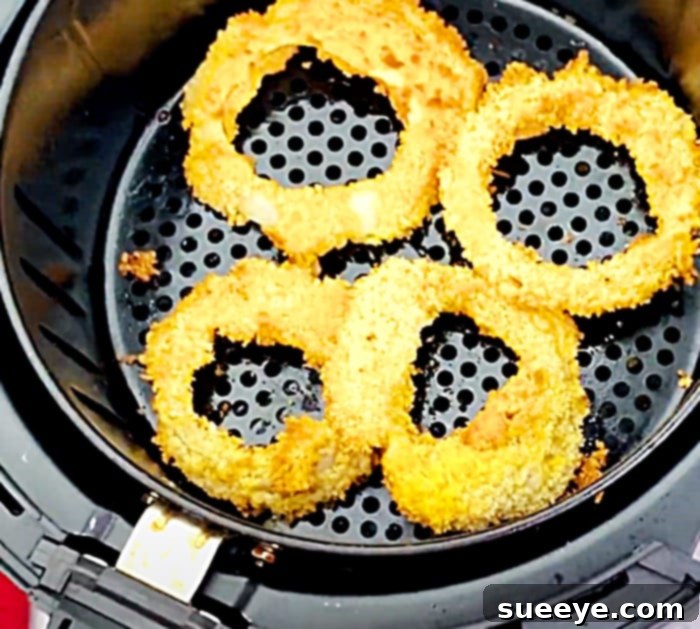
Once cooked, immediately transfer the crispy air fryer onion rings to a serving platter. A quick sprinkle of extra salt, if desired, will enhance their flavor even further. These homemade onion rings are incredibly delicious and are sure to become a favorite. The difference in taste and texture, combined with the significantly reduced fat content, makes this recipe an absolute winner!
Why Air Frying is the Best Way to Make Onion Rings
Beyond simply reducing fat, air frying offers numerous advantages that make it the superior method for preparing homemade onion rings:
- Significantly Reduced Fat: This is the most obvious benefit. Air frying uses a fraction of the oil compared to deep-frying, often just a tablespoon or two of spray oil. This dramatically cuts down on calories and unhealthy fats, making onion rings a guilt-free indulgence.
- Crispy Texture Without the Grease: Air fryers circulate hot air rapidly, creating a convection effect that crisps food beautifully. You get that satisfying crunch without the heavy, greasy residue often associated with deep-fried versions.
- Convenience and Speed: Air fryers preheat quickly and cook food faster than traditional ovens. The process is also much less messy than deep-frying, eliminating splatters and the need to dispose of large amounts of used oil.
- Consistent Results: With precise temperature control and even heat distribution, air fryers deliver consistently perfect results batch after batch.
- Enhanced Flavor: Without being submerged in oil, the true flavor of the sweet onion and the seasoned breading can shine through more prominently.
- Healthier Lifestyle: Incorporating air-fried versions of your favorite comfort foods allows you to maintain a healthier diet without feeling deprived, making it easier to stick to your wellness goals.
Expert Tips for Achieving the Perfect Air Fryer Onion Rings
To ensure every batch of your homemade air fryer onion rings turns out perfectly crispy and flavorful, keep these expert tips in mind:
- Uniform Slicing: Consistency in onion ring thickness (1/4 to 1/2 inch) is key for even cooking. Irregularly sized rings will cook at different rates, leading to some being overcooked and others undercooked.
- Use Panko Breadcrumbs: While regular breadcrumbs work, Panko offers a much lighter, crispier, and airier texture. Their unique flakiness creates a superior crunch that mimics deep-frying better than traditional breadcrumbs.
- Don’t Overcrowd the Basket: This is arguably the most important rule for air frying. Overcrowding prevents hot air from circulating effectively, leading to steaming instead of crisping. Cook in batches, leaving plenty of space between each ring.
- Light Oil Spray is Essential: A light, even coating of oil spray is critical for achieving that beautiful golden-brown color and crispy exterior. Without it, your onion rings might look pale and less appetizing. Olive oil or avocado oil sprays are excellent choices.
- Preheat Your Air Fryer: Just like a conventional oven, preheating your air fryer ensures that the food starts cooking immediately at the correct temperature, leading to better texture and faster cooking times.
- Flip or Shake Halfway: For ultimate crispiness and even browning, remember to shake the basket or manually flip the onion rings about halfway through the cooking cycle.
- Season Generously: Don’t be shy with the salt and pepper, both in the flour mixture and a final sprinkle after cooking. Good seasoning elevates the overall taste profile.
- Consider Freezing: If you’re making a large batch, you can freeze coated onion rings on a baking sheet until solid, then transfer them to a freezer bag. Air fry from frozen, adding a few extra minutes to the cooking time, for a quick snack anytime.
Serving Suggestions and Customizing Your Onion Rings
Homemade air fryer onion rings are incredibly versatile and pair wonderfully with a variety of meals, but they’re also fantastic on their own. Here are some ideas to elevate your onion ring experience:
- Classic Pairings: Serve them alongside your favorite burgers, hot dogs, grilled cheese sandwiches, or as a side with fish and chips. They also make a fantastic appetizer for any gathering.
- Dipping Sauces: While delicious on their own, onion rings are perfect for dipping! Classic options include ketchup, ranch dressing, BBQ sauce, or a spicy sriracha mayo. For a gourmet touch, try a homemade aioli, a creamy horseradish sauce, or a sweet and tangy chili sauce.
- Spice it Up: For those who love a bit of heat, add a pinch of cayenne pepper or a dash of chili powder to your flour mixture. A smoky flavor can be introduced with smoked paprika.
- Herb Infusion: Incorporate dried herbs like a pinch of thyme, rosemary, or oregano into the flour mixture for an aromatic twist.
- Gluten-Free Option: Easily adapt this recipe by using a gluten-free all-purpose flour blend and gluten-free Panko breadcrumbs. The cooking process remains the same.
- Dairy-Free Alternative: If buttermilk is an issue, you can create a dairy-free “buttermilk” by adding one tablespoon of lemon juice or white vinegar to a cup of your preferred dairy-free milk (like almond or soy milk) and letting it sit for 5-10 minutes until it slightly curdles.
Troubleshooting Common Air Fryer Onion Ring Issues
While air frying onion rings is generally straightforward, you might encounter a few common issues. Here’s how to troubleshoot them:
- Onion Rings Aren’t Crispy Enough:
- Solution: Ensure you’re not overcrowding the basket. Cook in smaller batches. Also, make sure to adequately spray with oil. Lack of oil often leads to a paler, softer crust. Increase cooking time by 1-2 minutes if needed, and ensure your air fryer is preheated.
- Coating is Falling Off:
- Solution: This usually happens if the onion rings are too wet before the flour coating, or if the flour layer isn’t complete. Ensure the onion slices are dry (pat them with paper towels) before coating. Also, press the Panko firmly onto the rings for better adhesion. Avoid handling them too much once coated.
- Onion Rings Are Burning on the Outside, Raw on the Inside:
- Solution: Your air fryer might be too hot, or the onion slices are too thick. Reduce the temperature slightly (e.g., to 360°F) and increase cooking time, or slice your onions thinner. Flipping them halfway through is also crucial for even cooking.
- Flavor is Bland:
- Solution: Don’t underestimate the power of seasoning! Ensure you generously season the flour mixture with salt, pepper, paprika, and garlic powder. A final sprinkle of salt immediately after air frying can also make a big difference.
Storage and Reheating Air Fryer Onion Rings
While these air fryer onion rings are best enjoyed fresh, you can store and reheat them effectively:
- Storage: Allow any leftover onion rings to cool completely. Store them in an airtight container in the refrigerator for up to 2-3 days.
- Reheating: To bring back their crispiness, reheat them in the air fryer. Place the cooled onion rings in a single layer in the air fryer basket (no need for additional oil spray). Air fry at 350°F (175°C) for 3-5 minutes, or until heated through and crispy. Avoid reheating in a microwave, as this will make them soggy.
With this comprehensive guide, you’re now equipped to create the most delicious, crispy, and healthier homemade onion rings using your air fryer. This recipe truly transforms a guilty pleasure into a delightful treat that you can enjoy without hesitation. The combination of perfectly tender onion and an incredibly crunchy, seasoned coating, all achieved with minimal oil, is simply irresistible. Go ahead, give this recipe a try, and prepare to fall in love with homemade air fryer onion rings!