
Mastering the Disappearing Nine Patch Quilt: A Beginner-Friendly Tutorial
Welcome to the wonderful world of quilting, where simple fabric squares transform into intricate designs! If you’ve been searching for a quilt pattern that’s both incredibly satisfying to create and surprisingly easy to master, look no further than the Disappearing Nine Patch. This captivating quilt block has a magical way of making a basic nine-patch design “disappear” into a more complex, visually stunning pattern with just a few strategic cuts and rotations.
Whether you’re a complete novice taking your first stitches or an experienced quilter seeking a quick and delightful project, the Disappearing Nine Patch is an absolute joy. Its beauty lies in its simplicity and versatility, allowing for endless design possibilities from a very straightforward technique. Many quilters find this method incredibly addictive, as it produces fantastic results with minimal effort, making it ideal for using up charm squares or fabric scraps.
Why the Disappearing Nine Patch is a Must-Try Quilt Block
The Disappearing Nine Patch quilt block stands out for several compelling reasons, making it a favorite among quilters of all skill levels:
- Beginner-Friendly: The core technique involves basic straight-line sewing and cutting, making it an excellent starting point for those new to quilting. You’ll build confidence quickly with this pattern.
- Quick to Assemble: Unlike intricate patterns that demand hours of precise piecing, the Disappearing Nine Patch comes together remarkably fast. This means you can see tangible progress and finish projects more quickly.
- Visually Stunning Results: What starts as a simple 3×3 grid of squares magically transforms into a kaleidoscope of smaller squares and rectangles, creating an illusion of complexity that belies its simple construction.
- Incredible Versatility: The way you re-arrange the cut sections offers a plethora of design possibilities. From elegant pinwheels to dynamic abstract patterns, your creativity is the only limit.
- Ideal for Scrap Busting: This block is perfect for utilizing those leftover fabric scraps or showcasing a beautiful collection of pre-cut charm squares (5-inch squares). It’s a fantastic way to give new life to your fabric stash.
Gather Your Supplies: What You’ll Need
Before diving into the fun, ensure you have all the necessary tools and materials at hand. Having everything ready will make your quilting experience smooth and enjoyable:
- Fabric: The heart of your quilt! For a single Disappearing Nine Patch block, you will need nine fabric squares. Charm squares (5 inches x 5 inches) are ideal, but you can also cut your own squares from fat quarters or yardage. Consider a mix of colors and patterns for visual interest. For instance, three light, three medium, and three dark fabrics can create a lovely contrast.
- Rotary Cutter: A sharp rotary cutter is essential for precise, clean cuts.
- Self-Healing Cutting Mat: Protects your work surface and your rotary cutter blade.
- Quilting Ruler: A clear acrylic ruler (at least 12.5 inches long) with clear markings will be indispensable for accurate measuring and cutting.
- Sewing Machine: A reliable sewing machine with a good quarter-inch presser foot.
- Thread: High-quality cotton thread that complements your fabric colors.
- Iron and Ironing Board: Crucial for pressing seams flat and ensuring your blocks lay perfectly flat.
- Fabric Scissors: For snipping threads and occasional fabric adjustments.
- Straight Pins: To hold fabric pieces securely in place before sewing.
Step-by-Step Tutorial: Creating Your Disappearing Nine Patch Block
Let’s get started on bringing your Disappearing Nine Patch to life. Follow these detailed steps to create your first block:
Step 1: Prepare Your Fabric Squares
Begin by cutting your fabric into nine identical squares. A common and beginner-friendly size is 5 inches x 5 inches, especially if you’re using charm squares. If cutting from yardage, carefully measure and cut nine squares, ensuring they are all uniform. The accuracy of this initial step is crucial for a successful outcome.
Step 2: Assemble the Traditional Nine Patch Block
Arrange your nine squares into a 3×3 grid. Play around with the placement until you achieve a pleasing color and pattern distribution. For instance, you might place a contrasting square in the center, or alternate light and dark fabrics. Once you’re happy with the layout:
- Sew the Rows: Take the three squares in your top row and sew them together, using a precise 1/4-inch seam allowance. Repeat this for the middle row and the bottom row. It’s often helpful to chain piece these sections, sewing one row after another without lifting the presser foot between sections.
- Press Your Seams: After sewing each row, press the seams. For the top and bottom rows, press your seams towards the outer squares. For the middle row, press your seams towards the center square. This technique, called “nesting seams,” helps the seams align perfectly when you join the rows.
- Join the Rows: Now, align the top row with the middle row, right sides together. Pin carefully at the seam intersections to ensure they match up. Sew them together with a 1/4-inch seam. Repeat this process to attach the bottom row to the combined top and middle rows.
- Final Press and Trim: Press all your new seams open or to one side (whichever you prefer and provides the flattest block). Your finished traditional nine-patch block should now measure approximately 12.5 inches x 12.5 inches (if you started with 5-inch squares and used a 1/4-inch seam). If it’s slightly off, you can carefully trim it to size using your ruler and rotary cutter.
Step 3: The “Disappearing” Cut – The Magic Happens!
This is where the magic of the Disappearing Nine Patch truly comes to life. Take your large 12.5-inch nine-patch block and prepare to cut it into four smaller quadrants. The key is to cut through the center of the block, splitting the middle squares.
- Find the Center: Lay your nine-patch block flat on your cutting mat. You’ll need to make two cuts: one horizontally and one vertically. The easiest way to ensure accuracy is to measure 2 inches from the seam line that runs through the middle block, both horizontally and vertically. Alternatively, you can find the exact center of your 12.5-inch block (which would be 6.25 inches from each edge) and cut there.
- Make Your Cuts: Using your quilting ruler and rotary cutter, make your first cut horizontally across the block, passing through the center of the middle row’s squares. Then, make your second cut vertically, passing through the center of the middle column’s squares.
You will now have four separate smaller blocks, each measuring approximately 6-1/4 inches x 6-1/4 inches. Notice how the original nine-patch pattern has been broken up, creating new, intriguing smaller units.
Step 4: Re-arrange for Unique Designs
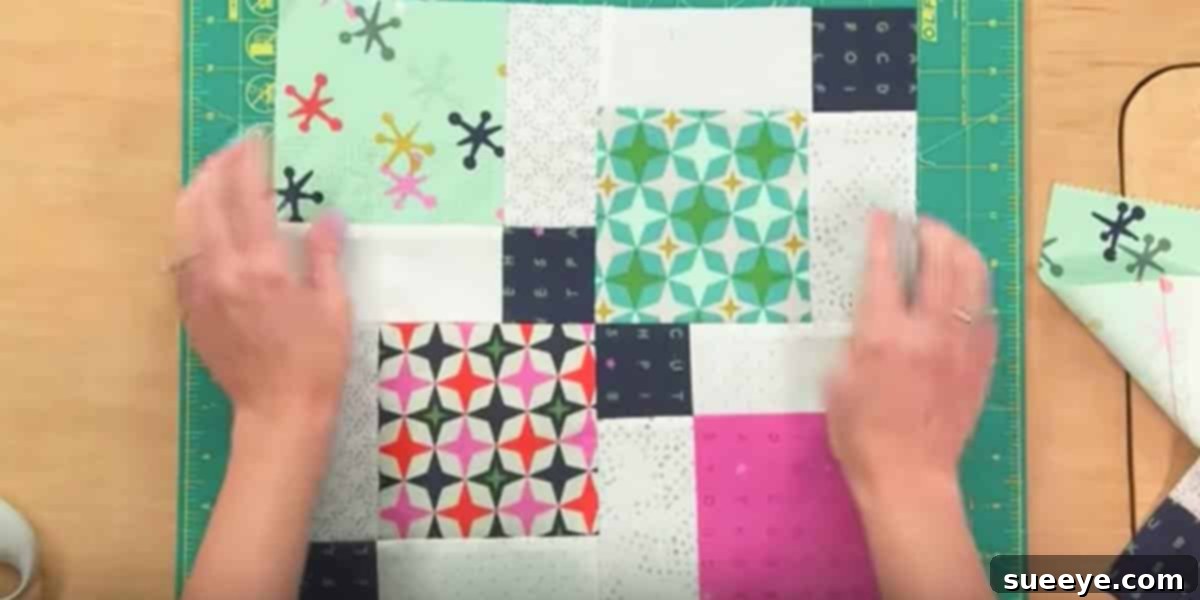
Now for the fun and creative part! These four smaller blocks can be rotated and re-arranged in countless ways to create stunning new patterns. This is where your quilt truly takes on its unique personality. Experiment by rotating each of the four quadrants. Some popular arrangements include:
- Pinwheel Effect: Rotate opposing blocks to create a dynamic pinwheel in the center.
- Kaleidoscope: Spin all four blocks in the same direction to generate a mesmerizing, repetitive pattern.
- Simple Grid: Keep some blocks in their original orientation and rotate others for a more subtle but still intricate design.
- Optical Illusions: With clever placement, you can create blocks that seem to have depth or movement.
Spend some time playing with these arrangements until you find a design that speaks to you. Remember, there’s no right or wrong way – it’s all about personal preference and artistic expression.
Step 5: Sew Your New Block Together
Once you’ve settled on your desired arrangement, it’s time to sew your four smaller units back into a larger, new block:
- Sew in Rows: Just like with the original nine-patch, sew the two top quadrants together with a 1/4-inch seam. Do the same for the two bottom quadrants.
- Press Seams: Press these new seams open or to one side, alternating directions for nesting.
- Join the Rows: Align your two newly sewn rows, right sides together, pinning at the center seam to ensure a perfect match. Sew them together with a 1/4-inch seam.
- Final Press and Square Up: Press the final seam. You now have a complete Disappearing Nine Patch quilt block! It should measure approximately 12.5 inches x 12.5 inches again. If needed, use your ruler and rotary cutter to carefully square up the block, trimming any slight inconsistencies to ensure it’s perfectly square and ready to join other blocks.
Tips for Quilting Success
To ensure your Disappearing Nine Patch quilt turns out beautifully, keep these valuable tips in mind:
- Precision is Key: In quilting, a small error in cutting or sewing can compound quickly. Take your time with measuring, cutting, and maintaining that consistent 1/4-inch seam allowance.
- Pressing Matters: Don’t underestimate the power of a good press! Flat seams prevent bulk and ensure your blocks lie flat and fit together perfectly.
- Chain Piecing: To save time and thread, especially if you’re making multiple blocks, use the chain piecing method. Sew multiple pieces in a continuous chain before cutting them apart.
- Pre-Wash Fabric: While optional, pre-washing your fabric can prevent shrinkage and color bleeding after your quilt is finished.
- Enjoy the Process: Quilting should be a relaxing and creative outlet. Don’t stress over perfection. Every stitch tells a story, and small imperfections add character to your handmade piece.
Beyond the Block: Assembling Your Quilt
Once you’ve mastered a single Disappearing Nine Patch block, you can create an entire quilt! Simply repeat the process to make as many blocks as needed for your desired quilt size. Then, you’ll arrange your completed blocks into rows, sew the rows together, add borders if desired, and finally, layer your quilt top with batting and backing for quilting and binding.
For an excellent visual guide and to see this awesome quilt come to life, watch how Teresa demonstrates each step in her detailed tutorial. Seeing the process in action can be incredibly helpful for understanding the nuances of cutting and arrangement.
Unleash Your Creativity
The Disappearing Nine Patch quilt is more than just a pattern; it’s a gateway to endless creative possibilities. Experiment with different fabric combinations, try varying the initial square sizes, or even adjust the “disappearing” cut measurements to achieve unique visual effects. Each choice will result in a distinct and beautiful quilt, truly your own.
So, gather your fabrics, fire up your sewing machine, and embark on this rewarding quilting journey. You’ll be amazed at how quickly you can transform simple squares into a stunning heirloom. Happy quilting!