
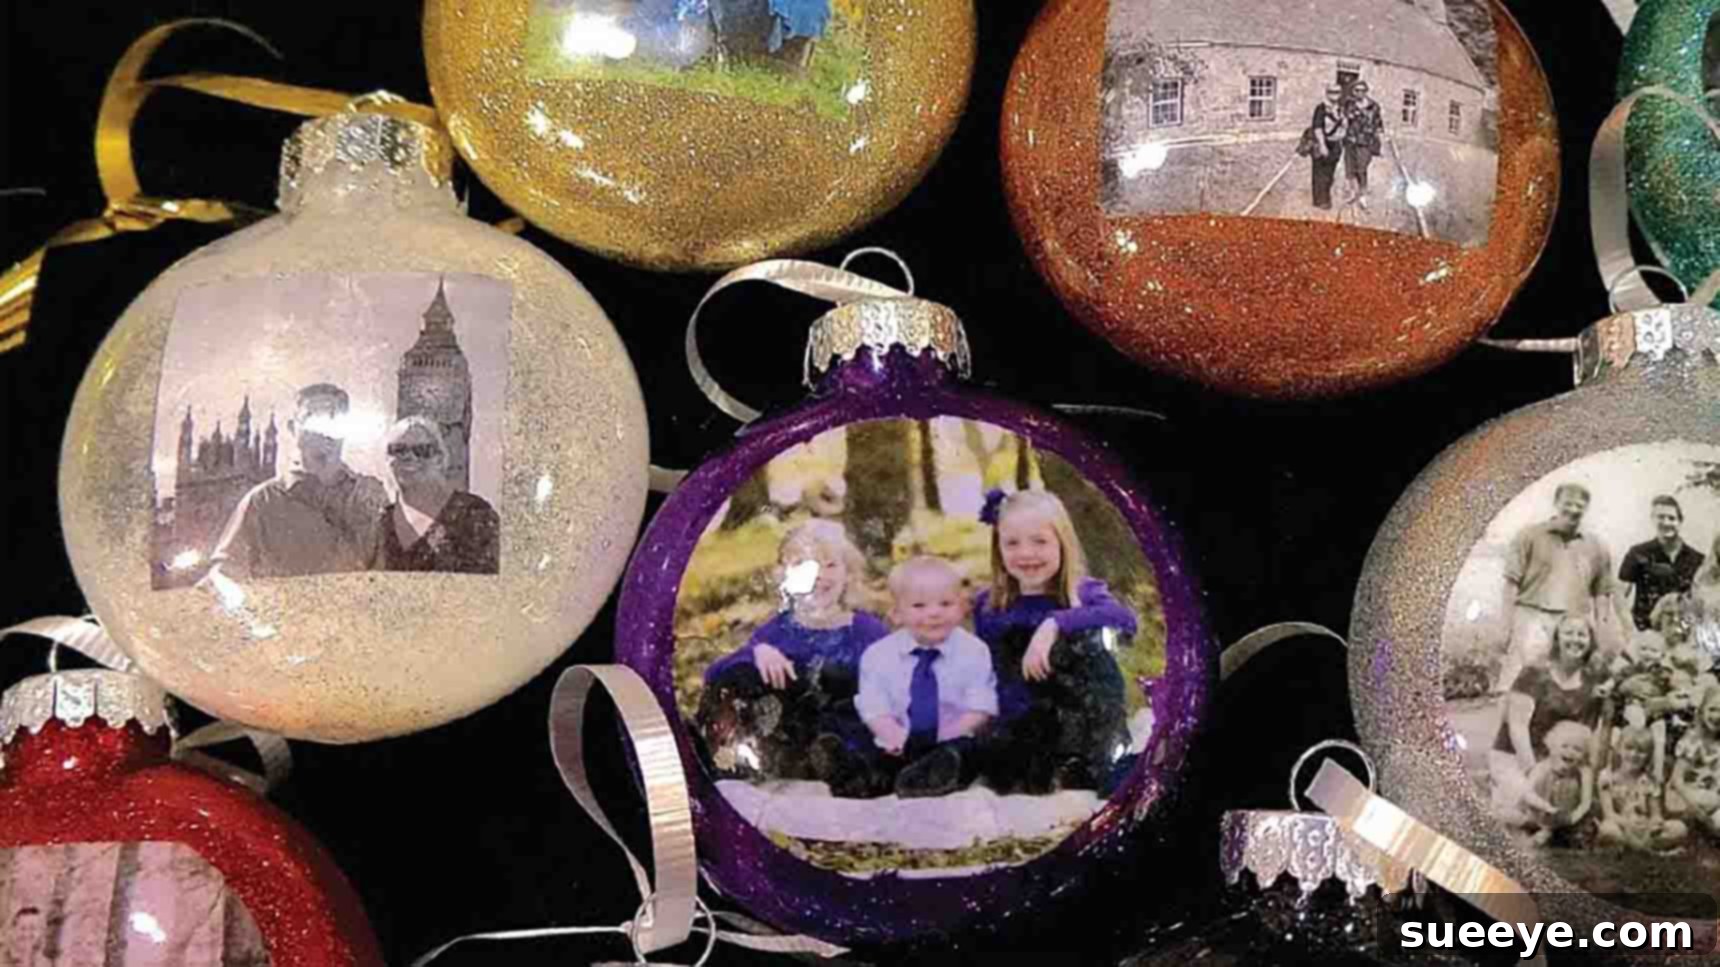
The holiday season is a time for warmth, joy, and cherished memories. What better way to capture and celebrate these precious moments than by creating stunning DIY Christmas photo ornaments? These personalized keepsakes, beautifully showcased by ClutterBug on YouTube, offer a unique and heartfelt touch to your festive decorations or make incredibly thoughtful gifts for friends and family. Imagine their delight upon receiving a custom ornament featuring a beloved photograph – it’s a gift that truly speaks volumes.
This project is not only incredibly fun and easy to make but also allows for immense creativity, letting your personality shine through in every piece. Whether you’re looking to adorn your own Christmas tree with a collection of memorable moments or craft a series of bespoke presents, these handmade photo ornaments are the perfect solution. Gather your crafting supplies today and embark on a rewarding journey to create beautiful, lasting holiday treasures that will be cherished for years to come. Our detailed guide will walk you through each step, ensuring a successful and enjoyable crafting experience from start to finish.
Why DIY Christmas Photo Ornaments Are a Must-Have This Holiday Season
In a world full of mass-produced items, there’s something truly special about a handmade gift. Personalized Christmas photo ornaments stand out as a unique way to convey love and thoughtfulness during the festive period. Here’s why these delightful crafts are an absolute must for your holiday preparations:
- Sentimental Value: Unlike generic store-bought decorations, a photo ornament holds a story. It can commemorate a baby’s first Christmas, a memorable family vacation, a special anniversary, or simply capture a beloved pet’s adorable face. Each glance at the ornament brings back happy memories, making your tree a gallery of cherished moments.
- Personalized Gifting: Struggling to find the perfect gift for someone who has everything? A custom photo ornament is a fail-safe choice. It shows effort, thought, and a deep personal connection that no off-the-shelf item can replicate. Grandparents, aunts, uncles, and friends will adore a gift that features a photo of their loved ones.
- Budget-Friendly Craft: Crafting personalized items doesn’t have to break the bank. With a few affordable supplies, you can create multiple stunning ornaments, making it an economical way to add a personal touch to your holiday decor or gift-giving list.
- Fun Family Activity: This DIY project is perfect for all ages. Gather your family for a crafting session, choose favorite photos together, and enjoy the process of creating something beautiful. It’s a wonderful way to bond and make new holiday memories while crafting old ones.
- Versatility in Design: While perfect for Christmas, the concept of a photo ornament can be adapted for various occasions throughout the year. Think birthdays, anniversaries, or even as unique party favors. The design possibilities are endless!
Essential Materials for Your Photo Ornament Project
Before you begin crafting your beautiful Christmas photo ornaments, ensure you have all the necessary supplies within reach. Having everything prepared will make the process smooth and enjoyable.
- Clear Plastic Ornaments: Opt for high-quality, shatterproof plastic ornaments. These are safer than glass, especially if you have children or pets, and provide a perfect canvas for your photos.
- Clear Floor Polish: This acts as both an adhesive and a sealant for your photo, giving it a beautiful, submerged look. Ensure it’s clear and quick-drying.
- Two Funnels: Essential for cleanly pouring the floor polish and later, the glitter, into the narrow opening of the ornaments without mess.
- Glitter: Choose your favorite colors and types! Fine glitter works best for an even coat, but chunky glitter can add extra sparkle and texture.
- Small Paintbrush: A thin, soft-bristled paintbrush is crucial for positioning and smoothing the photo inside the ornament.
- 2 & 1/2 Laser Jet Photo on Regular Paper: This specific photo size (or similar, depending on your ornament size) ensures it fits well inside most standard ornaments. Using a laser jet printer is vital, as inkjet prints tend to bleed when exposed to the floor polish. Regular paper is flexible enough to be rolled and inserted.
Step-by-Step Guide to Crafting Your Personalized Photo Ornaments
Creating these gorgeous photo ornaments is a straightforward process that yields incredibly impressive results. Follow these detailed steps to bring your cherished memories to life within a sparkling ornament.
Step 1: Preparing Your Ornament and Photo
The first crucial step involves preparing your ornament to receive the photo. Start by gently popping off the metal top of your clear plastic ornament. Set it aside carefully. Next, grab one of your funnels and insert it into the ornament’s opening. Slowly pour a small amount of clear floor polish into the ornament. You don’t need to fill it completely; just enough to coat the inside walls once swirled. Gently swirl the ornament around, ensuring the entire inner surface is coated with the polish. This layer acts as a temporary adhesive, helping your photo stick smoothly without bubbles.
Now, it’s time for your photo. Take your carefully selected and printed laser jet photo and gently roll it into a tight cylinder. The tighter you roll it, the easier it will be to insert into the ornament’s opening. Once rolled, carefully insert the photo into the ornament. Once inside, the photo will naturally unroll slightly. This is where your small paintbrush comes in handy. Using the brush, carefully position the photo against the inner wall of the ornament, pressing it down gently to ensure it lies flat and smooth. Take your time with this step, making sure there are no creases or large air bubbles trapped between the photo and the ornament wall. The floor polish will help the photo adhere seamlessly.
As the photo begins to absorb some of the floor polish, it will start to look “wet” and become more pliable. This is the ideal time to make any final adjustments, pressing out any remaining bubbles or wrinkles with your paintbrush. Be careful not to press too hard, as this could tear the paper. Once the photo is perfectly positioned and smooth, carefully pour out any excess floor polish from the ornament. This prevents pooling and ensures a clean finish. Allow the ornament to sit for a while, perhaps 30 minutes to an hour, to let the floor polish partially set and the photo to securely adhere. This will prevent glitter from sticking to the front of the photo in the next step.
Step 2: Adding Sparkle and Finishing Touches
After giving the floor polish some time to set, it’s time to add the festive sparkle! Grab your second clean funnel and insert it into the ornament’s opening. Slowly pour your chosen glitter into the ornament. You can use one color or layer different colors for a multi-dimensional effect. Once you’ve added enough glitter, remove the funnel and gently shake the ornament. Swirl and tap it, allowing the glitter to stick to the remaining, slightly tacky floor polish on the inside walls that aren’t covered by the photo. The goal is to achieve an even, shimmering coat around your photo. If you’re using multiple glitter colors, make sure to tap out any residual glitter from the funnel before switching to a new color to prevent mixing.
Once you’re satisfied with the glitter coverage, tap out any loose, excess glitter from the ornament. To finish, use a clean cloth or paper towel to gently wipe off the outside front of the ornament. This ensures there are no smudges or traces of floor polish left on the exterior surface. Finally, carefully replace the metal top of the ornament. Your personalized Christmas photo ornament is now complete and ready to hang on your tree or be lovingly presented as a gift!
Creative Variations and Personalization Ideas for Your Ornaments
While the basic steps create a beautiful ornament, don’t stop there! Unleash your creativity with these ideas to make each photo bauble truly unique:
- Beyond Glitter: Instead of just glitter, consider adding tiny faux snow, small beads, sequins, or even fine sand for a beach-themed photo. For a rustic look, try shredded natural fibers or fine wood shavings.
- Photo Styles: Experiment with black and white or sepia-toned photos for a vintage feel. You could also print collages of small images or use a single, striking portrait.
- Exterior Embellishments: Once the ornament is complete, tie a festive ribbon or bow around the top. You can also attach small charms, bells, or miniature pinecones to the hanger for extra flair.
- Custom Tags: Create small, handwritten or printed tags to attach to the ornament. These can include the date, a special message, or the names of the people in the photo.
- Themed Collections: Create a series of ornaments for specific themes: “Baby’s First Christmas,” “Our First Home,” “Family Vacation 2023,” or a collection featuring each family member or pet.
- Hand-Painted Details: For an artistic touch, use paint pens or acrylic paints to add delicate designs, names, or dates to the *outside* of the clear ornament.
Tips for Success and Troubleshooting Common Issues
To ensure your DIY photo ornament project goes smoothly and produces professional-looking results, keep these tips in mind:
- Choose the Right Photo: High-resolution photos with good contrast and clear subjects work best. Print a few extras in case of errors.
- Laser Jet is Key: As mentioned, always use a laser jet printer. Inkjet ink will bleed and ruin your photo when it comes into contact with the floor polish.
- Patience with Positioning: Don’t rush when positioning the photo. Use the paintbrush to gently work out all air bubbles and creases. A few small bubbles are normal, but aim for as flat a surface as possible.
- Managing Glitter Mess: Glitter tends to get everywhere! Work over a tray, newspaper, or a designated craft mat to contain the sparkle and make cleanup easier.
- Drying Time Matters: Allow ample time for the floor polish to set and dry. While the photo will adhere quickly, a full cure might take several hours or even overnight. Avoid excessive handling during this period.
- Storage: Store your precious photo ornaments carefully in a padded container to protect them from dust, moisture, and potential damage, ensuring they last for many Christmases to come.
- Practice Makes Perfect: If it’s your first time, consider doing a test run with a less critical photo and ornament to get a feel for the process.
Conclusion: Create Lasting Memories with DIY Photo Ornaments
Crafting personalized Christmas photo ornaments is a truly rewarding experience that adds a layer of heartfelt charm to your holiday celebrations. These easy-to-make, beautiful creations are more than just decorations; they are tangible pieces of your most treasured memories, sparkling with sentimentality. Whether you’re making them to adorn your family tree, offering them as bespoke gifts, or simply enjoying a relaxing craft session, the joy they bring is immeasurable.
Inspired by the wonderful tutorial from ClutterBug, you now have all the knowledge and steps needed to create your own collection of unique holiday keepsakes. So, gather your materials, select your favorite photographs, and embark on this delightful DIY journey. This holiday season, let your tree tell a story, one beautiful photo ornament at a time. Start crafting today and make memories that will shine for years to come!