
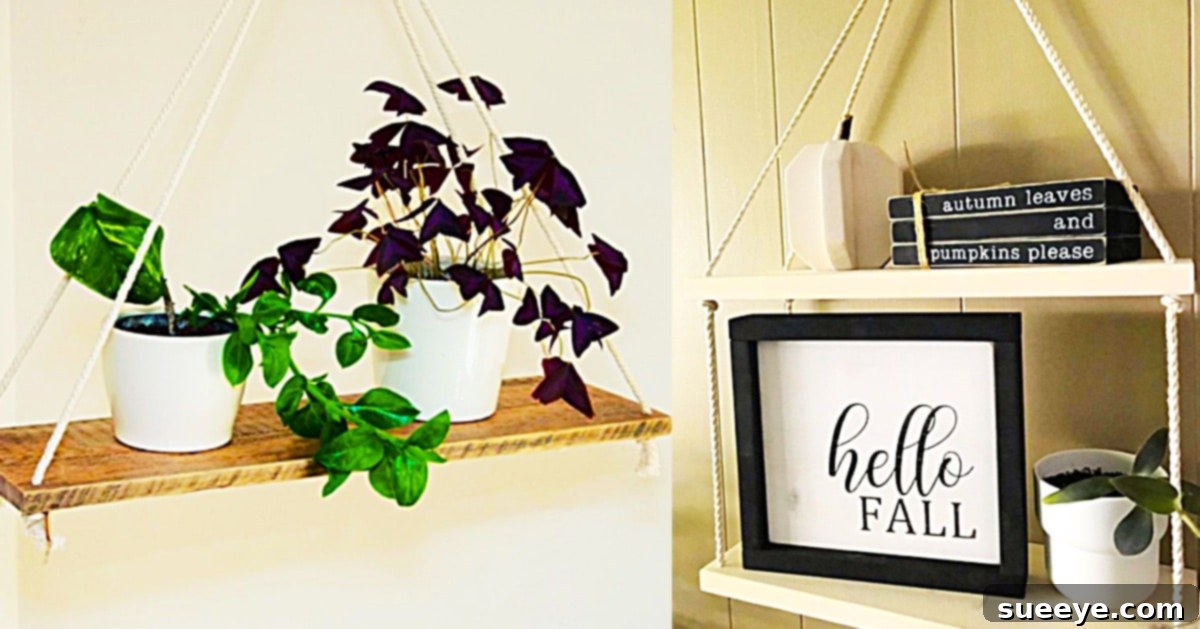
DIY Dollar Tree Rope Swing Shelves: Affordable & Easy Home Decor for Any Space
Are you looking to add a touch of charm and functionality to your home without breaking the bank? Imagine stylish, versatile shelves that “float” effortlessly, offering both display space and a unique aesthetic. When we first stumbled upon the ingenious Dollar Tree Rope Swing Shelf video tutorial by Auntie Tay on YouTube, we were instantly captivated by this brilliant idea. What makes these shelves truly exceptional is their ingenious design: they require no permanent wall attachments like nails or screws. This means unparalleled flexibility, allowing you to easily reposition them whenever your decor needs a refresh or you simply want a change of scenery.
For many aspiring DIY enthusiasts, the thought of building shelves can be daunting. Traditional shelving often demands precise measurements, intricate carpentry skills, and the dreaded commitment of drilling into walls – a task that can quickly lead to costly mistakes if you’re a novice crafter. The beauty of Auntie Tay’s rope swing shelf project is its simplicity. It completely bypasses the need for specialized carpentry expertise, making it an accessible and rewarding venture for anyone, regardless of their crafting experience. These innovative shelves are often affectionately referred to as “floating shelves” because of their non-fixed, seemingly suspended appearance, adding a modern and airy feel to any room.
Why Choose DIY Rope Swing Shelves? Unpacking the Benefits
In a world where home decor can often come with a hefty price tag, discovering a project that offers both style and affordability is like striking gold. These Dollar Tree rope swing shelves embody the perfect blend of budget-friendliness and aesthetic appeal. Beyond their minimal cost, they offer a myriad of advantages that make them a standout choice for anyone looking to enhance their living space.
Unmatched Versatility and Mobility
One of the most compelling features of these shelves is their incredible versatility. Unlike built-in or rigidly mounted shelving units, rope swing shelves are inherently mobile. This means you’re not committing to a permanent fixture. Want to move your plant display from the living room to the sunnier kitchen window? No problem. Need to reconfigure your office space? These shelves move with you. This adaptability makes them ideal for renters, those who frequently redecorate, or anyone who appreciates the freedom to change their environment without hassle. They can serve various purposes, from showcasing small plants and decorative accents to organizing spices in the kitchen or toiletries in the bathroom.
Beginner-Friendly Crafting Experience
Many DIY projects are intimidating for beginners, requiring specialized tools or advanced techniques. This is where the rope swing shelf truly shines. The core process involves straightforward steps: basic painting, simple drilling, and an easy knotting method demonstrated clearly in Auntie Tay’s tutorial. There’s no need for complex joinery, perfectly level cuts, or intricate assembly. This project builds confidence, proving that beautiful, functional decor is well within reach for even the most inexperienced crafters. It’s an excellent entry point into the world of DIY, offering immediate and satisfying results.
Aesthetic Appeal: The Charm of Floating Design
The term “floating shelves” perfectly captures the elegant, minimalist aesthetic these rope shelves bring to a room. By suspending the wooden boards with rope, they create an illusion of lightness and space. This design can make a room feel larger and more open, a significant advantage in smaller living areas. The natural texture of jute rope, combined with the warmth of painted or stained wood, adds a rustic yet contemporary touch that complements a wide range of interior design styles, from bohemian and farmhouse to modern minimalist. They provide visual interest without overwhelming the space, acting as subtle focal points.
Incredibly Cost-Effective
The “Dollar Tree” in the name isn’t just a suggestion; it’s a testament to the project’s affordability. Sourcing the primary materials – wooden signs and jute rope – from a dollar store keeps the overall cost incredibly low, often just a few dollars per shelf. This budget-friendly aspect makes it possible to create multiple shelves for various rooms or to experiment with different finishes without a significant financial investment. It’s proof that high-impact home decor doesn’t have to come with a high price tag.
Essential Materials for Your $6 Dollar Tree Swing Shelves Project
Gathering your materials is the first exciting step in any DIY adventure. For this particular project, the beauty lies in its simplicity and the accessibility of its components. Most items can be found at your local Dollar Tree, a craft store, or a hardware shop. Here’s what you’ll need to get started on your very own budget-friendly floating shelves:
- Wooden Signs or Boards: You’ll need four small wooden signs from Dollar Tree. These are often decorative signs that can be easily repurposed by painting over them. Alternatively, if you prefer slightly larger or specific dimensions, two 2x4s cut into four equal lengths (or other suitable wood pieces) from a hardware store will work perfectly. The key is to have sturdy, flat wooden pieces that will form the shelves themselves. Consider the thickness and weight capacity you desire.
- Chalk Paint or Wood Stain: This is where you infuse personality into your shelves. Chalk paint offers a matte, often distressed finish that’s very popular for rustic or shabby-chic aesthetics. It also adheres well to various surfaces with minimal prep. Wood stain, on the other hand, enhances the natural grain of the wood, providing a more classic and elegant look. Choose a color or finish that complements your existing home decor. You might also consider clear sealant or varnish for added durability, especially if the shelves will be in a high-traffic area or used for plants.
- Jute Rope: The lifeline of your swing shelves! Jute rope is an excellent choice for this project due to its natural, rustic appearance, strength, and affordability. Dollar Tree often carries suitable bundles. Ensure the rope is robust enough to safely hold the weight you intend to place on your shelves. Measure generously, as you’ll need sufficient length for the suspension and the decorative knots. Other natural fiber ropes like cotton or hemp could also be alternatives, depending on your preferred look and availability.
- A Drill and Drill Bits: Essential for creating the holes through which your rope will pass. You’ll need a drill bit that is slightly larger than the diameter of your chosen jute rope to allow for easy threading. Always ensure your drill bit is sharp and appropriate for wood. Safety goggles are highly recommended when operating power tools.
- Wood Glue (Optional, for added stability): While the core design relies on robust knotting, a dab of wood glue at each knot point where the rope meets the shelf can provide extra stability and prevent the shelves from shifting over time. This is an optional step but can significantly enhance the durability and longevity of your shelves.
Additional Recommended Tools & Supplies:
- Measuring Tape or Ruler: For precise hole placement and rope length.
- Pencil: To mark drilling points on your wooden boards.
- Scissors or Craft Knife: For cutting the jute rope cleanly.
- Sandpaper (fine-grit): To smooth any rough edges on your wooden boards after cutting or drilling, ensuring a professional finish and preventing splinters.
- Drop Cloth or Newspaper: To protect your work surface during painting or staining.
- Paint Brushes or Sponges: For applying your chosen paint or stain.
- Protective Gloves: To keep your hands clean while painting/staining.
Step-by-Step Directions: Crafting Your Easy Rope Swing Shelves
Creating these delightful rope swing shelves is a satisfying process that yields beautiful results. While the full, intricate details of the knotting technique are best viewed directly in Auntie Tay’s video tutorial on YouTube, we can outline the general steps to guide you through this simple yet effective DIY project.
1. Prepare Your Wooden Boards
Begin by ensuring your wooden signs or boards are ready for transformation. If you’re using Dollar Tree signs, you might want to gently sand them to remove any existing paint or rough patches, creating a smooth canvas. If you’ve cut your own wood, sand all edges and surfaces to prevent splinters and ensure an even finish. Wipe down the boards with a damp cloth to remove any dust or debris, then allow them to dry completely.
2. Personalize with Paint or Stain
Now comes the creative part! Lay your prepared boards on a drop cloth or newspaper in a well-ventilated area. Apply your chosen chalk paint or wood stain evenly. If using paint, you might need two coats for full coverage, allowing ample drying time between applications according to the product instructions. For stain, apply with a brush or rag, then wipe off excess to reveal the wood grain. This step allows you to truly customize the aesthetic of your shelves to match your home’s decor. Once painted or stained, let them cure completely before proceeding to avoid smudging.
3. Precision Drilling for Rope Placement
With your boards dry and beautiful, it’s time for the crucial drilling step. Carefully measure and mark four equidistant points on each corner of all your wooden boards. These marks should be far enough from the edges to prevent the wood from splitting but close enough to create a stable suspension. Using your drill fitted with a bit slightly larger than your jute rope, slowly and steadily drill through each marked point. Place a scrap piece of wood underneath your board to prevent splintering on the exit side of the hole. Ensure all holes are clean and smooth for easy rope threading.
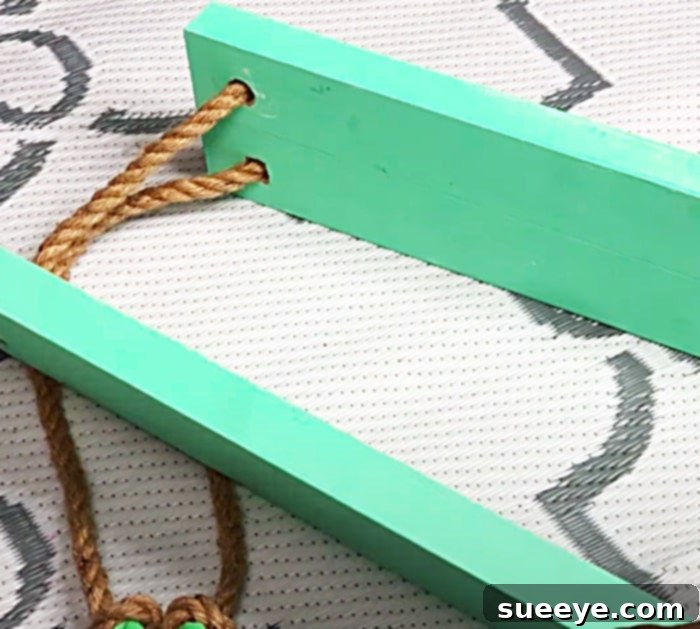
4. Assembling Your Shelves with Rope
This is where your shelves start to take shape. Cut four equal lengths of jute rope. The exact length will depend on how many shelves you’re assembling and your desired overall height. It’s always better to cut generously and trim later. Following Auntie Tay’s clear demonstration, thread one end of a rope through a corner hole of your bottom shelf, from top to bottom. Create a secure knot underneath the board to hold it in place. Repeat this for all four corners of the bottom shelf. Then, measure the desired distance for your next shelf, thread the rope through its corresponding corner hole, and tie another secure knot underneath it. Ensure these knots are level across all four ropes to keep your shelf even. Continue this process for all subsequent shelves.
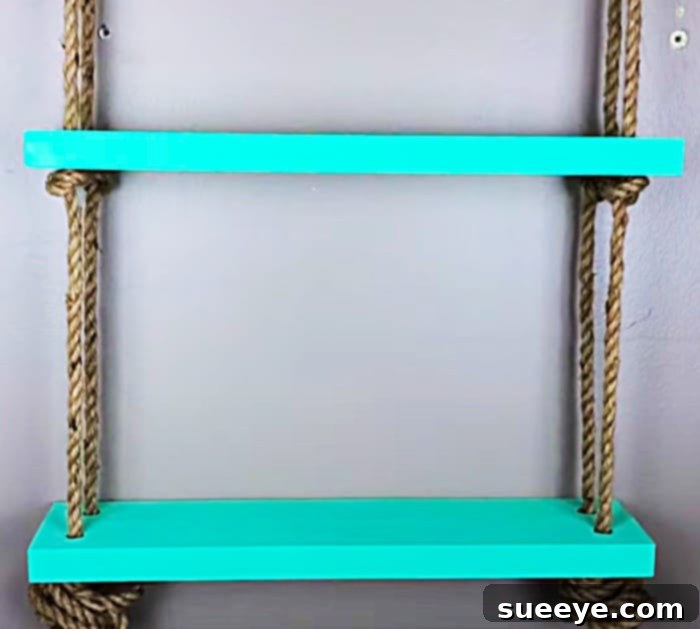
5. Securing and Hanging Your Rope Shelves
Once all your shelves are knotted onto the ropes, gather the four rope ends at the top. Tie them together in a large, sturdy loop or knot that will serve as the hanging point. Before final hanging, carefully inspect all knots for security and ensure the shelves are level. You can use a spirit level for accuracy. For hanging, choose a strong ceiling hook or a sturdy wall bracket. If hanging from drywall, always use appropriate wall anchors to ensure your shelves and their contents are safely supported. Trim any excess rope for a neat finish.
Customization and Decorating Ideas for Your New Shelves
The beauty of DIY projects like these rope swing shelves is the endless potential for personalization. Once assembled, your shelves are blank canvases ready for your unique touch. Consider painting them in vibrant colors to create a pop of personality, or opt for a distressed finish for a shabby-chic vibe. You could even use different types of rope, such as white cotton for a more nautical feel or thin leather straps for a sophisticated, modern look.
Beyond their construction, the way you style and utilize these shelves can dramatically impact your room’s aesthetic. Here are a few ideas:
- Plant Paradise: Adorn them with small potted plants, succulents, or trailing vines to bring a touch of nature indoors.
- Decorative Displays: Showcase your favorite small curios, candles, picture frames, or unique trinkets.
- Bathroom Organization: Hold rolled towels, small toiletries, or decorative soaps, adding both storage and style.
- Kitchen Charm: Perfect for spices, small cooking oils, or decorative mugs, freeing up counter space.
- Kids’ Rooms: Display lightweight toys, small books, or art projects, adding a playful element.
- Reading Nooks: Keep a few favorite paperbacks, a small reading lamp, and a cup of tea within reach.
Remember, these shelves are not designed for heavy loads, so always be mindful of the weight you place on them. Their delicate suspension is perfect for lighter decorative items and small organizational needs.
Final Thoughts: Embrace the Joy of DIY
Before discovering this project, the idea of constructing shelves seemed like an ambitious task, one far beyond the capabilities of a casual crafter. However, Auntie Tay’s Dollar Tree rope swing shelves completely demystified the process. They truly are quick, simple, and incredibly rewarding to make, transforming a few inexpensive materials into functional art.
Embarking on DIY projects like this not only allows you to save money but also infuses your home with personal character and the satisfaction of creating something beautiful with your own hands. These swing shelves are a testament to how creativity and resourcefulness can lead to stunning and practical home decor solutions. Don’t let the simplicity fool you; the impact these charming floating shelves can have on a room is significant. So, gather your materials, watch the tutorial, and get ready to add a touch of handmade elegance to your space!