
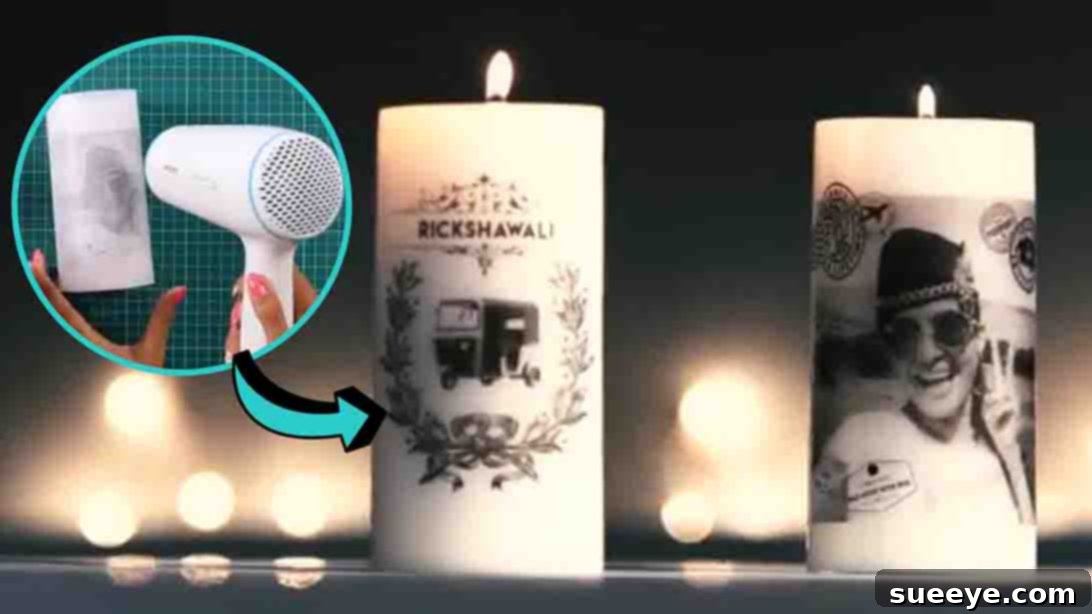
DIY Candle Image Transfer: Personalize Your Space with Custom Designs
Are you seeking a simple yet profound way to infuse your home with unique character, or to craft a truly memorable gift that speaks from the heart? This comprehensive DIY candle image transfer tutorial is your gateway to transforming ordinary candles into extraordinary works of personalized art. Inspired by the brilliant and accessible methods shared by Mad Stuff With Rob on YouTube, this project offers an incredibly fun and budget-friendly approach to custom decor.
Imagine the warm glow of a candle illuminating a cherished family photo, an inspiring quote, an intricate design, or even your own custom artwork. This versatile technique empowers you to bring any visual concept to life on wax, creating unique decorative accents for any room or occasion. Whether you’re a seasoned crafter or just starting your DIY journey, this guide provides all the necessary steps to elevate your candle-making endeavors and add a touch of bespoke elegance to your surroundings.
RELATED: Easy Inkjet Image Transfer Technique
Why Personalize Your Candles? The Power of Customization
Candles are more than just sources of light; they are powerful tools for setting ambiance, evoking emotions, and enhancing the aesthetic appeal of any space. By adding a personalized image, you magnify these qualities, turning a simple object into a narrative piece.
- Elevated Home Decor: Break free from generic, mass-produced decor. Custom candles allow you to seamlessly integrate your personal style, matching specific themes, colors, or moods within your home. They serve as unique conversation starters and focal points that reflect your individuality.
- Thoughtful & Heartfelt Gifts: In a world of fleeting trends, a handmade, personalized gift stands out. Imagine gifting a candle adorned with a shared memory, a special date, a meaningful symbol, or an inside joke. These are gifts that resonate deeply, demonstrating care and effort that far surpass any store-bought item.
- Budget-Friendly Luxury: Achieving a high-end, custom look often comes with a hefty price tag. This DIY method utilizes readily available and inexpensive materials, allowing you to create sophisticated, personalized items without straining your wallet. It’s smart crafting at its best.
- Unlimited Creative Expression: The canvas is yours! From elegant monograms and intricate patterns to vibrant photographs and inspiring typography, the possibilities for customization are truly limitless. Experiment with different images for seasonal decor, special events, or simply to refresh your home’s look.
- A Rewarding Hobby: Engaging in DIY projects like this offers a wonderful creative outlet and a sense of accomplishment. The process of watching your chosen image seamlessly transfer onto the candle is incredibly satisfying and can be a therapeutic way to unwind.
Getting Started: Essential Tips for a Perfect Image Transfer
To ensure your DIY candle image transfer project yields professional-looking results and a smooth crafting experience, a little foresight goes a long way.
Choosing the Ideal Image
- High Resolution is Key: Always select images that are sharp, clear, and high-resolution. Blurry or pixelated images will transfer with the same lack of clarity onto your candle.
- Optimal Contrast and Color: Images with good contrast and vibrant colors tend to transfer most vividly. Keep in mind that the candle’s background color will subtly influence the image’s appearance, so lighter candles are generally preferred.
- Mirror Text for Correct Orientation: If your chosen design includes text, remember this crucial step: you *must* mirror or flip the image horizontally in your photo editing software before printing. This ensures that when the image is transferred, the text reads correctly.
- Size and Proportion: Consider the dimensions of your candle. Print a test image on plain paper first to check the scale and how it will sit or wrap around the candle, avoiding awkward cropping or sizing issues.
Selecting the Right Candle
- Smooth Surface for Best Results: The smoother the surface of your candle, the better the image will adhere and transfer without any distortion or texture interference.
- Light Colors are Preferred: White, ivory, or lightly colored candles provide the best canvas, allowing the colors of your transferred image to pop and appear true to their original vibrancy. Darker candles may mute or alter the image’s colors.
- Wax Type Considerations: Most standard paraffin and soy wax candles work wonderfully with this technique. Avoid heavily textured candles or those with a very soft, oily finish, which might not hold the transfer as well.
Setting Up Your Workspace and Safety Measures
- Clean and Stable Environment: Work on a clean, dry, and flat surface to prevent smudges, accidental spills, and to provide a stable base for maneuvering your candle and materials.
- Ventilation: While the materials aren’t heavily fuming, ensuring good ventilation is always a good practice, especially when using a heat tool like a hairdryer.
- Patience and Precision: This DIY relies on careful execution, particularly during the heat application phase. Rushing can lead to uneven transfers or incomplete adhesion, so take your time.
Gathering Your Creative Toolkit: Essential Materials
One of the most appealing aspects of this DIY project is its reliance on readily available and affordable materials. You might already have most of these items at home, or they can be easily purchased from any craft store or office supply shop.
- Inkjet Printer: This is fundamental for the image transfer to work effectively. Inkjet printers use liquid ink, which can be “melted” and absorbed by the wax. Laser printers use toner, which behaves differently and is not suitable for this specific method.
- Standard Printing Paper: Serves as a crucial backing for the thin tracing paper, preventing it from jamming in the printer during the printing process.
- Tracing Paper: This semi-transparent, thin paper is your primary medium for printing the image. Its properties allow the ink to transfer effectively onto the candle wax when heat is applied.
- Wax Paper (or Parchment Paper): Essential for creating a protective barrier and helping to evenly distribute heat, allowing the ink to fuse into the candle. Ensure it’s a good quality wax or parchment paper that can withstand moderate heat.
- Candle: Your blank canvas. As mentioned, opt for a smooth, light-colored pillar or votive candle for the best results.
- Adhesive Tape: Standard clear office tape or painter’s tape works perfectly for securing the tracing paper to the printing paper, and the wax paper around the candle.
- Glue Stick or Craft Glue: A minimal amount is needed to temporarily fix your printed image onto the candle before the transfer process. A glue stick offers clean and easy application.
- Sharp Scissors: For precise cutting of your printed image, ensuring clean edges for a professional finish.
- Hair Dryer: This is your indispensable heat source. A hairdryer with adjustable heat settings (medium to high) is ideal for melting the wax just enough to absorb the ink.
Step-by-Step Guide: Crafting Your Custom Candles
With your materials gathered and your tips in mind, you’re ready to embark on the exciting journey of transforming your candles. Follow these detailed steps carefully for a seamless and successful image transfer.
Step 1: Preparing Your Image for Transfer
- Stabilize Your Tracing Paper: Begin by taking a sheet of standard printing paper and carefully aligning a sheet of tracing paper directly on top of it. The thicker printing paper acts as a stabilizer, preventing the delicate tracing paper from buckling or jamming when fed through your inkjet printer.
- Secure with Tape: Using small pieces of adhesive tape, gently secure the edges of the tracing paper to the printing paper. Ensure the tape is placed only along the very outer edges and doesn’t overlap the area where your image will be printed. The goal is a flat, unified sheet ready for printing.
- Print Your Chosen Design: Load your taped-together papers into your inkjet printer, making sure that the tracing paper side is positioned to receive the ink. Print your desired image. If your image contains text, double-check that you have mirrored it in your print settings or editing software prior to printing. For optimal ink saturation, select a “normal” or “best quality” print setting.
- Precisely Cut the Image: Once printed, carefully separate the tracing paper from the standard printing paper. Using sharp scissors, meticulously cut out your image along its edges from the tracing paper. The more precise your cut, the cleaner and more professional your transferred image will appear on the candle. The standard printing paper can now be discarded.
Step 2: Adhering and Activating the Image on Your Candle
- Position the Image on the Candle: Take your freshly cut tracing paper image and apply a very small amount of glue (a dab from a glue stick or a tiny dot of craft glue) to the back corners or edges. This glue is merely to hold the image temporarily in place. Carefully position the image onto your chosen spot on the candle, ensuring it is straight and precisely where you want it.
- Wrap with Wax Paper: Now, take a piece of wax paper that is generously sized to completely wrap around the candle, fully covering your image. Wrap the wax paper tightly around the candle, making sure it is smooth and taut over the image area. Use tape to secure the overlapping ends of the wax paper firmly at the back of the candle. This snug fit is critical to prevent air bubbles and ensure even heat distribution during the transfer.
- Apply Heat for Transfer: Turn on your hair dryer to a medium or high heat setting. Hold the hairdryer approximately 2-4 inches away from the candle. Direct the hot air evenly over the entire area where your image is positioned underneath the wax paper. Keep the hairdryer moving gently in circular motions or from side to side to distribute the heat consistently across the image.
- Watch for the “Magic” to Happen: As you apply heat, closely observe the image through the wax paper. You will notice the colors of the image begin to darken, become more vibrant, and take on a slightly glossy, “wet” appearance. This is the visual indicator that the candle wax beneath is melting slightly and absorbing the ink from the tracing paper. Continue applying heat until the entire image appears uniformly darker and fully integrated into the wax. This step requires patience and can take several minutes, depending on your hairdryer’s power and the size of your image.
- Cool Down and Reveal: Once the image looks fully saturated and blended into the wax, turn off your hairdryer. It is crucial to allow the candle to cool down completely with the wax paper still wrapped around it. This cooling period permits the wax to re-harden, permanently sealing the ink within its surface. After 5-10 minutes, or once the candle is cool to the touch, carefully un-tape and gently peel off the wax paper. You will now be greeted with your beautifully custom-transferred image seamlessly embedded onto the candle!
Unlock Your Imagination: Creative Ideas for Your Custom Candles
The beauty of image transfer on candles lies in its versatility. Here are some inspiring ideas to ignite your creativity and help you conceptualize your next personalized candle project:
- Cherished Photo Memories: Transfer family portraits, candid shots of friends, pictures of beloved pets, stunning travel photographs, or special moments from life events like graduations and anniversaries.
- Inspirational Quotes & Text: Adorn your candles with powerful motivational quotes, favorite song lyrics, poetic verses, meaningful scriptures, or even personalized messages. Remember to mirror text before printing!
- Artistic Patterns & Illustrations: Utilize intricate patterns (geometric, botanical, abstract), line art, watercolor illustrations, or even simple silhouette designs to create sophisticated or whimsical decor.
- Seasonal & Holiday Themes: Design candles to perfectly match any season or holiday. Think festive patterns for Christmas, spooky designs for Halloween, vibrant florals for spring, or cozy autumnal imagery for fall.
- Special Event Favors: Craft bespoke candles as unique favors for weddings, baby showers, birthday parties, or corporate events. Incorporate dates, monograms, event logos, or personalized thank-you messages.
- Brand & Business Promotion: Small business owners can create custom candles featuring their logo, brand colors, or product images as unique marketing tools or client gifts.
- Monograms & Initials: For a classic and elegant touch, transfer a beautifully designed monogram or initials, perfect for gifts or sophisticated home accents in a bedroom or living room.
Troubleshooting Tips for Common Issues
While the DIY candle image transfer process is generally straightforward, minor issues can occasionally arise. Here’s how to diagnose and resolve common problems to ensure your project’s success:
- Faded or Incomplete Transfer: This is typically a sign of insufficient heat or uneven heat application. Ensure your hairdryer is moving consistently over the entire image area and that enough heat has been applied until the image appears uniformly darkened and fully integrated into the wax. You can often gently reapply heat if the transfer isn’t perfect on the first try.
- Wrinkles or Bubbles in the Image: This occurs when the wax paper is not wrapped tightly and smoothly enough around the candle, allowing air pockets to form. Before applying heat, take extra care to smooth out any wrinkles or air bubbles between the wax paper and the image.
- Image Smearing or Blurring: If the transferred image smudges or blurs, it might be due to touching the transferred area before it has completely cooled and set. It could also result from using too much glue, which can interfere with the ink’s adhesion to the wax.
- Printer Jams with Tracing Paper: If your printer struggles with the tracing paper, it’s likely because the tracing paper wasn’t securely taped to the standard printing paper, or the tracing paper itself is too thin or flimsy for your printer model. Ensure secure taping and consider slightly heavier tracing paper if issues persist.
Care and Display of Your Personalized Candles
To ensure your beautifully customized candles remain pristine and bring joy for as long as possible, a few simple care and display tips are beneficial:
- Gentle Handling: Although the image is fused into the wax, rough handling can still scratch, chip, or mar the delicate surface. Handle your custom candles with care.
- Optimal Display Location: To preserve the vibrancy of your transferred image and the integrity of the candle, avoid placing them in direct sunlight or near extreme heat sources. Prolonged exposure can cause the wax to soften, warp, or the image to fade over time.
- Burning Considerations: As the candle burns down, the image will gradually descend and melt along with the wax. If the image is particularly precious or elaborate, consider using the candle primarily as a decorative piece. Alternatively, for pillar candles, you can carefully hollow out a small well in the center to insert a tea light or smaller votive, allowing the outer shell with your image to remain intact for much longer.
- Cleaning: Should dust accumulate on your custom candle, gently wipe it clean with a soft, dry, lint-free cloth. Avoid using abrasive cleaners or wet cloths, which could damage the image or wax surface.
Ignite Your Creativity with DIY Candle Image Transfer
This DIY candle image transfer tutorial provides a wonderfully accessible and deeply satisfying way to inject personality into your home or create truly memorable, bespoke gifts. It’s a project that marries simplicity with stunning visual results, enabling you to infuse everyday objects with personal narratives and artistic flair. Whether you’re a seasoned crafter eager for a new technique or a beginner looking for an impactful DIY, this method, expertly showcased by Mad Stuff With Rob, is sure to spark your imagination and delight your senses. So, gather your materials, select your favorite images, and prepare to illuminate your world with custom-crafted charm and unique style!