
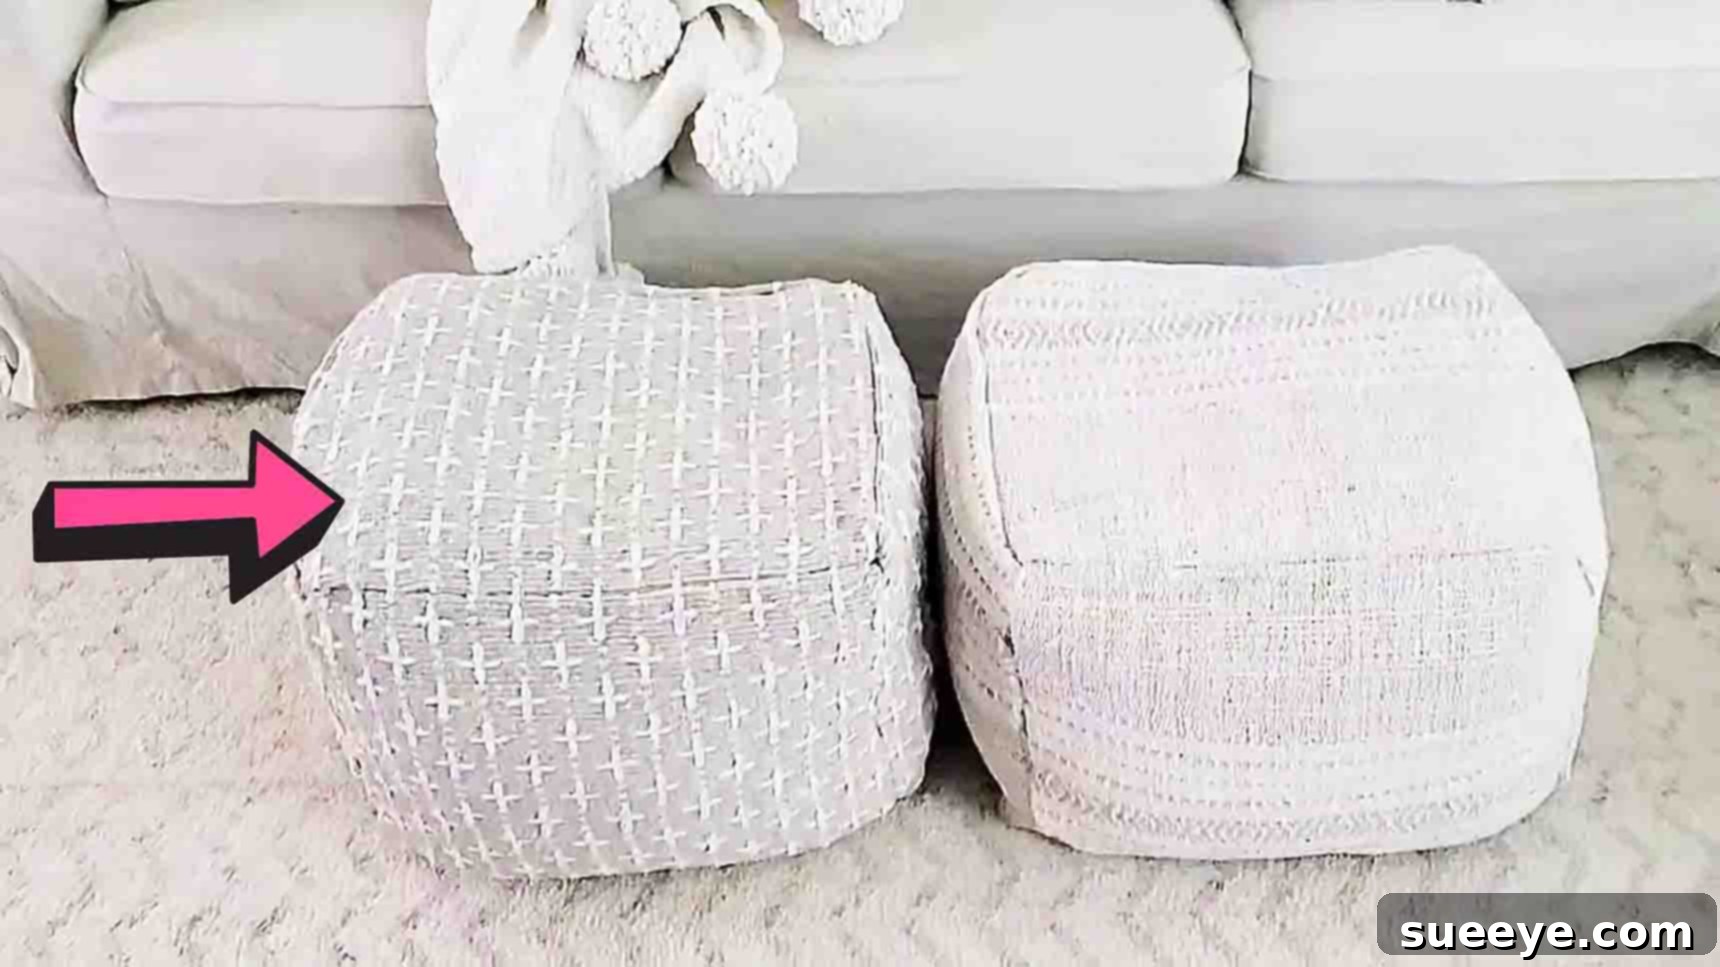
DIY No-Sew Floor Poufs: Transform Your Home with Stylish and Affordable Seating
Are you looking to add a touch of cozy elegance or versatile seating to your living space without spending a fortune? Floor poufs are incredibly popular, offering comfort, style, and functionality, but their price tags can often be a deterrent. What if we told you that you can craft your very own designer-inspired poufs with minimal effort, no sewing skills required, and on a budget? Thanks to an ingenious DIY method shared by Simple Made Pretty on Youtube, creating beautiful, no-sew floor poufs is now simpler than ever. This comprehensive guide will walk you through each step, ensuring you can easily achieve the perfect custom accent for any room.
Imagine effortlessly adding extra seating for guests, a comfortable footrest after a long day, or a playful element for a kid’s room. These DIY floor poufs are not only incredibly versatile but also allow for complete personalization to match your existing home decor. Get ready to embark on a fun, rewarding project that will elevate your interior design and impress everyone who visits!
Materials and Tools Needed
Gathering your supplies before you begin ensures a smooth and enjoyable crafting process. The beauty of this no-sew floor pouf project lies in its simplicity and the accessibility of its materials.
Materials:
- 3 Scatter Rugs (approximately 20″ x 32″ each): The foundation of your pouf. Look for soft, pliable rugs that are easy to manipulate and glue. Consider various textures and patterns to match your decor. Chenille, flat-weave, or faux sheepskin rugs work wonderfully. Ensure they are all the same size for a consistent shape.
- 6 Throw Pillow Inserts (standard 18″x18″ or 20″x20″ works well): These will provide the primary stuffing and structure for your pouf. You can repurpose old throw pillows or purchase inexpensive inserts. The number can vary slightly based on the desired firmness and rug size.
- 2 Old Bath Towels: These act as additional stuffing to fill gaps, provide extra firmness, and help maintain the pouf’s shape. Old, clean towels are perfect for this purpose. You can also use old blankets, t-shirts, or fabric scraps.
Tools:
- High-Temperature Glue Gun: Essential for securely bonding the rug edges. A high-temperature gun ensures a strong, durable hold.
- Plenty of Glue Sticks: You’ll need more than you think! It’s wise to have a large pack on hand to avoid interruptions.
- Sharp Scissors: For cleanly cutting the third rug. A good pair of fabric scissors will make this task much easier.
- Measuring Tape (Optional but Recommended): For precise measurements when cutting the rug and ensuring even glue lines.
Tip: When selecting your rugs, think about the room where your pouf will reside. Do you want a pop of color, a neutral texture, or a bold pattern? This is your chance to get creative and truly make it your own!
Step-by-Step Directions to Create Your No-Sew Pouf
Follow these detailed instructions carefully to construct a sturdy and stylish floor pouf. Remember, patience and attention to detail are key to a professional-looking finish.
Step 1: Constructing the Main Pouf Body and Initial Stuffing
Begin by laying two of your scatter rugs on a clean, flat surface. You’ll want to place them with their “right sides together,” meaning the decorative or top-facing sides are touching. This is crucial for creating a clean, finished look once the pouf is turned right side out.
Using your hot glue gun, carefully apply a generous, continuous bead of glue along the outside edges of three sides of the rugs. Leave one of the longer sides unglued for now, as this will be your primary opening for stuffing. Press the edges firmly together immediately after applying the glue to ensure a strong bond. Allow a few minutes for the glue to set and cool completely.
Once the three sides are securely glued and dry, gently turn the rug enclosure right side out. You will now have a U-shaped pouch. To create a “fake seam” along the glued edges that mimics a sewn finish, carefully fold a small crease (about half an inch) along each of the three glued edges, pushing the seam inwards slightly. Apply a thin line of hot glue along the inside of this folded crease and press firmly to seal. This step gives your pouf a more polished and professional appearance.
Now it’s time for the initial stuffing! Begin inserting your throw pillow inserts into the pouf opening. Distribute them evenly, pushing them into the corners and along the sides to ensure a consistent, square or rectangular shape. The goal here is to give the pouf its primary form and a good base firmness. Don’t worry about perfection at this stage, as you’ll have another opportunity to adjust the stuffing later.
Next, take your third scatter rug. Using your sharp scissors, carefully cut this rug in half lengthwise, creating two identical smaller rug pieces. These halves will form the top and bottom panels of your pouf. Take one of these halves and align it with the open side of your partially stuffed pouf, again placing it “right sides together.” Glue this half securely to the open side, bonding three of its edges to the body of the pouf. Leave one of the shorter sides (an end) of this new panel unglued; this will be your secondary, temporary opening for final stuffing and flipping.
Step 2: Finalizing the Structure, Stuffing, and Sealing
With the first half of the third rug now glued to one side of the pouf, it’s time to attach the remaining half. Take the second piece of your cut rug and align it with the last open side of your pouf (the opposite side from where you just attached the first half). Again, place them “right sides together” and carefully glue three of its edges, leaving a small, roughly 6-8 inch opening along one of the shorter sides. This small opening is critical as it will allow you to turn the entire pouf inside out for a flawless finish and for the final stuffing.
Once the glue has completely dried and cured on all joined edges, you should now have an almost fully enclosed pouf with a single, small opening. Carefully reach into this opening and begin to pull all the existing throw pillows and any temporary stuffing back out. This might seem counterintuitive, but it allows you to invert the pouf, turning it “inside out” so that all the raw, glued seams are now on the inside, hidden from view. Take your time with this step to avoid tearing the glued seams.
After successfully turning your pouf right side out, you’ll marvel at its clean, seamless exterior. Now, it’s time for the final stuffing process to give your pouf its permanent shape and desired firmness. Start by re-inserting all the throw pillows. Once these are in place, begin to strategically add your old bath towels (or other filler material). Roll or fold the towels and tuck them into any gaps or areas that feel less firm. This combination of pillows and towels provides excellent support and ensures your pouf holds its shape beautifully over time. Experiment with the amount of stuffing until you achieve your preferred level of firmness – whether you prefer a softer, squishier pouf or a more rigid, supportive one.
Finally, with your pouf perfectly stuffed, it’s time to seal the last remaining opening. Carefully fold the raw edges of the opening inwards to create a clean seam. Apply a strong bead of hot glue along this folded edge, pressing the two sides firmly together to create a durable, invisible closure. Hold the seam tightly until the glue cools and sets. Congratulations, your no-sew floor pouf is now complete!
Tips for a Perfect No-Sew Pouf
To ensure your DIY floor pouf turns out exactly as you envisioned, keep these expert tips in mind:
- Work on a Clean, Flat Surface: This helps in accurately aligning rugs and applying glue evenly.
- Patience with Gluing: Don’t rush the glue drying process. A strong bond is essential for durability. Apply glue in manageable sections if working alone.
- Generous Glue Application: Use enough glue to create a firm seal, but avoid excessive amounts that might seep through the rug and become visible.
- Even Stuffing is Key: Distribute the pillow inserts and towels uniformly. This prevents lumps and ensures the pouf maintains a good, stable shape.
- Test Firmness: Before sealing the final opening, sit on or press against the pouf to check its firmness. Add or remove stuffing until it feels just right.
- Consider Non-Slip Backing: If your chosen rugs are slippery, you might want to add non-slip rug grippers to the bottom of your finished pouf for added stability.
- Ventilation: Work in a well-ventilated area when using hot glue.
Customization Ideas for Your DIY Poufs
One of the greatest advantages of making your own poufs is the endless potential for customization. Here are some ideas to make your creations truly unique:
- Vary Rug Textures and Colors: Mix and match different rug materials like jute, faux fur, or even outdoor-friendly options for patio poufs. Create a set with coordinating but distinct designs.
- Experiment with Sizes: Adjust the size of your rugs to create larger floor cushions or smaller footrests. Remember to adjust the number of pillow inserts accordingly.
- Add Embellishments: Attach tassels, pom-poms, or fringe along the edges for a bohemian touch. You could also use fabric paint or stencils to add custom designs.
- Create a Handle: Sew (or glue, if skilled enough with fabric glue) a sturdy fabric handle to one side of the pouf for easy portability.
- Repurpose Beyond Rugs: While rugs are ideal, consider other sturdy, heavy-duty fabrics like canvas drop cloths or upholstery fabric for a different look.
Benefits of Crafting Your Own Floor Poufs
Beyond the simple joy of DIY, making your own no-sew floor poufs offers a myriad of practical advantages:
- Significant Cost Savings: Store-bought poufs can be incredibly expensive. This DIY method allows you to achieve the same stylish look for a fraction of the cost, often utilizing items you already have or can find affordably.
- Personalized Home Decor: You have complete control over the design, ensuring your pouf perfectly complements your home’s aesthetic and personal style. No more settling for limited store options!
- Eco-Friendly Repurposing: This project is a fantastic way to give new life to old bath towels, unused throw pillows, or even leftover fabric scraps, promoting sustainability and reducing waste.
- Sense of Accomplishment: There’s immense satisfaction in creating something beautiful and functional with your own hands. It’s a rewarding project that yields a tangible, useful item for your home.
- Versatile Functionality: Your finished pouf can serve multiple purposes – as extra seating, a comfortable footrest, a low side table (with a tray on top), or even a cozy pet bed.
Troubleshooting Common Pouf Issues
Even with the simplest DIY projects, sometimes unexpected challenges arise. Here’s how to address some common issues:
- Lumpy or Uneven Pouf: This usually indicates uneven stuffing. Open the final seam slightly and redistribute the pillow inserts and towels, pushing them into empty pockets until the shape is uniform.
- Glue Not Holding: Ensure both surfaces are clean and dry before applying glue. You might need to use more glue or apply firm pressure for longer. If the rug material is very dense, a stronger fabric adhesive in addition to hot glue might be beneficial.
- Poufs Too Soft or Too Hard: Adjust the amount of stuffing. For a firmer pouf, add more towels or denser materials. For a softer one, remove some stuffing.
- Seams Visible: If your “fake seams” aren’t quite hiding the glue, try to make the fold a bit deeper next time or carefully trim any visible glue strands once completely dry.
Conclusion: Your New Favorite DIY Project
Crafting your own no-sew floor pouf is an incredibly satisfying and budget-friendly way to enhance your home decor. With just a few basic materials and a hot glue gun, you can create a functional, stylish, and completely personalized piece of furniture that rivals expensive store-bought options. This project is a testament to how simple DIY endeavors can lead to significant upgrades in your living space.
We hope this detailed tutorial empowers you to create your dream poufs with confidence. Don’t hesitate to experiment with different rug styles and stuffing combinations to truly make these poufs your own. Share your creations and inspire others to embrace the joy of DIY! Happy crafting!