
Finding the perfect gift for a loved one can often feel like a daunting task, filled with endless options and the pressure to choose something truly special. While the market is flooded with choices, the real magic often lies not in the price tag or brand, but in the sentiment behind the present. A gift crafted with thought and personal effort speaks volumes, creating lasting memories and demonstrating a unique level of care.
This is where the art of personalization shines. Imagine presenting a gift that is not just an item, but a canvas for a cherished memory, an inside joke, or a heartfelt message. Custom t-shirts, for instance, offer an incredible way to express individuality and create truly unique items. And the best part? You don’t need expensive equipment or professional printing services to achieve stunning results. With a simple household iron and a few common materials, you can transform any design or photo into a wearable masterpiece.
RELATED: How to Print on Fabric Using Freezer Paper
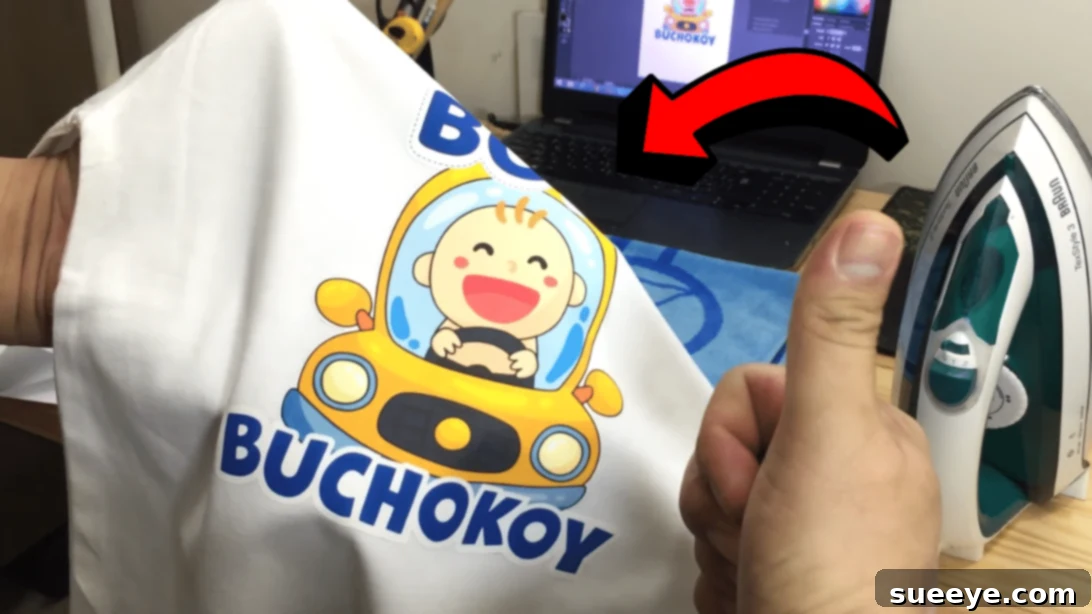
This genius DIY hack, inspired by a fantastic Dot360 Printing Tutorial on YouTube, will guide you through the process of customizing and printing a t-shirt using just an iron. The results are so professional and neat, you might just fool your friends into thinking you bought it from a high-end boutique! This method opens up a world of creative possibilities, allowing you to craft everything from personalized birthday gifts and unique event apparel to stylish custom designs for yourself.
Why Choose DIY Iron-On T-Shirt Printing?
The appeal of custom t-shirts extends far beyond just gift-giving. They serve as a powerful medium for personal expression, team spirit, branding, and commemorating special occasions. Here’s why the DIY iron-on method stands out:
- Unleash Your Creativity: From intricate artwork to simple text, you have complete freedom to design anything you can imagine.
- Budget-Friendly: Avoid the high costs of professional printers, especially when you only need a few shirts.
- Personal Touch: There’s an undeniable satisfaction in creating something with your own hands, infusing it with personal meaning.
- Versatility: Perfect for birthdays, anniversaries, family reunions, bachelorette parties, small business branding, or simply updating your wardrobe with unique pieces.
- Accessibility: Requires minimal tools that are likely already in your home.
This guide will equip you with all the knowledge to successfully print your chosen photo or design onto a t-shirt, ensuring a smooth, enjoyable, and rewarding crafting experience.
Essential Materials for Your Iron-On T-Shirt Project:
Before diving into the creative process, gather these essential items. Having everything ready will make the printing experience much smoother and more efficient.
- T-shirt: Opt for high-quality, pre-shrunk cotton or cotton-blend shirts for the best transfer results. Light-colored fabrics often yield the most vibrant prints with standard transfer paper, but specialized papers are available for dark fabrics.
- Thick Towel or Pillowcase: This will protect your work surface from heat and provide a smooth, firm base for even pressure during ironing.
- Iron: A standard household iron will do, but ensure it has a good flat soleplate and, critically, a “no steam” setting. Steam will interfere with the transfer process.
- Scissors or Craft Cutter: For precise trimming of your design. Sharp scissors are crucial for clean edges.
- Inkjet Printer: You’ll need an inkjet printer to print your design onto the transfer paper.
- Iron-On Transfer Paper: This is the magic ingredient! Often referred to as “heat transfer paper” or “t-shirt transfer paper,” it’s specifically designed to bond to fabric when heated. Make sure to purchase the correct type for your fabric color (light fabric or dark fabric) and printer type (inkjet or laser, though inkjet is more common for home use).
- Parchment Paper or Thin Pressing Cloth (Optional but Recommended): Some transfer papers require or recommend covering the design during ironing to protect it and ensure even heat distribution.
How to Print Any Photo or Design to a Shirt: Step-by-Step Guide
Achieving a professional-looking custom t-shirt at home is simpler than you might think. Follow these detailed steps for a flawless transfer.
Step 1: Design Creation and Precise Cutting
Begin by creating your desired design. You can use graphic design software like Adobe Photoshop, GIMP, Canva, or even simple word processing programs for text-based designs. Ensure your image has a high resolution for crisp print quality. Once your design is finalized, measure your t-shirt to determine the perfect size and placement for the graphic. Crucially, if your transfer paper instructs you to, remember to mirror (flip horizontally) your image before printing, especially for text, otherwise it will appear backward on the shirt. Print your design onto the iron-on transfer paper, following the paper manufacturer’s specific instructions for printer settings (e.g., “photo paper” or “best quality”). After printing, carefully cut out your design. Precision is key here; trim closely around the edges of your graphic to avoid any unwanted white borders or leftover transfer paper material transferring to the shirt. The cleaner the cut, the more seamlessly your design will blend with the fabric.
Step 2: Preparing Your Workspace and Iron
Find a sturdy, heat-resistant, and flat work surface, such as a sturdy table or a countertop. Avoid ironing boards as they often lack the firm, even pressure needed for proper transfer. Lay down a thick, clean towel or pillowcase smoothly over your work surface; this will protect the surface and provide a soft, yet firm, foundation for ironing. Next, prepare your iron. Set it to the highest temperature setting recommended for cotton (usually the “linen” or “cotton” setting). It is absolutely essential to turn off the steam function. Moisture from steam will prevent the transfer paper’s adhesive from bonding correctly with the fabric, potentially ruining your design. Allow the iron to fully heat up before proceeding.
Step 3: Prepping the T-Shirt and Positioning Your Design
Place your t-shirt flat on the prepared work surface over the towel. Use your preheated iron to quickly iron the area where your design will be placed. This step is vital as it removes any wrinkles and, more importantly, eliminates any residual moisture from the fabric, ensuring optimal adhesion. Once the shirt is smooth, carefully peel the backing off your iron-on transfer paper to reveal the adhesive side of your design. Position the design precisely on the center of the t-shirt. A good guideline is to place it roughly 1 to 2 inches below the neckline. Take your time to ensure it’s perfectly straight and centered before pressing down firmly. Once placed, try not to reposition it as this can compromise the adhesive.
Step 4: The Ironing and Transfer Process
Once your design is accurately placed, carefully lay a piece of parchment paper or a thin pressing cloth directly over the transfer paper (check your transfer paper instructions; some papers are ironed directly). This protective layer helps distribute heat evenly and prevents direct contact between the hot iron and the transfer paper, which can sometimes scorch the design. Now, using your hot, dry iron, begin to press down firmly over the design. Apply significant, consistent pressure, slowly moving the iron across the entire surface of the design. Hold the iron over each section for several seconds, ensuring that all parts of the design receive adequate heat to melt the adhesive and fuse it to the fabric. Do not use a circular motion like regular ironing; instead, use a steady, firm pressing motion. Continue this process for the duration recommended by your specific transfer paper (typically 60-90 seconds for a full-page design, but adjust based on paper instructions). Once you’ve ironed the entire design thoroughly, carefully remove the iron and the parchment paper/pressing cloth. Gently peel off the transfer paper backing while it’s still warm (or cold, depending on your paper’s instructions – this is called hot peel or cold peel). If any part of the design hasn’t fully adhered, immediately re-cover it with parchment paper and iron that specific area again until it’s properly fused. For a final touch and to ensure maximum durability, you can iron over the design one last time using the parchment paper, applying firm pressure.
Post-Transfer Care for Longevity
To ensure your custom t-shirt design lasts as long as possible and withstands multiple washes, proper care is crucial. While the transfer is fresh, avoid washing the shirt for at least 24-48 hours. When you do wash it, follow these tips:
- Wash Inside Out: This protects the design from friction with other clothes during the wash cycle.
- Cold Water, Gentle Cycle: Hot water and harsh agitation can cause the transfer to crack or peel.
- Mild Detergent: Avoid strong detergents, bleach, or fabric softeners, as these can degrade the adhesive.
- Air Dry or Low Heat: Tumble drying on high heat can damage the transfer. Ideally, hang dry your shirt or use the lowest heat setting on your dryer.
- Do Not Iron Directly on Design: If you need to iron the shirt after washing, turn it inside out or place a pressing cloth over the design.
Troubleshooting Common Iron-On Transfer Issues
Even with careful steps, you might encounter minor hiccups. Here are some common problems and their solutions:
- Design Not Sticking Completely: This usually indicates insufficient heat or pressure. Re-cover the design with parchment paper and iron again, applying firmer pressure and ensuring all areas receive consistent heat.
- Bubbling or Wrinkling: This can occur if the fabric wasn’t completely flat or if steam was accidentally used. Sometimes, re-ironing with firm pressure can smooth out minor bubbles.
- Cracking or Peeling After Washing: Often a result of improper washing instructions (e.g., hot water, harsh detergents, or direct high-heat drying). Ensure you follow the post-transfer care guidelines strictly. It can also indicate the transfer wasn’t fully fused during the initial ironing.
- Colors Appearing Dull: This might be due to low-quality printer settings, incorrect transfer paper for the fabric color, or the image itself having low resolution.
- Scorching: If the fabric or design appears yellowed or burnt, the iron might have been too hot or held in one spot for too long. Always follow paper instructions and keep the iron moving.
Unleash Your Creativity with Custom T-Shirts
The beauty of this iron-on printing method lies in its simplicity and the vast creative potential it unlocks. From creating a single, deeply personal gift to making a batch of matching shirts for a special event, the possibilities are endless. Think about unique designs for:
- Birthday & Anniversary Gifts: Featuring photos, dates, or inside jokes.
- Holiday Apparel: Custom designs for Christmas, Halloween, or Fourth of July.
- Family Reunions & Vacations: Coordinating shirts to celebrate togetherness.
- Small Business Branding: Creating affordable merchandise or staff uniforms.
- School & Club Events: Designing spirit wear for teams and organizations.
- Personal Fashion Statements: Updating plain garments with unique graphics that reflect your style.
*All these amazing images are credited to Dot360 Printing Tutorial via YouTube. Give his channel a visit and subscribe for more!
Summary: How to Print a Photo to a Shirt Using Iron
In conclusion, creating your own personalized t-shirts using an iron-on transfer method is an incredibly rewarding and straightforward DIY project. It’s a fantastic way to produce thoughtful gifts, express your unique style, or prepare custom apparel for any occasion without breaking the bank. By carefully following the steps outlined – from preparing your design and workspace to the precise ironing and post-transfer care – you can achieve durable, professional-looking results right in your own home. Embrace the joy of crafting and start transforming ordinary t-shirts into extraordinary statements today!