
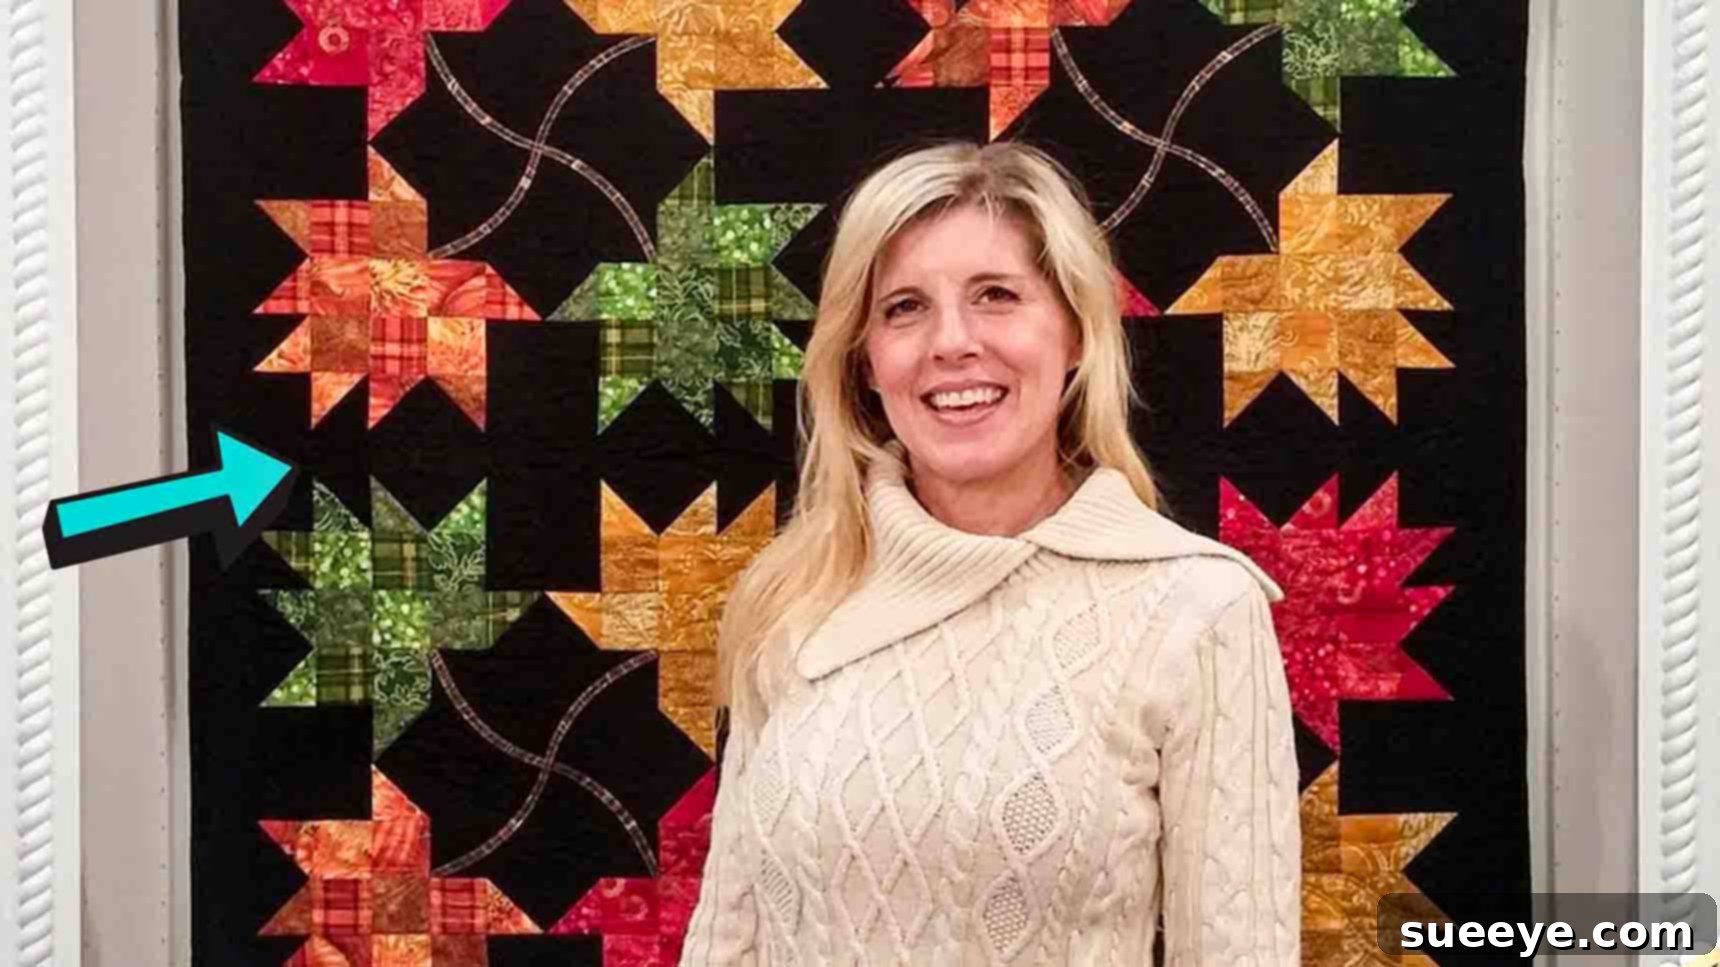
Mastering the Falling Leaves Quilt Block: An Essential Autumn Quilting Tutorial
As the crisp air of autumn descends and leaves transform into a breathtaking symphony of reds, oranges, and golds, there’s no better time to bring that vibrant beauty indoors. If you’ve been eagerly collecting gorgeous fall-themed fabrics, dreaming of a project that captures the essence of the season, then you’re in the perfect place. This comprehensive tutorial will guide you through creating a stunning Falling Leaves Quilt Block, a delightful and versatile design inspired by the creative minds at Shabby Fabrics on YouTube. Whether you envision a cozy lap quilt, an elegant placemat, a festive table runner, or a charming wall hanging, this block is your foundation for countless autumn-inspired creations. We’ll walk you through each step, ensuring a smooth and enjoyable quilting journey from start to finish.
The Falling Leaves Quilt Block is renowned for its captivating design and relative simplicity, making it an excellent project for both seasoned quilters looking for a quick seasonal make and adventurous beginners eager to expand their skills. By mastering this block, you’ll gain confidence in constructing half-square triangles (HSTs) and assembling intricate patterns, essential techniques in the world of quilting. This guide is designed to be clear, concise, and easy to follow, allowing you to transform your fabric stash into beautiful, lasting pieces of art. So, gather your autumnal treasures, sharpen your rotary cutter, and let’s embark on this creative adventure together!
Essential Materials for Your Falling Leaves Quilt Block
Before we dive into the exciting world of cutting and sewing, ensuring you have all the necessary tools and materials at hand will make your quilting experience seamless and enjoyable. High-quality tools contribute significantly to precision and a professional finish, so invest wisely in the items listed below.
- Autumn-Themed Fabrics: Select a variety of colors and patterns that evoke the beauty of fall. Think rich reds, burnt oranges, golden yellows, deep browns, and earthy greens. A mix of light, medium, and dark tones will add depth and dimension to your leaves. For this block, you’ll typically need at least two contrasting fabrics – one for the leaf itself and one for the background. Ensure they are 100% cotton quilting fabric for the best results; these fabrics are stable, easy to work with, and hold their shape well.
- 1/4″ Seam Marker: While many sewing machines have a reliable 1/4″ seam foot, a dedicated seam marker or a clear quilting ruler with a distinct 1/4″ mark can help you maintain consistent seam allowances. This precision is absolutely crucial for blocks to fit together perfectly.
- Frixion Pen (or other erasable fabric marker): This heat-erasable pen is a quilter’s best friend! It allows you to draw precise lines on your fabric that vanish completely with the touch of a hot iron, leaving no trace. Always test the pen on a small scrap of your chosen fabric first to ensure it erases cleanly without leaving ghost marks.
- 6 & 1/2″ Square Ruler: A versatile square ruler is indispensable for squaring up your blocks and half-square triangles (HSTs). This specific size is particularly useful for trimming many common quilt block units. Look for one with clear, easy-to-read markings and non-slip grippers to prevent accidental fabric shifts.
- Rotary Cutter: An essential tool for fast, precise, and accurate cutting of fabric strips and squares. A 45mm or 60mm cutter is ideal for quilting tasks, offering both control and efficiency. Always use a self-healing mat underneath to protect your surface.
- Sharp Blades: Always use sharp blades in your rotary cutter. Dull blades can lead to frayed edges, inaccurate cuts, and significant frustration. Keep spare blades on hand and change them regularly for optimal cutting performance and safety.
- Self-Healing Cutting Mats: Protect your work surface and prolong the life of your rotary blades with a good quality self-healing mat. A larger mat (e.g., 18″x24″ or larger) is highly recommended as it provides ample space for cutting larger pieces and organizing your components.
- 2″ Star Singles Half Square Triangle Paper (or similar): This specialized paper simplifies the creation of multiple perfect half-square triangles simultaneously. It’s an excellent tool for achieving consistency and accuracy, especially if you’re making several leaf blocks or a larger quilt. The 2″ size typically refers to the finished size of the HSTs once they are sewn into a block.
- Metallic Threads (optional): For an extra touch of sparkle, shimmer, and unique dimension, consider using metallic threads for quilting or appliqué details. Choose a color that complements your fall fabrics, perhaps a shimmering gold or bronze to mimic sunlight on leaves.
- Bottom Line Thread (or other neutral bobbin thread): A high-quality, fine polyester thread like Bottom Line is excellent for your bobbin. Its smooth nature minimizes bulk and helps create flat, crisp seams. For your top thread, match the dominant color of your leaf or background fabric for a cohesive look.
- Sewing Machine: A well-maintained sewing machine equipped with a consistent 1/4″ seam foot is crucial for accurate piecing. Ensure your machine is clean and oiled before you begin.
- Iron and Ironing Board: Absolutely critical for pressing seams and squaring up blocks. A good quality steam iron can make a significant difference in the flatness and accuracy of your finished block.
- Pins: Fine, sharp quilting pins are essential for accurately aligning fabric pieces before sewing, preventing shifting and ensuring precise seam matching.
Before You Begin: Essential Preparations for Success
A successful quilt block starts long before the first stitch. Taking these preparatory steps seriously will save you time, prevent common quilting headaches, and contribute significantly to a polished final product.
- Pre-Wash Your Fabrics (Highly Recommended): While some quilters choose to skip this step, pre-washing your fabrics is crucial for several reasons. It helps prevent potential shrinking and color bleeding after your quilt is finished, which can distort your design or ruin lighter fabrics. Wash all your chosen fabrics with a mild detergent, dry them gently, and press them smooth. This ensures that all fabrics behave consistently and that your finished quilt maintains its shape and color integrity over time, especially after its first wash.
- Press Fabrics Thoroughly: After washing (or if using unwashed fabric, as some choose for crispness), press all your fabrics completely flat and wrinkle-free. Any creases, folds, or wrinkles can lead to inaccurate cuts and distort your block. A crisp, flat starting point is paramount for precision.
- Familiarize Yourself with Your Tools: If you’re new to rotary cutters, practice on scrap fabric to get a feel for making straight, accurate cuts. Ensure your sewing machine’s 1/4″ seam allowance is accurate. A quick test stitch on two fabric scraps sewn together, followed by measuring the seam, can confirm this. Adjust your needle position or use a different presser foot if necessary.
- Review the Pattern: While this tutorial provides general guidance, the full pattern (from Shabby Fabrics, linked below) will have specific cutting dimensions for all components if you’re making the exact block. Always read through the pattern completely before making your first cut.
Step-by-Step Directions for Your Falling Leaves Quilt Block
Let’s transform your beautiful fall fabrics into a charming Falling Leaves Quilt Block. We’ll focus on creating the individual units and then carefully assembling them into the final leaf design. Precision is key in quilting, so take your time with each step and enjoy the creative process.
Step 1: Crafting Your Half-Square Triangle (HST) Units with Precision
Half-Square Triangles are fundamental building blocks for countless quilt patterns, including our falling leaf. This method ensures crisp, accurate units that will come together beautifully.
- Prepare Your Fabric Squares: For each pair of HSTs you wish to create, cut two squares of contrasting fabrics (e.g., one square of your chosen leaf color, one square of your background color) to 2 & 7/8″ each. It is vital that your cuts are precise, using your rotary cutter and a clear quilting ruler. The 7/8″ increment is absolutely crucial for accurate HSTs that will finish at 2 & 1/2″ before being sewn into the block. For example, if your complete leaf block requires eight HSTs, you would need eight 2 & 7/8″ squares of your leaf fabric and eight 2 & 7/8″ squares of your background fabric.
- Layer and Mark Your Squares: Place one 2 & 7/8″ background fabric square and one 2 & 7/8″ leaf fabric square right sides together. Ensure all raw edges are perfectly aligned. Using your Frixion pen and a ruler, carefully draw a diagonal line from one corner to the opposite corner across the lighter fabric. This drawn line will serve as your cutting guide after sewing. For maximum efficiency and to create two HSTs from each pair of squares, you will sew 1/4″ away from this drawn line on *both* sides.
- Sew Your Seams: Now, take your layered squares to your sewing machine. Sew precisely 1/4″ away from the central diagonal line you drew, first on one side, then on the other. Use a consistent 1/4″ seam allowance. Begin and end each seam with a few backstitches to secure your threads. This technique creates a secure pair of sewn lines that will hold your HSTs together.
- Cut Apart Your Units: Once both seams are sewn, carefully cut the unit in half directly along the original diagonal line you drew. Use your rotary cutter and ruler for a clean, straight cut. This will yield two unpressed, raw-edged half-square triangle units.
- Press and Trim for Perfection: Open each unit so the right sides are facing up. Now, it’s time to press. You can either press the seam allowance towards the darker fabric (to minimize bulk where seams meet) or press the seams open (for a flatter, albeit sometimes less strong, seam). Using your iron, gently press the seam to one side or open, ensuring no pleats or folds. Finally, using your 6 & 1/2″ square ruler, carefully trim each HST unit to a uniform size (e.g., 2 & 1/2″ square). This squaring-up step is vital for ensuring all your HSTs are identical in size, which will make assembly much easier and more accurate. Trim off any “dog ears” – the tiny triangles of fabric that extend beyond your HST – for cleaner edges.
Repeat this comprehensive process to create all the necessary half-square triangle units for your Falling Leaves block. The number of HSTs will depend on the specific leaf pattern you are following, so refer to your chosen pattern for exact quantities.
Step 2: Assembling Your Falling Leaves Quilt Block with Care
With your precision-cut HSTs ready, it’s time for the magic of assembly! This stage transforms individual pieces into a beautiful leaf motif that embodies the spirit of autumn.
- Visualize Your Design Layout: Now that you have all of your perfectly crafted half-square triangle units (and any plain background squares or other components if your pattern calls for them), carefully lay everything out on a flat surface, such as a large table, a design board, or even a clean floor. Refer to the specific pattern for the Falling Leaves Quilt Block to ensure correct placement and orientation of each unit. The leaf design typically involves arranging HSTs in a way that the “points” of the triangles form the veins and outer edges of the leaf, often against a contrasting background. Take a moment to admire your layout and double-check that all pieces are oriented correctly. This visual step is crucial for preventing mistakes before you sew.
- Sew the Rows Together: Once you are completely satisfied with your layout, begin sewing the units together into horizontal rows. Work methodically, row by row. Carefully align two adjacent units, placing them right sides together. Pin them securely at the corners and, most importantly, where the seams meet, to ensure precise alignment. Sew using your consistent 1/4″ seam allowance. For most Falling Leaves quilt blocks, you’ll typically have three or four rows to complete the design, depending on its complexity.
- Press Seams for Rows: After sewing each individual row, it’s crucial to press the seams before joining the rows together. For seamless nesting when joining rows, it’s often recommended to press the seams of adjacent rows in *opposite* directions. For example, press the seams in Row 1 to the right, and the seams in Row 2 to the left. When you place these rows right sides together, the seams will “nest” perfectly, reducing bulk and helping your points align. Alternatively, for maximum flatness, you can press all seams within a row open, which can create a very flat block. Choose the method that yields the flattest result for your fabrics and pattern.
- Join the Rows into Units: Begin combining your sewn and pressed rows. For instance, sew the first three rows together to create a larger “unit” of your leaf block. Align the rows right sides together, carefully matching up all seam intersections. Pin generously at these critical intersection points and along the length of the row to prevent shifting. This step requires precision to ensure all your points match perfectly, creating a crisp, professional look.
- Complete the Leaf Block: Continue attaching the remaining rows or units until your entire Falling Leaves Quilt Block is fully assembled. For example, if you have a fourth row or a separate “stem” unit, attach it to your main leaf unit. Ensure all seams are consistently 1/4″ and points are matched as closely as possible. Take your time, re-pin if necessary, and enjoy watching your leaf come to life.
- Final Pressing and Squaring Up: Once all rows are sewn together and your complete Falling Leaves Quilt Block is formed, give it a final, thorough pressing. Press from both the front and back to ensure all seams lie perfectly flat and your block is perfectly square. Using your 6 & 1/2″ square ruler, check the final dimensions of your block. If needed, carefully square up the block by trimming any excess fabric from the outer edges, ensuring you do not cut into your crucial 1/4″ seam allowance. This final step guarantees your block will fit seamlessly with others in a larger project.
Tips for a Flawless Falling Leaves Quilt Block
Achieving beautiful, professional results in quilting often comes down to a few key practices and habits. Keep these essential tips in mind as you work on your Falling Leaves Quilt Block and future quilting projects:
- Embrace Precision as Your Guide: Quilting is an art that thrives on accurate measurements and consistent seam allowances. The quilter’s mantra, “Measure twice, cut once,” is more than just a saying; it’s a foundation for success. Even a tiny deviation in cutting or sewing can throw off your entire block, leading to mismatched points and frustration. Invest in good quality, clear rulers and always ensure your rotary cutter blade is sharp for the cleanest cuts.
- Pressing is Different from Ironing: When you press fabric, you lift and set the iron down directly onto the fabric, holding it in place for a few seconds, rather than sliding it across the surface. Sliding the iron can stretch and distort your fabric units, especially on the bias. Always press seams flat and set them before joining units, which helps to lock in your stitches and create crisp lines.
- Harness the Power of Chain Piecing: If you’re making multiple HSTs or multiple rows of blocks, consider using the chain piecing technique. This involves sewing units one after another without lifting your presser foot or cutting the threads in between. You’ll create a “chain” of sewn units. This is a huge time-saver, conserves thread, and helps maintain a consistent rhythm.
- Pinning is Your Friend, Not a Foe: Don’t underestimate the power of pins, especially when matching critical points and seams, such as where multiple seams intersect. Pin generously at intersections, corners, and along the length of your seams to ensure everything stays perfectly aligned during sewing. Using fine, sharp pins will minimize fabric distortion.
- Always Test Your Seam Allowance: Before starting any major quilting project, sew two scrap fabric pieces together and measure the resulting seam width. It should be exactly 1/4 inch. If your seam isn’t exact, adjust your needle position or consider using a dedicated 1/4″ seam foot until you achieve consistent accuracy.
- Take Your Time and Enjoy the Journey: Quilting is a journey of creativity and craftsmanship, not a race. Enjoy the process of bringing your fabric to life! Rushing can lead to mistakes, frustration, and a less enjoyable experience. If you’re feeling overwhelmed or tired, take a break and come back to your project with fresh eyes and renewed energy.
- Utilize a Design Wall (or Clear Surface): Laying out your HSTs and squares on a design wall (a flannel-covered board or even a clean floor) allows you to visualize your block before sewing. This helps you catch errors in placement, orientation, and color arrangement, saving you from unpicking later on.
Beyond the Block: Project Ideas and Creative Variations
Once you’ve mastered the Falling Leaves Quilt Block, a world of creative possibilities opens up. This versatile block can be incorporated into a wide array of projects, and its design can be adapted for different looks and seasons.
- Autumn Lap Quilt or Throw: The most popular application! Sew multiple Falling Leaves blocks together, perhaps alternating them with solid background blocks or other complementary designs like four-patches or nine-patches, to create a cozy and inviting lap quilt perfect for snuggling on a cool autumn evening.
- Seasonal Table Runner or Placemats: A series of Falling Leaves blocks sewn in a row makes a stunning table runner that will instantly elevate your fall dining decor. Individual blocks can be finished with simple borders to create charming placemats, adding a personal, handmade touch to your table settings.
- Decorative Pillow Cover: One or two beautifully constructed Falling Leaves blocks can form the front of a throw pillow, instantly updating your living space or bedroom decor with seasonal flair. Choose backing fabric that complements your leaf colors for a professional finish.
- Wall Hanging: Frame a few blocks with sashing and borders to create a small wall hanging. This is a wonderful way to showcase your quilting skills and bring the vibrant beauty of autumn foliage directly onto your walls, adding a focal point to any room.
- Tote Bag or Pouch: Incorporate a single, standout Falling Leaves block into the front panel of a sturdy tote bag or a charming cosmetic pouch for a personalized, handmade accessory that’s perfect for everyday use or as a unique gift.
- Color Variations for Any Season: Don’t limit yourself to traditional fall colors! Experiment with different color palettes. Imagine pastel leaves for a delicate spring theme, vibrant greens for a fresh summer look, or even cool blues and whites for a frosty winter design. The geometric nature of the block makes it adaptable to any season or aesthetic.
- Block Combinations for Complex Designs: Pair your Falling Leaves blocks with other classic quilt blocks like simple squares, Four Patch, Nine Patch, or even snowball blocks to create more complex and visually interesting quilt tops. This adds texture and depth to your overall design.
- Sashing and Borders for Enhancement: Use sashing (strips of fabric sewn between blocks) and borders around your blocks to enhance the design, visually separate the individual leaf motifs, and provide a polished frame for your beautiful work. Sashing can be narrow or wide, in a solid color or a subtle print.
Conclusion: Embrace the Beauty of Handmade Autumn
Creating the Falling Leaves Quilt Block is more than just a sewing project; it’s an opportunity to connect with the intrinsic beauty of the autumn season and express your unique creativity through fabric. Each precisely cut square and carefully sewn seam brings you closer to a beautiful, tangible piece of art that reflects your passion for quilting and your dedication to craftsmanship. Whether this block is destined to become a cherished family heirloom, a thoughtful handmade gift, or simply a decorative accent for your home, the satisfaction of creating it yourself is truly immeasurable.
We hope this detailed tutorial has empowered you with the knowledge, confidence, and inspiration to tackle this delightful quilt block. Remember, every stitch is a valuable step in your creative journey. Don’t be afraid to experiment with new fabric combinations, personalize your projects to reflect your style, and most importantly, truly enjoy the fulfilling process of bringing your vision to life. Happy quilting, and may your autumn be filled with warmth, vibrant colors, and beautiful handmade creations!