
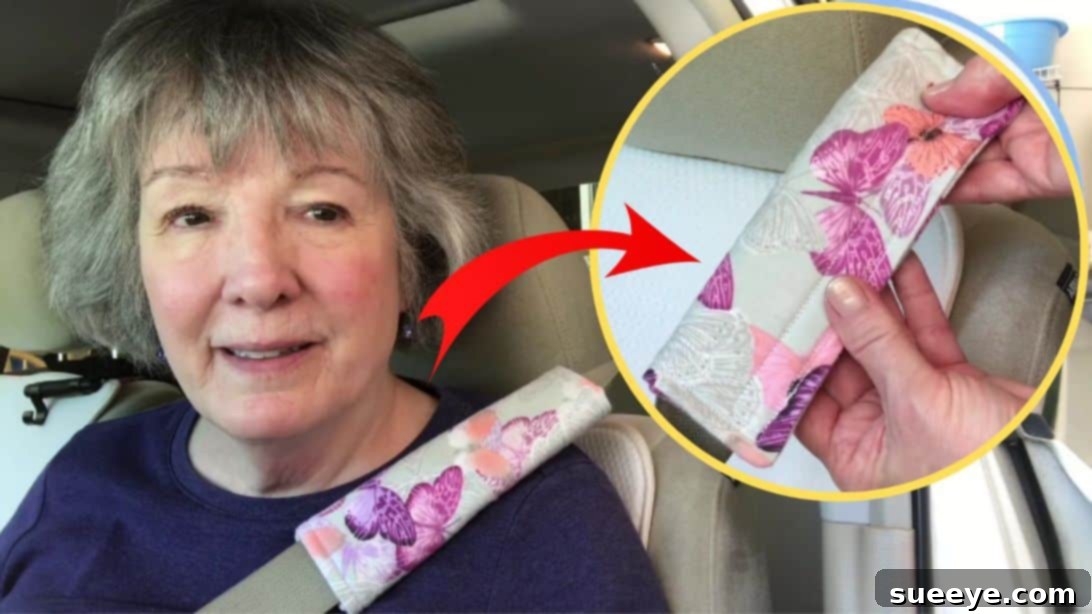
Transform your daily commute or travel experience with this incredibly simple and effective DIY project: an easy-to-sew cushion cover for your seat belt or bag handle. Brought to you by the creative minds at Seams Easy on YouTube, this tutorial empowers you to craft a soft, protective barrier that significantly reduces the painful pressure often applied by seat belts to your chest or shoulder, or the discomfort from heavy bag straps. Say goodbye to chafing and red marks, and hello to personalized comfort!
Whether you’re a seasoned sewing enthusiast or just starting your journey, this project is designed to be accessible and rewarding. It requires minimal materials and straightforward steps, making it perfect for a quick weekend craft or a thoughtful handmade gift. By following these clear instructions, you’ll create a durable and plush cushion that not only enhances comfort but also adds a touch of personal style to your vehicle or accessories. Let’s gather our supplies and get ready to sew!
Essential Materials for Your DIY Seat Belt Cushion
Gathering the right materials is the first step to a successful sewing project. For this comfortable seat belt cushion, we’ve selected fabrics that offer both softness and adequate padding. Always remember to prewash your fabrics to prevent any shrinking after your project is complete.
- 2 (9×9″) Flannel Fabrics, prewashed: Flannel is chosen for its superior softness and comfort against the skin. Prewashing ensures that the fabric won’t shrink unevenly after your cushion is made, maintaining its shape and fit. You can choose coordinating patterns or colors to personalize your cushion.
- 2 (7.5×7.5″) Polar Fleece Pieces: Polar fleece serves as the inner padding, providing the necessary cushion and bulk to relieve pressure. Its soft, non-fraying nature makes it easy to work with and adds an extra layer of plushness. The slightly smaller size ensures it fits neatly inside the flannel layers without adding excessive bulk to the edges.
- 7″ Sew-in Velcro (Hook and Loop Fastener), with rounded corners: This is crucial for securing your cushion around the seat belt or bag handle. Opting for sew-in Velcro ensures a strong, lasting attachment compared to adhesive versions. Rounded corners are a small detail that makes sewing easier and prevents sharp edges from poking through the fabric.
- Basting Adhesive Spray: A temporary fabric adhesive that helps hold your fabric layers together precisely before sewing. It eliminates the need for excessive pinning, ensuring a smooth, wrinkle-free finish, especially when working with soft, shifting fabrics like flannel and fleece.
- Parchment Paper: Used as a protective barrier when applying basting adhesive. It prevents the spray from sticking to your work surface and makes it easier to handle the sticky fabric layers.
- Pins and Fabric Clips: Indispensable tools for securing fabric layers while sewing. Pins are excellent for holding general seams, while fabric clips are especially useful for thicker fabrics or areas where pins might leave marks.
- Fabric Scissors or Rotary Cutter and Cutting Mat: For precise and clean cuts. A rotary cutter paired with a cutting mat offers exceptional accuracy, which is vital for achieving perfectly square fabric pieces and neat seams.
- Hand Sewing Needle and Thread: While most of the project uses a machine, a hand sewing needle and coordinating thread can be useful for minor touch-ups or to secure the very end of a seam opening if desired.
- Sewing Machine: The primary tool for stitching your cushion together efficiently and professionally. Ensure it’s threaded correctly and has a fresh needle suitable for your fabric type.
Step-by-Step Guide: Crafting Your Comfortable Seat Belt Cushion
Follow these detailed steps carefully to create your own personalized and pressure-relieving seat belt cushion cover. Precision and patience are key to achieving a professional-looking finish.
Step 1: Preparing and Fusing the Fabric Layers
This initial stage involves preparing your fabric pieces and fusing them together to create a sturdy, yet soft, foundation for your cushion. The goal is to ensure stability and prevent shifting during the sewing process.
- Prepare Your Work Surface: Lay a piece of parchment paper flat on your work surface. This will protect your table from the basting adhesive spray.
- Position the Fleece: Take one piece of your polar fleece fabric and lay it on top of the parchment paper. Make sure its wrong side (the side you don’t want to show on the finished product) is facing upwards.
- Apply Basting Adhesive: Lightly and evenly spray the wrong side of the fleece with basting adhesive. Be sure to follow the manufacturer’s instructions for optimal adhesion. The spray should be sufficient to hold the fabrics together but not so much that it saturates the fabric.
- Attach the Flannel: Carefully take one piece of your prewashed flannel fabric. Position it with its right side (the side you want to be visible) facing upwards, directly onto the adhesive-sprayed fleece. The goal here is to fuse their wrong sides together.
- Center the Fleece: As you place the flannel, ensure that the fleece is centered underneath it. Since the fleece pieces are slightly smaller (7.5×7.5″) than the flannel (9×9″), this will create a small border of flannel around the edges. This border provides a cleaner edge when you sew and turn the fabric. Gently smooth out any wrinkles or bubbles to ensure a flat, even bond between the flannel and fleece.
- Repeat for the Second Set: Repeat steps 2 through 5 for the remaining flannel and fleece pieces. You should now have two identical fused fabric units, each consisting of a flannel top layer and a fleece bottom layer. These units will form the front and back of your cushion.
- Layer for Sewing: Place these two fused pieces on top of each other. Crucially, their right sides should be facing each other. This means the flannel sides that will be visible on your finished cushion should be touching. Align all edges as precisely as possible.
- Secure and Stitch: Pin or clip the layers together around all four sides. Using a sewing machine, sew them together all around with a generous ½-inch seam allowance. This larger seam allowance helps create a durable seam and provides enough space to trim later.
- Leave an Opening: As you sew, remember to leave an opening of about 4 to 5 inches on one side. This unstitched gap is essential for turning the cushion right side out later. Make sure to backstitch at the beginning and end of your stitching at both sides of the opening to reinforce the seams and prevent them from unraveling when you turn the fabric.
Step 2: Finishing the Cushion and Attaching the Velcro
The final steps involve refining the shape of your cushion, turning it right side out, and securely attaching the Velcro closure. This brings your comfort project to life!
- Trim the Corners: Once you’ve finished sewing all four sides (leaving the opening), it’s time to trim the corners. Using your scissors, carefully snip off the corners diagonally, just outside your stitch line. Be extremely careful not to cut through your stitches. Trimming the corners reduces bulk when the cushion is turned right side out, resulting in crisp, sharp corners.
- Turn Right Side Out: Gently reach into the opening you left and carefully pull the entire piece right side out. Take your time with this step, especially around the corners.
- Poke Out Corners: Use a blunt tool, such as a point turner, a chopstick, or the end of a closed pair of scissors, to gently poke out the corners from the inside. Be careful not to push too hard, which could create a hole. This helps to achieve perfectly squared corners.
- Press Thoroughly: Take your cushion to the ironing board and give it a good press with an iron. This helps to flatten the seams, remove any wrinkles, and give your cushion a polished, professional look. Pressing is a critical step that significantly impacts the final appearance of your project.
- Prepare the Opening: Locate the unstitched gap. Fold the raw edges of the fabric at this opening neatly to the inside, aligning them with the existing seam line. Pin or clip them in place to create a smooth, closed edge.
- Topstitch the Entire Piece: With your sewing machine, topstitch the entire cushion with a ¼-inch seam allowance all the way around the perimeter. This means you will sew a line of stitches ¼ inch from the edge. This topstitching serves multiple purposes: it permanently closes the gap, provides a clean and decorative finish, and adds extra durability to the cushion. Ensure your stitches are straight and even for the best aesthetic.
- Position the First Velcro Half: Lay your cushion flat. Take one half of your 7-inch sew-in Velcro. Pin this part of the Velcro onto the left side of the cushion, approximately 1½ inches away from the edge. This precise placement is important for a secure and functional closure.
- Stitch the First Velcro Half: Securely stitch the Velcro in place using your sewing machine. Sew all around the perimeter of the Velcro strip. You may want to sew an ‘X’ or box stitch pattern in the center for added strength, especially since this area will experience repeated pulling.
- Position the Second Velcro Half: Flip the cushion over. Take the other half of your Velcro. Align it perfectly with the first half, so when the cushion is wrapped, the Velcro pieces will meet and fasten properly. Pin this second half onto the left side of the cushion as well, ensuring it mirrors the position of the first piece when the cushion is closed.
- Stitch the Second Velcro Half: Carefully stitch this second Velcro piece in place, just as you did the first. Ensure all stitches are secure and the Velcro is firmly attached to the fabric.
- Final Check and Use: Once both Velcro pieces are sewn, give your cushion a final inspection. Check for any loose threads or missed stitches. Your easy-to-sew seat belt cushion cover is now complete! Wrap it around your car’s seat belt or the handle of your favorite bag, and enjoy the immediate comfort it provides.
Why Sew Your Own Seat Belt Cushion Cover? The Benefits Unveiled
While ready-made seat belt covers are available, creating your own offers a multitude of advantages that go beyond simple functionality. Here’s why this DIY project is a game-changer for your comfort and style:
- Unparalleled Comfort and Pain Relief: The primary reason to craft this cushion is to alleviate the discomfort caused by seat belts digging into your shoulder or chest. The combination of soft flannel and plush fleece creates a gentle barrier, reducing pressure, preventing chafing, and making long drives significantly more comfortable. It’s also excellent for individuals recovering from surgery or those with sensitive skin.
- Complete Customization and Personalization: Store-bought options often come in limited designs and colors. By sewing your own, you gain complete creative control. Choose flannel fabrics that perfectly match your car’s interior, express your personality with vibrant patterns, or create a set that reflects your family’s style. This level of personalization is simply unmatched.
- Cost-Effective Solution: Quality seat belt covers can be surprisingly expensive. This DIY project uses readily available and affordable materials, making it a budget-friendly alternative that delivers premium comfort without breaking the bank. You’ll find that the cost of materials for one handmade cushion is often less than a single generic store-bought cover.
- Beginner-Friendly Sewing Project: This cushion cover is specifically designed with simplicity in mind. It involves basic straight stitching, fabric fusing, and turning techniques, making it an excellent project for sewing novices to build confidence and hone their skills. The steps are clear, and the outcome is quick and satisfying.
- Versatility Beyond Seat Belts: Don’t limit the use of your new cushion to just seat belts! Its design makes it incredibly versatile. Wrap it around the handle of a heavy tote bag, a camera strap, a guitar case handle, or even a backpack strap to distribute weight and prevent digging. It’s a multi-functional accessory for enhanced comfort wherever you need it.
- Durable and Washable: Made with sturdy flannel and fleece, and secured with strong stitches and sew-in Velcro, your handmade cushion is built to last. Plus, since you choose the fabrics, you can ensure they are easily machine washable, making maintenance a breeze and keeping your cushion fresh and hygienic.
Fabric Selection: Softness, Durability, and Style
While our tutorial specifies flannel and polar fleece, understanding fabric choices can elevate your project and help you customize future cushions. The right fabric not only dictates the feel but also the longevity and ease of care for your seat belt cushion.
- Flannel (Outer Layer): Cotton flannel is a fantastic choice due to its softness, breathability, and warmth. It comes in a vast array of colors and patterns, allowing for endless customization. Look for medium-weight flannel for good durability. Poly flannel is also an option, often feeling softer but sometimes less breathable. Always pre-wash flannel as it’s prone to shrinking.
- Polar Fleece (Inner Layer/Padding): Polar fleece is ideal for the padding layer because it’s soft, provides excellent cushioning without being too bulky, and resists fraying, which means cleaner edges even before finishing. Anti-pill fleece is a superior choice as it maintains its smooth texture through washes and use, preventing unsightly little balls of fabric from forming.
- Alternative Outer Fabrics: For a different look or feel, consider other fabrics. Minky fabric offers an incredibly soft, plush, and luxurious feel, perfect for ultimate comfort. However, it can be a bit more challenging for beginners to sew due to its slipperiness. Durable cotton blends or even lightweight canvas could be used for the outer layer if you prioritize extreme durability and less fluffiness, though they might not offer the same initial softness as flannel.
- Fabric Considerations:
- Softness: The primary goal is comfort, so prioritize fabrics that feel good against the skin.
- Durability: Your cushion will endure regular friction, so choose fabrics that can withstand wear and tear.
- Washability: Ensure all chosen fabrics are machine washable for easy cleaning.
- Thickness: Avoid overly thick fabrics that might make the cushion too bulky or difficult to sew.
Expert Tips for a Professional Finish
Achieving a neat and professional-looking finished product is satisfying. These tips will help you avoid common pitfalls and ensure your seat belt cushion looks store-bought, but with a handmade touch.
- Pre-Wash All Fabrics: This cannot be stressed enough. Fabrics, especially cotton flannel, can shrink significantly on their first wash. Pre-washing and drying them before cutting ensures your finished cushion maintains its size and shape.
- Accurate Cutting is Key: Use a rotary cutter and a self-healing cutting mat if you have them. This combination allows for precise, straight cuts, which are crucial for perfectly aligning your fabric pieces and achieving even seam allowances. If using scissors, take your time and cut carefully along your marked lines.
- Press as You Go: Ironing your fabric at each significant step (after fusing, after sewing seams, after turning right side out) makes a tremendous difference. It sets stitches, flattens seams, removes wrinkles, and gives your project a crisp, professional appearance.
- Use the Right Needle: Ensure your sewing machine has a sharp needle appropriate for medium-weight fabrics. A dull or incorrect needle can lead to skipped stitches, pulled threads, or damage to your fabric.
- Test Your Stitches: Before sewing on your actual project, always test your stitch length and tension on a scrap piece of fabric from your project. This helps ensure your settings are correct for your chosen fabrics.
- Backstitch at Start and End: Always backstitch at the beginning and end of every seam. This locks the stitches in place and prevents them from unraveling, especially important for areas like the opening and where the Velcro is attached.
- Trim Seam Allowances: Beyond just the corners, consider gently trimming down your seam allowance to ¼ inch (except where specified) after sewing to reduce bulk inside the cushion, especially if your fabrics are thicker.
- Secure Velcro Firmly: When sewing the Velcro, reinforce the stitching. Sew a square around the perimeter and then an ‘X’ diagonally across the square. This ensures the Velcro can withstand repeated pulling and use.
Care and Maintenance for Your Handmade Cushion
To ensure your comfortable seat belt cushion lasts for years to come, proper care is essential. Following these simple guidelines will help maintain its softness, shape, and cleanliness.
- Machine Wash Gentle Cycle: Most flannel and fleece fabrics are machine washable. Use a gentle cycle with cold or warm water to prevent excessive shrinking or damage to the fabric fibers.
- Mild Detergent: Use a mild, color-safe detergent. Avoid harsh chemicals or bleach, which can degrade the fabric and fade colors.
- Air Dry Recommended: While flannel and fleece can often be tumble dried on a low setting, air drying is highly recommended. Lay the cushion flat or hang it to dry to help maintain its shape and prevent potential shrinking or pilling, especially with fleece. If using a dryer, use the lowest heat setting.
- Avoid High Heat: High heat can cause flannel to shrink excessively and can damage the fibers of fleece, potentially leading to matting or reduced softness.
- Check Velcro: Before washing, ensure the Velcro is fastened. This prevents the hook side from snagging other laundry items or accumulating lint.
- Light Ironing if Needed: If your flannel outer layer becomes wrinkled, you can iron it on a low to medium heat setting, avoiding direct contact with the fleece or Velcro if possible.
Frequently Asked Questions About Sewing a Seat Belt Cushion
Here are answers to some common questions you might have about this sewing project, designed to help you troubleshoot and customize your cushion further.
- Q: Can I use different fabric sizes for the cushion?
- A: Absolutely! The provided dimensions (9×9″ flannel, 7.5×7.5″ fleece) are a common size, but you can adjust them to fit your specific needs or preferences. Just make sure to adjust all pieces proportionally and ensure the fleece remains slightly smaller than the flannel to allow for clean edges. A longer cushion might be ideal for taller individuals, for example.
- Q: What if I don’t have basting adhesive spray?
- A: While basting spray makes the process much easier by preventing fabric layers from shifting, you can certainly proceed without it. Instead, use plenty of pins or fabric clips to secure the flannel and fleece layers together before sewing. Place pins closer together than usual to ensure maximum stability.
- Q: Can I use snaps or buttons instead of Velcro?
- A: Yes, you can! Snaps or buttons are viable alternatives for the closure. However, sew-in Velcro is generally recommended for seat belt cushions because it provides a continuous, strong grip along the entire length, making it less likely to accidentally open during use. If using snaps or buttons, ensure they are securely attached and spaced appropriately for a firm closure.
- Q: Is this cushion suitable for all types of seat belts?
- A: This design is suitable for most standard car seat belts and bag straps. The 7-inch Velcro closure allows for some adjustability. For unusually wide or thick straps, you might need to adjust the overall width of your fabric pieces and the length of your Velcro to ensure a comfortable and secure fit.
- Q: How can I make the cushion more padded?
- A: If you desire extra padding, you have a couple of options. You could use a thicker type of fleece, or you could add a third, smaller layer of thin batting (like quilt batting) between the two fleece pieces before fusing. Be mindful that adding too much bulk can make sewing more challenging and might make the cushion less flexible.
Your Journey to Comfort Starts Here
Congratulations! You’ve successfully learned how to sew a comfortable and personalized seat belt cushion cover. This simple yet impactful project not only enhances your daily comfort but also serves as a fantastic opportunity to express your creativity through fabric choices. Remember, every stitch adds to a more pleasant journey, whether you’re driving across town or embarking on a long road trip. So, embrace the joy of handmade items and enjoy the lasting comfort your new cushion provides.
*A special thank you to Seams Easy via YouTube for sharing this wonderful tutorial and for all images used here. If you enjoyed this sewing project, we highly recommend visiting her channel and subscribing for more inspiring and easy-to-follow sewing guides!