
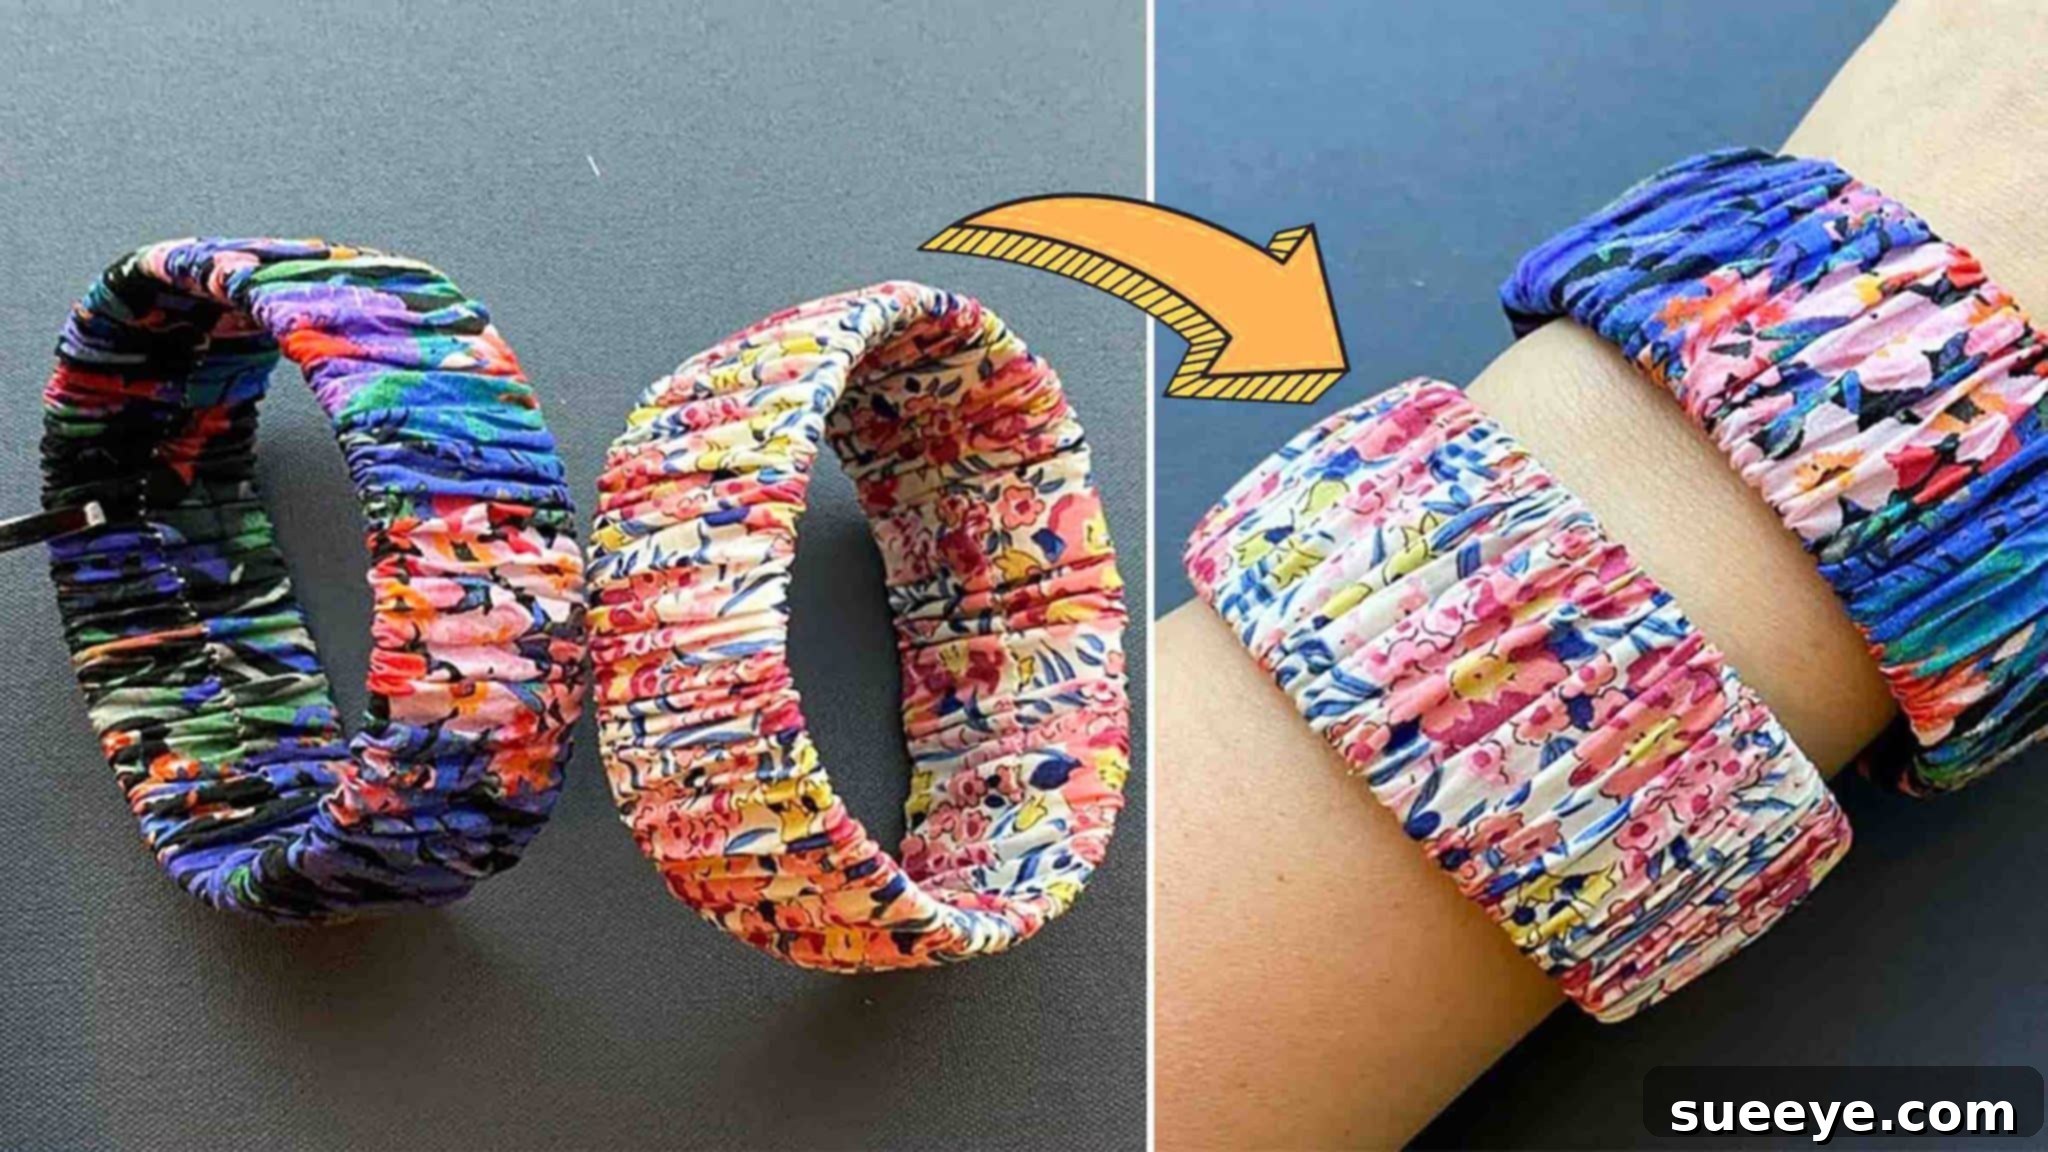
Are you searching for an easy, enjoyable, and incredibly stylish DIY project to elevate your fashion accessories? Look no further! This comprehensive guide will show you how to create your very own scrunchie bangle bracelets, a chic addition that perfectly blends comfort with contemporary style. Inspired by the brilliant tutorial from Red Blossom Designs on YouTube, this craft project ticks all the boxes: it’s fashionable, straightforward, and a blast to make. Whether you’re a seasoned crafter or a complete beginner, you’ll find this tutorial accessible and rewarding. The best part? You have complete creative freedom! While Liberty of London fabric offers a luxurious touch, you can use any fabric pattern, color, or texture that speaks to your personal style. Imagine crafting unique bracelets that perfectly complement your wardrobe or make thoughtful, personalized gifts for friends and family. Dive into the world of DIY fashion and discover how simple it is to add a touch of handmade elegance to your accessory collection. Follow this detailed tutorial to craft these adorable and versatile scrunchie bangle bracelets that are sure to turn heads.
Why Craft Your Own Scrunchie Bangle Bracelets?
In a world of mass-produced fashion, handmade accessories offer a unique charm and personal touch that can’t be replicated. Creating your own scrunchie bangle bracelets comes with a myriad of benefits, making it an increasingly popular DIY project:
- Unleash Your Creativity: This project is a fantastic outlet for personal expression. With an endless array of fabrics to choose from, you can create bracelets that truly reflect your individual taste and match any outfit in your wardrobe.
- Cost-Effective Fashion: Why spend a fortune on trendy accessories when you can make them yourself for a fraction of the cost? This project is perfect for utilizing fabric scraps from other sewing projects, making it not only economical but also environmentally friendly.
- Perfect for Beginners: If you’re new to sewing, this is an excellent entry-level project. It teaches fundamental sewing techniques like straight stitching, turning fabric, and hand sewing, all within a manageable and fun context.
- Unique Gifts: Handmade gifts carry a special sentiment. A personalized scrunchie bangle bracelet makes a thoughtful and cherished present for birthdays, holidays, or just because.
- Sustainable Style: By upcycling fabric remnants, you contribute to reducing waste and promoting sustainable fashion practices. It’s a small step that makes a big difference.
- Versatility in Wearing: Not only do these look fantastic on your wrist, but their scrunchie nature also means they can double as a chic hair tie in a pinch, offering dual functionality and style.
Essential Materials for Your Stylish Scrunchie Bangle Bracelet
Gathering your materials is the first exciting step in any DIY project. For this scrunchie bangle bracelet, you’ll need a few common sewing supplies. The beauty of this craft lies in its simplicity and the flexibility it offers in material choices.
- Fabric of Your Choice:
- Recommendation: Liberty of London fabric (known for its fine quality and beautiful prints).
- Alternatives: Any light to medium-weight woven fabric will work wonderfully. Consider cotton for easy handling, satin for a luxurious sheen, velvet for a touch of elegance, or even jersey knit for a softer, stretchier feel. Opt for a piece roughly 9 cm (3.5 inches) wide and 50 cm (20 inches) long. This size is ideal for most adult wrist sizes, but you can adjust the length for a looser fit or smaller wrist.
- Elastic (3 cm / 1.2 inches wide):
- Importance: The width of the elastic is crucial for achieving the classic scrunchie look and ensuring the bracelet maintains its shape and comfort.
- Quality: Choose good quality elastic that retains its stretch over time. Braided or knitted elastic works well.
- Writing Tool (Pen or Fabric Marker): Essential for marking measurements and tracing lines accurately on your fabric.
- Sharp Scissors: For precise fabric cutting, which is key to a professional-looking finish.
- Needle and Thread:
- Thread Color: Match your thread to your fabric color for an invisible finish.
- Needle Type: A universal sewing needle for machine sewing and a hand sewing needle for the final closure.
- Sewing Machine (Optional but Recommended): While portions can be hand-sewn, a sewing machine will make the initial fabric tube construction much quicker and neater.
- Tweezers or Safety Pin/Bodkin: Crucial for feeding the elastic through the fabric casing.
Step-by-Step Directions: Crafting Your Chic Scrunchie Bangle Bracelet
Follow these detailed instructions carefully to ensure a beautiful and durable scrunchie bangle bracelet. Take your time with each step, and don’t hesitate to refer to the original video tutorial by Red Blossom Designs if you need a visual aid.
Step 1: Preparing Your Elastic and Fabric Sleeve
The foundation of your scrunchie bangle lies in perfectly prepared elastic and a neatly sewn fabric tube. Precision in this step will ensure a comfortable and aesthetically pleasing bracelet.
- Measure and Cut Your Elastic: Begin by taking your 3 cm (1.2 inch) wide elastic. Wrap it comfortably around the widest part of one of your hands (usually around the knuckles) where the bracelet will need to slide on. This ensures a snug fit that can still be easily slipped on and off. Mark the point where the elastic overlaps by about 1.5 cm (0.6 inches), then cut off any excess. This initial measurement is vital for the bracelet’s wearability.
- Prepare Your Fabric Piece: Retrieve your fabric piece, ideally measuring approximately 9 cm (3.5 inches) in width and 50 cm (20 inches) in length. If your fabric is directional, ensure your pattern is oriented correctly. Lay the fabric flat with the wrong side facing up.
- Create a Hem for a Clean Edge: Take one of the shorter ends of your fabric. Fold about 1 cm (0.4 inches) of this end over to the wrong side and press it firmly. This creates a clean, finished edge that will be crucial for the final closure of your bracelet, preventing fraying and offering a professional look.
- Fold and Pin the Fabric: Now, fold the entire fabric strip in half lengthwise, bringing the two long raw edges together. Make sure the wrong side of the fabric is facing outwards, and the right side is tucked inside. Align the edges carefully and pin them in place along the raw edge. The previously folded 1 cm hem should remain folded at one end.
- Trace the Elastic for a Perfect Fit: Place your cut elastic strip directly on top of the pinned fabric, aligning it with the long raw edge. Using your pen or fabric marker, carefully trace the outline of the elastic along the fabric. This tracing line will serve as your sewing guide, ensuring the fabric tube is just the right size to snugly encase the elastic.
- Machine Sew Your Fabric Tube: Take your pinned and traced fabric to your sewing machine. Using a straight stitch, sew directly along the traced line you just made. Start from the un-hemmed end and sew all the way to the end where you created the 1 cm hem, making sure to backstitch at both the beginning and end for added security. This will create a long fabric tube.
- Trim Excess Fabric: After sewing, carefully trim away the excess fabric, leaving a small seam allowance of about 0.5 cm (0.2 inches) beyond your stitched line. This reduces bulk inside the fabric tube and allows it to turn more smoothly.
- Turn the Fabric Right Side Out: Now, it’s time to turn your fabric tube right side out. This can be done by attaching a safety pin to one end of the fabric tube and guiding it through the inside, or by using a bodkin or a specialized fabric turner. Gently pull the fabric through itself until the right side is exposed. Use a chopstick or blunt tool to gently push out the corners and edges for a crisp finish.
- Insert the Elastic into the Fabric Casing: Attach one end of your cut elastic to a pair of tweezers or a safety pin. Carefully feed this end through one opening of your fabric tube. As you push the tweezers through, guide the elastic along the entire length of the fabric casing. It’s important to hold onto the other end of the elastic, perhaps by pinning it to the fabric opening, to prevent it from accidentally slipping inside the tube completely. Gather the fabric evenly onto the elastic as you go, creating the characteristic scrunchie effect.
Step 2: Securing the Elastic and Finishing the Bracelet
This final step involves joining the elastic ends securely and neatly closing the fabric casing to complete your scrunchie bangle bracelet.
- Prepare to Join the Elastic Ends: Once the elastic is fully threaded through the fabric tube and the fabric is evenly gathered, you’ll have both ends of the elastic peeking out from the fabric openings. Carefully align the two ends of the elastic. Remember the 1.5 cm (0.6 inch) overlap allowance you factored in during the initial measurement? This is where it comes into play. Overlap the two elastic ends by this amount.
- Manually Sew the Elastic Together: This is a crucial step for the durability of your bracelet. Using your needle and strong thread (preferably double-threaded for extra strength), manually sew the overlapped elastic ends together. You can use a tight whipstitch, a crisscross stitch, or a strong backstitch to create a secure bond. Sew back and forth several times to ensure the connection is robust and won’t come apart with wear.
- Conceal the Elastic Joint with Fabric: After the elastic is securely sewn into a loop, gently pull the fabric sleeve over the joined elastic ends. The goal is to completely conceal the elastic joint inside the fabric casing. Gather the fabric around the joined elastic, making sure it sits neatly inside.
- Hand Stitch the Fabric Opening Closed: Now, refer back to the 1 cm (0.4 inch) hem you created on one end of the fabric in Step 1. Carefully tuck the raw edge of the other fabric opening inside this hem. Align the two folded edges neatly, ensuring the fabric is evenly distributed around the elastic. Using your needle and matching thread, hand stitch this opening closed with an invisible stitch, also known as a ladder stitch or slip stitch. This creates a seamless and professional finish, completely enclosing all raw edges and the elastic joint within the fabric tube. Take your time to make these stitches small and even so they blend into the fabric.
- Final Inspection: Once you’ve finished stitching, give your scrunchie bangle bracelet a gentle stretch and a quick inspection. Ensure all seams are secure, the elastic is firmly joined, and the fabric is neatly closed. Your beautiful, handmade scrunchie bangle bracelet is now complete and ready to be worn or gifted!
Tips for Success and Customization
To ensure your scrunchie bangle bracelets turn out perfectly every time, and to truly make them your own, consider these additional tips:
- Fabric Experimentation: Don’t limit yourself to just cotton! Silks and satins create a luxurious, elegant look, while linens offer a more rustic, natural feel. Velvet adds a touch of sophistication, perfect for evening wear. Experiment with different prints too – florals for spring, geometric for modern appeal, or solids for versatility.
- Elastic Tension: The comfort of your bracelet depends on the elastic tension. If you prefer a tighter fit, slightly reduce the initial elastic length. For a looser, more relaxed bangle, add an extra centimeter or two. Remember to account for the overlap when cutting.
- Stitching Perfection: For machine sewing, practice on a scrap piece of your chosen fabric first. This helps you get a feel for the tension and stitch length. When hand-stitching the final closure, use a sharp needle and a good quality, matching thread. The ladder stitch is your best friend here for an almost invisible finish.
- Sizing for All: This tutorial is for an adult-sized hand. To make bracelets for children or those with smaller wrists, simply reduce the initial elastic length proportionally. You might also slightly reduce the fabric width for a less voluminous scrunchie effect.
- Embellishments: Take your scrunchie bangles to the next level by adding small charms, beads, or decorative stitching. Just ensure any embellishments are securely attached and don’t interfere with comfort or movement.
Styling Your Handmade Scrunchie Bangle Bracelets
Now that you’ve crafted these beautiful accessories, it’s time to show them off! Scrunchie bangle bracelets are incredibly versatile and can enhance a wide range of outfits and occasions:
- Everyday Chic: Pair a vibrant floral scrunchie bangle with a simple jeans and T-shirt combo for an instant pop of color and personality. They are perfect for adding a touch of casual elegance to your daily wear.
- Sophisticated Stacking: Don’t just wear one! Create a curated stack of bracelets using different fabrics or patterns that complement each other. For instance, combine a satin scrunchie bangle with a delicate metallic bangle and a simple beaded bracelet for a layered, high-fashion look.
- Match Your Mood: With the ability to make them in any fabric, you can create a collection that perfectly matches your mood or the season. Think bright pastels for spring, earthy tones for autumn, or rich velvets for winter festivities.
- Beyond the Wrist: While primarily designed as bracelets, their scrunchie nature makes them versatile. They can be slipped onto a ponytail for a stylish hair accessory or even adorned on the handle of a handbag for an unexpected touch of flair.
- Gift with Love: These handmade bracelets make exceptional gifts. Present them individually in a small decorative box, or create a set of three coordinating bangles for a truly special present that shows thoughtfulness and craftsmanship.
Conclusion: Your Journey into DIY Fashion Accessories
Congratulations! You’ve successfully learned how to create charming and fashionable scrunchie bangle bracelets. This project, while simple, opens up a world of possibilities for personalizing your accessory collection and expressing your unique style. From selecting the perfect fabric to mastering the subtle art of an invisible stitch, each step contributes to a rewarding crafting experience and a beautiful end product.
Whether you’re making them for yourself, as thoughtful gifts, or simply for the joy of creating, these scrunchie bangle bracelets are a testament to the fact that handmade items can be both trendy and timeless. We hope this expanded tutorial, inspired by Red Blossom Designs, has provided you with all the guidance and inspiration you need to embark on your next DIY fashion adventure. So, grab your fabric, thread your needle, and start crafting your way to a more personalized and stylish wardrobe today!