
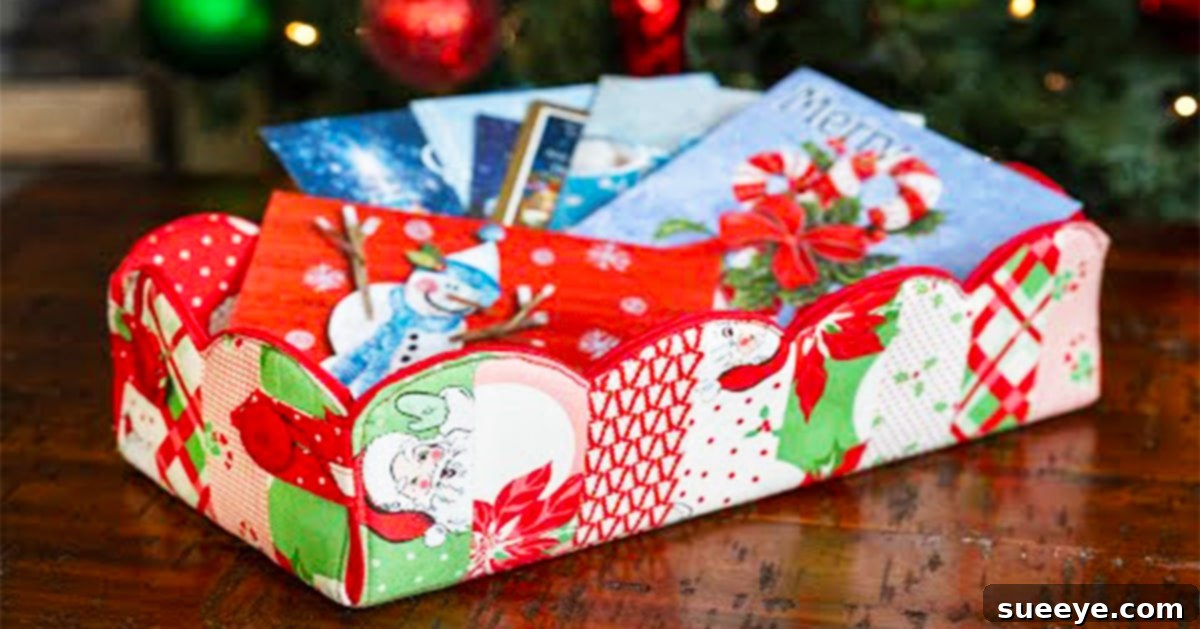
Welcome, craft enthusiasts, to an exciting journey into the world of fabric artistry! Today, we’re diving deep into a delightful project that promises both aesthetic charm and practical utility: the DIY Scalloped Basket. This ingenious creation, brought to life through the detailed guidance of Shabby Fabrics on YouTube, offers a fantastic opportunity to add a touch of handmade elegance to your home or create heartfelt gifts for loved ones. The beauty of this project lies in its remarkable versatility; whether you’re aiming for a seasonal theme, a specific color palette, or just a fun way to organize clutter, you can select any type of fabric to suit your vision. Shabby Fabrics is renowned for their exceptionally clear and comprehensive instructions, generously peppered with invaluable tips throughout their tutorials, making even intricate steps feel approachable for crafters of all skill levels. You have the convenient option to purchase a pre-made kit, which truly streamlines the process, or embark on a more personalized crafting adventure by gathering your own materials and following the video step-by-step. For those who prefer to curate their own fabric selections, Shabby Fabrics often provides free download pages on their website, allowing you to access templates and patterns for many of their projects. While the allure of selecting unique fabrics is undeniable, opting for a complete kit undeniably saves a significant amount of time and effort, letting you jump straight into the joy of creation.
Why Craft a DIY Scalloped Fabric Basket? Unlocking Its Charm and Utility
A handmade scalloped basket is far more than just a container; it’s a testament to creativity, a functional piece of art, and a personalized touch for any space. Its charming design, characterized by elegant, undulating edges, adds a soft, inviting aesthetic wherever it’s placed. But beyond its visual appeal, these baskets offer immense practical value. Imagine decluttering your craft room, organizing incoming mail, tidying up a nursery, or even presenting a thoughtful gift in a beautifully crafted, one-of-a-kind container. Here are just a few reasons why this project is a must-try:
- Superior Organization: From stationery and small toys to letters and keys, these baskets are perfect for keeping countless items neatly contained and easily accessible. Their sturdy construction ensures they hold their shape, making them ideal for high-traffic areas.
- Personalized Home Decor: With an endless array of fabric choices—from vibrant patterns to subtle textures—you can tailor your basket to perfectly complement your existing interior design. Match it to seasonal decor, a child’s bedroom theme, or simply your favorite colors.
- Heartfelt Handmade Gifts: There’s nothing quite like a handmade gift. A DIY scalloped basket filled with goodies makes an incredibly thoughtful present for birthdays, holidays, housewarmings, or “just because.” It shows care, effort, and a personal touch that store-bought items can’t replicate.
- Develop Your Sewing Skills: This project offers an excellent opportunity to practice various sewing techniques, including cutting precise shapes, working with fusible interfacing, stitching curves, and assembling three-dimensional objects. Shabby Fabrics’ clear instructions make it an ideal learning experience for intermediate sewers and an achievable goal for ambitious beginners.
- Eco-Friendly Crafting: Repurpose fabric scraps, or choose sustainable materials to create a reusable basket, contributing to a more eco-conscious lifestyle by reducing the need for single-use storage solutions.
The Shabby Fabrics Difference: Expert Guidance for Every Stitch
When embarking on a crafting project, having a reliable and clear guide can make all the difference between frustration and triumph. This is precisely where Shabby Fabrics excels. Their YouTube channel is a treasure trove of quilting and sewing tutorials, and their scalloped basket video is no exception. What sets their instructions apart and makes them particularly valuable for this project?
- Unrivaled Detail: Every step, from fabric preparation to final assembly, is demonstrated with exceptional clarity. They don’t skip over seemingly minor details, which are often crucial for achieving a professional finish.
- Helpful Tips and Tricks: Throughout the tutorial, Shabby Fabrics generously shares their expert knowledge, offering tips on pressing, precise cutting, managing tricky fabrics, and achieving crisp seams. These insights are invaluable for refining your technique and avoiding common mistakes.
- Visual Learning: For visual learners, video tutorials are paramount. Being able to see the exact movements, angles, and pressure applied by an experienced crafter is incredibly beneficial.
- Community and Support: While not explicitly stated in the original text, Shabby Fabrics often fosters a supportive community around their projects, encouraging engagement and shared creativity, which enhances the crafting experience.
- Accessible Resources: Beyond the video, they provide links to specific products and often offer free pattern downloads, ensuring you have all the necessary resources at your fingertips.
Understanding Your Options: Scalloped Basket Kit vs. Your Own Fabrics
One of the first decisions you’ll make when starting this project is whether to purchase a complete kit from Shabby Fabrics or use your own stash of fabrics and supplies. Both approaches have distinct advantages, and your choice will likely depend on your existing resources, budget, and desired level of personalization.
Option 1: Purchasing a Scalloped Basket Kit
Shabby Fabrics offers thoughtfully curated kits, like the Snow Day or Love Letters versions, which provide everything you need to complete your basket (minus basic tools like a sewing machine). The benefits are considerable:
- Time-Saving Convenience: All fabrics are pre-selected and often pre-cut or ready for precise cutting. You don’t have to spend time searching for coordinating materials.
- Guaranteed Cohesion: The fabrics within the kit are specifically chosen to complement each other, ensuring a beautiful, harmonious final product.
- Ideal for Beginners: Kits remove the guesswork of fabric selection and material sourcing, allowing new crafters to focus purely on the sewing process.
- Authentic Shabby Fabrics Look: If you love the specific aesthetic showcased in their tutorials, a kit guarantees you can replicate that exact style.
Option 2: Using Your Own Fabrics and Supplies
For seasoned crafters or those with a well-stocked fabric stash, using your own materials can be a highly rewarding path:
- Maximum Customization: Unleash your creativity by selecting fabrics that perfectly match your decor, personality, or the recipient’s taste. This is where truly unique pieces are born.
- Cost-Effective: If you already own most of the necessary supplies, crafting with your own materials can be more economical.
- Reducing Stash: It’s a fantastic way to utilize those beloved fabric pieces you’ve been saving for “just the right project.”
- Skill Development: The process of sourcing and preparing your own materials adds another layer to your crafting skills, enhancing your overall understanding of fabric projects.
Whichever path you choose, the key is to ensure you have all the necessary supplies before you begin. Shabby Fabrics provides valuable resources whether you buy a kit or work from your own collection.
Essential Supplies for Your Scalloped Basket Project
To ensure a smooth and enjoyable crafting experience, having the right tools and materials is crucial. While a kit will provide many of the fabric components, here’s a comprehensive list of what you’ll need, including specialized tools recommended by Shabby Fabrics for precision and ease:
- Fabric: Your chosen main fabric for the exterior, lining fabric, and any accent fabrics. Ensure they are good quality quilting cottons for best results.
- Double-sided fusible: This is key for giving your basket its structure and ensuring it stands upright. A foam interfacing like By Annie’s Soft and Stable is often recommended for fabric baskets.
- Scissors: Sharp fabric scissors are a must for clean cuts.
- Scalloped Basket Kit – Snow Day (Optional, if not using your own fabrics)
- Scalloped Basket Kit – Love Letters (Optional, if not using your own fabrics)
- Kringle & Claus Collection & Projects (Specific fabric collection often used by Shabby Fabrics, optional)
- Creative Grids 2½” x 24½” Ruler: For precise measuring and cutting of fabric strips and panels.
- Clover Bordeaux Ultimate Shears: High-quality shears for effortless fabric cutting.
- Clover Point 2 Point Turner: Invaluable for achieving crisp, sharp points and smooth curves when turning fabric right side out.
- Applique Pressing Sheet: Protects your iron and ironing board, especially when working with fusible materials.
- Clover Wonder Clips: Far superior to pins for holding multiple layers of fabric, especially with bulky materials or when working with foam interfacing.
- Konfetti Thread KT302 – Christmas Red: A strong, high-quality thread in a color that matches or complements your chosen fabrics.
- Schmetz Topstitch Needles – Size 80/12 5ct.: A sharp, strong needle specifically designed for topstitching and handling multiple layers of fabric.
- FriXion Clicker Pen: A heat-erasable pen for marking fabric without leaving permanent traces.
- Olfa 28mm Small Rotary Cutter: Excellent for precision cutting, especially useful for curves and smaller pieces.
- Clover Magnetic Pin Caddy: Keeps pins organized and easily accessible.
- Clover Patchwork Pins: Fine, sharp pins for holding fabric layers together.
- Wool Pressing Mat 14″ x 14″: Provides excellent heat retention for perfectly flat seams and pressing.
- Iron: A good quality steam iron is indispensable for pressing seams and fusible interfacing.
- Sewing Machine: A reliable machine capable of stitching through multiple layers of fabric.
Step-by-Step Guide to Crafting Your Scalloped Basket
Now that you have all your supplies ready, let’s dive into the creative process of assembling your beautiful scalloped fabric basket. Remember, for the most comprehensive visual guidance, always refer back to the Shabby Fabrics tutorial on YouTube. These directions provide a detailed overview of the key steps.
1. Preparation: Cutting Your Fusible Foam and Fabric Pieces
The foundation of your sturdy basket begins with precise cutting.
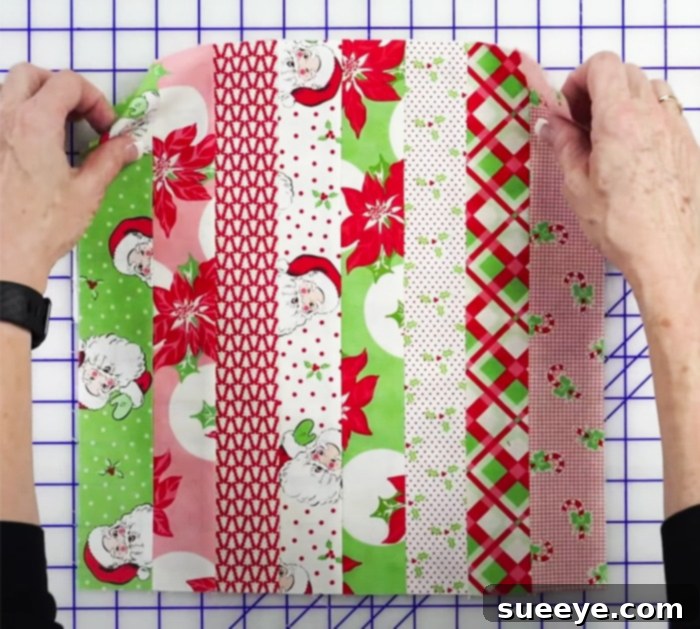
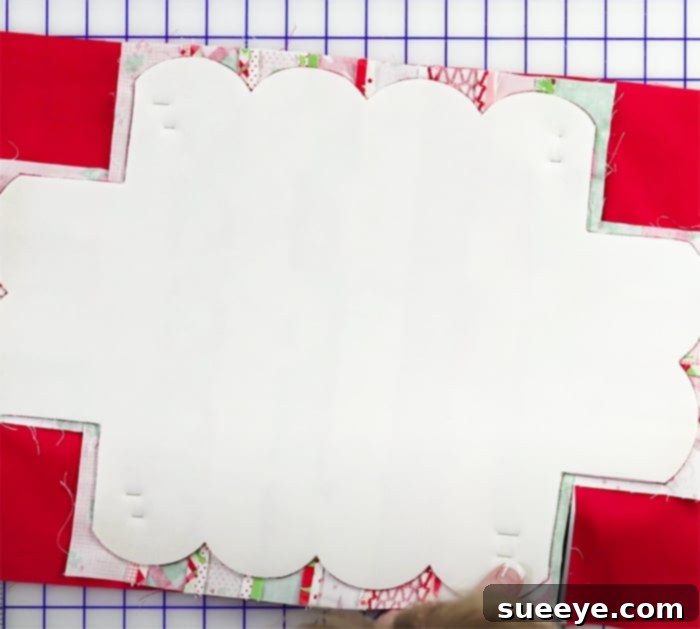
First, retrieve your scalloped basket fusible foam piece. If you’ve purchased a kit, a template will be provided, making this step straightforward. Carefully cut out the foam piece according to the template. This foam will give your basket its essential structure and defined shape. If you are not using a kit and need to create your own template, or if you require specific instructions on preparing your interfacing, be sure to watch the Shabby Fabrics tutorial for detailed guidance on this crucial initial phase. Next, you will need to cut your fabric strips that will form the sides and the bottom of your basket. Using your creative grids ruler and rotary cutter, meticulously cut these fabric pieces to the specified dimensions provided in the pattern. Accuracy here is vital for a professional-looking finish.
2. Assembling the Outer Basket Panels with Fusible Interfacing
With your pieces cut, it’s time to begin constructing the basket walls. Take your outer strip fabric – this is the exterior fabric that will be visible on your finished basket – and ensure the double-sided fusible interfacing is properly attached according to the manufacturer’s instructions, typically by pressing with an iron. This fusible layer bonds the fabric to the foam, creating a stiff, durable panel. Now, take your facing or lining fabric, which will form the interior of your basket, and place it right sides together with the outer strip fabric (which now has the fusible attached). Carefully align all edges, ensuring everything is perfectly square. Use your Clover Wonder Clips or patchwork pins generously to secure all layers together, preventing any shifting during the next step. Stitch around the perimeter, leaving an opening for turning if necessary, or following the specific seam allowances indicated in the Shabby Fabrics pattern. Precision in your stitching will lead to crisp, clean edges once turned.
3. Creating the Distinctive Scalloped Edge
The scalloped edge is what gives this basket its unique charm. After stitching your outer and lining fabric pieces together, carefully trim the seam allowances, especially around the curved scalloped sections. This will help reduce bulk and ensure a smooth curve once the fabric is turned right side out. Clip into the seam allowance along the concave curves and notch out the convex curves. Then, gently turn the entire piece right side out. Use your Clover Point 2 Point Turner to carefully push out all the curves and points, creating a beautifully defined scalloped edge. Press the edges flat with a hot iron, using your wool pressing mat for superior results. A topstitch along the scalloped edge and top of the panel can add a professional finish and help hold the shape, using your Konfetti thread and Schmetz Topstitch Needles.
4. Assembling the Basket Structure: Sides and Base
With your individual panels prepared, it’s time to bring your basket to life. You’ll now take these scalloped side panels and begin to sew them together, forming the rectangular or square shape of your basket. The pattern will guide you on how to join these pieces, typically by sewing the side seams. Once the side walls are connected, you will attach the bottom piece of your basket. Carefully align the base fabric piece with the bottom edges of your assembled side walls, pinning or clipping extensively. Stitch all around, ensuring to catch all layers securely. Reinforce the corners for added durability. This step requires careful handling to ensure the basket maintains its desired shape and stands upright once finished. Don’t hesitate to use plenty of clips to keep everything aligned.
5. Finishing Touches and Refinements
The final steps involve refining your basket and preparing it for use. After stitching the base, you may need to trim any excess fabric and turn the basket right side out, carefully pushing out the bottom corners with your point turner to create crisp angles. Give your entire basket a final, thorough pressing with your iron and wool pressing mat. This will help set the seams, fuse any remaining interfacing firmly, and give your basket a professional, finished look. Inspect all your seams and stitches, reinforcing any areas that seem weak. If desired, you can add embellishments such as decorative buttons, fabric tags, or even handles to further personalize your creation. Your DIY Scalloped Basket is now complete and ready to bring organization and beauty into your home!
Customizing Your Scalloped Basket: Endless Possibilities
One of the most exciting aspects of any DIY project is the ability to personalize it to your heart’s content. The scalloped basket offers a fantastic canvas for creativity. Here are some ideas to make your basket truly unique:
- Fabric Fantastic: Experiment with different fabric combinations. Use a bold print for the exterior and a subtle solid for the lining, or mix coordinating patterns. Consider seasonal fabrics for holiday-themed baskets (e.g., Christmas prints, spring florals). Denim, canvas, or even faux leather can give a completely different feel to the basket’s exterior.
- Embellishments Galore: Add decorative touches like ribbon ties, fabric rosettes, small charms sewn onto the side, or even a personalized embroidered tag. Contrast topstitching thread can also highlight the scalloped edges beautifully.
- Size and Shape Variations: While the Shabby Fabrics tutorial might focus on a specific size, once you understand the construction, you can adapt the pattern to create larger bins for blankets or smaller catch-all trays for keys and coins.
- Functional Additions: Consider adding small interior pockets for extra organization, or even a snap closure if you want to keep contents secure.
- Gift Themes: When crafting a gift, tailor the fabrics and any small additions to the recipient’s interests. A “sewing notions” basket for a fellow crafter, a “tea time” basket with tea bags and cookies, or a “baby essentials” basket for new parents.
The Perfect Gift or Home Decor Accent: A Touch of Handmade Love
As you can see, this DIY scalloped basket project transcends mere utility; it becomes a cherished item, whether it’s enhancing your own home or serving as a thoughtful gift. Imagine the delight on someone’s face receiving a beautifully crafted basket, knowing the time and care that went into its creation. It’s a wonderful way to keep organized with a variety of items, from letters and mail on an entryway table to small toys in a child’s room, or even toiletries in a bathroom. Its inherent charm makes it an ideal Christmas gift, a delightful present for a birthday, a thoughtful housewarming offering, or a unique item for any other special occasion throughout the year. The versatility of its design means it can adapt to countless uses and aesthetics.
Embarking on the DIY Scalloped Basket journey with Shabby Fabrics is a rewarding experience that combines the joy of crafting with the satisfaction of creating something truly beautiful and functional. Their commitment to clear, detailed instructions ensures that even those new to sewing can achieve fantastic results. Whether you opt for the convenience of a kit or the creative freedom of selecting your own fabrics, the outcome will be a charming, sturdy basket that adds warmth and organization to any space. So, gather your supplies, fire up your sewing machine, and prepare to be delighted by your handmade masterpiece. Happy crafting!